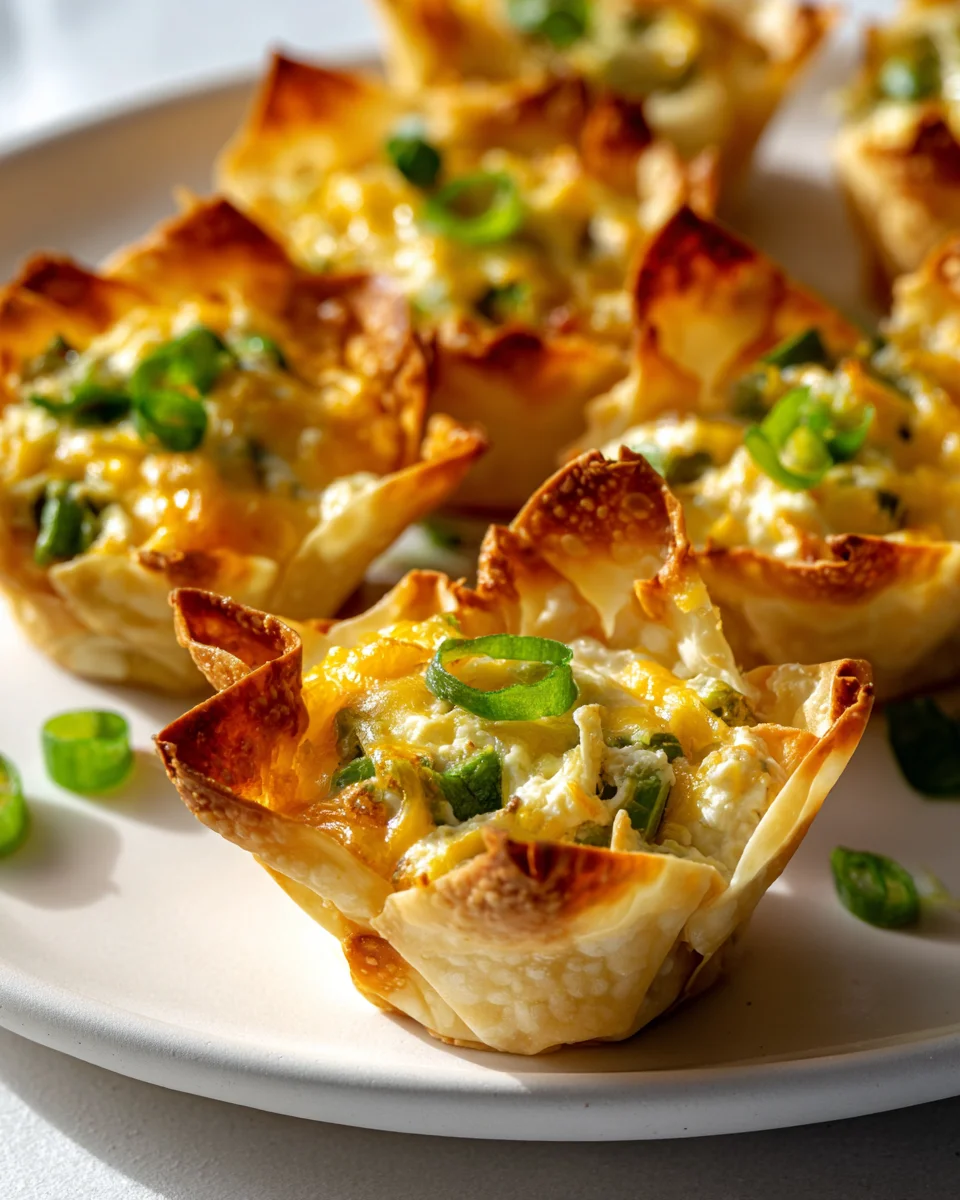
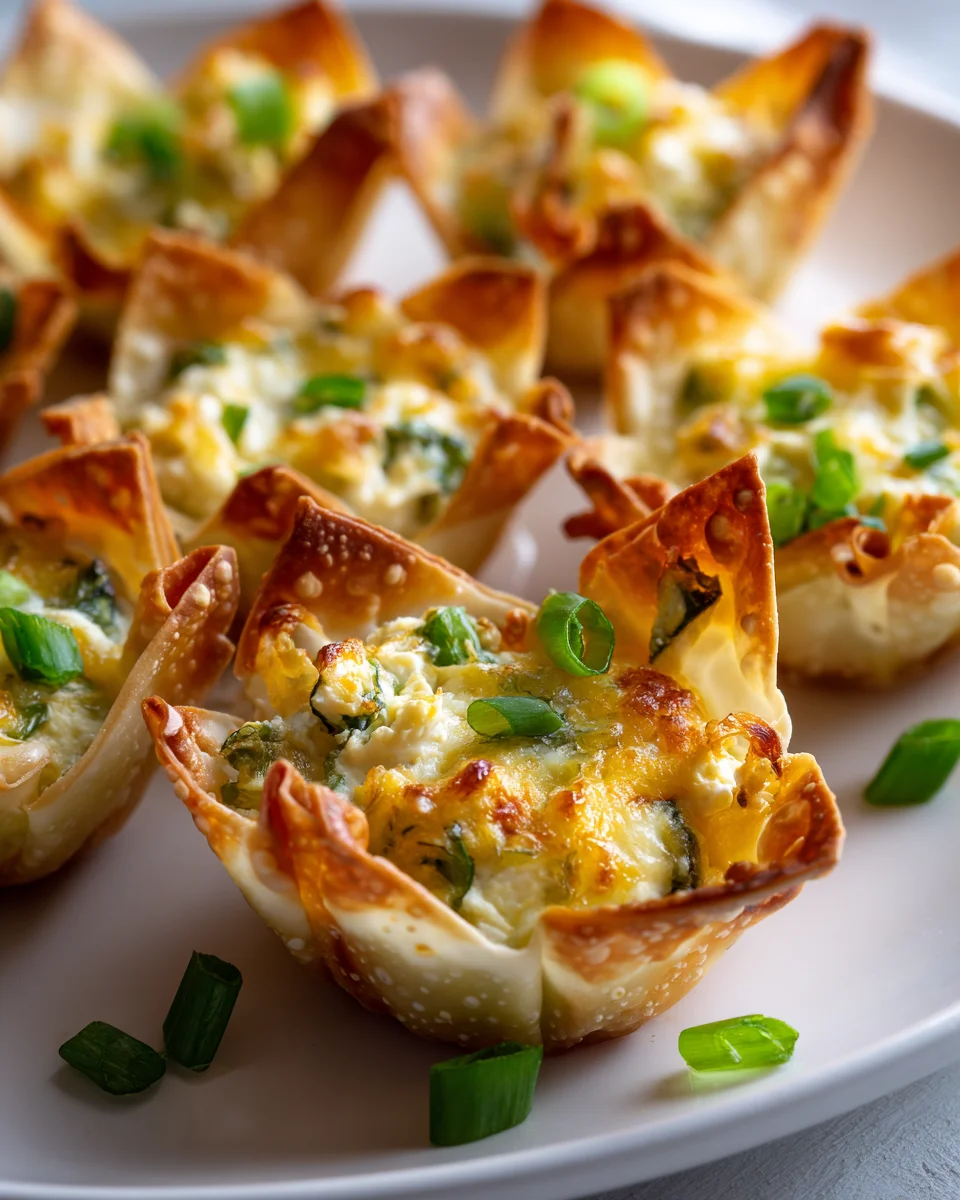
Jalapeno Popper Wonton Cups
Oh my goodness, do I have a treat for you today! Get ready to fall head over heels for something truly spectacular: our Jalapeno Popper Wonton Cups. This isn’t just another appetizer; it’s a game-changer that perfectly merges two beloved classics into one irresistible bite. I promise, you’re going to want to make these again and again!
I absolutely adore how these little marvels take everything we cherish about a classic, creamy, spicy jalapeno popper and wrap it up in a delightfully crispy, golden wonton shell. It’s pure genius! You get that satisfying crunch from the baked wonton, followed by a burst of warm, melty, cheesy goodness with just the right amount of kick from the jalapenos. Trust me, these are the ultimate party snack, potluck hero, or even just a fun weekend treat for yourself. Everyone who tries them becomes instantly addicted!
So, what exactly are we talking about here? Imagine a delicate, crunchy wonton wrapper, baked golden brown in a muffin tin to form a perfect little cup. Inside, we’re stuffing it with a glorious mixture of softened cream cheese, shredded cheddar, a touch of Monterey Jack for extra meltiness, and finely diced fresh jalapenos – you can keep the seeds for a fiery punch or remove them for a milder warmth. Sometimes, I even crumble in a little cooked, seasoned ground beef for an extra savory layer, making them even more substantial and satisfying. Baked until bubbly and golden, these cups are simply heavenly. They’re easy to make, even easier to eat, and guaranteed to disappear the moment you set them out.
Ingredient Notes
Crafting the perfect batch of Jalapeno Popper Wonton Cups starts with understanding the star ingredients. I’ve found that using quality components makes all the difference in these bite-sized flavor bombs. Here’s a breakdown of what you’ll need and some handy substitutions:
- Wonton Wrappers: These are the foundation of our cups! I usually pick up the square kind, readily available in the refrigerated section of most grocery stores, often near the produce or tofu. They bake up beautifully crisp and golden. If you can only find round ones, they will still work, just be a little more careful pressing them into your muffin tin.
- Cream Cheese: The heart of any good jalapeno popper filling! I always opt for full-fat cream cheese for maximum creaminess and flavor. Make sure it’s softened to room temperature before mixing; it makes the process so much easier and prevents lumps. Reduced-fat cream cheese can be used, but the filling might be a little less rich.
- Fresh Jalapenos: These are non-negotiable for that authentic popper experience. I love the fresh bite they add! For a milder cup, I recommend removing all the seeds and white membranes (the ribs) inside the pepper, as that’s where most of the heat resides. If you love a good kick, leave a few seeds in! You can also use canned diced jalapenos in a pinch, but fresh provides a better texture and flavor, in my opinion.
- Cooked Ground Beef: While traditional poppers often feature bacon, I’ve found that finely crumbled, seasoned cooked ground beef provides a wonderful savory depth that complements the creaminess and spice beautifully. I typically brown about a half-pound of lean ground beef, drain any excess fat, and season it simply with salt and pepper, or a touch of garlic powder. For a different twist, finely diced cooked chicken or turkey would also work well here.
- Shredded Cheddar Cheese: A classic pairing with jalapeno and cream cheese. I prefer a sharp or medium cheddar for its robust flavor. Monterey Jack or a Colby Jack blend are fantastic alternatives if you prefer a milder, meltier cheese. For the best melt, I recommend shredding your own cheese from a block, but pre-shredded works perfectly fine for convenience.
- Garlic Powder & Onion Powder: These two staples amplify the savory notes in the filling without adding moisture. They’re essential for a well-rounded flavor profile. Don’t skip them!
- Green Onions (Scallions): I use these for both flavor within the filling and as a vibrant garnish. They add a fresh, mild oniony bite that cuts through the richness. Fresh chives would be a great substitute if you have them.
- Cooking Spray or Oil: For greasing your muffin tin. This ensures the wonton cups crisp up nicely and don’t stick.
Step-by-Step Instructions
These Jalapeno Popper Wonton Cups are surprisingly simple to make, and they come together pretty quickly once you get the hang of it. Here’s how I put them together for a perfect appetizer every time:
- Preheat and Prep: First things first, get your oven ready. I always preheat mine to 375°F (190°C). While the oven is heating, lightly spray a standard 12-cup muffin tin with cooking spray. This helps prevent sticking and ensures your wonton cups get nice and crispy.
- Cook the Beef: In a medium skillet over medium heat, I cook about 1/2 pound of lean ground beef until it’s fully browned and crumbled. Once cooked, drain off any excess grease, then season it with a pinch of salt and pepper. Set the cooked beef aside to cool slightly.
- Prepare the Jalapenos: Carefully wash and dry your fresh jalapenos. Using gloves if you have sensitive skin, slice them in half lengthwise. For a milder flavor, I scrape out all the seeds and the white membranes using a small spoon. Then, finely dice the jalapeno halves. Remember, the more seeds and membranes you remove, the less spicy your cups will be!
- Mix the Filling: In a medium-sized mixing bowl, combine your softened cream cheese, the cooked and cooled ground beef, shredded cheddar cheese, diced jalapenos, garlic powder, and onion powder. I like to chop a tablespoon or two of fresh green onions and add them into the filling here too for an extra layer of flavor. Use a sturdy spoon or a rubber spatula to mix everything together until it’s well combined and evenly distributed.
- Assemble the Wonton Cups: Now for the fun part! Take one wonton wrapper and gently press it into each cavity of your prepared muffin tin, creating a cup shape. Make sure the corners of the wrapper stick up a bit around the edges – this creates a beautiful, crispy “petal” effect. Don’t worry if they tear slightly; the filling will hold them together.
- Fill the Cups: Using a small spoon or a cookie scoop, evenly distribute the jalapeno popper filling into each wonton cup. I usually fill them pretty generously, almost to the top, leaving just a little room for the cheese to bubble up.
- Bake to Perfection: Place the muffin tin in your preheated oven. Bake for 12-15 minutes, or until the edges of the wonton wrappers are golden brown and crispy, and the filling is bubbly and heated through. Keep an eye on them, as ovens can vary!
- Garnish and Serve: Once they’re out of the oven, let them cool in the muffin tin for just a minute or two. Then, carefully remove them and transfer them to a serving platter. I love to garnish mine with a sprinkle of freshly chopped green onions or chives for a pop of color and freshness. Serve them warm and watch them disappear!
Tips & Suggestions
I’ve made these Jalapeno Popper Wonton Cups countless times, and over the years, I’ve picked up a few tricks that really elevate them from good to absolutely fantastic. Here are my go-to tips and some fun suggestions to make them your own:
- Adjusting the Heat: The beauty of making these yourself is complete control over the spice level. If you’re a heat seeker like me, you can leave some of the seeds and membranes in the jalapenos. For a milder version that’s kid-friendly, ensure you remove every last seed and white rib. You could also substitute a small amount of diced bell pepper for some of the jalapenos if you want just a hint of flavor without any heat.
- For Extra Crispy Wontons: If you find your wontons are ever a little soft on the bottom, here’s a trick: after pressing the wrappers into the muffin tin, spray them very lightly with cooking spray and bake them empty for 2-3 minutes before adding the filling. This pre-bakes the bottom and makes them extra crisp!
- Making Ahead: These are fantastic for parties, and you can absolutely do some prep in advance. I often prepare the cream cheese filling mixture up to a day ahead and store it in an airtight container in the refrigerator. When it’s time to bake, simply scoop it into your wonton wrappers and bake as directed. This saves a lot of time on the day of your event! I don’t recommend assembling the entire cup too far in advance, as the wrappers can soften.
- Serving Suggestions: While they are perfect on their own, a little dipping sauce can take these over the top. My favorites include a drizzle of sriracha mayo for a spicy kick, a dollop of ranch dressing for creamy coolness, or even a sweet chili sauce. They make excellent appetizers for game day, potlucks, or any casual get-together.
- Flavor Variations: Don’t be afraid to experiment!
- Cheeses: Try a blend of cheeses! Pepper Jack for more spice, Gouda for a smoky flavor, or a sharp white cheddar.
- Meats: Instead of ground beef, consider cooked and crumbled chorizo (beef chorizo if you prefer), shredded rotisserie chicken, or even crumbled plant-based “bacon” bits.
- Add-ins: A little bit of drained, canned corn, finely diced red bell pepper, or a pinch of smoked paprika can add extra layers of flavor and texture to your filling.
- Don’t Overfill: While it’s tempting to cram in as much delicious filling as possible, try not to overfill the wonton cups. Leave a little room at the top so the filling can bubble and melt without spilling over, making a mess in your muffin tin.
Storage
These Jalapeno Popper Wonton Cups are definitely best enjoyed fresh from the oven, when the wonton wrappers are at their crispiest and the filling is wonderfully warm and gooey. However, I know life happens, and sometimes you have leftovers or need to plan ahead. Here’s how I handle storage:
- Cooling: If you have any leftovers (which is rare in my house!), allow the wonton cups to cool completely to room temperature before storing them. This prevents condensation from forming inside the container, which can make the wontons soggy.
- Refrigeration: Once cooled, transfer the Jalapeno Popper Wonton Cups to an airtight container. I usually place a paper towel on the bottom of the container to absorb any potential moisture. They will keep well in the refrigerator for up to 2-3 days. The wonton wrappers will lose some of their crispness during refrigeration, becoming a bit softer, but the flavor will still be fantastic.
- Freezing: Freezing these isn’t my top recommendation, as the texture of the wonton wrapper can become quite soft and a little gummy after thawing and reheating. However, if you really want to freeze them, you can.
- To Freeze: Place the cooled wonton cups on a baking sheet and freeze for about an hour, or until solid. This “flash freezing” prevents them from sticking together. Once solid, transfer them to a freezer-safe bag or airtight container. They can be frozen for up to 1 month.
- To Reheat from Frozen: I would suggest reheating directly from frozen to avoid extra moisture. Place them on a baking sheet and bake in a preheated oven at 350°F (175°C) for about 15-20 minutes, or until heated through and the edges are crisp again.
- Reheating: For best results and to try and regain some of that delicious crispness, I highly recommend reheating the refrigerated wonton cups in the oven or in an air fryer.
- Oven Reheating: Place the cups on a baking sheet and reheat in a preheated oven at 350°F (175°C) for about 8-10 minutes, or until the filling is hot and the wrappers are crisp again.
- Air Fryer Reheating: This is my preferred method for quick reheating! Place them in a single layer in your air fryer basket and air fry at 325°F (160°C) for 3-5 minutes, checking frequently, until heated through and crispy.
- Microwave Reheating: While you can reheat them in the microwave, I generally advise against it if you want any crispness. The microwave will make the wontons soft and potentially chewy, but it will heat the filling quickly. If using, microwave for 20-30 seconds at a time until warm.
Final Thoughts
I truly believe you’ve just discovered your new favorite appetizer! These Jalapeno Popper Wonton Cups are more than just a snack; they’re a revelation of flavor and texture, perfectly packaged for any occasion. I absolutely adore how they take all the beloved elements of a classic jalapeno popper – that creamy, spicy, cheesy filling – and nestle them into a delightfully crispy, golden wonton cup. It’s an ingenious combination that’s incredibly simple to prepare but delivers an impressive punch of flavor.
Whether you’re hosting a gathering, looking for the ultimate game-day bite, or simply craving something special, these Jalapeno Popper Wonton Cups are guaranteed to be a hit. They offer that perfect balance of heat, richness, and crunch that keeps everyone coming back for more. So go ahead, whip up a batch (or two!) and prepare for a chorus of compliments. I promise you, these little beauties are a testament to how effortlessly delicious and endlessly satisfying a homemade treat can be!

Crispy Jalapeno Popper Wonton Cups – Perfect Party Snack!
- Total Time: 30 minutes
- Yield: 12 servings
Description
These Jalapeno Popper Wonton Cups are a delightful fusion of creamy, spicy filling and crispy wonton wrappers. Perfect for any gathering, they are sure to impress your guests and satisfy your cravings!
Ingredients
- Wonton Wrappers
- Cream Cheese, softened
- Fresh Jalapenos, finely diced
- Cooked Ground Beef, crumbled
- Shredded Cheddar Cheese
- Monterey Jack Cheese (optional)
- Garlic Powder
- Onion Powder
- Green Onions (Scallions), chopped
- Cooking Spray or Oil
Instructions
- Preheat your oven to 375°F (190°C) and lightly spray a standard 12-cup muffin tin with cooking spray.
- In a medium skillet over medium heat, cook about 1/2 pound of lean ground beef until fully browned and crumbled. Drain any excess grease and season with salt and pepper. Set aside to cool slightly.
- Wash and dry the fresh jalapenos, slice them in half lengthwise, and remove seeds and membranes for a milder flavor. Finely dice the jalapeno halves.
- In a medium-sized mixing bowl, combine softened cream cheese, cooked ground beef, shredded cheddar cheese, diced jalapenos, garlic powder, and onion powder. Add chopped green onions and mix until well combined.
- Press one wonton wrapper into each cavity of the prepared muffin tin to create a cup shape.
- Evenly distribute the jalapeno popper filling into each wonton cup, filling generously but leaving a little room at the top.
- Bake in the preheated oven for 12-15 minutes, or until the edges of the wonton wrappers are golden brown and crispy, and the filling is bubbly.
- Let cool for a minute or two before transferring to a serving platter. Garnish with freshly chopped green onions or chives and serve warm.
- Prep Time: 15 mins
- Cook Time: 15 mins
- Category: Appetizer
- Method: Baking
- Cuisine: American
Nutrition
- Serving Size: 1 cup
- Calories: 150
- Sugar: 1 g
- Sodium: 200 mg
- Fat: 10 g
- Saturated Fat: 5 g
- Unsaturated Fat: 3 g
- Trans Fat: 0 g
- Carbohydrates: 10 g
- Fiber: 1 g
- Protein: 6 g
- Cholesterol: 20 mg
Keywords: For a milder flavor, remove all seeds and membranes from the jalapenos. You can also substitute cooked chicken or turkey for the ground beef, and experiment with different cheeses for varied flavors.