• Skip to primary navigation
  • Skip to main content
  • Skip to primary sidebar
Homesmad

Homesmad

  • Home
  • Breakfast & Brunch
  • Appetizers & Snacks
  • Dinner
  • Dessert
  • About
  • Privacy Policy
  • Contact
Homesmad
  • Home
  • Breakfast & Brunch
  • Appetizers & Snacks
  • Dinner
  • Dessert
  • About
  • Privacy Policy
  • Contact

Crockpot Big Mac Dip: The Viral Beefy Game Day Snack!

March 3, 2026 by Lily author

Crockpot Big Mac Dip Viral

Get ready to have your mind blown, because I’m here to introduce you to the internet sensation that is the Crockpot Big Mac Dip Viral! Seriously, if you’re a fan of those iconic golden arches, you are going to absolutely adore this warm, gooey, and unbelievably delicious dip. What makes this recipe so special? Well, imagine all the irresistible flavors of a classic Big Mac—the savory seasoned ground beef, the tangy pickles, the sweet onions, and of course, that legendary special sauce—all transformed into a comforting, melty dip that practically makes itself in your slow cooker.

You, my friend, are going to love this because it’s ridiculously easy to prepare, making it the ultimate stress-free appetizer for game days, potlucks, or just a fun night in. This isn’t just any cheesy dip; it’s a nostalgic flavor bomb that brings all the beloved components of your favorite burger right to your snack table, without needing to fire up a grill. We’re talking tender ground beef, a blend of rich cheeses, and those essential Big Mac toppings, all slow-cooked together to perfection. Just grab your favorite dippers—think potato chips, toasted bread, or even fries—and prepare for a truly epic snacking experience that everyone will be raving about!

Crockpot Big Mac Dip: The Viral Beefy Game Day Snack! this RECIPE

Ingredient Notes

Alright, let’s dive into the delicious world of our Crockpot Big Mac Dip! To achieve that truly viral, irresistible flavor, using the right ingredients is key. I’ll walk you through what you’ll need and some helpful substitutions.

The Beef: The Heart of the “Big Mac”

  • Ground Beef: This is non-negotiable for that authentic burger taste. I always recommend using a lean ground beef (like 90/10 or 85/15) to minimize excess grease in your dip. You’ll be browning it first, and thoroughly draining any fat is crucial for a smooth, non-oily dip. Think of it as the patty in your Big Mac, but broken down into glorious, dippable bits!
  • Substitution: While ground beef truly captures the Big Mac essence, if you’re looking for an alternative, ground turkey can work. Just be aware that it has a milder flavor, so you might want to increase your seasonings slightly. For a plant-based option, a meatless ground crumble is also a viable choice, though the overall flavor profile will naturally shift.

The Cheeses: Melted Perfection

  • American Cheese: This is a secret weapon for any truly great Big Mac Dip. Its incredible meltability and creamy texture are unmatched. It creates that smooth, gooey, diner-style cheese pull we all love. Don’t shy away from good quality processed American cheese slices or a block for the best result.
  • Cheddar Cheese: To add a bit more depth of flavor and that classic cheesy stretch, I like to mix in some shredded cheddar. A medium or sharp cheddar works wonderfully here. I always recommend shredding your own cheese from a block if possible, as it melts much more smoothly than pre-shredded varieties, which often contain anti-caking agents.
  • Substitution: Feel free to experiment with other melting cheeses like Monterey Jack, Colby, or even a cheese blend. However, I strongly advise keeping at least some American cheese for that essential creamy base.

The Tang & Crunch: Pickles and Onions

  • Dill Pickles: The iconic tang of dill pickles is absolutely essential to replicate the Big Mac experience. You’ll want them finely chopped. I prefer using whole dill pickles and chopping them myself for better control over the size and texture, but good quality chopped dill pickles or even dill relish can work in a pinch.
  • Onion: Finely diced yellow or white onion adds a lovely sharp bite and freshness. Some of it will cook down in the crockpot, mellowing slightly, but a portion added closer to serving or as a garnish gives that classic raw onion crunch.
  • Substitution: If raw onion is too strong for your preference, you can cook all of it with the ground beef to soften its bite, or simply omit it and rely on the onion powder in the sauce.

The “Special Sauce” Components: The Magic

This is where the Big Mac Dip truly comes to life. It’s all about creating that signature “special sauce.”

  • Mayonnaise: The creamy base. Use a good quality, full-fat mayonnaise for the best richness and flavor.
  • Ketchup: Adds sweetness and a slight tang.
  • Yellow Mustard: Crucial for that distinctive Big Mac sauce tang and hint of spice.
  • Sweet Pickle Relish: This is vital for the sauce’s unique sweet and sour profile. Don’t confuse it with dill relish; sweet relish is key here.
  • White Vinegar: Just a touch to brighten the flavors and enhance the tanginess, mimicking the pickle brine.
  • Garlic Powder, Onion Powder, Paprika: This trio of spices rounds out the “special sauce,” giving it depth and warmth that truly makes it taste like the real deal.
  • Substitution for Sauce: If you’re short on time, you could try a store-bought “special sauce” or “fry sauce,” but honestly, making your own is so simple and delivers a far superior, authentic flavor.

Dippers (Not in the Crockpot, but Essential!)

  • While not an ingredient in the dip, think about what you’ll serve it with! Toasted burger bun pieces (especially those sprinkled with sesame seeds!) are my absolute favorite for the full Big Mac experience. Potato chips, sturdy crackers, or even veggie sticks like carrot and celery are also fantastic.

Step-by-Step Instructions

Let’s get this viral Crockpot Big Mac Dip cooking! It’s super straightforward, I promise, and the crockpot does most of the heavy lifting for us.

Step 1: Brown and Season the Beef

First things first, let’s get that ground beef ready. In a large skillet over medium-high heat, crumble and cook your ground beef until it’s completely browned through. Break it up into small pieces as it cooks – we want a nice, fine texture for our dip. Once it’s cooked, it’s absolutely critical to drain off any excess grease. I usually transfer it to a plate lined with paper towels to absorb as much as possible. This ensures your dip isn’t greasy and maintains that perfect creamy consistency. Season the cooked beef simply with a pinch of salt and black pepper.

Step 2: Craft Your “Special Sauce”

While the beef is draining, let’s whip up the star of the show: the Big Mac “special sauce.” In a medium bowl, combine your mayonnaise, ketchup, yellow mustard, sweet pickle relish, white vinegar, garlic powder, onion powder, and paprika. Give it a really good whisk until all the ingredients are thoroughly combined and the sauce is smooth and creamy. Taste it and adjust if needed – sometimes I like a little extra dash of onion powder or a tiny bit more relish for that perfect tang. Set this aside; it’s going to bring all the Big Mac magic!

Step 3: Layer Up in the Crockpot

Now for the fun part – assembling your dip in the crockpot! Lightly grease the bottom and sides of your slow cooker insert. This helps prevent sticking and makes cleanup a breeze. We’re going to create layers for even cooking and melting.

Start by spreading about half of your cooked, drained ground beef evenly on the bottom of the crockpot.

Next, layer about half of your American cheese slices (or half of the shredded cheddar if using only shredded cheese for this layer) over the beef.

Then, dollop about half of your prepared “special sauce” over the cheese. Don’t worry about spreading it perfectly; it will melt and blend.

Scatter about half of your chopped dill pickles and diced onions over the sauce.

Repeat these layers with the remaining ground beef, American cheese (and any shredded cheddar you’re using), “special sauce,” pickles, and onions. I like to finish with a layer of cheese on top, as it gives a beautiful melted crust.

Step 4: Slow Cook to Perfection

Cover your crockpot and cook on the LOW setting for 2 to 3 hours. You’ll know it’s ready when all the cheese is completely melted, gooey, and bubbling around the edges. The aroma filling your kitchen will be absolutely incredible – trust me! If you’re in a bit more of a hurry, you can cook it on HIGH for about 1 to 1.5 hours, but keep a closer eye on it and stir more frequently to prevent any sticking or burning.

Step 5: Stir, Garnish, and Serve!

Once the dip is fully melted and hot, give it a really good stir. This will combine all those delicious layers into one harmonious, creamy, Big Mac-flavored masterpiece. I mean, seriously, a really good stir is key here to get everything perfectly incorporated.

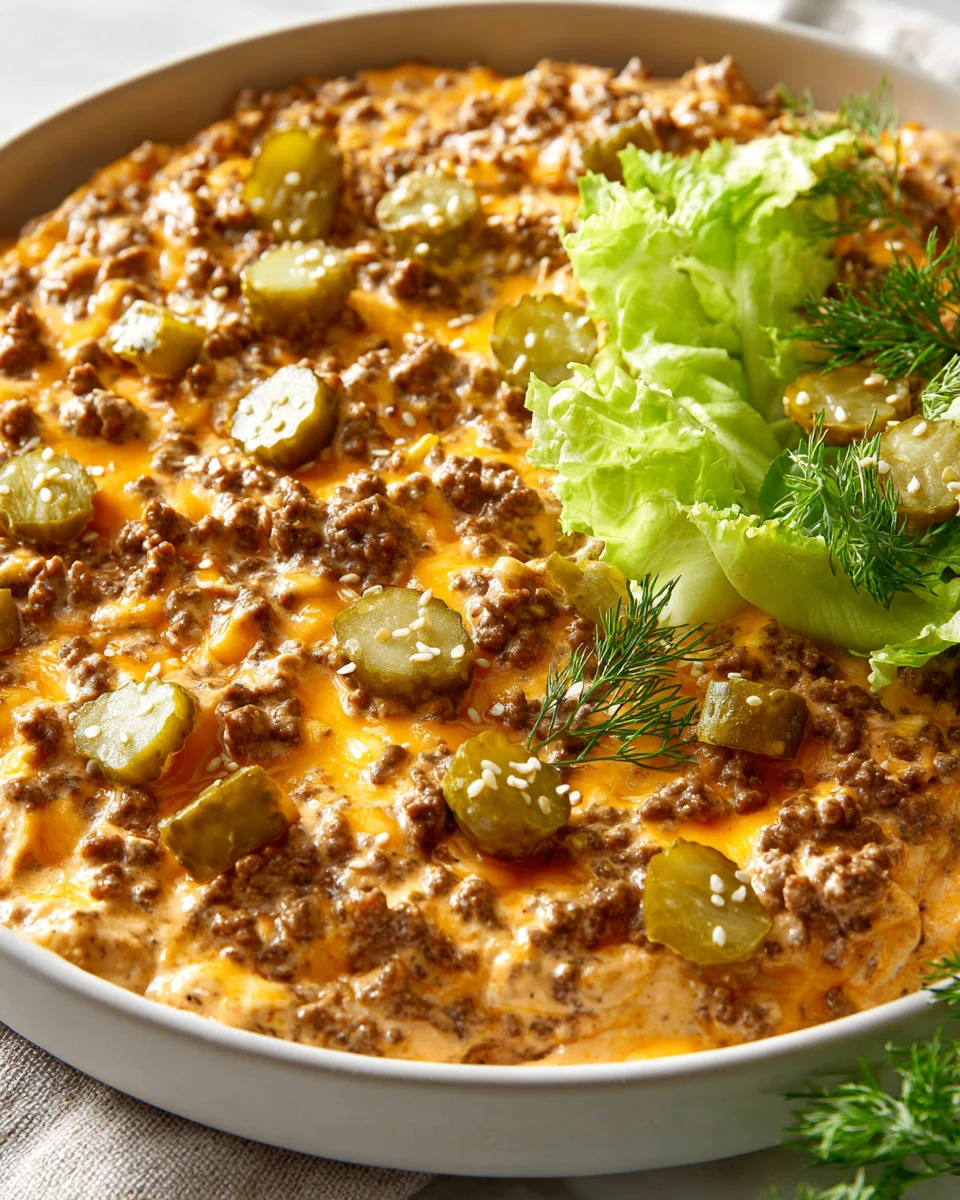
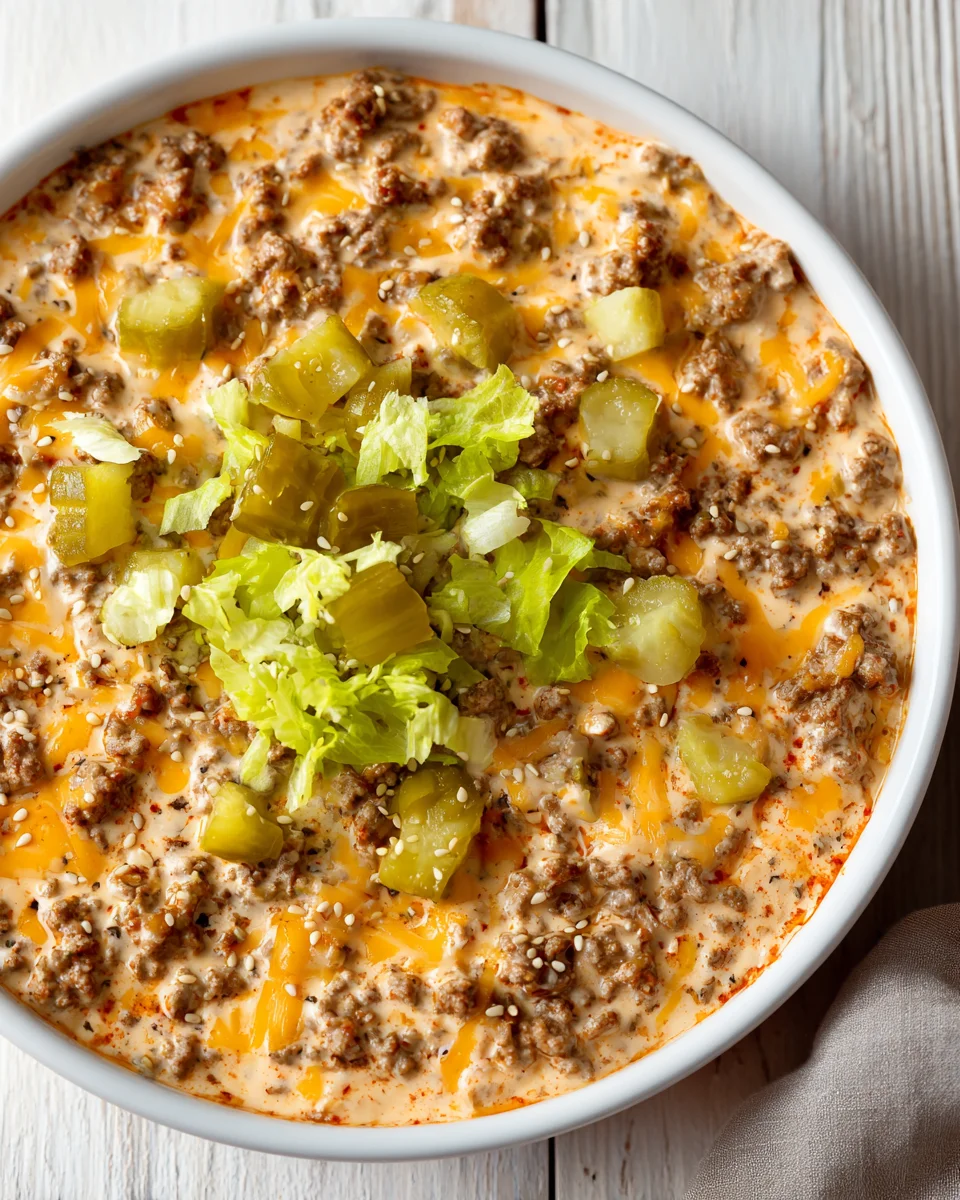
Transfer the crockpot to your serving area (or just set it directly on a heat-safe surface). For an extra touch of authenticity, garnish with a sprinkle of sesame seeds, some fresh shredded lettuce (yes, lettuce!), and maybe a few extra chopped dill pickles on top. Keep it on the “warm” setting if you’re serving it for a party, so it stays perfectly dippable. Get ready for everyone to ask for the recipe!

Tips & Suggestions

Making a viral dip means making it the best it can be! Here are some of my top tips and suggestions to elevate your Crockpot Big Mac Dip and ensure it’s a hit every time.

For the Ultimate Authentic Experience

  • The Right Dippers: This is huge! While chips and crackers are fine, for that true Big Mac feel, you absolutely MUST serve this dip with toasted, buttered burger bun pieces. For an extra touch, lightly toast the bun pieces and then sprinkle them with a few sesame seeds before serving. The combination of the warm, soft bun and the gooey dip is pure magic.
  • Fresh Shredded Lettuce Garnish: Don’t underestimate the power of a simple garnish! Just like a real Big Mac, a sprinkle of fresh, finely shredded iceberg lettuce on top of your dip before serving adds a refreshing crunch and helps cut through the richness. It really makes it feel like you’re eating a deconstructed burger.

Playing with Flavors and Consistency

  • Spice It Up: If you like a little kick, consider adding a pinch of red pepper flakes to your ground beef while it’s cooking, or even stirring in a dash of your favorite hot sauce to the “special sauce” mixture. You could also swap out some of the mild cheddar for a pepper jack cheese.
  • Tang Factor: Love pickles? Don’t be shy! Feel free to add more chopped dill pickles than the recipe calls for, either stirred directly into the dip or offered as an extra topping for those who want an even tangier bite.
  • Consistency Control: If your dip seems a little too thick after cooking, don’t fret! Just stir in a tablespoon or two of beef broth or even a splash of milk until it reaches your desired creaminess. On the flip side, if it’s a bit too thin, you can remove the lid from the crockpot for the last 30-60 minutes of cooking to allow some of the excess moisture to evaporate.

Make-Ahead Magic

  • Prep the Sauce in Advance: The “special sauce” is fantastic for making ahead! You can whisk it together a day or two before your event and store it in an airtight container in the refrigerator. The flavors actually meld and deepen a bit, making it even more delicious.
  • Pre-cook the Beef: You can also brown and drain your ground beef a day ahead of time. Store it in the fridge, and then just add it to the crockpot with the other ingredients when you’re ready to assemble and cook. This saves a lot of time on party day!

Serving Smarter

  • Keep it Warm: If you’re serving this dip at a party or gathering, keep your crockpot on the “warm” setting. This ensures the dip stays perfectly melted, dippable, and delicious throughout your event. Just give it an occasional stir.
  • Layering vs. Mixing: While I suggest layering, you could also just mix all the ingredients (except for some of the cheese you want to melt on top) directly into the crockpot. Layering often leads to a slightly more even melt and allows the flavors to meld beautifully as they slowly cook together.

Storage

You’ve made a fantastic batch of Crockpot Big Mac Dip, and chances are, there might be some left (though I’d be surprised!). Proper storage is key to enjoying those leftovers safely and deliciously. Here’s how I handle it:

Refrigeration

Once your party is over and the dip has cooled down a bit (it shouldn’t be piping hot, but you don’t need to wait until it’s completely cold either), transfer any remaining dip to an airtight container. I always make sure the container is sealed tightly to prevent any air from getting in, which can dry out the dip or cause it to spoil faster. Place it in the refrigerator promptly. Stored correctly, this Crockpot Big Mac Dip will stay fresh and delicious for about 3 to 4 days.

Reheating

Reheating this dip is super easy, and it tastes almost as good as fresh!

  • Microwave: This is my go-to for a quick single serving. Spoon the desired amount into a microwave-safe bowl. Heat on medium power in 30-second intervals, stirring well after each interval, until the dip is hot and creamy again. Stirring is crucial to prevent hot spots and ensure the cheese re-melts smoothly. You might find adding a tiny splash of milk or beef broth (about a teaspoon) can help restore its original creamy consistency, especially if it seems a bit thick after refrigeration.
  • Stovetop: For a larger batch of leftovers, transferring the dip to a saucepan and reheating it over low heat on the stovetop works wonderfully. Stir frequently and gently until it’s warmed through and bubbly. Again, a small splash of liquid can help it loosen up and become perfectly smooth.
  • Crockpot: If you have a significant amount of dip left and want to keep it warm for an extended period (perhaps for another small gathering), you can return it to your clean crockpot. Heat it on the LOW setting, stirring occasionally, until it’s hot and melted throughout. Once it’s ready, switch to the “warm” setting.

When reheating, pay attention to the texture. Sometimes dairy-heavy dips can separate a little when chilled. A good stir usually brings it right back together!

Freezing (Use with Caution)

While technically you can freeze this dip, I generally don’t recommend it as my first choice for dairy-based dips like this. The texture of cheese and mayonnaise can sometimes change after freezing and thawing – it might become a bit grainy, or the ingredients could separate, making it less creamy than when freshly made. However, if you absolutely must freeze it:

  • Portioning: Divide the dip into smaller, freezer-safe airtight containers or heavy-duty freezer bags. This makes thawing and reheating easier.
  • Thawing: Thaw the frozen dip overnight in the refrigerator.
  • Reheating Post-Freeze: Reheat gently using the stovetop or crockpot method, stirring very frequently. You will almost certainly need to add a splash of milk or beef broth and stir vigorously to help it regain a smooth consistency. Be prepared that the texture might not be identical to the fresh dip.

So, my advice is to enjoy it within its refrigerated shelf life if possible, as it’s truly at its best when fresh or gently reheated from the fridge!

Crockpot Big Mac Dip: The Viral Beefy Game Day Snack!

Final Thoughts

I truly believe the Crockpot Big Mac Dip Viral is an absolute must-try for anyone craving big flavor with minimal fuss. It brilliantly captures all the iconic tastes you love from that classic burger – the savory beef, the tangy special sauce, the cheese – and transforms them into a warm, creamy, and utterly irresistible dip. I’ve seen firsthand how this viral sensation brings smiles and satisfies cravings at every gathering, making it a guaranteed crowd-pleaser.

So, whether you’re hosting a game night, a casual get-together, or simply looking for a fun and easy snack, I wholeheartedly encourage you to whip up this Crockpot Big Mac Dip Viral. It’s more than just a dip; it’s a delightful, nostalgic experience that will have everyone asking for the recipe!

Print
clock clock iconcutlery cutlery iconflag flag iconfolder folder iconinstagram instagram iconpinterest pinterest iconfacebook facebook iconprint print iconsquares squares iconheart heart iconheart solid heart solid icon

Crockpot Big Mac Dip: The Viral Beefy Game Day Snack!


  • Author: Lily author
  • Total Time: 27 minute
  • Yield: 8 servings 1x
Pin Recipe
Print Recipe

Description

This Crockpot Big Mac Dip is a warm, gooey, and delicious twist on the classic burger, perfect for game days and gatherings. With all the iconic flavors of a Big Mac, this dip is sure to be a crowd-pleaser!


Ingredients

Scale
  • 1 lb Ground Beef
  • 8 oz American Cheese
  • 1 cup Cheddar Cheese, shredded
  • 1/2 cup Dill Pickles, finely chopped
  • 1/2 cup Onion, finely diced
  • 1/2 cup Mayonnaise
  • 1/4 cup Ketchup
  • 2 tbsp Yellow Mustard
  • 1/4 cup Sweet Pickle Relish
  • 1 tbsp White Vinegar
  • 1 tsp Garlic Powder
  • 1 tsp Onion Powder
  • 1 tsp Paprika

Instructions

  1. In a large skillet over medium-high heat, crumble and cook the ground beef until completely browned. Drain off any excess grease.
  2. In a medium bowl, combine mayonnaise, ketchup, yellow mustard, sweet pickle relish, white vinegar, garlic powder, onion powder, and paprika. Whisk until smooth and creamy.
  3. Lightly grease the bottom and sides of your slow cooker. Layer half of the cooked ground beef, half of the American cheese, half of the special sauce, and half of the chopped dill pickles and diced onions in the crockpot. Repeat with the remaining ingredients, finishing with a layer of cheese on top.
  4. Cover the crockpot and cook on LOW for 2 to 3 hours, or on HIGH for 1 to 1.5 hours, until the cheese is melted and bubbly.
  5. Stir the dip well to combine all layers. Garnish with sesame seeds, shredded lettuce, and extra chopped dill pickles before serving.
  • Prep Time: 15 mins
  • Cook Time: 2-3 hours
  • Category: Appetizer
  • Method: Slow Cooking
  • Cuisine: American

Nutrition

  • Serving Size: 1/2 cup
  • Calories: 300
  • Sugar: 3 g
  • Sodium: 600 mg
  • Fat: 20 g
  • Saturated Fat: 10 g
  • Unsaturated Fat: 8 g
  • Trans Fat: 0 g
  • Carbohydrates: 10 g
  • Fiber: 1 g
  • Protein: 15 g
  • Cholesterol: 50 mg

Keywords: For the best flavor, use lean ground beef and good quality cheeses. You can substitute ground turkey or meatless crumbles if desired. Serve with toasted burger bun pieces, potato chips, or veggie sticks.

Did you make this recipe?

Share a photo and tag us — we can't wait to see what you've made!

« Previous Post
Sweet & Spicy Mango Chicken Curry Recipe - Easy Dinner!
Next Post »
Irresistible Red Velvet Brownies: A Must-Try Dessert

If you enjoyed this…

Crispy Homemade Mozzarella Sticks Recipe You’ll Love!

Meaty Texas Trash Dip: Ultimate Game Day Beef Dip!

Bbq Pulled Beef Biscuit Cups: Easy Party Appetizer!

Primary Sidebar

Browse by Diet

BreakfastDinnerLunchDessertAppetizer

Sweet Peach Yogurt Parfait Delight

One of my fondest memories is from a lazy summer afternoon spent at my grandmother’s house. The sun filtered through the kitchen window, casting a warm glow over the table where she would create her culinary magic. It was during one of those blissful moments that I first tasted her Peach Yogurt Parfait with Honey and Granola. The sweet aroma of ripe peaches mingling with creamy yogurt and the crunch of granola was nothing short of heavenly. It felt like summer captured in a bowl, and I still remember the joy of diving in with a spoon, each layer revealing a new burst of flavor.

When I think about that parfait, I can almost hear the gentle hum of the bees outside, reminding me of the floral notes that honey brings to every bite. The vibrant yellows and soft oranges of the peaches contrast beautifully with the creamy white yogurt and the golden crunch of granola. It’s a dish that not only looks delightful but also tastes like a celebration of fresh, wholesome ingredients.

What makes my version of this Peach Yogurt Parfait special is the careful balance of flavors and textures. I use ripe, juicy peaches, drizzled with locally sourced honey, and a homemade granola that’s bursting with nuts and seeds for an extra crunch. It’s a simple dish, but every layer is crafted with love and attention.

Let me show you exactly how to make this delightful parfait, so you can bring a bit of that summer magic into your kitchen!

Sweet Peach Yogurt Parfait Delight

Why You’ll Love This Recipe

  • Delightfully creamy texture from the Greek yogurt, paired with the juicy sweetness of fresh peaches.
  • Ready in under 20 minutes, making it a quick and satisfying breakfast or snack option.
  • Budget-friendly, using common ingredients that you may already have in your pantry.
  • Customizable with your favorite granola and nuts, allowing you to tailor each parfait to your taste.
  • Perfectly balanced flavors with the bright acidity of lemon juice and the sweetness of honey enhancing the peaches.

Ingredients

  • For the Parfait:
  • 2 cups plain Greek yogurt (or vanilla yogurt for a sweeter option)
  • 2 large ripe peaches, diced (about 2 cups)
  • 1 tablespoon fresh lemon juice (to prevent browning of peaches)
  • 2 tablespoons honey (plus more for drizzling)
  • 1 teaspoon vanilla extract (optional for extra flavor)
  • For the Granola:
  • 1 cup granola (store-bought or homemade; see notes for a simple granola recipe)
  • 1/4 cup sliced almonds (optional for added crunch)
  • 1/4 cup shredded coconut (optional for added flavor)

Let’s dive into some key ingredients that make this Peach Yogurt Parfait so delightful! First, the Greek yogurt is not only creamy but also packed with protein, making it a satisfying option for breakfast or a snack. If you’re looking for a sweeter option, you can easily substitute it with vanilla yogurt, though it may alter the overall flavor balance. Next, the ripe peaches are the star of the show; their natural sweetness shines through, so I recommend choosing peaches that yield slightly to pressure, indicating they’re perfectly ripe. If peaches aren’t in season, feel free to use nectarines or even frozen peaches—just thaw them before use. Finally, honey adds a lovely floral sweetness that ties everything together. If you prefer, maple syrup can serve as a delicious substitute.

Step-by-Step Instructions

  1. Start by preparing the peaches. Wash them thoroughly, then slice and dice them into bite-sized pieces. In a medium bowl, toss the diced peaches with 1 tablespoon of fresh lemon juice to prevent browning. Set aside for about 5 minutes while the lemon juice works its magic.
  2. In a separate bowl, combine the Greek yogurt, 2 tablespoons of honey, and 1 teaspoon of vanilla extract if using. Stir the mixture until smooth and thoroughly blended. This should take about a minute. Avoid overmixing to maintain the creaminess of the yogurt.
  3. Now it’s time to layer your parfait. Grab a clear glass or bowl to showcase your beautiful creation. Start with a generous spoonful of the yogurt mixture at the bottom—about 1/4 cup will do. Use a spoon to spread it evenly.
  4. Add a layer of the diced peaches over the yogurt, ensuring they cover the yogurt completely. You might want to use about half of what you have prepared—roughly 1 cup. This layer should be visually appealing, so arrange the peaches neatly.
  5. Sprinkle 1/4 cup of granola over the peaches. This adds a delightful crunch. Make sure to distribute it evenly to ensure every bite has that satisfying texture. Avoid packing it down too tightly, as you want it to maintain its crunch.
  6. Repeat the layers: spoon in another 1/4 cup of yogurt, followed by another cup of peaches, and another sprinkle of granola. You should have at least two layers, but feel free to add more depending on your glass size.
  7. Finish off your parfait with a drizzle of honey on top for added sweetness and a touch of elegance. If you’re using sliced almonds or shredded coconut, sprinkle them on top now. It adds a lovely visual contrast and extra flavor.
  8. Serve immediately or refrigerate for up to 30 minutes before serving to allow the flavors to meld together. However, I recommend enjoying it fresh to maintain the granola’s crunch.

Pro Tips for the Best Peach Yogurt Parfait With Honey And Granola

  • Make sure to choose ripe peaches for the best flavor and texture. A common mistake is using unripe fruit, which can lead to a less enjoyable parfait. Look for peaches that are fragrant and slightly soft to the touch.
  • Use a clear glass to assemble your parfait; this not only makes for a beautiful presentation but also allows you to see the colorful layers, which adds to the enjoyment of eating it.
  • For an even creamier texture, consider whipping the Greek yogurt with a hand mixer for a couple of minutes before layering. This small adjustment makes a huge difference in mouthfeel.
  • Be mindful of the granola-to-yogurt ratio. Too much granola can overwhelm the parfait, while too little can make it feel too creamy. Aim for about 1/4 cup of granola per layer for the perfect balance.
  • If you’re making this for a gathering, consider preparing the yogurt and peaches ahead of time and layering them just before serving. This ensures the granola stays crunchy!

Variations & Serving Ideas

There are so many ways to get creative with your Peach Yogurt Parfait! For a tropical twist, swap out the peaches for mangoes or pineapples and top with coconut flakes. If you prefer a berry flavor, mix in some blueberries or strawberries with the peaches for added color and taste. For a nutty version, incorporate chopped walnuts or pecans instead of almonds.

As for serving ideas, this parfait pairs beautifully with a side of scrambled eggs for a hearty breakfast or fresh fruit salad for a light lunch. You might also enjoy it alongside whole grain toast with almond butter for an energizing snack. The contrast of flavors and textures will elevate your meal experience!

Storage, Make-Ahead & Reheating

The Peach Yogurt Parfait is best enjoyed fresh, but you can prepare some components ahead of time. Store the layered parfait in an airtight container in the refrigerator for up to 24 hours. However, be cautious; the granola may lose its crunch if stored too long. You can freeze the yogurt and peach mixture for up to 2 months; just remember to thaw it in the refrigerator overnight before serving.

If you plan to enjoy this dish the next day, it can taste even better as the flavors meld together. Just remember to add the granola right before serving to keep its delightful crunch!

Frequently Asked Questions

Can I make Peach Yogurt Parfait With Honey And Granola ahead of time?

Yes — in fact, it tastes even better the next day as the flavors meld. However, I recommend waiting to add the granola until just before serving to maintain its crunch.

What can I substitute for Greek yogurt?

If you prefer a lighter option, you can substitute Greek yogurt with regular yogurt or a dairy-free alternative like coconut yogurt. Just remember that this may alter the creaminess and flavor profile slightly.

Can I use frozen peaches for this parfait?

Absolutely! Just make sure to thaw the frozen peaches before using them. They will still add great flavor, though the texture may be slightly softer than fresh peaches.

How do I make the parfait vegan?

To make a vegan version, substitute the Greek yogurt with a plant-based yogurt alternative, and replace honey with maple syrup or agave nectar. This keeps the parfait sweet while adhering to a vegan diet.

What other fruits can I use in this recipe?

You can mix and match fruits based on your preference. Try using strawberries, blueberries, raspberries, or even bananas. Just make sure to adjust the lemon juice as needed to prevent browning.

Sweet Peach Yogurt Parfait Delight

Final Thoughts

The Peach Yogurt Parfait with Honey and Granola is a delightful blend of creamy yogurt, sweet peaches, and crunchy granola that creates a satisfying and nourishing treat. Each layer bursts with flavor, making it a perfect choice for breakfast or a light dessert.

This is the kind of recipe I come back to again and again, especially when I want something refreshing and wholesome to start my day. The harmony of sweet and tart flavors, combined with the delightful crunch, never fails to lift my spirits!

I encourage you to give this parfait a try and indulge in its comforting goodness. Feel free to share your results or even add your own twist—perhaps a sprinkle of cinnamon or a handful of nuts. Enjoy creating your perfect parfait!

Print
clock clock iconcutlery cutlery iconflag flag iconfolder folder iconinstagram instagram iconpinterest pinterest iconfacebook facebook iconprint print iconsquares squares iconheart heart iconheart solid heart solid icon

Peach Yogurt Parfait


  • Author: Lily author
  • Total Time: 15 minutes
  • Yield: 4 servings 1x
Pin Recipe
Print Recipe

Description

This Peach Yogurt Parfait combines creamy Greek yogurt, juicy peaches, and crunchy granola for a delightful treat. It’s a perfect breakfast or snack that captures the essence of summer in every bite.


Ingredients

Scale
  • For the Parfait:
  • 2 cups plain Greek yogurt (or vanilla yogurt for a sweeter option)
  • 2 large ripe peaches, diced (about 2 cups)
  • 1 tablespoon fresh lemon juice (to prevent browning of peaches)
  • 2 tablespoons honey (plus more for drizzling)
  • 1 teaspoon vanilla extract (optional for extra flavor)
  • For the Granola:
  • 1 cup granola (store-bought or homemade; see notes for a simple granola recipe)
  • 1/4 cup sliced almonds (optional for added crunch)
  • 1/4 cup shredded coconut (optional for added flavor)

Instructions

  1. Start by preparing the peaches. Wash them thoroughly, then slice and dice them into bite-sized pieces. In a medium bowl, toss the diced peaches with 1 tablespoon of fresh lemon juice to prevent browning. Set aside for about 5 minutes while the lemon juice works its magic.
  2. In a separate bowl, combine the Greek yogurt, 2 tablespoons of honey, and 1 teaspoon of vanilla extract if using. Stir the mixture until smooth and thoroughly blended. This should take about a minute. Avoid overmixing to maintain the creaminess of the yogurt.
  3. Now it’s time to layer your parfait. Grab a clear glass or bowl to showcase your beautiful creation. Start with a generous spoonful of the yogurt mixture at the bottom—about 1/4 cup will do. Use a spoon to spread it evenly.
  4. Add a layer of the diced peaches over the yogurt, ensuring they cover the yogurt completely. You might want to use about half of what you have prepared—roughly 1 cup. This layer should be visually appealing, so arrange the peaches neatly.
  5. Sprinkle 1/4 cup of granola over the peaches. This adds a delightful crunch. Make sure to distribute it evenly to ensure every bite has that satisfying texture. Avoid packing it down too tightly, as you want it to maintain its crunch.
  6. Repeat the layers: spoon in another 1/4 cup of yogurt, followed by another cup of peaches, and another sprinkle of granola. You should have at least two layers, but feel free to add more depending on your glass size.
  7. Finish off your parfait with a drizzle of honey on top for added sweetness and a touch of elegance. If you’re using sliced almonds or shredded coconut, sprinkle them on top now. It adds a lovely visual contrast and extra flavor.
  8. Serve immediately or refrigerate for up to 30 minutes before serving to allow the flavors to meld together. However, I recommend enjoying it fresh to maintain the granola’s crunch.
  • Prep Time: 15 mins
  • Cook Time: 0 mins
  • Category: Breakfast
  • Method: No-cook
  • Cuisine: American

Nutrition

  • Serving Size: 1 parfait
  • Calories: 250
  • Sugar: 20 g
  • Sodium: 50 mg
  • Fat: 5 g
  • Saturated Fat: 2 g
  • Unsaturated Fat: 3 g
  • Trans Fat: 0 g
  • Carbohydrates: 40 g
  • Fiber: 3 g
  • Protein: 10 g
  • Cholesterol: 10 mg

Keywords: Choose ripe peaches for the best flavor and texture. Use a clear glass for a beautiful presentation. For creaminess, consider whipping the yogurt before layering. Be mindful of the granola-to-yogurt ratio. Prepare yogurt and peaches ahead of time for gatherings, layering just before serving.

Did you make this recipe?

Share a photo and tag us — we can't wait to see what you've made!

Sun-Kissed Frozen Orange Cream Slush

As a child, summer days felt like they lasted forever. I remember the sticky heat wrapping around me as I played outside, my laughter mingling with the sounds of the neighborhood. But nothing could cool me down quite like the moment I’d spot my grandmother, laboring over her blender, whipping up her famous Frozen Orange Creamsicle Slush. That vibrant orange treat, with its frosty texture and sweet citrus aroma, was like a burst of sunshine in a cup. Just one sip, and I could feel the coolness wash over me, sparking pure joy.

This Frozen Orange Creamsicle Slush has a way of making you feel like a kid again. Its creamy, dreamy consistency is a delightful balance of bright orange and soft vanilla, inviting you to dive right in. The refreshing tang of orange dances on your tongue, while the smooth creaminess envelops you in a comforting embrace. It’s a nostalgic treat that’s perfect for hot summer afternoons or anytime you need a little pick-me-up.

What makes my version of this slush stand out is the addition of a hint of vanilla bean, which elevates the flavor and adds an extra layer of richness. Plus, it’s super easy to whip up with just a few simple ingredients that you probably already have on hand! So, if you’re ready to relive those sun-soaked memories, let me show you exactly how to make it.

Sun-Kissed Frozen Orange Cream Slush

Why You’ll Love This Recipe

  • Each slush is a perfect blend of creamy vanilla and zesty orange, creating a nostalgic flavor reminiscent of summer days.
  • This refreshing treat is ready in under 15 minutes, making it an ideal quick dessert for unexpected guests or hot afternoons.
  • With just 8 simple ingredients, it’s budget-friendly, ensuring you don’t have to break the bank to enjoy a delicious slush.
  • The slush has a perfectly smooth texture, thanks to the combination of ice and ice cream, providing a delightful contrast to the bright citrus flavors.
  • It’s highly customizable; you can easily adjust the sweetness and add fresh herbs for a unique twist that suits your taste.

Ingredients

  • 2 cups orange juice (freshly squeezed or store-bought)
  • 1 cup vanilla ice cream
  • 1 cup crushed ice
  • 1/2 cup milk (whole or 2%)
  • 1/4 cup granulated sugar (adjust based on sweetness preference)
  • 1 teaspoon vanilla extract
  • Zest of 1 orange (for added flavor)
  • Fresh orange slices and mint leaves (for garnish)

The star of this Frozen Orange Creamsicle Slush is the orange juice, which provides the vibrant, citrusy base. Freshly squeezed juice will yield the brightest flavor, but store-bought options can be just as convenient. If you’re opting for store-bought, choose 100% pure juice with no added sugars for the best results. Another essential ingredient is the vanilla ice cream; it adds creaminess and sweetness. You can substitute it with dairy-free ice cream if you’re looking for a vegan option. Whole or 2% milk complements the ice cream, creating a smooth blend. If you want a lower-calorie version, almond or oat milk can be good alternatives.

Lastly, the granulated sugar can be adjusted based on your sweetness preference. If you prefer a more natural sweetener, consider using honey or agave syrup. The orange zest enhances the flavor profile, providing an aromatic pop that brings the whole slush together. Don’t skip it! It adds an extra layer of brightness that makes this slush truly special.

Step-by-Step Instructions

  1. Start by preparing your ingredients. Gather 2 cups of orange juice, 1 cup of vanilla ice cream, and 1 cup of crushed ice. Make sure the ice is finely crushed, as larger chunks can make blending difficult.
  2. In a blender, combine the orange juice, vanilla ice cream, crushed ice, and 1/2 cup of milk. Add 1/4 cup of granulated sugar and 1 teaspoon of vanilla extract. If you like a sweeter slush, consider adding a bit more sugar at this stage.
  3. Add the zest of 1 orange to the blender. This step is crucial for enhancing the citrus flavor of your slush. Make sure not to include the bitter white pith—only the flavorful zest.
  4. Blend the mixture on medium-high speed for about 30-45 seconds. Stop once the ingredients are fully combined and the slush has a smooth, even consistency. If you notice large chunks of ice, blend for an additional 10-15 seconds. Avoid over-blending, as this can make the slush too liquidy.
  5. Once blended, taste the slush. If it needs more sweetness, add a little more sugar and blend for a few more seconds. If it’s too thick, you can add a splash of milk to reach your desired consistency.
  6. Pour the slush into glasses. This recipe typically serves 4, but you can easily double it for larger gatherings. Use a spoon to help guide the slush into the glasses if needed.
  7. Garnish each serving with fresh orange slices and mint leaves. The mint not only adds a pop of color but also a refreshing aroma that complements the citrus flavors beautifully.
  8. Serve immediately and enjoy! If you’ve made extra, you can refrigerate it for a short time, but it’s best enjoyed fresh.

Pro Tips for the Best Frozen Orange Creamsicle Slush

  • Don’t skip the orange zest! It’s a game-changer for flavor. Always zest before juicing to make it easier.
  • Use a high-powered blender for the best texture. A standard blender may struggle with ice, leading to uneven consistency. If you have a food processor, that can work too, but ensure the ice is finely crushed.
  • Adjust the ice-to-liquid ratio carefully. If your slush is too thick, it won’t blend well. Start with less ice and add more until you reach your preferred texture.
  • Be cautious with the sugar! Always start with the lower amount, as you can easily add more, but it’s hard to fix an overly sweet slush.
  • For a fun twist, consider adding a splash of coconut milk or a handful of fresh fruit like strawberries or pineapple. This not only enhances the flavor but also adds a beautiful color contrast.

Variations & Serving Ideas

There are countless ways to put a spin on your Frozen Orange Creamsicle Slush. Consider making a tropical version by adding in some pineapple juice or coconut milk for a delightful tropical twist. If you’re feeling adventurous, try incorporating a handful of frozen mango or peach slices for added sweetness. For a lighter version, swap out the vanilla ice cream for Greek yogurt for a creamy yet tangy alternative.

As for serving ideas, this refreshing slush pairs wonderfully with light summer dishes like grilled chicken skewers, fish tacos, or a simple salad topped with citrus vinaigrette. The bright, zesty flavors of the slush complement these dishes perfectly, making them an ideal pairing for a sunny day.

Storage, Make-Ahead & Reheating

This Frozen Orange Creamsicle Slush is best enjoyed fresh, but if you have leftovers, you can store them in an airtight container in the fridge for up to 2 days. Just keep in mind that the slush may lose some of its texture over time as the ice melts. It doesn’t freeze well, as the ice will turn into a solid block. If you must freeze it, blend again after thawing to restore the slushy consistency. This treat is best the day you make it, as the flavors meld together beautifully overnight, enhancing its deliciousness.

Frequently Asked Questions

Can I make Frozen Orange Creamsicle Slush ahead of time?

Yes — in fact, it tastes even better the next day as the flavors meld. However, it’s best to enjoy it fresh, as the texture can change if stored for too long. If you need to prepare it ahead, keep it in the fridge and re-blend before serving.

What kind of orange juice should I use?

For the best flavor, use freshly squeezed orange juice. However, if you’re short on time, opt for 100% pure store-bought juice without added sugars. This will ensure that your slush remains flavorful and refreshing.

Can I substitute the vanilla ice cream?

Absolutely! If you’re looking for a dairy-free option, coconut milk ice cream or a non-dairy vanilla ice cream can work wonderfully. They will still provide the creamy texture and sweetness you desire.

How can I adjust the sweetness of my slush?

You can easily adjust the sweetness by modifying the amount of sugar added. Start with 1/4 cup and taste the mixture before blending. If you prefer it sweeter, add more sugar gradually until it reaches your desired level.

What should I do if my slush is too thick?

If your slush is too thick, simply add a splash of milk or orange juice and blend again. This will help achieve a more drinkable consistency while maintaining the slushy texture. Adjust gradually to reach your preferred thickness.

Sun-Kissed Frozen Orange Cream Slush

Final Thoughts

The Frozen Orange Creamsicle Slush is a delightful blend of refreshing citrus and creamy goodness, making it a perfect treat for warm days or any time you crave a taste of nostalgia. The way the bright orange flavor dances with the creamy texture truly elevates this slush, transforming it into a satisfying escape from the everyday.

This is the kind of recipe I come back to again and again, especially when I’m looking to cool down or impress guests at a summer gathering. It’s simple to make and always brings smiles all around! I encourage you to try this recipe for yourself—don’t hesitate to share your results or even put your own spin on it. Happy slushing!

Print
clock clock iconcutlery cutlery iconflag flag iconfolder folder iconinstagram instagram iconpinterest pinterest iconfacebook facebook iconprint print iconsquares squares iconheart heart iconheart solid heart solid icon

Frozen Orange Creamsicle Slush


  • Author: Lily author
  • Total Time: 15 minutes
  • Yield: 4 servings 1x
Pin Recipe
Print Recipe

Description

This Frozen Orange Creamsicle Slush is a refreshing treat that combines creamy vanilla and zesty orange flavors. Perfect for hot summer days, it brings back nostalgic memories with every sip.


Ingredients

Scale
  • 2 cups orange juice (freshly squeezed or store-bought)
  • 1 cup vanilla ice cream
  • 1 cup crushed ice
  • 1/2 cup milk (whole or 2%)
  • 1/4 cup granulated sugar (adjust based on sweetness preference)
  • 1 teaspoon vanilla extract
  • Zest of 1 orange (for added flavor)
  • Fresh orange slices and mint leaves (for garnish)

Instructions

  1. Start by preparing your ingredients. Gather 2 cups of orange juice, 1 cup of vanilla ice cream, and 1 cup of crushed ice. Make sure the ice is finely crushed, as larger chunks can make blending difficult.
  2. In a blender, combine the orange juice, vanilla ice cream, crushed ice, and 1/2 cup of milk. Add 1/4 cup of granulated sugar and 1 teaspoon of vanilla extract. If you like a sweeter slush, consider adding a bit more sugar at this stage.
  3. Add the zest of 1 orange to the blender. This step is crucial for enhancing the citrus flavor of your slush. Make sure not to include the bitter white pith—only the flavorful zest.
  4. Blend the mixture on medium-high speed for about 30-45 seconds. Stop once the ingredients are fully combined and the slush has a smooth, even consistency. If you notice large chunks of ice, blend for an additional 10-15 seconds. Avoid over-blending, as this can make the slush too liquidy.
  5. Once blended, taste the slush. If it needs more sweetness, add a little more sugar and blend for a few more seconds. If it’s too thick, you can add a splash of milk to reach your desired consistency.
  6. Pour the slush into glasses. This recipe typically serves 4, but you can easily double it for larger gatherings. Use a spoon to help guide the slush into the glasses if needed.
  7. Garnish each serving with fresh orange slices and mint leaves. The mint not only adds a pop of color but also a refreshing aroma that complements the citrus flavors beautifully.
  8. Serve immediately and enjoy! If you’ve made extra, you can refrigerate it for a short time, but it's best enjoyed fresh.
  • Prep Time: 15 min
  • Cook Time: 0 min
  • Category: Dessert
  • Method: Blending
  • Cuisine: American

Nutrition

  • Serving Size: 1 serving
  • Calories: 200
  • Sugar: 30 g
  • Sodium: 50 mg
  • Fat: 5 g
  • Saturated Fat: 3 g
  • Unsaturated Fat: 2 g
  • Trans Fat: 0 g
  • Carbohydrates: 40 g
  • Fiber: 1 g
  • Protein: 2 g
  • Cholesterol: 20 mg

Keywords: Don't skip the orange zest! It's a game-changer for flavor. Always zest before juicing to make it easier.

Did you make this recipe?

Share a photo and tag us — we can't wait to see what you've made!

Zesty Lemon Poppy Seed Delight

One rainy afternoon, I found myself in my grandmother’s cozy kitchen, the kind that always smelled like warmth and love. She was whipping up her famous Lemon Poppy Seed Loaf, a recipe that had been passed down through generations. As the batter came together, the zesty aroma of fresh lemons filled the air, mingling perfectly with the nutty fragrance of poppy seeds. I can still picture her, apron-clad, as she expertly drizzled a vibrant citrus icing over the loaf, creating a glossy, sun-kissed finish that beckoned us to dive in. It was a moment that sparked my own passion for baking, and this recipe has become a cherished staple in my home ever since.

When you take a bite of this Lemon Poppy Seed Loaf, it’s like a burst of sunshine on your palate. The loaf is beautifully golden, with a tender crumb that melts in your mouth. Each slice is speckled with tiny poppy seeds, adding a delightful crunch that contrasts beautifully with the tangy sweetness of the lemon. And that citrus icing? It’s the finishing touch that elevates this loaf from ordinary to extraordinary, with its bright, zesty flavor dancing on your taste buds.

This recipe stands out because it embraces simplicity while delivering on flavor. I’ve added a hint of vanilla to the batter, enhancing the overall taste and making it even more indulgent. Trust me, once you make this Lemon Poppy Seed Loaf With Citrus Icing, it’ll become a go-to in your baking repertoire.

So, let me show you exactly how to make it!

Zesty Lemon Poppy Seed Delight

Why You’ll Love This Recipe

  • Moist and tender crumb that melts in your mouth, thanks to the perfect balance of butter and buttermilk.
  • Bright, zesty lemon flavor paired with crunchy poppy seeds, creating a delightful texture and taste experience.
  • Easy to whip up in just about an hour, perfect for last-minute gatherings or a cozy afternoon treat.
  • Budget-friendly with everyday ingredients, making it an accessible option for all home bakers.
  • The citrus icing adds a sweet tang that elevates the loaf, turning a simple recipe into a showstopper!

Ingredients

  • 1 ½ cups (190g) all-purpose flour
  • 1 teaspoon baking powder
  • ½ teaspoon baking soda
  • ½ teaspoon salt
  • 3 tablespoons poppy seeds
  • ½ cup (115g) unsalted butter, softened to room temperature
  • 1 cup (200g) granulated sugar
  • 2 large eggs
  • 1 teaspoon vanilla extract
  • 1 teaspoon lemon zest (from about 1 medium lemon)
  • ½ cup (120ml) buttermilk
  • 2 tablespoons fresh lemon juice

For the Citrus Icing:

  • 1 cup (120g) powdered sugar
  • 2 tablespoons fresh lemon juice
  • 1 tablespoon orange juice
  • 1 teaspoon lemon zest (for garnish, optional)

Let’s dive into the key ingredients that make this Lemon Poppy Seed Loaf so special. The all-purpose flour provides the structure and base for the loaf, while the baking powder and baking soda ensure it rises perfectly, giving the loaf a light texture. For a gluten-free variation, you could substitute the flour with a gluten-free all-purpose blend. Poppy seeds not only add a delightful crunch but also contribute to the unique flavor profile that pairs well with the citrus notes.

Unsalted butter is crucial for achieving the buttery richness that makes this loaf so moist. If you’re looking for a dairy-free option, coconut oil or a vegan butter can be used instead. The buttermilk is another essential component, providing acidity that activates the baking soda for a fluffy texture. If you don’t have buttermilk on hand, you can easily make a substitute by mixing ½ cup of milk with 1 tablespoon of vinegar or lemon juice and letting it sit for about 5 minutes.

Step-by-Step Instructions

  1. Preheat your oven to 350°F (175°C). Grease a 9×5-inch loaf pan or line it with parchment paper for easy removal later.
  2. In a medium mixing bowl, whisk together 1 ½ cups of all-purpose flour, 1 teaspoon of baking powder, ½ teaspoon of baking soda, ½ teaspoon of salt, and 3 tablespoons of poppy seeds. This helps to evenly distribute the baking agents and ensures a uniform rise.
  3. In a large mixing bowl, cream together ½ cup of softened unsalted butter and 1 cup of granulated sugar using an electric mixer on medium speed for about 3-4 minutes, until the mixture is light and fluffy. Make sure to scrape down the sides of the bowl occasionally.
  4. Add 2 large eggs, 1 teaspoon of vanilla extract, and 1 teaspoon of lemon zest to the creamed butter and sugar, mixing until fully combined. You want a smooth consistency, so ensure there are no lumps of butter.
  5. In a small bowl, combine ½ cup of buttermilk and 2 tablespoons of fresh lemon juice. Alternately add the dry ingredients and buttermilk mixture to the butter mixture, starting and ending with the dry ingredients. Mix just until combined; do not overmix, as this can lead to a dense loaf.
  6. Pour the batter into the prepared loaf pan. Smooth the top with a spatula, ensuring it’s even. Bake in the preheated oven for 50-60 minutes, or until a toothpick inserted in the center comes out clean. The edges should be lightly golden brown, and the center should feel just set.
  7. Once baked, remove the loaf from the oven and allow it to cool in the pan for about 10 minutes. Then, transfer it to a wire rack to cool completely. Resist the urge to slice too soon, as it will be crumbly if it’s still warm.
  8. While the loaf is cooling, prepare the citrus icing. In a medium bowl, whisk together 1 cup of powdered sugar, 2 tablespoons of fresh lemon juice, and 1 tablespoon of orange juice until smooth. If the icing is too thick, you can add a little more juice to reach your desired consistency.
  9. Once the loaf is completely cool, drizzle the citrus icing over the top. If you like, sprinkle with an additional teaspoon of lemon zest for an extra pop of flavor and color.

Pro Tips for the Best Lemon Poppy Seed Loaf With Citrus Icing

  • Be careful not to overmix your batter; this is a common mistake that can lead to a dense loaf. Mix just until the dry ingredients are incorporated for a light and fluffy texture.
  • Use room temperature ingredients, especially the butter and eggs. This helps to create a smoother batter and ensures even baking. Take your eggs out of the fridge about 30 minutes before you start.
  • For a more pronounced lemon flavor, consider adding a little lemon extract in addition to the zest and juice. Just a half teaspoon can elevate the citrus notes significantly.
  • When measuring your flour, spoon it into the measuring cup and level it off with a knife instead of scooping directly from the bag. This prevents packing and ensures you don’t end up with a dry loaf.
  • Invest in a good quality loaf pan; it makes a difference in heat distribution, which ensures even baking. If your pan is dark-coated, reduce the oven temperature by 25°F to prevent over-browning.

Variations & Serving Ideas

For a delightful twist, consider adding blueberries or raspberries to the batter for a fruity burst of flavor. You can also experiment with different citrus fruits—try lime or grapefruit zest and juice for a refreshing change. For a healthier option, substitute half of the all-purpose flour with whole wheat flour for added fiber without compromising too much on texture.

This Lemon Poppy Seed Loaf pairs beautifully with a light salad, such as a mixed greens salad with a vinaigrette, or a cup of tea for a cozy afternoon treat. It also complements a creamy cheese platter, as the acidity of the loaf balances rich cheeses perfectly. Lastly, a scoop of vanilla ice cream on the side creates a delightful contrast of temperatures and flavors!

Storage, Make-Ahead & Reheating

This Lemon Poppy Seed Loaf can be stored at room temperature for up to 3 days if wrapped tightly in plastic wrap. If you want to keep it longer, it freezes well for up to 3 months. To freeze, wrap the loaf tightly in plastic wrap and then in aluminum foil to prevent freezer burn.

When you’re ready to enjoy it again, simply thaw it in the fridge overnight. Reheat individual slices in the microwave for 15-20 seconds or in a toaster oven until warmed through. Interestingly, many people find that this loaf tastes even better the next day, as the flavors have time to meld!

Frequently Asked Questions

Can I make Lemon Poppy Seed Loaf With Citrus Icing ahead of time?

Yes — in fact, it tastes even better the next day! You can make the loaf a day in advance, allowing the flavors to develop. Just be sure to store it in an airtight container to maintain its moisture.

Can I substitute the poppy seeds?

Absolutely! If you don’t have poppy seeds on hand or prefer an alternative, you can use sesame seeds for a similar crunch or omit them entirely for a smooth loaf.

What can I use instead of buttermilk?

If you don’t have buttermilk, you can easily create a substitute by mixing ½ cup of milk (dairy or plant-based) with 1 tablespoon of vinegar or lemon juice. Let it sit for 5 minutes before using in the recipe.

How can I make this recipe gluten-free?

To make a gluten-free version of this Lemon Poppy Seed Loaf, substitute the all-purpose flour with a gluten-free all-purpose flour blend. Just ensure that the blend contains a binding agent like xanthan gum for the best results.

What is the best way to store leftover loaf?

Leftover Lemon Poppy Seed Loaf should be stored in an airtight container at room temperature for up to 3 days. For longer storage, wrap it tightly and freeze for up to 3 months. Thaw it before serving for the best texture.

Zesty Lemon Poppy Seed Delight

Final Thoughts

The Lemon Poppy Seed Loaf with Citrus Icing is truly a delightful treat that brings a burst of brightness to any occasion. The zesty lemon flavor combined with the subtle crunch of poppy seeds creates a satisfying balance, while the citrus icing adds a touch of sweetness that perfectly complements the loaf’s tanginess.

This is the kind of recipe I come back to again and again, especially when I want to brighten up a gloomy day or celebrate a small victory. The aroma that fills the kitchen as it bakes is absolutely heavenly! I encourage you to give this recipe a try; you might just find it becoming a beloved staple in your home. Don’t forget to share your results or even add your own unique twist—I can’t wait to see what you create!

Print
clock clock iconcutlery cutlery iconflag flag iconfolder folder iconinstagram instagram iconpinterest pinterest iconfacebook facebook iconprint print iconsquares squares iconheart heart iconheart solid heart solid icon

Lemon Poppy Seed Loaf


  • Author: Lily author
  • Total Time: 27 minute
  • Yield: 1 loaf 1x
Pin Recipe
Print Recipe

Description

This Lemon Poppy Seed Loaf is a delightful treat that combines zesty lemon flavor with crunchy poppy seeds. Topped with a citrus icing, it’s perfect for any occasion.


Ingredients

Scale
  • 1 ½ cups (190g) all-purpose flour
  • 1 teaspoon baking powder
  • ½ teaspoon baking soda
  • ½ teaspoon salt
  • 3 tablespoons poppy seeds
  • ½ cup (115g) unsalted butter, softened to room temperature
  • 1 cup (200g) granulated sugar
  • 2 large eggs
  • 1 teaspoon vanilla extract
  • 1 teaspoon lemon zest (from about 1 medium lemon)
  • ½ cup (120ml) buttermilk
  • 2 tablespoons fresh lemon juice
  • 1 cup (120g) powdered sugar
  • 2 tablespoons fresh lemon juice
  • 1 tablespoon orange juice
  • 1 teaspoon lemon zest (for garnish, optional)

Instructions

  1. Preheat your oven to 350°F (175°C). Grease a 9×5-inch loaf pan or line it with parchment paper for easy removal later.
  2. In a medium mixing bowl, whisk together 1 ½ cups of all-purpose flour, 1 teaspoon of baking powder, ½ teaspoon of baking soda, ½ teaspoon of salt, and 3 tablespoons of poppy seeds. This helps to evenly distribute the baking agents and ensures a uniform rise.
  3. In a large mixing bowl, cream together ½ cup of softened unsalted butter and 1 cup of granulated sugar using an electric mixer on medium speed for about 3-4 minutes, until the mixture is light and fluffy. Make sure to scrape down the sides of the bowl occasionally.
  4. Add 2 large eggs, 1 teaspoon of vanilla extract, and 1 teaspoon of lemon zest to the creamed butter and sugar, mixing until fully combined. You want a smooth consistency, so ensure there are no lumps of butter.
  5. In a small bowl, combine ½ cup of buttermilk and 2 tablespoons of fresh lemon juice. Alternately add the dry ingredients and buttermilk mixture to the butter mixture, starting and ending with the dry ingredients. Mix just until combined; do not overmix, as this can lead to a dense loaf.
  6. Pour the batter into the prepared loaf pan. Smooth the top with a spatula, ensuring it’s even. Bake in the preheated oven for 50-60 minutes, or until a toothpick inserted in the center comes out clean. The edges should be lightly golden brown, and the center should feel just set.
  7. Once baked, remove the loaf from the oven and allow it to cool in the pan for about 10 minutes. Then, transfer it to a wire rack to cool completely. Resist the urge to slice too soon, as it will be crumbly if it’s still warm.
  8. While the loaf is cooling, prepare the citrus icing. In a medium bowl, whisk together 1 cup of powdered sugar, 2 tablespoons of fresh lemon juice, and 1 tablespoon of orange juice until smooth. If the icing is too thick, you can add a little more juice to reach your desired consistency.
  9. Once the loaf is completely cool, drizzle the citrus icing over the top. If you like, sprinkle with an additional teaspoon of lemon zest for an extra pop of flavor and color.
  • Prep Time: 15 mins
  • Cook Time: 50-60 mins
  • Category: Dessert
  • Method: Baking
  • Cuisine: American

Nutrition

  • Serving Size: 1 slice
  • Calories: 200
  • Sugar: 15 g
  • Sodium: 150 mg
  • Fat: 8 g
  • Saturated Fat: 5 g
  • Unsaturated Fat: 3 g
  • Trans Fat: 0 g
  • Carbohydrates: 30 g
  • Fiber: 1 g
  • Protein: 3 g
  • Cholesterol: 40 mg

Keywords: Be careful not to overmix your batter; this is a common mistake that can lead to a dense loaf. Use room temperature ingredients for a smoother batter and even baking.

Did you make this recipe?

Share a photo and tag us — we can't wait to see what you've made!

  • Privacy Policy
  • Terms Of Service
  • Contact
  • About
  • GDPR

Copyright © 2025 Homesmad