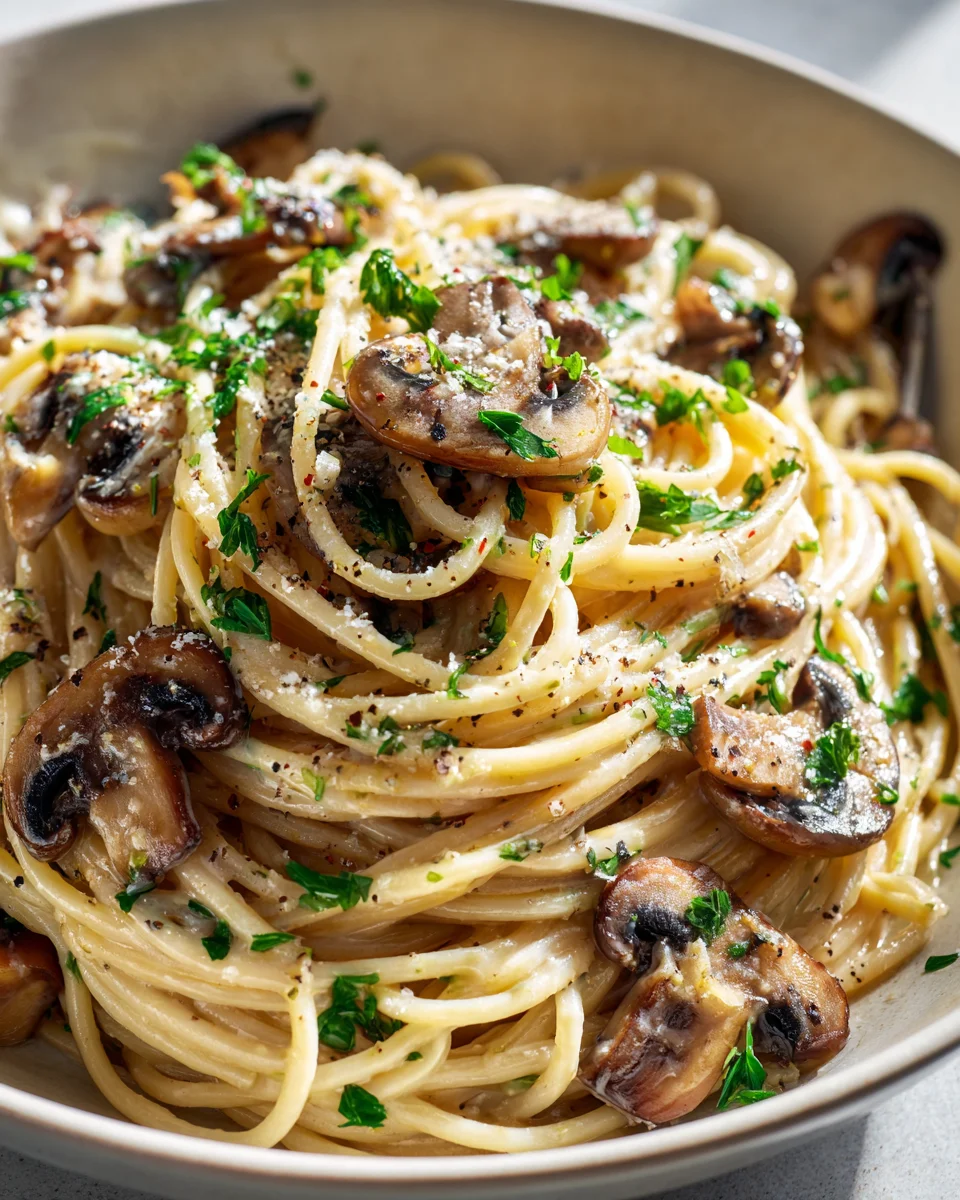
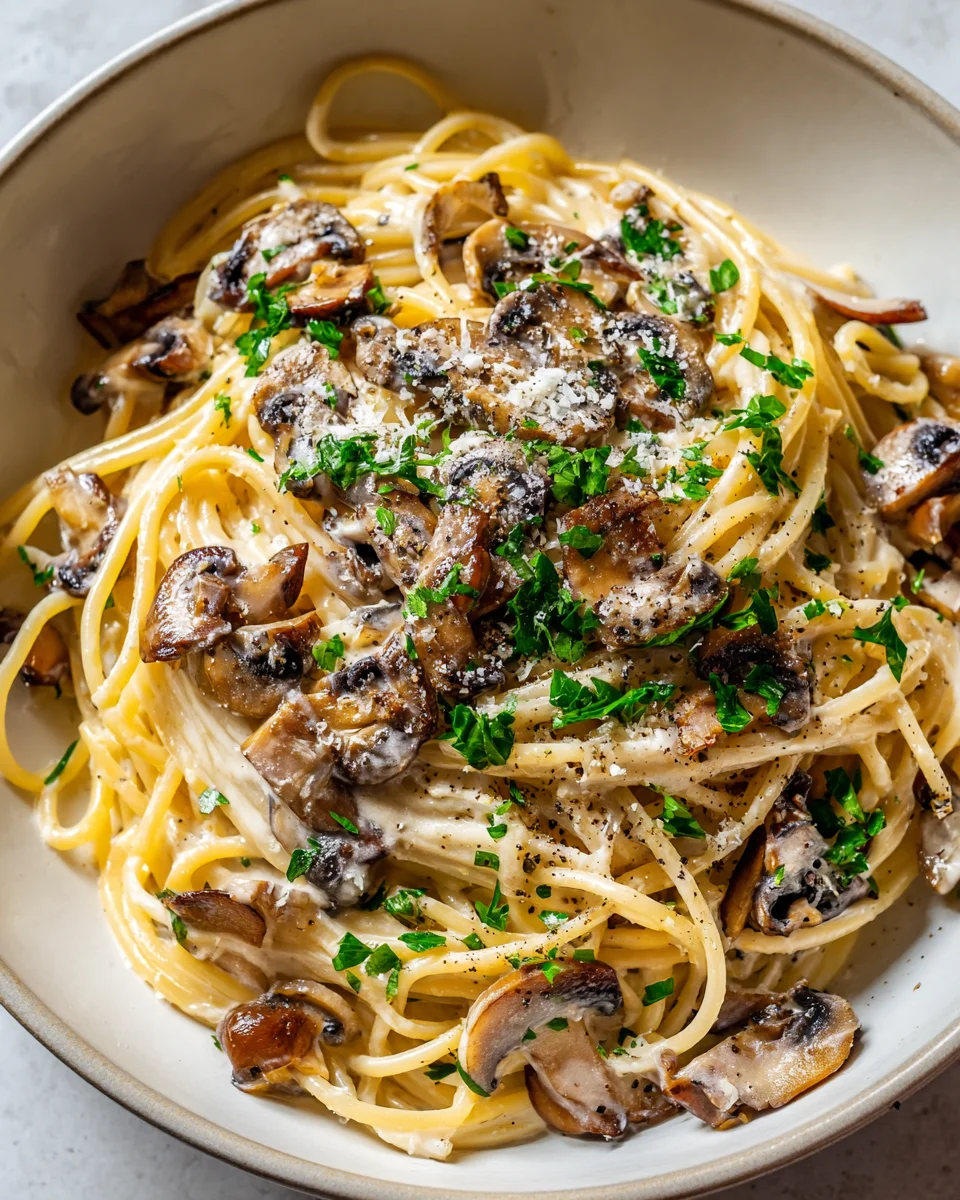
Creamy Mushroom Carbonara (meatless)
Oh, do I have a treat for you today! If you’re anything like me, you adore a rich, creamy pasta dish that feels incredibly indulgent but is surprisingly simple to whip up. This isn’t just any pasta; it’s our wonderful Creamy Mushroom Carbonara (meatless).
I know what you might be thinking – carbonara without meat? Trust me on this one. We’ve taken all the irresistible qualities of a classic carbonara – that velvety sauce, al dente pasta, and a sprinkle of savory goodness – and given it a delightful vegetarian twist. Forget the traditional cured meat; here, plump, earthy mushrooms step in to provide incredible umami and a satisfying texture that truly shines.
This dish is a comforting hug in a bowl, perfect for a cozy weeknight dinner or when you want to impress without spending hours in the kitchen. Imagine tender pasta strands enveloped in a luscious, creamy sauce made with eggs and Parmesan (or a suitable vegetarian alternative, if you prefer), beautifully complemented by perfectly sautéed mushrooms. It’s rich, it’s hearty, and it’s bursting with flavor – proving that sometimes, the simplest ingredients can create the most extraordinary meat-free meals.
Ingredient Notes
Crafting the perfect Creamy Mushroom Carbonara (meatless) truly begins with understanding the role each ingredient plays. While traditional carbonara relies on cured beef and eggs, our meatless version champions earthy mushrooms and a luxurious creamy sauce, while maintaining that classic carbonara feel. Here’s a rundown of what you’ll need and why:
- Mushrooms: These are the star of our meatless show! I highly recommend using a mix of mushrooms for depth of flavor. Cremini (baby bellas) are always a safe bet for their meaty texture and robust flavor. For an extra gourmet touch, consider adding some sliced shiitake or even delicate oyster mushrooms. The key is to brown them well, allowing them to release their moisture and develop a deep umami flavor. If you can only find button mushrooms, they’ll work perfectly too, just make sure to get a good sear on them.
- Pasta: Spaghetti or bucatini are my top choices for carbonara. Their long, thin strands are perfect for clinging to the creamy sauce. Linguine is another excellent option. Choose a good quality pasta – it makes a difference in texture and how well it holds the sauce.
- Eggs: This is where the magic happens! For a truly rich and velvety carbonara, I swear by using mostly egg yolks. I typically use 3-4 large egg yolks and 1 whole egg per serving for that luxurious mouthfeel. Ensure your eggs are at room temperature; this helps them emulsify more smoothly with the hot pasta water and reduces the risk of scrambling.
- Grated Cheese: Authenticity often calls for Pecorino Romano, and its sharp, salty tang is wonderful here. However, if you find Pecorino too strong, a good quality Parmigiano-Reggiano is a fantastic alternative. Better yet, use a blend of both! Freshly grated cheese is non-negotiable – pre-grated cheese contains anti-caking agents that can make your sauce gritty or less smooth.
- Heavy Cream: Since this is a “creamy” mushroom carbonara, a touch of heavy cream adds that extra layer of indulgence and stability to our sauce. It’s what differentiates it from a strictly traditional carbonara and gives it that comforting, rich texture. If you want a slightly lighter version, half-and-half can be used, but you might lose a little of that luxurious thickness.
- Garlic: Freshly minced garlic is essential for building a flavorful base for our mushrooms. Don’t skimp on it!
- Olive Oil and/or Butter: I love using a combination of good quality extra virgin olive oil and a knob of unsalted butter to sauté the mushrooms and garlic. The olive oil adds a fruity note, while the butter helps with browning and richness.
- Salt and Freshly Ground Black Pepper: Seasoning is key! Use sea salt or kosher salt for the pasta water and to season the mushrooms. Freshly ground black pepper is crucial for carbonara; its pungent aroma truly elevates the dish. Don’t use pre-ground pepper here.
- Optional (for deglazing): Sometimes, after browning the mushrooms, a splash of liquid helps scrape up those delicious browned bits from the pan. Instead of alcohol, I always opt for a good quality vegetable broth or even mushroom broth. It adds another layer of umami without any alcohol content.
Step-by-Step Instructions
Making Creamy Mushroom Carbonara (meatless) is all about timing and technique. Don’t be intimidated; with these steps, you’ll achieve a restaurant-quality dish right in your kitchen!
- Prep Your Ingredients: This is crucial for smooth sailing. Slice your mushrooms, mince your garlic, and grate your cheese. Separate your egg yolks into a medium bowl, adding one whole egg if desired. Add most of your grated cheese (reserving some for garnish) and a generous amount of freshly ground black pepper to the egg mixture. Whisk it lightly with a fork until just combined. Set aside.
- Start the Pasta Water: Bring a large pot of generously salted water to a rolling boil. Remember, your pasta water should taste like the sea – this is your main seasoning for the pasta itself.
- Sauté the Mushrooms: While the water heats, warm a large skillet or pan over medium-high heat. Add a tablespoon of olive oil and a knob of butter. Once the butter is melted and shimmering, add your sliced mushrooms in a single layer (cook in batches if necessary to avoid overcrowding, which steams rather than browns them). Cook for 5-7 minutes without stirring much, allowing them to brown nicely. Once they’re golden and have released their moisture, add the minced garlic and cook for another minute until fragrant. If you’re using it, add a splash of vegetable broth to deglaze the pan, scraping up any browned bits. Remove the pan from the heat and set aside for a moment.
- Cook the Pasta: Add your pasta to the boiling water and cook according to package directions until al dente – slightly firm to the bite. Before draining, reserve at least 1 cup of the starchy pasta water. This water is liquid gold for emulsifying our sauce!
- Combine for Creaminess: This is the most critical step. Immediately after draining, add the hot pasta directly to the skillet with the sautéed mushrooms. Return the pan to very low heat or, even better, remove it from the heat entirely.
- Create the Sauce: Pour about half of your reserved hot pasta water into the egg and cheese mixture, whisking constantly. This tempers the eggs, preventing them from scrambling when they hit the hot pasta. Now, pour the tempered egg mixture over the pasta and mushrooms in the skillet.
- Toss and Emulsify: Using tongs, rapidly toss the pasta, mushrooms, and egg mixture. The residual heat from the pasta and pan, combined with the hot pasta water, will cook the eggs into a luxurious, creamy sauce without scrambling them. Add the heavy cream now, along with more of the reserved pasta water, a tablespoon at a time, continuing to toss until the sauce reaches your desired consistency – glossy, velvety, and coating every strand of pasta. Taste and adjust seasoning with salt and pepper as needed.
- Serve Immediately: Carbonara waits for no one! Divide the Creamy Mushroom Carbonara among warm bowls, garnish with a sprinkle of the remaining grated cheese and a final crack of fresh black pepper.
Tips & Suggestions
Mastering Creamy Mushroom Carbonara (meatless) involves a few insider tricks that I’ve learned along the way. These tips will help you achieve that perfect restaurant-quality dish every time:
- Work Quickly, Off the Heat (Mostly): The number one rule for carbonara is to work fast once the pasta is cooked and removed from the direct heat. The goal is to gently cook the eggs into a sauce using the residual heat of the pasta and pan, not to scramble them. Having your ingredients prepped and ready is vital for this.
- Don’t Skimp on Pasta Water: That starchy, salty pasta water is your best friend. It’s essential for creating a smooth, emulsified sauce. The starch helps thicken the sauce, and the salt adds flavor. Always reserve more than you think you’ll need; you can always add less, but you can’t add more once it’s gone.
- Room Temperature Eggs are Key: Cold eggs are more prone to scrambling. Letting your eggs come to room temperature for at least 30 minutes before mixing helps them emulsify more smoothly and creates a silkier sauce.
- Quality Cheese Matters: A good carbonara lives and dies by its cheese. Use freshly grated, high-quality Pecorino Romano or Parmigiano-Reggiano. The flavor difference is monumental compared to pre-grated varieties.
- Brown Those Mushrooms Properly: Don’t rush this step. Allow your mushrooms to cook without crowding the pan until they release their moisture and develop a deep golden-brown sear. This creates a rich, savory foundation for your meatless carbonara.
- Taste as You Go: Always taste your components – the mushrooms, the pasta, and finally the finished sauce. Adjust salt and pepper as needed. Remember the cheese is quite salty, so be mindful when adding extra salt.
- Embrace the Pepper: Carbonara is famous for its peppery kick. Use freshly ground black pepper generously. Some even like to toast their peppercorns lightly before grinding for an extra aromatic punch.
- Consider Truffle Oil (Optional): For an extra layer of luxury and earthiness, a tiny drizzle of good quality white truffle oil at the very end can elevate your Creamy Mushroom Carbonara to new heights. Use it sparingly, as it’s very potent.
- Serve Immediately: Carbonara is a dish that truly must be enjoyed fresh. The sauce is at its peak right after preparation. As it sits, the sauce can thicken too much or even begin to separate.
Storage
While Creamy Mushroom Carbonara (meatless) is undeniably at its absolute best when served fresh, I understand that sometimes you might have leftovers. It’s not ideal, but with a few pointers, you can manage to store and reheat it, keeping in mind that the texture and consistency will inevitably change slightly.
- Immediate Serving is Best: Let me be clear: Carbonara is a dish designed for immediate consumption. The delicate egg-based sauce, especially with the added cream, is prone to thickening, separating, or becoming a bit clumpy as it cools and sits. The magic truly happens right off the stove.
- Refrigeration: If you do have leftovers, allow the carbonara to cool completely before transferring it to an airtight container. Refrigerate promptly within two hours of cooking. It will typically keep well in the refrigerator for up to 1-2 days.
- Reheating Challenges: Reheating carbonara can be tricky because the eggs can scramble if heated too quickly or intensely, and the sauce can separate or become dry. Avoid the microwave if at all possible, as it’s very difficult to control the heat evenly and often results in scrambled eggs and dry pasta.
- Stovetop Reheating (Recommended):
- Transfer the leftover carbonara to a non-stick skillet or pan.
- Add a splash of liquid – about 1-2 tablespoons of water, vegetable broth, or even a little milk or cream per serving. This helps to rehydrate the sauce and bring it back to a creamy consistency.
- Heat over very low heat, stirring constantly and gently. The goal is to warm it through slowly, not to cook it further.
- Continue stirring until the pasta is warm and the sauce has loosened up and appears creamy again. This might take a few minutes.
- Taste and adjust seasoning if necessary. You might want another crack of fresh black pepper.
- Expect Texture Changes: Even with careful reheating, the pasta won’t be as al dente, and the sauce won’t be as perfectly emulsified as when freshly made. The mushrooms might also be a little softer. It will still be flavorful, but just manage your expectations for the texture.
- Freezing is Not Recommended: Due to the egg and cream-based sauce and the delicate nature of pasta, freezing Creamy Mushroom Carbonara is definitely not recommended. The sauce will almost certainly separate and become unappetizingly grainy or watery upon thawing and reheating.
Final Thoughts
And there you have it! My hope is that you’ve discovered the sheer joy and comfort packed into every forkful of this incredible Creamy Mushroom Carbonara (meatless). I truly believe this recipe is a game-changer for anyone looking for a rich, satisfying pasta dish that doesn’t rely on traditional meat. It truly proves just how much deep, luscious flavor can come from humble mushrooms and a beautifully crafted creamy sauce, achieving that signature carbonara indulgence in a wonderfully accessible way for everyone, and without needing any alcoholic additions for depth.
From the first silky strand of pasta to the last bite of savory mushroom, I think you’ll agree that this Creamy Mushroom Carbonara (meatless) is an absolute triumph. It’s the perfect weeknight treat, a delightful dinner party option, or just a comforting hug in a bowl. So go ahead, treat yourself and your loved ones to this delightful culinary experience. I promise, your taste buds will thank you!
Delicious Creamy Mushroom Carbonara – Vegetarian Recipe
- Total Time: 45 minutes
- Yield: 4 servings 1x
Description
Indulge in a rich and creamy meatless carbonara that combines earthy mushrooms with a velvety sauce. This delightful dish is perfect for a cozy weeknight dinner or impressing guests without spending hours in the kitchen.
Ingredients
- Mushrooms (Cremini, shiitake, oyster, or button)
- Spaghetti or bucatini pasta
- 3–4 large egg yolks
- 1 whole egg
- Grated Pecorino Romano cheese
- Grated Parmigiano-Reggiano cheese
- Heavy cream
- Freshly minced garlic
- Olive oil
- Unsalted butter
- Salt
- Freshly ground black pepper
- Vegetable broth or mushroom broth (optional for deglazing)
Instructions
- Prep Your Ingredients: Slice your mushrooms, mince your garlic, and grate your cheese. Separate your egg yolks into a medium bowl, adding one whole egg if desired. Add most of your grated cheese (reserving some for garnish) and a generous amount of freshly ground black pepper to the egg mixture. Whisk it lightly with a fork until just combined. Set aside.
- Start the Pasta Water: Bring a large pot of generously salted water to a rolling boil.
- Sauté the Mushrooms: Warm a large skillet or pan over medium-high heat. Add a tablespoon of olive oil and a knob of butter. Once the butter is melted and shimmering, add your sliced mushrooms in a single layer. Cook for 5-7 minutes without stirring much, allowing them to brown nicely. Once they're golden and have released their moisture, add the minced garlic and cook for another minute until fragrant. If using, add a splash of vegetable broth to deglaze the pan, scraping up any browned bits. Remove the pan from the heat and set aside.
- Cook the Pasta: Add your pasta to the boiling water and cook according to package directions until al dente. Before draining, reserve at least 1 cup of the starchy pasta water.
- Combine for Creaminess: Immediately after draining, add the hot pasta directly to the skillet with the sautéed mushrooms. Return the pan to very low heat or remove it from the heat entirely.
- Create the Sauce: Pour about half of your reserved hot pasta water into the egg and cheese mixture, whisking constantly. Now, pour the tempered egg mixture over the pasta and mushrooms in the skillet.
- Toss and Emulsify: Using tongs, rapidly toss the pasta, mushrooms, and egg mixture. Add the heavy cream now, along with more of the reserved pasta water, a tablespoon at a time, continuing to toss until the sauce reaches your desired consistency. Taste and adjust seasoning with salt and pepper as needed.
- Serve Immediately: Divide the Creamy Mushroom Carbonara among warm bowls, garnish with a sprinkle of the remaining grated cheese and a final crack of fresh black pepper.
- Prep Time: 15 mins
- Cook Time: 30 mins
- Category: Dinner
- Method: Sautéing
- Cuisine: Italian
Nutrition
- Serving Size: 1 bowl
- Calories: 600
- Sugar: 3 g
- Sodium: 800 mg
- Fat: 30 g
- Saturated Fat: 15 g
- Unsaturated Fat: 10 g
- Trans Fat: 0 g
- Carbohydrates: 70 g
- Fiber: 4 g
- Protein: 18 g
- Cholesterol: 250 mg
Keywords: Work quickly after cooking the pasta to avoid scrambling the eggs. Use freshly grated cheese for the best flavor, and don't skimp on the pasta water for a smooth sauce.