• Skip to primary navigation
  • Skip to main content
  • Skip to primary sidebar
Homesmad

Homesmad

  • Home
  • Breakfast & Brunch
  • Appetizers & Snacks
  • Dinner
  • Dessert
  • About
  • Privacy Policy
  • Contact
Homesmad
  • Home
  • Breakfast & Brunch
  • Appetizers & Snacks
  • Dinner
  • Dessert
  • About
  • Privacy Policy
  • Contact

Delicious Honey Glazed Corn Casserole – Perfect Side Dish

November 28, 2025 by Lily author

Honey Glazed Corn Casserole isn’t just another side dish; it’s a revelation, a culinary hug that promises to steal the spotlight at any meal. I’ve always found something truly magical about a dish that can elevate simple ingredients into an extraordinary experience, and this casserole does just that. It’s the kind of recipe that sparks joy and anticipation, drawing everyone to the table with its irresistible aroma and beautiful golden-brown finish.

The Beloved History of Corn Casseroles and Its Sweet Evolution

The humble corn casserole has long held a cherished spot in countless family gatherings, particularly within Southern American culinary traditions. It’s a testament to comfort food, often signifying warmth, community, and abundant hospitality. What makes our version truly special is the exquisite addition of a honey glaze. This twist isn’t just about adding sweetness; it’s about transforming a classic into something unforgettable, offering a delightful interplay of sweet and savory notes that dance on your palate. It’s a modern take on a beloved classic, blending familiar comfort with an exciting new dimension of flavor.

People absolutely adore this dish for its incredible balance. The natural sweetness of the corn is perfectly complemented by the rich, amber notes of honey, all brought together in a creamy, tender casserole that holds a slight, satisfying crispness on top. It’s wonderfully convenient to prepare, making it a perfect candidate for holiday feasts, potlucks, or even a comforting weeknight dinner. The luscious texture and the dazzling taste profile ensure that this particular Honey Glazed Corn Casserole becomes an instant family favorite, cherished for its ability to bring smiles and satisfied sighs around the dinner table.

Delicious Honey Glazed Corn Casserole – Perfect Side Dish this RECIPE

Ingredients:

  • For the Creamy Corn Casserole Base:
    • 2 (15-ounce) cans whole kernel corn, drained exceptionally well
    • 1 (15-ounce) can cream-style corn (do not drain)
    • 1 (8-ounce) package cream cheese, softened to room temperature
    • 1/2 cup (1 stick) unsalted butter, melted
    • 1/2 cup sour cream (full-fat for best results)
    • 1/4 cup whole milk
    • 1/4 cup granulated sugar
    • 2 tablespoons all-purpose flour
    • 1 teaspoon baking powder
    • 1 teaspoon vanilla extract (pure extract, please!)
    • 1/2 teaspoon fine sea salt
    • 1/4 teaspoon freshly ground black pepper
  • For the Signature Honey Glaze:
    • 1/4 cup (1/2 stick) unsalted butter, melted
    • 1/4 cup high-quality honey (clover or wildflower work wonderfully)
    • 1 tablespoon light brown sugar, packed
    • 1/2 teaspoon vanilla extract
  • Optional Garnish:
    • Fresh chopped chives or parsley, for a touch of color and freshness

Preparing for the Ultimate Honey Glazed Corn Casserole Experience

Welcome, fellow food enthusiast, to the delightful journey of creating the most incredible Honey Glazed Corn Casserole you’ve ever tasted! This dish is a harmonious blend of sweet, savory, and wonderfully creamy textures, elevated by that irresistible golden honey glaze. Before we dive into the mixing, let’s get our kitchen prepped and ready for action. Trust me, a little preparation goes a long way in ensuring a smooth and enjoyable cooking process, leading to a perfectly baked casserole.

  1. Preheat Your Oven and Prepare Your Baking Dish:

    First things first, let’s get that oven ready. Preheat your oven to a welcoming 375°F (190°C). This ensures an even bake from the moment your casserole enters the heat. While the oven warms up, take out a 9×13-inch baking dish. This size is ideal for allowing our Honey Glazed Corn Casserole to bake evenly without being too thick or too thin. Lightly grease the interior of the dish with butter, cooking spray, or even a little bit of solid shortening. This simple step is absolutely crucial to prevent sticking and makes serving and cleanup so much easier later on. You want to make sure every glorious scoop comes out cleanly. I often use a paper towel to spread a thin, even layer of butter across the bottom and up the sides.

  2. Gather and Prepare Your Ingredients:

    Now, let’s talk about our stars – the ingredients! It’s always a good practice to have all your ingredients measured, opened, and ready to go before you start mixing. This is often referred to as “mise en place,” and it truly makes a difference. For our canned whole kernel corn, it’s vital to drain it exceptionally well. Any excess water will thin out our rich casserole base, impacting its luxurious texture. I like to use a fine-mesh sieve and press gently on the corn with the back of a spoon to squeeze out as much liquid as possible. For the cream cheese, remember it needs to be softened to room temperature. This isn’t just a suggestion; it’s a non-negotiable step to ensure it blends smoothly into the mixture, preventing any pesky lumps in your otherwise silky Honey Glazed Corn Casserole. If you’re short on time, you can cut the cream cheese into smaller cubes and microwave it for 10-15 seconds, just enough to soften, not melt.

    Ensure your butter is melted and slightly cooled, not piping hot, as hot butter could potentially scramble the eggs if we were using them, and it’s generally best to add it warm, not sizzling. Measure out your sour cream, milk, sugar, flour, baking powder, vanilla, salt, and pepper. Having everything lined up makes the subsequent steps flow effortlessly, allowing you to focus on the mixing technique rather than scrambling for ingredients.

Crafting the Creamy Corn Casserole Base

This is where the magic begins, building the foundational flavors and the incredibly creamy texture that makes this Honey Glazed Corn Casserole so addictive. Take your time with these steps, and you’ll be rewarded with a casserole that’s nothing short of spectacular.

  1. Cream Together the Wet Ingredients:

    In a large mixing bowl, combine the softened cream cheese and the melted butter. Using an electric mixer on medium speed (or a sturdy whisk and a bit of elbow grease!), beat these two until they are beautifully smooth and thoroughly combined. This might take a minute or two, but it’s crucial for that velvety base. Next, add the sour cream, whole milk, and vanilla extract. Continue to beat until the mixture is light, airy, and homogenous. The vanilla extract here isn’t just for flavor; it subtly enhances the sweetness of the corn and honey, creating a more complex and inviting aroma. You’re aiming for a consistency that’s wonderfully creamy and completely lump-free. This step is key to avoiding a lumpy casserole!

  2. Incorporate the Dry Ingredients:

    Once your wet ingredients are perfectly blended, it’s time to introduce the dry components. Add the granulated sugar, all-purpose flour, baking powder, fine sea salt, and freshly ground black pepper to the wet mixture. Beat again on low speed, gradually increasing to medium, until everything is just combined. Be careful not to overmix at this stage; overmixing flour can develop the gluten too much, potentially leading to a tougher texture in your finished Honey Glazed Corn Casserole. We want it tender and moist. The baking powder is our secret ingredient for a light, slightly fluffy texture, ensuring the casserole isn’t too dense. The salt and pepper, though seemingly small additions, are vital for balancing the sweetness and truly bringing out the natural deliciousness of the corn.

  3. Fold in the Corn:

    Now for the main event: the corn! Add both the well-drained whole kernel corn and the undrained cream-style corn to your creamy base. Gently fold them in with a large spoon or spatula until they are evenly distributed throughout the mixture. Avoid beating or stirring vigorously; we want to preserve the integrity of the corn kernels and keep the base light. The combination of whole kernel and cream-style corn is brilliant here – the whole kernels provide delightful bursts of sweetness and texture, while the cream-style corn adds an extra layer of moisture and richness, making the overall Honey Glazed Corn Casserole incredibly satisfying.

    A Note on Corn Choices:

    While canned corn is convenient and works beautifully, if you have access to fresh corn, by all means, use it! Cut the kernels from about 4-5 ears of corn (you’ll need roughly 3 cups) and scrape the milky “corn nectar” from the cobs after cutting the kernels off – this is your homemade cream-style corn. For frozen corn, make sure it’s completely thawed and drained, just like the canned whole kernels, to avoid watering down the casserole.

Crafting the Signature Honey Glaze

This is the moment we infuse our casserole with the “Honey Glazed” distinction. This simple yet profound glaze will caramelize on top, creating a sweet, sticky, and utterly irresistible crust that truly sets this corn casserole apart from any other.

  1. Prepare the Honey Glaze Mixture:

    In a separate small, microwave-safe bowl or a small saucepan, combine the melted unsalted butter, high-quality honey, and light brown sugar. If using the microwave, heat for about 30-45 seconds, stirring halfway through, until the brown sugar has dissolved and the mixture is smooth and syrupy. If using a saucepan, gently heat over low heat, stirring constantly until the sugar dissolves. Remove from the heat and stir in the 1/2 teaspoon of vanilla extract. The vanilla extract here deepens the honey flavor and adds another layer of aromatic complexity. This glaze is simple, but its impact on the final Honey Glazed Corn Casserole is monumental. It’s what gives our casserole its characteristic shine and incredible depth of flavor.

    Choosing Your Honey:

    Don’t skimp on the honey! A good quality clover, wildflower, or even orange blossom honey will impart a much richer and more nuanced flavor than generic supermarket honey. Since honey is a star ingredient in our “Honey Glazed Corn Casserole,” its quality really shines through.

Assembling and Baking Your Honey Glazed Corn Casserole

We’re almost there! The smells already filling your kitchen are just a preview of the deliciousness to come. Now, let’s bring it all together and get it into the oven.

  1. Assemble the Casserole:

    Pour the creamy corn mixture evenly into your prepared 9×13-inch baking dish. Use a spatula to spread it out into an even layer, ensuring consistent thickness across the dish. This helps with uniform baking. Next, take your beautifully prepared honey glaze and drizzle it generously and evenly over the top of the corn mixture. You can use a spoon to spread it gently if needed, but a simple drizzle pattern works perfectly. As it bakes, this glaze will meld and caramelize, forming that exquisite, sweet crust we’re aiming for. It’s truly what makes this a “Honey Glazed Corn Casserole” and not just a regular corn casserole.

    The Art of Glazing:

    The goal is to have the glaze coat the top of the casserole, creating a slight barrier that traps moisture underneath while caramelizing to a beautiful golden-brown on top. Don’t worry if it looks a bit patchy before baking; the heat will work its magic to spread and combine the glaze beautifully.

  2. Bake to Golden Perfection:

    Carefully transfer the baking dish to your preheated 375°F (190°C) oven. Bake for approximately 45-55 minutes, or until the casserole is set in the center, golden brown and bubbly around the edges, and that honey glaze on top has transformed into a rich, amber, slightly sticky crust. You’ll know it’s ready when a toothpick inserted into the center comes out clean or with just moist crumbs attached. The top should be a gorgeous, inviting golden-brown, glistening with that irresistible honey glaze. If you notice the top browning too quickly, you can loosely tent the casserole with aluminum foil for the last 10-15 minutes of baking. Resist the urge to open the oven door too often, especially during the first 30 minutes, as this can cause temperature fluctuations that might affect the casserole’s rise and set.

    Signs of Doneness:

    Look for a firm center when gently jiggled, and listen for the gentle bubbling around the edges. The aroma filling your kitchen will be another strong indicator – a sweet, savory, and utterly comforting scent that announces your Honey Glazed Corn Casserole is nearly ready.

Resting, Serving, and Savoring Your Masterpiece

The final steps are just as important as the first. A little patience now will ensure the best possible eating experience for your delicious Honey Glazed Corn Casserole.

  1. Rest Your Casserole:

    Once baked to perfection, remove the Honey Glazed Corn Casserole from the oven and place it on a wire rack to cool slightly. Allow it to rest for at least 10-15 minutes before serving. This resting period is crucial! It allows the casserole to firm up, ensuring that when you scoop it out, it holds its shape beautifully and doesn’t fall apart. It also gives the flavors a chance to meld and deepen even further, making each bite more delightful. The honey glaze will also set slightly, becoming that perfect sticky-sweet topping.
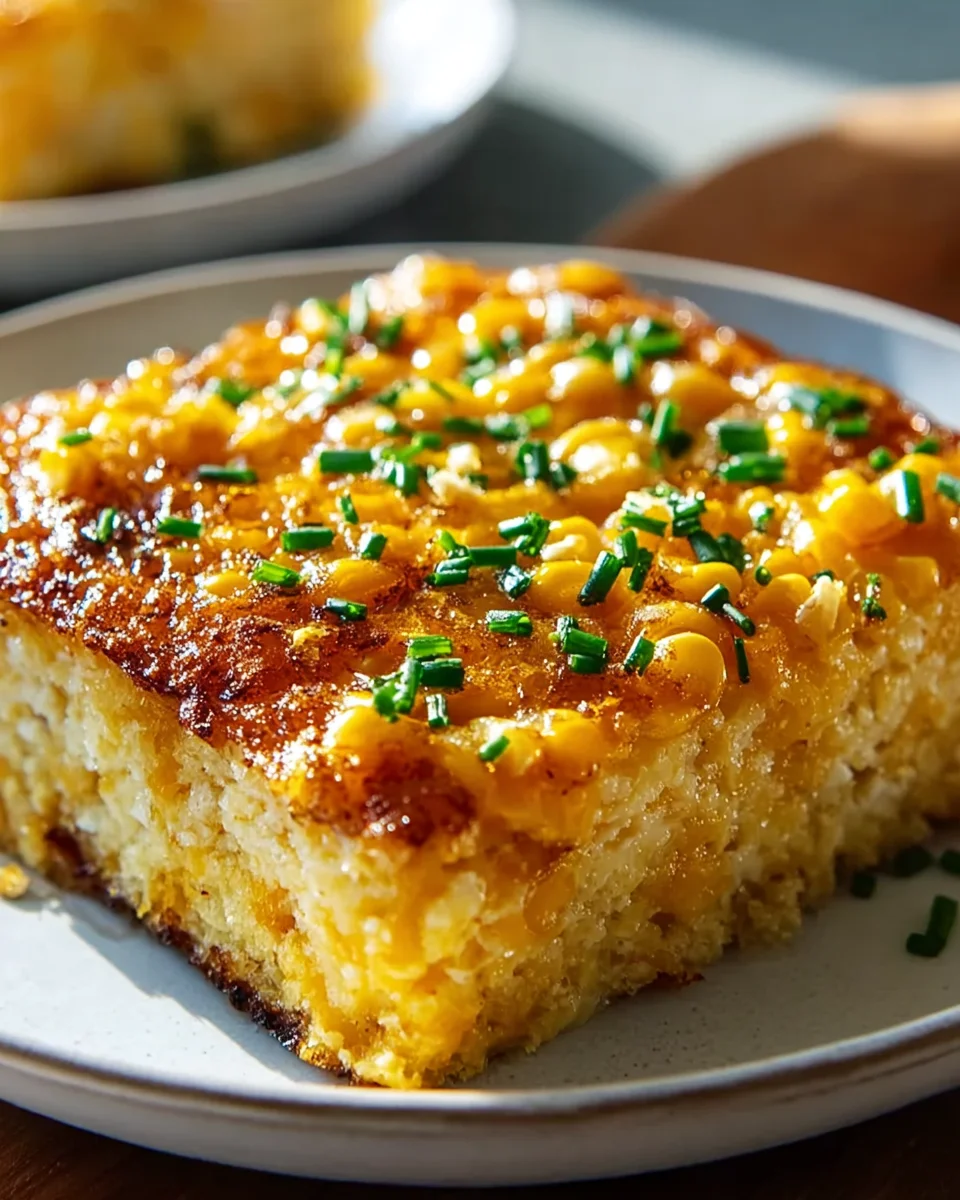
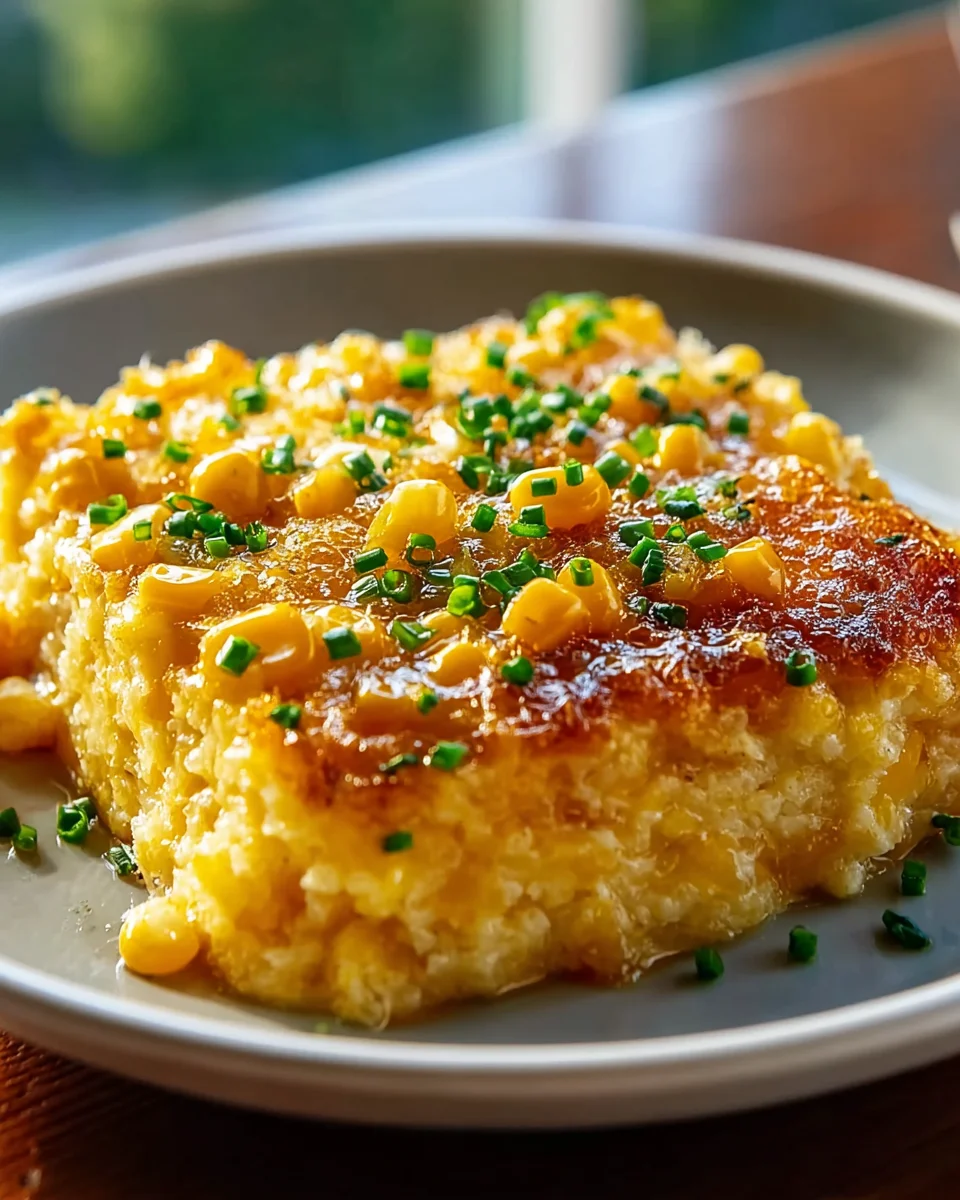
  2. Garnish and Serve:

    After resting, your Honey Glazed Corn Casserole is ready to be admired and devoured! If you wish, sprinkle with some fresh chopped chives or parsley for a pop of color and a hint of fresh herbaceousness that beautifully contrasts the sweetness of the casserole. This dish is fantastic served warm, straight from the oven, as a side dish for holiday meals, barbecues, or any family dinner. It pairs wonderfully with roasted meats, poultry, or even just a simple green salad. The creamy texture, sweet corn, and irresistible honey glaze make it a standout dish that’s sure to be a crowd-pleaser.

    Serving Suggestions and Storage:

    This Honey Glazed Corn Casserole is excellent alongside a roasted chicken, grilled pork tenderloin, or a hearty holiday ham. It’s also a fantastic addition to a potluck or buffet. Leftovers, if you’re lucky enough to have any, can be stored in an airtight container in the refrigerator for up to 3-4 days. To reheat, simply warm individual portions in the microwave or place the entire dish (covered with foil) in a 350°F (175°C) oven until heated through. The glaze might soften a bit, but the delicious flavors will remain. This recipe truly transforms humble corn into something extraordinary, making it a guaranteed hit at any gathering.

Delicious Honey Glazed Corn Casserole – Perfect Side Dish

Conclusion:

Well, my friends, we’ve reached the end of our culinary journey for today, and I truly hope you’re feeling as inspired as I am about this incredible dish. I can’t stress enough how much of a game-changer this recipe is, and it’s precisely why I had to share it with you. What makes it an absolute must-try isn’t just its undeniable deliciousness, but also its remarkable versatility and surprising simplicity. We’re talking about a dish that effortlessly marries sweet and savory notes, creating a symphony of flavors that will have everyone at your table asking for seconds. The creamy texture, combined with the subtle crunch of the corn and that unforgettable golden-brown crust, is pure perfection. It’s comfort food elevated, a side dish that often steals the show, and a recipe that will undoubtedly earn you rave reviews from family and friends alike. If you’re looking for a dish that consistently delivers on flavor, ease, and sheer satisfaction, then your search truly ends here. This isn’t just another side dish; it’s an experience, a delightful addition to any meal that promises to leave a lasting, delicious impression.

When it comes to serving this magnificent creation, the possibilities are truly endless. While it shines brightly as a star side dish, its robust flavor profile makes it incredibly adaptable. Imagine a generous scoop alongside a perfectly roasted chicken, complementing the savory notes with its gentle sweetness. It’s an impeccable partner for a smoky BBQ spread, cutting through the richness of ribs or pulled pork with its creamy texture. For holiday gatherings, whether it’s Thanksgiving, Christmas, or Easter, this casserole is a non-negotiable addition. It brings a comforting, festive feel to the table and pairs beautifully with traditional ham, turkey, or even a prime rib. Don’t relegate it solely to grand occasions, though! I’ve been known to enjoy a smaller portion of it as a comforting lunch, perhaps with a simple green salad on the side, proving its flexibility for everyday meals too. It’s also an absolute potluck hero; bring it to any gathering, and I guarantee the dish will be empty before you know it. Its universal appeal makes it a safe, yet incredibly exciting, bet for any social event.

But the fun doesn’t stop at serving suggestions; let’s talk about how you can make this recipe uniquely yours through simple variations. That’s the beauty of cooking, isn’t it? Feeling a little cheesy? Go ahead and experiment with different types of cheese! A sharp cheddar will give it a more pungent, classic flavor, while Monterey Jack or even a blend of Mexican cheeses could add a lovely melt and stretch. For those who love a bit of heat, consider dicing up a fresh jalapeño or two and folding it into the mixture before baking, or a pinch of red pepper flakes for a subtle kick. You could also stir in some sautéed onions and bell peppers for added depth and color, or even some crispy bacon bits for an irresistible smoky twist. A sprinkle of fresh chives or parsley before serving can brighten up the flavors beautifully, adding an herbaceous note. Don’t be afraid to adjust the level of sweetness either; if you prefer it less sweet, slightly reduce the amount of honey, or if you have a sweet tooth, a touch more won’t hurt! The core of what makes this particular dish so special is its incredible balance, but these small tweaks can truly transform it to suit any palate or occasion. This adaptability is one of the reasons I proudly call it my go-to Honey Glazed Corn Casserole.

Now, it’s your turn! I’ve shared my passion for this recipe, detailed its virtues, and offered countless ways to enjoy and adapt it. All that’s left is for you to roll up your sleeves and give it a try in your own kitchen. I promise you won’t be disappointed. There’s a certain magic in bringing a new, delicious dish to life, and I genuinely believe this one will become a treasured part of your recipe collection. Once you’ve experienced the joy of making and tasting this delightful casserole, I would absolutely love to hear from you. Please share your cooking adventures, your clever variations, and your family’s reactions in the comments below. Your feedback and creativity inspire me and our entire community of food lovers. So go on, embrace the culinary adventure, and prepare to fall in love with your new favorite side dish!


Honey Glazed Corn Casserole

Honey Glazed Corn Casserole is a culinary hug that promises to steal the spotlight at any meal. This modern take on a beloved classic blends familiar comfort with an exciting new dimension of flavor, offering a delightful interplay of sweet and savory notes that dance on your palate.

Prep Time
20 Minutes
Cook Time
50 Minutes
Total Time
25 Minutes
Servings
8-12 servings

Ingredients


Instructions


Important Information

Nutrition Facts (Per Serving)

It is important to consider this information as approximate and not to use it as definitive health advice.

Allergy Information

Please check ingredients for potential allergens and consult a health professional if in doubt.

« Previous Post
Bang Bang Chicken Bowl Recipe: Easy & Delicious Dinner!
Next Post »
Indulge in Steak Truffle Gouda Pasta Bake Perfection

If you enjoyed this…

Steak Queso Rice Bowl: The Ultimate Flavor Explosion

Pesto Chicken Flatbread: A Simple & Delicious Recipe

French Onion Potato Bake: A Deliciously Cheesy Comfort Food Recipe

Primary Sidebar

Browse by Diet

BreakfastDinnerLunchDessertAppetizer

Sweet Peach Yogurt Parfait Delight

One of my fondest memories is from a lazy summer afternoon spent at my grandmother’s house. The sun filtered through the kitchen window, casting a warm glow over the table where she would create her culinary magic. It was during one of those blissful moments that I first tasted her Peach Yogurt Parfait with Honey and Granola. The sweet aroma of ripe peaches mingling with creamy yogurt and the crunch of granola was nothing short of heavenly. It felt like summer captured in a bowl, and I still remember the joy of diving in with a spoon, each layer revealing a new burst of flavor.

When I think about that parfait, I can almost hear the gentle hum of the bees outside, reminding me of the floral notes that honey brings to every bite. The vibrant yellows and soft oranges of the peaches contrast beautifully with the creamy white yogurt and the golden crunch of granola. It’s a dish that not only looks delightful but also tastes like a celebration of fresh, wholesome ingredients.

What makes my version of this Peach Yogurt Parfait special is the careful balance of flavors and textures. I use ripe, juicy peaches, drizzled with locally sourced honey, and a homemade granola that’s bursting with nuts and seeds for an extra crunch. It’s a simple dish, but every layer is crafted with love and attention.

Let me show you exactly how to make this delightful parfait, so you can bring a bit of that summer magic into your kitchen!

Sweet Peach Yogurt Parfait Delight

Why You’ll Love This Recipe

  • Delightfully creamy texture from the Greek yogurt, paired with the juicy sweetness of fresh peaches.
  • Ready in under 20 minutes, making it a quick and satisfying breakfast or snack option.
  • Budget-friendly, using common ingredients that you may already have in your pantry.
  • Customizable with your favorite granola and nuts, allowing you to tailor each parfait to your taste.
  • Perfectly balanced flavors with the bright acidity of lemon juice and the sweetness of honey enhancing the peaches.

Ingredients

  • For the Parfait:
  • 2 cups plain Greek yogurt (or vanilla yogurt for a sweeter option)
  • 2 large ripe peaches, diced (about 2 cups)
  • 1 tablespoon fresh lemon juice (to prevent browning of peaches)
  • 2 tablespoons honey (plus more for drizzling)
  • 1 teaspoon vanilla extract (optional for extra flavor)
  • For the Granola:
  • 1 cup granola (store-bought or homemade; see notes for a simple granola recipe)
  • 1/4 cup sliced almonds (optional for added crunch)
  • 1/4 cup shredded coconut (optional for added flavor)

Let’s dive into some key ingredients that make this Peach Yogurt Parfait so delightful! First, the Greek yogurt is not only creamy but also packed with protein, making it a satisfying option for breakfast or a snack. If you’re looking for a sweeter option, you can easily substitute it with vanilla yogurt, though it may alter the overall flavor balance. Next, the ripe peaches are the star of the show; their natural sweetness shines through, so I recommend choosing peaches that yield slightly to pressure, indicating they’re perfectly ripe. If peaches aren’t in season, feel free to use nectarines or even frozen peaches—just thaw them before use. Finally, honey adds a lovely floral sweetness that ties everything together. If you prefer, maple syrup can serve as a delicious substitute.

Step-by-Step Instructions

  1. Start by preparing the peaches. Wash them thoroughly, then slice and dice them into bite-sized pieces. In a medium bowl, toss the diced peaches with 1 tablespoon of fresh lemon juice to prevent browning. Set aside for about 5 minutes while the lemon juice works its magic.
  2. In a separate bowl, combine the Greek yogurt, 2 tablespoons of honey, and 1 teaspoon of vanilla extract if using. Stir the mixture until smooth and thoroughly blended. This should take about a minute. Avoid overmixing to maintain the creaminess of the yogurt.
  3. Now it’s time to layer your parfait. Grab a clear glass or bowl to showcase your beautiful creation. Start with a generous spoonful of the yogurt mixture at the bottom—about 1/4 cup will do. Use a spoon to spread it evenly.
  4. Add a layer of the diced peaches over the yogurt, ensuring they cover the yogurt completely. You might want to use about half of what you have prepared—roughly 1 cup. This layer should be visually appealing, so arrange the peaches neatly.
  5. Sprinkle 1/4 cup of granola over the peaches. This adds a delightful crunch. Make sure to distribute it evenly to ensure every bite has that satisfying texture. Avoid packing it down too tightly, as you want it to maintain its crunch.
  6. Repeat the layers: spoon in another 1/4 cup of yogurt, followed by another cup of peaches, and another sprinkle of granola. You should have at least two layers, but feel free to add more depending on your glass size.
  7. Finish off your parfait with a drizzle of honey on top for added sweetness and a touch of elegance. If you’re using sliced almonds or shredded coconut, sprinkle them on top now. It adds a lovely visual contrast and extra flavor.
  8. Serve immediately or refrigerate for up to 30 minutes before serving to allow the flavors to meld together. However, I recommend enjoying it fresh to maintain the granola’s crunch.

Pro Tips for the Best Peach Yogurt Parfait With Honey And Granola

  • Make sure to choose ripe peaches for the best flavor and texture. A common mistake is using unripe fruit, which can lead to a less enjoyable parfait. Look for peaches that are fragrant and slightly soft to the touch.
  • Use a clear glass to assemble your parfait; this not only makes for a beautiful presentation but also allows you to see the colorful layers, which adds to the enjoyment of eating it.
  • For an even creamier texture, consider whipping the Greek yogurt with a hand mixer for a couple of minutes before layering. This small adjustment makes a huge difference in mouthfeel.
  • Be mindful of the granola-to-yogurt ratio. Too much granola can overwhelm the parfait, while too little can make it feel too creamy. Aim for about 1/4 cup of granola per layer for the perfect balance.
  • If you’re making this for a gathering, consider preparing the yogurt and peaches ahead of time and layering them just before serving. This ensures the granola stays crunchy!

Variations & Serving Ideas

There are so many ways to get creative with your Peach Yogurt Parfait! For a tropical twist, swap out the peaches for mangoes or pineapples and top with coconut flakes. If you prefer a berry flavor, mix in some blueberries or strawberries with the peaches for added color and taste. For a nutty version, incorporate chopped walnuts or pecans instead of almonds.

As for serving ideas, this parfait pairs beautifully with a side of scrambled eggs for a hearty breakfast or fresh fruit salad for a light lunch. You might also enjoy it alongside whole grain toast with almond butter for an energizing snack. The contrast of flavors and textures will elevate your meal experience!

Storage, Make-Ahead & Reheating

The Peach Yogurt Parfait is best enjoyed fresh, but you can prepare some components ahead of time. Store the layered parfait in an airtight container in the refrigerator for up to 24 hours. However, be cautious; the granola may lose its crunch if stored too long. You can freeze the yogurt and peach mixture for up to 2 months; just remember to thaw it in the refrigerator overnight before serving.

If you plan to enjoy this dish the next day, it can taste even better as the flavors meld together. Just remember to add the granola right before serving to keep its delightful crunch!

Frequently Asked Questions

Can I make Peach Yogurt Parfait With Honey And Granola ahead of time?

Yes — in fact, it tastes even better the next day as the flavors meld. However, I recommend waiting to add the granola until just before serving to maintain its crunch.

What can I substitute for Greek yogurt?

If you prefer a lighter option, you can substitute Greek yogurt with regular yogurt or a dairy-free alternative like coconut yogurt. Just remember that this may alter the creaminess and flavor profile slightly.

Can I use frozen peaches for this parfait?

Absolutely! Just make sure to thaw the frozen peaches before using them. They will still add great flavor, though the texture may be slightly softer than fresh peaches.

How do I make the parfait vegan?

To make a vegan version, substitute the Greek yogurt with a plant-based yogurt alternative, and replace honey with maple syrup or agave nectar. This keeps the parfait sweet while adhering to a vegan diet.

What other fruits can I use in this recipe?

You can mix and match fruits based on your preference. Try using strawberries, blueberries, raspberries, or even bananas. Just make sure to adjust the lemon juice as needed to prevent browning.

Sweet Peach Yogurt Parfait Delight

Final Thoughts

The Peach Yogurt Parfait with Honey and Granola is a delightful blend of creamy yogurt, sweet peaches, and crunchy granola that creates a satisfying and nourishing treat. Each layer bursts with flavor, making it a perfect choice for breakfast or a light dessert.

This is the kind of recipe I come back to again and again, especially when I want something refreshing and wholesome to start my day. The harmony of sweet and tart flavors, combined with the delightful crunch, never fails to lift my spirits!

I encourage you to give this parfait a try and indulge in its comforting goodness. Feel free to share your results or even add your own twist—perhaps a sprinkle of cinnamon or a handful of nuts. Enjoy creating your perfect parfait!

Print
clock clock iconcutlery cutlery iconflag flag iconfolder folder iconinstagram instagram iconpinterest pinterest iconfacebook facebook iconprint print iconsquares squares iconheart heart iconheart solid heart solid icon

Peach Yogurt Parfait


  • Author: Lily author
  • Total Time: 15 minutes
  • Yield: 4 servings 1x
Pin Recipe
Print Recipe

Description

This Peach Yogurt Parfait combines creamy Greek yogurt, juicy peaches, and crunchy granola for a delightful treat. It’s a perfect breakfast or snack that captures the essence of summer in every bite.


Ingredients

Scale
  • For the Parfait:
  • 2 cups plain Greek yogurt (or vanilla yogurt for a sweeter option)
  • 2 large ripe peaches, diced (about 2 cups)
  • 1 tablespoon fresh lemon juice (to prevent browning of peaches)
  • 2 tablespoons honey (plus more for drizzling)
  • 1 teaspoon vanilla extract (optional for extra flavor)
  • For the Granola:
  • 1 cup granola (store-bought or homemade; see notes for a simple granola recipe)
  • 1/4 cup sliced almonds (optional for added crunch)
  • 1/4 cup shredded coconut (optional for added flavor)

Instructions

  1. Start by preparing the peaches. Wash them thoroughly, then slice and dice them into bite-sized pieces. In a medium bowl, toss the diced peaches with 1 tablespoon of fresh lemon juice to prevent browning. Set aside for about 5 minutes while the lemon juice works its magic.
  2. In a separate bowl, combine the Greek yogurt, 2 tablespoons of honey, and 1 teaspoon of vanilla extract if using. Stir the mixture until smooth and thoroughly blended. This should take about a minute. Avoid overmixing to maintain the creaminess of the yogurt.
  3. Now it’s time to layer your parfait. Grab a clear glass or bowl to showcase your beautiful creation. Start with a generous spoonful of the yogurt mixture at the bottom—about 1/4 cup will do. Use a spoon to spread it evenly.
  4. Add a layer of the diced peaches over the yogurt, ensuring they cover the yogurt completely. You might want to use about half of what you have prepared—roughly 1 cup. This layer should be visually appealing, so arrange the peaches neatly.
  5. Sprinkle 1/4 cup of granola over the peaches. This adds a delightful crunch. Make sure to distribute it evenly to ensure every bite has that satisfying texture. Avoid packing it down too tightly, as you want it to maintain its crunch.
  6. Repeat the layers: spoon in another 1/4 cup of yogurt, followed by another cup of peaches, and another sprinkle of granola. You should have at least two layers, but feel free to add more depending on your glass size.
  7. Finish off your parfait with a drizzle of honey on top for added sweetness and a touch of elegance. If you’re using sliced almonds or shredded coconut, sprinkle them on top now. It adds a lovely visual contrast and extra flavor.
  8. Serve immediately or refrigerate for up to 30 minutes before serving to allow the flavors to meld together. However, I recommend enjoying it fresh to maintain the granola’s crunch.
  • Prep Time: 15 mins
  • Cook Time: 0 mins
  • Category: Breakfast
  • Method: No-cook
  • Cuisine: American

Nutrition

  • Serving Size: 1 parfait
  • Calories: 250
  • Sugar: 20 g
  • Sodium: 50 mg
  • Fat: 5 g
  • Saturated Fat: 2 g
  • Unsaturated Fat: 3 g
  • Trans Fat: 0 g
  • Carbohydrates: 40 g
  • Fiber: 3 g
  • Protein: 10 g
  • Cholesterol: 10 mg

Keywords: Choose ripe peaches for the best flavor and texture. Use a clear glass for a beautiful presentation. For creaminess, consider whipping the yogurt before layering. Be mindful of the granola-to-yogurt ratio. Prepare yogurt and peaches ahead of time for gatherings, layering just before serving.

Did you make this recipe?

Share a photo and tag us — we can't wait to see what you've made!

Sun-Kissed Frozen Orange Cream Slush

As a child, summer days felt like they lasted forever. I remember the sticky heat wrapping around me as I played outside, my laughter mingling with the sounds of the neighborhood. But nothing could cool me down quite like the moment I’d spot my grandmother, laboring over her blender, whipping up her famous Frozen Orange Creamsicle Slush. That vibrant orange treat, with its frosty texture and sweet citrus aroma, was like a burst of sunshine in a cup. Just one sip, and I could feel the coolness wash over me, sparking pure joy.

This Frozen Orange Creamsicle Slush has a way of making you feel like a kid again. Its creamy, dreamy consistency is a delightful balance of bright orange and soft vanilla, inviting you to dive right in. The refreshing tang of orange dances on your tongue, while the smooth creaminess envelops you in a comforting embrace. It’s a nostalgic treat that’s perfect for hot summer afternoons or anytime you need a little pick-me-up.

What makes my version of this slush stand out is the addition of a hint of vanilla bean, which elevates the flavor and adds an extra layer of richness. Plus, it’s super easy to whip up with just a few simple ingredients that you probably already have on hand! So, if you’re ready to relive those sun-soaked memories, let me show you exactly how to make it.

Sun-Kissed Frozen Orange Cream Slush

Why You’ll Love This Recipe

  • Each slush is a perfect blend of creamy vanilla and zesty orange, creating a nostalgic flavor reminiscent of summer days.
  • This refreshing treat is ready in under 15 minutes, making it an ideal quick dessert for unexpected guests or hot afternoons.
  • With just 8 simple ingredients, it’s budget-friendly, ensuring you don’t have to break the bank to enjoy a delicious slush.
  • The slush has a perfectly smooth texture, thanks to the combination of ice and ice cream, providing a delightful contrast to the bright citrus flavors.
  • It’s highly customizable; you can easily adjust the sweetness and add fresh herbs for a unique twist that suits your taste.

Ingredients

  • 2 cups orange juice (freshly squeezed or store-bought)
  • 1 cup vanilla ice cream
  • 1 cup crushed ice
  • 1/2 cup milk (whole or 2%)
  • 1/4 cup granulated sugar (adjust based on sweetness preference)
  • 1 teaspoon vanilla extract
  • Zest of 1 orange (for added flavor)
  • Fresh orange slices and mint leaves (for garnish)

The star of this Frozen Orange Creamsicle Slush is the orange juice, which provides the vibrant, citrusy base. Freshly squeezed juice will yield the brightest flavor, but store-bought options can be just as convenient. If you’re opting for store-bought, choose 100% pure juice with no added sugars for the best results. Another essential ingredient is the vanilla ice cream; it adds creaminess and sweetness. You can substitute it with dairy-free ice cream if you’re looking for a vegan option. Whole or 2% milk complements the ice cream, creating a smooth blend. If you want a lower-calorie version, almond or oat milk can be good alternatives.

Lastly, the granulated sugar can be adjusted based on your sweetness preference. If you prefer a more natural sweetener, consider using honey or agave syrup. The orange zest enhances the flavor profile, providing an aromatic pop that brings the whole slush together. Don’t skip it! It adds an extra layer of brightness that makes this slush truly special.

Step-by-Step Instructions

  1. Start by preparing your ingredients. Gather 2 cups of orange juice, 1 cup of vanilla ice cream, and 1 cup of crushed ice. Make sure the ice is finely crushed, as larger chunks can make blending difficult.
  2. In a blender, combine the orange juice, vanilla ice cream, crushed ice, and 1/2 cup of milk. Add 1/4 cup of granulated sugar and 1 teaspoon of vanilla extract. If you like a sweeter slush, consider adding a bit more sugar at this stage.
  3. Add the zest of 1 orange to the blender. This step is crucial for enhancing the citrus flavor of your slush. Make sure not to include the bitter white pith—only the flavorful zest.
  4. Blend the mixture on medium-high speed for about 30-45 seconds. Stop once the ingredients are fully combined and the slush has a smooth, even consistency. If you notice large chunks of ice, blend for an additional 10-15 seconds. Avoid over-blending, as this can make the slush too liquidy.
  5. Once blended, taste the slush. If it needs more sweetness, add a little more sugar and blend for a few more seconds. If it’s too thick, you can add a splash of milk to reach your desired consistency.
  6. Pour the slush into glasses. This recipe typically serves 4, but you can easily double it for larger gatherings. Use a spoon to help guide the slush into the glasses if needed.
  7. Garnish each serving with fresh orange slices and mint leaves. The mint not only adds a pop of color but also a refreshing aroma that complements the citrus flavors beautifully.
  8. Serve immediately and enjoy! If you’ve made extra, you can refrigerate it for a short time, but it’s best enjoyed fresh.

Pro Tips for the Best Frozen Orange Creamsicle Slush

  • Don’t skip the orange zest! It’s a game-changer for flavor. Always zest before juicing to make it easier.
  • Use a high-powered blender for the best texture. A standard blender may struggle with ice, leading to uneven consistency. If you have a food processor, that can work too, but ensure the ice is finely crushed.
  • Adjust the ice-to-liquid ratio carefully. If your slush is too thick, it won’t blend well. Start with less ice and add more until you reach your preferred texture.
  • Be cautious with the sugar! Always start with the lower amount, as you can easily add more, but it’s hard to fix an overly sweet slush.
  • For a fun twist, consider adding a splash of coconut milk or a handful of fresh fruit like strawberries or pineapple. This not only enhances the flavor but also adds a beautiful color contrast.

Variations & Serving Ideas

There are countless ways to put a spin on your Frozen Orange Creamsicle Slush. Consider making a tropical version by adding in some pineapple juice or coconut milk for a delightful tropical twist. If you’re feeling adventurous, try incorporating a handful of frozen mango or peach slices for added sweetness. For a lighter version, swap out the vanilla ice cream for Greek yogurt for a creamy yet tangy alternative.

As for serving ideas, this refreshing slush pairs wonderfully with light summer dishes like grilled chicken skewers, fish tacos, or a simple salad topped with citrus vinaigrette. The bright, zesty flavors of the slush complement these dishes perfectly, making them an ideal pairing for a sunny day.

Storage, Make-Ahead & Reheating

This Frozen Orange Creamsicle Slush is best enjoyed fresh, but if you have leftovers, you can store them in an airtight container in the fridge for up to 2 days. Just keep in mind that the slush may lose some of its texture over time as the ice melts. It doesn’t freeze well, as the ice will turn into a solid block. If you must freeze it, blend again after thawing to restore the slushy consistency. This treat is best the day you make it, as the flavors meld together beautifully overnight, enhancing its deliciousness.

Frequently Asked Questions

Can I make Frozen Orange Creamsicle Slush ahead of time?

Yes — in fact, it tastes even better the next day as the flavors meld. However, it’s best to enjoy it fresh, as the texture can change if stored for too long. If you need to prepare it ahead, keep it in the fridge and re-blend before serving.

What kind of orange juice should I use?

For the best flavor, use freshly squeezed orange juice. However, if you’re short on time, opt for 100% pure store-bought juice without added sugars. This will ensure that your slush remains flavorful and refreshing.

Can I substitute the vanilla ice cream?

Absolutely! If you’re looking for a dairy-free option, coconut milk ice cream or a non-dairy vanilla ice cream can work wonderfully. They will still provide the creamy texture and sweetness you desire.

How can I adjust the sweetness of my slush?

You can easily adjust the sweetness by modifying the amount of sugar added. Start with 1/4 cup and taste the mixture before blending. If you prefer it sweeter, add more sugar gradually until it reaches your desired level.

What should I do if my slush is too thick?

If your slush is too thick, simply add a splash of milk or orange juice and blend again. This will help achieve a more drinkable consistency while maintaining the slushy texture. Adjust gradually to reach your preferred thickness.

Sun-Kissed Frozen Orange Cream Slush

Final Thoughts

The Frozen Orange Creamsicle Slush is a delightful blend of refreshing citrus and creamy goodness, making it a perfect treat for warm days or any time you crave a taste of nostalgia. The way the bright orange flavor dances with the creamy texture truly elevates this slush, transforming it into a satisfying escape from the everyday.

This is the kind of recipe I come back to again and again, especially when I’m looking to cool down or impress guests at a summer gathering. It’s simple to make and always brings smiles all around! I encourage you to try this recipe for yourself—don’t hesitate to share your results or even put your own spin on it. Happy slushing!

Print
clock clock iconcutlery cutlery iconflag flag iconfolder folder iconinstagram instagram iconpinterest pinterest iconfacebook facebook iconprint print iconsquares squares iconheart heart iconheart solid heart solid icon

Frozen Orange Creamsicle Slush


  • Author: Lily author
  • Total Time: 15 minutes
  • Yield: 4 servings 1x
Pin Recipe
Print Recipe

Description

This Frozen Orange Creamsicle Slush is a refreshing treat that combines creamy vanilla and zesty orange flavors. Perfect for hot summer days, it brings back nostalgic memories with every sip.


Ingredients

Scale
  • 2 cups orange juice (freshly squeezed or store-bought)
  • 1 cup vanilla ice cream
  • 1 cup crushed ice
  • 1/2 cup milk (whole or 2%)
  • 1/4 cup granulated sugar (adjust based on sweetness preference)
  • 1 teaspoon vanilla extract
  • Zest of 1 orange (for added flavor)
  • Fresh orange slices and mint leaves (for garnish)

Instructions

  1. Start by preparing your ingredients. Gather 2 cups of orange juice, 1 cup of vanilla ice cream, and 1 cup of crushed ice. Make sure the ice is finely crushed, as larger chunks can make blending difficult.
  2. In a blender, combine the orange juice, vanilla ice cream, crushed ice, and 1/2 cup of milk. Add 1/4 cup of granulated sugar and 1 teaspoon of vanilla extract. If you like a sweeter slush, consider adding a bit more sugar at this stage.
  3. Add the zest of 1 orange to the blender. This step is crucial for enhancing the citrus flavor of your slush. Make sure not to include the bitter white pith—only the flavorful zest.
  4. Blend the mixture on medium-high speed for about 30-45 seconds. Stop once the ingredients are fully combined and the slush has a smooth, even consistency. If you notice large chunks of ice, blend for an additional 10-15 seconds. Avoid over-blending, as this can make the slush too liquidy.
  5. Once blended, taste the slush. If it needs more sweetness, add a little more sugar and blend for a few more seconds. If it’s too thick, you can add a splash of milk to reach your desired consistency.
  6. Pour the slush into glasses. This recipe typically serves 4, but you can easily double it for larger gatherings. Use a spoon to help guide the slush into the glasses if needed.
  7. Garnish each serving with fresh orange slices and mint leaves. The mint not only adds a pop of color but also a refreshing aroma that complements the citrus flavors beautifully.
  8. Serve immediately and enjoy! If you’ve made extra, you can refrigerate it for a short time, but it's best enjoyed fresh.
  • Prep Time: 15 min
  • Cook Time: 0 min
  • Category: Dessert
  • Method: Blending
  • Cuisine: American

Nutrition

  • Serving Size: 1 serving
  • Calories: 200
  • Sugar: 30 g
  • Sodium: 50 mg
  • Fat: 5 g
  • Saturated Fat: 3 g
  • Unsaturated Fat: 2 g
  • Trans Fat: 0 g
  • Carbohydrates: 40 g
  • Fiber: 1 g
  • Protein: 2 g
  • Cholesterol: 20 mg

Keywords: Don't skip the orange zest! It's a game-changer for flavor. Always zest before juicing to make it easier.

Did you make this recipe?

Share a photo and tag us — we can't wait to see what you've made!

Zesty Lemon Poppy Seed Delight

One rainy afternoon, I found myself in my grandmother’s cozy kitchen, the kind that always smelled like warmth and love. She was whipping up her famous Lemon Poppy Seed Loaf, a recipe that had been passed down through generations. As the batter came together, the zesty aroma of fresh lemons filled the air, mingling perfectly with the nutty fragrance of poppy seeds. I can still picture her, apron-clad, as she expertly drizzled a vibrant citrus icing over the loaf, creating a glossy, sun-kissed finish that beckoned us to dive in. It was a moment that sparked my own passion for baking, and this recipe has become a cherished staple in my home ever since.

When you take a bite of this Lemon Poppy Seed Loaf, it’s like a burst of sunshine on your palate. The loaf is beautifully golden, with a tender crumb that melts in your mouth. Each slice is speckled with tiny poppy seeds, adding a delightful crunch that contrasts beautifully with the tangy sweetness of the lemon. And that citrus icing? It’s the finishing touch that elevates this loaf from ordinary to extraordinary, with its bright, zesty flavor dancing on your taste buds.

This recipe stands out because it embraces simplicity while delivering on flavor. I’ve added a hint of vanilla to the batter, enhancing the overall taste and making it even more indulgent. Trust me, once you make this Lemon Poppy Seed Loaf With Citrus Icing, it’ll become a go-to in your baking repertoire.

So, let me show you exactly how to make it!

Zesty Lemon Poppy Seed Delight

Why You’ll Love This Recipe

  • Moist and tender crumb that melts in your mouth, thanks to the perfect balance of butter and buttermilk.
  • Bright, zesty lemon flavor paired with crunchy poppy seeds, creating a delightful texture and taste experience.
  • Easy to whip up in just about an hour, perfect for last-minute gatherings or a cozy afternoon treat.
  • Budget-friendly with everyday ingredients, making it an accessible option for all home bakers.
  • The citrus icing adds a sweet tang that elevates the loaf, turning a simple recipe into a showstopper!

Ingredients

  • 1 ½ cups (190g) all-purpose flour
  • 1 teaspoon baking powder
  • ½ teaspoon baking soda
  • ½ teaspoon salt
  • 3 tablespoons poppy seeds
  • ½ cup (115g) unsalted butter, softened to room temperature
  • 1 cup (200g) granulated sugar
  • 2 large eggs
  • 1 teaspoon vanilla extract
  • 1 teaspoon lemon zest (from about 1 medium lemon)
  • ½ cup (120ml) buttermilk
  • 2 tablespoons fresh lemon juice

For the Citrus Icing:

  • 1 cup (120g) powdered sugar
  • 2 tablespoons fresh lemon juice
  • 1 tablespoon orange juice
  • 1 teaspoon lemon zest (for garnish, optional)

Let’s dive into the key ingredients that make this Lemon Poppy Seed Loaf so special. The all-purpose flour provides the structure and base for the loaf, while the baking powder and baking soda ensure it rises perfectly, giving the loaf a light texture. For a gluten-free variation, you could substitute the flour with a gluten-free all-purpose blend. Poppy seeds not only add a delightful crunch but also contribute to the unique flavor profile that pairs well with the citrus notes.

Unsalted butter is crucial for achieving the buttery richness that makes this loaf so moist. If you’re looking for a dairy-free option, coconut oil or a vegan butter can be used instead. The buttermilk is another essential component, providing acidity that activates the baking soda for a fluffy texture. If you don’t have buttermilk on hand, you can easily make a substitute by mixing ½ cup of milk with 1 tablespoon of vinegar or lemon juice and letting it sit for about 5 minutes.

Step-by-Step Instructions

  1. Preheat your oven to 350°F (175°C). Grease a 9×5-inch loaf pan or line it with parchment paper for easy removal later.
  2. In a medium mixing bowl, whisk together 1 ½ cups of all-purpose flour, 1 teaspoon of baking powder, ½ teaspoon of baking soda, ½ teaspoon of salt, and 3 tablespoons of poppy seeds. This helps to evenly distribute the baking agents and ensures a uniform rise.
  3. In a large mixing bowl, cream together ½ cup of softened unsalted butter and 1 cup of granulated sugar using an electric mixer on medium speed for about 3-4 minutes, until the mixture is light and fluffy. Make sure to scrape down the sides of the bowl occasionally.
  4. Add 2 large eggs, 1 teaspoon of vanilla extract, and 1 teaspoon of lemon zest to the creamed butter and sugar, mixing until fully combined. You want a smooth consistency, so ensure there are no lumps of butter.
  5. In a small bowl, combine ½ cup of buttermilk and 2 tablespoons of fresh lemon juice. Alternately add the dry ingredients and buttermilk mixture to the butter mixture, starting and ending with the dry ingredients. Mix just until combined; do not overmix, as this can lead to a dense loaf.
  6. Pour the batter into the prepared loaf pan. Smooth the top with a spatula, ensuring it’s even. Bake in the preheated oven for 50-60 minutes, or until a toothpick inserted in the center comes out clean. The edges should be lightly golden brown, and the center should feel just set.
  7. Once baked, remove the loaf from the oven and allow it to cool in the pan for about 10 minutes. Then, transfer it to a wire rack to cool completely. Resist the urge to slice too soon, as it will be crumbly if it’s still warm.
  8. While the loaf is cooling, prepare the citrus icing. In a medium bowl, whisk together 1 cup of powdered sugar, 2 tablespoons of fresh lemon juice, and 1 tablespoon of orange juice until smooth. If the icing is too thick, you can add a little more juice to reach your desired consistency.
  9. Once the loaf is completely cool, drizzle the citrus icing over the top. If you like, sprinkle with an additional teaspoon of lemon zest for an extra pop of flavor and color.

Pro Tips for the Best Lemon Poppy Seed Loaf With Citrus Icing

  • Be careful not to overmix your batter; this is a common mistake that can lead to a dense loaf. Mix just until the dry ingredients are incorporated for a light and fluffy texture.
  • Use room temperature ingredients, especially the butter and eggs. This helps to create a smoother batter and ensures even baking. Take your eggs out of the fridge about 30 minutes before you start.
  • For a more pronounced lemon flavor, consider adding a little lemon extract in addition to the zest and juice. Just a half teaspoon can elevate the citrus notes significantly.
  • When measuring your flour, spoon it into the measuring cup and level it off with a knife instead of scooping directly from the bag. This prevents packing and ensures you don’t end up with a dry loaf.
  • Invest in a good quality loaf pan; it makes a difference in heat distribution, which ensures even baking. If your pan is dark-coated, reduce the oven temperature by 25°F to prevent over-browning.

Variations & Serving Ideas

For a delightful twist, consider adding blueberries or raspberries to the batter for a fruity burst of flavor. You can also experiment with different citrus fruits—try lime or grapefruit zest and juice for a refreshing change. For a healthier option, substitute half of the all-purpose flour with whole wheat flour for added fiber without compromising too much on texture.

This Lemon Poppy Seed Loaf pairs beautifully with a light salad, such as a mixed greens salad with a vinaigrette, or a cup of tea for a cozy afternoon treat. It also complements a creamy cheese platter, as the acidity of the loaf balances rich cheeses perfectly. Lastly, a scoop of vanilla ice cream on the side creates a delightful contrast of temperatures and flavors!

Storage, Make-Ahead & Reheating

This Lemon Poppy Seed Loaf can be stored at room temperature for up to 3 days if wrapped tightly in plastic wrap. If you want to keep it longer, it freezes well for up to 3 months. To freeze, wrap the loaf tightly in plastic wrap and then in aluminum foil to prevent freezer burn.

When you’re ready to enjoy it again, simply thaw it in the fridge overnight. Reheat individual slices in the microwave for 15-20 seconds or in a toaster oven until warmed through. Interestingly, many people find that this loaf tastes even better the next day, as the flavors have time to meld!

Frequently Asked Questions

Can I make Lemon Poppy Seed Loaf With Citrus Icing ahead of time?

Yes — in fact, it tastes even better the next day! You can make the loaf a day in advance, allowing the flavors to develop. Just be sure to store it in an airtight container to maintain its moisture.

Can I substitute the poppy seeds?

Absolutely! If you don’t have poppy seeds on hand or prefer an alternative, you can use sesame seeds for a similar crunch or omit them entirely for a smooth loaf.

What can I use instead of buttermilk?

If you don’t have buttermilk, you can easily create a substitute by mixing ½ cup of milk (dairy or plant-based) with 1 tablespoon of vinegar or lemon juice. Let it sit for 5 minutes before using in the recipe.

How can I make this recipe gluten-free?

To make a gluten-free version of this Lemon Poppy Seed Loaf, substitute the all-purpose flour with a gluten-free all-purpose flour blend. Just ensure that the blend contains a binding agent like xanthan gum for the best results.

What is the best way to store leftover loaf?

Leftover Lemon Poppy Seed Loaf should be stored in an airtight container at room temperature for up to 3 days. For longer storage, wrap it tightly and freeze for up to 3 months. Thaw it before serving for the best texture.

Zesty Lemon Poppy Seed Delight

Final Thoughts

The Lemon Poppy Seed Loaf with Citrus Icing is truly a delightful treat that brings a burst of brightness to any occasion. The zesty lemon flavor combined with the subtle crunch of poppy seeds creates a satisfying balance, while the citrus icing adds a touch of sweetness that perfectly complements the loaf’s tanginess.

This is the kind of recipe I come back to again and again, especially when I want to brighten up a gloomy day or celebrate a small victory. The aroma that fills the kitchen as it bakes is absolutely heavenly! I encourage you to give this recipe a try; you might just find it becoming a beloved staple in your home. Don’t forget to share your results or even add your own unique twist—I can’t wait to see what you create!

Print
clock clock iconcutlery cutlery iconflag flag iconfolder folder iconinstagram instagram iconpinterest pinterest iconfacebook facebook iconprint print iconsquares squares iconheart heart iconheart solid heart solid icon

Lemon Poppy Seed Loaf


  • Author: Lily author
  • Total Time: 35 minute
  • Yield: 1 loaf 1x
Pin Recipe
Print Recipe

Description

This Lemon Poppy Seed Loaf is a delightful treat that combines zesty lemon flavor with crunchy poppy seeds. Topped with a citrus icing, it’s perfect for any occasion.


Ingredients

Scale
  • 1 ½ cups (190g) all-purpose flour
  • 1 teaspoon baking powder
  • ½ teaspoon baking soda
  • ½ teaspoon salt
  • 3 tablespoons poppy seeds
  • ½ cup (115g) unsalted butter, softened to room temperature
  • 1 cup (200g) granulated sugar
  • 2 large eggs
  • 1 teaspoon vanilla extract
  • 1 teaspoon lemon zest (from about 1 medium lemon)
  • ½ cup (120ml) buttermilk
  • 2 tablespoons fresh lemon juice
  • 1 cup (120g) powdered sugar
  • 2 tablespoons fresh lemon juice
  • 1 tablespoon orange juice
  • 1 teaspoon lemon zest (for garnish, optional)

Instructions

  1. Preheat your oven to 350°F (175°C). Grease a 9×5-inch loaf pan or line it with parchment paper for easy removal later.
  2. In a medium mixing bowl, whisk together 1 ½ cups of all-purpose flour, 1 teaspoon of baking powder, ½ teaspoon of baking soda, ½ teaspoon of salt, and 3 tablespoons of poppy seeds. This helps to evenly distribute the baking agents and ensures a uniform rise.
  3. In a large mixing bowl, cream together ½ cup of softened unsalted butter and 1 cup of granulated sugar using an electric mixer on medium speed for about 3-4 minutes, until the mixture is light and fluffy. Make sure to scrape down the sides of the bowl occasionally.
  4. Add 2 large eggs, 1 teaspoon of vanilla extract, and 1 teaspoon of lemon zest to the creamed butter and sugar, mixing until fully combined. You want a smooth consistency, so ensure there are no lumps of butter.
  5. In a small bowl, combine ½ cup of buttermilk and 2 tablespoons of fresh lemon juice. Alternately add the dry ingredients and buttermilk mixture to the butter mixture, starting and ending with the dry ingredients. Mix just until combined; do not overmix, as this can lead to a dense loaf.
  6. Pour the batter into the prepared loaf pan. Smooth the top with a spatula, ensuring it’s even. Bake in the preheated oven for 50-60 minutes, or until a toothpick inserted in the center comes out clean. The edges should be lightly golden brown, and the center should feel just set.
  7. Once baked, remove the loaf from the oven and allow it to cool in the pan for about 10 minutes. Then, transfer it to a wire rack to cool completely. Resist the urge to slice too soon, as it will be crumbly if it’s still warm.
  8. While the loaf is cooling, prepare the citrus icing. In a medium bowl, whisk together 1 cup of powdered sugar, 2 tablespoons of fresh lemon juice, and 1 tablespoon of orange juice until smooth. If the icing is too thick, you can add a little more juice to reach your desired consistency.
  9. Once the loaf is completely cool, drizzle the citrus icing over the top. If you like, sprinkle with an additional teaspoon of lemon zest for an extra pop of flavor and color.
  • Prep Time: 15 mins
  • Cook Time: 50-60 mins
  • Category: Dessert
  • Method: Baking
  • Cuisine: American

Nutrition

  • Serving Size: 1 slice
  • Calories: 200
  • Sugar: 15 g
  • Sodium: 150 mg
  • Fat: 8 g
  • Saturated Fat: 5 g
  • Unsaturated Fat: 3 g
  • Trans Fat: 0 g
  • Carbohydrates: 30 g
  • Fiber: 1 g
  • Protein: 3 g
  • Cholesterol: 40 mg

Keywords: Be careful not to overmix your batter; this is a common mistake that can lead to a dense loaf. Use room temperature ingredients for a smoother batter and even baking.

Did you make this recipe?

Share a photo and tag us — we can't wait to see what you've made!

  • Privacy Policy
  • Terms Of Service
  • Contact
  • About
  • GDPR

Copyright © 2025 Homesmad