• Skip to primary navigation
  • Skip to main content
  • Skip to primary sidebar
Homesmad

Homesmad

  • Home
  • Breakfast & Brunch
  • Appetizers & Snacks
  • Dinner
  • Dessert
  • About
  • Privacy Policy
  • Contact
Homesmad
  • Home
  • Breakfast & Brunch
  • Appetizers & Snacks
  • Dinner
  • Dessert
  • About
  • Privacy Policy
  • Contact

Bang Bang Chicken Bowl Recipe: Easy & Delicious Dinner!

November 26, 2025 by Lily author

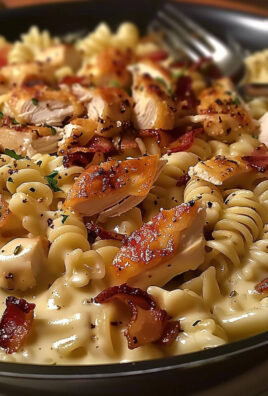
Bang Bang Chicken Bowl – just the name itself promises an explosion of flavor, doesn’t it? I’m incredibly excited to share with you a dish that is not only a feast for the eyes but a truly unforgettable experience for your taste buds. Imagine tender, succulent chicken pieces coated in a creamy, spicy, and slightly sweet sauce, nestled amongst crisp vegetables and fluffy rice. This isn’t just another weeknight meal; it’s a culinary adventure that brings the vibrant tastes of Sichuan right into your kitchen.

The origins of Bang Bang Chicken, or Bang Bang Ji, trace back to the Sichuan province of China. Legend has it that the “bang bang” refers to the sound made by street vendors pounding the cooked chicken with a stick to tenderize it before shredding – a testament to the care and craft put into preparing this beloved dish. While our modern preparation might skip the traditional pounding, the essence of that dedication to flavor and texture remains at its heart, ensuring every bite is rich with history and taste.

What truly makes people fall in love with a Bang Bang Chicken Bowl is its incredible balance. The sauce alone is a masterpiece – a complex symphony of nutty, spicy, sweet, and tangy notes that clings perfectly to every piece of chicken. Coupled with the satisfying textures of fresh cucumber, carrots, and the warmth of steamed rice, it creates a meal that is both comforting and exhilarating. It’s wonderfully versatile and surprisingly simple to put together, making it an ideal choice for a delicious and impressive dinner that will surely become a household favorite.

Bang Bang Chicken Bowl Recipe: Easy & Delicious Dinner! this RECIPE

Ingredients:

Creating a truly spectacular Bang Bang Chicken Bowl starts with having all your wonderful ingredients ready to go. I’ve broken it down into categories to make it super easy for you to gather everything you need. Trust me, fresh ingredients make all the difference in this vibrant dish!

For the Crispy Chicken:

  • 1.5 pounds Boneless, Skinless Chicken Breasts or Thighs: I prefer using chicken breasts because they absorb the marinade beautifully and cook up wonderfully crispy, but thighs will add more moisture if that’s your preference. Aim for pieces about 1 to 1.5 inches thick after slicing.
  • 2 tablespoons Cornstarch: This is my secret weapon for achieving that irresistible crispy coating without deep frying. It really locks in the flavor!
  • 1 teaspoon Salt: Just a touch to season the chicken before cooking.
  • 0.5 teaspoon Black Pepper: Freshly ground is always best for maximum aroma.
  • 3 tablespoons Vegetable Oil (or other neutral oil like Canola or Avocado): For pan-frying the chicken to golden perfection.

For the Irresistible Bang Bang Sauce:

This sauce is the heart and soul of our Bang Bang Chicken Bowl, offering that perfect balance of creamy, spicy, and sweet. Don’t skimp on these!

  • 0.75 cup Mayonnaise: I always reach for good quality full-fat mayonnaise for the creamiest texture and richest flavor. It forms the base of our luscious sauce.
  • 0.5 cup Sweet Chili Sauce: This provides the essential sweet and tangy notes that are characteristic of a classic bang bang sauce.
  • 2-3 tablespoons Sriracha Hot Sauce: Adjust this to your personal spice preference! I like a good kick, so I usually go for 3 tablespoons. Feel free to add more or less.
  • 1 tablespoon Honey or Maple Syrup: To balance the heat and acidity, adding a lovely depth of sweetness.
  • 1 tablespoon Rice Vinegar: A splash of rice vinegar brightens up the entire sauce, adding a subtle tanginess.
  • 1 teaspoon Sesame Oil: Just a tiny dash for that unmistakable nutty, aromatic complexity. It makes a huge difference!
  • 0.5 teaspoon Garlic Powder: For an easy way to infuse garlic flavor without mincing fresh cloves.

For the Perfect Rice Base:

A comforting bed of perfectly cooked rice is absolutely essential for soaking up all that incredible sauce in your Bang Bang Chicken Bowl.

  • 2 cups Jasmine Rice or Basmati Rice: These long-grain varieties are fantastic for their fluffy texture and mild aroma.
  • 3.5 cups Water (or chicken broth for extra flavor): The ideal liquid ratio for fluffy rice.
  • 0.5 teaspoon Salt: To season the rice while it cooks.

For the Fresh Veggie & Garnish Power-Up:

These elements add crunch, freshness, and vibrant color, making your Bang Bang Chicken Bowl not just delicious but also a feast for the eyes!

  • 1 English Cucumber: Sliced into thin half-moons or julienned for a refreshing crunch.
  • 1 large Carrot: Grated or julienned for sweetness and color.
  • 0.5 cup Edamame (shelled, cooked, and cooled): Adds protein and a lovely texture.
  • 2 Green Onions (Scallions): Thinly sliced for a mild oniony bite and beautiful green garnish.
  • 0.25 cup Fresh Cilantro: Roughly chopped for a burst of herbaceous freshness. If you’re not a fan, parsley or chives can be a substitute.
  • 1 tablespoon Toasted Sesame Seeds: For garnish and a final nutty flourish. Black sesame seeds also look stunning!
  • Optional: Avocado, Red Bell Pepper, or Shredded Cabbage: Feel free to customize your bowl with your favorite veggies!

Now that we have all our glorious ingredients ready, let’s dive into creating our incredible Bang Bang Chicken Bowl!


Instructions:

Get ready to transform these simple ingredients into a truly spectacular meal. I’ve broken down the process into clear, manageable steps so you can create a restaurant-quality Bang Bang Chicken Bowl right in your own kitchen!

Phase 1: Preparing the Chicken for the Bang Bang Chicken Bowl

  1. Prepping the Chicken:

    First things first, let’s get our chicken ready! Take your 1.5 pounds of boneless, skinless chicken breasts or thighs and pat them thoroughly dry with paper towels. This step is crucial for achieving that crispy exterior! Slice the chicken into bite-sized pieces, aiming for roughly 1 to 1.5-inch cubes or strips. I find that uniform pieces cook more evenly. Place the chicken in a medium-sized bowl.

  2. Seasoning and Coating:

    To the chicken in the bowl, add 1 teaspoon of salt, 0.5 teaspoon of black pepper, and 2 tablespoons of cornstarch. Toss everything together really well, ensuring each piece of chicken is lightly and evenly coated with the cornstarch. The cornstarch is going to give us that wonderful crispy texture without needing a heavy batter. This is a key step for a successful Bang Bang Chicken Bowl!

  3. Pan-Frying the Chicken (My Favorite Method!):

    Heat 3 tablespoons of vegetable oil in a large skillet or non-stick frying pan over medium-high heat. You want the oil to be shimmering but not smoking. Once hot, carefully add the coated chicken pieces to the pan in a single layer, making sure not to overcrowd the pan. If your pan isn’t big enough, work in two batches. Overcrowding will steam the chicken instead of crisping it.

    Cook for about 4-6 minutes per side, or until the chicken is golden brown and cooked through, with an internal temperature of 165°F (74°C). The cornstarch will create a beautiful, lightly crisp crust. Once cooked, remove the chicken from the pan and place it on a plate lined with paper towels to drain any excess oil. Set aside while we prepare the rest of our delicious Bang Bang Chicken Bowl components.

  4. Alternative Cooking Method: Baking the Chicken (Healthier Option):

    If you prefer to bake, preheat your oven to 400°F (200°C). After coating the chicken with cornstarch, salt, and pepper, arrange the pieces in a single layer on a baking sheet lined with parchment paper or a silicone mat. Drizzle lightly with about 1-2 tablespoons of oil. Bake for 18-25 minutes, flipping halfway through, until the chicken is cooked through and lightly golden. While it won’t be as crispy as pan-fried, it’s still incredibly tender and delicious for your Bang Bang Chicken Bowl.

Phase 2: Crafting the Irresistible Bang Bang Sauce

  1. Whisking the Sauce Ingredients:

    Now for the star of the show – the incredible Bang Bang Sauce! In a medium bowl, combine 0.75 cup of mayonnaise, 0.5 cup of sweet chili sauce, 2-3 tablespoons of sriracha hot sauce (remember to adjust to your spice preference!), 1 tablespoon of honey or maple syrup, 1 tablespoon of rice vinegar, 1 teaspoon of sesame oil, and 0.5 teaspoon of garlic powder. This combination creates that signature flavor profile for our Bang Bang Chicken Bowl.

  2. Mixing Until Smooth:

    Whisk all these ingredients vigorously until the sauce is completely smooth, creamy, and wonderfully uniform in color. I love watching it come together! Take a tiny taste test and adjust any seasonings as needed. Does it need a bit more heat? Add more sriracha! A touch more sweetness? Drizzle in a little extra honey. It’s all about personal preference here. Cover the bowl and place it in the refrigerator to chill slightly while you finish the rest of the meal; this allows the flavors to meld beautifully.

Phase 3: Preparing the Fluffy Rice Base

  1. Rinsing the Rice:

    For perfectly fluffy rice, I always recommend rinsing it first. Place 2 cups of jasmine or basmati rice in a fine-mesh sieve and rinse it under cold running water until the water runs clear. This removes excess starch, preventing the rice from becoming gummy. This small step makes a big difference in your Bang Bang Chicken Bowl experience!

  2. Cooking the Rice:

    In a medium saucepan with a tight-fitting lid, combine the rinsed rice, 3.5 cups of water (or chicken broth for richer flavor), and 0.5 teaspoon of salt. Bring the mixture to a boil over medium-high heat. Once boiling, immediately reduce the heat to the lowest setting, cover the pot tightly, and let it simmer for 15-18 minutes. Resist the urge to lift the lid! That trapped steam is crucial for cooking the rice evenly.

  3. Resting and Fluffing:

    After 15-18 minutes, remove the pot from the heat but keep the lid on. Let the rice rest for another 5-10 minutes. This allows any remaining steam to absorb and further tenderizes the grains. Finally, remove the lid and gently fluff the rice with a fork. It should be perfectly cooked, separate, and ready for your Bang Bang Chicken Bowl.

Phase 4: Preparing the Fresh Veggies and Garnishes

  1. Chopping and Slicing:

    While the chicken is cooking or resting, and the rice is simmering, it’s the perfect time to prep all your fresh vegetables. Thinly slice the English cucumber into half-moons or julienne it for delicate strips. Grate or julienne your large carrot. If using, prepare any optional veggies like dicing red bell pepper or shredding cabbage. Having all your components ready is key for a smooth assembly of your Bang Bang Chicken Bowl!

  2. Finishing Touches:

    Slice the green onions thinly, separating the white and green parts if desired. Roughly chop your fresh cilantro. If you’re using edamame, ensure it’s shelled, cooked, and cooled. Gather your toasted sesame seeds for the final flourish. Arrange all your prepared veggies and garnishes on a platter or in small bowls so they’re easy to access for assembling your individual Bang Bang Chicken Bowl.

Phase 5: Assembling Your Magnificent Bang Bang Chicken Bowl

  1. Building the Base:

    Grab your favorite serving bowls. Start by spooning a generous amount of your freshly cooked, fluffy rice into the bottom of each bowl. This forms the perfect foundation for all the deliciousness to come. Make sure it’s nicely spread out.

  2. Adding the Star:

    Next, arrange a hearty portion of your crispy, pan-fried (or baked!) chicken pieces over the rice. You want a good amount in each Bang Bang Chicken Bowl to ensure every bite is satisfying. Feel free to pile it high!

  3. Drizzling with Sauce:

    Now for the moment we’ve all been waiting for! Generously drizzle that incredible, creamy Bang Bang Sauce all over the chicken. Don’t be shy – this is what truly makes the dish sing. You can also serve extra sauce on the side for dipping or for those who love a little extra decadence in their Bang Bang Chicken Bowl.

  4. Layering the Freshness:

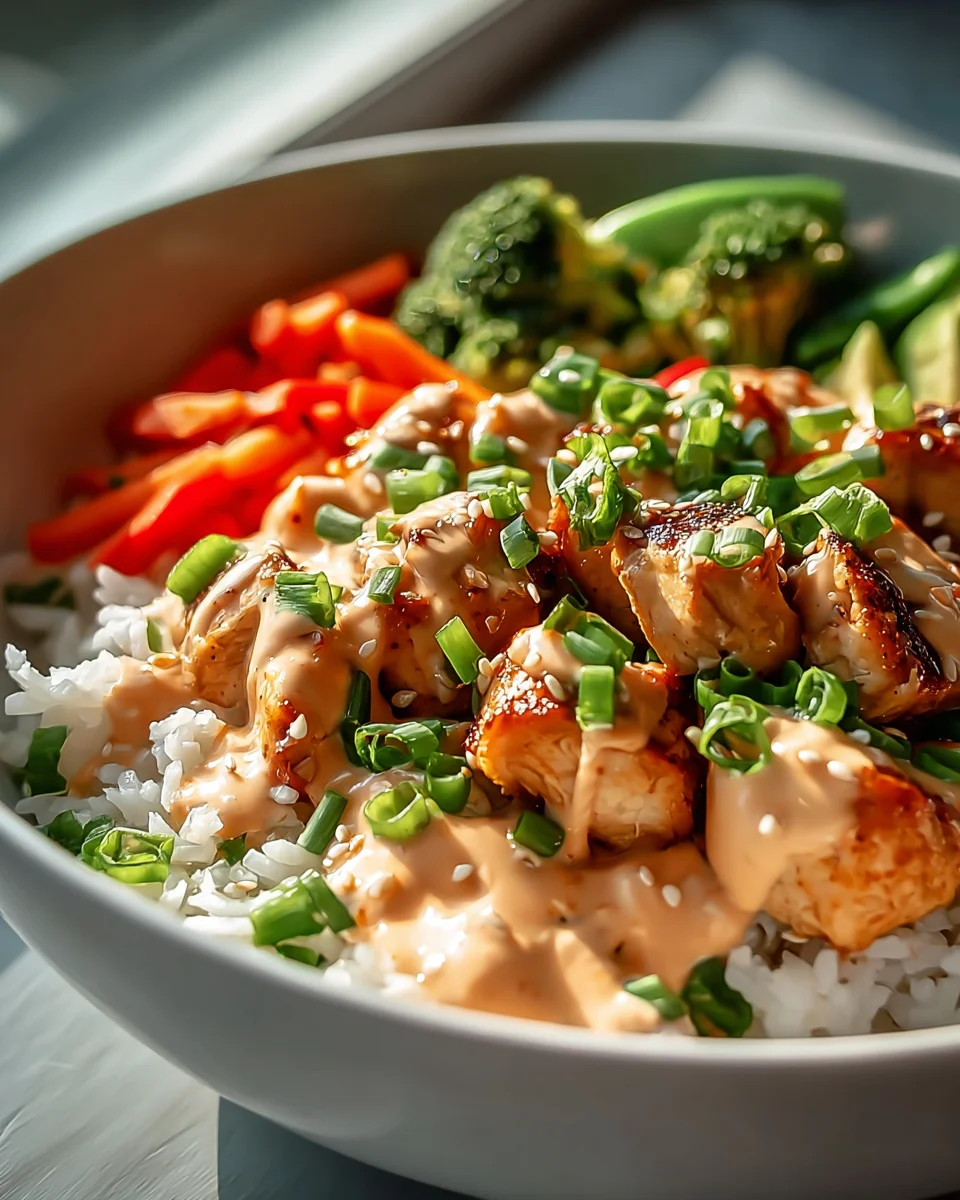
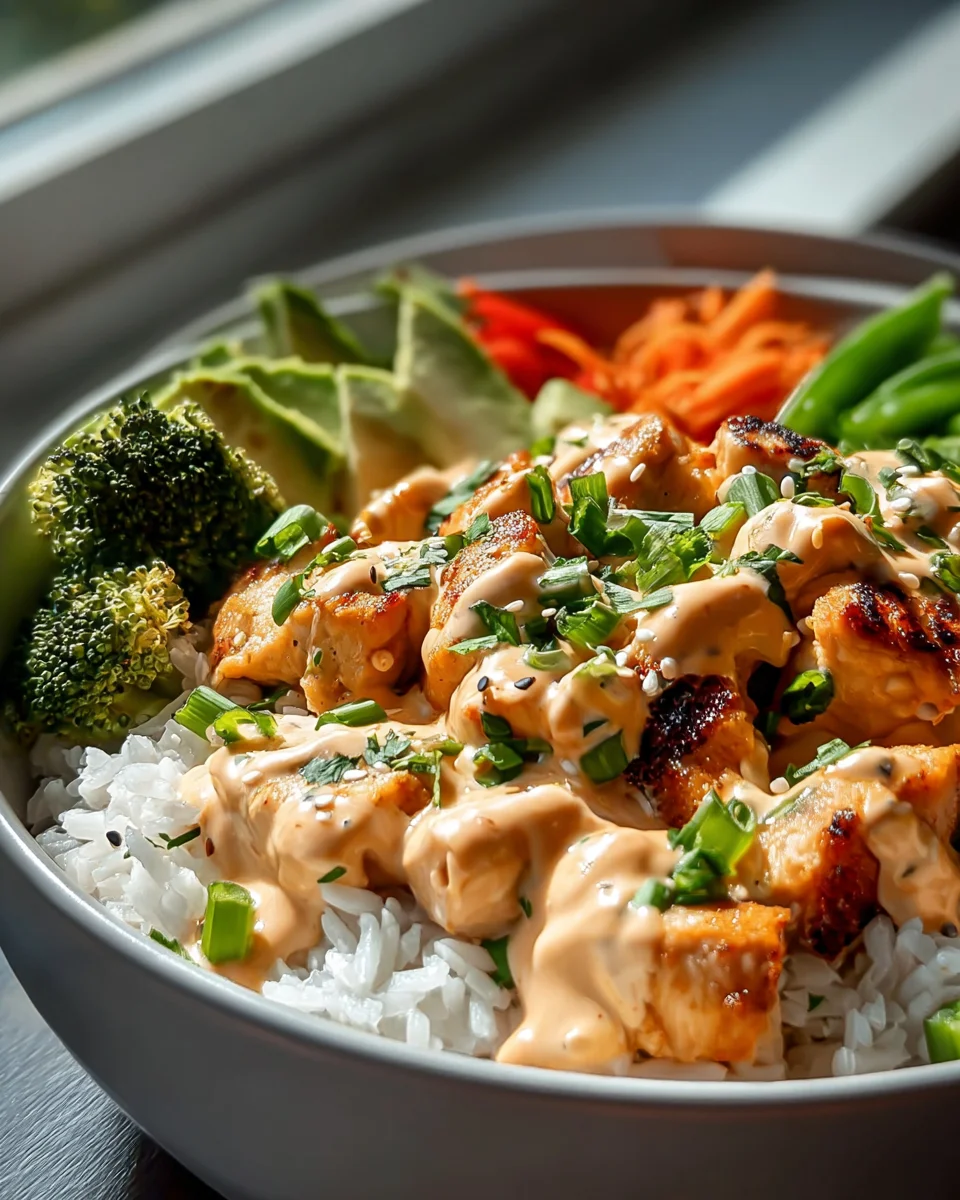
    Artfully arrange your prepared fresh vegetables around and over the chicken and sauce. I love to place the sliced cucumber, grated carrot, and edamame in separate sections or piles to create a colorful and appealing presentation. This adds not only visual appeal but also wonderful texture and nutrients to your Bang Bang Chicken Bowl.

  5. The Final Flourish:

    Sprinkle generously with the sliced green onions and fresh cilantro. Finish with a beautiful scattering of toasted sesame seeds. If you have some avocado, now is a great time to add a few slices for extra creaminess. Step back and admire your handiwork! You’ve just created a stunning and delicious Bang Bang Chicken Bowl!

Serving Suggestion:

Serve your Bang Bang Chicken Bowl immediately while everything is fresh and warm. Encourage everyone to mix it all together before digging in to ensure they get a fantastic blend of flavors and textures in every single bite. This dish is fantastic for meal prep too; just store the components separately and assemble when ready to eat!

Enjoy every single mouthwatering bite of your homemade Bang Bang Chicken Bowl!

Bang Bang Chicken Bowl Recipe: Easy & Delicious Dinner!

Conclusion:

My friends, if you’ve been following along, you now hold the key to unlocking a truly sensational culinary experience. This isn’t just another dinner recipe; it’s an invitation to a vibrant, flavor-packed adventure that will quickly become a cherished favorite in your kitchen. I’ve poured my heart into perfecting this dish because I genuinely believe it offers something special for everyone. It strikes that coveted balance between being incredibly exciting for your taste buds and surprisingly simple to whip up, even on a busy weeknight. The combination of tender, succulent chicken, crisp vegetables, and that utterly irresistible, creamy, spicy, and slightly sweet sauce creates a symphony of textures and tastes that is hard to forget. It’s the kind of meal that excites you from the first glance to the last delicious bite, satisfying those cravings for something both fresh and deeply comforting. Trust me, the effort (minimal as it is!) is so incredibly worth the reward. This recipe is your ticket to a homemade meal that feels gourmet without the fuss, bringing restaurant-quality delight right to your table. The freshness of the ingredients, combined with the bold, dynamic sauce, ensures every mouthful is a burst of pure joy, making it a standout in any meal rotation.

Now, let’s talk about how to make this star dish shine even brighter on your table, or how to tweak it to perfectly suit your mood or dietary needs. While truly a complete meal on its own, a bed of fluffy steamed jasmine rice or fragrant basmati rice is an absolutely classic and wonderful accompaniment, soaking up all that incredible sauce. For a lighter touch, consider serving it over perfectly cooked quinoa or even cauliflower rice, which adds another layer of texture and makes it a fantastic low-carb option. Don’t forget the garnishes – they truly elevate the experience! A generous sprinkle of toasted sesame seeds adds a lovely nutty crunch and visual appeal, while a handful of freshly chopped cilantro brightens everything up with its herbaceous notes. For those who love an extra kick, a few thinly sliced red chilies or a drizzle of chili oil will do the trick. A squeeze of fresh lime juice just before serving can also add a delightful zing that cuts through the richness beautifully.

And the versatility? Oh, it’s endless! If you’re looking to turn this into a vegetarian or vegan masterpiece, simply swap out the chicken for crispy pan-fried tofu, marinated tempeh, or even roasted chickpeas. The sauce itself is incredibly adaptable, so feel free to adjust the spice level to your liking – more sriracha for a fiery kick, or a little less for a milder, family-friendly version. You can also play around with the vegetables; think vibrant bell peppers, crisp snap peas, or even some blanched broccoli florets for added color and nutrients. This dish also makes for incredible leftovers, tasting even better the next day as the flavors meld further, making it a fantastic option for meal prep. Imagining the possibilities with this amazing Bang Bang Chicken Bowl truly excites me, and I hope it does you too!

So, what are you waiting for? Take the plunge and give this recipe a try this week. I promise you won’t regret it. There’s something immensely satisfying about creating something so delicious from scratch, and I am confident that once you taste it, you’ll understand why I’m so passionate about it. More than just cooking, it’s about creating memories around the table and enjoying truly fantastic food. I would absolutely love to hear about your experience! Did you stick to the original recipe, or did you put your own unique spin on it? Share your thoughts, your successes, and perhaps even your own clever variations in the comments below. Your feedback and creativity inspire me and our whole community of food lovers. Get cooking, enjoy every single bite, and let’s celebrate the joy of delicious homemade food together!


Bang Bang Chicken Bowl: Easy & Delicious Dinner!

Imagine tender, succulent chicken pieces coated in a creamy, spicy, and slightly sweet sauce, nestled amongst crisp vegetables and fluffy rice. This culinary adventure brings the vibrant tastes of Sichuan right into your kitchen with an incredible balance of nutty, spicy, sweet, and tangy notes.

Prep Time
30 Minutes
Cook Time
35 Minutes
Total Time
5 Minutes
Servings
4 servings

Ingredients


Instructions


Important Information

Nutrition Facts (Per Serving)

It is important to consider this information as approximate and not to use it as definitive health advice.

Allergy Information

Please check ingredients for potential allergens and consult a health professional if in doubt.

« Previous Post
Balsamic Baked Chicken Breast: Easy & Healthy Dinner
Next Post »
Delicious Honey Glazed Corn Casserole – Perfect Side Dish

If you enjoyed this…

One Hour French Bread: Easy Recipe & Baking Tips

Honey Garlic Chicken: The Ultimate Recipe for Deliciousness

Zucchini Tomato Rice: A Delicious & Easy One-Pot Recipe

Primary Sidebar

Browse by Diet

BreakfastDinnerLunchDessertAppetizer

Sweet Peach Yogurt Parfait Delight

One of my fondest memories is from a lazy summer afternoon spent at my grandmother’s house. The sun filtered through the kitchen window, casting a warm glow over the table where she would create her culinary magic. It was during one of those blissful moments that I first tasted her Peach Yogurt Parfait with Honey and Granola. The sweet aroma of ripe peaches mingling with creamy yogurt and the crunch of granola was nothing short of heavenly. It felt like summer captured in a bowl, and I still remember the joy of diving in with a spoon, each layer revealing a new burst of flavor.

When I think about that parfait, I can almost hear the gentle hum of the bees outside, reminding me of the floral notes that honey brings to every bite. The vibrant yellows and soft oranges of the peaches contrast beautifully with the creamy white yogurt and the golden crunch of granola. It’s a dish that not only looks delightful but also tastes like a celebration of fresh, wholesome ingredients.

What makes my version of this Peach Yogurt Parfait special is the careful balance of flavors and textures. I use ripe, juicy peaches, drizzled with locally sourced honey, and a homemade granola that’s bursting with nuts and seeds for an extra crunch. It’s a simple dish, but every layer is crafted with love and attention.

Let me show you exactly how to make this delightful parfait, so you can bring a bit of that summer magic into your kitchen!

Sweet Peach Yogurt Parfait Delight

Why You’ll Love This Recipe

  • Delightfully creamy texture from the Greek yogurt, paired with the juicy sweetness of fresh peaches.
  • Ready in under 20 minutes, making it a quick and satisfying breakfast or snack option.
  • Budget-friendly, using common ingredients that you may already have in your pantry.
  • Customizable with your favorite granola and nuts, allowing you to tailor each parfait to your taste.
  • Perfectly balanced flavors with the bright acidity of lemon juice and the sweetness of honey enhancing the peaches.

Ingredients

  • For the Parfait:
  • 2 cups plain Greek yogurt (or vanilla yogurt for a sweeter option)
  • 2 large ripe peaches, diced (about 2 cups)
  • 1 tablespoon fresh lemon juice (to prevent browning of peaches)
  • 2 tablespoons honey (plus more for drizzling)
  • 1 teaspoon vanilla extract (optional for extra flavor)
  • For the Granola:
  • 1 cup granola (store-bought or homemade; see notes for a simple granola recipe)
  • 1/4 cup sliced almonds (optional for added crunch)
  • 1/4 cup shredded coconut (optional for added flavor)

Let’s dive into some key ingredients that make this Peach Yogurt Parfait so delightful! First, the Greek yogurt is not only creamy but also packed with protein, making it a satisfying option for breakfast or a snack. If you’re looking for a sweeter option, you can easily substitute it with vanilla yogurt, though it may alter the overall flavor balance. Next, the ripe peaches are the star of the show; their natural sweetness shines through, so I recommend choosing peaches that yield slightly to pressure, indicating they’re perfectly ripe. If peaches aren’t in season, feel free to use nectarines or even frozen peaches—just thaw them before use. Finally, honey adds a lovely floral sweetness that ties everything together. If you prefer, maple syrup can serve as a delicious substitute.

Step-by-Step Instructions

  1. Start by preparing the peaches. Wash them thoroughly, then slice and dice them into bite-sized pieces. In a medium bowl, toss the diced peaches with 1 tablespoon of fresh lemon juice to prevent browning. Set aside for about 5 minutes while the lemon juice works its magic.
  2. In a separate bowl, combine the Greek yogurt, 2 tablespoons of honey, and 1 teaspoon of vanilla extract if using. Stir the mixture until smooth and thoroughly blended. This should take about a minute. Avoid overmixing to maintain the creaminess of the yogurt.
  3. Now it’s time to layer your parfait. Grab a clear glass or bowl to showcase your beautiful creation. Start with a generous spoonful of the yogurt mixture at the bottom—about 1/4 cup will do. Use a spoon to spread it evenly.
  4. Add a layer of the diced peaches over the yogurt, ensuring they cover the yogurt completely. You might want to use about half of what you have prepared—roughly 1 cup. This layer should be visually appealing, so arrange the peaches neatly.
  5. Sprinkle 1/4 cup of granola over the peaches. This adds a delightful crunch. Make sure to distribute it evenly to ensure every bite has that satisfying texture. Avoid packing it down too tightly, as you want it to maintain its crunch.
  6. Repeat the layers: spoon in another 1/4 cup of yogurt, followed by another cup of peaches, and another sprinkle of granola. You should have at least two layers, but feel free to add more depending on your glass size.
  7. Finish off your parfait with a drizzle of honey on top for added sweetness and a touch of elegance. If you’re using sliced almonds or shredded coconut, sprinkle them on top now. It adds a lovely visual contrast and extra flavor.
  8. Serve immediately or refrigerate for up to 30 minutes before serving to allow the flavors to meld together. However, I recommend enjoying it fresh to maintain the granola’s crunch.

Pro Tips for the Best Peach Yogurt Parfait With Honey And Granola

  • Make sure to choose ripe peaches for the best flavor and texture. A common mistake is using unripe fruit, which can lead to a less enjoyable parfait. Look for peaches that are fragrant and slightly soft to the touch.
  • Use a clear glass to assemble your parfait; this not only makes for a beautiful presentation but also allows you to see the colorful layers, which adds to the enjoyment of eating it.
  • For an even creamier texture, consider whipping the Greek yogurt with a hand mixer for a couple of minutes before layering. This small adjustment makes a huge difference in mouthfeel.
  • Be mindful of the granola-to-yogurt ratio. Too much granola can overwhelm the parfait, while too little can make it feel too creamy. Aim for about 1/4 cup of granola per layer for the perfect balance.
  • If you’re making this for a gathering, consider preparing the yogurt and peaches ahead of time and layering them just before serving. This ensures the granola stays crunchy!

Variations & Serving Ideas

There are so many ways to get creative with your Peach Yogurt Parfait! For a tropical twist, swap out the peaches for mangoes or pineapples and top with coconut flakes. If you prefer a berry flavor, mix in some blueberries or strawberries with the peaches for added color and taste. For a nutty version, incorporate chopped walnuts or pecans instead of almonds.

As for serving ideas, this parfait pairs beautifully with a side of scrambled eggs for a hearty breakfast or fresh fruit salad for a light lunch. You might also enjoy it alongside whole grain toast with almond butter for an energizing snack. The contrast of flavors and textures will elevate your meal experience!

Storage, Make-Ahead & Reheating

The Peach Yogurt Parfait is best enjoyed fresh, but you can prepare some components ahead of time. Store the layered parfait in an airtight container in the refrigerator for up to 24 hours. However, be cautious; the granola may lose its crunch if stored too long. You can freeze the yogurt and peach mixture for up to 2 months; just remember to thaw it in the refrigerator overnight before serving.

If you plan to enjoy this dish the next day, it can taste even better as the flavors meld together. Just remember to add the granola right before serving to keep its delightful crunch!

Frequently Asked Questions

Can I make Peach Yogurt Parfait With Honey And Granola ahead of time?

Yes — in fact, it tastes even better the next day as the flavors meld. However, I recommend waiting to add the granola until just before serving to maintain its crunch.

What can I substitute for Greek yogurt?

If you prefer a lighter option, you can substitute Greek yogurt with regular yogurt or a dairy-free alternative like coconut yogurt. Just remember that this may alter the creaminess and flavor profile slightly.

Can I use frozen peaches for this parfait?

Absolutely! Just make sure to thaw the frozen peaches before using them. They will still add great flavor, though the texture may be slightly softer than fresh peaches.

How do I make the parfait vegan?

To make a vegan version, substitute the Greek yogurt with a plant-based yogurt alternative, and replace honey with maple syrup or agave nectar. This keeps the parfait sweet while adhering to a vegan diet.

What other fruits can I use in this recipe?

You can mix and match fruits based on your preference. Try using strawberries, blueberries, raspberries, or even bananas. Just make sure to adjust the lemon juice as needed to prevent browning.

Sweet Peach Yogurt Parfait Delight

Final Thoughts

The Peach Yogurt Parfait with Honey and Granola is a delightful blend of creamy yogurt, sweet peaches, and crunchy granola that creates a satisfying and nourishing treat. Each layer bursts with flavor, making it a perfect choice for breakfast or a light dessert.

This is the kind of recipe I come back to again and again, especially when I want something refreshing and wholesome to start my day. The harmony of sweet and tart flavors, combined with the delightful crunch, never fails to lift my spirits!

I encourage you to give this parfait a try and indulge in its comforting goodness. Feel free to share your results or even add your own twist—perhaps a sprinkle of cinnamon or a handful of nuts. Enjoy creating your perfect parfait!

Print
clock clock iconcutlery cutlery iconflag flag iconfolder folder iconinstagram instagram iconpinterest pinterest iconfacebook facebook iconprint print iconsquares squares iconheart heart iconheart solid heart solid icon

Peach Yogurt Parfait


  • Author: Lily author
  • Total Time: 15 minutes
  • Yield: 4 servings 1x
Pin Recipe
Print Recipe

Description

This Peach Yogurt Parfait combines creamy Greek yogurt, juicy peaches, and crunchy granola for a delightful treat. It’s a perfect breakfast or snack that captures the essence of summer in every bite.


Ingredients

Scale
  • For the Parfait:
  • 2 cups plain Greek yogurt (or vanilla yogurt for a sweeter option)
  • 2 large ripe peaches, diced (about 2 cups)
  • 1 tablespoon fresh lemon juice (to prevent browning of peaches)
  • 2 tablespoons honey (plus more for drizzling)
  • 1 teaspoon vanilla extract (optional for extra flavor)
  • For the Granola:
  • 1 cup granola (store-bought or homemade; see notes for a simple granola recipe)
  • 1/4 cup sliced almonds (optional for added crunch)
  • 1/4 cup shredded coconut (optional for added flavor)

Instructions

  1. Start by preparing the peaches. Wash them thoroughly, then slice and dice them into bite-sized pieces. In a medium bowl, toss the diced peaches with 1 tablespoon of fresh lemon juice to prevent browning. Set aside for about 5 minutes while the lemon juice works its magic.
  2. In a separate bowl, combine the Greek yogurt, 2 tablespoons of honey, and 1 teaspoon of vanilla extract if using. Stir the mixture until smooth and thoroughly blended. This should take about a minute. Avoid overmixing to maintain the creaminess of the yogurt.
  3. Now it’s time to layer your parfait. Grab a clear glass or bowl to showcase your beautiful creation. Start with a generous spoonful of the yogurt mixture at the bottom—about 1/4 cup will do. Use a spoon to spread it evenly.
  4. Add a layer of the diced peaches over the yogurt, ensuring they cover the yogurt completely. You might want to use about half of what you have prepared—roughly 1 cup. This layer should be visually appealing, so arrange the peaches neatly.
  5. Sprinkle 1/4 cup of granola over the peaches. This adds a delightful crunch. Make sure to distribute it evenly to ensure every bite has that satisfying texture. Avoid packing it down too tightly, as you want it to maintain its crunch.
  6. Repeat the layers: spoon in another 1/4 cup of yogurt, followed by another cup of peaches, and another sprinkle of granola. You should have at least two layers, but feel free to add more depending on your glass size.
  7. Finish off your parfait with a drizzle of honey on top for added sweetness and a touch of elegance. If you’re using sliced almonds or shredded coconut, sprinkle them on top now. It adds a lovely visual contrast and extra flavor.
  8. Serve immediately or refrigerate for up to 30 minutes before serving to allow the flavors to meld together. However, I recommend enjoying it fresh to maintain the granola’s crunch.
  • Prep Time: 15 mins
  • Cook Time: 0 mins
  • Category: Breakfast
  • Method: No-cook
  • Cuisine: American

Nutrition

  • Serving Size: 1 parfait
  • Calories: 250
  • Sugar: 20 g
  • Sodium: 50 mg
  • Fat: 5 g
  • Saturated Fat: 2 g
  • Unsaturated Fat: 3 g
  • Trans Fat: 0 g
  • Carbohydrates: 40 g
  • Fiber: 3 g
  • Protein: 10 g
  • Cholesterol: 10 mg

Keywords: Choose ripe peaches for the best flavor and texture. Use a clear glass for a beautiful presentation. For creaminess, consider whipping the yogurt before layering. Be mindful of the granola-to-yogurt ratio. Prepare yogurt and peaches ahead of time for gatherings, layering just before serving.

Did you make this recipe?

Share a photo and tag us — we can't wait to see what you've made!

Sun-Kissed Frozen Orange Cream Slush

As a child, summer days felt like they lasted forever. I remember the sticky heat wrapping around me as I played outside, my laughter mingling with the sounds of the neighborhood. But nothing could cool me down quite like the moment I’d spot my grandmother, laboring over her blender, whipping up her famous Frozen Orange Creamsicle Slush. That vibrant orange treat, with its frosty texture and sweet citrus aroma, was like a burst of sunshine in a cup. Just one sip, and I could feel the coolness wash over me, sparking pure joy.

This Frozen Orange Creamsicle Slush has a way of making you feel like a kid again. Its creamy, dreamy consistency is a delightful balance of bright orange and soft vanilla, inviting you to dive right in. The refreshing tang of orange dances on your tongue, while the smooth creaminess envelops you in a comforting embrace. It’s a nostalgic treat that’s perfect for hot summer afternoons or anytime you need a little pick-me-up.

What makes my version of this slush stand out is the addition of a hint of vanilla bean, which elevates the flavor and adds an extra layer of richness. Plus, it’s super easy to whip up with just a few simple ingredients that you probably already have on hand! So, if you’re ready to relive those sun-soaked memories, let me show you exactly how to make it.

Sun-Kissed Frozen Orange Cream Slush

Why You’ll Love This Recipe

  • Each slush is a perfect blend of creamy vanilla and zesty orange, creating a nostalgic flavor reminiscent of summer days.
  • This refreshing treat is ready in under 15 minutes, making it an ideal quick dessert for unexpected guests or hot afternoons.
  • With just 8 simple ingredients, it’s budget-friendly, ensuring you don’t have to break the bank to enjoy a delicious slush.
  • The slush has a perfectly smooth texture, thanks to the combination of ice and ice cream, providing a delightful contrast to the bright citrus flavors.
  • It’s highly customizable; you can easily adjust the sweetness and add fresh herbs for a unique twist that suits your taste.

Ingredients

  • 2 cups orange juice (freshly squeezed or store-bought)
  • 1 cup vanilla ice cream
  • 1 cup crushed ice
  • 1/2 cup milk (whole or 2%)
  • 1/4 cup granulated sugar (adjust based on sweetness preference)
  • 1 teaspoon vanilla extract
  • Zest of 1 orange (for added flavor)
  • Fresh orange slices and mint leaves (for garnish)

The star of this Frozen Orange Creamsicle Slush is the orange juice, which provides the vibrant, citrusy base. Freshly squeezed juice will yield the brightest flavor, but store-bought options can be just as convenient. If you’re opting for store-bought, choose 100% pure juice with no added sugars for the best results. Another essential ingredient is the vanilla ice cream; it adds creaminess and sweetness. You can substitute it with dairy-free ice cream if you’re looking for a vegan option. Whole or 2% milk complements the ice cream, creating a smooth blend. If you want a lower-calorie version, almond or oat milk can be good alternatives.

Lastly, the granulated sugar can be adjusted based on your sweetness preference. If you prefer a more natural sweetener, consider using honey or agave syrup. The orange zest enhances the flavor profile, providing an aromatic pop that brings the whole slush together. Don’t skip it! It adds an extra layer of brightness that makes this slush truly special.

Step-by-Step Instructions

  1. Start by preparing your ingredients. Gather 2 cups of orange juice, 1 cup of vanilla ice cream, and 1 cup of crushed ice. Make sure the ice is finely crushed, as larger chunks can make blending difficult.
  2. In a blender, combine the orange juice, vanilla ice cream, crushed ice, and 1/2 cup of milk. Add 1/4 cup of granulated sugar and 1 teaspoon of vanilla extract. If you like a sweeter slush, consider adding a bit more sugar at this stage.
  3. Add the zest of 1 orange to the blender. This step is crucial for enhancing the citrus flavor of your slush. Make sure not to include the bitter white pith—only the flavorful zest.
  4. Blend the mixture on medium-high speed for about 30-45 seconds. Stop once the ingredients are fully combined and the slush has a smooth, even consistency. If you notice large chunks of ice, blend for an additional 10-15 seconds. Avoid over-blending, as this can make the slush too liquidy.
  5. Once blended, taste the slush. If it needs more sweetness, add a little more sugar and blend for a few more seconds. If it’s too thick, you can add a splash of milk to reach your desired consistency.
  6. Pour the slush into glasses. This recipe typically serves 4, but you can easily double it for larger gatherings. Use a spoon to help guide the slush into the glasses if needed.
  7. Garnish each serving with fresh orange slices and mint leaves. The mint not only adds a pop of color but also a refreshing aroma that complements the citrus flavors beautifully.
  8. Serve immediately and enjoy! If you’ve made extra, you can refrigerate it for a short time, but it’s best enjoyed fresh.

Pro Tips for the Best Frozen Orange Creamsicle Slush

  • Don’t skip the orange zest! It’s a game-changer for flavor. Always zest before juicing to make it easier.
  • Use a high-powered blender for the best texture. A standard blender may struggle with ice, leading to uneven consistency. If you have a food processor, that can work too, but ensure the ice is finely crushed.
  • Adjust the ice-to-liquid ratio carefully. If your slush is too thick, it won’t blend well. Start with less ice and add more until you reach your preferred texture.
  • Be cautious with the sugar! Always start with the lower amount, as you can easily add more, but it’s hard to fix an overly sweet slush.
  • For a fun twist, consider adding a splash of coconut milk or a handful of fresh fruit like strawberries or pineapple. This not only enhances the flavor but also adds a beautiful color contrast.

Variations & Serving Ideas

There are countless ways to put a spin on your Frozen Orange Creamsicle Slush. Consider making a tropical version by adding in some pineapple juice or coconut milk for a delightful tropical twist. If you’re feeling adventurous, try incorporating a handful of frozen mango or peach slices for added sweetness. For a lighter version, swap out the vanilla ice cream for Greek yogurt for a creamy yet tangy alternative.

As for serving ideas, this refreshing slush pairs wonderfully with light summer dishes like grilled chicken skewers, fish tacos, or a simple salad topped with citrus vinaigrette. The bright, zesty flavors of the slush complement these dishes perfectly, making them an ideal pairing for a sunny day.

Storage, Make-Ahead & Reheating

This Frozen Orange Creamsicle Slush is best enjoyed fresh, but if you have leftovers, you can store them in an airtight container in the fridge for up to 2 days. Just keep in mind that the slush may lose some of its texture over time as the ice melts. It doesn’t freeze well, as the ice will turn into a solid block. If you must freeze it, blend again after thawing to restore the slushy consistency. This treat is best the day you make it, as the flavors meld together beautifully overnight, enhancing its deliciousness.

Frequently Asked Questions

Can I make Frozen Orange Creamsicle Slush ahead of time?

Yes — in fact, it tastes even better the next day as the flavors meld. However, it’s best to enjoy it fresh, as the texture can change if stored for too long. If you need to prepare it ahead, keep it in the fridge and re-blend before serving.

What kind of orange juice should I use?

For the best flavor, use freshly squeezed orange juice. However, if you’re short on time, opt for 100% pure store-bought juice without added sugars. This will ensure that your slush remains flavorful and refreshing.

Can I substitute the vanilla ice cream?

Absolutely! If you’re looking for a dairy-free option, coconut milk ice cream or a non-dairy vanilla ice cream can work wonderfully. They will still provide the creamy texture and sweetness you desire.

How can I adjust the sweetness of my slush?

You can easily adjust the sweetness by modifying the amount of sugar added. Start with 1/4 cup and taste the mixture before blending. If you prefer it sweeter, add more sugar gradually until it reaches your desired level.

What should I do if my slush is too thick?

If your slush is too thick, simply add a splash of milk or orange juice and blend again. This will help achieve a more drinkable consistency while maintaining the slushy texture. Adjust gradually to reach your preferred thickness.

Sun-Kissed Frozen Orange Cream Slush

Final Thoughts

The Frozen Orange Creamsicle Slush is a delightful blend of refreshing citrus and creamy goodness, making it a perfect treat for warm days or any time you crave a taste of nostalgia. The way the bright orange flavor dances with the creamy texture truly elevates this slush, transforming it into a satisfying escape from the everyday.

This is the kind of recipe I come back to again and again, especially when I’m looking to cool down or impress guests at a summer gathering. It’s simple to make and always brings smiles all around! I encourage you to try this recipe for yourself—don’t hesitate to share your results or even put your own spin on it. Happy slushing!

Print
clock clock iconcutlery cutlery iconflag flag iconfolder folder iconinstagram instagram iconpinterest pinterest iconfacebook facebook iconprint print iconsquares squares iconheart heart iconheart solid heart solid icon

Frozen Orange Creamsicle Slush


  • Author: Lily author
  • Total Time: 15 minutes
  • Yield: 4 servings 1x
Pin Recipe
Print Recipe

Description

This Frozen Orange Creamsicle Slush is a refreshing treat that combines creamy vanilla and zesty orange flavors. Perfect for hot summer days, it brings back nostalgic memories with every sip.


Ingredients

Scale
  • 2 cups orange juice (freshly squeezed or store-bought)
  • 1 cup vanilla ice cream
  • 1 cup crushed ice
  • 1/2 cup milk (whole or 2%)
  • 1/4 cup granulated sugar (adjust based on sweetness preference)
  • 1 teaspoon vanilla extract
  • Zest of 1 orange (for added flavor)
  • Fresh orange slices and mint leaves (for garnish)

Instructions

  1. Start by preparing your ingredients. Gather 2 cups of orange juice, 1 cup of vanilla ice cream, and 1 cup of crushed ice. Make sure the ice is finely crushed, as larger chunks can make blending difficult.
  2. In a blender, combine the orange juice, vanilla ice cream, crushed ice, and 1/2 cup of milk. Add 1/4 cup of granulated sugar and 1 teaspoon of vanilla extract. If you like a sweeter slush, consider adding a bit more sugar at this stage.
  3. Add the zest of 1 orange to the blender. This step is crucial for enhancing the citrus flavor of your slush. Make sure not to include the bitter white pith—only the flavorful zest.
  4. Blend the mixture on medium-high speed for about 30-45 seconds. Stop once the ingredients are fully combined and the slush has a smooth, even consistency. If you notice large chunks of ice, blend for an additional 10-15 seconds. Avoid over-blending, as this can make the slush too liquidy.
  5. Once blended, taste the slush. If it needs more sweetness, add a little more sugar and blend for a few more seconds. If it’s too thick, you can add a splash of milk to reach your desired consistency.
  6. Pour the slush into glasses. This recipe typically serves 4, but you can easily double it for larger gatherings. Use a spoon to help guide the slush into the glasses if needed.
  7. Garnish each serving with fresh orange slices and mint leaves. The mint not only adds a pop of color but also a refreshing aroma that complements the citrus flavors beautifully.
  8. Serve immediately and enjoy! If you’ve made extra, you can refrigerate it for a short time, but it's best enjoyed fresh.
  • Prep Time: 15 min
  • Cook Time: 0 min
  • Category: Dessert
  • Method: Blending
  • Cuisine: American

Nutrition

  • Serving Size: 1 serving
  • Calories: 200
  • Sugar: 30 g
  • Sodium: 50 mg
  • Fat: 5 g
  • Saturated Fat: 3 g
  • Unsaturated Fat: 2 g
  • Trans Fat: 0 g
  • Carbohydrates: 40 g
  • Fiber: 1 g
  • Protein: 2 g
  • Cholesterol: 20 mg

Keywords: Don't skip the orange zest! It's a game-changer for flavor. Always zest before juicing to make it easier.

Did you make this recipe?

Share a photo and tag us — we can't wait to see what you've made!

Zesty Lemon Poppy Seed Delight

One rainy afternoon, I found myself in my grandmother’s cozy kitchen, the kind that always smelled like warmth and love. She was whipping up her famous Lemon Poppy Seed Loaf, a recipe that had been passed down through generations. As the batter came together, the zesty aroma of fresh lemons filled the air, mingling perfectly with the nutty fragrance of poppy seeds. I can still picture her, apron-clad, as she expertly drizzled a vibrant citrus icing over the loaf, creating a glossy, sun-kissed finish that beckoned us to dive in. It was a moment that sparked my own passion for baking, and this recipe has become a cherished staple in my home ever since.

When you take a bite of this Lemon Poppy Seed Loaf, it’s like a burst of sunshine on your palate. The loaf is beautifully golden, with a tender crumb that melts in your mouth. Each slice is speckled with tiny poppy seeds, adding a delightful crunch that contrasts beautifully with the tangy sweetness of the lemon. And that citrus icing? It’s the finishing touch that elevates this loaf from ordinary to extraordinary, with its bright, zesty flavor dancing on your taste buds.

This recipe stands out because it embraces simplicity while delivering on flavor. I’ve added a hint of vanilla to the batter, enhancing the overall taste and making it even more indulgent. Trust me, once you make this Lemon Poppy Seed Loaf With Citrus Icing, it’ll become a go-to in your baking repertoire.

So, let me show you exactly how to make it!

Zesty Lemon Poppy Seed Delight

Why You’ll Love This Recipe

  • Moist and tender crumb that melts in your mouth, thanks to the perfect balance of butter and buttermilk.
  • Bright, zesty lemon flavor paired with crunchy poppy seeds, creating a delightful texture and taste experience.
  • Easy to whip up in just about an hour, perfect for last-minute gatherings or a cozy afternoon treat.
  • Budget-friendly with everyday ingredients, making it an accessible option for all home bakers.
  • The citrus icing adds a sweet tang that elevates the loaf, turning a simple recipe into a showstopper!

Ingredients

  • 1 ½ cups (190g) all-purpose flour
  • 1 teaspoon baking powder
  • ½ teaspoon baking soda
  • ½ teaspoon salt
  • 3 tablespoons poppy seeds
  • ½ cup (115g) unsalted butter, softened to room temperature
  • 1 cup (200g) granulated sugar
  • 2 large eggs
  • 1 teaspoon vanilla extract
  • 1 teaspoon lemon zest (from about 1 medium lemon)
  • ½ cup (120ml) buttermilk
  • 2 tablespoons fresh lemon juice

For the Citrus Icing:

  • 1 cup (120g) powdered sugar
  • 2 tablespoons fresh lemon juice
  • 1 tablespoon orange juice
  • 1 teaspoon lemon zest (for garnish, optional)

Let’s dive into the key ingredients that make this Lemon Poppy Seed Loaf so special. The all-purpose flour provides the structure and base for the loaf, while the baking powder and baking soda ensure it rises perfectly, giving the loaf a light texture. For a gluten-free variation, you could substitute the flour with a gluten-free all-purpose blend. Poppy seeds not only add a delightful crunch but also contribute to the unique flavor profile that pairs well with the citrus notes.

Unsalted butter is crucial for achieving the buttery richness that makes this loaf so moist. If you’re looking for a dairy-free option, coconut oil or a vegan butter can be used instead. The buttermilk is another essential component, providing acidity that activates the baking soda for a fluffy texture. If you don’t have buttermilk on hand, you can easily make a substitute by mixing ½ cup of milk with 1 tablespoon of vinegar or lemon juice and letting it sit for about 5 minutes.

Step-by-Step Instructions

  1. Preheat your oven to 350°F (175°C). Grease a 9×5-inch loaf pan or line it with parchment paper for easy removal later.
  2. In a medium mixing bowl, whisk together 1 ½ cups of all-purpose flour, 1 teaspoon of baking powder, ½ teaspoon of baking soda, ½ teaspoon of salt, and 3 tablespoons of poppy seeds. This helps to evenly distribute the baking agents and ensures a uniform rise.
  3. In a large mixing bowl, cream together ½ cup of softened unsalted butter and 1 cup of granulated sugar using an electric mixer on medium speed for about 3-4 minutes, until the mixture is light and fluffy. Make sure to scrape down the sides of the bowl occasionally.
  4. Add 2 large eggs, 1 teaspoon of vanilla extract, and 1 teaspoon of lemon zest to the creamed butter and sugar, mixing until fully combined. You want a smooth consistency, so ensure there are no lumps of butter.
  5. In a small bowl, combine ½ cup of buttermilk and 2 tablespoons of fresh lemon juice. Alternately add the dry ingredients and buttermilk mixture to the butter mixture, starting and ending with the dry ingredients. Mix just until combined; do not overmix, as this can lead to a dense loaf.
  6. Pour the batter into the prepared loaf pan. Smooth the top with a spatula, ensuring it’s even. Bake in the preheated oven for 50-60 minutes, or until a toothpick inserted in the center comes out clean. The edges should be lightly golden brown, and the center should feel just set.
  7. Once baked, remove the loaf from the oven and allow it to cool in the pan for about 10 minutes. Then, transfer it to a wire rack to cool completely. Resist the urge to slice too soon, as it will be crumbly if it’s still warm.
  8. While the loaf is cooling, prepare the citrus icing. In a medium bowl, whisk together 1 cup of powdered sugar, 2 tablespoons of fresh lemon juice, and 1 tablespoon of orange juice until smooth. If the icing is too thick, you can add a little more juice to reach your desired consistency.
  9. Once the loaf is completely cool, drizzle the citrus icing over the top. If you like, sprinkle with an additional teaspoon of lemon zest for an extra pop of flavor and color.

Pro Tips for the Best Lemon Poppy Seed Loaf With Citrus Icing

  • Be careful not to overmix your batter; this is a common mistake that can lead to a dense loaf. Mix just until the dry ingredients are incorporated for a light and fluffy texture.
  • Use room temperature ingredients, especially the butter and eggs. This helps to create a smoother batter and ensures even baking. Take your eggs out of the fridge about 30 minutes before you start.
  • For a more pronounced lemon flavor, consider adding a little lemon extract in addition to the zest and juice. Just a half teaspoon can elevate the citrus notes significantly.
  • When measuring your flour, spoon it into the measuring cup and level it off with a knife instead of scooping directly from the bag. This prevents packing and ensures you don’t end up with a dry loaf.
  • Invest in a good quality loaf pan; it makes a difference in heat distribution, which ensures even baking. If your pan is dark-coated, reduce the oven temperature by 25°F to prevent over-browning.

Variations & Serving Ideas

For a delightful twist, consider adding blueberries or raspberries to the batter for a fruity burst of flavor. You can also experiment with different citrus fruits—try lime or grapefruit zest and juice for a refreshing change. For a healthier option, substitute half of the all-purpose flour with whole wheat flour for added fiber without compromising too much on texture.

This Lemon Poppy Seed Loaf pairs beautifully with a light salad, such as a mixed greens salad with a vinaigrette, or a cup of tea for a cozy afternoon treat. It also complements a creamy cheese platter, as the acidity of the loaf balances rich cheeses perfectly. Lastly, a scoop of vanilla ice cream on the side creates a delightful contrast of temperatures and flavors!

Storage, Make-Ahead & Reheating

This Lemon Poppy Seed Loaf can be stored at room temperature for up to 3 days if wrapped tightly in plastic wrap. If you want to keep it longer, it freezes well for up to 3 months. To freeze, wrap the loaf tightly in plastic wrap and then in aluminum foil to prevent freezer burn.

When you’re ready to enjoy it again, simply thaw it in the fridge overnight. Reheat individual slices in the microwave for 15-20 seconds or in a toaster oven until warmed through. Interestingly, many people find that this loaf tastes even better the next day, as the flavors have time to meld!

Frequently Asked Questions

Can I make Lemon Poppy Seed Loaf With Citrus Icing ahead of time?

Yes — in fact, it tastes even better the next day! You can make the loaf a day in advance, allowing the flavors to develop. Just be sure to store it in an airtight container to maintain its moisture.

Can I substitute the poppy seeds?

Absolutely! If you don’t have poppy seeds on hand or prefer an alternative, you can use sesame seeds for a similar crunch or omit them entirely for a smooth loaf.

What can I use instead of buttermilk?

If you don’t have buttermilk, you can easily create a substitute by mixing ½ cup of milk (dairy or plant-based) with 1 tablespoon of vinegar or lemon juice. Let it sit for 5 minutes before using in the recipe.

How can I make this recipe gluten-free?

To make a gluten-free version of this Lemon Poppy Seed Loaf, substitute the all-purpose flour with a gluten-free all-purpose flour blend. Just ensure that the blend contains a binding agent like xanthan gum for the best results.

What is the best way to store leftover loaf?

Leftover Lemon Poppy Seed Loaf should be stored in an airtight container at room temperature for up to 3 days. For longer storage, wrap it tightly and freeze for up to 3 months. Thaw it before serving for the best texture.

Zesty Lemon Poppy Seed Delight

Final Thoughts

The Lemon Poppy Seed Loaf with Citrus Icing is truly a delightful treat that brings a burst of brightness to any occasion. The zesty lemon flavor combined with the subtle crunch of poppy seeds creates a satisfying balance, while the citrus icing adds a touch of sweetness that perfectly complements the loaf’s tanginess.

This is the kind of recipe I come back to again and again, especially when I want to brighten up a gloomy day or celebrate a small victory. The aroma that fills the kitchen as it bakes is absolutely heavenly! I encourage you to give this recipe a try; you might just find it becoming a beloved staple in your home. Don’t forget to share your results or even add your own unique twist—I can’t wait to see what you create!

Print
clock clock iconcutlery cutlery iconflag flag iconfolder folder iconinstagram instagram iconpinterest pinterest iconfacebook facebook iconprint print iconsquares squares iconheart heart iconheart solid heart solid icon

Lemon Poppy Seed Loaf


  • Author: Lily author
  • Total Time: 34 minute
  • Yield: 1 loaf 1x
Pin Recipe
Print Recipe

Description

This Lemon Poppy Seed Loaf is a delightful treat that combines zesty lemon flavor with crunchy poppy seeds. Topped with a citrus icing, it’s perfect for any occasion.


Ingredients

Scale
  • 1 ½ cups (190g) all-purpose flour
  • 1 teaspoon baking powder
  • ½ teaspoon baking soda
  • ½ teaspoon salt
  • 3 tablespoons poppy seeds
  • ½ cup (115g) unsalted butter, softened to room temperature
  • 1 cup (200g) granulated sugar
  • 2 large eggs
  • 1 teaspoon vanilla extract
  • 1 teaspoon lemon zest (from about 1 medium lemon)
  • ½ cup (120ml) buttermilk
  • 2 tablespoons fresh lemon juice
  • 1 cup (120g) powdered sugar
  • 2 tablespoons fresh lemon juice
  • 1 tablespoon orange juice
  • 1 teaspoon lemon zest (for garnish, optional)

Instructions

  1. Preheat your oven to 350°F (175°C). Grease a 9×5-inch loaf pan or line it with parchment paper for easy removal later.
  2. In a medium mixing bowl, whisk together 1 ½ cups of all-purpose flour, 1 teaspoon of baking powder, ½ teaspoon of baking soda, ½ teaspoon of salt, and 3 tablespoons of poppy seeds. This helps to evenly distribute the baking agents and ensures a uniform rise.
  3. In a large mixing bowl, cream together ½ cup of softened unsalted butter and 1 cup of granulated sugar using an electric mixer on medium speed for about 3-4 minutes, until the mixture is light and fluffy. Make sure to scrape down the sides of the bowl occasionally.
  4. Add 2 large eggs, 1 teaspoon of vanilla extract, and 1 teaspoon of lemon zest to the creamed butter and sugar, mixing until fully combined. You want a smooth consistency, so ensure there are no lumps of butter.
  5. In a small bowl, combine ½ cup of buttermilk and 2 tablespoons of fresh lemon juice. Alternately add the dry ingredients and buttermilk mixture to the butter mixture, starting and ending with the dry ingredients. Mix just until combined; do not overmix, as this can lead to a dense loaf.
  6. Pour the batter into the prepared loaf pan. Smooth the top with a spatula, ensuring it’s even. Bake in the preheated oven for 50-60 minutes, or until a toothpick inserted in the center comes out clean. The edges should be lightly golden brown, and the center should feel just set.
  7. Once baked, remove the loaf from the oven and allow it to cool in the pan for about 10 minutes. Then, transfer it to a wire rack to cool completely. Resist the urge to slice too soon, as it will be crumbly if it’s still warm.
  8. While the loaf is cooling, prepare the citrus icing. In a medium bowl, whisk together 1 cup of powdered sugar, 2 tablespoons of fresh lemon juice, and 1 tablespoon of orange juice until smooth. If the icing is too thick, you can add a little more juice to reach your desired consistency.
  9. Once the loaf is completely cool, drizzle the citrus icing over the top. If you like, sprinkle with an additional teaspoon of lemon zest for an extra pop of flavor and color.
  • Prep Time: 15 mins
  • Cook Time: 50-60 mins
  • Category: Dessert
  • Method: Baking
  • Cuisine: American

Nutrition

  • Serving Size: 1 slice
  • Calories: 200
  • Sugar: 15 g
  • Sodium: 150 mg
  • Fat: 8 g
  • Saturated Fat: 5 g
  • Unsaturated Fat: 3 g
  • Trans Fat: 0 g
  • Carbohydrates: 30 g
  • Fiber: 1 g
  • Protein: 3 g
  • Cholesterol: 40 mg

Keywords: Be careful not to overmix your batter; this is a common mistake that can lead to a dense loaf. Use room temperature ingredients for a smoother batter and even baking.

Did you make this recipe?

Share a photo and tag us — we can't wait to see what you've made!

  • Privacy Policy
  • Terms Of Service
  • Contact
  • About
  • GDPR

Copyright © 2025 Homesmad