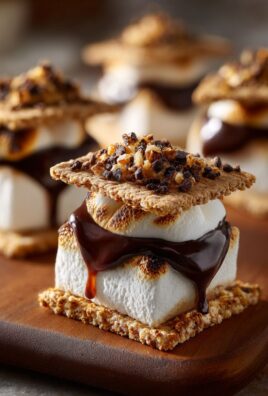
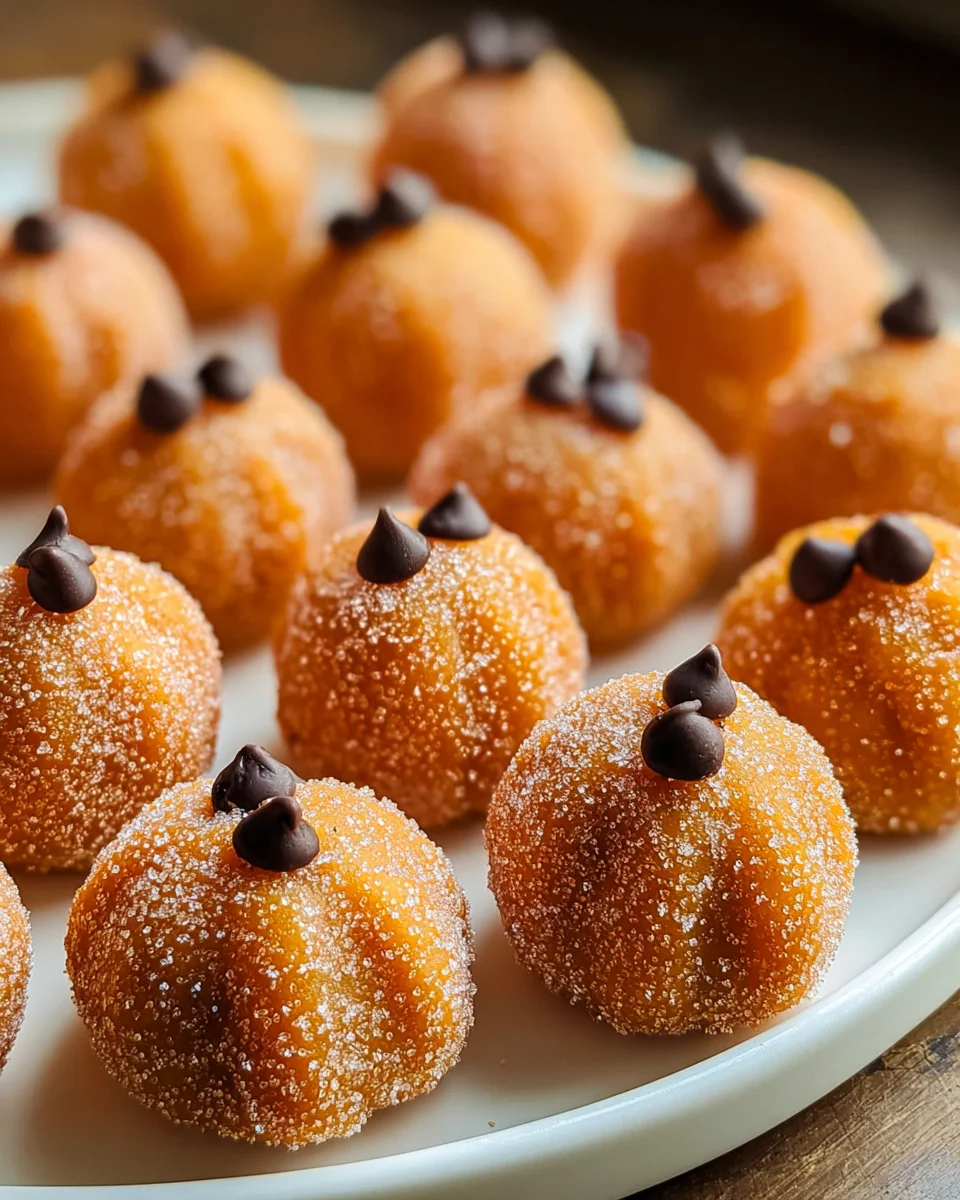
Pumpkin Cheesecake Truffles are more than just a dessert; they’re a tiny, exquisite celebration of autumn in every bite, promising to captivate your taste buds from the very first nibble. Imagine the creamy, spiced delight of pumpkin cheesecake, condensed into a perfect, bite-sized sphere, coated in a delicate shell. It’s no wonder these little gems become an instant favorite wherever they appear, offering all the indulgence of a classic dessert without the need for a fork or a large slice. I find them utterly irresistible!
While the concept of a “truffle” traditionally refers to luxurious chocolate ganache confections, inspired by their earthy namesake, modern culinary creativity has embraced the form to celebrate a myriad of iconic flavor profiles. Pumpkin cheesecake, on the other hand, has become a quintessential American autumn dessert, symbolizing warmth, harvest, and the joy of festive gatherings. Marrying these two beloved concepts creates a truly delightful fusion, blending classic dessert elegance with the comforting, spicy notes we adore during the fall season.
People absolutely adore these truffles for their irresistible blend of rich cream cheese, warm pumpkin spice, and a delightful, smooth texture that simply melts in your mouth. They’re incredibly convenient for entertaining, perfect for holiday platters, or simply as an indulgent treat when you crave something special. Plus, they offer a fantastic make-ahead option, simplifying your dessert preparations without compromising on flavor or presentation. Whether you’re a seasoned baker or just looking for an impressive yet easy treat, these Pumpkin Cheesecake Truffles are guaranteed to be a showstopper.

Ingredients:
- Two 8-ounce packages (16 ounces total) cream cheese, full-fat, softened to room temperature
- 1 cup pure pumpkin puree (not pumpkin pie filling)
- 3 cups powdered sugar, sifted
- 1 ½ cups fine graham cracker crumbs (about 10-12 full graham cracker sheets processed into crumbs)
- 2 teaspoons pumpkin pie spice
- 1 teaspoon pure vanilla extract
- 1 pound good quality white chocolate, chopped or in melting wafers, for coating
- Optional: 1-2 teaspoons coconut oil or vegetable shortening (for thinning chocolate, if needed)
- Optional: Festive sprinkles, additional cinnamon, or a drizzle of dark chocolate for decoration
Preparing the Pumpkin Cheesecake Filling
Creating the perfectly smooth and flavorful base for these delightful Pumpkin Cheesecake Truffles is the foundational step. Each ingredient plays a crucial role in achieving the right texture and taste.
- Ensure Cream Cheese is Properly Softened: This step is absolutely critical for a smooth truffle filling. I always make sure to remove my two 8-ounce packages of full-fat cream cheese from the refrigerator at least an hour, or even two, before I plan to start mixing. If you forget, a quick trick is to unwrap the cream cheese, cut it into smaller cubes, and spread them out on a plate. Let them sit at room temperature for about 15-20 minutes, or you can even microwave them on low power (30% or less) in 10-second bursts, flipping halfway, until just softened but not melted. You want it pliable enough to whip easily, but not warm or oily. This prevents lumps in your mixture, ensuring your Pumpkin Cheesecake Truffles have that signature silky texture.
- Whip the Softened Cream Cheese: In a large mixing bowl, using either a stand mixer fitted with the paddle attachment or a hand mixer, beat the softened cream cheese on medium speed for 2-3 minutes. I aim for a really light, fluffy, and completely smooth consistency. Scrape down the sides and bottom of the bowl frequently with a rubber spatula to ensure no unmixed cream cheese is left clinging to the bowl. This initial aeration also helps contribute to the truffle’s delightful texture.
- Incorporate the Pumpkin Puree: Now, it’s time to add that lovely autumnal flavor! Add the 1 cup of pure pumpkin puree to the whipped cream cheese. It is so important here to use pure pumpkin puree and not pumpkin pie filling. Pumpkin pie filling comes pre-sweetened and spiced, which would throw off the flavor balance of our Pumpkin Cheesecake Truffles significantly. Mix on low speed until just combined. Overmixing at this stage can incorporate too much air, which we want to avoid once the dry ingredients are added. Again, scrape down the bowl to ensure everything is evenly incorporated.
- Gradually Add Sifted Powdered Sugar: Next, add the 3 cups of sifted powdered sugar. I always sift my powdered sugar for this recipe because it helps prevent any lumps from forming in the filling, leading to a much smoother final product. Add it in two or three additions, mixing on low speed after each addition until just combined. The mixture will start to thicken considerably and take on that characteristic cheesecake texture. Scrape the bowl thoroughly after each addition. If you add it all at once, you risk a cloud of sugar flying up from your mixer, and we definitely want to avoid that!
- Introduce the Spices and Vanilla: Sprinkle in the 2 teaspoons of pumpkin pie spice and the 1 teaspoon of pure vanilla extract. These ingredients are essential for giving our Pumpkin Cheesecake Truffles their warm, inviting aroma and flavor. Mix on low speed until the spices and vanilla are fully distributed throughout the pumpkin cheesecake mixture. The aroma will instantly transport you to a cozy autumn day!
- Fold in the Graham Cracker Crumbs: Finally, add the 1 ½ cups of fine graham cracker crumbs. These crumbs are absolutely essential for giving the truffle mixture structure and body, making it firm enough to roll into balls. Without them, your filling would be too soft and difficult to handle. Add them to the bowl and mix on the lowest speed or, even better, fold them in by hand using a sturdy spatula until they are just incorporated. Be careful not to overmix at this stage; we just want the crumbs evenly distributed and absorbed by the moist pumpkin cheesecake mixture. The final consistency should be thick, pliable, and easy to handle, almost like a very thick cookie dough. Scrape the bottom and sides one last time to ensure everything is perfectly combined.
Chilling the Truffle Mixture
This phase is non-negotiable for success when making Pumpkin Cheesecake Truffles. Proper chilling ensures the mixture firms up enough to be easily scooped and rolled without becoming sticky or losing its shape.
- Prepare for Chilling: Cover the bowl containing your pumpkin cheesecake mixture tightly with plastic wrap. I like to press the plastic wrap directly onto the surface of the mixture to prevent a skin from forming. Alternatively, you can transfer the mixture to a shallow baking dish or an airtight container, which can sometimes speed up the chilling process due to a larger surface area exposed to the cold.
- Refrigerate Thoroughly: Place the covered bowl or container in the refrigerator for at least 2-3 hours. However, I find that chilling it for a minimum of 4 hours, or even better, overnight, yields the absolute best results. This extended chilling time allows the flavors to meld beautifully and, more importantly, ensures the mixture is incredibly firm and easy to handle. If the mixture isn’t cold enough, it will be sticky and messy to roll, leading to frustration and misshapen Pumpkin Cheesecake Truffles. Don’t rush this step!
Forming the Pumpkin Cheesecake Truffles
Once your truffle mixture is perfectly chilled, the fun part of shaping these festive treats begins! Consistency in size and a gentle touch are key here.
- Prepare Your Workstation: Line a large baking sheet (or two smaller ones) with parchment paper or a silicone baking mat. This will prevent your rolled truffles from sticking and make transfer easier later. Gather your tools: I find a small cookie scoop (about 1 tablespoon in size) to be invaluable for portioning. You could also use a measuring spoon.
- Scoop and Roll the Truffles: Remove the chilled pumpkin cheesecake mixture from the refrigerator. Using your small cookie scoop, portion out uniform amounts of the mixture. Uniformity is important for even coating and a professional look for your Pumpkin Cheesecake Truffles. Once scooped, gently roll each portion between the palms of your hands to form smooth, round balls. My hands are usually a bit cool, which helps prevent the mixture from melting and becoming sticky. If the mixture starts to get too soft during rolling, pop it back into the fridge for 10-15 minutes to firm up again. Aim for truffle sizes that are about 1 inch to 1.5 inches in diameter. This recipe typically yields about 30-36 truffles, depending on their size.
- Chill Again (Optional but Recommended): Once all the truffles are rolled and placed on your parchment-lined baking sheet, I highly recommend placing the entire tray back into the refrigerator for another 30-60 minutes. This second chill firms up the exterior of the truffles even more, making them much easier to coat in chocolate without them falling apart or softening too quickly when they hit the warm chocolate. This is a small step that makes a big difference in the final presentation of your Pumpkin Cheesecake Truffles.
Coating and Decorating the Truffles
This is where your Pumpkin Cheesecake Truffles get their irresistible outer shell and beautiful finishing touches. Melting chocolate correctly is paramount here!
-
Prepare the White Chocolate for Melting: Using good quality white chocolate is a game-changer for taste and how easily it melts and coats. I prefer using white chocolate melting wafers or a good quality white chocolate bar chopped into small, uniform pieces. Avoid chocolate chips if possible, as they often contain stabilizers that prevent smooth melting. You have two excellent options for melting:
- Double Boiler Method (My preferred method for control): Fill a saucepan with about an inch or two of water and bring it to a gentle simmer over medium-low heat. Place a heatproof bowl (glass or stainless steel) over the saucepan, ensuring the bottom of the bowl does not touch the simmering water. Add your chopped white chocolate to the bowl. Stir occasionally with a clean, dry rubber spatula as the chocolate slowly melts. This method provides gentle, even heat, significantly reducing the risk of scorching or seizing the chocolate. Once about two-thirds of the chocolate is melted, remove the bowl from the heat (but leave it over the warm water if possible) and continue stirring until completely smooth. The residual heat will melt the remaining pieces.
- Microwave Method (Faster, but requires more vigilance): Place your chopped white chocolate in a microwave-safe bowl. Microwave on 50% power for 30-second intervals, stirring thoroughly after each interval. White chocolate can seize or burn very easily, so it’s crucial to go slowly and stir often. The chocolate may not look fully melted at first, but stirring will help redistribute the heat and melt any remaining lumps. Stop microwaving when there are still a few small lumps remaining, and continue stirring until completely smooth. If the chocolate seems too thick for dipping, you can stir in 1-2 teaspoons of coconut oil or vegetable shortening until you reach a smooth, dippable consistency.
Important Tip: Ensure absolutely no water or steam comes into contact with your melting chocolate, as this will cause it to seize and become thick and grainy, making it unusable for coating.
- Dip the Chilled Truffles: Remove the chilled Pumpkin Cheesecake Truffles from the refrigerator. Using a dipping fork or a regular fork, carefully drop one truffle into the melted white chocolate. Make sure it’s fully submerged. Gently lift the truffle out of the chocolate, tapping the fork against the edge of the bowl to allow any excess chocolate to drip off. You want a thin, even coating.
- Place and Decorate: Carefully transfer the coated truffle back to the parchment-lined baking sheet. Before the chocolate sets, sprinkle with festive sprinkles, a light dusting of cinnamon, or if you’re feeling fancy, drizzle with a contrasting melted dark chocolate for an elegant touch. Work quickly, as white chocolate tends to set relatively fast. Repeat this process with the remaining truffles, melting more white chocolate as needed.
- Allow Truffles to Set: Once all your Pumpkin Cheesecake Truffles are coated and decorated, place the baking sheets back into the refrigerator for at least 20-30 minutes, or until the chocolate coating is completely set and firm to the touch. This ensures the coating is crisp and won’t smudge when handled.
- Final Storage: Once fully set, you can gently remove the Pumpkin Cheesecake Truffles from the parchment paper. Store them in an airtight container in the refrigerator for up to 1 week. For the best flavor and texture, I always recommend letting them sit at room temperature for about 10-15 minutes before serving, which allows the cheesecake filling to soften slightly and become incredibly creamy. These are truly a delightful autumn treat, and I hope you enjoy making and sharing them as much as I do!
Conclusion:
As we wrap up our journey through this delightful recipe, I truly hope you’re feeling as excited as I am about creating these amazing treats. This isn’t just any dessert; it’s a vibrant, bite-sized celebration of everything wonderful about fall, wrapped up in a creamy, dreamy package. The incredible fusion of rich, spiced pumpkin and tangy, smooth cheesecake is what truly sets this recipe apart, making it an absolute must-try for anyone who appreciates a touch of seasonal magic. Forget the fuss of a full pie or an elaborate cake – these truffles deliver all the decadent flavors with a fraction of the effort, perfect for both novice bakers and seasoned pros looking for something spectacular yet simple. They strike that perfect balance between comfort and elegance, offering a sophisticated taste experience that is surprisingly easy to achieve. Every single bite is a burst of autumn, reminiscent of cozy evenings and festive gatherings, making them an instant crowd-pleaser and a guaranteed conversation starter at any event. I can confidently say that once you taste these, you’ll understand exactly why I’m so passionate about sharing this particular creation. It’s not just a recipe; it’s an experience, a little moment of joy you can create and share.
Now, let’s talk about making these beauties shine even brighter, or perhaps putting your own creative spin on them! When it comes to serving, these truffles are incredibly versatile. Picture them nestled artfully on a tiered dessert stand at your next holiday party, or simply arranged on a beautiful platter for a cozy family get-together. They pair wonderfully with a hot cup of coffee, a creamy chai latte, or even a glass of sparkling cider. For an extra touch of flair, you could dust them with a light coating of cocoa powder or a sprinkle of cinnamon sugar just before serving. Don’t hesitate to explore variations to make these Pumpkin Cheesecake Truffles uniquely yours. While our recipe calls for a classic chocolate coating, consider experimenting with different types of chocolate – a rich dark chocolate offers a sophisticated contrast, while white chocolate can create an even sweeter, milder treat. You could even try a sprinkle of finely chopped pecans or walnuts over the chocolate coating before it sets for added texture and a nutty flavor. For a more festive look, crushed gingersnaps or graham cracker crumbs pressed into the wet chocolate coating would be absolutely divine, adding another layer of flavor and crunch. Imagine a drizzle of salted caramel over the finished truffles for an extra layer of indulgence! These little bites are also perfect for gifting; arrange them in a decorative box, and you’ve got a thoughtful, homemade present that’s sure to impress. They’re fantastic for making ahead, too; just keep them chilled until about 15-20 minutes before serving to allow them to soften slightly for the best texture.
So, there you have it – all the reasons why this recipe deserves a prime spot in your culinary repertoire, along with endless possibilities for customization and presentation. I genuinely encourage you to roll up your sleeves and give these utterly irresistible truffles a try. You’ll be amazed at how simple it is to create something so incredibly delicious and visually appealing. Don’t just read about them; make them, taste them, and revel in the pure joy they bring. I’m truly excited for you to experience the magic of these creamy, spiced delights. Once you’ve whipped up your batch, please don’t keep it to yourself! I would absolutely love to hear about your experience. Did you try a new coating? Did you serve them with a special drink? Share your photos, your feedback, and any creative twists you came up with in the comments section or on social media. Your culinary adventures inspire me, and I can’t wait to see your wonderful creations. Happy baking, and enjoy every single delightful bite!
Delicious Pumpkin Cheesecake Truffles | Perfect Fall Dessert
Pumpkin Cheesecake Truffles are a tiny, exquisite celebration of autumn in every bite. Imagine the creamy, spiced delight of pumpkin cheesecake, condensed into a perfect, bite-sized sphere, coated in a delicate shell. These irresistible gems are perfect for entertaining or as an indulgent treat, offering all the indulgence of a classic dessert without a fork.
Ingredients
Instructions
Important Information
Nutrition Facts (Per Serving)
It is important to consider this information as approximate and not to use it as definitive health advice.
Allergy Information
Please check ingredients for potential allergens and consult a health professional if in doubt.