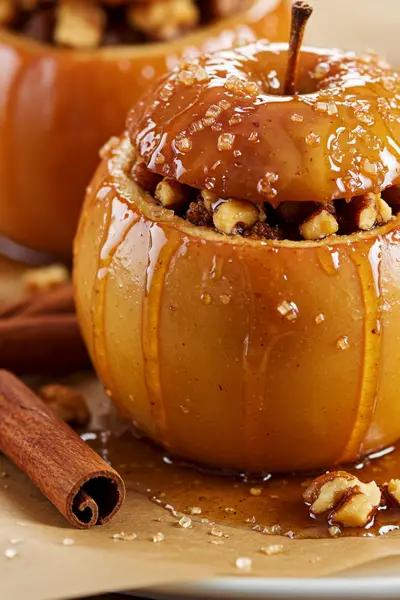
Salted Caramel Apple Crumble Bars Fall Treat is more than just a dessert; for me, it’s an irresistible invitation to fully embrace the crisp air and cozy flavors of autumn. I find myself dreaming of these bars as soon as the leaves begin to turn, anticipating that first delightful bite. Imagine sinking your teeth into a perfectly balanced symphony of tart, tender apples, gooey salted caramel, and a buttery, crumbly topping, all conveniently presented in one delightful bar that’s ready to be savored.
For generations, apple desserts have been a beloved cornerstone of fall gatherings, celebrating the abundant harvest. I believe the crumble, a simpler yet equally satisfying cousin to the traditional pie, offers a rustic charm that truly resonates with the season’s spirit. The ingenious addition of rich, sweet, and perfectly salted caramel elevates this classic to new heights of indulgence, transforming it into a modern favorite. This particular treat artfully combines everything I adore about fall baking: the crisp, sweet-tart apples soften beautifully, mingling with the irresistible sweetness of caramel, perfectly cut by a hint of sea salt. The crumble provides a delightful textural contrast – crunchy on top, tender below – making each bite an absolute joy. It’s the ultimate crowd-pleaser and a quintessential Salted Caramel Apple Crumble Bars Fall Treat that truly captures the essence of the season, perfect for sharing with loved ones or savoring on a quiet afternoon.

Ingredients:
-
For the Shortbread Crust & Crumble Topping:
- 2 ½ cups (300g) all-purpose flour
- ¾ cup (150g) granulated sugar
- ½ cup (100g) packed light brown sugar
- 1 teaspoon salt
- 1 cup (226g) unsalted butter, very cold and cut into ½-inch cubes
- 1 teaspoon pure vanilla extract
-
For the Salted Caramel Apple Filling:
- 6 medium baking apples (about 4 ½ – 5 pounds), such as Honeycrisp, Fuji, Gala, or a mix of Granny Smith for tartness
- ½ cup (100g) packed light brown sugar
- ¼ cup (30g) all-purpose flour
- 1 ½ teaspoons ground cinnamon
- ½ teaspoon ground nutmeg
- ¼ teaspoon ground cloves (optional, but lovely for a fall treat!)
- 1 tablespoon fresh lemon juice
- ¼ teaspoon salt
-
For the Salted Caramel Drizzle (Optional but Highly Recommended!):
- ½ cup (100g) granulated sugar
- 2 tablespoons water
- ¼ cup (60ml) heavy cream, warmed
- 2 tablespoons unsalted butter, room temperature
- ½ teaspoon pure vanilla extract
- ½ teaspoon flaky sea salt (like Maldon), plus extra for sprinkling
For the Shortbread Crust & Crumble Topping:
- Prepare your baking pan: First things first, let’s get our pan ready. Preheat your oven to 375°F (190°C). Line a 9×13-inch baking pan with parchment paper, leaving an overhang on the sides. This overhang acts as a convenient sling, making it much easier to lift the cooled bars out of the pan. A little non-stick cooking spray on the bottom of the pan before laying the parchment down can help hold it in place.
- Combine dry ingredients: In a large mixing bowl, whisk together the all-purpose flour, granulated sugar, light brown sugar, and salt until they are thoroughly combined. This ensures an even distribution of sweetness and seasoning throughout our delightful crust and crumble. Using a whisk helps to break up any lumps in the sugars and aerate the flour slightly.
- Cut in the cold butter: Add the very cold, cubed unsalted butter and the vanilla extract to the dry ingredients. Now, this is where the magic happens! Using a pastry blender, two knives, or your fingertips, cut the butter into the flour mixture until it resembles coarse crumbs with some pea-sized pieces of butter still visible. The key here is to work quickly so the butter doesn’t melt too much. Cold butter is crucial for a tender, flaky shortbread crust and a wonderfully crumbly topping. If your butter gets too warm, the dough will be greasy and tough. If you’re using your hands, try to use just your fingertips as they are cooler than your palms.
- Separate the mixture for crust and crumble: Remove about 1 ½ cups of this mixture and set it aside in a separate bowl. This reserved portion will become our fantastic crumble topping. It’s a generous amount, ensuring we get that lovely textural contrast over our apple filling.
- Form the crust: Take the remaining mixture in the large bowl and press it evenly into the bottom of your prepared 9×13-inch pan. You can use your hands, the back of a measuring cup, or a flat-bottomed glass to really compact it down. Make sure it’s a firm, even layer from edge to edge. A well-pressed crust will hold up beautifully when slicing these Salted Caramel Apple Crumble Bars Fall Treat later on.
- Pre-bake the crust: Bake the crust in the preheated oven for 15-18 minutes, or until the edges are lightly golden brown. This pre-baking step, often called blind baking, helps to set the crust and prevents it from becoming soggy once the apple filling is added. While the crust is baking, let’s get started on our incredible apple filling!
For the Salted Caramel Apple Filling:
- Prepare the apples: While the crust is pre-baking, peel, core, and thinly slice your apples. I find that slicing them about ¼-inch thick is perfect – not too chunky, but still thick enough to maintain some texture after baking. If you’re using a mix of apples, like I often do, the different textures and tartness levels will add wonderful complexity to the filling. For instance, Granny Smiths offer a delightful tang that balances the sweetness, while Honeycrisps provide a lovely crispness that holds up well.
- Combine filling ingredients: In a very large bowl, combine the sliced apples, light brown sugar, all-purpose flour, ground cinnamon, ground nutmeg, optional ground cloves, fresh lemon juice, and salt. Gently toss everything together until the apples are thoroughly coated with the spice and sugar mixture. The flour in the mixture acts as a thickener, ensuring our apple filling doesn’t become too watery. The lemon juice brightens the flavors and helps prevent the apples from browning.
Assembling the Salted Caramel Apple Crumble Bars:
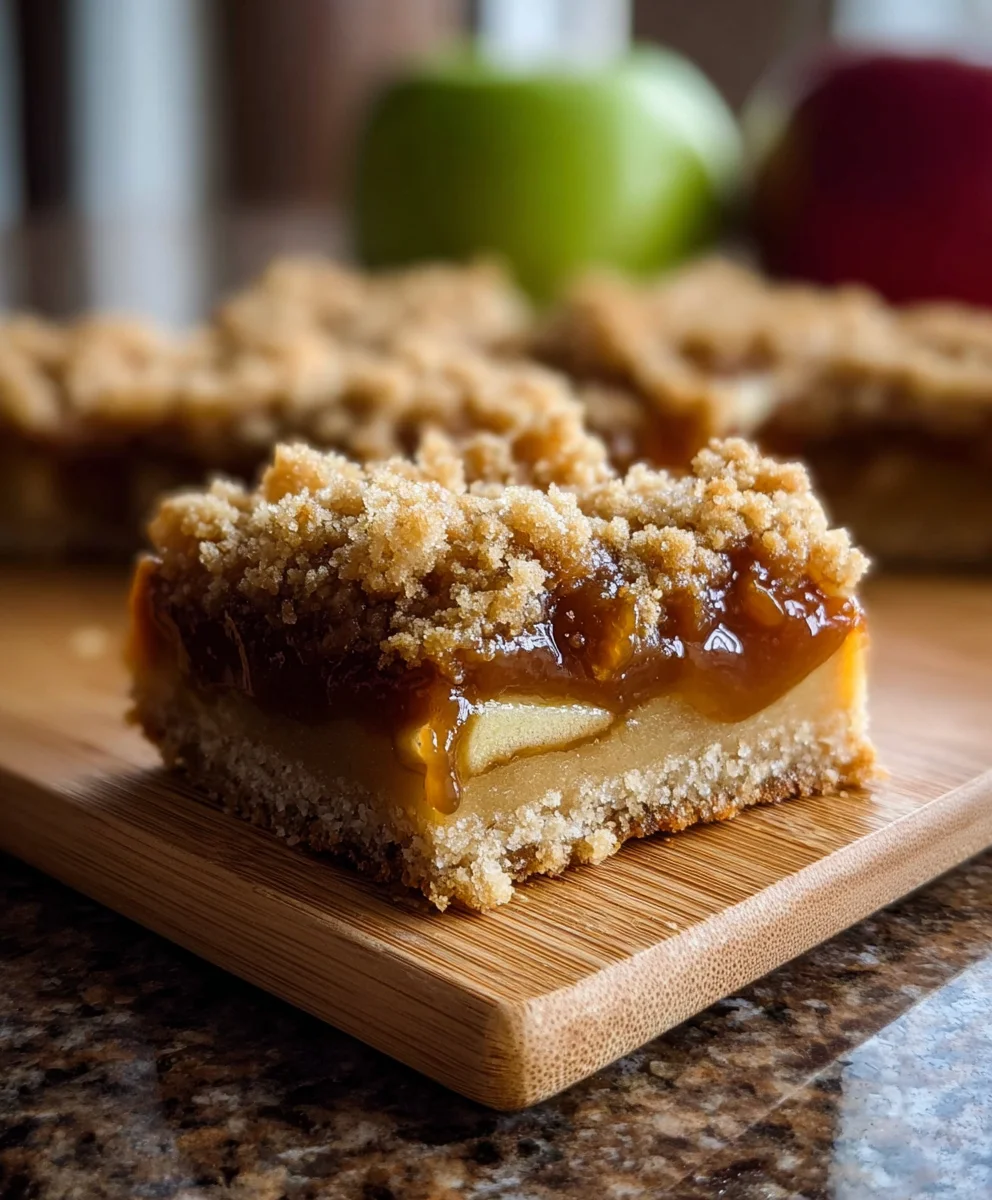
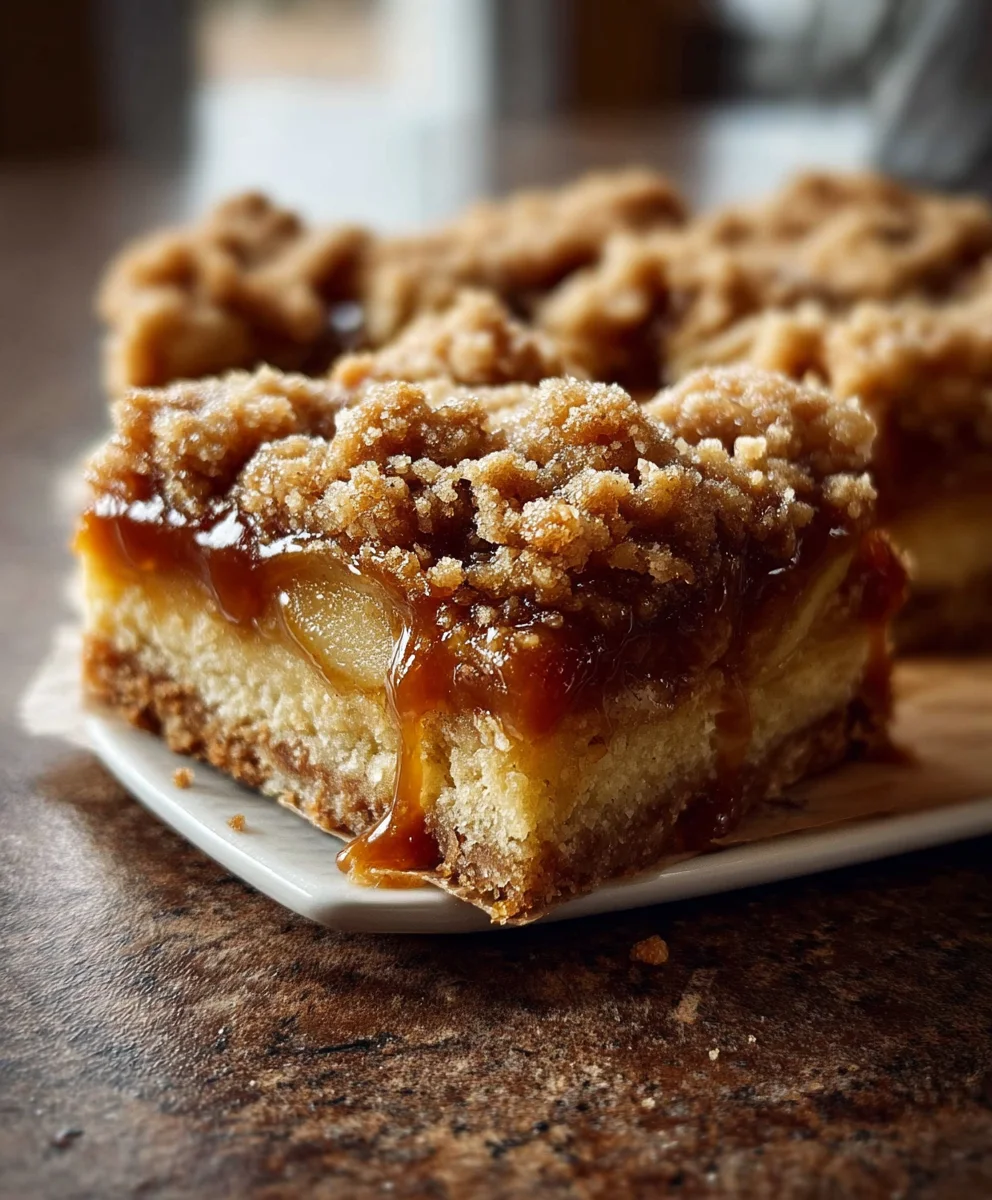
- Layer the filling: Once the crust is pre-baked, carefully remove the pan from the oven. Evenly spread the apple filling over the warm crust. Try to get an even layer right to the edges, ensuring every bite of your Salted Caramel Apple Crumble Bars Fall Treat has a good amount of delicious apple.
- Add the crumble topping: Take the reserved crumble mixture and sprinkle it evenly over the apple filling. You want to aim for a nice, consistent layer of crumbs, covering the apples as much as possible. Don’t press the crumble down; keep it loose so it bakes up wonderfully crisp and golden.
Baking and Cooling:
- Bake the bars: Return the pan to the oven and bake for another 45-55 minutes, or until the crumble topping is golden brown and the apple filling is bubbly and tender when poked with a knife. You should see the edges of the apples bubbling up through the crumble. The aroma filling your kitchen will be absolutely incredible – a true sign that a delightful Fall Treat is in the making!
- Cool completely: This step is arguably the hardest part – patience is key! Once baked, remove the pan from the oven and place it on a wire rack to cool completely. This means cooling for at least 3-4 hours, or even better, overnight. Resist the urge to cut into them warm! Cooling allows the apple filling to set properly and the bars to firm up, making them much easier to slice neatly. If you cut them warm, they will likely fall apart. Trust me, the wait is worth it for perfectly structured Salted Caramel Apple Crumble Bars.
- Lift and slice: Once completely cool, use the parchment paper overhang to lift the entire slab of bars out of the pan and transfer it to a cutting board. Now, you can confidently slice them into desired bar sizes. I usually aim for 12-16 bars, but you can go smaller for bite-sized treats or larger for a more substantial dessert.
For the Salted Caramel Drizzle (Optional but Recommended!):
This homemade salted caramel is truly the crowning glory for your Salted Caramel Apple Crumble Bars Fall Treat, adding an extra layer of decadence and balancing the sweetness with a touch of salt. It’s surprisingly easy to make, but requires a little focus!
- Prepare the caramel base: In a medium, heavy-bottomed saucepan (preferably light-colored so you can easily see the caramel’s color change), combine the granulated sugar and water. Stir gently just to moisten all the sugar.
- Cook the sugar: Place the saucepan over medium heat. Do not stir once it starts boiling. Simply let the sugar melt and boil. You can gently swirl the pan occasionally if some sugar crystals appear on the sides of the pan, or use a clean, damp pastry brush to brush down any sugar crystals that climb the sides of the pan (this prevents crystallization).
- Watch for color change: Continue to cook until the sugar turns into a beautiful amber color. This usually takes about 8-12 minutes, but pay close attention as it can go from perfect to burnt very quickly. It will start light, then turn golden, and finally a deep, rich amber. This is where the flavor develops!
- Add warm cream carefully: Once the caramel reaches a deep amber color, immediately and very carefully remove the pan from the heat. Pour the warm heavy cream into the caramel. Be extremely cautious here, as the mixture will bubble up vigorously and steam heavily. Stir constantly with a heat-proof whisk until smooth. The warm cream helps to prevent the caramel from seizing too much.
- Incorporate butter and flavor: Return the pan to very low heat (or off heat if your stove retains heat well). Add the room temperature butter, vanilla extract, and flaky sea salt. Whisk until the butter is completely melted and incorporated, and the caramel is smooth and glossy.
- Cool the caramel: Pour the salted caramel into a heat-proof jar or bowl and let it cool completely to room temperature. As it cools, it will thicken to a pourable, drizzly consistency. If it becomes too thick, you can gently warm it in the microwave for a few seconds or in a small saucepan over low heat until it reaches your desired consistency.
- Drizzle and serve: Once the bars are sliced and the caramel is cooled, generously drizzle the salted caramel over the individual bars. You can also sprinkle a little extra flaky sea salt on top for an extra pop of flavor and visual appeal. Serve immediately and enjoy these incredible Salted Caramel Apple Crumble Bars! Store any leftover bars in an airtight container at room temperature for up to 3 days, or in the refrigerator for up to a week. They are absolutely divine slightly warmed in the microwave for a few seconds, making the caramel gooey again.
Conclusion:
And there you have it, my friends! We’ve journeyed through the delightful process of creating what I genuinely believe to be one of the most irresistible autumn desserts you’ll ever encounter. These bars are more than just a sweet treat; they are a sensory experience, a comforting hug in edible form, perfectly encapsulating the very essence of the season. From the moment the sweet, buttery aroma starts to waft through your kitchen, you’ll know you’re onto something truly special. The magic lies in the exquisite balance: the tender, spiced apples bursting with natural sweetness and a subtle tartness, perfectly complemented by the rich, gooey salted caramel that weaves its way through every bite. Then, there’s that undeniably satisfying textural contrast – the rustic, buttery crumble topping providing a delightful crunch, giving way to the soft, warm fruit filling, all held together in a convenient bar form that’s just begging to be picked up and savored.
I truly can’t emphasize enough why this recipe is an absolute must-try. It’s the kind of dessert that looks incredibly impressive, yet is surprisingly straightforward to achieve, making it perfect for both seasoned bakers and those just starting their culinary adventures. Imagine impressing your loved ones with these at your next gathering, or simply treating yourself to a moment of pure bliss with a warm square and a cup of tea. The combination of classic apple pie comfort with the sophisticated twist of salted caramel makes these bars an instant classic, a recipe you’ll undoubtedly find yourself returning to year after year once the leaves begin to turn and the air grows crisp. This isn’t just baking; it’s crafting joy, one delicious layer at a time.
Elevate Your Enjoyment: Serving Suggestions and Delicious Variations
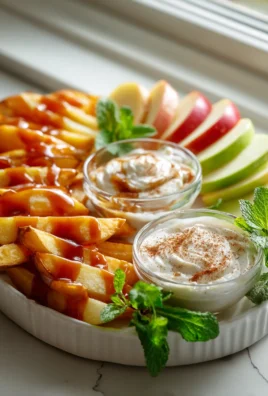
Now, while these bars are absolutely divine straight out of the pan, still slightly warm and incredibly fragrant, there are so many wonderful ways to further enhance their appeal. For an extra touch of indulgence, I highly recommend serving them warm with a generous scoop of your favorite vanilla bean ice cream. The cold, creamy ice cream melting into the warm apple and caramel creates a truly heavenly experience that’s hard to beat. Alternatively, a dollop of freshly whipped cream, perhaps infused with a hint of cinnamon or a splash of bourbon, would also be an exquisite pairing. For those who can never get enough caramel (and who can blame you?), a final drizzle of extra salted caramel sauce over the top just before serving adds an extra layer of decadence and visual appeal. And for a pop of flavor and texture, a final sprinkle of flaky sea salt truly makes the caramel sing.
Feeling creative? Don’t hesitate to experiment with variations to make this recipe uniquely yours! For a different apple experience, try mixing different varieties – Granny Smith for tartness, Honeycrisp for crispness, and Fuji for sweetness. A little extra pinch of nutmeg or allspice alongside the cinnamon in the apple filling can deepen the autumnal spice notes beautifully. You could also add some finely chopped pecans or walnuts to the crumble topping for an added nutty crunch and flavor dimension. For those with dietary considerations, this recipe is quite adaptable: gluten-free flour blends and gluten-free oats work wonderfully for a celiac-friendly version, and vegan butter can be swapped in for a dairy-free option without sacrificing flavor or texture. These bars are incredibly versatile, meaning you can truly tailor them to your personal preferences and create a bespoke dessert every time.
Your Turn to Create and Share!
I truly hope I’ve inspired you to roll up your sleeves and give this incredible recipe a try. There’s an immense satisfaction that comes from baking something so delicious and sharing it with others, or simply enjoying it yourself. So, please, don’t let another autumn pass without experiencing the pure joy of these Salted Caramel Apple Crumble Bars Fall Treat. They are, without a doubt, a quintessential part of the season’s culinary delights, a perfect project for a cozy afternoon, and an even better reward. Once you’ve baked your batch, I would absolutely love to hear about your experience! Did you stick to the recipe, or did you try one of the variations? What was your favorite part? Please come back and leave a comment below, or better yet, share a photo of your beautiful creations on social media. Tag me, and let’s celebrate the magic of fall baking together. I can’t wait to see your delicious results and hear how much you adore these phenomenal bars!
Delicious Salted Caramel Apple Crumble Bars Fall Treat
Salted Caramel Apple Crumble Bars are an irresistible autumn treat, combining tender apples, gooey salted caramel, and a buttery, crumbly topping in a convenient bar form, perfect for fall gatherings. This recipe captures the essence of the season with its crisp, sweet-tart apples, rich caramel, and delightful crunchy texture.
Ingredients
-
1 cup (2 sticks) unsalted butter, melted
-
1 1/2 cups granulated sugar
-
1 teaspoon vanilla extract
-
1/2 teaspoon salt
-
2 1/2 cups all-purpose flour
-
3 cups peeled and thinly sliced apples (about 3 medium)
-
1/2 cup salted caramel sauce
-
1 teaspoon ground cinnamon
-
1/4 teaspoon ground nutmeg
Instructions
-
Step 1
Preheat oven to 375°F (190°C). Line a 9×13-inch baking pan with parchment paper. In a large bowl, whisk together 2 ½ cups all-purpose flour, 1 cup granulated sugar, and ½ teaspoon salt. Add 1 cup melted unsalted butter and 1 teaspoon vanilla extract; mix until coarse crumbs form. -
Step 2
Reserve 1 cup of the crumb mixture for the topping. Press the remaining mixture firmly and evenly into the bottom of the prepared pan for the crust. Bake the crust for 15-18 minutes, or until lightly golden brown. -
Step 3
While the crust bakes, peel, core, and thinly slice 3 cups of apples. In a separate large bowl, gently toss the sliced apples with the remaining ½ cup granulated sugar, 1 teaspoon ground cinnamon, and ¼ teaspoon ground nutmeg until evenly coated. -
Step 4
Remove the pre-baked crust from the oven. Evenly spread the apple filling over the warm crust. Sprinkle the reserved 1 cup of crumb mixture over the apples, covering them as much as possible. -
Step 5
Return the pan to the oven and bake for another 45-55 minutes, or until the crumble topping is golden brown and the apple filling is bubbly and tender. -
Step 6
Remove from oven and cool completely on a wire rack for at least 3-4 hours, or preferably overnight. Cooling is crucial for the bars to set. Once completely cool, use the parchment overhang to lift the slab of bars from the pan and transfer to a cutting board. Slice into 12-16 desired bar sizes. -
Step 7
Generously drizzle the ½ cup salted caramel sauce over the individual cooled and sliced bars before serving. Store leftovers in an airtight container at room temperature for up to 3 days, or in the refrigerator for up to a week.
Important Information
Nutrition Facts (Per Serving)
It is important to consider this information as approximate and not to use it as definitive health advice.
Allergy Information
Please check ingredients for potential allergens and consult a health professional if in doubt.