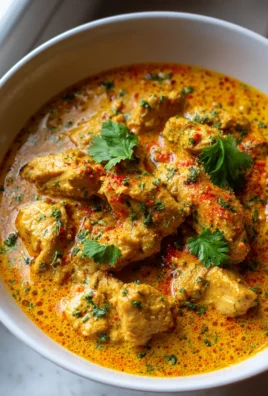
Marry Me Pumpkin Chicken Pasta is more than just a meal; it’s an experience that captures hearts and taste buds alike. I’m truly thrilled to share with you a recipe that has earned its affectionate, if ambitious, name. Imagine a dish so comforting, so rich, and so utterly delicious that it inspires grand gestures and leaves a lasting impression. This isn’t just a weeknight dinner; it’s a celebration in a bowl, perfect for making any occasion feel profoundly special.
While not steeped in centuries of ancient tradition, the legend of “Marry Me” dishes began with their undeniable power to impress and delight, becoming a modern hallmark for special moments. Our particular rendition, the Marry Me Pumpkin Chicken Pasta, elevates this concept by blending the heartwarming essence of autumnal pumpkin with tender, succulent chicken and perfectly al dente pasta, all enveloped in a luscious, creamy sauce. It has quickly become a beloved contemporary classic for those seeking to create truly unforgettable dining experiences at home.
People adore this dish for its incredible depth of flavor—the subtle, natural sweetness of pumpkin perfectly balanced with savory herbs and spices, complemented by the juicy chicken, all coated in a velvety, indulgent sauce that clings beautifully to every strand of pasta. It’s an easy-to-make yet incredibly sophisticated meal that genuinely satisfies the soul. Whether you’re looking to impress a loved one or simply treat yourself to something extraordinarily comforting, this recipe promises pure culinary bliss.

Ingredients
For the Chicken:
-
1.5 lbs boneless, skinless chicken thighs or breasts, cut into 1-inch pieces
-
1 tablespoon olive oil
-
1 teaspoon salt
-
½ teaspoon freshly ground black pepper
-
½ teaspoon garlic powder
-
¼ teaspoon smoked paprika (optional, but highly recommended for a subtle smoky depth)
For the Pasta:
-
12 ounces (about 340g) penne, rigatoni, cavatappi, or orecchiette pasta
-
1 tablespoon olive oil (for pasta water, optional, helps prevent sticking)
-
Salt for boiling water (at least 1-2 tablespoons)
For the Creamy Pumpkin Sauce:
-
2 tablespoons unsalted butter
-
1 tablespoon olive oil
-
1 medium yellow onion, finely chopped
-
4 cloves garlic, minced
-
½ cup dry white wine (like Sauvignon Blanc or Pinot Grigio), or if you prefer to omit alcohol, use ½ cup extra chicken broth
-
1 (15-ounce) can 100% pure pumpkin puree (not pumpkin pie filling)
-
1 cup low-sodium chicken broth
-
1 cup heavy cream
-
½ cup sun-dried tomatoes, packed in oil, drained well and thinly sliced (about ¼ cup once sliced)
-
2 tablespoons fresh sage, finely chopped
-
1 tablespoon fresh thyme leaves, picked from stems
-
½ teaspoon ground nutmeg
-
¼ teaspoon red pepper flakes (optional)
-
¾ cup freshly grated Parmesan cheese, plus more for serving
-
Salt and freshly ground black pepper to taste
For Garnish:
-
Fresh parsley, chopped
-
Extra grated Parmesan cheese
Phase 1: Preparing Your Ingredients for the Marry Me Pumpkin Chicken Pasta
Getting Organized for a Smooth Cooking Experience
First things first, let’s get our workspace organized. Cooking is so much more enjoyable when everything is prepped and ready to go! This process is often called “mise en place,” and it’s key to creating a stress-free cooking experience, especially for a dish as delightful as this Marry Me Pumpkin Chicken Pasta.
Prepare the Chicken: Take your boneless, skinless chicken (thighs are my personal preference for their juiciness, but breasts work beautifully too) and cut them into uniform 1-inch pieces. Aim for pieces that are roughly the same size so they cook evenly. In a medium bowl, toss the chicken pieces with 1 tablespoon of olive oil, 1 teaspoon of salt, ½ teaspoon of freshly ground black pepper, ½ teaspoon of garlic powder, and if you’re using it, ¼ teaspoon of smoked paprika. The smoked paprika adds a lovely, subtle warmth that complements the pumpkin so well. Give it a good mix to ensure every piece is coated. Set this aside to marinate slightly while you prepare the other components.
Chop the Aromatics: Grab your medium yellow onion and finely chop it. We want it to melt into the sauce, providing a sweet base without being overtly chunky. Next, peel and mince your four cloves of garlic. Trust me, fresh garlic makes a huge difference here. If you’re a garlic lover like me, an extra clove or two won’t hurt!
Slice the Sun-Dried Tomatoes: Drain your sun-dried tomatoes from their oil. Pat them gently with a paper towel to remove excess oil, then thinly slice them. These little gems add a burst of concentrated tomato flavor and a wonderful chew to the dish, cutting through the richness of the cream and pumpkin.
Chop the Fresh Herbs: Wash and thoroughly dry your fresh sage and thyme. Finely chop the sage – its earthy, slightly peppery notes are a match made in heaven with pumpkin. Pick the thyme leaves from their stems; they’ll infuse the sauce with a delicate, herbaceous aroma. I always find that fresh herbs elevate a dish to a whole new level, and in this Marry Me Pumpkin Chicken Pasta, they are truly essential.
Measure Out Your Liquids and Spices: Open your can of pure pumpkin puree (double-check that it’s not pie filling!). Measure out your chicken broth, heavy cream, dry white wine (or extra broth), and have your ground nutmeg and red pepper flakes ready. Grate your Parmesan cheese. Having everything portioned out will make the cooking process seamless.
Get the Pasta Water Ready: Fill a large pot with water, enough to generously cover your pasta. Add a good amount of salt – at least 1-2 tablespoons. This is crucial for flavoring the pasta from the inside out. I like to say it should taste “like the sea.” Place it over high heat to bring it to a rolling boil later. You can add a tablespoon of olive oil to the water if you wish, though I find adequate stirring and not overcrowding the pot usually prevents sticking.
Phase 2: Searing the Chicken to Golden Perfection
Heat the Pan: Place a large, deep skillet or Dutch oven over medium-high heat. Add 1 tablespoon of olive oil. We want the pan to be nice and hot so we can get a beautiful sear on our chicken. You’ll know it’s ready when the oil shimmers slightly.
Sear the Chicken: Add the seasoned chicken pieces to the hot skillet in a single layer. Do not overcrowd the pan! If necessary, work in two batches. Overcrowding will steam the chicken instead of searing it, and we want that lovely golden-brown crust for maximum flavor. Let the chicken cook undisturbed for 3-4 minutes per side, until it’s beautifully golden brown and cooked through. It doesn’t need to be fully cooked at this stage, as it will finish cooking in the sauce, but we want that wonderful browning.
Remove and Rest: Once the chicken is seared and nicely browned on all sides, remove it from the skillet and transfer it to a clean plate. Don’t worry about any browned bits left in the pan – those are flavor bombs that we’ll use for our sauce! Set the chicken aside for now; it’ll rejoin the party later.
Phase 3: Crafting the Irresistibly Creamy Pumpkin Sauce
Building Layers of Flavor for Your Marry Me Pumpkin Chicken Pasta
Sauté the Aromatics: Reduce the heat to medium. Add 2 tablespoons of unsalted butter and 1 tablespoon of olive oil to the same skillet (no need to clean it, those browned bits are liquid gold!). Once the butter is melted and foamy, add your finely chopped yellow onion. Cook, stirring occasionally, for 5-7 minutes, until the onion is softened and translucent. We’re looking for sweet, tender onions, not crispy ones.
Add the Garlic: Stir in the minced garlic. Cook for just 1 minute more, until fragrant. Be careful not to let the garlic brown or burn, as it can turn bitter. That amazing aroma filling your kitchen right now is just the beginning of this delightful sauce!
Deglaze with Wine (or Broth): Pour in the ½ cup of dry white wine. This is where the magic happens! Use a wooden spoon to scrape up all those delicious browned bits from the bottom of the pan. This process, called deglazing, adds incredible depth of flavor to your sauce. Let the wine simmer and reduce for 2-3 minutes, until it’s mostly evaporated. If you’re skipping the wine, simply add an extra ½ cup of chicken broth here and let it reduce slightly.
Introduce the Pumpkin Base: Stir in the entire 15-ounce can of pure pumpkin puree, 1 cup of low-sodium chicken broth, and 1 cup of heavy cream. Whisk everything together until smooth and well combined. This is the heart of your Marry Me Pumpkin Chicken Pasta sauce, rich and velvety.
Season and Simmer: Add your thinly sliced sun-dried tomatoes, chopped fresh sage, fresh thyme leaves, ½ teaspoon of ground nutmeg, and ¼ teaspoon of red pepper flakes (if using). Stir well to incorporate all these wonderful flavors. Bring the sauce to a gentle simmer, then reduce the heat to low and let it cook, stirring occasionally, for about 5-7 minutes. This allows the flavors to meld beautifully and the sauce to thicken slightly.
Finish with Parmesan: Remove the skillet from the heat. Stir in ¾ cup of freshly grated Parmesan cheese until it’s completely melted and smooth. Parmesan adds a crucial salty, umami depth and helps to thicken the sauce further. Taste the sauce and adjust the seasoning with salt and freshly ground black pepper as needed. You might find it needs a little more salt to really make those flavors pop. This is where you make it truly yours!
Phase 4: Cooking the Pasta to Al Dente Perfection
Boil the Pasta: By now, your large pot of salted water should be at a rolling boil. Add your chosen pasta (penne, rigatoni, or cavatappi are excellent choices as they hold sauce well). Cook according to package directions until it’s al dente – meaning it’s cooked through but still has a slight bite to it. Overcooked pasta is a no-go for this dish!
Reserve Pasta Water: Before draining the pasta, ladle out about 1 to 1.5 cups of the starchy pasta cooking water into a heatproof mug or bowl. This liquid gold will be your secret weapon for achieving the perfect sauce consistency later. The starch in the water helps the sauce cling to the pasta beautifully.
Drain the Pasta: Once al dente, drain the pasta thoroughly in a colander. Do not rinse the pasta, as we want that starchy surface to help the sauce adhere.
Phase 5: Bringing It All Together for Your Marry Me Pumpkin Chicken Pasta
The Grand Finale of Flavors and Textures
Combine Pasta and Sauce: Return the creamy pumpkin sauce skillet to low heat. Add the drained pasta directly into the sauce. Toss everything together gently using tongs, ensuring every piece of pasta is coated in that luscious, rich pumpkin sauce.
Reintroduce the Chicken: Add the seared chicken pieces back into the skillet with the pasta and sauce. Gently stir to combine, allowing the chicken to warm through and absorb some of the incredible flavors of the sauce.
Adjust Consistency with Pasta Water: If the sauce seems too thick (which it often will, especially as it cools slightly), gradually add some of the reserved pasta water, a quarter-cup at a time, stirring constantly. Continue adding until you reach your desired consistency – a beautiful, creamy sauce that lovingly coats the pasta without being watery or overly dry. This step is key to making sure your Marry Me Pumpkin Chicken Pasta is perfectly saucy.
Final Taste and Seasoning: Taste the entire dish once more. This is your last chance to make any final adjustments to salt and pepper. Sometimes, after adding pasta and chicken, the flavors can mellow slightly, so don’t be afraid to add a pinch more of what it needs. A little more nutmeg, a dash more red pepper flakes for an extra kick, or a generous grind of black pepper can make all the difference.
Serve Immediately: Transfer your glorious Marry Me Pumpkin Chicken Pasta to serving bowls. Garnish each serving generously with fresh chopped parsley and an extra sprinkle of freshly grated Parmesan cheese. The vibrant green of the parsley not only adds freshness but also a beautiful color contrast to the warm, inviting hues of the pumpkin.
Enjoy Your Culinary Masterpiece: Serve this incredibly flavorful and comforting dish hot. The rich, savory pumpkin sauce, tender chicken, and perfectly cooked pasta create a symphony of flavors that truly lives up to its name. Get ready for rave reviews – this Marry Me Pumpkin Chicken Pasta is a dish that truly melts hearts!

Conclusion:
To sum it all up, this isn’t just another dinner recipe; it’s an experience waiting to happen. I truly believe that once you try this incredible dish, you’ll understand why I’m so passionate about it. The creamy, savory notes of the pumpkin, perfectly balanced with tender chicken and al dente pasta, create a symphony of flavors that truly sets our Marry Me Pumpkin Chicken Pasta apart. It’s a dish that manages to be both incredibly comforting and surprisingly elegant, making it suitable for a cozy weeknight in or a special occasion that demands something truly memorable. I’ve heard countless stories from friends and family who have made this recipe, each one raving about its unique ability to bring warmth and joy to their tables. The richness of the pumpkin, often relegated to sweet treats, finds its true calling in this savory embrace, offering a subtle sweetness that cuts through the creaminess, while the spices add a depth that makes every bite an adventure. It’s the kind of meal that makes you want to curl up by a fire, but also bright enough to be the star of a lively dinner party. Truly, it’s a culinary masterpiece that I am excited for you to discover.
Why This Recipe is a Must-Try:
What makes this particular pasta dish an absolute must-try? For starters, it’s the delightful fusion of seasonal pumpkin with hearty chicken and pasta, all enveloped in a velvety, rich sauce. It’s not overly sweet, nor is it overwhelmingly savory; instead, it strikes a harmonious balance that will tantalize your taste buds. This recipe is incredibly adaptable, forgiving, and yields consistently delicious results, even for novice cooks. The preparation is straightforward, designed to get a wholesome, flavorful meal on your table without unnecessary fuss. Imagine a dish that feels gourmet yet requires minimal effort – that’s precisely what you’re getting here. It’s the ultimate comfort food, elevated, offering warmth, satisfaction, and a touch of sophistication. You’ll find yourself craving its unique flavor profile long after the last bite. It’s a dish that inspires joy and contentment, and I honestly can’t wait for you to experience it firsthand. The way the spices, like sage and a hint of nutmeg, intertwine with the sweet notes of pumpkin creates a profile that is both familiar and excitingly new.
Serving Suggestions and Delightful Variations:
While this pasta dish is robust enough to stand on its own, I love to pair it with a few complementary sides to round out the meal. A simple, crisp green salad with a light vinaigrette is always a fantastic choice, providing a refreshing counterpoint to the pasta’s richness. For something heartier, a slice of crusty artisan bread, perfect for soaking up every last drop of that incredible sauce, is an absolute winner. You could also sprinkle a generous amount of freshly grated Parmesan or Pecorino Romano cheese over the top just before serving for an extra layer of salty goodness, or garnish with a scattering of fresh parsley or sage for a pop of color and herbaceous aroma. Consider adding some toasted pumpkin seeds for a delightful textural crunch. For those looking to experiment, the beauty of this recipe lies in its versatility. Try swapping the chicken for Italian sausage (mild or spicy, depending on your preference) for a different kind of savory depth. For a vegetarian twist, chickpeas or cannellini beans work wonderfully, adding protein and fiber, or you could load it up with extra seasonal vegetables like sautéed spinach, kale, or roasted bell peppers. Feeling adventurous? A pinch of red pepper flakes can introduce a lovely kick, or a splash of dry white wine deglazed into the sauce can add another layer of complexity. Don’t be afraid to make it your own; this recipe is a fantastic canvas for your culinary creativity.
Your Culinary Journey Begins Now!
Now, it’s your turn! I genuinely encourage you to roll up your sleeves and give this incredible recipe a try. You won’t regret it. The satisfaction of creating such a flavorful and heartwarming meal from scratch is immense, and I promise you, the smiles around your table will be your greatest reward. This isn’t just about following instructions; it’s about embarking on a delightful culinary adventure that will undoubtedly become a staple in your recipe repertoire. So, gather your ingredients, set aside some time, and prepare to be amazed by the deliciousness you’re about to create. And once you’ve experienced the magic of this dish, I would absolutely love to hear about it! Did you make any exciting variations? What did your family think? Did you serve it with a specific side dish that truly shone? Please, don’t keep your successes (or even your interesting experiments!) to yourself. Share your experiences, your photos, and your tips in the comments section below. Let’s build a community around delicious food and shared culinary joys. Your insights could inspire another home cook to try something new, or help someone perfect their own rendition of this fantastic recipe. Happy cooking, my friends, and I can’t wait to see what you whip up!
Marry Me Pumpkin Chicken Pasta
Marry Me Pumpkin Chicken Pasta is more than just a meal; it’s an experience that captures hearts and taste buds alike. A comforting, rich, and utterly delicious dish perfect for making any occasion feel profoundly special.
Ingredients
-
1.5 lbs boneless, skinless chicken (thighs/breasts), cut into 1-inch pieces
-
1 tbsp olive oil
-
1 tsp salt
-
½ tsp black pepper
-
½ tsp garlic powder
-
¼ tsp smoked paprika (optional)
-
12 oz penne, rigatoni, cavatappi, or orecchiette pasta
-
1-2 tbsp salt (for pasta water)
-
2 tbsp unsalted butter
-
1 tbsp olive oil
-
1 medium yellow onion, finely chopped
-
4 cloves garlic, minced
-
½ cup chicken broth (non-alcohol substitute for dry white wine)
-
1 (15 oz) can 100% pure pumpkin puree
-
1 cup low-sodium chicken broth
-
1 cup heavy cream
-
½ cup sun-dried tomatoes, packed in oil, drained & thinly sliced
-
2 tbsp fresh sage, finely chopped
-
1 tbsp fresh thyme leaves
-
½ tsp ground nutmeg
-
¼ tsp red pepper flakes (optional)
-
¾ cup freshly grated Parmesan cheese
-
Salt and freshly ground black pepper to taste
-
Fresh parsley, chopped (for garnish)
-
Extra grated Parmesan cheese (for garnish)
Instructions
- Step 1
Cut chicken into 1-inch pieces. Toss with 1 tbsp olive oil, 1 tsp salt, ½ tsp black pepper, ½ tsp garlic powder, and ¼ tsp smoked paprika. Set aside. Finely chop onion and mince garlic. Thinly slice drained sun-dried tomatoes. Chop fresh sage and pick thyme leaves. Measure out pumpkin puree, chicken broth, heavy cream, nutmeg, red pepper flakes, and grate Parmesan. Fill a large pot with salted water (1-2 tbsp salt) for pasta; bring to a boil later. - Step 2
Heat 1 tbsp olive oil in a large skillet over medium-high heat. Sear chicken in batches for 3-4 minutes per side until golden brown and cooked through. Remove chicken to a plate. - Step 3
Reduce heat to medium. Add 2 tbsp unsalted butter and 1 tbsp olive oil to the skillet. Sauté onion for 5-7 minutes until softened and translucent. Stir in minced garlic; cook for 1 minute until fragrant. - Step 4
Add ½ cup chicken broth (replacing wine). Scrape up browned bits from the pan. Let the broth simmer and reduce for 2-3 minutes. Stir in pumpkin puree, 1 cup low-sodium chicken broth, and 1 cup heavy cream. Whisk until smooth and well combined. - Step 5
Add sun-dried tomatoes, chopped fresh sage, fresh thyme leaves, ½ tsp ground nutmeg, and ¼ tsp red pepper flakes (if using). Bring the sauce to a gentle simmer, then reduce heat to low and cook for about 5-7 minutes, stirring occasionally, allowing flavors to meld and sauce to thicken. Remove from heat. - Step 6
Stir in ¾ cup freshly grated Parmesan cheese until completely melted and smooth. Taste the sauce and adjust seasoning with salt and freshly ground black pepper as needed. - Step 7
Cook pasta in boiling salted water according to package directions until al dente. Reserve 1 to 1.5 cups of the starchy pasta cooking water. Drain pasta thoroughly (do not rinse). - Step 8
Return the creamy pumpkin sauce skillet to low heat. Add the drained pasta and seared chicken pieces to the sauce. Toss gently to combine. If the sauce seems too thick, gradually add some of the reserved pasta water, ¼ cup at a time, stirring until desired consistency. Taste the entire dish and make any final seasoning adjustments. Serve immediately, garnished generously with fresh chopped parsley and an extra sprinkle of freshly grated Parmesan cheese.
Important Information
Nutrition Facts (Per Serving)
It is important to consider this information as approximate and not to use it as definitive health advice.
Allergy Information
Please check ingredients for potential allergens and consult a health professional if in doubt.