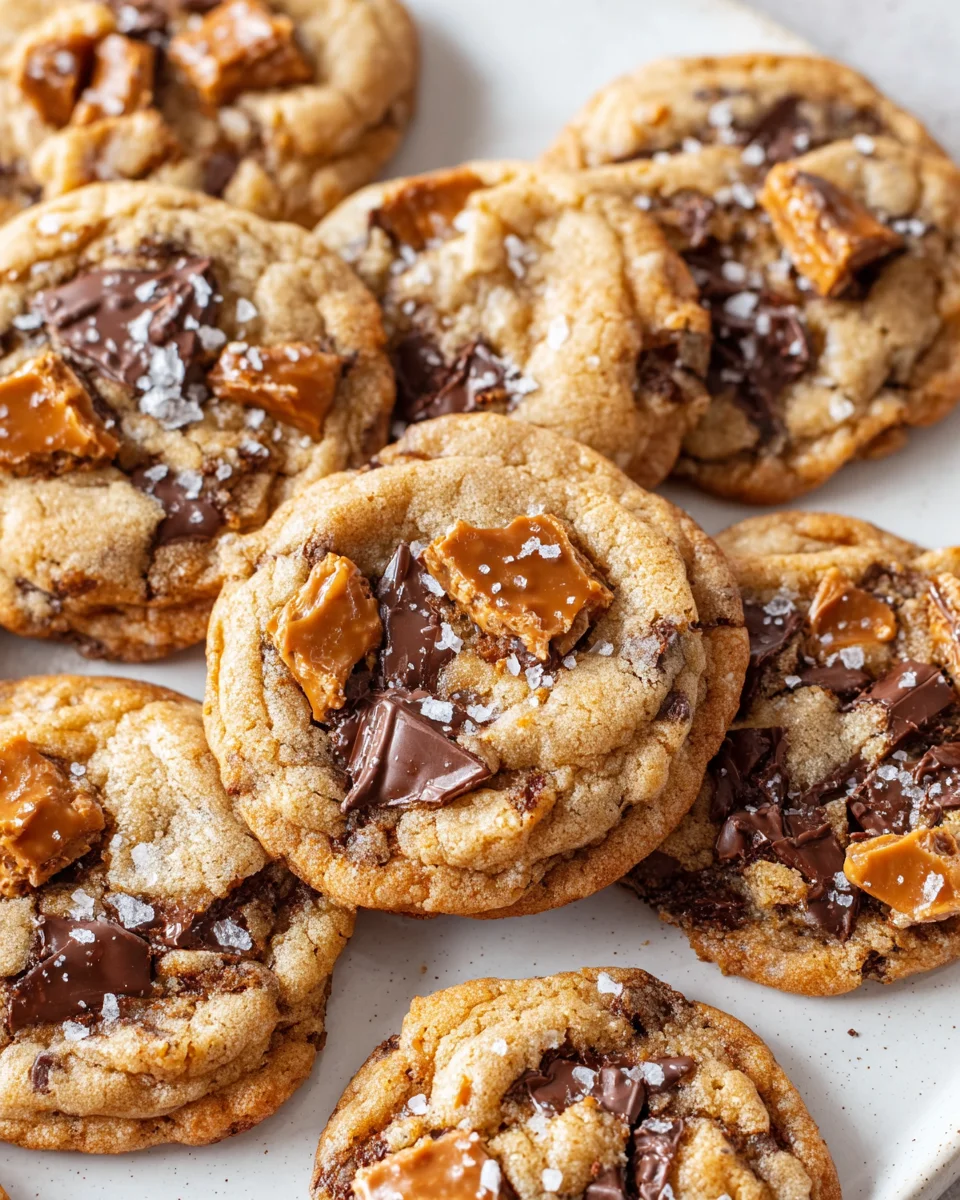
Toffee Cookies are a true delight, offering a symphony of buttery, chewy goodness punctuated by pockets of golden, caramelized crunch. I’ve always found something incredibly special about how the simple addition of toffee can elevate a classic cookie into an extraordinary experience. The humble toffee itself boasts a rich heritage, originating centuries ago in Britain as a beloved confection. Over time, it naturally made its way into the baking world, transforming countless desserts, and arguably, reaching its pinnacle when baked into a tender, golden cookie.
What truly makes these cookies a universal favorite is their irresistible texture and flavor profile. People are absolutely captivated by the unique textural interplay – the soft, yielding cookie contrasting beautifully with the slightly crisp, sweet burst of toffee pieces. It’s that perfect balance of sweet and a hint of saltiness, the chewiness complemented by the crunch, that makes these Toffee Cookies utterly unforgettable. They evoke a sense of warmth and nostalgia, perfect for cozy afternoons or sharing moments of joy. Every single bite promises comforting familiarity, yet delivers a delicious surprise. Whether you’re baking for a special occasion or simply craving a comforting treat, mastering these delightful Toffee Cookies will surely earn you rave reviews and requests for more.
Ingredients:
- Unsalted Butter: 1 cup (2 sticks), softened to room temperature. I always opt for unsalted butter when baking so I can precisely control the salt content in my recipes. The reason we want it softened, but not melted or greasy, is because room temperature butter emulsifies much better with sugar, creating tiny air pockets. These air pockets are what give your Toffee Cookies their incredible lightness, contribute to their tender crumb, and help them rise beautifully in the oven. This seemingly small detail is truly foundational for perfect cookies!
- Granulated Sugar: 3/4 cup. This white sugar contributes to the initial spread of the cookie, helping to achieve those slightly crisp edges that contrast so well with a chewy center. It also plays a role in the overall sweetness and caramelization.
- Light Brown Sugar: 1 cup, packed. For moisture, chewiness, and that lovely molasses flavor that complements the buttery toffee so perfectly. Make sure to pack it firmly into your measuring cup to ensure you’re getting the correct amount; this density is crucial for the cookie’s texture and moisture. The combination of granulated and brown sugar is what gives these Toffee Cookies their perfect balance of crisp edges and a wonderfully chewy center.
- Large Eggs: 2, at room temperature. Just like the butter, room temperature eggs are essential. They emulsify better with the fats and sugars in the dough, leading to a smoother, more uniform batter. This smooth base helps create a consistent texture throughout your Toffee Cookies. If you forget to take them out ahead of time, a quick trick is to place them in a bowl of warm (not hot!) water for about 5-10 minutes.
- Vanilla Extract: 2 teaspoons. Please, use good quality pure vanilla extract here. It makes a huge difference in the overall flavor profile of your Toffee Cookies, adding a warm, aromatic depth that elevates all the other ingredients. Avoid artificial vanilla if you can!
- All-Purpose Flour: 2 1/4 cups, spooned and leveled. Spooning it into the measuring cup and then leveling off with a straight edge (like a knife) prevents you from inadvertently overpacking the flour. If you scoop directly from the bag, you risk compacting it, which can add up to an extra 1/4 to 1/2 cup of flour. Too much flour means dry, crumbly, and tough Toffee Cookies. We’re aiming for tender, delightful cookies, so precision here truly matters.
- Baking Soda: 1 teaspoon. This is our primary leavening agent, working in conjunction with the acids in the brown sugar to help the Toffee Cookies rise, giving them a soft interior and contributing to their chewiness.
- Salt: 1/2 teaspoon. Even with unsalted butter, a little extra salt is vital. It doesn’t just add its own flavor; it brightens and brings out all the other flavors, balancing the sweetness and making the rich toffee notes sing. Don’t skip it!
- Toffee Bits: 1 1/2 cups. You can use commercially available Heath Bits ‘o Brickle, Skor bits, or even chop up your favorite toffee bars into small pieces. These are undeniably the star of our Toffee Cookies, providing that irresistible buttery crunch and rich caramel flavor that defines this recipe. While store-bought bits are super convenient, feel free to get creative! If you’re feeling ambitious, homemade toffee chopped into small pieces would be absolutely divine. Just ensure they’re not too large, or they might cause your Toffee Cookies to spread unevenly.
- Optional Mix-ins (but highly recommended for extra indulgence!):
- Milk or Semi-Sweet Chocolate Chips: 1 cup. The melting chocolate adds another layer of decadent richness and gooey texture to these Toffee Cookies, creating a beautiful contrast with the crunchy toffee.
- Chopped Pecans or Walnuts: 1/2 cup. If you love a nutty crunch and earthy flavor, these are a fantastic addition and pair wonderfully with the buttery toffee. Toasting them lightly before adding can enhance their flavor even further!
Getting Started: Prep and Preheat Your Way to Perfect Toffee Cookies
- Bring Ingredients to Room Temperature: This initial step is frequently underestimated but is absolutely vital for achieving flawless Toffee Cookies! Make sure your unsalted butter and large eggs have been sitting out at room temperature for at least 30-60 minutes before you even think about starting. Softened butter should yield slightly when you press it with your finger but should not be greasy or melted; it should still hold its shape. Room temperature eggs, as mentioned, emulsify much more effectively with the butter and sugar, creating a smoother, more uniform dough without separation. Imagine trying to mix cold, stiff butter with cold eggs and sugar – it would result in a lumpy, separated mess. Trust me, investing this small amount of time upfront makes an enormous impact on the texture and consistency of your finished Toffee Cookies.
- Prepare Your Baking Environment: Take two large, sturdy baking sheets and line them with parchment paper or silicone baking mats. I am a huge proponent of parchment paper; it prevents any sticking, ensures even baking, and makes for incredibly easy cleanup afterward. If you don’t have parchment or silicone mats, you can lightly grease your baking sheets, but be aware that greasing can sometimes cause cookies to spread a bit more than desired. Parchment paper truly is a game-changer for consistently beautiful, evenly baked Toffee Cookies and hassle-free removal.
- Preheat Your Oven Accurately: Set your oven to 375°F (190°C). It’s critically important for the oven to be fully preheated and at the correct temperature before your precious Toffee Cookies go in. A hot oven ensures the cookies begin to bake immediately, which helps them spread just the right amount and set properly without becoming too thin, greasy, or overspreading. While the oven is coming up to temperature (always use an oven thermometer if you suspect your oven runs hot or cold!), you can efficiently move on to preparing the dough.
- Measure and Whisk Your Dry Ingredients: In a medium-sized bowl, meticulously whisk together the 2 1/4 cups of all-purpose flour (remembering to spoon and level!), 1 teaspoon of baking soda, and 1/2 teaspoon of salt. Whisking isn’t just a casual stir; it ensures these dry ingredients are thoroughly combined and evenly distributed throughout what will become your Toffee Cookies dough. This crucial step prevents pockets of unmixed baking soda or salt, which can lead to unpleasant tastes or uneven rising in your final product. Set this bowl aside for now.
Crafting the Irresistible Toffee Cookie Dough: The Heart of the Recipe
- Cream the Butter and Sugars to Perfection: In the large bowl of a stand mixer fitted with the paddle attachment, or with a large bowl and a powerful handheld electric mixer, combine the 1 cup of softened unsalted butter with the 3/4 cup of granulated sugar and the 1 cup of firmly packed light brown sugar. Beat these ingredients together on medium speed for a good 2-3 minutes, or until the mixture transforms into a light, fluffy, and noticeably pale cream. This creaming process isn’t just about mixing; it’s about aeration. As the butter and sugar crystals rub against each other, they create thousands of tiny air pockets. These pockets are incredibly important because they expand during baking, contributing significantly to the lift and tender texture of your Toffee Cookies. Scrape down the sides and bottom of the bowl once or twice during this process to ensure everything is evenly combined and no butter or sugar is clinging to the sides. This successful aeration step is a hallmark of truly amazing cookies!
- Incorporate the Eggs and Vanilla Smoothly: Add the two room temperature large eggs, one at a time, beating well after each individual addition until each egg is fully incorporated into the butter and sugar mixture. After the eggs have been thoroughly mixed in, stir in the 2 teaspoons of pure vanilla extract. Continue to beat on medium speed for another minute. The mixture might appear slightly curdled or separated after adding the first egg, but don’t worry – it should come back together into a smooth, cohesive mixture as you add the second egg and continue mixing. The goal here is a perfectly emulsified blend, where the eggs are fully integrated into the butter and sugar, contributing to the richness and moistness of your Toffee Cookies.
- Gradually Add Dry Ingredients – The Gentle Touch: Reduce your mixer speed to low. Slowly add the prepared dry ingredient mixture (flour, baking soda, salt) to the wet ingredients. Mix just until combined and you no longer see any visible streaks of flour. This is where you must be careful not to overmix! Overmixing is one of the most common cookie mistakes. It develops the gluten in the flour too much, which can lead to tough, dense, and cake-like Toffee Cookies instead of the tender, chewy ones we are aiming for. As soon as you see the flour disappear into the dough, stop the mixer. It’s perfectly okay if there are still a few tiny specks or pockets of flour; they’ll get fully incorporated in the next step when you fold in the mix-ins. Err on the side of undermixing rather than overmixing here.
- Fold in the Stars of the Show (and any supporting cast!): Remove the bowl from the mixer and grab a sturdy rubber spatula or a wooden spoon. Gently, but thoroughly, fold in the 1 1/2 cups of toffee bits. If you’re using any of the optional (but highly recommended!) mix-ins, now is the time to add them: the 1 cup of chocolate chips and/or the 1/2 cup of chopped nuts. Fold them in until they are evenly distributed throughout the dough. You want to ensure that every single bite of your future Toffee Cookies has a generous and satisfying amount of that glorious toffee crunch and any other delicious additions you’ve chosen.
Baking Your Perfect Toffee Cookies: From Dough to Golden Perfection
- Scoop and Space the Dough Carefully: Using a 1.5-tablespoon cookie scoop (this ensures uniformly sized cookies, which helps them bake evenly) or simply two spoons, drop rounded balls of cookie dough onto your prepared baking sheets. Make sure to leave ample space – about 2 inches – between each cookie. This generous spacing is crucial because the cookies will spread significantly while baking. Crowding the baking sheet can lead to uneven baking, cookies that merge into one giant, misshapen Toffee Cookie, and potentially less crisp edges due to steam build-up. I typically fit about 12 cookies per standard large baking sheet.
- Bake to Golden Perfection: Place one baking sheet at a time into your preheated 375°F (190°C) oven. Bake for 9-12 minutes. The exact baking time will naturally vary depending on the quirks of your specific oven, the size of your scooped cookies, and your preferred level of doneness. Look for the edges of the Toffee Cookies to be lightly golden brown and the centers to still appear slightly soft, puffed up, and perhaps a touch undercooked. When you pull them out, they might still look slightly underbaked in the very center – that’s absolutely perfect! The residual heat from the hot baking sheet will continue to cook them through as they cool, a process known as ‘carry-over baking.’ This ensures you get that ideal chewy center with perfectly set, slightly crisp edges. If you wait until they look completely done and firm in the oven, they will inevitably be overbaked and overly crispy once cooled. We’re aiming for tender, chewy Toffee Cookies, so trust the process!
- The Crucial Cooling Process: Once baked, carefully remove the baking sheet from the oven. Resist the urge to move the cookies immediately! Let the Toffee Cookies cool on the hot baking sheet for 5-10 minutes. This is a crucial step! The cookies are still very delicate and can easily crumble or break if handled too soon. Allowing them to set up on the sheet ensures they firm up, retain their beautiful shape, and are sturdy enough to transfer. After this initial cooling period, carefully transfer the Toffee Cookies to a wire rack using a thin spatula. Allow them to cool completely on the wire rack. Cooling on a wire rack ensures air circulates all around them, preventing condensation from building up on the bottom, which could make them soggy. Nobody wants soggy Toffee Cookies!
- Repeat for Remaining Dough: While the first batch is cooling, repeat steps 9 through 11 with the remaining cookie dough. If your baking sheets are still warm from the previous batch, it’s a good idea to let them cool down a bit before placing fresh dough on them, or swap to a fresh, cool baking sheet if you have one available. Placing cookie dough on a hot sheet can cause the cookies to spread too much too quickly before they even enter the oven, resulting in thinner, less ideal Toffee Cookies.
Serving and Storage Tips for Your Delightful Toffee Cookies
- Enjoy Warm or Cooled: These Toffee Cookies are an absolute dream when enjoyed warm, right off the cooling rack. At this stage, any chocolate chips you added will still be wonderfully gooey and molten, and the toffee bits will be slightly melty and lusciously chewy. However, they are equally excellent once completely cooled, offering a firmer texture and a more pronounced, satisfying toffee crunch. Both experiences are delightful, so pick your pleasure!
- Optional Finishing Touch for Extra Flair: For an extra special, gourmet touch, while the Toffee Cookies are still warm on the cooling rack, you can sprinkle a tiny pinch of flaky sea salt (like Maldon) over them. The salt doesn’t just add a touch of sparkle; it beautifully enhances the sweetness and truly makes the rich, buttery toffee flavor pop! Alternatively, for even more decadence, melt some extra milk or dark chocolate and artfully drizzle it over the completely cooled Toffee Cookies. Allow the chocolate to set before storing.
- Storage for Lasting Freshness: Once your Toffee Cookies have cooled completely, store them in an airtight container at room temperature. They tend to stay wonderfully soft and chewy for up to 3-4 days. While this is the recommended storage time, I highly doubt they’ll last that long once your family, friends, or even just you discover their irresistible charm! For optimal freshness, you can place a half slice of bread in the container with the cookies; the cookies will absorb moisture from the bread, keeping them softer longer.
- Freezing Options for Future Cravings:
- Freezing Raw Cookie Dough: This is my favorite trick for having fresh Toffee Cookies on demand! Scoop the raw cookie dough balls onto a parchment-lined baking sheet and freeze them until they are completely solid (this usually takes about 1-2 hours). Once frozen, transfer the solid dough balls to a freezer-safe zip-top bag or an airtight container. They can be stored in the freezer for up to 3 months. When you’re ready to bake, simply place the frozen dough balls on a prepared baking sheet and bake as directed (steps 9-11), adding an extra 2-4 minutes to the baking time since they are starting from a frozen state. No need to thaw!
- Freezing Baked Toffee Cookies: Fully baked and completely cooled Toffee Cookies can also be frozen successfully. Layer them between sheets of parchment paper in an airtight freezer-safe container or a heavy-duty freezer bag. They can be stored in the freezer for up to 2-3 months. When a craving strikes, simply thaw them at room temperature for an hour or two, or warm them gently in the microwave for a few seconds until soft and chewy again.
You’ll find these homemade Toffee Cookies are an absolute hit no matter how you choose to serve them! The rich, buttery dough, combined with the delightful crunch and sweet caramel notes of the toffee bits, creates a truly unforgettable treat that will have everyone asking for the recipe. Happy baking!
Conclusion:
And there you have it! We’ve journeyed through the steps to create something truly magical in your kitchen. This isn’t just another cookie recipe; it’s an invitation to experience pure, unadulterated bliss with every single bite. I truly believe this recipe is a must-try for anyone who appreciates the finer things in life, especially when those things involve a perfect symphony of chewy, crunchy, sweet, and buttery. What makes these cookies stand out is that incredible combination of textures – the slight crispness at the edge, yielding to a wonderfully soft and chewy center, all punctuated by those irresistible, buttery bits of toffee. It’s a texture party that your taste buds won’t soon forget, and it’s surprisingly simple to achieve, making it perfect for bakers of all skill levels.
I can personally attest to the joy these bring. From the delightful aroma that fills your home as they bake, instantly making the atmosphere warmer and more inviting, to that first satisfying crunch and chew. There’s a special kind of comfort baked into each one. They’re the kind of treat that brightens an ordinary afternoon coffee break or adds a sparkle to any gathering. Forget complicated desserts; sometimes, the most profound pleasure comes from something seemingly simple yet executed perfectly. These cookies aren’t just a dessert; they’re a moment, a memory waiting to be made. They offer that perfect balance of sweetness without being cloying, with the toffee pieces providing a sophisticated depth that elevates them far beyond your average chocolate chip cookie.
Now, let’s talk about enjoying your magnificent creations! While these cookies are absolutely divine on their own, perhaps with a cup of freshly brewed coffee or a soothing mug of tea, don’t be afraid to experiment. Imagine serving them slightly warm alongside a scoop of premium vanilla bean ice cream, allowing the residual heat to ever so slightly melt the edges of the ice cream – pure heaven! For a more decadent treat, try pairing them with a rich espresso or a glass of cold milk for a classic combination that never disappoints. They also make fantastic additions to any dessert platter, standing proudly amongst other treats, or even as a thoughtful homemade gift for friends, family, or neighbors. Packaged in a beautiful tin or cellophane bag, they speak volumes about your care and culinary prowess. They’re also fabulous for school lunches or as a pick-me-up treat during a busy workday, truly versatile for any occasion.
Feeling adventurous? These cookies are incredibly versatile. You could easily elevate them further by adding a sprinkle of flaky sea salt on top before baking for a delightful sweet and salty contrast, enhancing the toffee’s natural butteriness. Consider folding in some chopped pecans or walnuts along with the toffee bits for an extra layer of nutty crunch and depth of flavor. For the chocolate lovers out there, a handful of mini chocolate chips, whether milk, dark, or even white chocolate, would be a welcome addition, creating a multi-layered flavor profile that’s simply irresistible. You could even try transforming this recipe into delicious cookie bars by pressing the dough into a rectangular baking dish and baking a bit longer, then cutting into squares once cooled. The possibilities are truly endless, limited only by your imagination and what delights your palate most!
So, my dear friends, I implore you: clear your schedule, gather your ingredients, and give this recipe a whirl. Experience for yourself the sheer delight of baking and tasting these extraordinary Toffee Cookies. I promise you won’t regret it. Once you’ve whipped up your batch, I would absolutely love to hear about your experience! Did you stick to the original recipe, or did you venture into exciting variations? What did your family and friends think? Please don’t hesitate to share your thoughts, tips, and even photos of your delectable creations in the comments section below or on your favorite social media platforms. Your feedback not only makes my day but also inspires other home bakers in our wonderful community. Happy baking, and get ready to fall in love with your new favorite cookie!
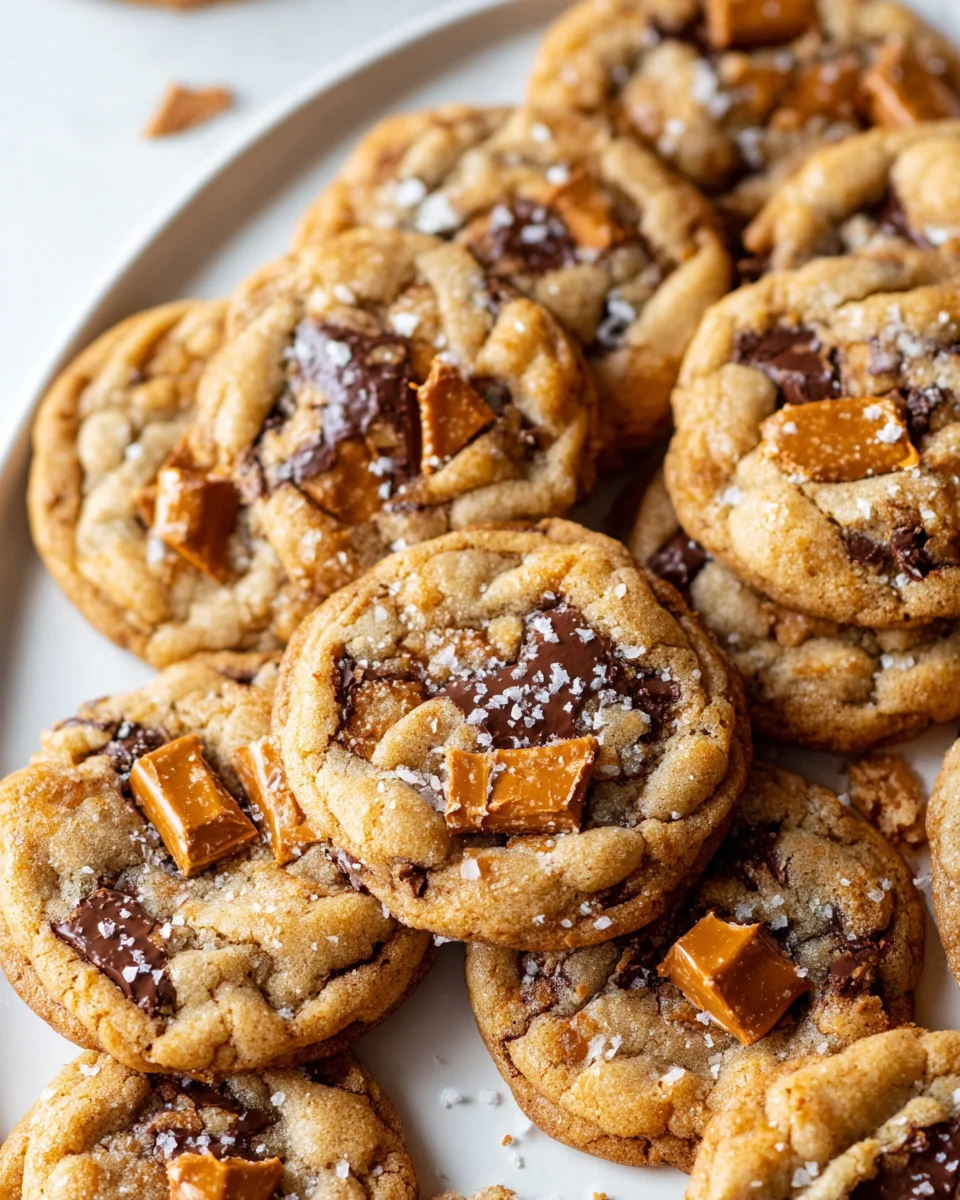
Toffee Cookies with Cracker Toffee Pieces
Toffee Cookies are a true delight, offering a symphony of buttery, chewy goodness punctuated by pockets of golden, caramelized crunch. The simple addition of toffee elevates a classic cookie into an extraordinary experience, with an irresistible texture and flavor profile. The soft, yielding cookie beautifully contrasts with the slightly crisp, sweet burst of toffee pieces, creating a perfect balance of sweet and a hint of saltiness. These cookies evoke warmth and nostalgia, perfect for any occasion.
Ingredients
Instructions
Important Information
Nutrition Facts (Per Serving)
It is important to consider this information as approximate and not to use it as definitive health advice.
Allergy Information
Please check ingredients for potential allergens and consult a health professional if in doubt.