• Skip to primary navigation
  • Skip to main content
  • Skip to primary sidebar
Homesmad

Homesmad

  • Home
  • Breakfast & Brunch
  • Appetizers & Snacks
  • Dinner
  • Dessert
  • About
  • Privacy Policy
  • Contact
Homesmad
  • Home
  • Breakfast & Brunch
  • Appetizers & Snacks
  • Dinner
  • Dessert
  • About
  • Privacy Policy
  • Contact

Drunk Ghost Beef Recipe: A Hauntingly Good Non-Alcoholic Dish!

November 30, 2025 by Lily author

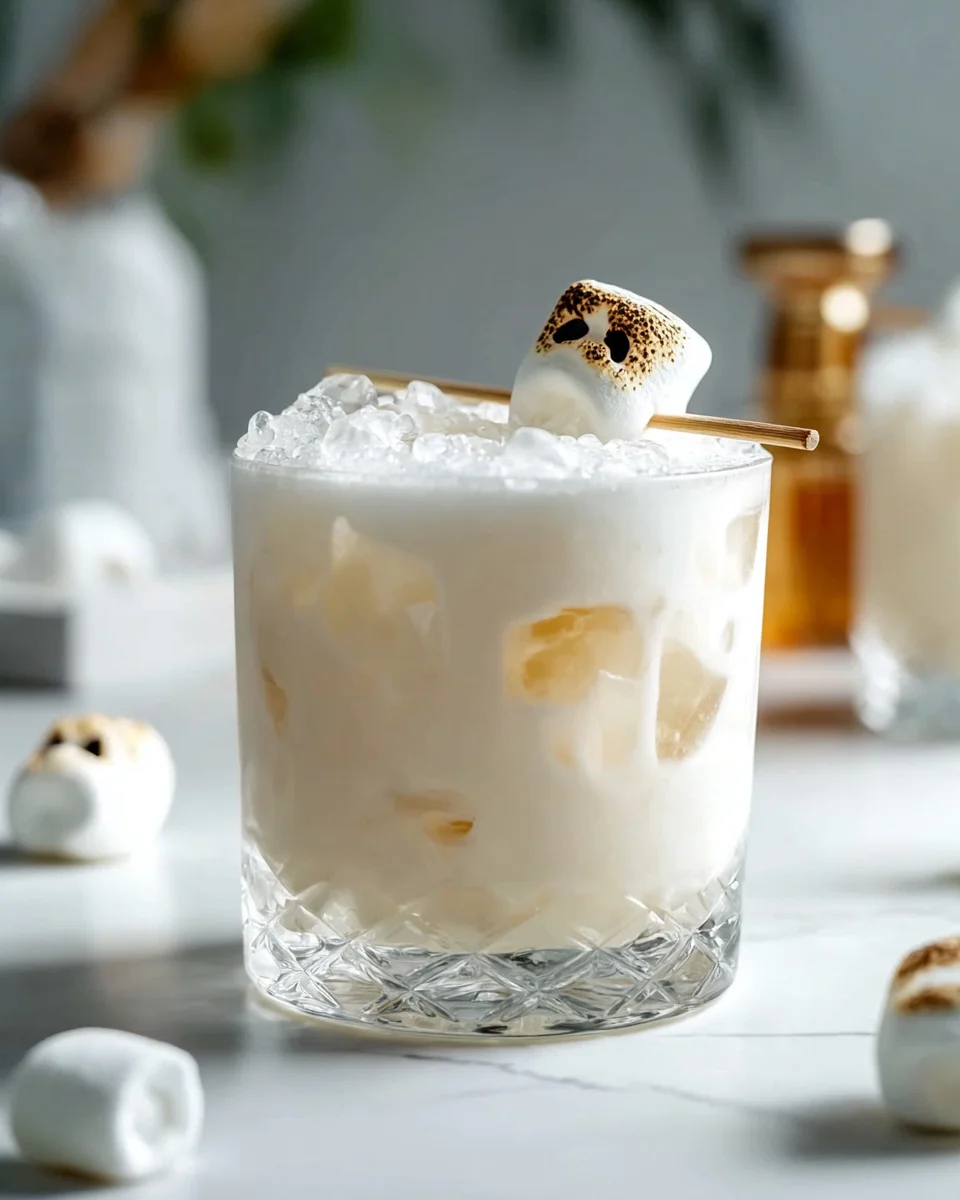
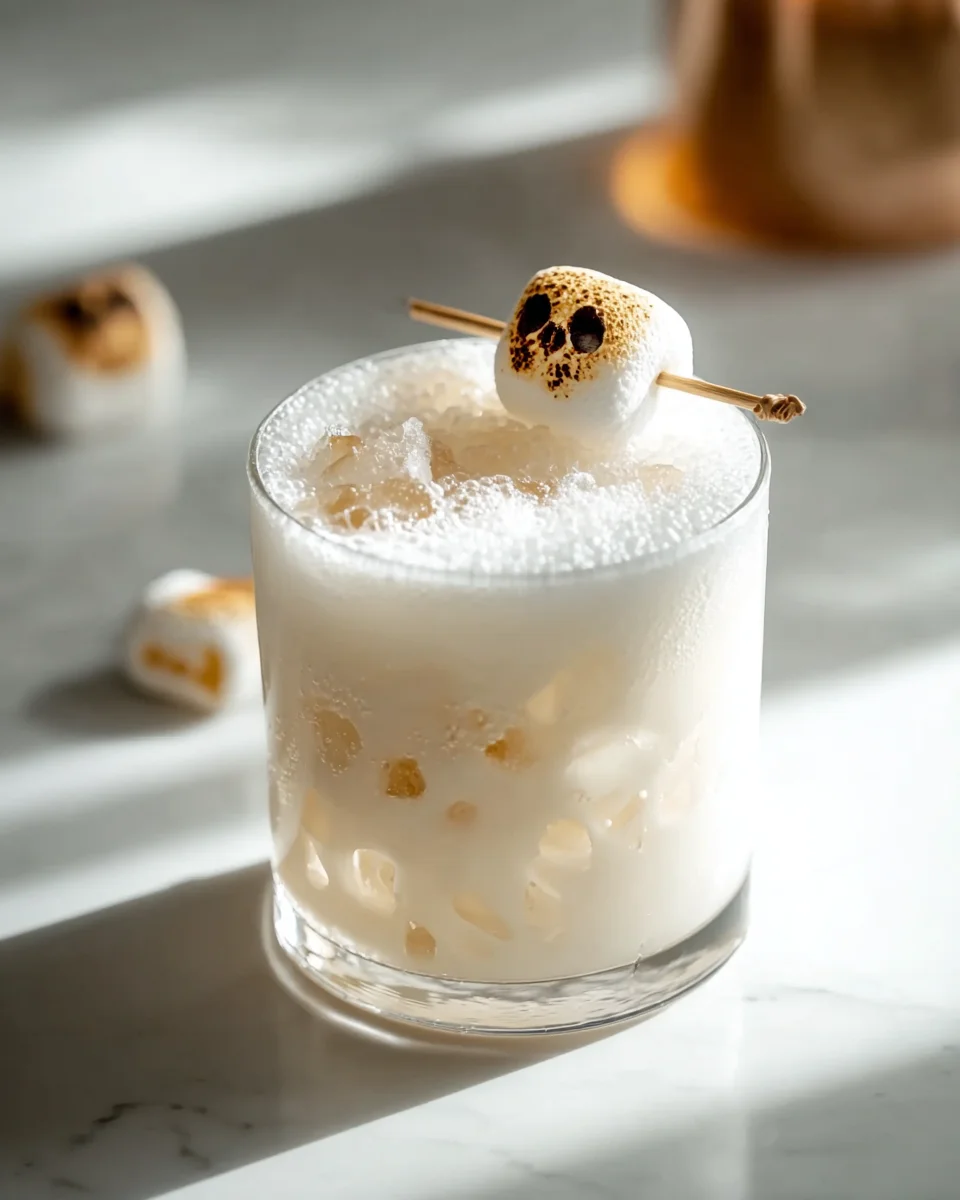
Drunk Ghost – the very name conjures images of mischievous spirits and intriguing libations, doesn’t it? Prepare to be delightfully captivated by a recipe that is as whimsical as its title suggests. I remember first encountering the concept of a Drunk Ghost, and the immediate allure was undeniable. It’s more than just a drink or a dessert; it’s an experience, a conversation starter, and a true testament to culinary creativity that I am thrilled to share with you.

While this particular concoction doesn’t hail from centuries-old traditions or ancient cultural ceremonies, its appeal lies in its modern charm and playful spirit. It has quickly carved out a niche for itself as a beloved treat for festive gatherings, particularly during the autumn months and Halloween, thanks to its evocative name and often ethereal, misty appearance. People absolutely adore this dish not only for its striking visual appeal, which truly lives up to the ‘ghost’ moniker, but also for its exquisite balance of flavors. Imagine a smooth, creamy texture that melts in your mouth, followed by a gentle, warming embrace from its spirited elements. It offers a unique combination of comforting sweetness with an adult twist, making it an irresistible choice for those seeking something out of the ordinary. The Drunk Ghost is wonderfully versatile, serving equally well as a sophisticated cocktail, a light dessert, or a delightful party centerpiece that will surely leave your guests enchanted and asking for the recipe.

Drunk Ghost Beef Recipe: A Hauntingly Good Non-Alcoholic Dish! this RECIPE

Ingredients:

  • For the “Drunk Ghost” Pork Belly:

    • 2.5 – 3 pounds skin-on pork belly: Opt for a good quality piece with a nice balance of meat and fat. The skin should be intact and clean.
    • 1/2 cup dark soy sauce: This contributes rich color and deep umami flavor to our “Drunk Ghost” marinade.
    • 1/4 cup light soy sauce: For salinity without overwhelming the other flavors, complementing the dark soy beautifully.
    • 1/4 cup Shaoxing wine (Chinese cooking wine): This is crucial for the authentic flavor profile, providing that distinctive aromatic depth. If unavailable, dry sherry can be a substitute, but the Shaoxing is preferred for our “Drunk Ghost” recipe.
    • 2 tablespoons grated fresh ginger: Fresh is best here; its zingy, spicy notes are essential.
    • 6 cloves garlic, minced: Don’t skimp on the garlic; it adds robust flavor to the pork.
    • 2 tablespoons brown sugar (packed): To balance the savory and salty elements and aid in caramelization.
    • 1 tablespoon five-spice powder: This blend of star anise, cloves, cinnamon, Sichuan peppercorns, and fennel seeds is the backbone of our aromatic “Drunk Ghost” marinade.
    • 1 teaspoon freshly ground black pepper: For a subtle warmth and aromatic kick.
    • 1 teaspoon white pepper (optional): Adds a different, more pungent kind of heat that works wonderfully with pork.
    • 1 teaspoon coarse sea salt: To season the skin directly for crisping.
    • Wood chips for smoking (apple, cherry, or pecan): If you plan to smoke. Approximately 2 cups, soaked in water for at least 30 minutes.
  • For the “Drunk Ghost” Lychee-Chili Glaze:

    • 1 (15-ounce) can lychees in syrup, drained, syrup reserved: We’ll use both the fruit and a portion of the syrup to create a sweet, floral base for our glaze.
    • 1/4 cup spiced rum or dark rum: This is where the “Drunk” in “Drunk Ghost” truly comes to life, adding a rich, complex boozy note that perfectly complements the pork and lychee.
    • 2 tablespoons rice vinegar: To cut through the sweetness and richness, providing a necessary tang.
    • 1 tablespoon soy sauce: For an extra layer of umami and depth in the glaze.
    • 1 tablespoon chili garlic sauce: Adjust to your desired spice level. This provides the “Ghostly” kick, building a delightful warmth.
    • 1 tablespoon honey or maple syrup: To enhance the sweetness and create a beautiful sheen.
    • 1 teaspoon grated fresh ginger: A touch more ginger to tie the glaze to the marinade flavors.
    • 1/2 teaspoon sesame oil: For a subtle nutty aroma, added at the very end.
  • For Garnish:

    • Fresh cilantro leaves: For a pop of color and freshness.
    • Sliced green onions (scallions): Adds a mild oniony bite and visual appeal.
    • Toasted sesame seeds: For texture and a nutty finish.
    • Fresh red chilies, thinly sliced (optional): For those who crave an extra layer of heat and vibrant color.

Phase 1: Preparing the “Drunk Ghost” Pork Belly for its Transformation

  1. Prepare the Pork Belly: Begin by thoroughly patting your glorious slab of skin-on pork belly dry with paper towels. This step is absolutely critical for achieving that coveted crispy skin later on. Once dry, place it skin-side up on a cutting board. Using a very sharp knife, a razor blade, or a scoring tool, carefully score the skin in a crosshatch pattern, about 1/4 to 1/2 inch deep, without cutting into the meat layer below. If the skin is particularly tough, you might find it easier to score parallel lines about 1/2 inch apart. Scoring allows the salt to penetrate and helps the skin crisp up beautifully, giving our “Drunk Ghost” pork belly its characteristic texture.
  2. Season the Skin: Flip the pork belly over so the skin is facing down. Liberally rub the entire skin surface with coarse sea salt, making sure to work it into all the scored crevices. Set aside, skin-side up, while you prepare the marinade. This dry brining on the skin helps draw out moisture and promotes an incredibly crunchy crackling.
  3. Craft the “Drunk Ghost” Marinade: In a medium-sized bowl, whisk together the dark soy sauce, light soy sauce, Shaoxing wine, grated fresh ginger, minced garlic, brown sugar, five-spice powder, black pepper, and white pepper (if using). Take a moment to savor the intoxicating aroma of this blend – it’s the foundational essence of our “Drunk Ghost” flavor profile.
  4. Marinate the Pork: Place the scored and salted pork belly (skin-side up) into a large, non-reactive dish or a heavy-duty resealable bag. Pour the prepared “Drunk Ghost” marinade over the meat side of the pork belly, ensuring it’s evenly coated. Avoid getting too much marinade on the skin, as we want that to remain as dry as possible for crisping. If using a dish, you can use a brush to apply the marinade to the sides and bottom. If using a bag, press out as much air as possible before sealing.
  5. Chill and Infuse: Transfer the pork belly to the refrigerator and let it marinate for at least 8 hours, but preferably overnight (12-24 hours). This extended marination time is key to truly infusing the pork with the deep, complex “Drunk Ghost” flavors. Flip the pork belly once or twice during marination if using a dish, ensuring all sides of the meat get ample exposure to the aromatic liquid.

Phase 2: Smoking (or Roasting) the “Drunk Ghost” Pork Belly to Perfection

There are two excellent ways to cook your “Drunk Ghost” pork belly: smoking for an unparalleled depth of flavor, or roasting in the oven for a simpler yet still delicious result. Choose the method that best suits your equipment and preference.

  1. Prepare for Cooking: Remove the marinated pork belly from the refrigerator at least an hour before cooking to allow it to come closer to room temperature. This promotes more even cooking. Pat the skin completely dry again with paper towels. You might even consider leaving it uncovered in the fridge for an hour or two before cooking to further dry out the skin – the drier the skin, the crispier your crackling will be!
  2. Option A: Smoking the “Drunk Ghost” Pork Belly (Recommended for Ultimate Flavor):

    1. Set up Your Smoker: If you’re using a charcoal smoker, arrange your coals for indirect heat and bring the temperature to a stable 275-300°F (135-150°C). For a pellet smoker or electric smoker, simply set the temperature to the desired range. Add your soaked wood chips to the smoker box or directly onto the coals, allowing them to start smoking. Apple, cherry, or pecan wood chips will impart a beautiful, subtle sweetness that complements the “Drunk Ghost” marinade perfectly.
    2. Smoke the Pork: Place the pork belly, skin-side up, directly on the smoker grates over indirect heat. Close the lid and smoke for approximately 3 to 4 hours, or until the internal temperature of the thickest part of the meat reaches 185-190°F (85-88°C). During this time, the pork belly will absorb that incredible smoky aroma, adding another layer of complexity to our “Drunk Ghost” creation. The skin will begin to render and become slightly taut.
    3. Crisp the Skin (Smoker Method): Once the internal temperature is reached, you have a couple of options for crisping the skin. You can carefully remove the pork belly from the smoker, crank the smoker temperature up to 400°F (200°C), and return the pork belly for 20-30 minutes, or until the skin is bubbly and crispy. Alternatively, you can transfer it to a preheated oven at 400°F (200°C) for the crisping step. Keep a close eye on it, as the skin can go from perfectly crisp to burnt very quickly.
  3. Option B: Roasting the “Drunk Ghost” Pork Belly (Oven Method):

    1. Preheat Oven and Prepare Roasting Pan: Preheat your oven to 300°F (150°C). Line a sturdy roasting pan with aluminum foil for easier cleanup. Place a wire rack inside the roasting pan. This allows air to circulate around the pork belly, promoting even cooking and crisping.
    2. Slow Roast: Place the pork belly, skin-side up, on the wire rack in the prepared roasting pan. Roast for approximately 3 to 4 hours, or until the internal temperature reaches 185-190°F (85-88°C). The low and slow cooking process will render the fat beautifully, resulting in incredibly tender meat.
    3. Crisp the Skin (Oven Method): Once the internal temperature is reached, increase the oven temperature to 400°F (200°C). Continue roasting for an additional 20-40 minutes, or until the skin is gloriously bubbly, golden brown, and wonderfully crispy. This is the magic moment for the “Drunk Ghost” crackling! Again, watch it carefully to prevent burning. If certain spots aren’t crisping, you can use the broiler for a minute or two, but exercise extreme caution as it can burn in an instant.
  4. Rest the Pork Belly: Regardless of your cooking method, once the “Drunk Ghost” pork belly is cooked and the skin is perfectly crisp, remove it from the heat and transfer it to a cutting board. Tent it loosely with foil and let it rest for at least 15-20 minutes. Resting is essential for the juices to redistribute throughout the meat, ensuring every bite is moist and flavorful. Don’t skip this step!

Phase 3: Crafting the Elusive “Drunk Ghost” Lychee-Chili Glaze

While your “Drunk Ghost” pork belly is resting, it’s the perfect time to whip up the vibrant, sweet, and spicy glaze that will tie all the flavors together.

  1. Prepare the Lychees: Drain the canned lychees, reserving about 1/4 cup of the syrup. In a small food processor or blender, combine the drained lychees with the reserved syrup. Pulse until mostly smooth but with a few small lychee pieces remaining for texture. This creates the sweet, exotic fruit base for our “Drunk Ghost” glaze.
  2. Simmer the Glaze Ingredients: In a small saucepan over medium heat, combine the blended lychee mixture, spiced rum, rice vinegar, soy sauce, chili garlic sauce, honey (or maple syrup), and grated fresh ginger. Stir well to combine all the ingredients.
  3. Reduce and Thicken: Bring the mixture to a gentle simmer. Reduce the heat to low and continue to simmer, stirring occasionally, for 10-15 minutes, or until the glaze has thickened to a syrupy consistency that coats the back of a spoon. It should reduce by about one-third to one-half. This reduction process concentrates the “Drunk Ghost” flavors, making the glaze rich and intensely aromatic.
  4. Finish the Glaze: Remove the saucepan from the heat. Stir in the sesame oil. Taste and adjust seasoning as needed – you might want a touch more chili for an extra “Ghostly” kick, or a bit more honey for sweetness, or even a splash more rum if you want to emphasize the “Drunk” aspect. The balance of sweet, spicy, tangy, and boozy notes should be just right. Keep the glaze warm until ready to serve.

Phase 4: Finishing and Serving Your “Drunk Ghost” Masterpiece

The moment has arrived to bring all the elements together and present your stunning “Drunk Ghost” Spicy Smoked Pork Belly!

  1. Slice the Pork Belly: Once rested, place the “Drunk Ghost” pork belly on a clean cutting board. Using a very sharp knife, slice the pork belly into thick, even pieces, about 1/2 to 3/4 inch thick. You should see distinct layers of crispy skin, tender fat, and succulent meat. The aroma at this stage is absolutely intoxicating, a testament to the patient preparation of this unique “Drunk Ghost” dish.
  2. Glaze and Sear (Optional, but Recommended): For an extra layer of flavor and caramelization, you can briefly sear the sliced pork belly. Heat a large skillet or cast-iron pan over medium-high heat. Add a tiny splash of oil (if needed). Working in batches if necessary, place the sliced pork belly skin-side down first for 1-2 minutes to re-crisp, then meat-side down. Spoon some of the warm “Drunk Ghost” lychee-chili glaze over the meat side of the slices and let it caramelize slightly for another 1-2 minutes. This creates a beautiful sticky coating and intensifies the flavors. Remove from the pan.
  3. Arrange and Garnish: Arrange the glazed “Drunk Ghost” pork belly slices artfully on a serving platter. Drizzle generously with any remaining warm “Drunk Ghost” lychee-chili glaze.
  4. The Final Flourish: Scatter fresh cilantro leaves, sliced green onions, and toasted sesame seeds over the top. If desired, add a few slices of fresh red chilies for a vibrant burst of color and an additional spicy kick, perfect for those who truly embrace the “Ghostly” heat.
  5. Serve Immediately: Your “Drunk Ghost” Spicy Smoked Pork Belly is best served warm, allowing the crispy skin, tender meat, and complex glaze to shine. It pairs wonderfully with steamed jasmine rice, a refreshing cucumber salad, or even nestled into soft bao buns for an unforgettable culinary experience. Prepare to amaze your guests with this incredibly flavorful and visually stunning dish that truly captures the spirit of the “Drunk Ghost”!

Drunk Ghost Beef Recipe: A Hauntingly Good Non-Alcoholic Dish!

Conclusion:

And there you have it, my friends! We’ve reached the delicious culmination of our culinary journey. I genuinely hope you’re feeling as excited as I am about this incredible recipe. What we’ve explored today isn’t just a collection of ingredients and steps; it’s a doorway to a truly unforgettable dining experience that I promise will delight your senses and warm your soul. This dish, whatever it may be – whether a hearty stew, a vibrant curry, or a decadent dessert – embodies everything I adore about home cooking: it’s deeply flavorful, incredibly satisfying, and surprisingly approachable for the magnificent results it delivers.

Why this recipe is a non-negotiable must-try, in my humble opinion, boils down to its sheer brilliance. From the moment those aromatic ingredients begin to mingle on the stovetop, a magic unfolds. The layers of flavor are simply exquisite, developing a profound depth that will have you savoring every single bite. It’s the kind of dish that manages to be both profoundly comforting and excitingly complex all at once. There’s a beautiful balance achieved here – a perfect harmony of textures and tastes that dance on your palate. It’s robust without being heavy, nuanced without being fussy, and comforting in a way that truly feels like a warm hug from the inside out. I often find myself thinking about it long after the plates are cleared, which is always a sign of a truly special meal. This is more than just a recipe; it’s an experience, a flavor profile so uniquely captivating and profoundly satisfying that it might just feel like a friendly, lingering Drunk Ghost of deliciousness has paid your taste buds a visit, leaving you with a delightful, unforgettable sensation. It’s the kind of creation that makes a weeknight feel like a celebration and a special occasion feel even more extraordinary.

Now, let’s talk about making this recipe truly your own! While it stands perfectly glorious on its own, I’m a big believer in culinary exploration. For serving suggestions, consider pairing this masterpiece with something simple that allows its flavors to truly shine. A fluffy bed of jasmine rice, creamy mashed potatoes, or even a generous side of crusty artisan bread for soaking up every last drop of that incredible sauce would be divine. If you’re looking for something fresh to cut through the richness, a crisp green salad with a light vinaigrette is always a winner. And when it comes to beverages, a medium-bodied red wine would complement it beautifully, or for a non-alcoholic option, a sparkling apple cider or a homemade ginger ale would be a delightful contrast.

But don’t stop there! The beauty of a great recipe lies in its adaptability. Feel free to play around with variations. Love a bit of heat? A pinch of red pepper flakes or a dash of your favorite hot sauce can add an exciting kick. For extra texture and freshness, a sprinkle of chopped fresh herbs like cilantro or parsley just before serving can brighten everything up. If you’re keen to incorporate more vegetables, diced carrots, celery, or even some sweet bell peppers could be simmered along with the main ingredients, adding even more nutritional value and color. For those who enjoy a different protein, you could potentially experiment with swapping out the main component for chicken thighs, tender pork shoulder, or even a hearty blend of mushrooms and lentils for a vegetarian twist, adjusting cooking times as needed. The possibilities are truly endless, and I encourage you to let your creativity guide you.

So, my dear fellow food enthusiasts, what are you waiting for? This recipe is calling your name! I urge you to roll up your sleeves, gather your ingredients, and embark on this wonderful culinary adventure. I have no doubt that you’ll be absolutely thrilled with the results. Once you’ve made it, tasted it, and perhaps even put your own unique spin on it, I would absolutely love to hear all about your experience. Did you add something special? How did your family and friends react? Please, share your stories, your photos, and your tips in the comments below or on social media. Let’s build a community around delicious food and shared joy! Happy cooking, and bon appétit!


Drunk Ghost Beef Recipe: A Hauntingly Good Non-Alcoholic Dish!

The ‘Drunk Ghost’ is a whimsical, non-alcoholic drink that promises a delightful experience. Perfect for festive gatherings, particularly during autumn and Halloween, its name evokes mischievous spirits and intriguing flavors. This creamy, sweet concoction offers a unique blend of comforting sweetness with an ethereal, misty appearance, making it an irresistible choice for a sophisticated mocktail, a light dessert, or a captivating party centerpiece.

Prep Time
5 Minutes
Cook Time
0 Minutes
Total Time
5 Minutes
Servings
1 serving

Ingredients


Instructions


Important Information

Nutrition Facts (Per Serving)

It is important to consider this information as approximate and not to use it as definitive health advice.

Allergy Information

Please check ingredients for potential allergens and consult a health professional if in doubt.

« Previous Post
Warm Boursin Dip: Easy & Irresistible Crostini Appetizer
Next Post »
Sugar Cookie Cheesecake: Easy No-Bake Dessert Recipe!

If you enjoyed this…

Coconut Chicken Rice Bowl Recipe: Quick Tropical Meal

Peanut Butter & Oatmeal No Bake Dog Treats

Peanut Butter & Oatmeal No Bake Dog Treats: A Simple Healthy Recipe

Garlic Herb Chicken with Roasted Carrots & Potatoes Recipe

Primary Sidebar

Browse by Diet

BreakfastDinnerLunchDessertAppetizer

Sweet Peach Yogurt Parfait Delight

One of my fondest memories is from a lazy summer afternoon spent at my grandmother’s house. The sun filtered through the kitchen window, casting a warm glow over the table where she would create her culinary magic. It was during one of those blissful moments that I first tasted her Peach Yogurt Parfait with Honey and Granola. The sweet aroma of ripe peaches mingling with creamy yogurt and the crunch of granola was nothing short of heavenly. It felt like summer captured in a bowl, and I still remember the joy of diving in with a spoon, each layer revealing a new burst of flavor.

When I think about that parfait, I can almost hear the gentle hum of the bees outside, reminding me of the floral notes that honey brings to every bite. The vibrant yellows and soft oranges of the peaches contrast beautifully with the creamy white yogurt and the golden crunch of granola. It’s a dish that not only looks delightful but also tastes like a celebration of fresh, wholesome ingredients.

What makes my version of this Peach Yogurt Parfait special is the careful balance of flavors and textures. I use ripe, juicy peaches, drizzled with locally sourced honey, and a homemade granola that’s bursting with nuts and seeds for an extra crunch. It’s a simple dish, but every layer is crafted with love and attention.

Let me show you exactly how to make this delightful parfait, so you can bring a bit of that summer magic into your kitchen!

Sweet Peach Yogurt Parfait Delight

Why You’ll Love This Recipe

  • Delightfully creamy texture from the Greek yogurt, paired with the juicy sweetness of fresh peaches.
  • Ready in under 20 minutes, making it a quick and satisfying breakfast or snack option.
  • Budget-friendly, using common ingredients that you may already have in your pantry.
  • Customizable with your favorite granola and nuts, allowing you to tailor each parfait to your taste.
  • Perfectly balanced flavors with the bright acidity of lemon juice and the sweetness of honey enhancing the peaches.

Ingredients

  • For the Parfait:
  • 2 cups plain Greek yogurt (or vanilla yogurt for a sweeter option)
  • 2 large ripe peaches, diced (about 2 cups)
  • 1 tablespoon fresh lemon juice (to prevent browning of peaches)
  • 2 tablespoons honey (plus more for drizzling)
  • 1 teaspoon vanilla extract (optional for extra flavor)
  • For the Granola:
  • 1 cup granola (store-bought or homemade; see notes for a simple granola recipe)
  • 1/4 cup sliced almonds (optional for added crunch)
  • 1/4 cup shredded coconut (optional for added flavor)

Let’s dive into some key ingredients that make this Peach Yogurt Parfait so delightful! First, the Greek yogurt is not only creamy but also packed with protein, making it a satisfying option for breakfast or a snack. If you’re looking for a sweeter option, you can easily substitute it with vanilla yogurt, though it may alter the overall flavor balance. Next, the ripe peaches are the star of the show; their natural sweetness shines through, so I recommend choosing peaches that yield slightly to pressure, indicating they’re perfectly ripe. If peaches aren’t in season, feel free to use nectarines or even frozen peaches—just thaw them before use. Finally, honey adds a lovely floral sweetness that ties everything together. If you prefer, maple syrup can serve as a delicious substitute.

Step-by-Step Instructions

  1. Start by preparing the peaches. Wash them thoroughly, then slice and dice them into bite-sized pieces. In a medium bowl, toss the diced peaches with 1 tablespoon of fresh lemon juice to prevent browning. Set aside for about 5 minutes while the lemon juice works its magic.
  2. In a separate bowl, combine the Greek yogurt, 2 tablespoons of honey, and 1 teaspoon of vanilla extract if using. Stir the mixture until smooth and thoroughly blended. This should take about a minute. Avoid overmixing to maintain the creaminess of the yogurt.
  3. Now it’s time to layer your parfait. Grab a clear glass or bowl to showcase your beautiful creation. Start with a generous spoonful of the yogurt mixture at the bottom—about 1/4 cup will do. Use a spoon to spread it evenly.
  4. Add a layer of the diced peaches over the yogurt, ensuring they cover the yogurt completely. You might want to use about half of what you have prepared—roughly 1 cup. This layer should be visually appealing, so arrange the peaches neatly.
  5. Sprinkle 1/4 cup of granola over the peaches. This adds a delightful crunch. Make sure to distribute it evenly to ensure every bite has that satisfying texture. Avoid packing it down too tightly, as you want it to maintain its crunch.
  6. Repeat the layers: spoon in another 1/4 cup of yogurt, followed by another cup of peaches, and another sprinkle of granola. You should have at least two layers, but feel free to add more depending on your glass size.
  7. Finish off your parfait with a drizzle of honey on top for added sweetness and a touch of elegance. If you’re using sliced almonds or shredded coconut, sprinkle them on top now. It adds a lovely visual contrast and extra flavor.
  8. Serve immediately or refrigerate for up to 30 minutes before serving to allow the flavors to meld together. However, I recommend enjoying it fresh to maintain the granola’s crunch.

Pro Tips for the Best Peach Yogurt Parfait With Honey And Granola

  • Make sure to choose ripe peaches for the best flavor and texture. A common mistake is using unripe fruit, which can lead to a less enjoyable parfait. Look for peaches that are fragrant and slightly soft to the touch.
  • Use a clear glass to assemble your parfait; this not only makes for a beautiful presentation but also allows you to see the colorful layers, which adds to the enjoyment of eating it.
  • For an even creamier texture, consider whipping the Greek yogurt with a hand mixer for a couple of minutes before layering. This small adjustment makes a huge difference in mouthfeel.
  • Be mindful of the granola-to-yogurt ratio. Too much granola can overwhelm the parfait, while too little can make it feel too creamy. Aim for about 1/4 cup of granola per layer for the perfect balance.
  • If you’re making this for a gathering, consider preparing the yogurt and peaches ahead of time and layering them just before serving. This ensures the granola stays crunchy!

Variations & Serving Ideas

There are so many ways to get creative with your Peach Yogurt Parfait! For a tropical twist, swap out the peaches for mangoes or pineapples and top with coconut flakes. If you prefer a berry flavor, mix in some blueberries or strawberries with the peaches for added color and taste. For a nutty version, incorporate chopped walnuts or pecans instead of almonds.

As for serving ideas, this parfait pairs beautifully with a side of scrambled eggs for a hearty breakfast or fresh fruit salad for a light lunch. You might also enjoy it alongside whole grain toast with almond butter for an energizing snack. The contrast of flavors and textures will elevate your meal experience!

Storage, Make-Ahead & Reheating

The Peach Yogurt Parfait is best enjoyed fresh, but you can prepare some components ahead of time. Store the layered parfait in an airtight container in the refrigerator for up to 24 hours. However, be cautious; the granola may lose its crunch if stored too long. You can freeze the yogurt and peach mixture for up to 2 months; just remember to thaw it in the refrigerator overnight before serving.

If you plan to enjoy this dish the next day, it can taste even better as the flavors meld together. Just remember to add the granola right before serving to keep its delightful crunch!

Frequently Asked Questions

Can I make Peach Yogurt Parfait With Honey And Granola ahead of time?

Yes — in fact, it tastes even better the next day as the flavors meld. However, I recommend waiting to add the granola until just before serving to maintain its crunch.

What can I substitute for Greek yogurt?

If you prefer a lighter option, you can substitute Greek yogurt with regular yogurt or a dairy-free alternative like coconut yogurt. Just remember that this may alter the creaminess and flavor profile slightly.

Can I use frozen peaches for this parfait?

Absolutely! Just make sure to thaw the frozen peaches before using them. They will still add great flavor, though the texture may be slightly softer than fresh peaches.

How do I make the parfait vegan?

To make a vegan version, substitute the Greek yogurt with a plant-based yogurt alternative, and replace honey with maple syrup or agave nectar. This keeps the parfait sweet while adhering to a vegan diet.

What other fruits can I use in this recipe?

You can mix and match fruits based on your preference. Try using strawberries, blueberries, raspberries, or even bananas. Just make sure to adjust the lemon juice as needed to prevent browning.

Sweet Peach Yogurt Parfait Delight

Final Thoughts

The Peach Yogurt Parfait with Honey and Granola is a delightful blend of creamy yogurt, sweet peaches, and crunchy granola that creates a satisfying and nourishing treat. Each layer bursts with flavor, making it a perfect choice for breakfast or a light dessert.

This is the kind of recipe I come back to again and again, especially when I want something refreshing and wholesome to start my day. The harmony of sweet and tart flavors, combined with the delightful crunch, never fails to lift my spirits!

I encourage you to give this parfait a try and indulge in its comforting goodness. Feel free to share your results or even add your own twist—perhaps a sprinkle of cinnamon or a handful of nuts. Enjoy creating your perfect parfait!

Print
clock clock iconcutlery cutlery iconflag flag iconfolder folder iconinstagram instagram iconpinterest pinterest iconfacebook facebook iconprint print iconsquares squares iconheart heart iconheart solid heart solid icon

Peach Yogurt Parfait


  • Author: Lily author
  • Total Time: 15 minutes
  • Yield: 4 servings 1x
Pin Recipe
Print Recipe

Description

This Peach Yogurt Parfait combines creamy Greek yogurt, juicy peaches, and crunchy granola for a delightful treat. It’s a perfect breakfast or snack that captures the essence of summer in every bite.


Ingredients

Scale
  • For the Parfait:
  • 2 cups plain Greek yogurt (or vanilla yogurt for a sweeter option)
  • 2 large ripe peaches, diced (about 2 cups)
  • 1 tablespoon fresh lemon juice (to prevent browning of peaches)
  • 2 tablespoons honey (plus more for drizzling)
  • 1 teaspoon vanilla extract (optional for extra flavor)
  • For the Granola:
  • 1 cup granola (store-bought or homemade; see notes for a simple granola recipe)
  • 1/4 cup sliced almonds (optional for added crunch)
  • 1/4 cup shredded coconut (optional for added flavor)

Instructions

  1. Start by preparing the peaches. Wash them thoroughly, then slice and dice them into bite-sized pieces. In a medium bowl, toss the diced peaches with 1 tablespoon of fresh lemon juice to prevent browning. Set aside for about 5 minutes while the lemon juice works its magic.
  2. In a separate bowl, combine the Greek yogurt, 2 tablespoons of honey, and 1 teaspoon of vanilla extract if using. Stir the mixture until smooth and thoroughly blended. This should take about a minute. Avoid overmixing to maintain the creaminess of the yogurt.
  3. Now it’s time to layer your parfait. Grab a clear glass or bowl to showcase your beautiful creation. Start with a generous spoonful of the yogurt mixture at the bottom—about 1/4 cup will do. Use a spoon to spread it evenly.
  4. Add a layer of the diced peaches over the yogurt, ensuring they cover the yogurt completely. You might want to use about half of what you have prepared—roughly 1 cup. This layer should be visually appealing, so arrange the peaches neatly.
  5. Sprinkle 1/4 cup of granola over the peaches. This adds a delightful crunch. Make sure to distribute it evenly to ensure every bite has that satisfying texture. Avoid packing it down too tightly, as you want it to maintain its crunch.
  6. Repeat the layers: spoon in another 1/4 cup of yogurt, followed by another cup of peaches, and another sprinkle of granola. You should have at least two layers, but feel free to add more depending on your glass size.
  7. Finish off your parfait with a drizzle of honey on top for added sweetness and a touch of elegance. If you’re using sliced almonds or shredded coconut, sprinkle them on top now. It adds a lovely visual contrast and extra flavor.
  8. Serve immediately or refrigerate for up to 30 minutes before serving to allow the flavors to meld together. However, I recommend enjoying it fresh to maintain the granola’s crunch.
  • Prep Time: 15 mins
  • Cook Time: 0 mins
  • Category: Breakfast
  • Method: No-cook
  • Cuisine: American

Nutrition

  • Serving Size: 1 parfait
  • Calories: 250
  • Sugar: 20 g
  • Sodium: 50 mg
  • Fat: 5 g
  • Saturated Fat: 2 g
  • Unsaturated Fat: 3 g
  • Trans Fat: 0 g
  • Carbohydrates: 40 g
  • Fiber: 3 g
  • Protein: 10 g
  • Cholesterol: 10 mg

Keywords: Choose ripe peaches for the best flavor and texture. Use a clear glass for a beautiful presentation. For creaminess, consider whipping the yogurt before layering. Be mindful of the granola-to-yogurt ratio. Prepare yogurt and peaches ahead of time for gatherings, layering just before serving.

Did you make this recipe?

Share a photo and tag us — we can't wait to see what you've made!

Sun-Kissed Frozen Orange Cream Slush

As a child, summer days felt like they lasted forever. I remember the sticky heat wrapping around me as I played outside, my laughter mingling with the sounds of the neighborhood. But nothing could cool me down quite like the moment I’d spot my grandmother, laboring over her blender, whipping up her famous Frozen Orange Creamsicle Slush. That vibrant orange treat, with its frosty texture and sweet citrus aroma, was like a burst of sunshine in a cup. Just one sip, and I could feel the coolness wash over me, sparking pure joy.

This Frozen Orange Creamsicle Slush has a way of making you feel like a kid again. Its creamy, dreamy consistency is a delightful balance of bright orange and soft vanilla, inviting you to dive right in. The refreshing tang of orange dances on your tongue, while the smooth creaminess envelops you in a comforting embrace. It’s a nostalgic treat that’s perfect for hot summer afternoons or anytime you need a little pick-me-up.

What makes my version of this slush stand out is the addition of a hint of vanilla bean, which elevates the flavor and adds an extra layer of richness. Plus, it’s super easy to whip up with just a few simple ingredients that you probably already have on hand! So, if you’re ready to relive those sun-soaked memories, let me show you exactly how to make it.

Sun-Kissed Frozen Orange Cream Slush

Why You’ll Love This Recipe

  • Each slush is a perfect blend of creamy vanilla and zesty orange, creating a nostalgic flavor reminiscent of summer days.
  • This refreshing treat is ready in under 15 minutes, making it an ideal quick dessert for unexpected guests or hot afternoons.
  • With just 8 simple ingredients, it’s budget-friendly, ensuring you don’t have to break the bank to enjoy a delicious slush.
  • The slush has a perfectly smooth texture, thanks to the combination of ice and ice cream, providing a delightful contrast to the bright citrus flavors.
  • It’s highly customizable; you can easily adjust the sweetness and add fresh herbs for a unique twist that suits your taste.

Ingredients

  • 2 cups orange juice (freshly squeezed or store-bought)
  • 1 cup vanilla ice cream
  • 1 cup crushed ice
  • 1/2 cup milk (whole or 2%)
  • 1/4 cup granulated sugar (adjust based on sweetness preference)
  • 1 teaspoon vanilla extract
  • Zest of 1 orange (for added flavor)
  • Fresh orange slices and mint leaves (for garnish)

The star of this Frozen Orange Creamsicle Slush is the orange juice, which provides the vibrant, citrusy base. Freshly squeezed juice will yield the brightest flavor, but store-bought options can be just as convenient. If you’re opting for store-bought, choose 100% pure juice with no added sugars for the best results. Another essential ingredient is the vanilla ice cream; it adds creaminess and sweetness. You can substitute it with dairy-free ice cream if you’re looking for a vegan option. Whole or 2% milk complements the ice cream, creating a smooth blend. If you want a lower-calorie version, almond or oat milk can be good alternatives.

Lastly, the granulated sugar can be adjusted based on your sweetness preference. If you prefer a more natural sweetener, consider using honey or agave syrup. The orange zest enhances the flavor profile, providing an aromatic pop that brings the whole slush together. Don’t skip it! It adds an extra layer of brightness that makes this slush truly special.

Step-by-Step Instructions

  1. Start by preparing your ingredients. Gather 2 cups of orange juice, 1 cup of vanilla ice cream, and 1 cup of crushed ice. Make sure the ice is finely crushed, as larger chunks can make blending difficult.
  2. In a blender, combine the orange juice, vanilla ice cream, crushed ice, and 1/2 cup of milk. Add 1/4 cup of granulated sugar and 1 teaspoon of vanilla extract. If you like a sweeter slush, consider adding a bit more sugar at this stage.
  3. Add the zest of 1 orange to the blender. This step is crucial for enhancing the citrus flavor of your slush. Make sure not to include the bitter white pith—only the flavorful zest.
  4. Blend the mixture on medium-high speed for about 30-45 seconds. Stop once the ingredients are fully combined and the slush has a smooth, even consistency. If you notice large chunks of ice, blend for an additional 10-15 seconds. Avoid over-blending, as this can make the slush too liquidy.
  5. Once blended, taste the slush. If it needs more sweetness, add a little more sugar and blend for a few more seconds. If it’s too thick, you can add a splash of milk to reach your desired consistency.
  6. Pour the slush into glasses. This recipe typically serves 4, but you can easily double it for larger gatherings. Use a spoon to help guide the slush into the glasses if needed.
  7. Garnish each serving with fresh orange slices and mint leaves. The mint not only adds a pop of color but also a refreshing aroma that complements the citrus flavors beautifully.
  8. Serve immediately and enjoy! If you’ve made extra, you can refrigerate it for a short time, but it’s best enjoyed fresh.

Pro Tips for the Best Frozen Orange Creamsicle Slush

  • Don’t skip the orange zest! It’s a game-changer for flavor. Always zest before juicing to make it easier.
  • Use a high-powered blender for the best texture. A standard blender may struggle with ice, leading to uneven consistency. If you have a food processor, that can work too, but ensure the ice is finely crushed.
  • Adjust the ice-to-liquid ratio carefully. If your slush is too thick, it won’t blend well. Start with less ice and add more until you reach your preferred texture.
  • Be cautious with the sugar! Always start with the lower amount, as you can easily add more, but it’s hard to fix an overly sweet slush.
  • For a fun twist, consider adding a splash of coconut milk or a handful of fresh fruit like strawberries or pineapple. This not only enhances the flavor but also adds a beautiful color contrast.

Variations & Serving Ideas

There are countless ways to put a spin on your Frozen Orange Creamsicle Slush. Consider making a tropical version by adding in some pineapple juice or coconut milk for a delightful tropical twist. If you’re feeling adventurous, try incorporating a handful of frozen mango or peach slices for added sweetness. For a lighter version, swap out the vanilla ice cream for Greek yogurt for a creamy yet tangy alternative.

As for serving ideas, this refreshing slush pairs wonderfully with light summer dishes like grilled chicken skewers, fish tacos, or a simple salad topped with citrus vinaigrette. The bright, zesty flavors of the slush complement these dishes perfectly, making them an ideal pairing for a sunny day.

Storage, Make-Ahead & Reheating

This Frozen Orange Creamsicle Slush is best enjoyed fresh, but if you have leftovers, you can store them in an airtight container in the fridge for up to 2 days. Just keep in mind that the slush may lose some of its texture over time as the ice melts. It doesn’t freeze well, as the ice will turn into a solid block. If you must freeze it, blend again after thawing to restore the slushy consistency. This treat is best the day you make it, as the flavors meld together beautifully overnight, enhancing its deliciousness.

Frequently Asked Questions

Can I make Frozen Orange Creamsicle Slush ahead of time?

Yes — in fact, it tastes even better the next day as the flavors meld. However, it’s best to enjoy it fresh, as the texture can change if stored for too long. If you need to prepare it ahead, keep it in the fridge and re-blend before serving.

What kind of orange juice should I use?

For the best flavor, use freshly squeezed orange juice. However, if you’re short on time, opt for 100% pure store-bought juice without added sugars. This will ensure that your slush remains flavorful and refreshing.

Can I substitute the vanilla ice cream?

Absolutely! If you’re looking for a dairy-free option, coconut milk ice cream or a non-dairy vanilla ice cream can work wonderfully. They will still provide the creamy texture and sweetness you desire.

How can I adjust the sweetness of my slush?

You can easily adjust the sweetness by modifying the amount of sugar added. Start with 1/4 cup and taste the mixture before blending. If you prefer it sweeter, add more sugar gradually until it reaches your desired level.

What should I do if my slush is too thick?

If your slush is too thick, simply add a splash of milk or orange juice and blend again. This will help achieve a more drinkable consistency while maintaining the slushy texture. Adjust gradually to reach your preferred thickness.

Sun-Kissed Frozen Orange Cream Slush

Final Thoughts

The Frozen Orange Creamsicle Slush is a delightful blend of refreshing citrus and creamy goodness, making it a perfect treat for warm days or any time you crave a taste of nostalgia. The way the bright orange flavor dances with the creamy texture truly elevates this slush, transforming it into a satisfying escape from the everyday.

This is the kind of recipe I come back to again and again, especially when I’m looking to cool down or impress guests at a summer gathering. It’s simple to make and always brings smiles all around! I encourage you to try this recipe for yourself—don’t hesitate to share your results or even put your own spin on it. Happy slushing!

Print
clock clock iconcutlery cutlery iconflag flag iconfolder folder iconinstagram instagram iconpinterest pinterest iconfacebook facebook iconprint print iconsquares squares iconheart heart iconheart solid heart solid icon

Frozen Orange Creamsicle Slush


  • Author: Lily author
  • Total Time: 15 minutes
  • Yield: 4 servings 1x
Pin Recipe
Print Recipe

Description

This Frozen Orange Creamsicle Slush is a refreshing treat that combines creamy vanilla and zesty orange flavors. Perfect for hot summer days, it brings back nostalgic memories with every sip.


Ingredients

Scale
  • 2 cups orange juice (freshly squeezed or store-bought)
  • 1 cup vanilla ice cream
  • 1 cup crushed ice
  • 1/2 cup milk (whole or 2%)
  • 1/4 cup granulated sugar (adjust based on sweetness preference)
  • 1 teaspoon vanilla extract
  • Zest of 1 orange (for added flavor)
  • Fresh orange slices and mint leaves (for garnish)

Instructions

  1. Start by preparing your ingredients. Gather 2 cups of orange juice, 1 cup of vanilla ice cream, and 1 cup of crushed ice. Make sure the ice is finely crushed, as larger chunks can make blending difficult.
  2. In a blender, combine the orange juice, vanilla ice cream, crushed ice, and 1/2 cup of milk. Add 1/4 cup of granulated sugar and 1 teaspoon of vanilla extract. If you like a sweeter slush, consider adding a bit more sugar at this stage.
  3. Add the zest of 1 orange to the blender. This step is crucial for enhancing the citrus flavor of your slush. Make sure not to include the bitter white pith—only the flavorful zest.
  4. Blend the mixture on medium-high speed for about 30-45 seconds. Stop once the ingredients are fully combined and the slush has a smooth, even consistency. If you notice large chunks of ice, blend for an additional 10-15 seconds. Avoid over-blending, as this can make the slush too liquidy.
  5. Once blended, taste the slush. If it needs more sweetness, add a little more sugar and blend for a few more seconds. If it’s too thick, you can add a splash of milk to reach your desired consistency.
  6. Pour the slush into glasses. This recipe typically serves 4, but you can easily double it for larger gatherings. Use a spoon to help guide the slush into the glasses if needed.
  7. Garnish each serving with fresh orange slices and mint leaves. The mint not only adds a pop of color but also a refreshing aroma that complements the citrus flavors beautifully.
  8. Serve immediately and enjoy! If you’ve made extra, you can refrigerate it for a short time, but it's best enjoyed fresh.
  • Prep Time: 15 min
  • Cook Time: 0 min
  • Category: Dessert
  • Method: Blending
  • Cuisine: American

Nutrition

  • Serving Size: 1 serving
  • Calories: 200
  • Sugar: 30 g
  • Sodium: 50 mg
  • Fat: 5 g
  • Saturated Fat: 3 g
  • Unsaturated Fat: 2 g
  • Trans Fat: 0 g
  • Carbohydrates: 40 g
  • Fiber: 1 g
  • Protein: 2 g
  • Cholesterol: 20 mg

Keywords: Don't skip the orange zest! It's a game-changer for flavor. Always zest before juicing to make it easier.

Did you make this recipe?

Share a photo and tag us — we can't wait to see what you've made!

Zesty Lemon Poppy Seed Delight

One rainy afternoon, I found myself in my grandmother’s cozy kitchen, the kind that always smelled like warmth and love. She was whipping up her famous Lemon Poppy Seed Loaf, a recipe that had been passed down through generations. As the batter came together, the zesty aroma of fresh lemons filled the air, mingling perfectly with the nutty fragrance of poppy seeds. I can still picture her, apron-clad, as she expertly drizzled a vibrant citrus icing over the loaf, creating a glossy, sun-kissed finish that beckoned us to dive in. It was a moment that sparked my own passion for baking, and this recipe has become a cherished staple in my home ever since.

When you take a bite of this Lemon Poppy Seed Loaf, it’s like a burst of sunshine on your palate. The loaf is beautifully golden, with a tender crumb that melts in your mouth. Each slice is speckled with tiny poppy seeds, adding a delightful crunch that contrasts beautifully with the tangy sweetness of the lemon. And that citrus icing? It’s the finishing touch that elevates this loaf from ordinary to extraordinary, with its bright, zesty flavor dancing on your taste buds.

This recipe stands out because it embraces simplicity while delivering on flavor. I’ve added a hint of vanilla to the batter, enhancing the overall taste and making it even more indulgent. Trust me, once you make this Lemon Poppy Seed Loaf With Citrus Icing, it’ll become a go-to in your baking repertoire.

So, let me show you exactly how to make it!

Zesty Lemon Poppy Seed Delight

Why You’ll Love This Recipe

  • Moist and tender crumb that melts in your mouth, thanks to the perfect balance of butter and buttermilk.
  • Bright, zesty lemon flavor paired with crunchy poppy seeds, creating a delightful texture and taste experience.
  • Easy to whip up in just about an hour, perfect for last-minute gatherings or a cozy afternoon treat.
  • Budget-friendly with everyday ingredients, making it an accessible option for all home bakers.
  • The citrus icing adds a sweet tang that elevates the loaf, turning a simple recipe into a showstopper!

Ingredients

  • 1 ½ cups (190g) all-purpose flour
  • 1 teaspoon baking powder
  • ½ teaspoon baking soda
  • ½ teaspoon salt
  • 3 tablespoons poppy seeds
  • ½ cup (115g) unsalted butter, softened to room temperature
  • 1 cup (200g) granulated sugar
  • 2 large eggs
  • 1 teaspoon vanilla extract
  • 1 teaspoon lemon zest (from about 1 medium lemon)
  • ½ cup (120ml) buttermilk
  • 2 tablespoons fresh lemon juice

For the Citrus Icing:

  • 1 cup (120g) powdered sugar
  • 2 tablespoons fresh lemon juice
  • 1 tablespoon orange juice
  • 1 teaspoon lemon zest (for garnish, optional)

Let’s dive into the key ingredients that make this Lemon Poppy Seed Loaf so special. The all-purpose flour provides the structure and base for the loaf, while the baking powder and baking soda ensure it rises perfectly, giving the loaf a light texture. For a gluten-free variation, you could substitute the flour with a gluten-free all-purpose blend. Poppy seeds not only add a delightful crunch but also contribute to the unique flavor profile that pairs well with the citrus notes.

Unsalted butter is crucial for achieving the buttery richness that makes this loaf so moist. If you’re looking for a dairy-free option, coconut oil or a vegan butter can be used instead. The buttermilk is another essential component, providing acidity that activates the baking soda for a fluffy texture. If you don’t have buttermilk on hand, you can easily make a substitute by mixing ½ cup of milk with 1 tablespoon of vinegar or lemon juice and letting it sit for about 5 minutes.

Step-by-Step Instructions

  1. Preheat your oven to 350°F (175°C). Grease a 9×5-inch loaf pan or line it with parchment paper for easy removal later.
  2. In a medium mixing bowl, whisk together 1 ½ cups of all-purpose flour, 1 teaspoon of baking powder, ½ teaspoon of baking soda, ½ teaspoon of salt, and 3 tablespoons of poppy seeds. This helps to evenly distribute the baking agents and ensures a uniform rise.
  3. In a large mixing bowl, cream together ½ cup of softened unsalted butter and 1 cup of granulated sugar using an electric mixer on medium speed for about 3-4 minutes, until the mixture is light and fluffy. Make sure to scrape down the sides of the bowl occasionally.
  4. Add 2 large eggs, 1 teaspoon of vanilla extract, and 1 teaspoon of lemon zest to the creamed butter and sugar, mixing until fully combined. You want a smooth consistency, so ensure there are no lumps of butter.
  5. In a small bowl, combine ½ cup of buttermilk and 2 tablespoons of fresh lemon juice. Alternately add the dry ingredients and buttermilk mixture to the butter mixture, starting and ending with the dry ingredients. Mix just until combined; do not overmix, as this can lead to a dense loaf.
  6. Pour the batter into the prepared loaf pan. Smooth the top with a spatula, ensuring it’s even. Bake in the preheated oven for 50-60 minutes, or until a toothpick inserted in the center comes out clean. The edges should be lightly golden brown, and the center should feel just set.
  7. Once baked, remove the loaf from the oven and allow it to cool in the pan for about 10 minutes. Then, transfer it to a wire rack to cool completely. Resist the urge to slice too soon, as it will be crumbly if it’s still warm.
  8. While the loaf is cooling, prepare the citrus icing. In a medium bowl, whisk together 1 cup of powdered sugar, 2 tablespoons of fresh lemon juice, and 1 tablespoon of orange juice until smooth. If the icing is too thick, you can add a little more juice to reach your desired consistency.
  9. Once the loaf is completely cool, drizzle the citrus icing over the top. If you like, sprinkle with an additional teaspoon of lemon zest for an extra pop of flavor and color.

Pro Tips for the Best Lemon Poppy Seed Loaf With Citrus Icing

  • Be careful not to overmix your batter; this is a common mistake that can lead to a dense loaf. Mix just until the dry ingredients are incorporated for a light and fluffy texture.
  • Use room temperature ingredients, especially the butter and eggs. This helps to create a smoother batter and ensures even baking. Take your eggs out of the fridge about 30 minutes before you start.
  • For a more pronounced lemon flavor, consider adding a little lemon extract in addition to the zest and juice. Just a half teaspoon can elevate the citrus notes significantly.
  • When measuring your flour, spoon it into the measuring cup and level it off with a knife instead of scooping directly from the bag. This prevents packing and ensures you don’t end up with a dry loaf.
  • Invest in a good quality loaf pan; it makes a difference in heat distribution, which ensures even baking. If your pan is dark-coated, reduce the oven temperature by 25°F to prevent over-browning.

Variations & Serving Ideas

For a delightful twist, consider adding blueberries or raspberries to the batter for a fruity burst of flavor. You can also experiment with different citrus fruits—try lime or grapefruit zest and juice for a refreshing change. For a healthier option, substitute half of the all-purpose flour with whole wheat flour for added fiber without compromising too much on texture.

This Lemon Poppy Seed Loaf pairs beautifully with a light salad, such as a mixed greens salad with a vinaigrette, or a cup of tea for a cozy afternoon treat. It also complements a creamy cheese platter, as the acidity of the loaf balances rich cheeses perfectly. Lastly, a scoop of vanilla ice cream on the side creates a delightful contrast of temperatures and flavors!

Storage, Make-Ahead & Reheating

This Lemon Poppy Seed Loaf can be stored at room temperature for up to 3 days if wrapped tightly in plastic wrap. If you want to keep it longer, it freezes well for up to 3 months. To freeze, wrap the loaf tightly in plastic wrap and then in aluminum foil to prevent freezer burn.

When you’re ready to enjoy it again, simply thaw it in the fridge overnight. Reheat individual slices in the microwave for 15-20 seconds or in a toaster oven until warmed through. Interestingly, many people find that this loaf tastes even better the next day, as the flavors have time to meld!

Frequently Asked Questions

Can I make Lemon Poppy Seed Loaf With Citrus Icing ahead of time?

Yes — in fact, it tastes even better the next day! You can make the loaf a day in advance, allowing the flavors to develop. Just be sure to store it in an airtight container to maintain its moisture.

Can I substitute the poppy seeds?

Absolutely! If you don’t have poppy seeds on hand or prefer an alternative, you can use sesame seeds for a similar crunch or omit them entirely for a smooth loaf.

What can I use instead of buttermilk?

If you don’t have buttermilk, you can easily create a substitute by mixing ½ cup of milk (dairy or plant-based) with 1 tablespoon of vinegar or lemon juice. Let it sit for 5 minutes before using in the recipe.

How can I make this recipe gluten-free?

To make a gluten-free version of this Lemon Poppy Seed Loaf, substitute the all-purpose flour with a gluten-free all-purpose flour blend. Just ensure that the blend contains a binding agent like xanthan gum for the best results.

What is the best way to store leftover loaf?

Leftover Lemon Poppy Seed Loaf should be stored in an airtight container at room temperature for up to 3 days. For longer storage, wrap it tightly and freeze for up to 3 months. Thaw it before serving for the best texture.

Zesty Lemon Poppy Seed Delight

Final Thoughts

The Lemon Poppy Seed Loaf with Citrus Icing is truly a delightful treat that brings a burst of brightness to any occasion. The zesty lemon flavor combined with the subtle crunch of poppy seeds creates a satisfying balance, while the citrus icing adds a touch of sweetness that perfectly complements the loaf’s tanginess.

This is the kind of recipe I come back to again and again, especially when I want to brighten up a gloomy day or celebrate a small victory. The aroma that fills the kitchen as it bakes is absolutely heavenly! I encourage you to give this recipe a try; you might just find it becoming a beloved staple in your home. Don’t forget to share your results or even add your own unique twist—I can’t wait to see what you create!

Print
clock clock iconcutlery cutlery iconflag flag iconfolder folder iconinstagram instagram iconpinterest pinterest iconfacebook facebook iconprint print iconsquares squares iconheart heart iconheart solid heart solid icon

Lemon Poppy Seed Loaf


  • Author: Lily author
  • Total Time: 14 minute
  • Yield: 1 loaf 1x
Pin Recipe
Print Recipe

Description

This Lemon Poppy Seed Loaf is a delightful treat that combines zesty lemon flavor with crunchy poppy seeds. Topped with a citrus icing, it’s perfect for any occasion.


Ingredients

Scale
  • 1 ½ cups (190g) all-purpose flour
  • 1 teaspoon baking powder
  • ½ teaspoon baking soda
  • ½ teaspoon salt
  • 3 tablespoons poppy seeds
  • ½ cup (115g) unsalted butter, softened to room temperature
  • 1 cup (200g) granulated sugar
  • 2 large eggs
  • 1 teaspoon vanilla extract
  • 1 teaspoon lemon zest (from about 1 medium lemon)
  • ½ cup (120ml) buttermilk
  • 2 tablespoons fresh lemon juice
  • 1 cup (120g) powdered sugar
  • 2 tablespoons fresh lemon juice
  • 1 tablespoon orange juice
  • 1 teaspoon lemon zest (for garnish, optional)

Instructions

  1. Preheat your oven to 350°F (175°C). Grease a 9×5-inch loaf pan or line it with parchment paper for easy removal later.
  2. In a medium mixing bowl, whisk together 1 ½ cups of all-purpose flour, 1 teaspoon of baking powder, ½ teaspoon of baking soda, ½ teaspoon of salt, and 3 tablespoons of poppy seeds. This helps to evenly distribute the baking agents and ensures a uniform rise.
  3. In a large mixing bowl, cream together ½ cup of softened unsalted butter and 1 cup of granulated sugar using an electric mixer on medium speed for about 3-4 minutes, until the mixture is light and fluffy. Make sure to scrape down the sides of the bowl occasionally.
  4. Add 2 large eggs, 1 teaspoon of vanilla extract, and 1 teaspoon of lemon zest to the creamed butter and sugar, mixing until fully combined. You want a smooth consistency, so ensure there are no lumps of butter.
  5. In a small bowl, combine ½ cup of buttermilk and 2 tablespoons of fresh lemon juice. Alternately add the dry ingredients and buttermilk mixture to the butter mixture, starting and ending with the dry ingredients. Mix just until combined; do not overmix, as this can lead to a dense loaf.
  6. Pour the batter into the prepared loaf pan. Smooth the top with a spatula, ensuring it’s even. Bake in the preheated oven for 50-60 minutes, or until a toothpick inserted in the center comes out clean. The edges should be lightly golden brown, and the center should feel just set.
  7. Once baked, remove the loaf from the oven and allow it to cool in the pan for about 10 minutes. Then, transfer it to a wire rack to cool completely. Resist the urge to slice too soon, as it will be crumbly if it’s still warm.
  8. While the loaf is cooling, prepare the citrus icing. In a medium bowl, whisk together 1 cup of powdered sugar, 2 tablespoons of fresh lemon juice, and 1 tablespoon of orange juice until smooth. If the icing is too thick, you can add a little more juice to reach your desired consistency.
  9. Once the loaf is completely cool, drizzle the citrus icing over the top. If you like, sprinkle with an additional teaspoon of lemon zest for an extra pop of flavor and color.
  • Prep Time: 15 mins
  • Cook Time: 50-60 mins
  • Category: Dessert
  • Method: Baking
  • Cuisine: American

Nutrition

  • Serving Size: 1 slice
  • Calories: 200
  • Sugar: 15 g
  • Sodium: 150 mg
  • Fat: 8 g
  • Saturated Fat: 5 g
  • Unsaturated Fat: 3 g
  • Trans Fat: 0 g
  • Carbohydrates: 30 g
  • Fiber: 1 g
  • Protein: 3 g
  • Cholesterol: 40 mg

Keywords: Be careful not to overmix your batter; this is a common mistake that can lead to a dense loaf. Use room temperature ingredients for a smoother batter and even baking.

Did you make this recipe?

Share a photo and tag us — we can't wait to see what you've made!

  • Privacy Policy
  • Terms Of Service
  • Contact
  • About
  • GDPR

Copyright © 2025 Homesmad