
Lemon Crum extractb Bars
Oh, my friends, get ready to discover your new favorite dessert! When I first tried these Lemon Crum extractb Bars, I knew immediately that I had to share them with you. What makes this recipe so incredibly special, you ask? Well, it takes everything you love about classic lemon bars – that vibrant, zesty, perfectly tart lemon filling – and elevates it with an irresistible “Crum extractb” element. This isn’t just any ordinary lemon bar; it’s a textural masterpiece!
I just know you’re going to adore these bars for their incredible balance. Each bite delivers that bright, sunshine-y burst of lemon, perfectly complemented by a rich, buttery, and slightly crisp “Crum extractb” layer. It’s the kind of dessert that makes your taste buds sing, brightening any day with its refreshing flavor and comforting texture. Whether you’re bringing them to a potluck, serving them for a special occasion, or simply treating yourself to something truly delightful, these Lemon Crum extractb Bars are guaranteed to be a hit.
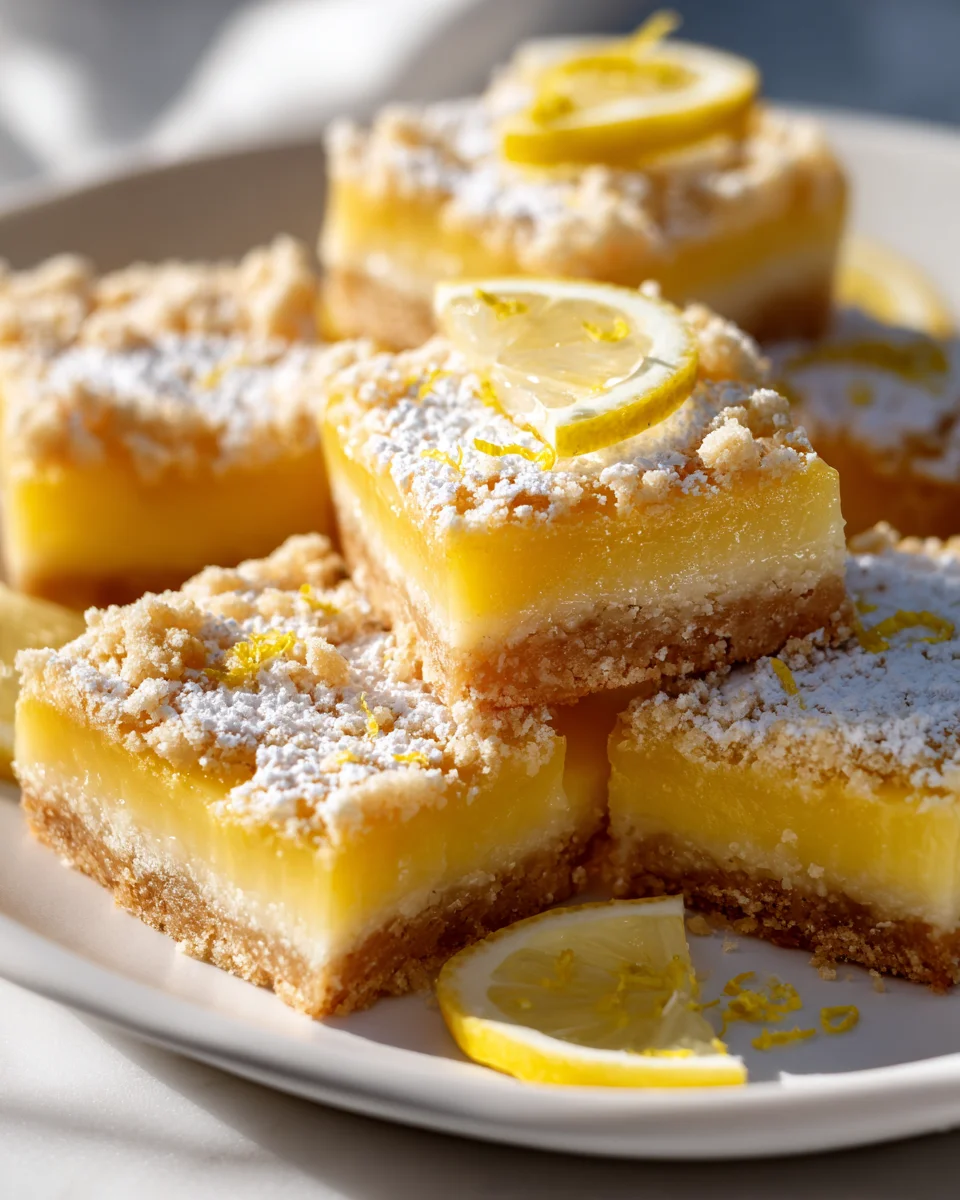
So, what exactly are we diving into? Imagine a luscious, gooey lemon curd, bursting with fresh citrus flavor, nestled between a tender base and a delightful, crumbly “Crum extractb” topping. It’s the perfect harmony of sweet and tart, soft and slightly crunchy, creating an experience that’s utterly unforgettable. Trust me, once you try these, you’ll be making them again and again!

Ingredient Notes
Creating truly spectacular Lemon Crumble Bars starts with understanding the role each ingredient plays. While the recipe itself is straightforward, a little insight into your key components can elevate your final product from good to absolutely incredible.
For the Crumble Base and Topping:
- All-Purpose Flour: This is the backbone of our delicious, buttery crumble. It provides structure and a tender texture. If you’re looking for a gluten-free option, a 1:1 gluten-free baking blend that contains xanthan gum works wonderfully here. Just ensure it’s a blend designed for baking to get the best results.
- Granulated Sugar: It adds sweetness to our crumble and helps with that lovely golden-brown crispness. You could experiment with slightly less refined sugars like organic cane sugar for a subtle flavor difference, but granulated sugar is classic for a reason.
- Cold Unsalted Butter: This is non-negotiable for a perfect crumble. Using cold butter, cut into small cubes, ensures that when you rub it into the flour and sugar, you create small pockets of butter that melt slowly during baking, resulting in a flaky, tender, and rich crumble. Salted butter can be used, but you might want to slightly reduce the added salt in the recipe to avoid over-salting.
- Salt: Just a pinch helps to balance the sweetness and really brings out the flavors of the butter and lemon. Don’t skip it!
For the Zesty Lemon Filling:
- Fresh Lemons (Zest and Juice): This is the star of our show! Freshly squeezed lemon juice provides that vibrant, tangy flavor we all adore in lemon bars. The zest, however, is where the concentrated lemon oil is, delivering an intense aromatic punch. Don’t use bottled lemon juice unless absolutely necessary; the flavor will not be as bright or complex. For an even sweeter, less tart lemon flavor, consider using Meyer lemons if they’re in season.
- Granulated Sugar: It sweetens the tart lemon juice, creating a harmonious balance. The amount can be adjusted slightly to your preference for more or less tartness, but stick close to the recipe for the best texture.
- Large Eggs: Eggs are crucial for the filling’s structure and creamy texture. They act as a thickener, helping the lemon juice and sugar set into that classic custard-like consistency. Make sure your eggs are at room temperature for easier incorporation, though it’s less critical here than in some other baking applications.
- All-Purpose Flour: A small amount of flour in the filling helps to stabilize it and prevent it from becoming too runny. It contributes to the filling’s custardy body without making it heavy.
Step-by-Step Instructions
Let’s dive into making these delightful Lemon Crumble Bars! Follow these steps carefully for the best results, and you’ll be enjoying a perfect balance of zesty lemon and buttery crumble in no time.
Step 1: Prepare Your Pan and Oven
First things first, preheat your oven to 350°F (175°C). Line a 9×13-inch baking pan with parchment paper, leaving an overhang on the sides. This “sling” will make it incredibly easy to lift the entire batch of bars out of the pan once they’re cool, simplifying the cutting process. Lightly grease the parchment paper.
Step 2: Make the Crumble Base and Topping
- In a large mixing bowl, combine the all-purpose flour, granulated sugar, and salt for the crumble. Whisk them together until well combined.
- Add the cold, cubed unsalted butter to the dry ingredients. Using your fingertips, a pastry blender, or a stand mixer with the paddle attachment, cut the butter into the flour mixture until it resembles coarse crumbs. You should have some pea-sized pieces of butter remaining; this is perfect for that desirable crumbly texture.
- Measure out about 1 ¾ cups of this crumble mixture and firmly press it evenly into the bottom of your prepared baking pan. This will form our delicious base. Save the remaining crumble mixture for the topping later.
Step 3: Par-Bake the Crumble Base
Place the pan with the pressed crumble base into your preheated oven and par-bake for 15-18 minutes, or until the edges are lightly golden. This step helps ensure a firm, crisp crust that won’t get soggy under the lemon filling. While it’s baking, you can prepare the lemon filling.
Step 4: Prepare the Zesty Lemon Filling
- While the base is par-baking, in another medium-sized bowl, whisk together the fresh lemon juice, lemon zest, granulated sugar, large eggs, and the small amount of all-purpose flour until the mixture is completely smooth and well combined. Make sure there are no lumps of flour. The color should be a beautiful pale yellow.
- Once the crust is done par-baking, carefully remove the pan from the oven.
Step 5: Assemble and Bake the Bars
- Pour the lemon filling evenly over the warm, par-baked crust.
- Evenly sprinkle the reserved crumble mixture over the lemon filling.
- Return the pan to the oven and bake for another 25-30 minutes, or until the lemon filling is set (it shouldn’t jiggle much in the center when gently shaken) and the top crumble is golden brown.
Step 6: Cool Completely and Cut
This step is critical for perfectly clean bars! Once baked, remove the pan from the oven and place it on a wire rack to cool completely. This will take at least 2-3 hours, or even longer at room temperature. For the cleanest cuts, I often let them cool at room temperature for an hour, then transfer the pan (or just the bars using the parchment sling) to the refrigerator for another 2-3 hours. Once thoroughly chilled and firm, use the parchment paper overhangs to lift the whole block of bars out of the pan onto a cutting board. Use a sharp knife to cut them into squares or rectangles. You can wipe the knife with a damp cloth between cuts for extra neatness.
Tips & Suggestions
Making Lemon Crumble Bars is a joyful process, and these tips will help you achieve perfection every time, ensuring your bars are the talk of the town!
- Don’t Overwork the Crumble: When mixing the butter into the flour for the crumble, be gentle. Overworking it will develop the gluten in the flour too much, resulting in a tough crumble rather than a tender, flaky one. You want coarse crumbs with visible pieces of butter.
- Zest Before Juicing: Always zest your lemons before you cut and juice them! It’s much easier to get all that flavorful zest from a whole lemon. Use a microplane for the finest zest, avoiding the bitter white pith underneath.
- For Maximum Lemon Flavor: If you’re a true lemon lover, consider rubbing the lemon zest into the granulated sugar for the filling (and even a bit for the crumble) with your fingers before adding other ingredients. This releases the essential oils from the zest, infusing the sugar with intense lemon aroma and flavor.
- Cooling is Key: I cannot stress this enough – patience is a virtue when it comes to cutting these bars! If you try to cut them while they’re still warm, the filling will be too soft and messy, and the bars will fall apart. Cooling completely, ideally chilling in the refrigerator for a few hours, allows the lemon filling to fully set and makes for beautiful, clean cuts.
- Achieving Clean Cuts: For professional-looking bars, use a large, sharp chef’s knife. For extra-neat edges, you can run the knife under hot water and wipe it clean between each cut. This helps to prevent the filling from sticking to the blade.
- Varying Sweetness/Tartness: The amount of sugar in the lemon filling can be slightly adjusted based on your personal preference. If you like a very tart bar, reduce the sugar by a tablespoon or two. If you prefer it sweeter, add a little extra. Just be aware that significant changes might slightly affect the filling’s texture.
- Serving Suggestion: While they are absolutely divine on their own, a light dusting of powdered sugar just before serving adds a lovely finish and a touch more sweetness. A dollop of fresh whipped cream or a few fresh berries on the side can also be a delightful addition.
- Pan Size Matters: Stick to the recommended 9×13-inch pan. Using a different size might alter the thickness of the crust and filling, requiring adjustments to baking times.
Storage
Once you’ve gone to the effort of baking these wonderful Lemon Crumble Bars, you’ll want to make sure they stay fresh and delicious for as long as possible. Proper storage is essential!
- Room Temperature: Due to the egg-based lemon filling, I do not recommend storing Lemon Crumble Bars at room temperature for extended periods. The filling contains eggs and can become unsafe or spoil quickly.
- Refrigeration: This is the best way to store your bars. Once completely cooled, place the bars in an airtight container. They will keep beautifully in the refrigerator for up to 5-7 days. The cold temperature helps the filling maintain its firm, custard-like texture, which is delightful when served chilled. Layering parchment paper between layers of bars in the container can prevent them from sticking together.
- Freezing: Yes, you can freeze Lemon Crumble Bars! This is fantastic if you want to make a big batch or save some for later.
- Ensure the bars are completely cooled and chilled.
- Cut them into individual squares or your desired serving size.
- Arrange them in a single layer on a baking sheet and freeze until solid, about 1-2 hours. This prevents them from sticking together when you stack them.
- Once frozen solid, transfer the bars to an airtight, freezer-safe container or a heavy-duty freezer bag. You can place parchment paper between layers to prevent sticking.
- They will keep well in the freezer for up to 2-3 months.
To enjoy, simply thaw the frozen bars in the refrigerator overnight or at room temperature for a few hours. They taste just as fresh as when they were first baked!
Enjoy every zesty, buttery bite of your homemade Lemon Crumble Bars!
Final Thoughts
And there you have it! I truly believe that making these Lemon Crum extractb Bars will bring so much joy to your kitchen. There’s just something magical about the combination of bright, zesty lemon cutting through the sweet, buttery crumble that makes them utterly irresistible. Each bite is a perfect balance of tangy and sweet, with that delightful texture that keeps you coming back for more.
I can promise you, once you taste these incredible Lemon Crum extractb Bars, you’ll understand why they’re an absolute must-try. They’re perfect for sharing with loved ones, bringing to a potluck, or simply treating yourself to a moment of pure bliss with a cup of tea. Go ahead, give them a try – I know you’re going to love them as much as I do!

Easy Lemon Crumble Bars: Bright, Tangy & Delicious!
- Total Time: 1 hour 15 minutes
- Yield: 12 servings 1x
Description
Discover your new favorite dessert with these Easy Lemon Crumble Bars that perfectly balance zesty lemon and buttery crumble. Each bite is a delightful experience that brightens any day!
Ingredients
- 1 ¾ cups All-Purpose Flour (for the Crumble Base and Topping)
- ½ cup Granulated Sugar (for the Crumble Base and Topping)
- ½ cup Cold Unsalted Butter, cut into small cubes (for the Crumble Base and Topping)
- 1 pinch Salt (for the Crumble Base and Topping)
- 1 cup Fresh Lemons (Zest and Juice) (for the Zesty Lemon Filling)
- ¾ cup Granulated Sugar (for the Zesty Lemon Filling)
- 3 Large Eggs (for the Zesty Lemon Filling)
- 2 tablespoons All-Purpose Flour (for the Zesty Lemon Filling)
Instructions
- Preheat your oven to 350°F (175°C). Line a 9×13-inch baking pan with parchment paper, leaving an overhang on the sides. Lightly grease the parchment paper.
- In a large mixing bowl, combine the all-purpose flour, granulated sugar, and salt for the crumble. Whisk them together until well combined.
- Add the cold, cubed unsalted butter to the dry ingredients. Using your fingertips, a pastry blender, or a stand mixer with the paddle attachment, cut the butter into the flour mixture until it resembles coarse crumbs.
- Measure out about 1 ¾ cups of this crumble mixture and firmly press it evenly into the bottom of your prepared baking pan.
- Place the pan with the pressed crumble base into your preheated oven and par-bake for 15-18 minutes, or until the edges are lightly golden.
- While the base is par-baking, in another medium-sized bowl, whisk together the fresh lemon juice, lemon zest, granulated sugar, large eggs, and the small amount of all-purpose flour until the mixture is completely smooth and well combined.
- Once the crust is done par-baking, carefully remove the pan from the oven.
- Pour the lemon filling evenly over the warm, par-baked crust.
- Evenly sprinkle the reserved crumble mixture over the lemon filling.
- Return the pan to the oven and bake for another 25-30 minutes, or until the lemon filling is set and the top crumble is golden brown.
- Once baked, remove the pan from the oven and place it on a wire rack to cool completely. This will take at least 2-3 hours.
- For the cleanest cuts, let them cool at room temperature for an hour, then transfer the pan to the refrigerator for another 2-3 hours. Once thoroughly chilled and firm, use the parchment paper overhangs to lift the whole block of bars out of the pan onto a cutting board. Use a sharp knife to cut them into squares or rectangles.
- Prep Time: 30 mins
- Cook Time: 45 mins
- Category: Dessert
- Method: Baking
- Cuisine: American
Nutrition
- Serving Size: 1 bar
- Calories: 200
- Sugar: 15 g
- Sodium: 50 mg
- Fat: 10 g
- Saturated Fat: 6 g
- Unsaturated Fat: 4 g
- Trans Fat: 0 g
- Carbohydrates: 25 g
- Fiber: 1 g
- Protein: 2 g
- Cholesterol: 50 mg
Keywords: Don't overwork the crumble to maintain a tender texture. Zest your lemons before juicing for maximum flavor. Patience is key when cooling for clean cuts.


