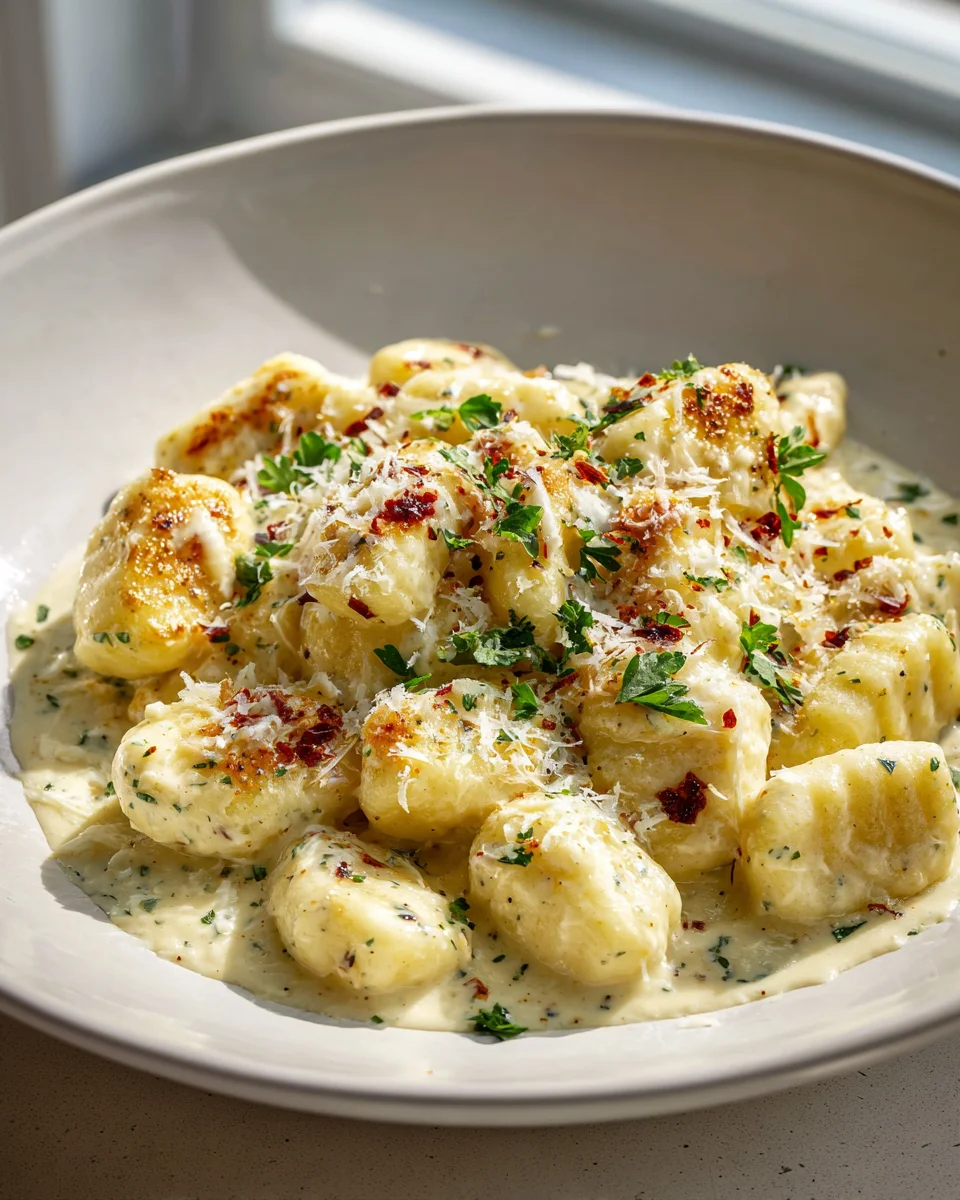
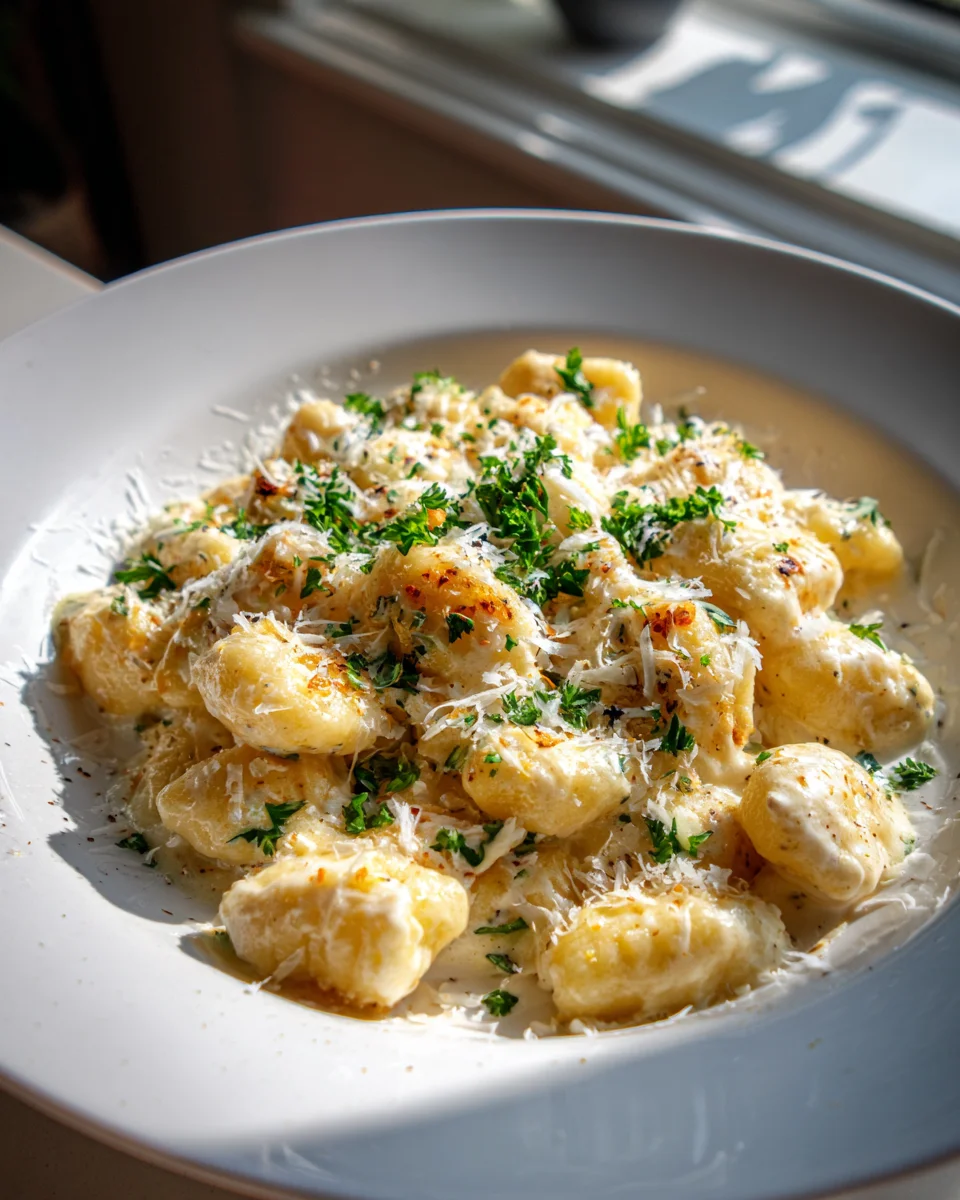
• Skip to primary navigation
  • Skip to main content
  • Skip to primary sidebar
Homesmad

Homesmad

  • Home
  • Breakfast & Brunch
  • Appetizers & Snacks
  • Dinner
  • Dessert
  • About
  • Privacy Policy
  • Contact
Homesmad
  • Home
  • Breakfast & Brunch
  • Appetizers & Snacks
  • Dinner
  • Dessert
  • About
  • Privacy Policy
  • Contact

Millionaire Gnocchi: Decadent, Creamy & Easy Dinner!

March 18, 2026 by Lily author

Millionaire Gnocchi

Millionaire Gnocchi – oh, get ready to dive headfirst into pure culinary indulgence! I am absolutely thrilled to introduce you to a dish that lives up to its name in every single delicious bite. This isn’t just gnocchi; it’s gnocchi elevated to a level of luxurious comfort that feels truly extravagant, without requiring a trust fund to make it!

What makes this recipe so incredibly special, you ask? Well, it takes the humble, pillowy potato gnocchi and smothers it in a sauce so rich, so deeply savory, and so utterly decadent, you’ll feel like you’ve won the culinary lottery. We’re talking about a slow-simmered, tender beef ragu that’s been lovingly cooked down with aromatic vegetables and a splash of non-alcoholic richness, creating an unparalleled depth of flavor. It’s then finished with a creamy touch and a generous sprinkle of cheesy goodness that makes every forkful taste like a dream.

You, my friend, are going to absolutely adore this recipe because it’s the ultimate comfort food upgrade. It’s perfect for a cozy night in, a special occasion where you want to impress without the stress, or simply when you want to treat yourself to something truly spectacular. It’s hearty, incredibly satisfying, and promises to warm you from the inside out. Get ready for an unforgettable meal that feels utterly luxurious!

Millionaire Gnocchi: Decadent, Creamy & Easy Dinner! this RECIPE

Ingredient Notes

Welcome to the world of Millionaire Gnocchi – a dish I absolutely adore for its incredibly rich, comforting, and utterly indulgent character. This isn’t just gnocchi with sauce; it’s a truly decadent experience, earning its “Millionaire” title through layers of flavor, creamy textures, and a generous cheesy finish. To achieve this culinary opulence, we need to select our ingredients wisely. Here’s what I recommend for making your gnocchi feel like a million bucks:

Gnocchi

  • What I use: For ultimate convenience without sacrificing quality, I often reach for good-quality store-bought potato gnocchi. You can find them in the dry pasta aisle or sometimes in the refrigerated section. Aim for about 1.5 pounds (around 680g) for four generous servings. The beauty of store-bought gnocchi is their quick cooking time, making this dish surprisingly weeknight-friendly despite its luxurious feel.
  • Substitution/Upgrade: If you’re feeling ambitious and want to truly elevate the dish, homemade potato gnocchi are a game-changer. They offer an unparalleled light, pillowy texture that’s truly magnificent. Just be sure to prepare them ahead of time!

The Rich Beef Ragu

  • Ground Beef: This is the heart of our Millionaire Ragu. I use about 1 pound (450g) of ground beef, opting for an 80/20 lean-to-fat ratio. The fat renders down beautifully, adding incredible flavor and richness to the sauce. It browns well and creates those lovely crispy bits that deepen the savory profile.
  • Aromatics (Onion & Garlic): The foundation of any great sauce! One medium onion, finely chopped, and 3-4 cloves of minced garlic provide the essential aromatic base. Don’t rush sautéing these; letting them soften and become fragrant truly builds the flavor profile.
  • Tomato Power: I use a combination of a 28 oz (794g) can of crushed tomatoes for a robust, rich tomato base, and 2 tablespoons of tomato paste. The paste is concentrated tomato goodness that adds depth and a touch of umami. Sometimes, I’ll add a pinch of sugar to the tomatoes if they taste a bit acidic, just to balance everything out.
  • Beef Broth: Instead of traditional wine, which is sometimes used in ragus, I opt for 1 cup (240ml) of good quality beef broth. It adds savory depth, helps deglaze the pan, and thins the sauce perfectly without introducing alcohol, keeping the flavor profile rich and robust.
  • Herbs & Spices: Dried oregano and basil (about 1 teaspoon each) are classic Italian herbs that complement the beef and tomato wonderfully. A tiny pinch of red pepper flakes (1/4 teaspoon, optional) adds a very subtle warmth without making the dish spicy – it just wakes up the other flavors.

The Creamy, Cheesy Finish

  • Heavy Cream: This is where the “Millionaire” aspect truly shines! A half-cup (120ml) of heavy cream stirred into the ragu at the end transforms it into an incredibly luxurious, velvety sauce. It mellows the tomato’s acidity and binds all the flavors together beautifully.
  • Parmesan Cheese: About 1/2 cup of freshly grated Parmesan cheese goes into the sauce, adding a salty, umami kick and contributing to that rich, savory depth. Don’t forget extra for serving!
  • Mozzarella Cheese: For that irresistible, bubbly, golden-brown topping, I use about 1 cup of shredded mozzarella. It melts into a glorious blanket, creating a truly comforting and visually appealing finish to our Millionaire Gnocchi.

With these ingredients, we’re setting ourselves up for a dish that is truly extraordinary – hearty, creamy, cheesy, and bursting with flavor. Let’s get cooking!

Step-by-Step Instructions

Making Millionaire Gnocchi is a wonderfully rewarding process, and I promise you, the results are worth every step. Here’s how I bring this luxurious dish to life, ensuring every bite is rich and satisfying:

  1. Brown the Beef: First things first, get a large, heavy-bottomed skillet or a Dutch oven hot over medium-high heat. Add 1 tablespoon of olive oil, then add your 1 pound (450g) of ground beef. Break it up with a spoon and cook until it’s beautifully browned all over, about 7-8 minutes. I make sure to really get some good color on it; those browned bits are flavor bombs! Once cooked, drain off any excess fat and transfer the beef to a bowl, leaving about 1 tablespoon of fat in the pan.
  2. Sauté the Aromatics: Reduce the heat to medium. Add the remaining 1 tablespoon of olive oil to the pan, along with your chopped onion. Sauté the onion for about 5-7 minutes, stirring occasionally, until it’s softened and translucent. Then, toss in your minced garlic and cook for another minute until fragrant, being careful not to burn it.
  3. Build the Rich Ragu: Stir in the 2 tablespoons of tomato paste and cook for 1-2 minutes, stirring constantly. This step caramelizes the tomato paste and deepens its flavor significantly. Now, pour in the 1 cup (240ml) of beef broth, scraping up any delicious browned bits from the bottom of the pan. This deglazing adds even more flavor to our sauce.
  4. Simmer the Sauce: Add the 28 oz (794g) can of crushed tomatoes, dried oregano, dried basil, optional red pepper flakes, and a pinch of sugar (if using) to the pan. Return the cooked ground beef to the skillet. Give everything a good stir to combine. Bring the sauce to a gentle simmer, then reduce the heat to low, cover, and let it cook for at least 30 minutes, or up to an hour, stirring occasionally. The longer it simmers, the more the flavors meld and deepen – that’s the secret to a millionaire-level ragu! Taste and season generously with salt and black pepper.
  5. Cook the Gnocchi: While the sauce is simmering, bring a large pot of salted water to a rolling boil. Add your 1.5 pounds (680g) of potato gnocchi. They cook incredibly fast! Once they float to the surface, they’re usually ready. This typically takes only 2-3 minutes. Don’t overcook them, or they’ll become mushy. Use a slotted spoon to transfer the cooked gnocchi directly into your simmering ragu, reserving about 1/2 cup of the gnocchi cooking water.
  6. Combine and Enrich: Gently stir the gnocchi into the ragu. Add the 1/2 cup (120ml) of heavy cream and 1/2 cup of grated Parmesan cheese. If the sauce seems too thick, add a splash or two of the reserved gnocchi cooking water until it reaches your desired consistency – I like it coating the gnocchi beautifully but still luscious.
  7. The Cheesy Bake (Optional but Highly Recommended): For that ultimate Millionaire Gnocchi experience, transfer the gnocchi and sauce to a 9×13 inch baking dish. Sprinkle the 1 cup of shredded mozzarella cheese evenly over the top. Bake in a preheated oven at 375°F (190°C) for 15-20 minutes, or until the cheese is melted, bubbly, and lightly golden brown. If you want even more color, you can broil it for a minute or two at the very end (watch it carefully!).
  8. Serve: Let the Millionaire Gnocchi rest for a few minutes after it comes out of the oven. Garnish with fresh parsley or basil, and serve immediately with extra Parmesan cheese on the side. Get ready to indulge!

Tips & Suggestions

To truly unlock the millionaire potential of this gnocchi dish, I’ve gathered a few of my favorite tips and tricks. These little nuances can elevate your Millionaire Gnocchi from great to absolutely unforgettable!

  • Don’t Overcook the Gnocchi: This is crucial! Gnocchi cook very quickly. As soon as they float to the surface, they’re typically done. Overcooked gnocchi become mushy and lose their delightful texture, which is a big no-no for a dish like this. Keep a close eye on them!
  • Let the Ragu Simmer: While you can eat the sauce after 30 minutes, the flavors in the beef ragu truly deepen and meld when allowed to simmer for longer. If you have time, aim for an hour. It’s a game-changer for richness. You can even make the ragu a day ahead – it often tastes even better the next day!
  • Adjust Sauce Consistency with Gnocchi Water: That starchy gnocchi cooking water is liquid gold! Don’t throw it out immediately. It’s perfect for thinning your sauce if it’s too thick, adding body and helping the sauce cling beautifully to the gnocchi. Add it a tablespoon at a time until you reach your desired consistency.
  • Cheese, Please!: For the best flavor, use freshly grated Parmesan cheese both in the sauce and for serving. Pre-grated cheeses often contain anti-caking agents that can affect melting and flavor. For the topping, experiment with a blend of mozzarella and a little provolone or fontina for extra gourmet flair.
  • Make it Your Own (Vegetarian Option): If you want a meat-free version, this ragu can be adapted beautifully. Sauté diced mushrooms, lentils, or a hearty plant-based ground “meat” alternative in place of the beef. You’ll still get a rich, satisfying sauce, especially with the cream and cheese.
  • Spice it Up (or Down): I’ve included a hint of red pepper flakes, but if you love a bit of heat, feel free to add more to the ragu. Conversely, if you’re sensitive to spice, simply omit them.
  • Serve with Confidence: This dish is rich, so I like to serve it with something fresh to balance it out. A simple green salad with a light vinaigrette or some crusty bread for soaking up every last drop of that incredible sauce makes for a perfect meal.
  • Batch Cooking Brilliance: The beef ragu component freezes exceptionally well on its own. Consider doubling the sauce recipe and freezing half for an even quicker meal another day. When you’re ready, just thaw, heat, cook your gnocchi, and proceed with the cream and cheese steps.

Storage

One of the many wonderful things about Millionaire Gnocchi is how well it holds up, making it a fantastic option for leftovers or even meal prepping. Here’s how I handle storing this delicious dish to keep it at its best:

Refrigeration

  • Cooked Dish: If you have leftover Millionaire Gnocchi (which is rare in my house!), allow it to cool completely at room temperature, ideally within an hour. Then, transfer it to an airtight container. It will keep beautifully in the refrigerator for up to 3-4 days. The flavors actually tend to deepen a bit overnight, making for a fantastic next-day lunch!
  • Ragu Only: If you’ve made a batch of the rich beef ragu ahead of time, it stores even better on its own. Cool it completely and transfer to an airtight container. It will last in the refrigerator for up to 5 days. This is my secret weapon for quick weeknight meals – just boil gnocchi and finish the sauce with cream and cheese when you’re ready.

Reheating

  • Oven Method (Recommended for Best Texture): For reheating the full Millionaire Gnocchi dish, the oven is my preferred method, especially if it was baked with cheese. Preheat your oven to 350°F (175°C). Place the gnocchi in an oven-safe dish, cover loosely with foil, and bake for 20-25 minutes, or until heated through. If it looks a little dry, you can add a tablespoon or two of beef broth or water before reheating. Remove the foil for the last 5 minutes to crisp up any cheese topping.
  • Stovetop Method: If you’re just reheating the ragu with gnocchi (not a baked version), you can do so in a skillet over medium-low heat. Stir occasionally, adding a splash of beef broth or water if the sauce seems too thick. Heat until simmering and warmed through.
  • Microwave Method: For a quick single serving, the microwave works too! Place a portion in a microwave-safe dish, cover loosely, and heat on high in 1-minute intervals, stirring in between, until hot. Be aware that the gnocchi texture might soften slightly more in the microwave.

Freezing

  • Cooked Dish (Less Ideal): While you can freeze the fully cooked Millionaire Gnocchi, I find that the gnocchi themselves can become a bit softer and slightly mealy once thawed and reheated. If you do freeze it, ensure it’s in a freezer-safe, airtight container for up to 2-3 months. Thaw overnight in the refrigerator before reheating in the oven.
  • Ragu Only (Highly Recommended): Freezing the beef ragu on its own is an excellent option! Once completely cooled, divide it into freezer-safe bags or containers. It will keep well for up to 3-4 months. When ready to use, thaw overnight in the refrigerator, then gently reheat on the stovetop. Once hot, proceed with adding your freshly cooked gnocchi, heavy cream, and cheeses as per the original recipe. This ensures the best texture for your gnocchi while still providing that incredible, rich sauce conveniently.

Millionaire Gnocchi: Decadent, Creamy & Easy Dinner!

Final Thoughts

And there you have it, my friends! Your very own batch of Millionaire Gnocchi. I truly hope you give this recipe a try, because it’s more than just a meal; it’s an experience. The way the tender gnocchi soaks up that incredibly rich, savory beef sauce, all coming together in a creamy, indulgent masterpiece – it’s pure bliss.

Trust me, once you taste the luxurious depth of flavor in this Millionaire Gnocchi, you’ll understand why it earned its name. It’s the perfect dish for a special occasion or when you simply want to treat yourself to something extraordinary. Go ahead, make it, savor every bite, and feel like a millionaire without breaking the bank. Happy cooking!

Print
clock clock iconcutlery cutlery iconflag flag iconfolder folder iconinstagram instagram iconpinterest pinterest iconfacebook facebook iconprint print iconsquares squares iconheart heart iconheart solid heart solid icon

Millionaire Gnocchi: Decadent, Creamy & Easy Dinner!


  • Author: Lily author
  • Total Time: 1 hour 15 minutes
  • Yield: 4 servings 1x
Pin Recipe
Print Recipe

Description

Dive into the luxurious world of Millionaire Gnocchi, where pillowy potato gnocchi meets a rich beef ragu and creamy, cheesy finish. This dish is the ultimate comfort food upgrade, perfect for any special occasion or cozy night in.


Ingredients

Scale
  • 1.5 pounds (around 680g) of potato gnocchi
  • 1 pound (450g) of ground beef (80/20 lean-to-fat ratio)
  • 1 medium onion, finely chopped
  • 3–4 cloves of minced garlic
  • 28 oz (794g) can of crushed tomatoes
  • 2 tablespoons of tomato paste
  • 1 cup (240ml) of beef broth
  • 1 teaspoon of dried oregano
  • 1 teaspoon of dried basil
  • 1/4 teaspoon of red pepper flakes (optional)
  • 1/2 cup (120ml) of heavy cream
  • 1/2 cup of freshly grated Parmesan cheese
  • 1 cup of shredded mozzarella cheese
  • 1 tablespoon of olive oil (for browning beef)
  • 1 tablespoon of olive oil (for sautéing onion)

Instructions

  1. First things first, get a large, heavy-bottomed skillet or a Dutch oven hot over medium-high heat. Add 1 tablespoon of olive oil, then add your 1 pound (450g) of ground beef. Break it up with a spoon and cook until it's beautifully browned all over, about 7-8 minutes. Drain off any excess fat and transfer the beef to a bowl, leaving about 1 tablespoon of fat in the pan.
  2. Reduce the heat to medium. Add the remaining 1 tablespoon of olive oil to the pan, along with your chopped onion. Sauté the onion for about 5-7 minutes, stirring occasionally, until it's softened and translucent. Then, toss in your minced garlic and cook for another minute until fragrant.
  3. Stir in the 2 tablespoons of tomato paste and cook for 1-2 minutes, stirring constantly. Pour in the 1 cup (240ml) of beef broth, scraping up any delicious browned bits from the bottom of the pan.
  4. Add the 28 oz (794g) can of crushed tomatoes, dried oregano, dried basil, optional red pepper flakes, and a pinch of sugar (if using) to the pan. Return the cooked ground beef to the skillet. Stir to combine. Bring the sauce to a gentle simmer, then reduce the heat to low, cover, and let it cook for at least 30 minutes, stirring occasionally.
  5. While the sauce is simmering, bring a large pot of salted water to a rolling boil. Add your 1.5 pounds (680g) of potato gnocchi. Once they float to the surface, they're usually ready. This typically takes only 2-3 minutes. Use a slotted spoon to transfer the cooked gnocchi directly into your simmering ragu, reserving about 1/2 cup of the gnocchi cooking water.
  6. Gently stir the gnocchi into the ragu. Add the 1/2 cup (120ml) of heavy cream and 1/2 cup of grated Parmesan cheese. If the sauce seems too thick, add a splash or two of the reserved gnocchi cooking water until it reaches your desired consistency.
  7. For that ultimate Millionaire Gnocchi experience, transfer the gnocchi and sauce to a 9×13 inch baking dish. Sprinkle the 1 cup of shredded mozzarella cheese evenly over the top. Bake in a preheated oven at 375°F (190°C) for 15-20 minutes, or until the cheese is melted, bubbly, and lightly golden brown.
  8. Let the Millionaire Gnocchi rest for a few minutes after it comes out of the oven. Garnish with fresh parsley or basil, and serve immediately with extra Parmesan cheese on the side.
  • Prep Time: 15 mins
  • Cook Time: 1 hour
  • Category: Dinner
  • Method: Baking
  • Cuisine: Italian

Nutrition

  • Serving Size: 1 bowl
  • Calories: 800
  • Sugar: 6 g
  • Sodium: 900 mg
  • Fat: 45 g
  • Saturated Fat: 20 g
  • Unsaturated Fat: 15 g
  • Trans Fat: 1 g
  • Carbohydrates: 60 g
  • Fiber: 4 g
  • Protein: 35 g
  • Cholesterol: 100 mg

Keywords: Don't overcook the gnocchi; they cook very quickly. Let the ragu simmer for longer for deeper flavors. Use freshly grated Parmesan for the best flavor.

Did you make this recipe?

Share a photo and tag us — we can't wait to see what you've made!

« Previous Post
Easy Lemon Crumble Bars: Bright, Tangy & Delicious!
Next Post »
Delicious Strawberry Yogurt Bark – Perfect Healthy Frozen Treat

If you enjoyed this…

Texas Roadhouse Butter Chicken: Recipe, Ingredients & Easy Steps

Italian Wedding Soup: A Delicious & Easy Recipe

Baked Honey BBQ Chicken Bites: A Delicious and Easy Recipe for Any Occasion

Primary Sidebar

Browse by Diet

BreakfastDinnerLunchDessertAppetizer

Sweet Peach Yogurt Parfait Delight

One of my fondest memories is from a lazy summer afternoon spent at my grandmother’s house. The sun filtered through the kitchen window, casting a warm glow over the table where she would create her culinary magic. It was during one of those blissful moments that I first tasted her Peach Yogurt Parfait with Honey and Granola. The sweet aroma of ripe peaches mingling with creamy yogurt and the crunch of granola was nothing short of heavenly. It felt like summer captured in a bowl, and I still remember the joy of diving in with a spoon, each layer revealing a new burst of flavor.

When I think about that parfait, I can almost hear the gentle hum of the bees outside, reminding me of the floral notes that honey brings to every bite. The vibrant yellows and soft oranges of the peaches contrast beautifully with the creamy white yogurt and the golden crunch of granola. It’s a dish that not only looks delightful but also tastes like a celebration of fresh, wholesome ingredients.

What makes my version of this Peach Yogurt Parfait special is the careful balance of flavors and textures. I use ripe, juicy peaches, drizzled with locally sourced honey, and a homemade granola that’s bursting with nuts and seeds for an extra crunch. It’s a simple dish, but every layer is crafted with love and attention.

Let me show you exactly how to make this delightful parfait, so you can bring a bit of that summer magic into your kitchen!

Sweet Peach Yogurt Parfait Delight

Why You’ll Love This Recipe

  • Delightfully creamy texture from the Greek yogurt, paired with the juicy sweetness of fresh peaches.
  • Ready in under 20 minutes, making it a quick and satisfying breakfast or snack option.
  • Budget-friendly, using common ingredients that you may already have in your pantry.
  • Customizable with your favorite granola and nuts, allowing you to tailor each parfait to your taste.
  • Perfectly balanced flavors with the bright acidity of lemon juice and the sweetness of honey enhancing the peaches.

Ingredients

  • For the Parfait:
  • 2 cups plain Greek yogurt (or vanilla yogurt for a sweeter option)
  • 2 large ripe peaches, diced (about 2 cups)
  • 1 tablespoon fresh lemon juice (to prevent browning of peaches)
  • 2 tablespoons honey (plus more for drizzling)
  • 1 teaspoon vanilla extract (optional for extra flavor)
  • For the Granola:
  • 1 cup granola (store-bought or homemade; see notes for a simple granola recipe)
  • 1/4 cup sliced almonds (optional for added crunch)
  • 1/4 cup shredded coconut (optional for added flavor)

Let’s dive into some key ingredients that make this Peach Yogurt Parfait so delightful! First, the Greek yogurt is not only creamy but also packed with protein, making it a satisfying option for breakfast or a snack. If you’re looking for a sweeter option, you can easily substitute it with vanilla yogurt, though it may alter the overall flavor balance. Next, the ripe peaches are the star of the show; their natural sweetness shines through, so I recommend choosing peaches that yield slightly to pressure, indicating they’re perfectly ripe. If peaches aren’t in season, feel free to use nectarines or even frozen peaches—just thaw them before use. Finally, honey adds a lovely floral sweetness that ties everything together. If you prefer, maple syrup can serve as a delicious substitute.

Step-by-Step Instructions

  1. Start by preparing the peaches. Wash them thoroughly, then slice and dice them into bite-sized pieces. In a medium bowl, toss the diced peaches with 1 tablespoon of fresh lemon juice to prevent browning. Set aside for about 5 minutes while the lemon juice works its magic.
  2. In a separate bowl, combine the Greek yogurt, 2 tablespoons of honey, and 1 teaspoon of vanilla extract if using. Stir the mixture until smooth and thoroughly blended. This should take about a minute. Avoid overmixing to maintain the creaminess of the yogurt.
  3. Now it’s time to layer your parfait. Grab a clear glass or bowl to showcase your beautiful creation. Start with a generous spoonful of the yogurt mixture at the bottom—about 1/4 cup will do. Use a spoon to spread it evenly.
  4. Add a layer of the diced peaches over the yogurt, ensuring they cover the yogurt completely. You might want to use about half of what you have prepared—roughly 1 cup. This layer should be visually appealing, so arrange the peaches neatly.
  5. Sprinkle 1/4 cup of granola over the peaches. This adds a delightful crunch. Make sure to distribute it evenly to ensure every bite has that satisfying texture. Avoid packing it down too tightly, as you want it to maintain its crunch.
  6. Repeat the layers: spoon in another 1/4 cup of yogurt, followed by another cup of peaches, and another sprinkle of granola. You should have at least two layers, but feel free to add more depending on your glass size.
  7. Finish off your parfait with a drizzle of honey on top for added sweetness and a touch of elegance. If you’re using sliced almonds or shredded coconut, sprinkle them on top now. It adds a lovely visual contrast and extra flavor.
  8. Serve immediately or refrigerate for up to 30 minutes before serving to allow the flavors to meld together. However, I recommend enjoying it fresh to maintain the granola’s crunch.

Pro Tips for the Best Peach Yogurt Parfait With Honey And Granola

  • Make sure to choose ripe peaches for the best flavor and texture. A common mistake is using unripe fruit, which can lead to a less enjoyable parfait. Look for peaches that are fragrant and slightly soft to the touch.
  • Use a clear glass to assemble your parfait; this not only makes for a beautiful presentation but also allows you to see the colorful layers, which adds to the enjoyment of eating it.
  • For an even creamier texture, consider whipping the Greek yogurt with a hand mixer for a couple of minutes before layering. This small adjustment makes a huge difference in mouthfeel.
  • Be mindful of the granola-to-yogurt ratio. Too much granola can overwhelm the parfait, while too little can make it feel too creamy. Aim for about 1/4 cup of granola per layer for the perfect balance.
  • If you’re making this for a gathering, consider preparing the yogurt and peaches ahead of time and layering them just before serving. This ensures the granola stays crunchy!

Variations & Serving Ideas

There are so many ways to get creative with your Peach Yogurt Parfait! For a tropical twist, swap out the peaches for mangoes or pineapples and top with coconut flakes. If you prefer a berry flavor, mix in some blueberries or strawberries with the peaches for added color and taste. For a nutty version, incorporate chopped walnuts or pecans instead of almonds.

As for serving ideas, this parfait pairs beautifully with a side of scrambled eggs for a hearty breakfast or fresh fruit salad for a light lunch. You might also enjoy it alongside whole grain toast with almond butter for an energizing snack. The contrast of flavors and textures will elevate your meal experience!

Storage, Make-Ahead & Reheating

The Peach Yogurt Parfait is best enjoyed fresh, but you can prepare some components ahead of time. Store the layered parfait in an airtight container in the refrigerator for up to 24 hours. However, be cautious; the granola may lose its crunch if stored too long. You can freeze the yogurt and peach mixture for up to 2 months; just remember to thaw it in the refrigerator overnight before serving.

If you plan to enjoy this dish the next day, it can taste even better as the flavors meld together. Just remember to add the granola right before serving to keep its delightful crunch!

Frequently Asked Questions

Can I make Peach Yogurt Parfait With Honey And Granola ahead of time?

Yes — in fact, it tastes even better the next day as the flavors meld. However, I recommend waiting to add the granola until just before serving to maintain its crunch.

What can I substitute for Greek yogurt?

If you prefer a lighter option, you can substitute Greek yogurt with regular yogurt or a dairy-free alternative like coconut yogurt. Just remember that this may alter the creaminess and flavor profile slightly.

Can I use frozen peaches for this parfait?

Absolutely! Just make sure to thaw the frozen peaches before using them. They will still add great flavor, though the texture may be slightly softer than fresh peaches.

How do I make the parfait vegan?

To make a vegan version, substitute the Greek yogurt with a plant-based yogurt alternative, and replace honey with maple syrup or agave nectar. This keeps the parfait sweet while adhering to a vegan diet.

What other fruits can I use in this recipe?

You can mix and match fruits based on your preference. Try using strawberries, blueberries, raspberries, or even bananas. Just make sure to adjust the lemon juice as needed to prevent browning.

Sweet Peach Yogurt Parfait Delight

Final Thoughts

The Peach Yogurt Parfait with Honey and Granola is a delightful blend of creamy yogurt, sweet peaches, and crunchy granola that creates a satisfying and nourishing treat. Each layer bursts with flavor, making it a perfect choice for breakfast or a light dessert.

This is the kind of recipe I come back to again and again, especially when I want something refreshing and wholesome to start my day. The harmony of sweet and tart flavors, combined with the delightful crunch, never fails to lift my spirits!

I encourage you to give this parfait a try and indulge in its comforting goodness. Feel free to share your results or even add your own twist—perhaps a sprinkle of cinnamon or a handful of nuts. Enjoy creating your perfect parfait!

Print
clock clock iconcutlery cutlery iconflag flag iconfolder folder iconinstagram instagram iconpinterest pinterest iconfacebook facebook iconprint print iconsquares squares iconheart heart iconheart solid heart solid icon

Peach Yogurt Parfait


  • Author: Lily author
  • Total Time: 15 minutes
  • Yield: 4 servings 1x
Pin Recipe
Print Recipe

Description

This Peach Yogurt Parfait combines creamy Greek yogurt, juicy peaches, and crunchy granola for a delightful treat. It’s a perfect breakfast or snack that captures the essence of summer in every bite.


Ingredients

Scale
  • For the Parfait:
  • 2 cups plain Greek yogurt (or vanilla yogurt for a sweeter option)
  • 2 large ripe peaches, diced (about 2 cups)
  • 1 tablespoon fresh lemon juice (to prevent browning of peaches)
  • 2 tablespoons honey (plus more for drizzling)
  • 1 teaspoon vanilla extract (optional for extra flavor)
  • For the Granola:
  • 1 cup granola (store-bought or homemade; see notes for a simple granola recipe)
  • 1/4 cup sliced almonds (optional for added crunch)
  • 1/4 cup shredded coconut (optional for added flavor)

Instructions

  1. Start by preparing the peaches. Wash them thoroughly, then slice and dice them into bite-sized pieces. In a medium bowl, toss the diced peaches with 1 tablespoon of fresh lemon juice to prevent browning. Set aside for about 5 minutes while the lemon juice works its magic.
  2. In a separate bowl, combine the Greek yogurt, 2 tablespoons of honey, and 1 teaspoon of vanilla extract if using. Stir the mixture until smooth and thoroughly blended. This should take about a minute. Avoid overmixing to maintain the creaminess of the yogurt.
  3. Now it’s time to layer your parfait. Grab a clear glass or bowl to showcase your beautiful creation. Start with a generous spoonful of the yogurt mixture at the bottom—about 1/4 cup will do. Use a spoon to spread it evenly.
  4. Add a layer of the diced peaches over the yogurt, ensuring they cover the yogurt completely. You might want to use about half of what you have prepared—roughly 1 cup. This layer should be visually appealing, so arrange the peaches neatly.
  5. Sprinkle 1/4 cup of granola over the peaches. This adds a delightful crunch. Make sure to distribute it evenly to ensure every bite has that satisfying texture. Avoid packing it down too tightly, as you want it to maintain its crunch.
  6. Repeat the layers: spoon in another 1/4 cup of yogurt, followed by another cup of peaches, and another sprinkle of granola. You should have at least two layers, but feel free to add more depending on your glass size.
  7. Finish off your parfait with a drizzle of honey on top for added sweetness and a touch of elegance. If you’re using sliced almonds or shredded coconut, sprinkle them on top now. It adds a lovely visual contrast and extra flavor.
  8. Serve immediately or refrigerate for up to 30 minutes before serving to allow the flavors to meld together. However, I recommend enjoying it fresh to maintain the granola’s crunch.
  • Prep Time: 15 mins
  • Cook Time: 0 mins
  • Category: Breakfast
  • Method: No-cook
  • Cuisine: American

Nutrition

  • Serving Size: 1 parfait
  • Calories: 250
  • Sugar: 20 g
  • Sodium: 50 mg
  • Fat: 5 g
  • Saturated Fat: 2 g
  • Unsaturated Fat: 3 g
  • Trans Fat: 0 g
  • Carbohydrates: 40 g
  • Fiber: 3 g
  • Protein: 10 g
  • Cholesterol: 10 mg

Keywords: Choose ripe peaches for the best flavor and texture. Use a clear glass for a beautiful presentation. For creaminess, consider whipping the yogurt before layering. Be mindful of the granola-to-yogurt ratio. Prepare yogurt and peaches ahead of time for gatherings, layering just before serving.

Did you make this recipe?

Share a photo and tag us — we can't wait to see what you've made!

Sun-Kissed Frozen Orange Cream Slush

As a child, summer days felt like they lasted forever. I remember the sticky heat wrapping around me as I played outside, my laughter mingling with the sounds of the neighborhood. But nothing could cool me down quite like the moment I’d spot my grandmother, laboring over her blender, whipping up her famous Frozen Orange Creamsicle Slush. That vibrant orange treat, with its frosty texture and sweet citrus aroma, was like a burst of sunshine in a cup. Just one sip, and I could feel the coolness wash over me, sparking pure joy.

This Frozen Orange Creamsicle Slush has a way of making you feel like a kid again. Its creamy, dreamy consistency is a delightful balance of bright orange and soft vanilla, inviting you to dive right in. The refreshing tang of orange dances on your tongue, while the smooth creaminess envelops you in a comforting embrace. It’s a nostalgic treat that’s perfect for hot summer afternoons or anytime you need a little pick-me-up.

What makes my version of this slush stand out is the addition of a hint of vanilla bean, which elevates the flavor and adds an extra layer of richness. Plus, it’s super easy to whip up with just a few simple ingredients that you probably already have on hand! So, if you’re ready to relive those sun-soaked memories, let me show you exactly how to make it.

Sun-Kissed Frozen Orange Cream Slush

Why You’ll Love This Recipe

  • Each slush is a perfect blend of creamy vanilla and zesty orange, creating a nostalgic flavor reminiscent of summer days.
  • This refreshing treat is ready in under 15 minutes, making it an ideal quick dessert for unexpected guests or hot afternoons.
  • With just 8 simple ingredients, it’s budget-friendly, ensuring you don’t have to break the bank to enjoy a delicious slush.
  • The slush has a perfectly smooth texture, thanks to the combination of ice and ice cream, providing a delightful contrast to the bright citrus flavors.
  • It’s highly customizable; you can easily adjust the sweetness and add fresh herbs for a unique twist that suits your taste.

Ingredients

  • 2 cups orange juice (freshly squeezed or store-bought)
  • 1 cup vanilla ice cream
  • 1 cup crushed ice
  • 1/2 cup milk (whole or 2%)
  • 1/4 cup granulated sugar (adjust based on sweetness preference)
  • 1 teaspoon vanilla extract
  • Zest of 1 orange (for added flavor)
  • Fresh orange slices and mint leaves (for garnish)

The star of this Frozen Orange Creamsicle Slush is the orange juice, which provides the vibrant, citrusy base. Freshly squeezed juice will yield the brightest flavor, but store-bought options can be just as convenient. If you’re opting for store-bought, choose 100% pure juice with no added sugars for the best results. Another essential ingredient is the vanilla ice cream; it adds creaminess and sweetness. You can substitute it with dairy-free ice cream if you’re looking for a vegan option. Whole or 2% milk complements the ice cream, creating a smooth blend. If you want a lower-calorie version, almond or oat milk can be good alternatives.

Lastly, the granulated sugar can be adjusted based on your sweetness preference. If you prefer a more natural sweetener, consider using honey or agave syrup. The orange zest enhances the flavor profile, providing an aromatic pop that brings the whole slush together. Don’t skip it! It adds an extra layer of brightness that makes this slush truly special.

Step-by-Step Instructions

  1. Start by preparing your ingredients. Gather 2 cups of orange juice, 1 cup of vanilla ice cream, and 1 cup of crushed ice. Make sure the ice is finely crushed, as larger chunks can make blending difficult.
  2. In a blender, combine the orange juice, vanilla ice cream, crushed ice, and 1/2 cup of milk. Add 1/4 cup of granulated sugar and 1 teaspoon of vanilla extract. If you like a sweeter slush, consider adding a bit more sugar at this stage.
  3. Add the zest of 1 orange to the blender. This step is crucial for enhancing the citrus flavor of your slush. Make sure not to include the bitter white pith—only the flavorful zest.
  4. Blend the mixture on medium-high speed for about 30-45 seconds. Stop once the ingredients are fully combined and the slush has a smooth, even consistency. If you notice large chunks of ice, blend for an additional 10-15 seconds. Avoid over-blending, as this can make the slush too liquidy.
  5. Once blended, taste the slush. If it needs more sweetness, add a little more sugar and blend for a few more seconds. If it’s too thick, you can add a splash of milk to reach your desired consistency.
  6. Pour the slush into glasses. This recipe typically serves 4, but you can easily double it for larger gatherings. Use a spoon to help guide the slush into the glasses if needed.
  7. Garnish each serving with fresh orange slices and mint leaves. The mint not only adds a pop of color but also a refreshing aroma that complements the citrus flavors beautifully.
  8. Serve immediately and enjoy! If you’ve made extra, you can refrigerate it for a short time, but it’s best enjoyed fresh.

Pro Tips for the Best Frozen Orange Creamsicle Slush

  • Don’t skip the orange zest! It’s a game-changer for flavor. Always zest before juicing to make it easier.
  • Use a high-powered blender for the best texture. A standard blender may struggle with ice, leading to uneven consistency. If you have a food processor, that can work too, but ensure the ice is finely crushed.
  • Adjust the ice-to-liquid ratio carefully. If your slush is too thick, it won’t blend well. Start with less ice and add more until you reach your preferred texture.
  • Be cautious with the sugar! Always start with the lower amount, as you can easily add more, but it’s hard to fix an overly sweet slush.
  • For a fun twist, consider adding a splash of coconut milk or a handful of fresh fruit like strawberries or pineapple. This not only enhances the flavor but also adds a beautiful color contrast.

Variations & Serving Ideas

There are countless ways to put a spin on your Frozen Orange Creamsicle Slush. Consider making a tropical version by adding in some pineapple juice or coconut milk for a delightful tropical twist. If you’re feeling adventurous, try incorporating a handful of frozen mango or peach slices for added sweetness. For a lighter version, swap out the vanilla ice cream for Greek yogurt for a creamy yet tangy alternative.

As for serving ideas, this refreshing slush pairs wonderfully with light summer dishes like grilled chicken skewers, fish tacos, or a simple salad topped with citrus vinaigrette. The bright, zesty flavors of the slush complement these dishes perfectly, making them an ideal pairing for a sunny day.

Storage, Make-Ahead & Reheating

This Frozen Orange Creamsicle Slush is best enjoyed fresh, but if you have leftovers, you can store them in an airtight container in the fridge for up to 2 days. Just keep in mind that the slush may lose some of its texture over time as the ice melts. It doesn’t freeze well, as the ice will turn into a solid block. If you must freeze it, blend again after thawing to restore the slushy consistency. This treat is best the day you make it, as the flavors meld together beautifully overnight, enhancing its deliciousness.

Frequently Asked Questions

Can I make Frozen Orange Creamsicle Slush ahead of time?

Yes — in fact, it tastes even better the next day as the flavors meld. However, it’s best to enjoy it fresh, as the texture can change if stored for too long. If you need to prepare it ahead, keep it in the fridge and re-blend before serving.

What kind of orange juice should I use?

For the best flavor, use freshly squeezed orange juice. However, if you’re short on time, opt for 100% pure store-bought juice without added sugars. This will ensure that your slush remains flavorful and refreshing.

Can I substitute the vanilla ice cream?

Absolutely! If you’re looking for a dairy-free option, coconut milk ice cream or a non-dairy vanilla ice cream can work wonderfully. They will still provide the creamy texture and sweetness you desire.

How can I adjust the sweetness of my slush?

You can easily adjust the sweetness by modifying the amount of sugar added. Start with 1/4 cup and taste the mixture before blending. If you prefer it sweeter, add more sugar gradually until it reaches your desired level.

What should I do if my slush is too thick?

If your slush is too thick, simply add a splash of milk or orange juice and blend again. This will help achieve a more drinkable consistency while maintaining the slushy texture. Adjust gradually to reach your preferred thickness.

Sun-Kissed Frozen Orange Cream Slush

Final Thoughts

The Frozen Orange Creamsicle Slush is a delightful blend of refreshing citrus and creamy goodness, making it a perfect treat for warm days or any time you crave a taste of nostalgia. The way the bright orange flavor dances with the creamy texture truly elevates this slush, transforming it into a satisfying escape from the everyday.

This is the kind of recipe I come back to again and again, especially when I’m looking to cool down or impress guests at a summer gathering. It’s simple to make and always brings smiles all around! I encourage you to try this recipe for yourself—don’t hesitate to share your results or even put your own spin on it. Happy slushing!

Print
clock clock iconcutlery cutlery iconflag flag iconfolder folder iconinstagram instagram iconpinterest pinterest iconfacebook facebook iconprint print iconsquares squares iconheart heart iconheart solid heart solid icon

Frozen Orange Creamsicle Slush


  • Author: Lily author
  • Total Time: 15 minutes
  • Yield: 4 servings 1x
Pin Recipe
Print Recipe

Description

This Frozen Orange Creamsicle Slush is a refreshing treat that combines creamy vanilla and zesty orange flavors. Perfect for hot summer days, it brings back nostalgic memories with every sip.


Ingredients

Scale
  • 2 cups orange juice (freshly squeezed or store-bought)
  • 1 cup vanilla ice cream
  • 1 cup crushed ice
  • 1/2 cup milk (whole or 2%)
  • 1/4 cup granulated sugar (adjust based on sweetness preference)
  • 1 teaspoon vanilla extract
  • Zest of 1 orange (for added flavor)
  • Fresh orange slices and mint leaves (for garnish)

Instructions

  1. Start by preparing your ingredients. Gather 2 cups of orange juice, 1 cup of vanilla ice cream, and 1 cup of crushed ice. Make sure the ice is finely crushed, as larger chunks can make blending difficult.
  2. In a blender, combine the orange juice, vanilla ice cream, crushed ice, and 1/2 cup of milk. Add 1/4 cup of granulated sugar and 1 teaspoon of vanilla extract. If you like a sweeter slush, consider adding a bit more sugar at this stage.
  3. Add the zest of 1 orange to the blender. This step is crucial for enhancing the citrus flavor of your slush. Make sure not to include the bitter white pith—only the flavorful zest.
  4. Blend the mixture on medium-high speed for about 30-45 seconds. Stop once the ingredients are fully combined and the slush has a smooth, even consistency. If you notice large chunks of ice, blend for an additional 10-15 seconds. Avoid over-blending, as this can make the slush too liquidy.
  5. Once blended, taste the slush. If it needs more sweetness, add a little more sugar and blend for a few more seconds. If it’s too thick, you can add a splash of milk to reach your desired consistency.
  6. Pour the slush into glasses. This recipe typically serves 4, but you can easily double it for larger gatherings. Use a spoon to help guide the slush into the glasses if needed.
  7. Garnish each serving with fresh orange slices and mint leaves. The mint not only adds a pop of color but also a refreshing aroma that complements the citrus flavors beautifully.
  8. Serve immediately and enjoy! If you’ve made extra, you can refrigerate it for a short time, but it's best enjoyed fresh.
  • Prep Time: 15 min
  • Cook Time: 0 min
  • Category: Dessert
  • Method: Blending
  • Cuisine: American

Nutrition

  • Serving Size: 1 serving
  • Calories: 200
  • Sugar: 30 g
  • Sodium: 50 mg
  • Fat: 5 g
  • Saturated Fat: 3 g
  • Unsaturated Fat: 2 g
  • Trans Fat: 0 g
  • Carbohydrates: 40 g
  • Fiber: 1 g
  • Protein: 2 g
  • Cholesterol: 20 mg

Keywords: Don't skip the orange zest! It's a game-changer for flavor. Always zest before juicing to make it easier.

Did you make this recipe?

Share a photo and tag us — we can't wait to see what you've made!

Zesty Lemon Poppy Seed Delight

One rainy afternoon, I found myself in my grandmother’s cozy kitchen, the kind that always smelled like warmth and love. She was whipping up her famous Lemon Poppy Seed Loaf, a recipe that had been passed down through generations. As the batter came together, the zesty aroma of fresh lemons filled the air, mingling perfectly with the nutty fragrance of poppy seeds. I can still picture her, apron-clad, as she expertly drizzled a vibrant citrus icing over the loaf, creating a glossy, sun-kissed finish that beckoned us to dive in. It was a moment that sparked my own passion for baking, and this recipe has become a cherished staple in my home ever since.

When you take a bite of this Lemon Poppy Seed Loaf, it’s like a burst of sunshine on your palate. The loaf is beautifully golden, with a tender crumb that melts in your mouth. Each slice is speckled with tiny poppy seeds, adding a delightful crunch that contrasts beautifully with the tangy sweetness of the lemon. And that citrus icing? It’s the finishing touch that elevates this loaf from ordinary to extraordinary, with its bright, zesty flavor dancing on your taste buds.

This recipe stands out because it embraces simplicity while delivering on flavor. I’ve added a hint of vanilla to the batter, enhancing the overall taste and making it even more indulgent. Trust me, once you make this Lemon Poppy Seed Loaf With Citrus Icing, it’ll become a go-to in your baking repertoire.

So, let me show you exactly how to make it!

Zesty Lemon Poppy Seed Delight

Why You’ll Love This Recipe

  • Moist and tender crumb that melts in your mouth, thanks to the perfect balance of butter and buttermilk.
  • Bright, zesty lemon flavor paired with crunchy poppy seeds, creating a delightful texture and taste experience.
  • Easy to whip up in just about an hour, perfect for last-minute gatherings or a cozy afternoon treat.
  • Budget-friendly with everyday ingredients, making it an accessible option for all home bakers.
  • The citrus icing adds a sweet tang that elevates the loaf, turning a simple recipe into a showstopper!

Ingredients

  • 1 ½ cups (190g) all-purpose flour
  • 1 teaspoon baking powder
  • ½ teaspoon baking soda
  • ½ teaspoon salt
  • 3 tablespoons poppy seeds
  • ½ cup (115g) unsalted butter, softened to room temperature
  • 1 cup (200g) granulated sugar
  • 2 large eggs
  • 1 teaspoon vanilla extract
  • 1 teaspoon lemon zest (from about 1 medium lemon)
  • ½ cup (120ml) buttermilk
  • 2 tablespoons fresh lemon juice

For the Citrus Icing:

  • 1 cup (120g) powdered sugar
  • 2 tablespoons fresh lemon juice
  • 1 tablespoon orange juice
  • 1 teaspoon lemon zest (for garnish, optional)

Let’s dive into the key ingredients that make this Lemon Poppy Seed Loaf so special. The all-purpose flour provides the structure and base for the loaf, while the baking powder and baking soda ensure it rises perfectly, giving the loaf a light texture. For a gluten-free variation, you could substitute the flour with a gluten-free all-purpose blend. Poppy seeds not only add a delightful crunch but also contribute to the unique flavor profile that pairs well with the citrus notes.

Unsalted butter is crucial for achieving the buttery richness that makes this loaf so moist. If you’re looking for a dairy-free option, coconut oil or a vegan butter can be used instead. The buttermilk is another essential component, providing acidity that activates the baking soda for a fluffy texture. If you don’t have buttermilk on hand, you can easily make a substitute by mixing ½ cup of milk with 1 tablespoon of vinegar or lemon juice and letting it sit for about 5 minutes.

Step-by-Step Instructions

  1. Preheat your oven to 350°F (175°C). Grease a 9×5-inch loaf pan or line it with parchment paper for easy removal later.
  2. In a medium mixing bowl, whisk together 1 ½ cups of all-purpose flour, 1 teaspoon of baking powder, ½ teaspoon of baking soda, ½ teaspoon of salt, and 3 tablespoons of poppy seeds. This helps to evenly distribute the baking agents and ensures a uniform rise.
  3. In a large mixing bowl, cream together ½ cup of softened unsalted butter and 1 cup of granulated sugar using an electric mixer on medium speed for about 3-4 minutes, until the mixture is light and fluffy. Make sure to scrape down the sides of the bowl occasionally.
  4. Add 2 large eggs, 1 teaspoon of vanilla extract, and 1 teaspoon of lemon zest to the creamed butter and sugar, mixing until fully combined. You want a smooth consistency, so ensure there are no lumps of butter.
  5. In a small bowl, combine ½ cup of buttermilk and 2 tablespoons of fresh lemon juice. Alternately add the dry ingredients and buttermilk mixture to the butter mixture, starting and ending with the dry ingredients. Mix just until combined; do not overmix, as this can lead to a dense loaf.
  6. Pour the batter into the prepared loaf pan. Smooth the top with a spatula, ensuring it’s even. Bake in the preheated oven for 50-60 minutes, or until a toothpick inserted in the center comes out clean. The edges should be lightly golden brown, and the center should feel just set.
  7. Once baked, remove the loaf from the oven and allow it to cool in the pan for about 10 minutes. Then, transfer it to a wire rack to cool completely. Resist the urge to slice too soon, as it will be crumbly if it’s still warm.
  8. While the loaf is cooling, prepare the citrus icing. In a medium bowl, whisk together 1 cup of powdered sugar, 2 tablespoons of fresh lemon juice, and 1 tablespoon of orange juice until smooth. If the icing is too thick, you can add a little more juice to reach your desired consistency.
  9. Once the loaf is completely cool, drizzle the citrus icing over the top. If you like, sprinkle with an additional teaspoon of lemon zest for an extra pop of flavor and color.

Pro Tips for the Best Lemon Poppy Seed Loaf With Citrus Icing

  • Be careful not to overmix your batter; this is a common mistake that can lead to a dense loaf. Mix just until the dry ingredients are incorporated for a light and fluffy texture.
  • Use room temperature ingredients, especially the butter and eggs. This helps to create a smoother batter and ensures even baking. Take your eggs out of the fridge about 30 minutes before you start.
  • For a more pronounced lemon flavor, consider adding a little lemon extract in addition to the zest and juice. Just a half teaspoon can elevate the citrus notes significantly.
  • When measuring your flour, spoon it into the measuring cup and level it off with a knife instead of scooping directly from the bag. This prevents packing and ensures you don’t end up with a dry loaf.
  • Invest in a good quality loaf pan; it makes a difference in heat distribution, which ensures even baking. If your pan is dark-coated, reduce the oven temperature by 25°F to prevent over-browning.

Variations & Serving Ideas

For a delightful twist, consider adding blueberries or raspberries to the batter for a fruity burst of flavor. You can also experiment with different citrus fruits—try lime or grapefruit zest and juice for a refreshing change. For a healthier option, substitute half of the all-purpose flour with whole wheat flour for added fiber without compromising too much on texture.

This Lemon Poppy Seed Loaf pairs beautifully with a light salad, such as a mixed greens salad with a vinaigrette, or a cup of tea for a cozy afternoon treat. It also complements a creamy cheese platter, as the acidity of the loaf balances rich cheeses perfectly. Lastly, a scoop of vanilla ice cream on the side creates a delightful contrast of temperatures and flavors!

Storage, Make-Ahead & Reheating

This Lemon Poppy Seed Loaf can be stored at room temperature for up to 3 days if wrapped tightly in plastic wrap. If you want to keep it longer, it freezes well for up to 3 months. To freeze, wrap the loaf tightly in plastic wrap and then in aluminum foil to prevent freezer burn.

When you’re ready to enjoy it again, simply thaw it in the fridge overnight. Reheat individual slices in the microwave for 15-20 seconds or in a toaster oven until warmed through. Interestingly, many people find that this loaf tastes even better the next day, as the flavors have time to meld!

Frequently Asked Questions

Can I make Lemon Poppy Seed Loaf With Citrus Icing ahead of time?

Yes — in fact, it tastes even better the next day! You can make the loaf a day in advance, allowing the flavors to develop. Just be sure to store it in an airtight container to maintain its moisture.

Can I substitute the poppy seeds?

Absolutely! If you don’t have poppy seeds on hand or prefer an alternative, you can use sesame seeds for a similar crunch or omit them entirely for a smooth loaf.

What can I use instead of buttermilk?

If you don’t have buttermilk, you can easily create a substitute by mixing ½ cup of milk (dairy or plant-based) with 1 tablespoon of vinegar or lemon juice. Let it sit for 5 minutes before using in the recipe.

How can I make this recipe gluten-free?

To make a gluten-free version of this Lemon Poppy Seed Loaf, substitute the all-purpose flour with a gluten-free all-purpose flour blend. Just ensure that the blend contains a binding agent like xanthan gum for the best results.

What is the best way to store leftover loaf?

Leftover Lemon Poppy Seed Loaf should be stored in an airtight container at room temperature for up to 3 days. For longer storage, wrap it tightly and freeze for up to 3 months. Thaw it before serving for the best texture.

Zesty Lemon Poppy Seed Delight

Final Thoughts

The Lemon Poppy Seed Loaf with Citrus Icing is truly a delightful treat that brings a burst of brightness to any occasion. The zesty lemon flavor combined with the subtle crunch of poppy seeds creates a satisfying balance, while the citrus icing adds a touch of sweetness that perfectly complements the loaf’s tanginess.

This is the kind of recipe I come back to again and again, especially when I want to brighten up a gloomy day or celebrate a small victory. The aroma that fills the kitchen as it bakes is absolutely heavenly! I encourage you to give this recipe a try; you might just find it becoming a beloved staple in your home. Don’t forget to share your results or even add your own unique twist—I can’t wait to see what you create!

Print
clock clock iconcutlery cutlery iconflag flag iconfolder folder iconinstagram instagram iconpinterest pinterest iconfacebook facebook iconprint print iconsquares squares iconheart heart iconheart solid heart solid icon

Lemon Poppy Seed Loaf


  • Author: Lily author
  • Total Time: 41 minute
  • Yield: 1 loaf 1x
Pin Recipe
Print Recipe

Description

This Lemon Poppy Seed Loaf is a delightful treat that combines zesty lemon flavor with crunchy poppy seeds. Topped with a citrus icing, it’s perfect for any occasion.


Ingredients

Scale
  • 1 ½ cups (190g) all-purpose flour
  • 1 teaspoon baking powder
  • ½ teaspoon baking soda
  • ½ teaspoon salt
  • 3 tablespoons poppy seeds
  • ½ cup (115g) unsalted butter, softened to room temperature
  • 1 cup (200g) granulated sugar
  • 2 large eggs
  • 1 teaspoon vanilla extract
  • 1 teaspoon lemon zest (from about 1 medium lemon)
  • ½ cup (120ml) buttermilk
  • 2 tablespoons fresh lemon juice
  • 1 cup (120g) powdered sugar
  • 2 tablespoons fresh lemon juice
  • 1 tablespoon orange juice
  • 1 teaspoon lemon zest (for garnish, optional)

Instructions

  1. Preheat your oven to 350°F (175°C). Grease a 9×5-inch loaf pan or line it with parchment paper for easy removal later.
  2. In a medium mixing bowl, whisk together 1 ½ cups of all-purpose flour, 1 teaspoon of baking powder, ½ teaspoon of baking soda, ½ teaspoon of salt, and 3 tablespoons of poppy seeds. This helps to evenly distribute the baking agents and ensures a uniform rise.
  3. In a large mixing bowl, cream together ½ cup of softened unsalted butter and 1 cup of granulated sugar using an electric mixer on medium speed for about 3-4 minutes, until the mixture is light and fluffy. Make sure to scrape down the sides of the bowl occasionally.
  4. Add 2 large eggs, 1 teaspoon of vanilla extract, and 1 teaspoon of lemon zest to the creamed butter and sugar, mixing until fully combined. You want a smooth consistency, so ensure there are no lumps of butter.
  5. In a small bowl, combine ½ cup of buttermilk and 2 tablespoons of fresh lemon juice. Alternately add the dry ingredients and buttermilk mixture to the butter mixture, starting and ending with the dry ingredients. Mix just until combined; do not overmix, as this can lead to a dense loaf.
  6. Pour the batter into the prepared loaf pan. Smooth the top with a spatula, ensuring it’s even. Bake in the preheated oven for 50-60 minutes, or until a toothpick inserted in the center comes out clean. The edges should be lightly golden brown, and the center should feel just set.
  7. Once baked, remove the loaf from the oven and allow it to cool in the pan for about 10 minutes. Then, transfer it to a wire rack to cool completely. Resist the urge to slice too soon, as it will be crumbly if it’s still warm.
  8. While the loaf is cooling, prepare the citrus icing. In a medium bowl, whisk together 1 cup of powdered sugar, 2 tablespoons of fresh lemon juice, and 1 tablespoon of orange juice until smooth. If the icing is too thick, you can add a little more juice to reach your desired consistency.
  9. Once the loaf is completely cool, drizzle the citrus icing over the top. If you like, sprinkle with an additional teaspoon of lemon zest for an extra pop of flavor and color.
  • Prep Time: 15 mins
  • Cook Time: 50-60 mins
  • Category: Dessert
  • Method: Baking
  • Cuisine: American

Nutrition

  • Serving Size: 1 slice
  • Calories: 200
  • Sugar: 15 g
  • Sodium: 150 mg
  • Fat: 8 g
  • Saturated Fat: 5 g
  • Unsaturated Fat: 3 g
  • Trans Fat: 0 g
  • Carbohydrates: 30 g
  • Fiber: 1 g
  • Protein: 3 g
  • Cholesterol: 40 mg

Keywords: Be careful not to overmix your batter; this is a common mistake that can lead to a dense loaf. Use room temperature ingredients for a smoother batter and even baking.

Did you make this recipe?

Share a photo and tag us — we can't wait to see what you've made!

  • Privacy Policy
  • Terms Of Service
  • Contact
  • About
  • GDPR

Copyright © 2025 Homesmad