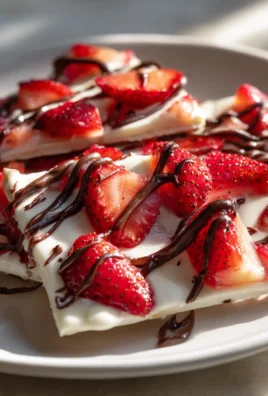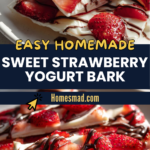
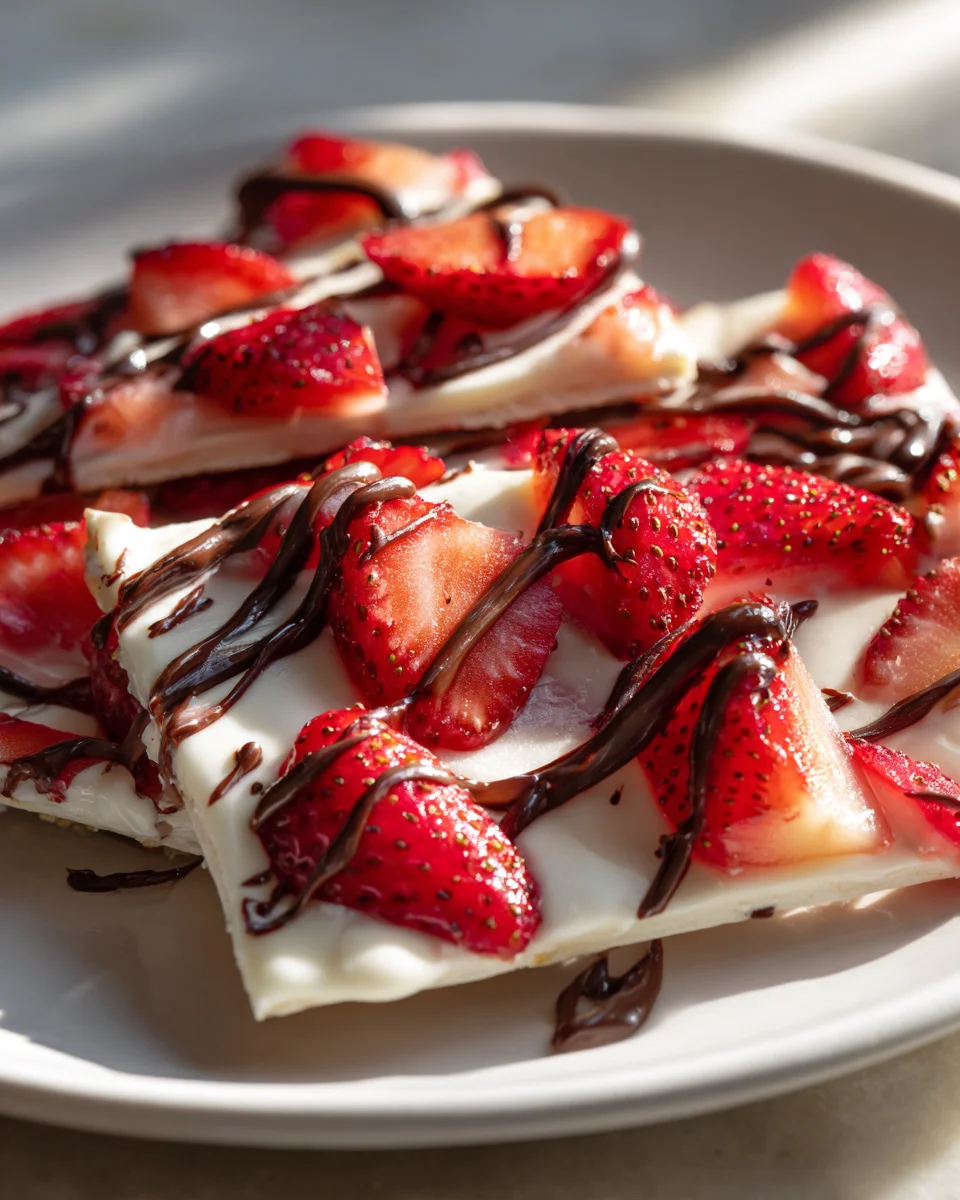
Strawberry Yogurt Bark
Strawberry Yogurt Bark is one of those magical recipes that feels like a decadent treat but is secretly incredibly good for you! I absolutely adore making this because it’s a brilliant way to satisfy my sweet tooth without any guilt, and honestly, it couldn’t be simpler. What makes this recipe truly special is its incredible versatility and vibrant, fresh taste – it’s like a little burst of summer sunshine in every bite. I think you’ll love it because it’s ridiculously easy to prepare with just a few ingredients you probably already have, and it transforms simple Greek yogurt and fresh strawberries into a refreshing, make-ahead snack or light dessert. Essentially, we’re spreading creamy yogurt onto a sheet, scattering it with juicy strawberries, freezing it solid, and then breaking it into delightful, bite-sized “bark” pieces. It’s cool, creamy, and bursting with fruity flavor, making it the perfect pick-me-up for any time of day!
Ingredient Notes
Hello there, fellow snack enthusiasts! When it comes to whipping up a batch of delicious Strawberry Yogurt Bark, the beauty truly lies in its simplicity and the quality of a few key ingredients. I’ve found that starting with the right foundation makes all the difference in achieving that perfect balance of creamy, fruity, and refreshing.
Yogurt: This is, without a doubt, the star of our show. I highly recommend using full-fat Greek yogurt. Why Greek, you ask? Its thick, creamy consistency is absolutely essential for creating a bark that holds its shape beautifully once frozen. Regular yogurt tends to be thinner and can result in a more icy, less satisfying texture. If you’re watching your fat intake, a 2% or even 0% fat Greek yogurt can work, but I find the full-fat option provides the best mouthfeel and richness. As for flavor, plain, unsweetened yogurt is my top choice, as it gives us a blank canvas to sweeten and flavor precisely to our liking. However, if you’re in a pinch, a plain vanilla Greek yogurt could work, just be mindful of adjusting the added sweetener.
Strawberries: Fresh, ripe strawberries are truly magnificent for this recipe. Their vibrant color and natural sweetness are unmatched. I like to hull them and then slice them thinly or chop them into small pieces. This ensures they distribute well across the bark and are easy to bite into once frozen. If fresh strawberries aren’t in season or readily available, frozen sliced strawberries can absolutely be used. Just make sure to thaw them slightly and pat them very dry with a paper towel before adding them to the yogurt. Excess moisture can lead to ice crystals in your bark, which we want to avoid for the creamiest texture.
Sweetener: This is where you can truly customize the bark to your personal taste. My go-to is a touch of honey or maple syrup. They both blend seamlessly into the yogurt, offering a lovely, natural sweetness. Start with a small amount, taste, and add more if needed. Remember, the flavors can mellow slightly when frozen, so don’t be afraid to make it taste just right before freezing. For those preferring sugar-free options, a small amount of a natural sugar substitute like stevia or erythritol can also work wonders. Just ensure it dissolves well into the yogurt to avoid a grainy texture.
Optional Toppings: While the strawberries are fantastic on their own, don’t hesitate to get creative! A sprinkle of granola adds a wonderful crunch and texture contrast. I sometimes add a handful of chopped nuts, like almonds or pecans, for a little extra protein and healthy fats. A dash of vanilla extract stirred into the yogurt can also deepen its flavor profile. For a lovely swirl, you could even mash a few strawberries and swirl them gently into the yogurt base before adding the sliced fruit.
Step-by-Step Instructions
Making Strawberry Yogurt Bark is incredibly straightforward, perfect for a quick snack prep or even a fun activity with the kids. Here’s how I go about it, ensuring a perfectly delicious and freezable treat every time:
- Prepare Your Baking Sheet: First things first, grab a rimmed baking sheet (about 9×13 inches works well, but any size you have will do – just adjust the thickness of your bark accordingly). Line it generously with parchment paper. This step is absolutely crucial! It prevents the frozen bark from sticking to the pan and makes for super easy removal once it’s set. I usually let the parchment paper hang over the edges a bit to create little ‘handles’.
- Mix the Yogurt Base: In a medium-sized bowl, combine your plain Greek yogurt with your chosen sweetener (honey, maple syrup, or sugar substitute). If you’re adding vanilla extract, stir it in now too. Mix thoroughly until everything is well combined and the yogurt is smooth. Give it a taste test! This is your chance to adjust the sweetness to your liking. Remember, frozen items can taste a little less sweet, so aim for a flavor that’s just a touch sweeter than you might normally prefer.
- Spread the Yogurt: Pour the sweetened yogurt mixture onto your prepared, parchment-lined baking sheet. Using an offset spatula or the back of a spoon, spread the yogurt evenly into a layer about 1/4 to 1/2 inch thick. Try to get it as uniform as possible across the entire surface. A consistent thickness ensures even freezing and makes for tidier bark pieces later.
- Add the Strawberries: Now for the fun part! Artfully arrange your sliced or chopped strawberries over the spread yogurt. You can dot them evenly, create rows, or even make a beautiful pattern – it’s your canvas! If you’re using other optional toppings like granola or chopped nuts, sprinkle them over the strawberries now. Gently press the toppings into the yogurt ever so slightly to ensure they adhere and don’t fall off once frozen.
- Freeze Until Solid: Carefully transfer the baking sheet to your freezer. Make sure it’s placed on a flat, level surface so the yogurt doesn’t shift or spill. Allow it to freeze for at least 3-4 hours, or until the yogurt bark is completely solid and firm to the touch. The exact time will depend on the thickness of your bark and the power of your freezer.
- Break and Serve: Once fully frozen, remove the baking sheet from the freezer. Lift the bark off the pan by holding the parchment paper edges. Place the entire frozen sheet of bark onto a cutting board. Using a sharp knife, or simply your hands, break or cut the bark into irregular pieces or more uniform squares, whatever you prefer! I love the rustic look of broken bark, but sometimes neat squares are appealing too. Serve immediately and enjoy your refreshing homemade treat!
Tips & Suggestions
Over the years of making this delightful Strawberry Yogurt Bark, I’ve picked up a few tricks and learned some helpful hints that I love to share. These tips can elevate your bark from good to absolutely fantastic and help you avoid common pitfalls:
- Achieving the Perfect Thickness: One of the most common questions I get is about how thick to spread the yogurt. I aim for about 1/4 to 1/2 inch. Any thinner, and it can become brittle and melt too quickly. Any thicker, and it takes longer to freeze solid and can be quite hard to bite into straight from the freezer. A consistent thickness is also key for even freezing and a uniform texture throughout.
- Preventing Ice Crystals: To ensure the creamiest bark, especially if using fresh fruit, make sure your strawberries are as dry as possible after washing and before adding them to the yogurt. Excess water is the main culprit for forming icy spots. Pat them thoroughly with paper towels. Using Greek yogurt also inherently helps with this, as its lower water content makes it less prone to crystallization.
- Get Creative with Toppings: While strawberries are fantastic, this recipe is incredibly versatile! Try adding other berries like blueberries or raspberries. A sprinkle of mini chocolate chips or a drizzle of melted non-alcohol dark chocolate (let it set slightly before freezing) can be a delightful addition. For a tropical twist, consider a sprinkle of shredded coconut or diced mango. Don’t be afraid to experiment with different flavor combinations!
- Making it Kid-Friendly: This is a wonderful recipe to get kids involved in the kitchen. Let them help spread the yogurt (it’s okay if it’s not perfect!) and arrange the fruit. They love choosing their own patterns and toppings. Plus, it’s a healthy and fun snack for them to enjoy later. You can also use cookie cutters to make fun shapes once the bark is partially frozen but still pliable, then freeze until solid.
- Consider a Swirl: For an extra layer of strawberry flavor and a beautiful aesthetic, you can mash a small handful of strawberries with a fork (or blend briefly for a smoother puree). Once your yogurt is spread on the parchment paper, dollop small amounts of the strawberry puree over it and gently swirl with a skewer or the tip of a knife for a marbled effect before adding your sliced strawberries.
- Keep it Cold: Remember, this is a frozen treat! It melts relatively quickly once out of the freezer, especially on a warm day. Serve it immediately after breaking it into pieces. If you’re serving it for a gathering, consider keeping it in a bowl nestled in ice to maintain its firmness.
Storage
Proper storage is essential to keep your Strawberry Yogurt Bark fresh, delicious, and perfectly ready for whenever a craving strikes. It’s such a convenient snack, and with the right storage methods, you can enjoy it for weeks!
Immediate Storage: Once your Strawberry Yogurt Bark is fully frozen and you’ve broken or cut it into pieces, it’s time to get it into its long-term home in the freezer. Don’t leave it out at room temperature for too long, as it will start to soften quickly.
Airtight Container is Key: I always recommend storing the bark pieces in an airtight freezer-safe container. This is crucial for two main reasons:
- Preventing Freezer Burn: Exposure to air in the freezer is what leads to freezer burn, which can make your delicious bark develop an unappetizing icy taste and texture. An airtight container minimizes this exposure.
- Preventing Odor Absorption: The freezer can be a place of many smells! An airtight container helps prevent your yogurt bark from absorbing any unwanted odors from other foods stored nearby.
Layering for Success: To prevent the bark pieces from sticking together in a large frozen clump, I find it incredibly helpful to layer them. Place a single layer of bark pieces at the bottom of your container, then lay a piece of parchment paper or wax paper over them. Add another layer of bark, followed by more parchment paper, and continue this process until your container is full. This way, you can easily grab just a few pieces without having to chip away at a solid block.
Ideal Freezer Location: Try to store the container in a colder part of your freezer, away from the door, where temperatures tend to fluctuate more. Consistent cold temperatures are best for preserving texture and flavor.
Shelf Life: Stored properly in an airtight container, your Strawberry Yogurt Bark will stay fresh and delicious in the freezer for up to 3-4 weeks. While it might still be edible beyond that, its quality (texture and flavor) will likely start to decline. I usually make a batch and find it disappears well before the month is up!
Serving from Frozen: The best way to enjoy Strawberry Yogurt Bark is straight from the freezer. It’s designed to be eaten cold and firm. If you let it sit out for too long, it will soften and eventually melt, losing its characteristic bark texture. Just grab a piece or two whenever you need a refreshing, healthy, and satisfying snack!
Final Thoughts
And there you have it! I truly hope you’ve enjoyed this journey to creating your very own Strawberry Yogurt Bark. This isn’t just another sweet treat; it’s a testament to how effortlessly you can craft something both incredibly delicious and wonderfully refreshing. I absolutely love how simple it is to prepare, yet it delivers such a vibrant burst of fruity goodness, making it an ideal choice for a guilt-free snack or a light, satisfying dessert.
I promise you, once you taste the delightful coolness and creamy texture, mingled with those juicy strawberries, you’ll understand why this Strawberry Yogurt Bark is an absolute must-try. It’s the perfect way to brighten any day, cool down on a warm afternoon, or simply enjoy a moment of sweet indulgence without any fuss. Go on, give it a go – I know you’ll fall in love with it!
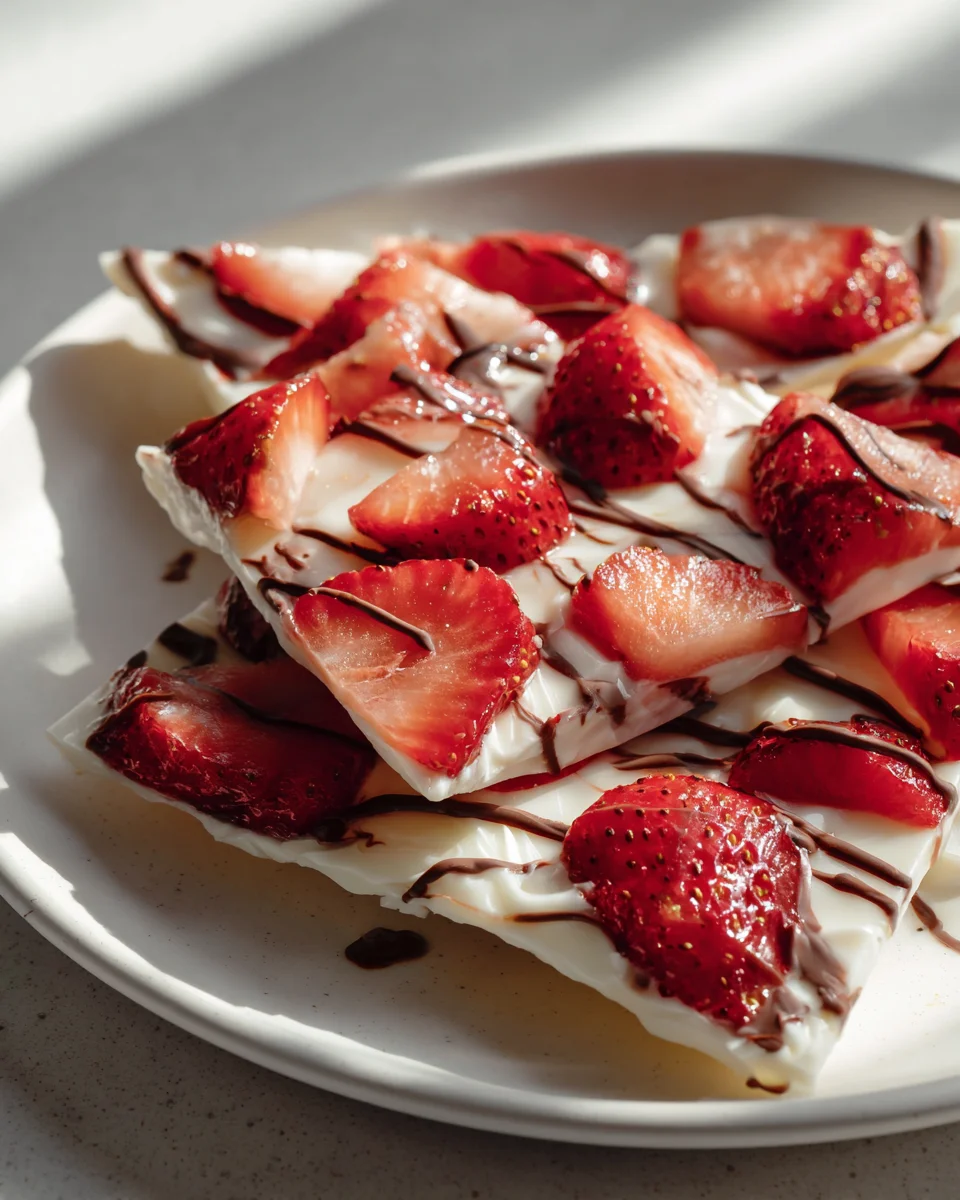
Delicious Strawberry Yogurt Bark – Perfect Healthy Frozen Treat
- Total Time: 15 minutes
- Yield: 4 servings 1x
Description
Strawberry Yogurt Bark is a refreshing and guilt-free treat that combines creamy Greek yogurt with fresh strawberries. It’s an easy-to-make snack that delivers a burst of fruity flavor in every bite.
Ingredients
- 2 cups full-fat Greek yogurt
- 2–4 tablespoons honey or maple syrup (or sugar substitute)
- 1 teaspoon vanilla extract (optional)
- 1 cup fresh strawberries, hulled and sliced or chopped
- Granola (optional topping)
- Chopped nuts (like almonds or pecans, optional topping)
Instructions
- Prepare Your Baking Sheet: Grab a rimmed baking sheet (about 9×13 inches) and line it generously with parchment paper.
- Mix the Yogurt Base: In a medium-sized bowl, combine your plain Greek yogurt with your chosen sweetener and vanilla extract if using. Mix thoroughly until smooth and adjust sweetness to taste.
- Spread the Yogurt: Pour the sweetened yogurt mixture onto the prepared baking sheet and spread it evenly into a layer about 1/4 to 1/2 inch thick.
- Add the Strawberries: Arrange your sliced or chopped strawberries over the yogurt. If using optional toppings, sprinkle them over the strawberries and gently press them into the yogurt.
- Freeze Until Solid: Transfer the baking sheet to your freezer and allow it to freeze for at least 3-4 hours until completely solid.
- Break and Serve: Once frozen, lift the bark off the pan using the parchment paper edges and break or cut it into pieces. Serve immediately.
- Prep Time: 15 mins
- Cook Time: 0 mins
- Category: Snack
- Method: Freezing
- Cuisine: American
Nutrition
- Serving Size: 1 piece
- Calories: 100
- Sugar: 8 g
- Sodium: 50 mg
- Fat: 4 g
- Saturated Fat: 2 g
- Unsaturated Fat: 2 g
- Trans Fat: 0 g
- Carbohydrates: 12 g
- Fiber: 1 g
- Protein: 5 g
- Cholesterol: 10 mg
Keywords: For a creamier texture, ensure strawberries are dry before adding to yogurt. Feel free to experiment with different fruits or toppings to customize your bark.