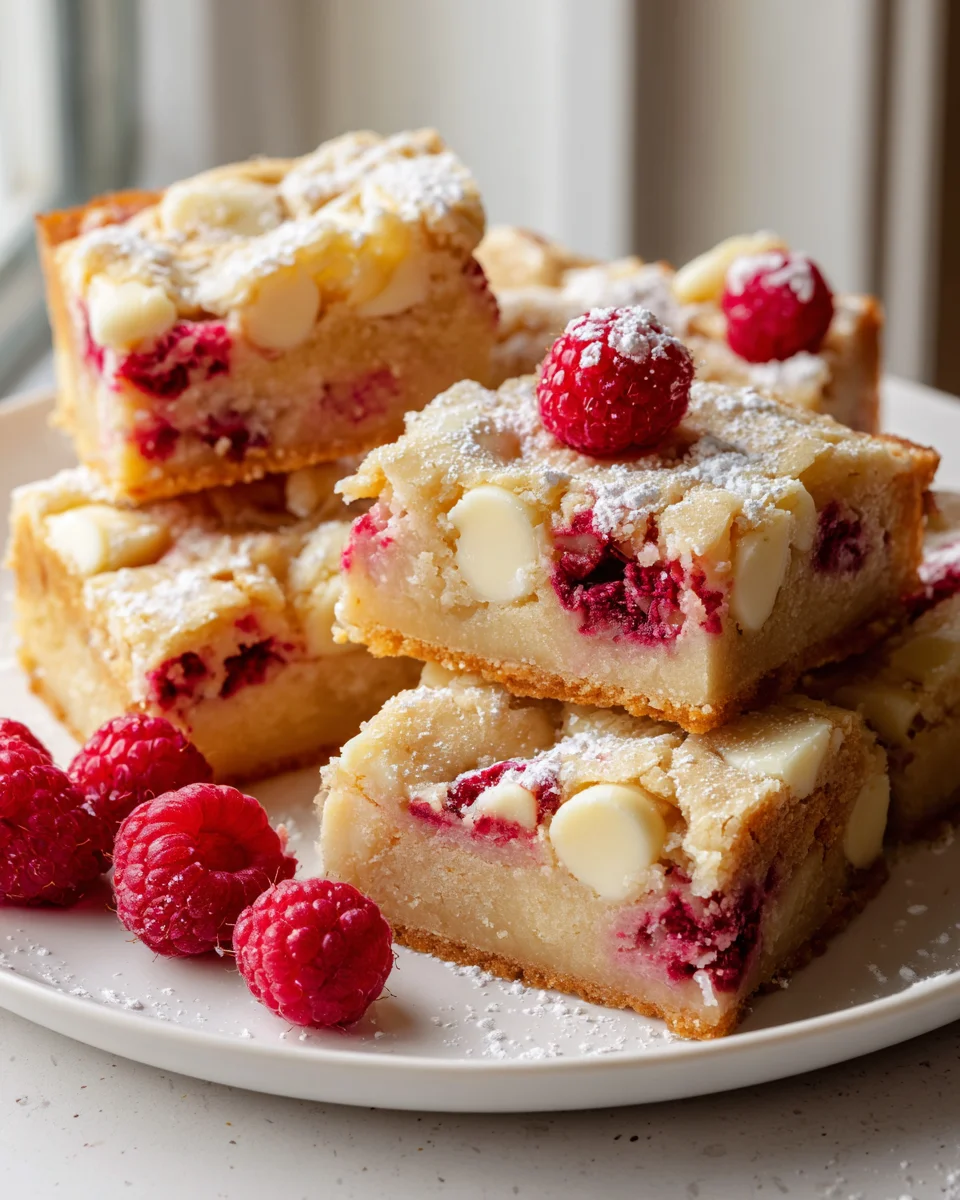
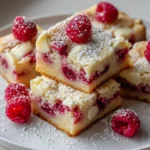
Raspberry White Chocolate Cookie Bars
Oh my goodness, let me tell you about these incredible Raspberry White Chocolate Cookie Bars! I am absolutely obsessed, and I know you’re going to be too. What makes them so special, you ask? It’s that magical balance of flavors that just sings on your palate: the bright, tart burst of fresh raspberries cutting through the creamy, sweet indulgence of white chocolate. It’s a truly perfect match made in dessert heaven!
You’ll fall head over heels for these bars because they offer all the comforting chewiness of your favorite cookie, but in an easy-to-make, shareable format. No scooping dozens of individual cookies here! Just press the dough into a pan, layer on the good stuff, and bake. The result? A stunning tray of golden cookie bars, studded with luscious pockets of melted white chocolate and vibrant swirls of juicy raspberry. Each bite is a delightful journey from tangy fruit to smooth, sweet chocolate, all nestled in a perfectly chewy cookie base. Trust me, these are going to be your new go-to for potlucks, parties, or simply a well-deserved treat for yourself!

Ingredient Notes
Creating truly irresistible Raspberry White Chocolate Cookie Bars starts with understanding the role each ingredient plays. I’ve carefully selected these components to ensure a perfect balance of chewy texture, sweet indulgence, and a burst of fruity freshness. Here’s what you’ll need and a few notes on why they matter, plus some handy substitutions:
- Unsalted Butter: I always opt for unsalted butter in baking to control the overall salt content of my recipe. Make sure it’s softened to room temperature; this is crucial for creaming it properly with the sugars, creating a light and airy base for our bars. If you only have salted butter, you can use it, but reduce the added salt in the recipe by about ¼ teaspoon.
- Granulated Sugar & Light Brown Sugar: The combination of these two sugars is key to achieving that signature chewy cookie bar texture. Granulated sugar provides crispness, while light brown sugar, with its molasses content, adds moisture, chewiness, and a subtle caramel-like flavor. I wouldn’t recommend altering the ratio too much, as it significantly impacts the final texture.
- Large Eggs: Eggs act as a binder, adding structure and moisture to our cookie bars. Ensure they are also at room temperature so they incorporate more smoothly into the butter and sugar mixture, preventing the batter from curdling.
- Vanilla Extract: A good quality vanilla extract is essential for enhancing all the other flavors in the bars. It adds warmth and depth. For an extra special touch, you could use vanilla bean paste.
- All-Purpose Flour: This is the backbone of our bars, providing structure. When measuring, I always recommend spooning the flour into your measuring cup and then leveling it off to avoid compacting it, which can lead to dry, dense bars.
- Baking Soda & Salt: Baking soda helps the bars rise slightly and contributes to their tender crumb. Salt is a flavor enhancer, balancing the sweetness and bringing out the best in the white chocolate and raspberries. Don’t skip it!
- White Chocolate Chips or Chunks: The star of the show! I highly recommend using good quality white chocolate here, as it truly makes a difference in flavor. Chips are convenient, but chopping a block of white chocolate into chunks can create lovely pockets of melted chocolate throughout the bars. If white chocolate isn’t your preference, you could substitute with milk chocolate or even dark chocolate for a different flavor profile, though it would change the recipe’s core identity.
- Fresh or Frozen Raspberries: These provide the vibrant fruity tang that cuts through the richness of the white chocolate. Fresh raspberries are wonderful when in season; simply gently fold them in. If using frozen raspberries, I suggest adding them directly from the freezer without thawing, and tossing them with a tablespoon of flour before adding them to the dough. This helps prevent them from bleeding too much color into the batter and keeps them from sinking to the bottom. Other berries like blueberries or chopped strawberries could work as a substitute, but then they wouldn’t truly be “Raspberry White Chocolate Cookie Bars”!
Step-by-Step Instructions
Let’s get baking! Follow these detailed steps to create perfectly chewy and flavorful Raspberry White Chocolate Cookie Bars:
- Prepare Your Pan: First things first, preheat your oven to 350°F (175°C). While the oven is heating, line a 9×13-inch baking pan with parchment paper, leaving an overhang on the sides. This parchment paper sling will make it incredibly easy to lift the entire slab of cookie bars out of the pan once they’re baked and cooled, ensuring clean cuts.
- Cream Butter and Sugars: In a large mixing bowl, using either a stand mixer fitted with the paddle attachment or an electric hand mixer, cream together the softened unsalted butter, granulated sugar, and light brown sugar. Beat on medium speed for 2-3 minutes, until the mixture is light, fluffy, and pale in color. This step incorporates air, which contributes to the bars’ tender texture.
- Add Eggs and Vanilla: Scrape down the sides of the bowl. Add the large eggs, one at a time, beating well after each addition until fully incorporated. Then, stir in the vanilla extract. Continue to beat until the mixture is smooth and cohesive.
- Combine Dry Ingredients: In a separate medium bowl, whisk together the all-purpose flour, baking soda, and salt. Whisking ensures these dry ingredients are evenly distributed, so you don’t end up with pockets of leavening agents in your bars.
- Combine Wet and Dry: Gradually add the dry ingredients to the wet ingredients in the large mixing bowl. Mix on low speed just until combined. Be very careful not to overmix; overmixing flour can develop the gluten too much, resulting in tough, dry bars. Stop mixing as soon as you see no more streaks of dry flour.
- Fold in White Chocolate: Gently fold in the white chocolate chips or chunks using a rubber spatula. Distribute them evenly throughout the dough. I love seeing those generous pockets of white chocolate!
- Add the Raspberries: Now for the star fruit! Gently fold in the fresh or frozen (and floured, if frozen) raspberries. Be delicate here to avoid crushing them too much and to prevent excessive color bleeding into the dough. You want pretty, distinct raspberry swirls, not a fully pink batter.
- Press into Pan: Transfer the cookie dough to your prepared 9×13-inch baking pan. Use a rubber spatula or your fingertips (lightly floured if the dough is sticky) to gently press the dough evenly into the bottom of the pan. Make sure it’s spread out from edge to edge.
- Bake: Place the pan in your preheated oven and bake for 25-30 minutes. You’ll know they’re ready when the edges are lightly golden brown and the center appears set but still slightly soft. A toothpick inserted into the center should come out with moist crumbs, not wet batter. Remember, bars continue to cook slightly as they cool.
- Cool Completely: This is a crucial step! Once baked, remove the pan from the oven and place it on a wire rack to cool completely. This can take 1-2 hours. Resisting the urge to cut into them hot is tough, but cooling allows the bars to firm up and set properly, making them much easier to slice cleanly.
- Slice and Serve: Once fully cooled, use the parchment paper overhang to lift the entire slab of cookie bars out of the pan onto a cutting board. Cut into desired square or rectangular shapes. Now, finally, you can enjoy your delicious Raspberry White Chocolate Cookie Bars!
Tips & Suggestions
I’ve baked countless batches of cookie bars, and over the years, I’ve picked up a few tricks that make all the difference. Here are my top tips and suggestions to ensure your Raspberry White Chocolate Cookie Bars turn out perfectly every time:
- Don’t Overmix: I cannot stress this enough! Once you add the flour to the wet ingredients, mix only until just combined. Overmixing develops the gluten in the flour, leading to tough, dense bars instead of the delightfully chewy texture we’re aiming for. A gentle hand is key here.
- Room Temperature Ingredients: Always make sure your butter and eggs are at room temperature. This allows them to emulsify better, creating a smooth, homogenous batter that holds air more effectively, leading to a lighter, more tender crumb.
- The Parchment Paper Sling: That parchment paper overhang isn’t just for aesthetics! It’s your best friend for easy removal. Once the bars are cool, you can simply lift them out as a whole slab, transfer to a cutting board, and slice without damaging the edges or wrestling them out of the pan.
- Avoid Overbaking: Keep a close eye on your bars, especially towards the end of the baking time. They should look set in the center with lightly golden edges. A slightly underbaked center is better than an overbaked one, as they will continue to firm up as they cool. Overbaking leads to dry, crumbly bars.
- Chill the Dough (Optional but Recommended): If you find your dough is a bit too sticky or soft to spread easily, cover the pan and pop it in the refrigerator for 15-20 minutes before baking. This can make handling easier and sometimes results in a slightly chewier bar.
- Raspberry Preparation for Frozen Berries: If you’re using frozen raspberries, don’t thaw them. Toss them directly from the freezer with about a tablespoon of flour before folding them into the dough. This light coating helps to absorb excess moisture and prevents the berries from sinking to the bottom or bleeding too much color into your beautiful white dough.
- Enhance Presentation: For an extra touch, once the bars are completely cool, you can melt a little extra white chocolate and drizzle it decoratively over the top. A light dusting of powdered sugar just before serving also looks lovely and adds a touch more sweetness.
- Quality of White Chocolate Matters: Since white chocolate is such a prominent flavor here, using a good quality brand will make a noticeable difference. Cheap white chocolate often contains more sugar and less cocoa butter, which can affect both taste and texture.
Storage
You’ve put in the effort to bake these delicious Raspberry White Chocolate Cookie Bars, so let’s make sure they stay fresh and delightful for as long as possible! Proper storage is key to maintaining their perfect chewy texture and vibrant flavors:
- At Room Temperature: Once your cookie bars have completely cooled down to room temperature, they can be stored in an airtight container. I usually place a sheet of parchment paper between layers if I’m stacking them to prevent sticking. They will stay wonderfully fresh and chewy for 3-4 days on your countertop. This is my preferred method for immediate enjoyment!
- In the Refrigerator: If you want to extend their shelf life a bit, or if your kitchen is particularly warm, you can store the cooled bars in an airtight container in the refrigerator. They will last for up to a week. Be aware that chilling can make them slightly firmer, so I often let them come closer to room temperature for about 15-20 minutes before serving to regain some of their original softness and chewiness.
- Freezing Baked Bars: These cookie bars freeze beautifully! This is a fantastic option if you’ve made a large batch or want to have a quick treat on hand for later.
- To Freeze: First, ensure the bars are completely cooled. Then, you can either freeze them whole as a slab or cut them into individual portions. If freezing individual portions, I recommend wrapping each bar tightly in plastic wrap, then placing them in a freezer-safe airtight container or heavy-duty freezer bag. For a whole slab, wrap it tightly in plastic wrap, then aluminum foil.
- Freezing Duration: Properly stored, baked Raspberry White Chocolate Cookie Bars can be kept in the freezer for up to 3 months without compromising their quality.
- To Thaw: When you’re ready to enjoy them, simply remove the desired number of bars from the freezer. You can thaw them overnight in the refrigerator, or for a quicker thaw, let them sit at room temperature for an hour or two until soft. They’ll taste almost as good as freshly baked!
- Freezing Unbaked Dough (for future baking): If you want to prepare the dough ahead of time, you can also freeze the unbaked dough.
- To Freeze: After preparing the dough and pressing it into your parchment-lined pan, cover the pan tightly with plastic wrap, then aluminum foil.
- Freezing Duration: Unbaked dough can be frozen for up to 1 month.
- To Bake from Frozen: When ready to bake, remove the pan from the freezer, unwrap, and bake directly from frozen. You may need to add an additional 10-15 minutes to the baking time, so keep an eye on them.
Final Thoughts
And there you have it! I truly believe that these Raspberry White Chocolate Cookie Bars are more than just a dessert; they’re a little slice of heaven that’s sure to brighten anyone’s day. The way the bright, tangy burst of fresh raspberries perfectly complements the creamy sweetness of white chocolate, all nestled in a soft, chewy cookie bar base, is simply irresistible. I just love how easy they are to whip up, yet they taste incredibly gourmet and impressive. They’re perfect for sharing at a gathering, bringing a smile to a friend’s face, or simply treating yourself to something truly special. So go ahead, give these Raspberry White Chocolate Cookie Bars a try – I promise you won’t regret filling your kitchen with their amazing aroma and your taste buds with their delightful flavor!
Easy Raspberry White Chocolate Cookie Bars: Sweet Treat
- Total Time: 45 minutes
- Yield: 12 servings 1x
Description
These Raspberry White Chocolate Cookie Bars are a delightful combination of tart raspberries and creamy white chocolate, all nestled in a chewy cookie base. Perfect for sharing at gatherings or enjoying as a special treat, they are easy to make and absolutely irresistible!
Ingredients
- 1 cup Unsalted Butter, softened
- 1 cup Granulated Sugar
- 1 cup Light Brown Sugar
- 2 Large Eggs
- 2 teaspoons Vanilla Extract
- 2 1/2 cups All-Purpose Flour
- 1 teaspoon Baking Soda
- 1/2 teaspoon Salt
- 2 cups White Chocolate Chips or Chunks
- 1 1/2 cups Fresh or Frozen Raspberries
Instructions
- Preheat your oven to 350°F (175°C) and line a 9×13-inch baking pan with parchment paper, leaving an overhang on the sides.
- In a large mixing bowl, cream together the softened unsalted butter, granulated sugar, and light brown sugar using a stand mixer or electric hand mixer on medium speed for 2-3 minutes until light and fluffy.
- Add the large eggs one at a time, beating well after each addition, then stir in the vanilla extract until smooth.
- In a separate medium bowl, whisk together the all-purpose flour, baking soda, and salt.
- Gradually add the dry ingredients to the wet ingredients in the large mixing bowl, mixing on low speed just until combined.
- Gently fold in the white chocolate chips or chunks using a rubber spatula.
- Fold in the fresh or frozen raspberries, being careful not to crush them too much.
- Transfer the cookie dough to the prepared baking pan and press it evenly into the bottom.
- Bake for 25-30 minutes until the edges are lightly golden brown and the center is set but still slightly soft.
- Remove from the oven and let cool completely on a wire rack for 1-2 hours before slicing.
- Prep Time: 15 mins
- Cook Time: 30 mins
- Category: Dessert
- Method: Baking
- Cuisine: American
Nutrition
- Serving Size: 1 bar
- Calories: 250
- Sugar: 20 g
- Sodium: 150 mg
- Fat: 12 g
- Saturated Fat: 7 g
- Unsaturated Fat: 3 g
- Trans Fat: 0 g
- Carbohydrates: 35 g
- Fiber: 1 g
- Protein: 3 g
- Cholesterol: 40 mg
Keywords: Ensure all ingredients are at room temperature for best results. Don't overmix the dough to maintain a chewy texture. If using frozen raspberries, toss them with a tablespoon of flour before adding to prevent color bleeding.