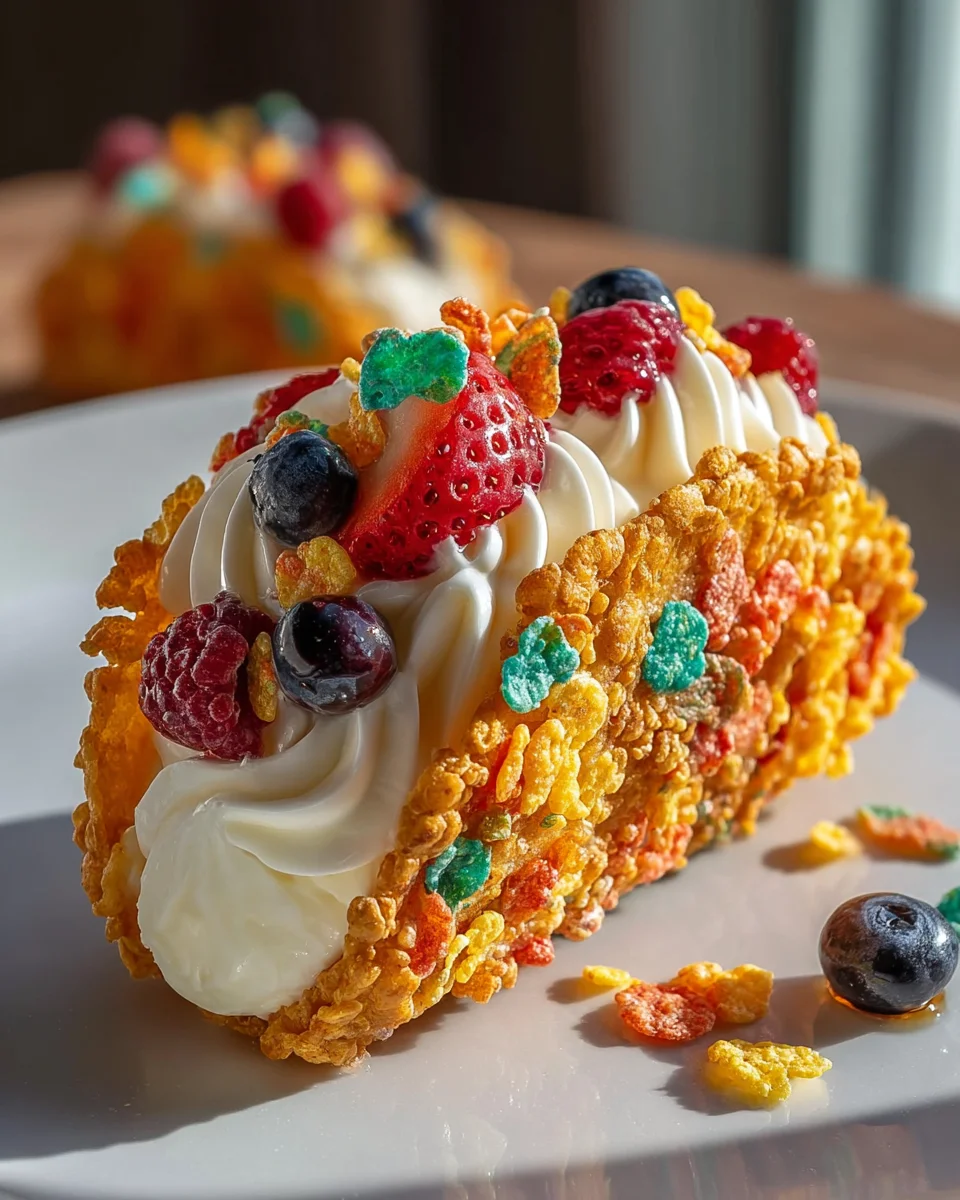
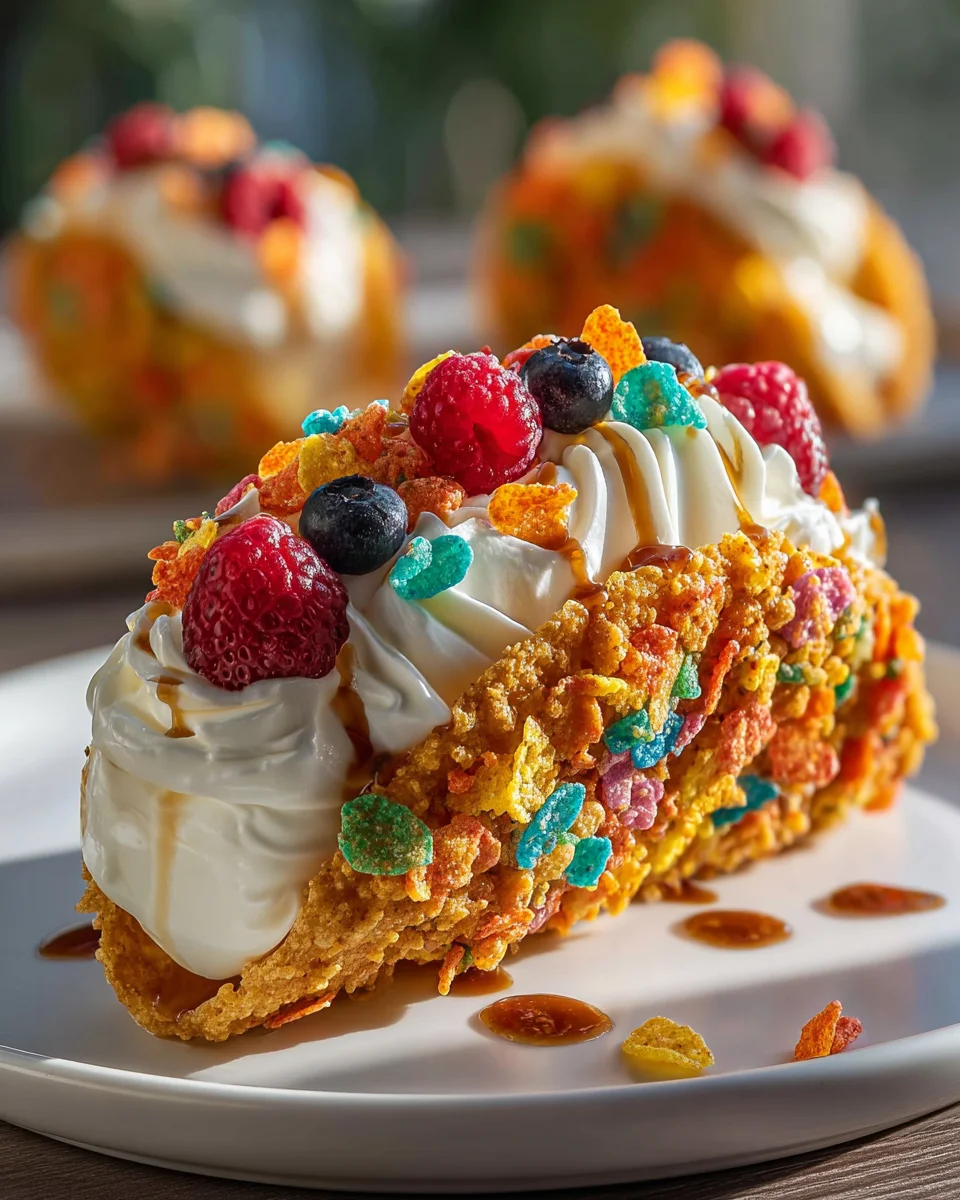
Fruity Pebbles Cheesecake Tacos A Deliciously Fun Dessert Recipe
Let me take you on a delightful journey with my latest creation: Fruity Pebbles Cheesecake Tacos A Deliciously Fun Dessert Recipe. This whimsical dessert combines two of my favorite things—tacos and cheesecake—into a treat that’s not only delicious but also bursting with color and nostalgia. Imagine creamy cheesecake filling nestled inside a crispy taco shell, all coated in the vibrant crunch of Fruity Pebbles cereal. It’s like a party for your taste buds!
What makes this recipe truly special is the playful twist on traditional tacos, bringing the joy of childhood breakfast cereals into a dessert that’s perfect for any occasion. Whether you’re hosting a birthday party, a casual get-together, or just want to indulge in something sweet, these Fruity Pebbles Cheesecake Tacos will surely steal the show. Plus, they’re incredibly easy to make, allowing you to whip up a batch in no time. I promise, once you take that first bite, you’ll be hooked on their creamy, crunchy, and oh-so-fun flavor!
Ingredient Notes
To create delicious Fruity Pebbles Cheesecake Tacos, you’ll need a variety of ingredients that combine to form a fun and colorful dessert. Here’s what you’ll need:
- Fruity Pebbles Cereal: This will be the star of the dish! You can use any fruity cereal if you want a similar flavor profile, but Fruity Pebbles adds that iconic taste and color.
- Cream Cheese: You’ll want full-fat cream cheese for a rich and creamy filling. If you need a lighter option, consider using Neufchâtel cheese.
- Powdered Sugar: This sweetens the cheesecake filling. If you’re looking for a healthier alternative, you can use a sugar substitute like stevia, but adjust to taste.
- Vanilla Extract: A dash of vanilla enhances the flavor. If you want a unique twist, use almond extract instead.
- Cool Whip: This adds a light and fluffy texture to the cheesecake. You can substitute it with homemade whipped cream if desired.
- Taco Shells: For the taco shells, you can use mini flour tortillas or taco-style cookie shells. If you’re looking for a gluten-free option, consider using corn tortillas.
- Chocolate or White Chocolate Chips: These are optional for added sweetness and texture. You can also use dairy-free chocolate if you prefer.
Step-by-Step Instructions
Now that you have your ingredients ready, let’s dive into making these fun and fruity cheesecake tacos!
- Prepare the Taco Shells: If using flour tortillas, lightly toast them in a skillet until they become warm and pliable. For cookie shells, follow the package instructions to prepare them. Allow them to cool.
- Make the Cheesecake Filling: In a mixing bowl, combine 8 oz of softened cream cheese with 1 cup of powdered sugar and 1 teaspoon of vanilla extract. Beat until smooth and creamy. Gently fold in 1 cup of Cool Whip until well combined. Mix in 1 cup of Fruity Pebbles until evenly distributed.
- Fill the Taco Shells: Spoon the cheesecake mixture into each taco shell, being generous with the filling. You can also use a piping bag for a neater presentation.
- Add Toppings: Sprinkle the tops of the filled tacos with additional Fruity Pebbles, chocolate chips, or any other toppings you desire.
- Chill: Place the filled tacos in the refrigerator for at least 30 minutes to allow the filling to set slightly.
- Serve: Once chilled, it’s time to serve your Fruity Pebbles Cheesecake Tacos! Enjoy them as a fun dessert at parties or just as a sweet treat at home.
Tips & Suggestions
Here are some tips to ensure your Fruity Pebbles Cheesecake Tacos turn out perfectly:
- Don’t Overmix: When folding in the Cool Whip and Fruity Pebbles, be gentle to maintain the light and fluffy texture of the filling.
- Experiment with Flavors: Feel free to add other mix-ins like mini marshmallows or rainbow sprinkles for an extra burst of fun!
- Make Ahead: You can prepare the cheesecake filling a day in advance and assemble the tacos right before serving to keep the shells crisp.
- Customize Your Toppings: Consider adding fresh fruits like strawberries or bananas for a fruity twist or drizzling with chocolate sauce for extra indulgence.
Storage
To keep your Fruity Pebbles Cheesecake Tacos fresh, follow these storage tips:
- Refrigeration: Store any leftover tacos in an airtight container in the refrigerator. They are best enjoyed within 2-3 days for optimal flavor and texture.
- Separation: If you know you won’t eat them all at once, consider storing the taco shells and cheesecake filling separately. This helps keep the shells from getting soggy.
- Freezing: While it’s not recommended to freeze the filled tacos, you can freeze the cheesecake filling for up to a month. Just thaw it in the refrigerator and reassemble when you’re ready to enjoy!
With these simple instructions and tips, you’re all set to create a delightful and whimsical dessert that’s sure to bring smiles to faces. Enjoy your Fruity Pebbles Cheesecake Tacos!
Final Thoughts
If you’re looking for a dessert that brings joy and nostalgia to the table, then the Fruity Pebbles Cheesecake Tacos A Deliciously Fun Dessert Recipe is an absolute must-try! This delightful treat combines the creamy richness of cheesecake with the playful crunch of Fruity Pebbles, all wrapped up in a taco shell that adds a fun twist. It’s perfect for parties, family gatherings, or just a sweet pick-me-up after a long day. Trust me, every bite is a burst of flavor that will take you back to your childhood while impressing your friends and family with your creativity. So, gather your ingredients and get ready to indulge in a dessert that’s as fun to make as it is to eat!

Fruity Pebbles Cheesecake Tacos: A Fun Dessert Recipe!
- Total Time: 25 minutes
- Yield: 12 tacos 1x
Description
These Fruity Pebbles Cheesecake Tacos combine the creamy richness of cheesecake with the playful crunch of Fruity Pebbles, all wrapped up in a taco shell. Perfect for parties or a sweet treat at home!
Ingredients
- Fruity Pebbles Cereal
- 8 oz of Cream Cheese
- 1 cup of Powdered Sugar
- 1 teaspoon of Vanilla Extract
- 1 cup of Cool Whip
- Taco Shells (mini flour tortillas or taco-style cookie shells)
- Chocolate or White Chocolate Chips (optional)
Instructions
- Prepare the Taco Shells: If using flour tortillas, lightly toast them in a skillet until they become warm and pliable. For cookie shells, follow the package instructions to prepare them. Allow them to cool.
- Make the Cheesecake Filling: In a mixing bowl, combine 8 oz of softened cream cheese with 1 cup of powdered sugar and 1 teaspoon of vanilla extract. Beat until smooth and creamy. Gently fold in 1 cup of Cool Whip until well combined. Mix in 1 cup of Fruity Pebbles until evenly distributed.
- Fill the Taco Shells: Spoon the cheesecake mixture into each taco shell, being generous with the filling. You can also use a piping bag for a neater presentation.
- Add Toppings: Sprinkle the tops of the filled tacos with additional Fruity Pebbles, chocolate chips, or any other toppings you desire.
- Chill: Place the filled tacos in the refrigerator for at least 30 minutes to allow the filling to set slightly.
- Serve: Once chilled, it’s time to serve your Fruity Pebbles Cheesecake Tacos! Enjoy them as a fun dessert at parties or just as a sweet treat at home.
- Prep Time: 15 mins
- Cook Time: 10 mins
- Category: Dessert
- Method: No-bake
- Cuisine: American
Nutrition
- Serving Size: 1 taco
- Calories: 200
- Sugar: 15 g
- Sodium: 150 mg
- Fat: 8 g
- Saturated Fat: 4 g
- Unsaturated Fat: 3 g
- Trans Fat: 0 g
- Carbohydrates: 28 g
- Fiber: 1 g
- Protein: 3 g
- Cholesterol: 30 mg
Keywords: Don’t overmix when folding in the Cool Whip and Fruity Pebbles. Feel free to add other mix-ins like mini marshmallows or rainbow sprinkles for an extra burst of fun!