• Skip to primary navigation
  • Skip to main content
  • Skip to primary sidebar
Homesmad

Homesmad

  • Home
  • Breakfast & Brunch
  • Appetizers & Snacks
  • Dinner
  • Dessert
  • About
  • Privacy Policy
  • Contact
Homesmad
  • Home
  • Breakfast & Brunch
  • Appetizers & Snacks
  • Dinner
  • Dessert
  • About
  • Privacy Policy
  • Contact

Grilled Salsa Verde Chicken: Recipe, Tips, and Delicious Ideas

June 19, 2025 by Lily author

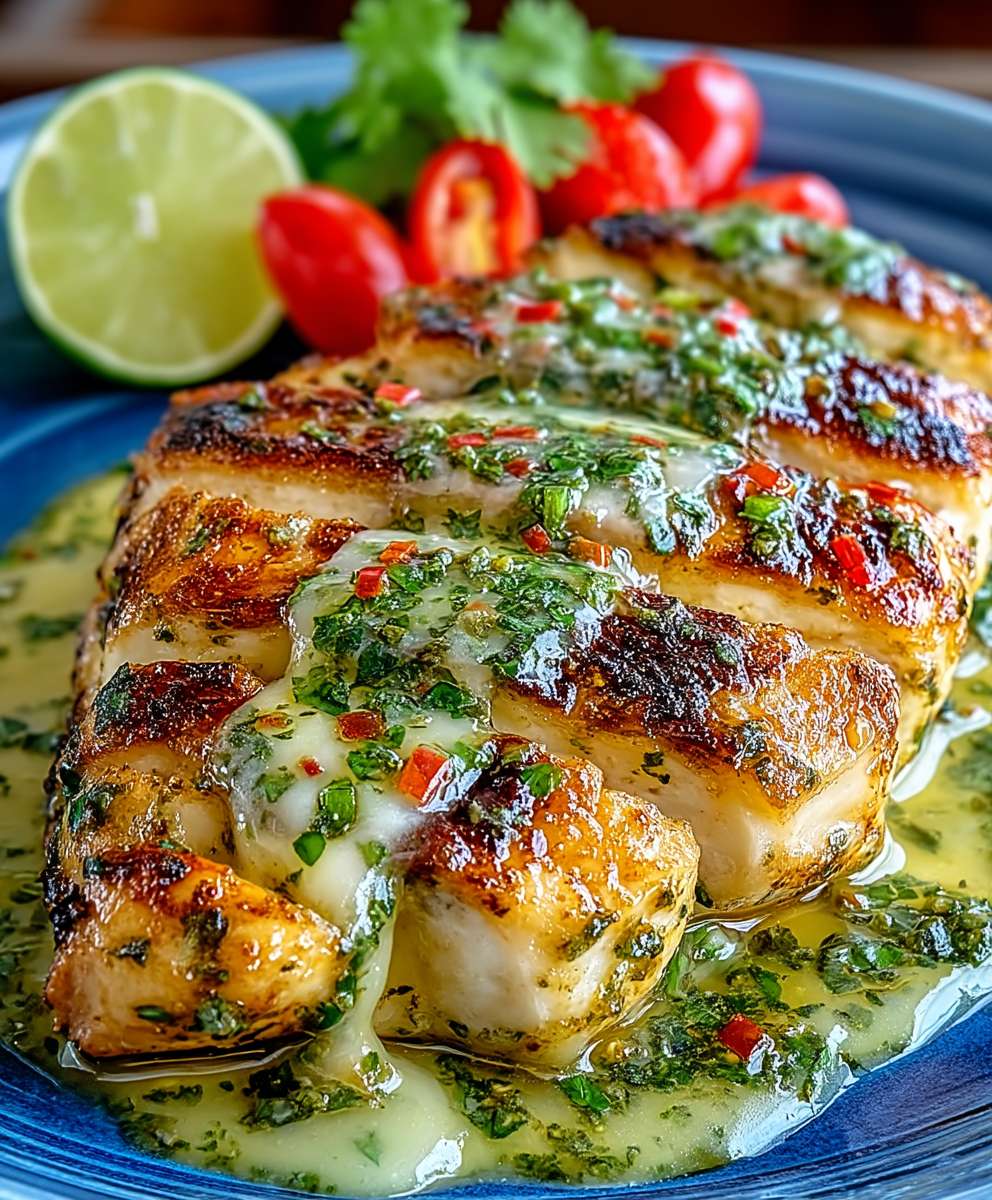
Grilled Salsa Verde Chicken: Prepare to unlock a flavor explosion that will transform your weeknight dinners! Imagine succulent, perfectly grilled chicken, infused with the vibrant tang of homemade salsa verde. This isn’t just another chicken recipe; it’s a culinary journey to the heart of Mexican cuisine, simplified for your kitchen.

Salsa verde, meaning “green sauce” in Spanish, has roots stretching back to pre-Columbian Mexico, where indigenous cultures crafted flavorful sauces from tomatillos, chilies, and herbs. Over centuries, it has evolved into a staple condiment and cooking ingredient, celebrated for its bright, herbaceous notes and versatility. It’s no wonder that Grilled Salsa Verde Chicken is such a popular dish!

What makes this recipe so irresistible? It’s the perfect balance of smoky char from the grill, the juicy tenderness of the chicken, and the zesty, slightly spicy kick of the salsa verde. The fresh herbs and tangy tomatillos in the salsa verde cut through the richness of the chicken, creating a symphony of flavors that dance on your palate. Plus, it’s incredibly easy to make! Whether you’re a seasoned grill master or a kitchen novice, you can whip up this Grilled Salsa Verde Chicken in under an hour, making it the ideal choice for a quick, healthy, and utterly delicious meal. Get ready to impress your family and friends with this vibrant and flavorful dish!

Grilled Salsa Verde Chicken this RECIPE

Ingredients:

  • For the Salsa Verde:
    • 1 1/2 pounds tomatillos, husked and rinsed
    • 2-3 serrano peppers, stemmed (adjust to your spice preference!)
    • 1/2 white onion, roughly chopped
    • 2 cloves garlic, peeled
    • 1 cup packed cilantro leaves
    • 1/4 cup packed parsley leaves
    • 2 tablespoons lime juice, freshly squeezed
    • 1 tablespoon olive oil
    • 1 teaspoon kosher salt, or to taste
    • 1/2 teaspoon ground cumin
  • For the Chicken:
    • 4 boneless, skinless chicken breasts (about 6-8 ounces each)
    • 1 tablespoon olive oil
    • 1 teaspoon kosher salt
    • 1/2 teaspoon black pepper
    • 1/2 teaspoon garlic powder
    • 1/4 teaspoon onion powder
  • Optional Garnishes:
    • Crumbled cotija cheese
    • Chopped cilantro
    • Lime wedges

Preparing the Salsa Verde

Okay, let’s get started with the heart of this dish – the vibrant Salsa Verde! This is where all the flavor magic happens. Don’t be intimidated; it’s super easy to make.

  1. Roast the Tomatillos and Serranos: Preheat your broiler. Place the tomatillos and serrano peppers on a baking sheet lined with foil. Broil for about 5-7 minutes, or until the tomatillos are softened and slightly charred, flipping halfway through. Keep a close eye on them, as they can burn quickly! The charring adds a wonderful smoky flavor to the salsa.
  2. Cool Slightly: Remove the baking sheet from the oven and let the tomatillos and peppers cool slightly. This will make them easier to handle.
  3. Blend the Ingredients: In a blender or food processor, combine the roasted tomatillos and serrano peppers (including any juices that accumulated on the baking sheet – that’s flavor!), white onion, garlic cloves, cilantro, parsley, lime juice, olive oil, salt, and cumin.
  4. Blend Until Smooth: Blend until the salsa is smooth, but still has a little bit of texture. You don’t want it completely pureed. Taste and adjust the seasoning as needed. Add more lime juice for tanginess, salt for flavor, or serrano pepper if you want more heat. Remember, you can always add, but you can’t take away!
  5. Set Aside: Once the salsa verde is to your liking, set it aside. You can use it immediately, or store it in an airtight container in the refrigerator for up to 5 days. The flavors actually meld together and deepen over time, so it’s even better the next day!

Preparing the Chicken

Now, let’s move on to the chicken. We want to make sure it’s juicy and flavorful, so we’ll give it a little extra love before grilling.

  1. Pound the Chicken Breasts (Optional): If your chicken breasts are very thick, you can pound them to an even thickness (about 1/2 inch). This will help them cook evenly and prevent them from drying out. Place the chicken breasts between two sheets of plastic wrap and use a meat mallet or rolling pin to gently pound them.
  2. Season the Chicken: In a small bowl, combine the olive oil, salt, pepper, garlic powder, and onion powder. Rub this mixture all over the chicken breasts, making sure they are evenly coated. This simple seasoning blend adds a nice savory flavor that complements the salsa verde perfectly.
  3. Marinate (Optional): For even more flavor, you can marinate the chicken in about 1/2 cup of the salsa verde for at least 30 minutes, or up to a few hours in the refrigerator. This will help tenderize the chicken and infuse it with the delicious salsa verde flavor. If you marinate, be sure to discard the marinade after use.

Grilling the Chicken

Time to fire up the grill! Grilling the chicken gives it a wonderful smoky flavor that you just can’t get any other way. If you don’t have a grill, you can also cook the chicken in a grill pan on the stovetop or bake it in the oven.

  1. Preheat the Grill: Preheat your grill to medium-high heat (about 375-450°F). Make sure the grates are clean and lightly oiled to prevent the chicken from sticking.
  2. Grill the Chicken: Place the chicken breasts on the preheated grill. Grill for about 5-7 minutes per side, or until the chicken is cooked through and the internal temperature reaches 165°F. Use a meat thermometer to ensure accuracy. Don’t overcook the chicken, or it will become dry.
  3. Rest the Chicken: Once the chicken is cooked through, remove it from the grill and let it rest for 5-10 minutes before slicing. This allows the juices to redistribute, resulting in a more tender and flavorful chicken.

Serving the Grilled Salsa Verde Chicken

Now for the best part – putting it all together and enjoying your delicious creation!

  1. Slice the Chicken: Slice the grilled chicken breasts against the grain. This will make them easier to chew and more tender.
  2. Top with Salsa Verde: Spoon a generous amount of the salsa verde over the sliced chicken.
  3. Garnish (Optional): Garnish with crumbled cotija cheese, chopped cilantro, and lime wedges, if desired. These garnishes add a pop of color and flavor that really elevates the dish.
  4. Serve: Serve immediately and enjoy! This Grilled Salsa Verde Chicken is delicious on its own, or you can serve it with your favorite sides, such as rice, beans, salad, or grilled vegetables. It’s also great in tacos, burritos, or salads.

Tips and Variations:

  • Spice Level: Adjust the amount of serrano peppers in the salsa verde to control the spice level. If you’re sensitive to heat, start with just one pepper and taste as you go. You can also remove the seeds and membranes from the peppers to reduce the heat.
  • Tomatillo Substitute: If you can’t find tomatillos, you can substitute with green tomatoes, but the flavor will be slightly different.
  • Chicken Thighs: You can also use boneless, skinless chicken thighs instead of chicken breasts. Chicken thighs are more forgiving and tend to stay juicier than chicken breasts.
  • Oven Baking: If you don’t have a grill, you can bake the chicken in the oven. Preheat the oven to 400°F and bake for 20-25 minutes, or until the chicken is cooked through.
  • Slow Cooker: For a super easy weeknight meal, you can cook the chicken in a slow cooker. Place the chicken breasts in the slow cooker and pour the salsa verde over them. Cook on low for 6-8 hours, or on high for 3-4 hours. Shred the chicken with two forks and serve.
  • Make Ahead: The salsa verde can be made ahead of time and stored in the refrigerator for up to 5 days. The chicken can also be marinated ahead of time and stored in the refrigerator for up to 24 hours.
  • Serving Suggestions: This Grilled Salsa Verde Chicken is incredibly versatile. Serve it with rice and beans for a classic Mexican-inspired meal, or use it as a topping for salads, tacos, or nachos. You can also chop it up and add it to quesadillas or enchiladas.
Nutritional Information (Approximate):

Please note that the nutritional information is an estimate and may vary depending on the specific ingredients and portion sizes used.

  • Calories: Approximately 350-400 per serving
  • Protein: 40-45 grams
  • Fat: 15-20 grams
  • Carbohydrates: 10-15 grams

Enjoy your delicious and healthy Grilled Salsa Verde Chicken! I hope you love it as much as I do!

Grilled Salsa Verde Chicken

Conclusion:

This Grilled Salsa Verde Chicken recipe is more than just a meal; it’s a flavor explosion waiting to happen! I truly believe it’s a must-try for anyone looking to add a vibrant, healthy, and incredibly delicious dish to their repertoire. The combination of the smoky char from the grill and the tangy, herbaceous salsa verde creates a symphony of tastes that will leave you wanting more. It’s quick enough for a weeknight dinner but impressive enough to serve to guests.

Why is it a must-try? Because it’s ridiculously easy to make! Seriously, the prep time is minimal, and the grilling process is straightforward. Even if you’re a novice in the kitchen, you can confidently whip up this dish and impress everyone with your culinary skills. Plus, it’s incredibly versatile. The salsa verde itself is a powerhouse of flavor, and when paired with the grilled chicken, it’s simply divine. But the best part? It’s healthy! Grilled chicken is a lean protein source, and the salsa verde is packed with fresh herbs and vegetables, making it a guilt-free indulgence.

But the fun doesn’t stop there! Let’s talk serving suggestions and variations. I love serving this Grilled Salsa Verde Chicken over a bed of fluffy quinoa or rice, drizzled with extra salsa verde, of course. It’s also fantastic in tacos or burritos, adding a burst of freshness and flavor to your favorite Mexican-inspired dishes. For a lighter option, try slicing the chicken and adding it to a vibrant salad with mixed greens, avocado, and a light vinaigrette.

And if you’re feeling adventurous, here are a few variations to try:

* Spice it up: Add a pinch of red pepper flakes to the salsa verde for an extra kick.
* Make it creamy: Stir in a dollop of Greek yogurt or sour cream to the salsa verde for a richer, creamier sauce.
* Add some sweetness: Incorporate a few chunks of grilled pineapple into the salsa verde for a tropical twist.
* Marinate it longer: While 30 minutes is sufficient, marinating the chicken for a few hours (or even overnight) will intensify the flavors even more. Just be sure to keep it refrigerated.
* Different cuts of chicken: While I personally love using chicken breasts, you can easily adapt this recipe to use chicken thighs, drumsticks, or even a whole chicken. Just adjust the cooking time accordingly.

I’m so excited for you to try this recipe! I know you’ll love it as much as I do. It’s a guaranteed crowd-pleaser that’s perfect for any occasion.

So, what are you waiting for? Fire up that grill and get ready to experience the magic of Grilled Salsa Verde Chicken! Once you’ve made it, I’d absolutely love to hear about your experience. Did you try any of the variations? What did you serve it with? Share your photos and stories in the comments below! Your feedback is invaluable, and I can’t wait to see what culinary creations you come up with. Happy grilling!


Grilled Salsa Verde Chicken: Recipe, Tips, and Delicious Ideas

Juicy grilled chicken breasts smothered in a vibrant, homemade salsa verde. A flavorful and healthy Mexican-inspired dish perfect for a quick weeknight meal or a weekend gathering.

Prep Time20 minutes
Cook Time20 minutes
Total Time40 minutes
Category: Dinner
Yield: 4 servings
Save This Recipe

Ingredients

  • 1 1/2 pounds tomatillos, husked and rinsed
  • 2-3 serrano peppers, stemmed (adjust to your spice preference!)
  • 1/2 white onion, roughly chopped
  • 2 cloves garlic, peeled
  • 1 cup packed cilantro leaves
  • 1/4 cup packed parsley leaves
  • 2 tablespoons lime juice, freshly squeezed
  • 1 tablespoon olive oil
  • 1 teaspoon kosher salt, or to taste
  • 1/2 teaspoon ground cumin
  • 4 boneless, skinless chicken breasts (about 6-8 ounces each)
  • 1 tablespoon olive oil
  • 1 teaspoon kosher salt
  • 1/2 teaspoon black pepper
  • 1/2 teaspoon garlic powder
  • 1/4 teaspoon onion powder
  • Crumbled cotija cheese
  • Chopped cilantro
  • Lime wedges

Instructions

Okay, this is excellent! The information is well-organized and complete, ready to be plugged into a recipe plugin. Here’s a slightly refined version, focusing on clarity and potential SEO keywords, while still maintaining your original content:

**Recipe Title:** Grilled Chicken with Homemade Salsa Verde

**Recipe Description (Short):**

Juicy grilled chicken breasts smothered in a vibrant, homemade salsa verde. This flavorful and healthy Mexican-inspired dish is perfect for a quick weeknight meal or a weekend gathering. A delicious and easy way to enjoy grilled chicken!

**Recipe Description (Long – for SEO and user engagement):**

Looking for a quick, healthy, and flavorful dinner? This Grilled Chicken with Homemade Salsa Verde is the answer! Tender, juicy grilled chicken breasts are elevated with a bright and zesty homemade salsa verde, made with roasted tomatillos, serrano peppers, and fresh herbs. This Mexican-inspired recipe is perfect for weeknights or entertaining. Learn how to make this easy grilled chicken recipe and impress your family and friends! Serve with rice and beans, in tacos, or over a salad for a complete and satisfying meal.

**Ingredients:**

* **For the Salsa Verde:**
* 1 1/2 pounds tomatillos, husked and rinsed
* 2-3 serrano peppers, stemmed (adjust to your spice preference!)
* 1/2 white onion, roughly chopped
* 2 cloves garlic, peeled
* 1 cup packed cilantro leaves
* 1/4 cup packed parsley leaves
* 2 tablespoons lime juice, freshly squeezed
* 1 tablespoon olive oil
* 1 teaspoon kosher salt, or to taste
* 1/2 teaspoon ground cumin
* **For the Chicken:**
* 4 boneless, skinless chicken breasts (about 6-8 ounces each)
* 1 tablespoon olive oil
* 1 teaspoon kosher salt
* 1/2 teaspoon black pepper
* 1/2 teaspoon garlic powder
* 1/4 teaspoon onion powder
* **Optional Garnishes:**
* Crumbled cotija cheese
* Chopped cilantro
* Lime wedges

**Instructions:**

1. **Roast the Tomatillos and Serranos:** Preheat your broiler. Place the tomatillos and serrano peppers on a baking sheet lined with foil. Broil for about 5-7 minutes, or until the tomatillos are softened and slightly charred, flipping halfway through. Watch carefully to prevent burning.
2. **Cool Slightly:** Remove the baking sheet from the oven and let the tomatillos and peppers cool slightly before handling.
3. **Blend the Ingredients:** In a blender or food processor, combine the roasted tomatillos and serrano peppers (including any juices), white onion, garlic cloves, cilantro, parsley, lime juice, olive oil, salt, and cumin.
4. **Blend Until Smooth:** Blend until the salsa is smooth, but still has a little bit of texture. Taste and adjust the seasoning as needed. Add more lime juice for tanginess or salt for flavor.
5. **Set Aside:** Set the salsa verde aside.
6. **Prepare the Chicken:** If your chicken breasts are very thick, you can pound them to an even thickness (about 1/2 inch). Place the chicken breasts between two sheets of plastic wrap and use a meat mallet or rolling pin to gently pound them. This ensures even cooking.
7. **Season the Chicken:** In a small bowl, combine the olive oil, salt, pepper, garlic powder, and onion powder. Rub this mixture all over the chicken breasts, making sure they are evenly coated.
8. **Marinate (Optional):** For even more flavor, you can marinate the chicken in about 1/2 cup of the salsa verde for at least 30 minutes, or up to a few hours in the refrigerator. Discard the marinade after use. *Important: Do not reuse marinade that has touched raw chicken.*
9. **Preheat the Grill:** Preheat your grill to medium-high heat (about 375-450°F). Make sure the grates are clean and lightly oiled to prevent the chicken from sticking.
10. **Grill the Chicken:** Place the chicken breasts on the preheated grill. Grill for about 5-7 minutes per side, or until the chicken is cooked through and the internal temperature reaches 165°F. Use a meat thermometer to ensure accuracy. *Cooking times may vary depending on the thickness of the chicken.*
11. **Rest the Chicken:** Once the chicken is cooked through, remove it from the grill and let it rest for 5-10 minutes before slicing. This allows the juices to redistribute, resulting in more tender chicken.
12. **Slice the Chicken:** Slice the grilled chicken breasts against the grain.
13. **Top with Salsa Verde:** Spoon a generous amount of the salsa verde over the sliced chicken.
14. **Garnish (Optional):** Garnish with crumbled cotija cheese, chopped cilantro, and lime wedges, if desired.
15. **Serve:** Serve immediately and enjoy!

**Notes:**

* **Spice Level:** Adjust the amount of serrano peppers in the salsa verde to control the spice level. Remove seeds and membranes for less heat. For a milder salsa, you can also use jalapeños.
* **Tomatillo Substitute:** Green tomatoes can be substituted, but the flavor will be slightly different. Consider adding a touch more lime juice to compensate.
* **Chicken Thighs:** Boneless, skinless chicken thighs can be used instead of chicken breasts. They will require a slightly longer cooking time.
* **Oven Baking:** Bake chicken at 400°F for 20-25 minutes if you don’t have a grill. Ensure the internal temperature reaches 165°F.
* **Slow Cooker:** Cook chicken in a slow cooker with salsa verde on low for 6-8 hours or high for 3-4 hours. Shred before serving. This is a great option for a hands-off meal.
* **Make Ahead:** Salsa verde can be made up to 5 days in advance and stored in an airtight container in the refrigerator. Chicken can be marinated up to 24 hours in advance.
* **Serving Suggestions:** Serve with rice and beans, salads, tacos, or nachos. It’s also delicious with grilled vegetables or a side of guacamole.

**Prep Time:** 20 minutes
**Cook Time:** 20 minutes
**Total Time:** 40 minutes

**Yield:** 4 servings

**Keywords (for SEO):** Grilled Chicken, Salsa Verde, Mexican Chicken, Healthy Chicken Recipe, Easy Chicken Recipe, Tomatillo Salsa, Grilled Chicken Breast, Weeknight Dinner, Summer Grilling, Gluten-Free, Low Carb (if applicable)

**Changes and Rationale:**

* **Recipe Title:** More concise and descriptive.
* **Long Description:** Added for SEO and to entice readers.
* **Instructions:** Added a few clarifying words and tips (e.g., “Watch carefully to prevent burning,” “Cooking times may vary…”). Added a warning about reusing marinade.
* **Notes:** Expanded on some of the notes to provide more helpful information.
* **Keywords:** Added a list of relevant keywords for SEO.

This refined version should work perfectly with your Tasty Recipes plugin and help your recipe rank well in search results! Good luck!

Notes

  • Spice Level: Adjust the amount of serrano peppers in the salsa verde to control the spice level. Remove seeds and membranes for less heat.
  • Tomatillo Substitute: Green tomatoes can be substituted, but the flavor will be slightly different.
  • Chicken Thighs: Boneless, skinless chicken thighs can be used instead of chicken breasts.
  • Oven Baking: Bake chicken at 400°F for 20-25 minutes if you don’t have a grill.
  • Slow Cooker: Cook chicken in a slow cooker with salsa verde on low for 6-8 hours or high for 3-4 hours. Shred before serving.
  • Make Ahead: Salsa verde can be made up to 5 days in advance. Chicken can be marinated up to 24 hours in advance.
  • Serving Suggestions: Serve with rice and beans, salads, tacos, or nachos.

« Previous Post
Street Corn Pasta Salad: The Ultimate Summer Side Dish
Next Post »
Cucumber Strawberry Salad: A Refreshing Summer Recipe

If you enjoyed this…

Grilled Garlic Parmesan Chicken Skewers: A Delicious and Easy Recipe for Your Next BBQ

Cozy Beef Bacon Cheddar Gnocchi Soup – Dinner Perfection

Blackberry Pork Chops: A Delicious & Easy Recipe

Primary Sidebar

Browse by Diet

BreakfastDinnerLunchDessertAppetizer

Sweet Peach Yogurt Parfait Delight

One of my fondest memories is from a lazy summer afternoon spent at my grandmother’s house. The sun filtered through the kitchen window, casting a warm glow over the table where she would create her culinary magic. It was during one of those blissful moments that I first tasted her Peach Yogurt Parfait with Honey and Granola. The sweet aroma of ripe peaches mingling with creamy yogurt and the crunch of granola was nothing short of heavenly. It felt like summer captured in a bowl, and I still remember the joy of diving in with a spoon, each layer revealing a new burst of flavor.

When I think about that parfait, I can almost hear the gentle hum of the bees outside, reminding me of the floral notes that honey brings to every bite. The vibrant yellows and soft oranges of the peaches contrast beautifully with the creamy white yogurt and the golden crunch of granola. It’s a dish that not only looks delightful but also tastes like a celebration of fresh, wholesome ingredients.

What makes my version of this Peach Yogurt Parfait special is the careful balance of flavors and textures. I use ripe, juicy peaches, drizzled with locally sourced honey, and a homemade granola that’s bursting with nuts and seeds for an extra crunch. It’s a simple dish, but every layer is crafted with love and attention.

Let me show you exactly how to make this delightful parfait, so you can bring a bit of that summer magic into your kitchen!

Sweet Peach Yogurt Parfait Delight

Why You’ll Love This Recipe

  • Delightfully creamy texture from the Greek yogurt, paired with the juicy sweetness of fresh peaches.
  • Ready in under 20 minutes, making it a quick and satisfying breakfast or snack option.
  • Budget-friendly, using common ingredients that you may already have in your pantry.
  • Customizable with your favorite granola and nuts, allowing you to tailor each parfait to your taste.
  • Perfectly balanced flavors with the bright acidity of lemon juice and the sweetness of honey enhancing the peaches.

Ingredients

  • For the Parfait:
  • 2 cups plain Greek yogurt (or vanilla yogurt for a sweeter option)
  • 2 large ripe peaches, diced (about 2 cups)
  • 1 tablespoon fresh lemon juice (to prevent browning of peaches)
  • 2 tablespoons honey (plus more for drizzling)
  • 1 teaspoon vanilla extract (optional for extra flavor)
  • For the Granola:
  • 1 cup granola (store-bought or homemade; see notes for a simple granola recipe)
  • 1/4 cup sliced almonds (optional for added crunch)
  • 1/4 cup shredded coconut (optional for added flavor)

Let’s dive into some key ingredients that make this Peach Yogurt Parfait so delightful! First, the Greek yogurt is not only creamy but also packed with protein, making it a satisfying option for breakfast or a snack. If you’re looking for a sweeter option, you can easily substitute it with vanilla yogurt, though it may alter the overall flavor balance. Next, the ripe peaches are the star of the show; their natural sweetness shines through, so I recommend choosing peaches that yield slightly to pressure, indicating they’re perfectly ripe. If peaches aren’t in season, feel free to use nectarines or even frozen peaches—just thaw them before use. Finally, honey adds a lovely floral sweetness that ties everything together. If you prefer, maple syrup can serve as a delicious substitute.

Step-by-Step Instructions

  1. Start by preparing the peaches. Wash them thoroughly, then slice and dice them into bite-sized pieces. In a medium bowl, toss the diced peaches with 1 tablespoon of fresh lemon juice to prevent browning. Set aside for about 5 minutes while the lemon juice works its magic.
  2. In a separate bowl, combine the Greek yogurt, 2 tablespoons of honey, and 1 teaspoon of vanilla extract if using. Stir the mixture until smooth and thoroughly blended. This should take about a minute. Avoid overmixing to maintain the creaminess of the yogurt.
  3. Now it’s time to layer your parfait. Grab a clear glass or bowl to showcase your beautiful creation. Start with a generous spoonful of the yogurt mixture at the bottom—about 1/4 cup will do. Use a spoon to spread it evenly.
  4. Add a layer of the diced peaches over the yogurt, ensuring they cover the yogurt completely. You might want to use about half of what you have prepared—roughly 1 cup. This layer should be visually appealing, so arrange the peaches neatly.
  5. Sprinkle 1/4 cup of granola over the peaches. This adds a delightful crunch. Make sure to distribute it evenly to ensure every bite has that satisfying texture. Avoid packing it down too tightly, as you want it to maintain its crunch.
  6. Repeat the layers: spoon in another 1/4 cup of yogurt, followed by another cup of peaches, and another sprinkle of granola. You should have at least two layers, but feel free to add more depending on your glass size.
  7. Finish off your parfait with a drizzle of honey on top for added sweetness and a touch of elegance. If you’re using sliced almonds or shredded coconut, sprinkle them on top now. It adds a lovely visual contrast and extra flavor.
  8. Serve immediately or refrigerate for up to 30 minutes before serving to allow the flavors to meld together. However, I recommend enjoying it fresh to maintain the granola’s crunch.

Pro Tips for the Best Peach Yogurt Parfait With Honey And Granola

  • Make sure to choose ripe peaches for the best flavor and texture. A common mistake is using unripe fruit, which can lead to a less enjoyable parfait. Look for peaches that are fragrant and slightly soft to the touch.
  • Use a clear glass to assemble your parfait; this not only makes for a beautiful presentation but also allows you to see the colorful layers, which adds to the enjoyment of eating it.
  • For an even creamier texture, consider whipping the Greek yogurt with a hand mixer for a couple of minutes before layering. This small adjustment makes a huge difference in mouthfeel.
  • Be mindful of the granola-to-yogurt ratio. Too much granola can overwhelm the parfait, while too little can make it feel too creamy. Aim for about 1/4 cup of granola per layer for the perfect balance.
  • If you’re making this for a gathering, consider preparing the yogurt and peaches ahead of time and layering them just before serving. This ensures the granola stays crunchy!

Variations & Serving Ideas

There are so many ways to get creative with your Peach Yogurt Parfait! For a tropical twist, swap out the peaches for mangoes or pineapples and top with coconut flakes. If you prefer a berry flavor, mix in some blueberries or strawberries with the peaches for added color and taste. For a nutty version, incorporate chopped walnuts or pecans instead of almonds.

As for serving ideas, this parfait pairs beautifully with a side of scrambled eggs for a hearty breakfast or fresh fruit salad for a light lunch. You might also enjoy it alongside whole grain toast with almond butter for an energizing snack. The contrast of flavors and textures will elevate your meal experience!

Storage, Make-Ahead & Reheating

The Peach Yogurt Parfait is best enjoyed fresh, but you can prepare some components ahead of time. Store the layered parfait in an airtight container in the refrigerator for up to 24 hours. However, be cautious; the granola may lose its crunch if stored too long. You can freeze the yogurt and peach mixture for up to 2 months; just remember to thaw it in the refrigerator overnight before serving.

If you plan to enjoy this dish the next day, it can taste even better as the flavors meld together. Just remember to add the granola right before serving to keep its delightful crunch!

Frequently Asked Questions

Can I make Peach Yogurt Parfait With Honey And Granola ahead of time?

Yes — in fact, it tastes even better the next day as the flavors meld. However, I recommend waiting to add the granola until just before serving to maintain its crunch.

What can I substitute for Greek yogurt?

If you prefer a lighter option, you can substitute Greek yogurt with regular yogurt or a dairy-free alternative like coconut yogurt. Just remember that this may alter the creaminess and flavor profile slightly.

Can I use frozen peaches for this parfait?

Absolutely! Just make sure to thaw the frozen peaches before using them. They will still add great flavor, though the texture may be slightly softer than fresh peaches.

How do I make the parfait vegan?

To make a vegan version, substitute the Greek yogurt with a plant-based yogurt alternative, and replace honey with maple syrup or agave nectar. This keeps the parfait sweet while adhering to a vegan diet.

What other fruits can I use in this recipe?

You can mix and match fruits based on your preference. Try using strawberries, blueberries, raspberries, or even bananas. Just make sure to adjust the lemon juice as needed to prevent browning.

Sweet Peach Yogurt Parfait Delight

Final Thoughts

The Peach Yogurt Parfait with Honey and Granola is a delightful blend of creamy yogurt, sweet peaches, and crunchy granola that creates a satisfying and nourishing treat. Each layer bursts with flavor, making it a perfect choice for breakfast or a light dessert.

This is the kind of recipe I come back to again and again, especially when I want something refreshing and wholesome to start my day. The harmony of sweet and tart flavors, combined with the delightful crunch, never fails to lift my spirits!

I encourage you to give this parfait a try and indulge in its comforting goodness. Feel free to share your results or even add your own twist—perhaps a sprinkle of cinnamon or a handful of nuts. Enjoy creating your perfect parfait!

Print
clock clock iconcutlery cutlery iconflag flag iconfolder folder iconinstagram instagram iconpinterest pinterest iconfacebook facebook iconprint print iconsquares squares iconheart heart iconheart solid heart solid icon

Peach Yogurt Parfait


  • Author: Lily author
  • Total Time: 15 minutes
  • Yield: 4 servings 1x
Pin Recipe
Print Recipe

Description

This Peach Yogurt Parfait combines creamy Greek yogurt, juicy peaches, and crunchy granola for a delightful treat. It’s a perfect breakfast or snack that captures the essence of summer in every bite.


Ingredients

Scale
  • For the Parfait:
  • 2 cups plain Greek yogurt (or vanilla yogurt for a sweeter option)
  • 2 large ripe peaches, diced (about 2 cups)
  • 1 tablespoon fresh lemon juice (to prevent browning of peaches)
  • 2 tablespoons honey (plus more for drizzling)
  • 1 teaspoon vanilla extract (optional for extra flavor)
  • For the Granola:
  • 1 cup granola (store-bought or homemade; see notes for a simple granola recipe)
  • 1/4 cup sliced almonds (optional for added crunch)
  • 1/4 cup shredded coconut (optional for added flavor)

Instructions

  1. Start by preparing the peaches. Wash them thoroughly, then slice and dice them into bite-sized pieces. In a medium bowl, toss the diced peaches with 1 tablespoon of fresh lemon juice to prevent browning. Set aside for about 5 minutes while the lemon juice works its magic.
  2. In a separate bowl, combine the Greek yogurt, 2 tablespoons of honey, and 1 teaspoon of vanilla extract if using. Stir the mixture until smooth and thoroughly blended. This should take about a minute. Avoid overmixing to maintain the creaminess of the yogurt.
  3. Now it’s time to layer your parfait. Grab a clear glass or bowl to showcase your beautiful creation. Start with a generous spoonful of the yogurt mixture at the bottom—about 1/4 cup will do. Use a spoon to spread it evenly.
  4. Add a layer of the diced peaches over the yogurt, ensuring they cover the yogurt completely. You might want to use about half of what you have prepared—roughly 1 cup. This layer should be visually appealing, so arrange the peaches neatly.
  5. Sprinkle 1/4 cup of granola over the peaches. This adds a delightful crunch. Make sure to distribute it evenly to ensure every bite has that satisfying texture. Avoid packing it down too tightly, as you want it to maintain its crunch.
  6. Repeat the layers: spoon in another 1/4 cup of yogurt, followed by another cup of peaches, and another sprinkle of granola. You should have at least two layers, but feel free to add more depending on your glass size.
  7. Finish off your parfait with a drizzle of honey on top for added sweetness and a touch of elegance. If you’re using sliced almonds or shredded coconut, sprinkle them on top now. It adds a lovely visual contrast and extra flavor.
  8. Serve immediately or refrigerate for up to 30 minutes before serving to allow the flavors to meld together. However, I recommend enjoying it fresh to maintain the granola’s crunch.
  • Prep Time: 15 mins
  • Cook Time: 0 mins
  • Category: Breakfast
  • Method: No-cook
  • Cuisine: American

Nutrition

  • Serving Size: 1 parfait
  • Calories: 250
  • Sugar: 20 g
  • Sodium: 50 mg
  • Fat: 5 g
  • Saturated Fat: 2 g
  • Unsaturated Fat: 3 g
  • Trans Fat: 0 g
  • Carbohydrates: 40 g
  • Fiber: 3 g
  • Protein: 10 g
  • Cholesterol: 10 mg

Keywords: Choose ripe peaches for the best flavor and texture. Use a clear glass for a beautiful presentation. For creaminess, consider whipping the yogurt before layering. Be mindful of the granola-to-yogurt ratio. Prepare yogurt and peaches ahead of time for gatherings, layering just before serving.

Did you make this recipe?

Share a photo and tag us — we can't wait to see what you've made!

Sun-Kissed Frozen Orange Cream Slush

As a child, summer days felt like they lasted forever. I remember the sticky heat wrapping around me as I played outside, my laughter mingling with the sounds of the neighborhood. But nothing could cool me down quite like the moment I’d spot my grandmother, laboring over her blender, whipping up her famous Frozen Orange Creamsicle Slush. That vibrant orange treat, with its frosty texture and sweet citrus aroma, was like a burst of sunshine in a cup. Just one sip, and I could feel the coolness wash over me, sparking pure joy.

This Frozen Orange Creamsicle Slush has a way of making you feel like a kid again. Its creamy, dreamy consistency is a delightful balance of bright orange and soft vanilla, inviting you to dive right in. The refreshing tang of orange dances on your tongue, while the smooth creaminess envelops you in a comforting embrace. It’s a nostalgic treat that’s perfect for hot summer afternoons or anytime you need a little pick-me-up.

What makes my version of this slush stand out is the addition of a hint of vanilla bean, which elevates the flavor and adds an extra layer of richness. Plus, it’s super easy to whip up with just a few simple ingredients that you probably already have on hand! So, if you’re ready to relive those sun-soaked memories, let me show you exactly how to make it.

Sun-Kissed Frozen Orange Cream Slush

Why You’ll Love This Recipe

  • Each slush is a perfect blend of creamy vanilla and zesty orange, creating a nostalgic flavor reminiscent of summer days.
  • This refreshing treat is ready in under 15 minutes, making it an ideal quick dessert for unexpected guests or hot afternoons.
  • With just 8 simple ingredients, it’s budget-friendly, ensuring you don’t have to break the bank to enjoy a delicious slush.
  • The slush has a perfectly smooth texture, thanks to the combination of ice and ice cream, providing a delightful contrast to the bright citrus flavors.
  • It’s highly customizable; you can easily adjust the sweetness and add fresh herbs for a unique twist that suits your taste.

Ingredients

  • 2 cups orange juice (freshly squeezed or store-bought)
  • 1 cup vanilla ice cream
  • 1 cup crushed ice
  • 1/2 cup milk (whole or 2%)
  • 1/4 cup granulated sugar (adjust based on sweetness preference)
  • 1 teaspoon vanilla extract
  • Zest of 1 orange (for added flavor)
  • Fresh orange slices and mint leaves (for garnish)

The star of this Frozen Orange Creamsicle Slush is the orange juice, which provides the vibrant, citrusy base. Freshly squeezed juice will yield the brightest flavor, but store-bought options can be just as convenient. If you’re opting for store-bought, choose 100% pure juice with no added sugars for the best results. Another essential ingredient is the vanilla ice cream; it adds creaminess and sweetness. You can substitute it with dairy-free ice cream if you’re looking for a vegan option. Whole or 2% milk complements the ice cream, creating a smooth blend. If you want a lower-calorie version, almond or oat milk can be good alternatives.

Lastly, the granulated sugar can be adjusted based on your sweetness preference. If you prefer a more natural sweetener, consider using honey or agave syrup. The orange zest enhances the flavor profile, providing an aromatic pop that brings the whole slush together. Don’t skip it! It adds an extra layer of brightness that makes this slush truly special.

Step-by-Step Instructions

  1. Start by preparing your ingredients. Gather 2 cups of orange juice, 1 cup of vanilla ice cream, and 1 cup of crushed ice. Make sure the ice is finely crushed, as larger chunks can make blending difficult.
  2. In a blender, combine the orange juice, vanilla ice cream, crushed ice, and 1/2 cup of milk. Add 1/4 cup of granulated sugar and 1 teaspoon of vanilla extract. If you like a sweeter slush, consider adding a bit more sugar at this stage.
  3. Add the zest of 1 orange to the blender. This step is crucial for enhancing the citrus flavor of your slush. Make sure not to include the bitter white pith—only the flavorful zest.
  4. Blend the mixture on medium-high speed for about 30-45 seconds. Stop once the ingredients are fully combined and the slush has a smooth, even consistency. If you notice large chunks of ice, blend for an additional 10-15 seconds. Avoid over-blending, as this can make the slush too liquidy.
  5. Once blended, taste the slush. If it needs more sweetness, add a little more sugar and blend for a few more seconds. If it’s too thick, you can add a splash of milk to reach your desired consistency.
  6. Pour the slush into glasses. This recipe typically serves 4, but you can easily double it for larger gatherings. Use a spoon to help guide the slush into the glasses if needed.
  7. Garnish each serving with fresh orange slices and mint leaves. The mint not only adds a pop of color but also a refreshing aroma that complements the citrus flavors beautifully.
  8. Serve immediately and enjoy! If you’ve made extra, you can refrigerate it for a short time, but it’s best enjoyed fresh.

Pro Tips for the Best Frozen Orange Creamsicle Slush

  • Don’t skip the orange zest! It’s a game-changer for flavor. Always zest before juicing to make it easier.
  • Use a high-powered blender for the best texture. A standard blender may struggle with ice, leading to uneven consistency. If you have a food processor, that can work too, but ensure the ice is finely crushed.
  • Adjust the ice-to-liquid ratio carefully. If your slush is too thick, it won’t blend well. Start with less ice and add more until you reach your preferred texture.
  • Be cautious with the sugar! Always start with the lower amount, as you can easily add more, but it’s hard to fix an overly sweet slush.
  • For a fun twist, consider adding a splash of coconut milk or a handful of fresh fruit like strawberries or pineapple. This not only enhances the flavor but also adds a beautiful color contrast.

Variations & Serving Ideas

There are countless ways to put a spin on your Frozen Orange Creamsicle Slush. Consider making a tropical version by adding in some pineapple juice or coconut milk for a delightful tropical twist. If you’re feeling adventurous, try incorporating a handful of frozen mango or peach slices for added sweetness. For a lighter version, swap out the vanilla ice cream for Greek yogurt for a creamy yet tangy alternative.

As for serving ideas, this refreshing slush pairs wonderfully with light summer dishes like grilled chicken skewers, fish tacos, or a simple salad topped with citrus vinaigrette. The bright, zesty flavors of the slush complement these dishes perfectly, making them an ideal pairing for a sunny day.

Storage, Make-Ahead & Reheating

This Frozen Orange Creamsicle Slush is best enjoyed fresh, but if you have leftovers, you can store them in an airtight container in the fridge for up to 2 days. Just keep in mind that the slush may lose some of its texture over time as the ice melts. It doesn’t freeze well, as the ice will turn into a solid block. If you must freeze it, blend again after thawing to restore the slushy consistency. This treat is best the day you make it, as the flavors meld together beautifully overnight, enhancing its deliciousness.

Frequently Asked Questions

Can I make Frozen Orange Creamsicle Slush ahead of time?

Yes — in fact, it tastes even better the next day as the flavors meld. However, it’s best to enjoy it fresh, as the texture can change if stored for too long. If you need to prepare it ahead, keep it in the fridge and re-blend before serving.

What kind of orange juice should I use?

For the best flavor, use freshly squeezed orange juice. However, if you’re short on time, opt for 100% pure store-bought juice without added sugars. This will ensure that your slush remains flavorful and refreshing.

Can I substitute the vanilla ice cream?

Absolutely! If you’re looking for a dairy-free option, coconut milk ice cream or a non-dairy vanilla ice cream can work wonderfully. They will still provide the creamy texture and sweetness you desire.

How can I adjust the sweetness of my slush?

You can easily adjust the sweetness by modifying the amount of sugar added. Start with 1/4 cup and taste the mixture before blending. If you prefer it sweeter, add more sugar gradually until it reaches your desired level.

What should I do if my slush is too thick?

If your slush is too thick, simply add a splash of milk or orange juice and blend again. This will help achieve a more drinkable consistency while maintaining the slushy texture. Adjust gradually to reach your preferred thickness.

Sun-Kissed Frozen Orange Cream Slush

Final Thoughts

The Frozen Orange Creamsicle Slush is a delightful blend of refreshing citrus and creamy goodness, making it a perfect treat for warm days or any time you crave a taste of nostalgia. The way the bright orange flavor dances with the creamy texture truly elevates this slush, transforming it into a satisfying escape from the everyday.

This is the kind of recipe I come back to again and again, especially when I’m looking to cool down or impress guests at a summer gathering. It’s simple to make and always brings smiles all around! I encourage you to try this recipe for yourself—don’t hesitate to share your results or even put your own spin on it. Happy slushing!

Print
clock clock iconcutlery cutlery iconflag flag iconfolder folder iconinstagram instagram iconpinterest pinterest iconfacebook facebook iconprint print iconsquares squares iconheart heart iconheart solid heart solid icon

Frozen Orange Creamsicle Slush


  • Author: Lily author
  • Total Time: 15 minutes
  • Yield: 4 servings 1x
Pin Recipe
Print Recipe

Description

This Frozen Orange Creamsicle Slush is a refreshing treat that combines creamy vanilla and zesty orange flavors. Perfect for hot summer days, it brings back nostalgic memories with every sip.


Ingredients

Scale
  • 2 cups orange juice (freshly squeezed or store-bought)
  • 1 cup vanilla ice cream
  • 1 cup crushed ice
  • 1/2 cup milk (whole or 2%)
  • 1/4 cup granulated sugar (adjust based on sweetness preference)
  • 1 teaspoon vanilla extract
  • Zest of 1 orange (for added flavor)
  • Fresh orange slices and mint leaves (for garnish)

Instructions

  1. Start by preparing your ingredients. Gather 2 cups of orange juice, 1 cup of vanilla ice cream, and 1 cup of crushed ice. Make sure the ice is finely crushed, as larger chunks can make blending difficult.
  2. In a blender, combine the orange juice, vanilla ice cream, crushed ice, and 1/2 cup of milk. Add 1/4 cup of granulated sugar and 1 teaspoon of vanilla extract. If you like a sweeter slush, consider adding a bit more sugar at this stage.
  3. Add the zest of 1 orange to the blender. This step is crucial for enhancing the citrus flavor of your slush. Make sure not to include the bitter white pith—only the flavorful zest.
  4. Blend the mixture on medium-high speed for about 30-45 seconds. Stop once the ingredients are fully combined and the slush has a smooth, even consistency. If you notice large chunks of ice, blend for an additional 10-15 seconds. Avoid over-blending, as this can make the slush too liquidy.
  5. Once blended, taste the slush. If it needs more sweetness, add a little more sugar and blend for a few more seconds. If it’s too thick, you can add a splash of milk to reach your desired consistency.
  6. Pour the slush into glasses. This recipe typically serves 4, but you can easily double it for larger gatherings. Use a spoon to help guide the slush into the glasses if needed.
  7. Garnish each serving with fresh orange slices and mint leaves. The mint not only adds a pop of color but also a refreshing aroma that complements the citrus flavors beautifully.
  8. Serve immediately and enjoy! If you’ve made extra, you can refrigerate it for a short time, but it's best enjoyed fresh.
  • Prep Time: 15 min
  • Cook Time: 0 min
  • Category: Dessert
  • Method: Blending
  • Cuisine: American

Nutrition

  • Serving Size: 1 serving
  • Calories: 200
  • Sugar: 30 g
  • Sodium: 50 mg
  • Fat: 5 g
  • Saturated Fat: 3 g
  • Unsaturated Fat: 2 g
  • Trans Fat: 0 g
  • Carbohydrates: 40 g
  • Fiber: 1 g
  • Protein: 2 g
  • Cholesterol: 20 mg

Keywords: Don't skip the orange zest! It's a game-changer for flavor. Always zest before juicing to make it easier.

Did you make this recipe?

Share a photo and tag us — we can't wait to see what you've made!

Zesty Lemon Poppy Seed Delight

One rainy afternoon, I found myself in my grandmother’s cozy kitchen, the kind that always smelled like warmth and love. She was whipping up her famous Lemon Poppy Seed Loaf, a recipe that had been passed down through generations. As the batter came together, the zesty aroma of fresh lemons filled the air, mingling perfectly with the nutty fragrance of poppy seeds. I can still picture her, apron-clad, as she expertly drizzled a vibrant citrus icing over the loaf, creating a glossy, sun-kissed finish that beckoned us to dive in. It was a moment that sparked my own passion for baking, and this recipe has become a cherished staple in my home ever since.

When you take a bite of this Lemon Poppy Seed Loaf, it’s like a burst of sunshine on your palate. The loaf is beautifully golden, with a tender crumb that melts in your mouth. Each slice is speckled with tiny poppy seeds, adding a delightful crunch that contrasts beautifully with the tangy sweetness of the lemon. And that citrus icing? It’s the finishing touch that elevates this loaf from ordinary to extraordinary, with its bright, zesty flavor dancing on your taste buds.

This recipe stands out because it embraces simplicity while delivering on flavor. I’ve added a hint of vanilla to the batter, enhancing the overall taste and making it even more indulgent. Trust me, once you make this Lemon Poppy Seed Loaf With Citrus Icing, it’ll become a go-to in your baking repertoire.

So, let me show you exactly how to make it!

Zesty Lemon Poppy Seed Delight

Why You’ll Love This Recipe

  • Moist and tender crumb that melts in your mouth, thanks to the perfect balance of butter and buttermilk.
  • Bright, zesty lemon flavor paired with crunchy poppy seeds, creating a delightful texture and taste experience.
  • Easy to whip up in just about an hour, perfect for last-minute gatherings or a cozy afternoon treat.
  • Budget-friendly with everyday ingredients, making it an accessible option for all home bakers.
  • The citrus icing adds a sweet tang that elevates the loaf, turning a simple recipe into a showstopper!

Ingredients

  • 1 ½ cups (190g) all-purpose flour
  • 1 teaspoon baking powder
  • ½ teaspoon baking soda
  • ½ teaspoon salt
  • 3 tablespoons poppy seeds
  • ½ cup (115g) unsalted butter, softened to room temperature
  • 1 cup (200g) granulated sugar
  • 2 large eggs
  • 1 teaspoon vanilla extract
  • 1 teaspoon lemon zest (from about 1 medium lemon)
  • ½ cup (120ml) buttermilk
  • 2 tablespoons fresh lemon juice

For the Citrus Icing:

  • 1 cup (120g) powdered sugar
  • 2 tablespoons fresh lemon juice
  • 1 tablespoon orange juice
  • 1 teaspoon lemon zest (for garnish, optional)

Let’s dive into the key ingredients that make this Lemon Poppy Seed Loaf so special. The all-purpose flour provides the structure and base for the loaf, while the baking powder and baking soda ensure it rises perfectly, giving the loaf a light texture. For a gluten-free variation, you could substitute the flour with a gluten-free all-purpose blend. Poppy seeds not only add a delightful crunch but also contribute to the unique flavor profile that pairs well with the citrus notes.

Unsalted butter is crucial for achieving the buttery richness that makes this loaf so moist. If you’re looking for a dairy-free option, coconut oil or a vegan butter can be used instead. The buttermilk is another essential component, providing acidity that activates the baking soda for a fluffy texture. If you don’t have buttermilk on hand, you can easily make a substitute by mixing ½ cup of milk with 1 tablespoon of vinegar or lemon juice and letting it sit for about 5 minutes.

Step-by-Step Instructions

  1. Preheat your oven to 350°F (175°C). Grease a 9×5-inch loaf pan or line it with parchment paper for easy removal later.
  2. In a medium mixing bowl, whisk together 1 ½ cups of all-purpose flour, 1 teaspoon of baking powder, ½ teaspoon of baking soda, ½ teaspoon of salt, and 3 tablespoons of poppy seeds. This helps to evenly distribute the baking agents and ensures a uniform rise.
  3. In a large mixing bowl, cream together ½ cup of softened unsalted butter and 1 cup of granulated sugar using an electric mixer on medium speed for about 3-4 minutes, until the mixture is light and fluffy. Make sure to scrape down the sides of the bowl occasionally.
  4. Add 2 large eggs, 1 teaspoon of vanilla extract, and 1 teaspoon of lemon zest to the creamed butter and sugar, mixing until fully combined. You want a smooth consistency, so ensure there are no lumps of butter.
  5. In a small bowl, combine ½ cup of buttermilk and 2 tablespoons of fresh lemon juice. Alternately add the dry ingredients and buttermilk mixture to the butter mixture, starting and ending with the dry ingredients. Mix just until combined; do not overmix, as this can lead to a dense loaf.
  6. Pour the batter into the prepared loaf pan. Smooth the top with a spatula, ensuring it’s even. Bake in the preheated oven for 50-60 minutes, or until a toothpick inserted in the center comes out clean. The edges should be lightly golden brown, and the center should feel just set.
  7. Once baked, remove the loaf from the oven and allow it to cool in the pan for about 10 minutes. Then, transfer it to a wire rack to cool completely. Resist the urge to slice too soon, as it will be crumbly if it’s still warm.
  8. While the loaf is cooling, prepare the citrus icing. In a medium bowl, whisk together 1 cup of powdered sugar, 2 tablespoons of fresh lemon juice, and 1 tablespoon of orange juice until smooth. If the icing is too thick, you can add a little more juice to reach your desired consistency.
  9. Once the loaf is completely cool, drizzle the citrus icing over the top. If you like, sprinkle with an additional teaspoon of lemon zest for an extra pop of flavor and color.

Pro Tips for the Best Lemon Poppy Seed Loaf With Citrus Icing

  • Be careful not to overmix your batter; this is a common mistake that can lead to a dense loaf. Mix just until the dry ingredients are incorporated for a light and fluffy texture.
  • Use room temperature ingredients, especially the butter and eggs. This helps to create a smoother batter and ensures even baking. Take your eggs out of the fridge about 30 minutes before you start.
  • For a more pronounced lemon flavor, consider adding a little lemon extract in addition to the zest and juice. Just a half teaspoon can elevate the citrus notes significantly.
  • When measuring your flour, spoon it into the measuring cup and level it off with a knife instead of scooping directly from the bag. This prevents packing and ensures you don’t end up with a dry loaf.
  • Invest in a good quality loaf pan; it makes a difference in heat distribution, which ensures even baking. If your pan is dark-coated, reduce the oven temperature by 25°F to prevent over-browning.

Variations & Serving Ideas

For a delightful twist, consider adding blueberries or raspberries to the batter for a fruity burst of flavor. You can also experiment with different citrus fruits—try lime or grapefruit zest and juice for a refreshing change. For a healthier option, substitute half of the all-purpose flour with whole wheat flour for added fiber without compromising too much on texture.

This Lemon Poppy Seed Loaf pairs beautifully with a light salad, such as a mixed greens salad with a vinaigrette, or a cup of tea for a cozy afternoon treat. It also complements a creamy cheese platter, as the acidity of the loaf balances rich cheeses perfectly. Lastly, a scoop of vanilla ice cream on the side creates a delightful contrast of temperatures and flavors!

Storage, Make-Ahead & Reheating

This Lemon Poppy Seed Loaf can be stored at room temperature for up to 3 days if wrapped tightly in plastic wrap. If you want to keep it longer, it freezes well for up to 3 months. To freeze, wrap the loaf tightly in plastic wrap and then in aluminum foil to prevent freezer burn.

When you’re ready to enjoy it again, simply thaw it in the fridge overnight. Reheat individual slices in the microwave for 15-20 seconds or in a toaster oven until warmed through. Interestingly, many people find that this loaf tastes even better the next day, as the flavors have time to meld!

Frequently Asked Questions

Can I make Lemon Poppy Seed Loaf With Citrus Icing ahead of time?

Yes — in fact, it tastes even better the next day! You can make the loaf a day in advance, allowing the flavors to develop. Just be sure to store it in an airtight container to maintain its moisture.

Can I substitute the poppy seeds?

Absolutely! If you don’t have poppy seeds on hand or prefer an alternative, you can use sesame seeds for a similar crunch or omit them entirely for a smooth loaf.

What can I use instead of buttermilk?

If you don’t have buttermilk, you can easily create a substitute by mixing ½ cup of milk (dairy or plant-based) with 1 tablespoon of vinegar or lemon juice. Let it sit for 5 minutes before using in the recipe.

How can I make this recipe gluten-free?

To make a gluten-free version of this Lemon Poppy Seed Loaf, substitute the all-purpose flour with a gluten-free all-purpose flour blend. Just ensure that the blend contains a binding agent like xanthan gum for the best results.

What is the best way to store leftover loaf?

Leftover Lemon Poppy Seed Loaf should be stored in an airtight container at room temperature for up to 3 days. For longer storage, wrap it tightly and freeze for up to 3 months. Thaw it before serving for the best texture.

Zesty Lemon Poppy Seed Delight

Final Thoughts

The Lemon Poppy Seed Loaf with Citrus Icing is truly a delightful treat that brings a burst of brightness to any occasion. The zesty lemon flavor combined with the subtle crunch of poppy seeds creates a satisfying balance, while the citrus icing adds a touch of sweetness that perfectly complements the loaf’s tanginess.

This is the kind of recipe I come back to again and again, especially when I want to brighten up a gloomy day or celebrate a small victory. The aroma that fills the kitchen as it bakes is absolutely heavenly! I encourage you to give this recipe a try; you might just find it becoming a beloved staple in your home. Don’t forget to share your results or even add your own unique twist—I can’t wait to see what you create!

Print
clock clock iconcutlery cutlery iconflag flag iconfolder folder iconinstagram instagram iconpinterest pinterest iconfacebook facebook iconprint print iconsquares squares iconheart heart iconheart solid heart solid icon

Lemon Poppy Seed Loaf


  • Author: Lily author
  • Total Time: 23 minute
  • Yield: 1 loaf 1x
Pin Recipe
Print Recipe

Description

This Lemon Poppy Seed Loaf is a delightful treat that combines zesty lemon flavor with crunchy poppy seeds. Topped with a citrus icing, it’s perfect for any occasion.


Ingredients

Scale
  • 1 ½ cups (190g) all-purpose flour
  • 1 teaspoon baking powder
  • ½ teaspoon baking soda
  • ½ teaspoon salt
  • 3 tablespoons poppy seeds
  • ½ cup (115g) unsalted butter, softened to room temperature
  • 1 cup (200g) granulated sugar
  • 2 large eggs
  • 1 teaspoon vanilla extract
  • 1 teaspoon lemon zest (from about 1 medium lemon)
  • ½ cup (120ml) buttermilk
  • 2 tablespoons fresh lemon juice
  • 1 cup (120g) powdered sugar
  • 2 tablespoons fresh lemon juice
  • 1 tablespoon orange juice
  • 1 teaspoon lemon zest (for garnish, optional)

Instructions

  1. Preheat your oven to 350°F (175°C). Grease a 9×5-inch loaf pan or line it with parchment paper for easy removal later.
  2. In a medium mixing bowl, whisk together 1 ½ cups of all-purpose flour, 1 teaspoon of baking powder, ½ teaspoon of baking soda, ½ teaspoon of salt, and 3 tablespoons of poppy seeds. This helps to evenly distribute the baking agents and ensures a uniform rise.
  3. In a large mixing bowl, cream together ½ cup of softened unsalted butter and 1 cup of granulated sugar using an electric mixer on medium speed for about 3-4 minutes, until the mixture is light and fluffy. Make sure to scrape down the sides of the bowl occasionally.
  4. Add 2 large eggs, 1 teaspoon of vanilla extract, and 1 teaspoon of lemon zest to the creamed butter and sugar, mixing until fully combined. You want a smooth consistency, so ensure there are no lumps of butter.
  5. In a small bowl, combine ½ cup of buttermilk and 2 tablespoons of fresh lemon juice. Alternately add the dry ingredients and buttermilk mixture to the butter mixture, starting and ending with the dry ingredients. Mix just until combined; do not overmix, as this can lead to a dense loaf.
  6. Pour the batter into the prepared loaf pan. Smooth the top with a spatula, ensuring it’s even. Bake in the preheated oven for 50-60 minutes, or until a toothpick inserted in the center comes out clean. The edges should be lightly golden brown, and the center should feel just set.
  7. Once baked, remove the loaf from the oven and allow it to cool in the pan for about 10 minutes. Then, transfer it to a wire rack to cool completely. Resist the urge to slice too soon, as it will be crumbly if it’s still warm.
  8. While the loaf is cooling, prepare the citrus icing. In a medium bowl, whisk together 1 cup of powdered sugar, 2 tablespoons of fresh lemon juice, and 1 tablespoon of orange juice until smooth. If the icing is too thick, you can add a little more juice to reach your desired consistency.
  9. Once the loaf is completely cool, drizzle the citrus icing over the top. If you like, sprinkle with an additional teaspoon of lemon zest for an extra pop of flavor and color.
  • Prep Time: 15 mins
  • Cook Time: 50-60 mins
  • Category: Dessert
  • Method: Baking
  • Cuisine: American

Nutrition

  • Serving Size: 1 slice
  • Calories: 200
  • Sugar: 15 g
  • Sodium: 150 mg
  • Fat: 8 g
  • Saturated Fat: 5 g
  • Unsaturated Fat: 3 g
  • Trans Fat: 0 g
  • Carbohydrates: 30 g
  • Fiber: 1 g
  • Protein: 3 g
  • Cholesterol: 40 mg

Keywords: Be careful not to overmix your batter; this is a common mistake that can lead to a dense loaf. Use room temperature ingredients for a smoother batter and even baking.

Did you make this recipe?

Share a photo and tag us — we can't wait to see what you've made!

  • Privacy Policy
  • Terms Of Service
  • Contact
  • About
  • GDPR

Copyright © 2025 Homesmad