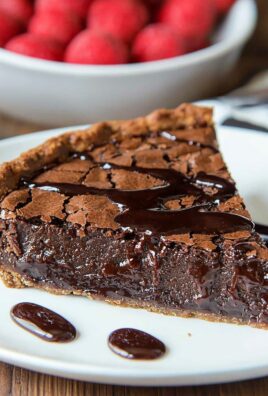
Halloween Cauldron Cookie Creation is more than just baking; it’s an invitation to conjure a little culinary magic in your kitchen this spooky season. Imagine presenting a platter of whimsical, edible cauldrons, each one bubbling with personality and charm, perfectly capturing the playful spirit of All Hallow’s Eve. For centuries, Halloween has been a time of mystical tales, enchanting costumes, and, crucially, delightful treats that bring people together. The cauldron, a timeless symbol of transformation and bubbling brews, stands as an iconic emblem of the holiday, sparking imaginations young and old.
I find that what truly makes this dish beloved is its unique blend of visual appeal and irresistible taste. These cookies are not merely delicious; they are a canvas for creativity, allowing bakers of all skill levels to infuse their treats with personal flair, from vibrant “potions” to shimmering sprinkles. They offer a comforting, familiar cookie base elevated by an exciting, thematic design that ensures they’re the star of any Halloween party or family gathering. This ultimate guide to Halloween Cauldron Cookie Creation will ensure your spooky season is filled with delicious magic and unforgettable moments.

Ingredients:
- For the Spooky Sugar Cookies (Cauldron Base):
- 3 cups (360g) all-purpose flour, plus more for dusting
- 1 teaspoon baking powder
- 1/2 teaspoon salt
- 1 cup (226g) unsalted butter, softened to room temperature
- 1 cup (200g) granulated sugar
- 1 large egg, room temperature
- 1 teaspoon vanilla extract (pure vanilla is best for flavor)
- 1/2 teaspoon almond extract (optional, but adds a lovely depth)
- Black gel food coloring (a good quality, concentrated one is key for a truly dark cauldron)
- For the Royal Icing (Bubbling Potion & Details):
- 4 cups (480g) powdered sugar, sifted (this is crucial for smooth icing!)
- 3 tablespoons meringue powder
- 1/2 teaspoon clear vanilla extract (to keep colors vibrant, regular vanilla can tint)
- 6-8 tablespoons warm water, start with 6 and add gradually
- Green gel food coloring (vibrant lime green or a darker forest green, depending on your potion vision)
- Purple gel food coloring (for accent bubbles or a contrasting potion color)
- Black gel food coloring (for outlining and cauldron details)
- White gel food coloring (or a touch of titanium dioxide paste if you want super opaque white)
- Orange gel food coloring (optional, for flames or other spooky accents)
- For the Spooky Adornments (Optional but Highly Recommended!):
- Edible glitter (green or iridescent, for a shimmering potion effect)
- Various Halloween sprinkles (bones, bats, ghosts, nonpareils)
- Small candy eyes
- Food-safe brushes for glitter application
- Piping bags and various small round tips (e.g., PME #1, #1.5, #2, #3 for outlining and flooding)
- Scribe tool or toothpicks (for manipulating icing)
Making the Cauldron Cookie Dough
- Prepare Dry Ingredients: In a medium bowl, whisk together the 3 cups of all-purpose flour, baking powder, and salt. I always like to give it a good whisk to ensure everything is evenly distributed. Set this aside for a moment.
- Cream Butter and Sugar: In the bowl of a stand mixer fitted with the paddle attachment, or with a large mixing bowl and an electric hand mixer, cream together the softened unsalted butter and granulated sugar on medium speed. Beat for about 3-5 minutes until the mixture is light and fluffy. This step is super important for incorporating air, which helps keep your cookies tender! Scrape down the sides of the bowl periodically to ensure everything is well combined.
- Add Wet Ingredients: Reduce the mixer speed to low. Add the large egg, vanilla extract, and almond extract (if you’re using it). Mix until just combined. Be careful not to overmix here; we just want everything incorporated. Again, give the bowl a good scrape.
- Combine Wet and Dry: Gradually add the dry ingredient mixture to the wet ingredients, mixing on low speed until just combined. The dough will look crumbly at first, but keep mixing until it comes together into a cohesive ball. Do not overmix! Overmixing develops the gluten in the flour, which can lead to tough cookies. We’re aiming for tender, melt-in-your-mouth cauldrons.
- Color the Dough: This is where the magic begins for our Halloween Cauldron Cookie Creation! Take about half of your dough and return it to the mixer or a separate bowl. Add a generous amount of black gel food coloring. Start with a small amount and gradually add more until you achieve a rich, deep black. I find that gel food coloring works best here because it’s highly concentrated and won’t thin out your dough. Mix until the color is uniformly distributed. The remaining half of the dough can be left plain, or you can color it a different spooky color like purple or orange if you desire for variety, but for classic cauldrons, black is key.
- Chill the Dough: Divide each colored dough (black and plain, or whatever colors you chose) into two equal portions. Flatten each portion into a disk, wrap tightly in plastic wrap, and refrigerate for at least 1 hour, or up to 2 days. Chilling the dough is an absolute must! It solidifies the butter, which prevents the cookies from spreading too much in the oven, ensuring your cauldron shapes hold their definition beautifully.
Chilling, Rolling, and Cutting the Cookies
- Prepare Your Work Surface: Once your dough is well-chilled, take one disk out of the refrigerator. Lightly flour your work surface, your rolling pin, and the top of the dough. I like to use a pastry mat for easy cleanup, but a clean countertop works perfectly too.
- Roll the Dough: Roll the dough to about 1/4 inch thickness. I find this thickness ideal for decorated sugar cookies – it’s sturdy enough to handle, but still tender to eat. If the dough gets too sticky, dust with a little more flour, but try not to add too much, as it can make the cookies tough. If the dough becomes too warm and soft, pop it back into the fridge for 10-15 minutes. Patience is a virtue when making perfect cut-out cookies!
- Cut Out Shapes: Using a cauldron-shaped cookie cutter (you can find these easily around Halloween!), cut out your cookies. Try to place the cuts as close together as possible to minimize scraps.
- Transfer to Baking Sheets: Carefully transfer the cut-out cauldron shapes to baking sheets lined with parchment paper or silicone baking mats. Parchment paper is my personal preference as it prevents sticking and makes cleanup a breeze.
- Gather Scraps and Re-roll: Gather the dough scraps, gently press them back together, re-wrap, and chill for another 15-20 minutes before re-rolling. This helps prevent the re-rolled cookies from becoming tough. Repeat the rolling and cutting process with the remaining dough disks. You should yield a good number of spooky cauldrons!
Baking the Cauldron Cookies
- Preheat Oven: Preheat your oven to 375°F (190°C). Make sure your oven is fully preheated before placing cookies inside for even baking.
- Bake the Cookies: Bake one sheet at a time for 8-10 minutes, or until the edges are just set and very lightly golden. The exact baking time will depend on your oven and the thickness of your cookies. You don’t want them to brown too much if you’re going for a pure black cauldron base, so keep a close eye on them. For the black dough, it can be harder to see browning, so gently touch the top of a cookie; if it feels firm, they’re likely done.
- Cool Completely: Remove the baking sheets from the oven and let the cookies cool on the sheets for about 5 minutes before carefully transferring them to a wire rack to cool completely. It is absolutely essential that the cookies are 100% cool before you even think about decorating them with royal icing. Warm cookies will melt your beautiful icing and ruin your Halloween Cauldron Cookie Creation!
Preparing the Royal Icing for Decoration
- Sift Powdered Sugar: In a large bowl, combine the sifted powdered sugar and meringue powder. Sifting the sugar is a non-negotiable step for smooth, lump-free icing that will pipe beautifully.
- Combine with Liquids: Add the clear vanilla extract and 6 tablespoons of warm water. Using a stand mixer with the whisk attachment, or a hand mixer, beat on low speed until combined, then increase to medium-high speed.
-
Achieve Right Consistency: Beat for 5-7 minutes, until the icing is thick, glossy, and forms stiff peaks. If the icing is too thick, add more water, 1 teaspoon at a time, until you reach your desired consistency. If it’s too thin, add a little more sifted powdered sugar.
- Outlining Consistency (Piping Consistency): This should be like toothpaste. When you lift the beater, a peak should stand up firmly. This is what you’ll use for drawing the borders of your cauldron and the potion.
- Flooding Consistency (Run-out Consistency): This should be thinner, like honey or syrup. When you drop a spoonful back into the bowl, it should disappear back into the main icing in about 10-15 seconds. This is for filling in your outlined areas. You’ll achieve this by adding small amounts of water to your outlining consistency icing.
- Divide and Color Icing: Divide the royal icing into several small bowls. Keep one portion white, and then color the others using your gel food colorings: green for the bubbling potion, black for outlines and details, purple for accent bubbles, and orange if you plan to add flames. Remember to cover the bowls with a damp paper towel and plastic wrap immediately after coloring to prevent crusting. Royal icing dries quickly when exposed to air!
- Prepare Piping Bags: Fit piping bags with small round tips (e.g., #2 or #3 for outlining, #1 or #1.5 for fine details). Fill bags with your outlining consistency icings. For flooding, you can use a slightly larger tip or just snip the end of a piping bag without a tip, but ensure the hole isn’t too large.
Decorating the Cauldron Cookies: Base Layer
- Outline the Cauldron: Using the black royal icing at outlining consistency, carefully pipe a border around the entire edge of each cauldron cookie. Take your time to make a smooth, even line. You can also pipe a thin handle on each side of the cauldron at this stage. Allow this outline to dry for about 10-15 minutes to create a barrier for flooding.
- Flood the Cauldron Base: Once the outline is set, switch to your black royal icing at flooding consistency. Fill in the outlined cauldron shape. Use your scribe tool or a toothpick to gently spread the icing to the edges and pop any air bubbles. Don’t overfill, or it might overflow the outline. Let these black cauldron bases dry completely – this can take several hours, or even overnight, depending on humidity. This is a critical drying step for a flawless finish for your Halloween Cauldron Cookie Creation.
- Prepare for the Potion: Once the black cauldron bases are dry, you’re ready for the bubbling potion!
Decorating the Cauldron Cookies: Bubbling Potion and Details
- Outline the Potion: Using your green royal icing at outlining consistency, pipe an irregular, wavy line along the top edge of the black cauldron. This will form the “lip” of your bubbling potion. You can make it look like it’s overflowing slightly for an extra spooky effect. Allow this green outline to set for about 10-15 minutes.
- Flood the Potion: Now, use your green royal icing at flooding consistency to fill in the area above the black cauldron, within your green outline. Gently guide the icing to the edges with your scribe tool. This will be the main body of your bubbling potion.
-
Create “Bubbles” (Wet-on-Wet Technique): While the green flood icing is still wet (this is key!), immediately take your purple, white, and a little bit of black or dark green royal icing (all at flooding consistency). Drop small dots of these colors into the wet green potion. You can make them different sizes.
- For an extra swirly, bubbly effect, gently drag your scribe tool through the wet dots, creating swirls or concentric circles. This wet-on-wet technique creates a seamless, embedded design that looks fantastic and truly enhances the bubbling effect of your potion. This is one of my favorite parts of creating a vibrant Halloween Cauldron Cookie Creation!
- Allow Potion Layer to Dry: Let the entire potion layer, with all its wet-on-wet bubbles, dry completely. This might take another 6-12 hours, or even overnight. Patience here will be rewarded with a beautiful, smooth surface.
Adding Final Spooky Touches
-
Add Cauldron Details (Optional): Once the potion is dry, you can add more details to the black cauldron base.
- Using white royal icing at outlining consistency, you could pipe small, ghostly faces or intricate spiderwebs on the black surface.
- With black icing and a very fine tip, you could add small horizontal lines around the top rim of the cauldron to give it a textured, cast-iron look.
- Apply Edible Glitter: For that extra magical, shimmering potion effect, gently brush edible green or iridescent glitter over the dry green potion. You can use a clean, dry food-safe brush for this. A little goes a long way to make your potion truly sparkle. This step truly elevates the “bubbling” aspect of our Halloween Cauldron Cookie Creation.
- Attach Spooky Adornments: Using a tiny dot of royal icing as “glue,” attach small candy eyes, edible bones, or bat sprinkles to the edges of the potion or even emerging from the potion itself. You can also strategically place Halloween nonpareils around the base for a final flourish.
- Final Drying: Let any final details or attachments dry completely for at least an hour before packaging or serving your magnificent Halloween Cauldron Cookies. This ensures everything is set and your stunning decorations won’t smudge.
Conclusion:
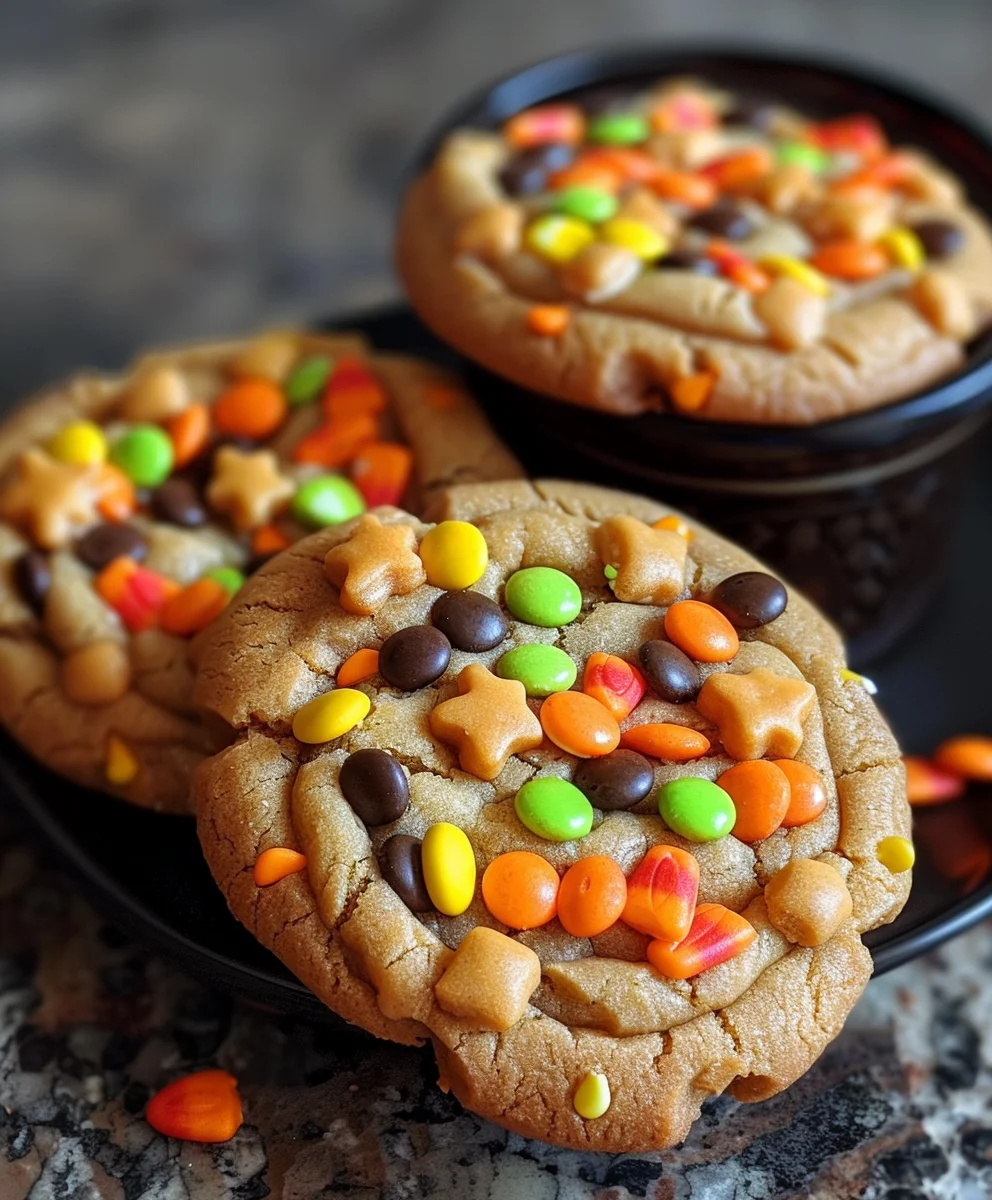
So, there you have it! We’ve journeyed through the enchanting process of bringing these delightful Halloween treats to life. What truly makes this recipe a must-try isn’t just its undeniable cuteness or its vibrant, spooky aesthetic; it’s the sheer joy it brings to the kitchen. From the moment you start mixing, you’ll feel the festive spirit bubbling up, transforming simple ingredients into something magical. This isn’t just another cookie; it’s a miniature edible spectacle, perfectly capturing the whimsical fun of Halloween. It’s incredibly forgiving for beginner bakers, yet offers enough creative freedom for seasoned pros to truly make it their own. The textures – a perfectly chewy cookie base, a smooth, sweet frosting, and playful candy embellishments – come together in a symphony of flavor that will undoubtedly put a smile on everyone’s face. It’s the kind of treat that doesn’t just taste good, but tells a story, sparking conversations and creating memorable moments. Trust me, once you experience the delight of presenting these to friends and family, you’ll understand why I’m so passionate about them. They are a guaranteed crowd-pleaser, perfect for school parties, office potlucks, or just a cozy night in celebrating the spooky season with loved ones. Every bite is an invitation to embrace the playful side of Halloween, making them an indispensable addition to your seasonal baking repertoire.
Now, let’s talk about how to elevate your experience with these charming concoctions. While they are absolutely spectacular on their own, a little imagination can turn them into an even grander affair. For serving, imagine them artfully arranged on a dark platter, perhaps nestled amongst dried leaves or miniature decorative pumpkins, creating a truly bewitching display. They pair wonderfully with a warm mug of apple cider, hot chocolate, or even a creamy vanilla milkshake, providing a delightful contrast to their sweetness. For an adult gathering, consider serving them alongside a spiced rum punch or a dark stout for a sophisticated twist. But the fun doesn’t stop there! These cookies are incredibly versatile. You could experiment with different food colorings for the frosting – perhaps a vibrant purple, an eerie orange, or even a glow-in-the-dark green (with food-safe glow colors, of course!). Consider adding a touch of mint extract to the cookie dough for a subtle, refreshing kick, or a hint of almond for a richer flavor profile. For those who love a bit of sparkle, edible glitter dusted over the “brew” inside the cauldron can add an extra layer of magic. If you’re feeling extra adventurous, try swapping out some of the all-purpose flour for almond flour for a slightly different texture, or incorporate mini chocolate chips into the base dough for a hidden surprise. You could even use different candy toppings – think mini gummy worms crawling out, or tiny candy eyeballs peering over the edge. The possibilities are truly endless, limited only by your imagination and what you have in your pantry! Don’t be afraid to experiment; that’s where the real magic happens.
This is where you come in! I wholeheartedly encourage you to roll up your sleeves, gather your ingredients, and dive into the delightful process of creating your very own batch of these festive treats. There’s something uniquely satisfying about baking from scratch, especially when the end result is as charming and delicious as these. Once you’ve mastered your Halloween Cauldron Cookie Creation, I would absolutely love to hear all about your experience. Did you add your own unique twist? Were there any specific reactions from your friends and family that made you smile? Did you find a secret ingredient that elevated them even further? Please, don’t keep your culinary triumphs to yourself! Share your photos, your stories, and your clever variations. Your insights and creativity inspire not just me, but every other budding baker in our community. Let’s make this Halloween season the most delicious one yet, filled with spooky sweets and shared smiles. Happy baking, and may your cauldrons bubble over with joy!

Halloween Cauldron Cookie Creation
Conjure a batch of spooky and delicious Halloween Cauldron Cookies! This recipe combines a flavorful cookie base with vibrant royal icing decorations to create edible, bubbling cauldrons perfect for any Halloween celebration. Get ready to enchant your taste buds and impress with these unique treats.
Ingredients
-
1 cup unsalted butter, softened
-
1 cup granulated sugar
-
1 cup brown sugar, packed
-
2 large eggs
-
2 teaspoons vanilla extract
-
3 cups all-purpose flour
-
1 teaspoon baking soda
-
1/2 teaspoon salt
-
1 cup chocolate chips
-
1 cup candy corn
-
4 cups powdered sugar, sifted
-
3 tablespoons meringue powder
-
1/2 teaspoon clear vanilla extract
-
6-8 tablespoons warm water
-
Green gel food coloring
-
Purple gel food coloring
-
Black gel food coloring
-
White gel food coloring
-
Orange gel food coloring (optional)
-
Edible glitter (optional)
-
Various Halloween sprinkles (optional)
-
Small candy eyes (optional)
Instructions
-
Step 1
In a bowl, whisk 3 cups all-purpose flour, 1 teaspoon baking soda, and 1/2 teaspoon salt. In a stand mixer, cream 1 cup softened unsalted butter with 1 cup granulated sugar and 1 cup packed brown sugar until light and fluffy. Beat in 2 large eggs and 2 teaspoons vanilla extract. Gradually add dry ingredients to wet, then stir in 1 cup chocolate chips and 1 cup candy corn until just combined. Chill dough for at least 1 hour. -
Step 2
Preheat oven to 375°F (190°C). On a lightly floured surface, roll chilled dough to 1/4 inch thickness and cut cauldron shapes, or scoop for drop cookies. Transfer to parchment-lined baking sheets. Bake for 8-10 minutes until edges are lightly set. Cool completely on a wire rack. -
Step 3
Sift 4 cups powdered sugar and 3 tablespoons meringue powder. Add 1/2 teaspoon clear vanilla extract and 6-8 tablespoons warm water. Beat until thick, glossy, and stiff peaks form (5-7 minutes). Adjust consistency for outlining (toothpaste) and flooding (honey). Divide and color icing with green, purple, black, white, and orange gel food colorings. Keep covered. -
Step 4
Using black outlining icing, pipe a border around each cooled cookie to form a cauldron. Allow outline to dry for 10-15 minutes. Flood the outlined area with black flooding icing. Spread evenly and pop air bubbles. Let dry completely (several hours or overnight) for a smooth base. -
Step 5
Once black bases are dry, pipe an irregular, wavy green outline along the cauldron’s top edge for the ‘potion lip’. Let set for 10-15 minutes. Flood the area with green flooding icing. While still wet, immediately drop small dots of purple, white, and black/dark green icing into the green. Gently drag a scribe tool through the dots to create a swirly, bubbling effect. Allow this potion layer to dry completely (6-12 hours or overnight). -
Step 6
Once all icing layers are dry, gently brush edible green or iridescent glitter over the potion for shimmer. Attach small candy eyes, Halloween sprinkles, or edible bones using tiny dots of royal icing. Let any final details dry for at least an hour before serving or packaging.
Important Information
Nutrition Facts (Per Serving)
It is important to consider this information as approximate and not to use it as definitive health advice.
Allergy Information
Please check ingredients for potential allergens and consult a health professional if in doubt.