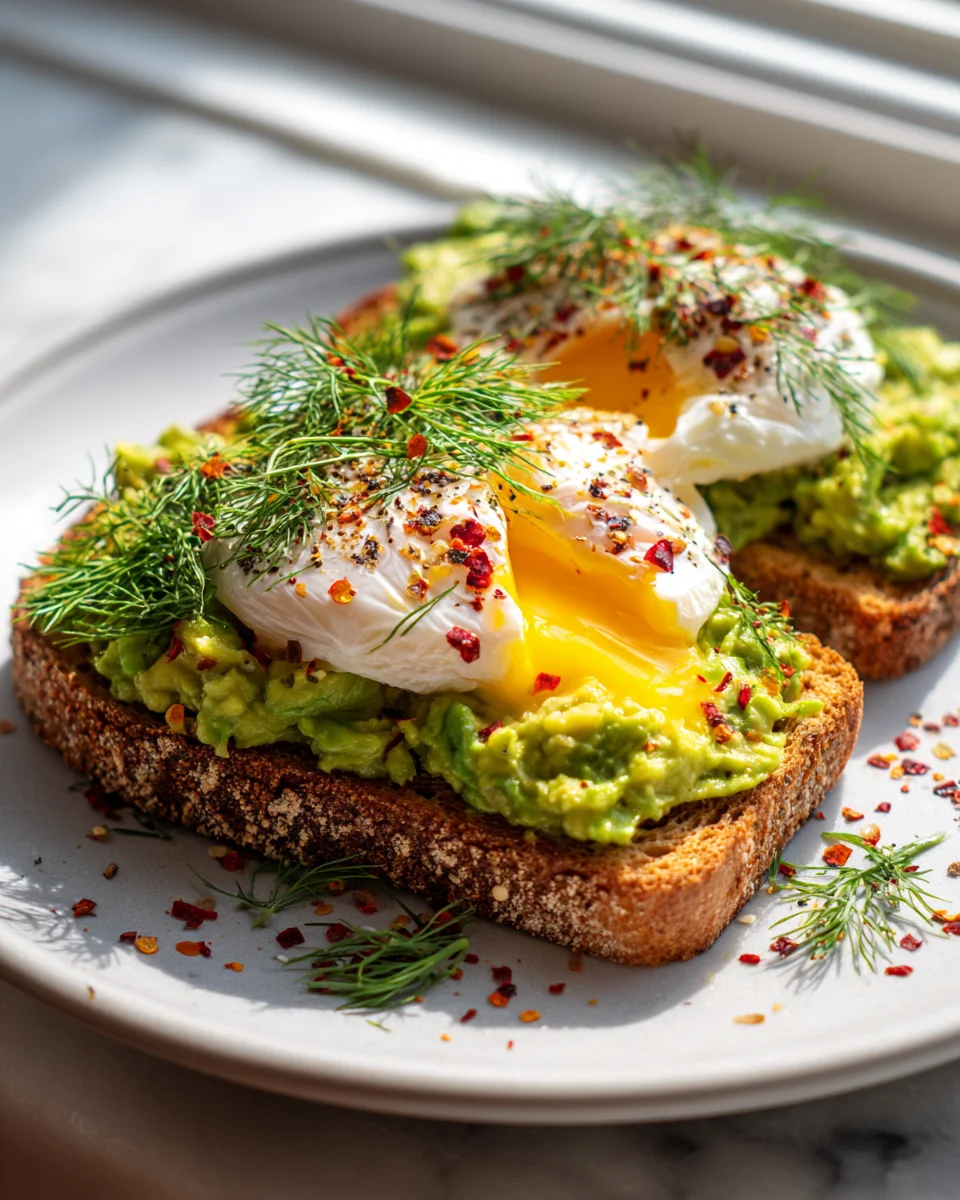
Avocado Toast Mit Pochiertem Ei Nahrstoffreiche Mahlzeit
Oh, let me tell you, there’s a reason I keep coming back to Avocado Toast Mit Pochiertem Ei Nahrstoffreiche Mahlzeit. It’s more than just a dish; it’s my go-to for a meal that feels both indulgent and incredibly smart. What makes this recipe so special, you ask? It’s the harmonious blend of textures and tastes: the satisfying crunch of perfectly toasted bread, the silky smooth, rich creaminess of mashed avocado, and then, the absolute star – a perfectly poached egg with its luscious, runny yolk ready to coat every bite. It’s a culinary hug in a bowl, or rather, on a plate!
I just know you’re going to love this because it perfectly embodies what a fantastic meal should be: quick to prepare, utterly delicious, and packed with goodness. It’s that perfect balance of healthy fats, protein, and complex carbs that truly makes it a “nahrstoffreiche Mahlzeit” – a truly nutrient-rich meal. Whether you’re kicking off your day with an energizing breakfast, looking for a wholesome lunch, or even a light yet fulfilling dinner, this recipe delivers every single time. Get ready to experience simple ingredients elevated to something truly extraordinary!

Ingredient Notes
Crafting the perfect ‘Avocado Toast Mit Pochiertem Ei’ for a truly ‘Nahrstoffreiche Mahlzeit’ (nutritious meal) begins with selecting fresh, high-quality ingredients. I’ve found that paying attention to these details makes all the difference, not just in flavor, but also in the meal’s overall health benefits.
The Essentials
- Ripe Avocados: These are the star! I always look for Haas avocados that yield gently to pressure but aren’t mushy. A perfectly ripe avocado provides that creamy texture and a wealth of healthy monounsaturated fats, fiber, and vitamins like K, C, E, and B-6. For our nutritious meal, the healthy fats are key for satiety and nutrient absorption.
- Fresh Eggs: The fresher the eggs, the better they will poach. Fresh eggs hold their shape beautifully in the water, giving you that perfect, neat poached egg with a runny yolk. Eggs are a fantastic source of high-quality protein, essential amino acids, and choline, making them a powerhouse for brain health and muscle repair.
- Good Quality Bread: This is the foundation of our toast. For a truly ‘Nahrstoffreiche Mahlzeit’, I highly recommend using a hearty whole-grain bread, sourdough, or a robust rye bread. These options offer complex carbohydrates, more fiber, and a lower glycemic index compared to white bread, contributing to sustained energy levels and better digestive health.
- Lemon Juice: A squeeze of fresh lemon juice is indispensable. Not only does it brighten the flavor of the mashed avocado and prevent it from browning, but it also adds a dose of Vitamin C. I also like to add a tiny splash to my poaching water, alongside vinegar.
- Vinegar (for poaching): White wine vinegar or apple cider vinegar works wonders for poaching eggs. A tablespoon added to the simmering water helps the egg whites coagulate quickly around the yolk, creating that neat, beautiful shape we all desire. Rest assured, the taste of vinegar is barely noticeable in the finished egg.
- Salt and Freshly Ground Black Pepper: These are non-negotiable for seasoning. I generously season both the mashed avocado and the poached egg to bring out all the flavors.
Optional, but Recommended Additions for a Nutritious Boost
- Chili Flakes: For a gentle warmth and a metabolic boost, a sprinkle of red chili flakes is fantastic.
- Sesame Seeds or Everything Bagel Seasoning: These add a lovely nutty crunch and an extra layer of flavor, plus some healthy fats and minerals.
- Microgreens or Fresh Herbs: A scattering of microgreens (like radish or arugula) or chopped fresh chives, parsley, or cilantro elevates the dish with freshness, vibrant color, and an extra nutrient punch. They are excellent sources of vitamins and antioxidants.
- Cherry Tomatoes: Halved or quartered cherry tomatoes add a burst of sweet acidity and lycopene, an important antioxidant.
- Radish Slices: Thinly sliced radishes provide a refreshing crunch and a subtle peppery note.
- Nutritional Yeast: If you’re looking for a cheesy, umami flavor without dairy, nutritional yeast is a fantastic choice. It’s also packed with B vitamins.
Substitutions
- Bread: If you’re gluten-sensitive, a good quality gluten-free whole-grain bread works perfectly. The key is to choose something substantial that can hold up to the avocado and egg.
- Vinegar: While vinegar is highly recommended for poaching, if you don’t have any, a larger squeeze of lemon juice in the poaching water can offer a similar, albeit slightly less effective, benefit in helping the egg whites set.
Remember, the beauty of ‘Avocado Toast Mit Pochiertem Ei’ as a ‘Nahrstoffreiche Mahlzeit’ lies in its simplicity and the quality of its fresh components.
Step-by-Step Instructions
Creating this ‘Avocado Toast Mit Pochiertem Ei’ is incredibly satisfying, especially when you nail that perfect poached egg. I’ll walk you through my method for a truly delicious and ‘Nahrstoffreiche Mahlzeit’.
- Prepare Your Poaching Station:
- Fill a medium saucepan with about 3-4 inches of water. Add 1 tablespoon of white wine vinegar (or apple cider vinegar) and a generous pinch of salt.
- Bring the water to a gentle simmer over medium heat. You’re looking for small bubbles, not a rolling boil. If it’s boiling too vigorously, the eggs will break apart.
- While the water heats, crack each egg individually into its own small ramekin or bowl. This makes it easier to gently slide them into the water and ensures no shell fragments make it into your dish.
- Toast Your Bread:
- Place your chosen slice(s) of whole-grain bread into a toaster or under the broiler. Toast to your preferred golden crispness. A well-toasted slice provides a sturdy base and a delightful textural contrast to the creamy avocado and runny egg.
- Prepare the Avocado:
- While the bread toasts, cut your ripe avocado in half, remove the pit, and scoop the flesh into a small bowl.
- Using a fork, gently mash the avocado to your desired consistency – I like mine slightly chunky.
- Season the mashed avocado generously with salt and freshly ground black pepper. Add a squeeze of fresh lemon juice (about 1-2 teaspoons) to brighten the flavor and help prevent browning. Stir to combine.
- Poach the Eggs:
- Once the water is at a gentle simmer, you can optionally create a gentle swirl in the water with a spoon. This helps to gather the egg whites around the yolk.
- Carefully and gently tip each egg from its ramekin into the simmering water. If poaching multiple eggs, don’t overcrowd the pan; cook them in batches if necessary (I usually do one or two at a time for best results).
- Let the eggs poach for 3-4 minutes for a beautifully runny yolk, or a minute longer if you prefer a slightly firmer yolk. The whites should be fully set.
- Using a slotted spoon, carefully lift each poached egg out of the water. Let any excess water drain off, or gently dab the bottom with a paper towel.
- Assemble Your ‘Avocado Toast Mit Pochiertem Ei’:
- Place the warm, toasted bread on your plate.
- Spread the seasoned mashed avocado generously over the toast.
- Carefully place a perfectly poached egg on top of the avocado.
- Finish with any desired toppings – a sprinkle of chili flakes, sesame seeds, fresh microgreens, or a grind of black pepper.
- Serve Immediately:
- This ‘Nahrstoffreiche Mahlzeit’ is best enjoyed right away while the toast is warm, the avocado is fresh, and the egg yolk is still wonderfully runny.
Tips & Suggestions
To truly elevate your ‘Avocado Toast Mit Pochiertem Ei’ into a memorable and consistently ‘Nahrstoffreiche Mahlzeit’, I’ve gathered some of my favorite tips and suggestions. These small details can make a big difference in both the process and the final outcome.
Mastering the Poached Egg
- Freshness is Key: I can’t stress this enough – use the freshest eggs you can find. Older eggs tend to have runnier whites that spread out more in the water, making it harder to get that perfect compact shape.
- Gentle Simmer, Not a Boil: Keep the water at a gentle simmer. A rolling boil will agitate the eggs too much, causing them to break apart. Small, consistent bubbles are your goal.
- Vinegar is Your Friend: The tablespoon of vinegar in the poaching water really helps the egg whites set quickly and neatly around the yolk. Don’t worry, you won’t taste it!
- Crack into Ramekins: Always crack your eggs into individual ramekins or small bowls first. This allows you to check for any shell fragments and makes it much easier to gently slide the egg into the simmering water, maintaining its shape.
- Don’t Overcrowd: Poaching more than two eggs at a time in a standard saucepan can lower the water temperature and make them cook unevenly or stick together. If you’re making several servings, work in batches.
- The Swirl Method: For a really neat egg, I sometimes create a gentle swirl in the water with a spoon just before adding the egg. This vortex helps to gather the egg white around the yolk as it cooks.
- Timing is Everything: For a perfect runny yolk with set whites, 3 to 4 minutes is usually the sweet spot. Use a timer!
Perfecting the Avocado and Toast
- Choose Wisely: Select avocados that are ripe but not overripe. They should yield slightly to gentle pressure. Overripe avocados can be stringy or brownish.
- Season Liberally: Don’t be shy with the salt, pepper, and lemon juice for your mashed avocado. Proper seasoning truly enhances its flavor and makes it pop. The lemon juice is also crucial for preventing browning if you’re not eating it immediately.
- Toast for Texture: Make sure your bread is well-toasted. A sturdy, crispy base prevents sogginess and adds a delightful crunch that contrasts with the creamy avocado and egg. Whole-grain or sourdough bread offers the best texture and nutritional value for this ‘Nahrstoffreiche Mahlzeit’.
Enhancing the “Nahrstoffreiche Mahlzeit” Aspect
- Add Greens: I love to top my avocado toast with a handful of fresh microgreens (like arugula or kale sprouts), spinach, or even some thinly sliced cucumber for extra vitamins, minerals, and crunch.
- Spice It Up: A sprinkle of red pepper flakes, a dash of hot sauce, or a pinch of everything bagel seasoning can add an exciting kick and complexity of flavor.
- Consider a Balsamic Glaze: A drizzle of a high-quality balsamic glaze (ensuring it’s a non-alcohol preparation) adds a lovely sweet-tangy counterpoint.
- Smoked Paprika: A light dusting of smoked paprika can add a beautiful depth of flavor and a touch of color without overwhelming the dish.
Remember, ‘Avocado Toast Mit Pochiertem Ei’ is wonderfully customizable. Feel free to experiment with toppings that align with your taste and nutritional goals to make it your ultimate ‘Nahrstoffreiche Mahlzeit’!
Storage
While ‘Avocado Toast Mit Pochiertem Ei’ is undeniably a ‘Nahrstoffreiche Mahlzeit’ best enjoyed fresh, I understand the desire to consider storage, especially if you’re thinking about meal prep. However, for optimal taste and texture, this dish is truly meant to be assembled and savored immediately.
Assembled Avocado Toast with Poached Egg
- Not Recommended for Storage: Once you’ve assembled your avocado toast with the poached egg, it simply doesn’t store well. The toast will quickly become soggy from the avocado and the moisture from the egg. The avocado will begin to oxidize and turn brown, and the poached egg, while still edible, will lose its appealing warm, runny yolk texture.
- Immediate Consumption is Best: To experience this dish at its peak – with warm, crispy toast, fresh vibrant avocado, and a perfectly runny poached egg – I highly recommend enjoying it as soon as it’s prepared.
Individual Components for Limited Meal Prep
If you’re really keen on a bit of meal prepping, you can prepare some components separately, though it still won’t be quite the same as fresh:
- Mashed Avocado:
- Short-Term Storage: Mashed avocado, even with lemon juice, will start to brown relatively quickly due to oxidation. You can store it in an airtight container in the refrigerator for a few hours, but no more than a day. To minimize browning, I always press a layer of plastic wrap directly onto the surface of the avocado before sealing the container.
- Best Made Fresh: For the freshest taste and vibrant green color, I always mash the avocado right before assembly.
- Poached Eggs:
- Limited Pre-Poaching: Poached eggs can be prepared ahead of time, but they will never be as good as freshly cooked. If you must, poach your eggs slightly under their usual cooking time (e.g., 2.5-3 minutes instead of 3-4 minutes).
- Storage Method: Immediately after poaching, transfer them to an ice bath to stop the cooking process. Once cooled, store them in a bowl of cold water (ensuring they are fully submerged) in an airtight container in the refrigerator for up to 1-2 days.
- Reheating: To reheat, gently place the cold poached eggs into a bowl of very hot (but not boiling) water for about 30-60 seconds, or until warmed through. Avoid microwaving, as it can cause the yolk to explode.
- Recommendation: While possible, I find the texture and temperature of pre-poached and reheated eggs to be inferior. For the best ‘Avocado Toast Mit Pochiertem Ei’, poach your eggs fresh.
Ultimately, the core philosophy of ‘Avocado Toast Mit Pochiertem Ei’ as a ‘Nahrstoffreiche Mahlzeit’ leans heavily on freshness. Planning to prepare and enjoy it straight away ensures you get the full benefits and delightful experience of every component.
Final Thoughts
There you have it! My hope is that you’re now ready to create your very own batch of Avocado Toast Mit Pochiertem Ei Nahrstoffreiche Mahlzeit. I absolutely love how this dish brings together the creamy richness of avocado, the perfectly runny yolk of a poached egg, and the satisfying crunch of toast into one harmonious bite. It’s more than just a quick bite; it truly is a nutrient-packed powerhouse that fuels your day wonderfully.
This recipe isn’t just about combining ingredients; it’s about crafting a simple yet elegant meal that feels both indulgent and incredibly wholesome. Whether you’re looking for a quick breakfast, a light lunch, or a satisfying snack, Avocado Toast Mit Pochiertem Ei Nahrstoffreiche Mahlzeit is an absolute winner. Trust me, once you try this delightful combination, it’s sure to become a cherished part of your culinary repertoire. Enjoy every delicious, nourishing bite!

Healthy Avocado Toast with Poached Egg – Quick Recipe!
- Total Time: 20 minutes
- Yield: 2 servings 1x
Description
This Healthy Avocado Toast with Poached Egg is a delightful blend of textures and flavors, perfect for any meal of the day. Enjoy the creamy avocado, perfectly poached egg, and crunchy toast for a nutritious and satisfying dish.
Ingredients
- 2 ripe avocados
- 2 fresh eggs
- 2 slices of good quality bread (whole-grain, sourdough, or rye)
- 1–2 teaspoons lemon juice
- 1 tablespoon vinegar (white wine or apple cider)
- Salt
- Freshly ground black pepper
- Chili flakes (optional)
- Sesame seeds or Everything Bagel seasoning (optional)
- Microgreens or fresh herbs (optional)
- Cherry tomatoes (optional)
- Radish slices (optional)
- Nutritional yeast (optional)
Instructions
- Prepare Your Poaching Station: Fill a medium saucepan with about 3-4 inches of water. Add 1 tablespoon of white wine vinegar (or apple cider vinegar) and a generous pinch of salt. Bring the water to a gentle simmer over medium heat.
- While the water heats, crack each egg individually into its own small ramekin or bowl.
- Toast Your Bread: Place your chosen slice(s) of whole-grain bread into a toaster or under the broiler. Toast to your preferred golden crispness.
- Prepare the Avocado: While the bread toasts, cut your ripe avocado in half, remove the pit, and scoop the flesh into a small bowl. Using a fork, gently mash the avocado to your desired consistency. Season the mashed avocado generously with salt and freshly ground black pepper. Add a squeeze of fresh lemon juice to brighten the flavor and help prevent browning.
- Poach the Eggs: Once the water is at a gentle simmer, you can optionally create a gentle swirl in the water with a spoon. Carefully and gently tip each egg from its ramekin into the simmering water. Let the eggs poach for 3-4 minutes for a beautifully runny yolk, or a minute longer if you prefer a slightly firmer yolk. Using a slotted spoon, carefully lift each poached egg out of the water.
- Assemble Your 'Avocado Toast Mit Pochiertem Ei': Place the warm, toasted bread on your plate. Spread the seasoned mashed avocado generously over the toast. Carefully place a perfectly poached egg on top of the avocado. Finish with any desired toppings.
- Serve Immediately: This dish is best enjoyed right away while the toast is warm, the avocado is fresh, and the egg yolk is still wonderfully runny.
- Prep Time: 10 mins
- Cook Time: 10 mins
- Category: Breakfast
- Method: Poaching
- Cuisine: American
Nutrition
- Serving Size: 1 toast with poached egg
- Calories: 350
- Sugar: 1 g
- Sodium: 300 mg
- Fat: 20 g
- Saturated Fat: 3 g
- Unsaturated Fat: 15 g
- Trans Fat: 0 g
- Carbohydrates: 30 g
- Fiber: 10 g
- Protein: 12 g
- Cholesterol: 186 mg
Keywords: Use the freshest eggs for the best poached results. If gluten-sensitive, substitute with gluten-free bread. For poaching, vinegar helps the egg whites set quickly, but lemon juice can be used as a substitute if needed.