Heaven On Earth Cake No Bake Recipe – just the name itself evokes images of pure dessert bliss, doesn’t it? If you’ve been searching for that magical treat that promises incredible flavor without the need to even preheat your oven, then you’ve absolutely landed in the right place. Imagine layers of creamy, dreamy indulgence, a refreshing coolness, and a symphony of textures all coming together to create a slice of pure joy. This dessert isn’t just a recipe; it’s a phenomenon, beloved across countless kitchens for its irresistible charm and remarkable simplicity.
While its exact origins are shrouded in the sweet mists of time, this delightful concoction quickly became a staple at potlucks, family gatherings, and celebrations for one undeniable reason: it’s heavenly! People adore this cake because it delivers an unbelievably rich, yet light and airy taste experience. The combination of its luscious, often pudding-based filling, delicate whipped topping, and a sturdy, flavorful crust is simply irresistible. Furthermore, the sheer convenience of a no-bake dessert means you can whip up something spectacular even on the busiest of days or when the summer heat makes oven use unbearable. Truly, mastering this Heaven On Earth Cake No Bake Recipe is like unlocking a secret level of dessert wizardry that everyone will applaud. Get ready to impress with minimal effort!
Ingredients:
Creating this Heaven On Earth Cake No Bake Recipe is an absolute joy, and the beauty of it lies in its simplicity and the readily available ingredients. Here’s everything you’ll need to whip up this divine dessert:
- 1 (12 to 16 ounce) frozen pound cake, store-bought and thawed. This is our wonderful shortcut to a truly no-bake experience. Make sure it’s completely thawed for easy slicing.
- 1 (8 ounce) package cream cheese, full-fat and softened to room temperature. Trust me, softened cream cheese makes all the difference for a smooth, lump-free mixture.
- 1 cup powdered sugar, also known as confectioners’ sugar. This will give our cream cheese layer its perfect sweetness and velvety texture.
- 1/2 cup cold milk (preferably whole milk, for richness) for the cream cheese mixture.
- 1 teaspoon pure vanilla extract. A good quality vanilla extract really elevates the flavor profile of the cream cheese layer.
- 2 (3.4 ounce) packages instant vanilla pudding mix. We’re using two packages to ensure a thick, luxurious pudding layer. Do not use cook-and-serve pudding.
- 2 (3.4 ounce) packages instant chocolate pudding mix. The combination of vanilla and chocolate truly lives up to the “Heaven On Earth” name! Again, instant is key here.
- 6 cups cold milk (preferably whole milk, divided, approximately 3 cups for each pudding flavor). This will be used to prepare both instant pudding mixes. Ensure it’s very cold for optimal setting.
- 1 (12 ounce) container frozen whipped topping, like Cool Whip, thawed in the refrigerator. This is our glorious cloud-like top layer and a component in the cream cheese mixture.
- Optional garnishes: Chocolate shavings, cocoa powder, fresh berries (strawberries or raspberries work wonderfully), or a drizzle of chocolate syrup for an extra touch of elegance.
Preparing the Cream Cheese Layer
The first step in our Heaven On Earth Cake No Bake Recipe journey is to create the lusciously smooth and subtly tangy cream cheese layer. This layer provides a wonderful contrast to the sweet puddings and light whipped topping.
- First things first, make sure your cream cheese is thoroughly softened. I can’t stress this enough! If your cream cheese is cold, you’ll end up with lumps, and nobody wants that in a silky dessert. You can leave it on the counter for about an hour or carefully soften it in the microwave for 15-20 seconds if you’re short on time.
- In a large mixing bowl, using an electric mixer on medium speed, beat the softened cream cheese until it’s incredibly light and fluffy. This usually takes about 2-3 minutes. You want to incorporate air into it, making it wonderfully smooth.
- Gradually add the powdered sugar to the cream cheese, beating until well combined and smooth. Start on a low speed to avoid a powdered sugar cloud explosion in your kitchen! Once incorporated, increase the speed to medium and beat for another minute or two until there are no sugar lumps and the mixture is uniformly creamy.
- Pour in the 1/2 cup cold milk and the vanilla extract. Continue beating on medium speed until everything is fully combined and the mixture is perfectly smooth and spreadable. It should have a consistency that’s thick but easy to spread.
- Now, gently fold in about 1 cup of the thawed whipped topping into your cream cheese mixture. This lightens the cream cheese layer, making it even more ethereal and giving it a delightful fluffiness. Use a spatula for this, folding gently from the bottom up to maintain the airiness. Set this heavenly concoction aside for a moment. This cream cheese mixture is truly the heart of our “Heaven On Earth Cake No Bake Recipe.”
Mixing the Pudding Layers
Next up, we’re going to prepare our two distinct pudding layers – vanilla and chocolate. These layers bring in incredible depth of flavor and a comforting, creamy texture that defines this amazing “Heaven On Earth Cake No Bake Recipe.”
- Grab another large mixing bowl. We’ll start with the vanilla pudding. Empty both packages of instant vanilla pudding mix into the bowl.
- Add 3 cups of very cold milk to the vanilla pudding mix. The colder the milk, the faster and better your instant pudding will set, so make sure it’s fresh out of the fridge.
- Using a whisk or an electric mixer on low speed, beat the pudding mix and milk together vigorously for about 2 minutes. You’ll notice it starting to thicken quite quickly. It’s important to mix it thoroughly to ensure there are no dry pockets of pudding mix. Don’t over-mix once it’s thickened, though, as that can sometimes cause it to break down. Once it reaches a thick, pourable consistency, set it aside.
- Repeat the exact same process for the chocolate pudding. In a separate clean bowl, combine both packages of instant chocolate pudding mix with the remaining 3 cups of very cold milk.
- Whisk or beat the chocolate pudding mixture for about 2 minutes, until it’s thick and creamy, just like the vanilla. Make sure both puddings are well-mixed and have achieved a good, thick consistency. These are going to be wonderful, distinct layers in our Heaven On Earth Cake.
- Chef’s Tip: If your puddings seem a little thin after 2 minutes, don’t panic. Sometimes different brands or types of milk can affect the setting time. Just give them another 30 seconds to a minute of whisking, or let them sit for a few extra minutes, and they should firm up nicely.
Assembling the Heaven On Earth Cake
This is where the magic truly happens! We’re going to layer all our delicious components into a stunning, show-stopping dessert. Get ready to assemble your very own “Heaven On Earth Cake No Bake Recipe.”
- First, retrieve your thawed pound cake. Using a serrated knife, carefully slice the pound cake horizontally into approximately 1/2-inch thick slices. You should aim for about 10-12 slices depending on the size of your cake.
- Arrange a single layer of these pound cake slices in the bottom of a 9×13 inch baking dish. You may need to trim some slices to fit snugly and cover the entire bottom of the dish. Don’t worry if there are small gaps; they’ll be filled with our creamy layers. This cake base is crucial for our “Heaven On Earth Cake No Bake Recipe.”
- Evenly spread the prepared cream cheese layer over the pound cake slices. Take your time to ensure it’s distributed from edge to edge, creating a smooth and even layer. This creates a wonderful tangy foundation for the sweeter layers to come.
- Next, gently spoon and spread the vanilla pudding mixture over the cream cheese layer. Again, be mindful to spread it evenly and carefully so as not to disturb the cream cheese layer underneath. Its pale, inviting color contrasts beautifully with the cream cheese.
- Now, on top of the vanilla pudding, add another layer of pound cake slices. Just like before, arrange them to cover the vanilla pudding as much as possible. You might have to use some of your remaining slices, possibly cutting them to fit any gaps.
- It’s time for the decadent chocolate! Carefully spoon and spread the chocolate pudding mixture over the second layer of pound cake. This rich, dark layer adds incredible depth and makes the cake feel truly indulgent.
- Finally, top the entire cake with the remaining thawed whipped topping. Spread it gently and evenly across the chocolate pudding layer, creating a beautiful, cloud-like topping. You can make little swirls or peaks with the back of a spoon for a more decorative finish. This truly makes it look like a cloud straight from heaven!
- Pro-Tip for Clean Layers: When spreading each layer, use an offset spatula or the back of a spoon. Start spreading from the center outwards to gently push the mixture to the edges without disturbing the layers below. Work slowly and patiently for the best results!
Chilling and Serving Your Heaven On Earth Cake
The final, crucial step for our “Heaven On Earth Cake No Bake Recipe” is to allow it ample time to chill. This isn’t just about making it cold; it’s about allowing all those magnificent layers to meld, set, and firm up, resulting in a dessert that cuts beautifully and tastes even better.
- Once assembled, cover the baking dish tightly with plastic wrap. You want to prevent any unwanted refrigerator odors from permeating your delicious dessert.
- Place the covered dish in the refrigerator to chill for at least 4 hours. Honestly, for the absolute best results, I highly recommend chilling it overnight. This extended chilling time allows the puddings to set completely, the cake layers to absorb some moisture from the creamy fillings, and all the flavors to truly marry together, creating that exquisite “Heaven On Earth” taste.
- When you’re ready to serve this glorious Heaven On Earth Cake No Bake Recipe, remove it from the refrigerator.
- If desired, now is the time to add your chosen garnishes. I love sprinkling a generous amount of chocolate shavings or a dusting of cocoa powder over the whipped topping. Fresh berries like sliced strawberries or whole raspberries add a pop of color and a lovely tart contrast to the sweetness. A drizzle of chocolate syrup can also elevate its visual appeal and flavor.
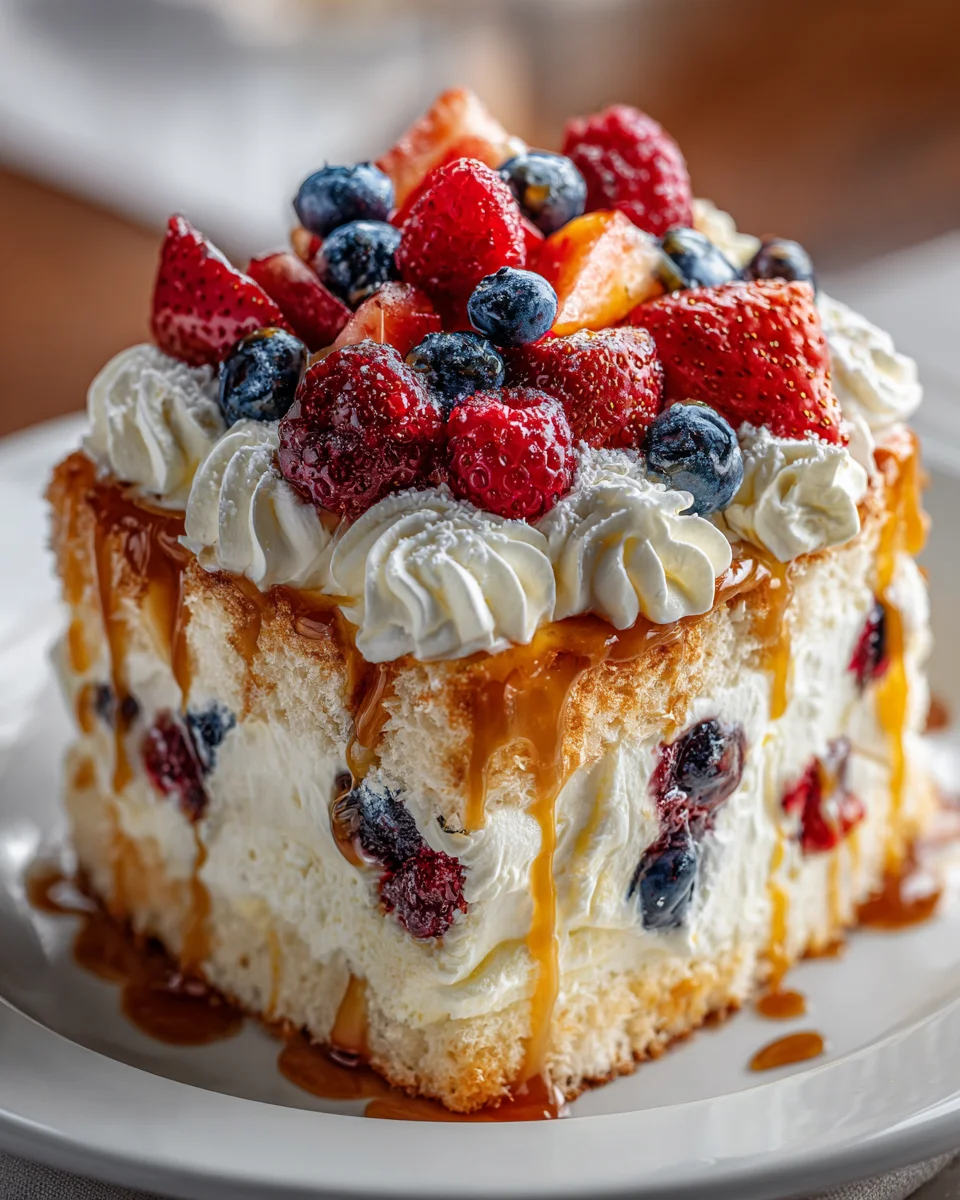
- To serve, cut the cake into generous squares. A sharp knife, wiped clean between each cut, will help you achieve neat, clean slices, showcasing those beautiful, distinct layers you worked so hard to create.
- Serving Suggestion: This cake is perfect for potlucks, family gatherings, or simply as a special treat on a warm evening. Its light, refreshing quality makes it a crowd-pleaser every single time. Prepare to receive compliments!
- Storage: Store any leftover Heaven On Earth Cake in an airtight container in the refrigerator for up to 3-4 days. While it’s best enjoyed fresh, it still holds up wonderfully for a few days, though the pound cake might become a little softer.
Conclusion:
So, there you have it! We’ve journeyed through what I truly believe is one of the most delightful and effortlessly elegant desserts you could ever whip up. This isn’t just a cake; it’s an experience. The sheer simplicity of its creation, coupled with the complex layers of creamy vanilla, rich chocolate, tender shortbread, and fluffy whipped topping, makes it an absolute showstopper. It’s the kind of dessert that elicits gasps of delight and requests for the recipe, all while demanding minimal effort from you. Imagine impressing your guests or treating your family to something that tastes incredibly indulgent, yet required no oven time whatsoever. That’s the magic we’re talking about. I honestly can’t stress enough how much joy this particular treat brings, and it truly lives up to its name, promising a little slice of culinary paradise with every bite.
Now, while this dessert is glorious on its own, I’m a firm believer in tailoring dishes to suit your mood or occasion. For a classic presentation, a generous slice served chilled is perfect. But don’t be afraid to get creative!
Personalize Your Slice of Heaven
- Garnish Game Strong: A sprinkle of cocoa powder, a dusting of powdered sugar, or a scattering of fresh berries like raspberries or strawberries can elevate its visual appeal and add a lovely tang. Chocolate shavings are always a welcome addition for extra decadence. For a truly luxurious finish, a drizzle of caramel or a scattering of toasted coconut flakes can introduce delightful new dimensions to an already incredible dessert.
- Individual Indulgence: Instead of one large cake, why not assemble this in individual parfait glasses or small ramekins? Layering the ingredients in smaller vessels makes for a sophisticated single-serving dessert, perfect for dinner parties where presentation is key. Just adjust the cookie layering as needed, perhaps crushing them slightly to fit. This also makes portion control a breeze, if that’s something you’re considering, though honestly, with a dessert this good, who wants to control portions?
- Flavor Adventures: The beauty of this no-bake wonder is its adaptability. Feel free to experiment with different pudding flavors. A butterscotch pudding layer could add a delightful caramel note, or perhaps a banana pudding for a tropical twist. You could even swap out the vanilla wafers or shortbread for graham crackers or chocolate sandwich cookies (crushed, of course) for a different base texture and flavor profile. Imagine a peanut butter layer with peanut butter cookies, or a rich coffee-flavored pudding for an adult twist! The possibilities are truly endless, allowing you to customize your own perfect version of the Heaven On Earth Cake. Don’t be afraid to mix and match; that’s where the real culinary fun begins.
- Seasonal Swaps: In the summer, fresh peaches or blueberries could be folded into the whipped topping or layered between the pudding for a lighter, fruitier touch, making it incredibly refreshing on a hot day. During colder months, a sprinkle of toasted pecans or walnuts can add a cozy, nutty crunch, perhaps even with a hint of cinnamon or nutmeg in the whipped cream for a festive feel.
- Dietary Tweaks: For those avoiding gluten, simply choose gluten-free shortbread cookies or wafers; there are many fantastic options available now that hold up beautifully. And if you’re mindful of sugar intake, there are fantastic sugar-free pudding mixes and whipped toppings available that work beautifully without compromising on flavor or texture. This adaptability ensures that almost everyone can enjoy a slice of this heavenly creation, proving that delicious desserts can be inclusive.
I genuinely hope you feel inspired to give this incredible dessert a try. It’s more than just a recipe; it’s an opportunity to create something truly special with minimal fuss. The smiles you’ll see and the compliments you’ll receive will be all the proof you need that choosing the Heaven On Earth Cake No Bake Recipe was an excellent decision. Seriously, it’s a game-changer for entertaining or simply treating yourself to something wonderfully delicious. Once you’ve made it, I would absolutely love to hear about your experience! What variations did you try? Who did you share it with? Did it live up to its heavenly name? Please, don’t keep your triumphs to yourself! Come back and share your stories and photos with me. Let’s spread the joy of easy, delicious desserts far and wide. Happy baking… or rather, happy assembling!
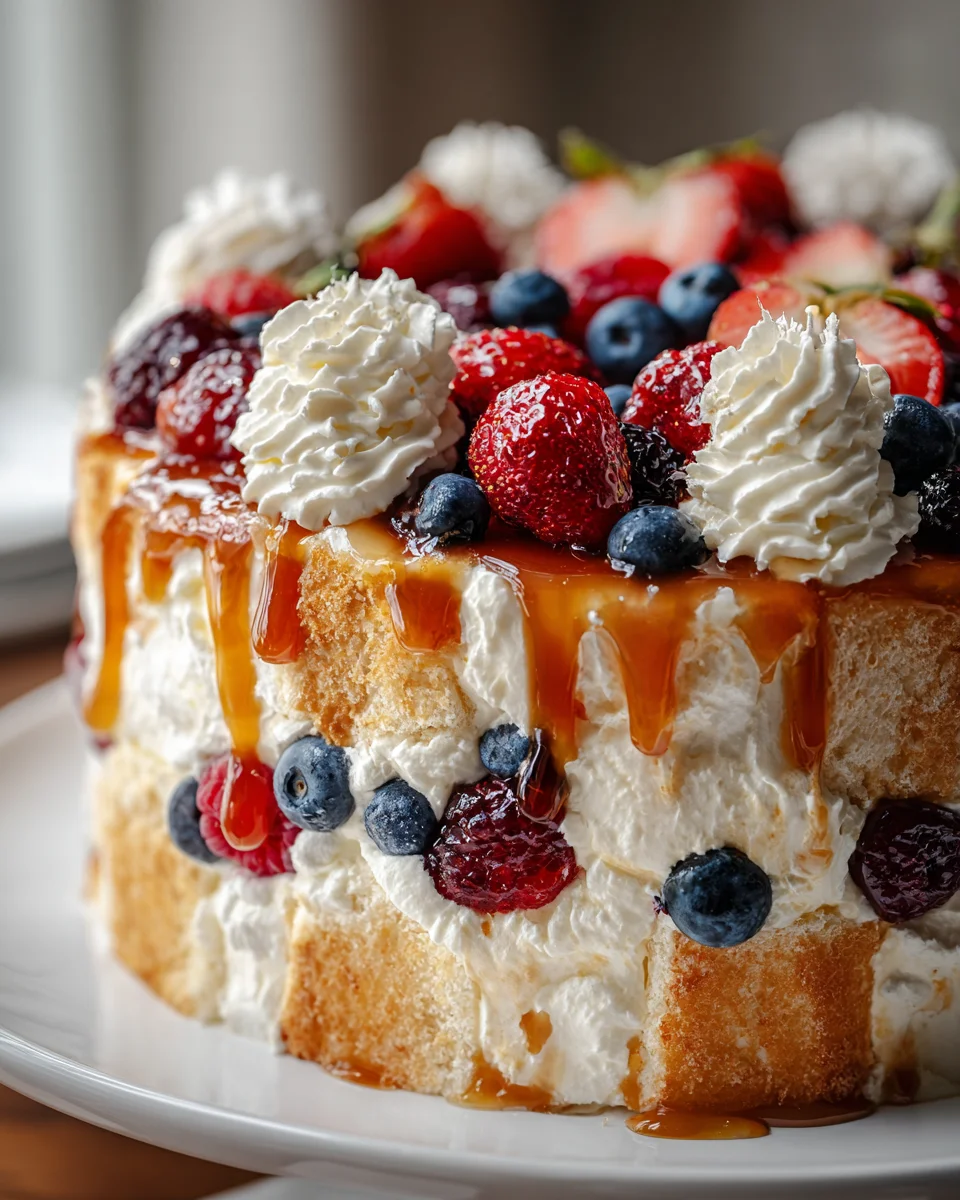
Heaven On Earth Cake No Bake Recipe
Heaven On Earth Cake No Bake Recipe – a magical treat promising incredible flavor without needing an oven. Layers of creamy, dreamy indulgence, refreshing coolness, and a symphony of textures create a slice of pure joy. This dessert is beloved for its irresistible charm and remarkable simplicity.
Ingredients
Instructions
Important Information
Nutrition Facts (Per Serving)
It is important to consider this information as approximate and not to use it as definitive health advice.
Allergy Information
Please check ingredients for potential allergens and consult a health professional if in doubt.