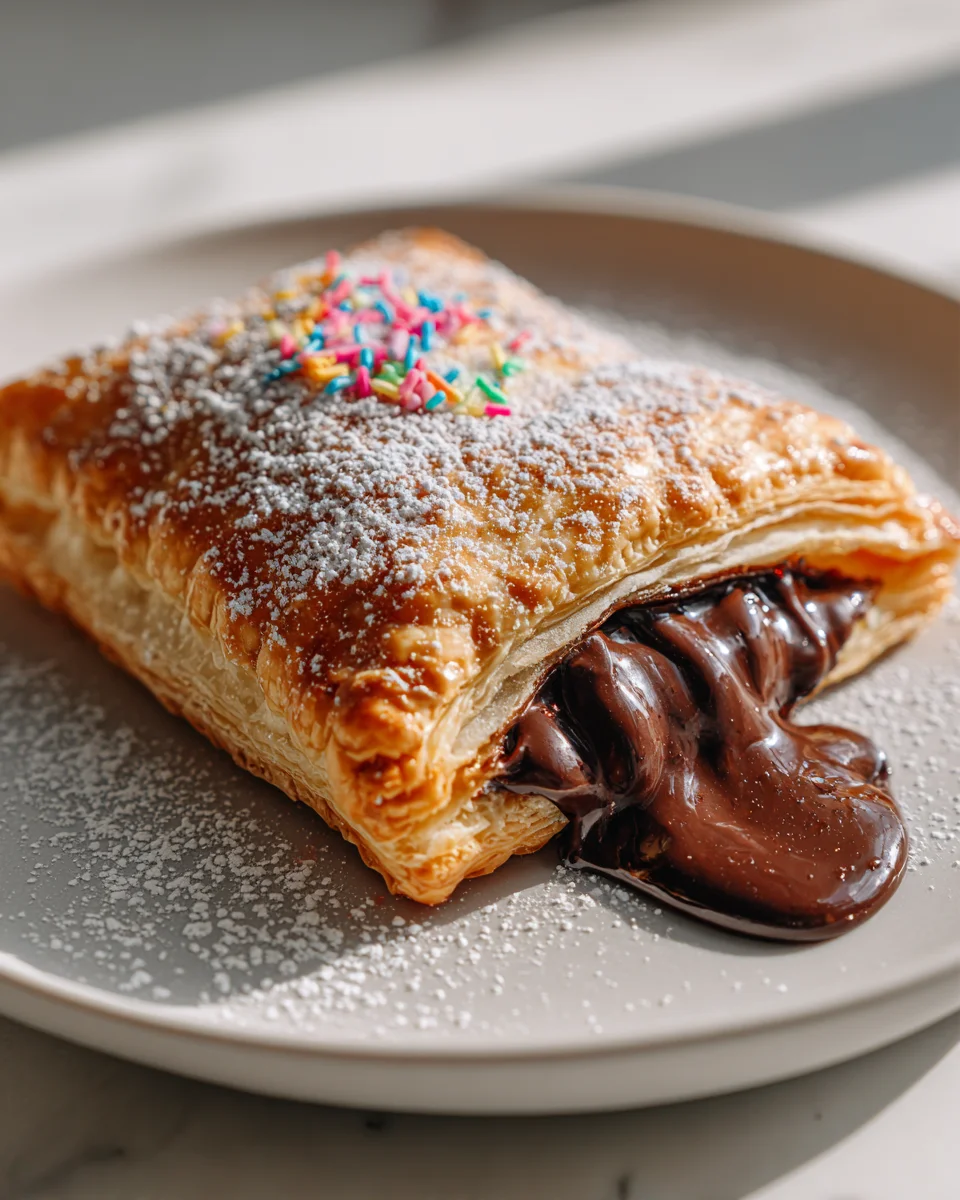
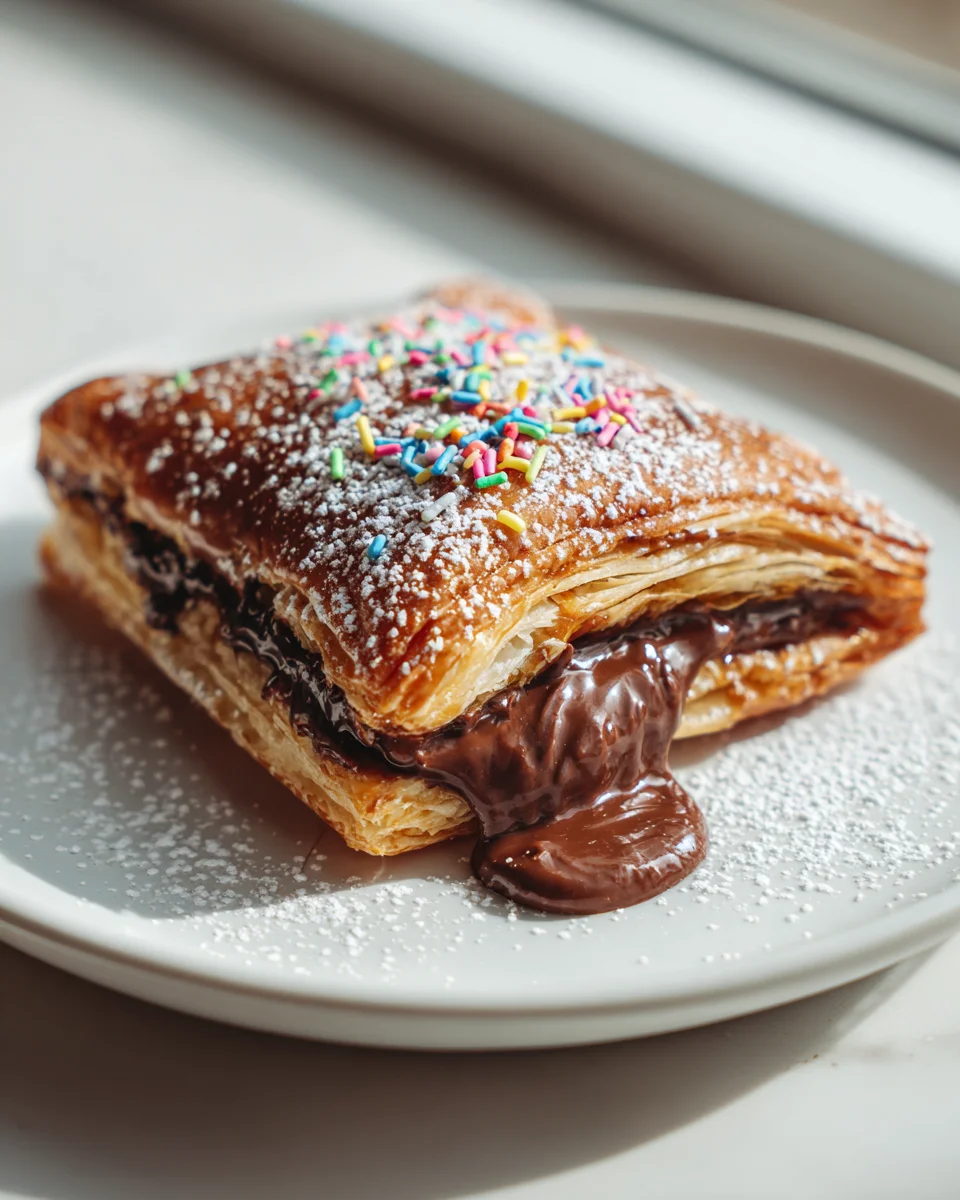
Chocolate Fudge Pop Tarts
Oh, prepare yourselves, because today we’re not just making a dessert; we’re crafting a little slice of pure, unadulterated nostalgia, but better. These Chocolate Fudge Pop Tarts are everything you loved about that childhood breakfast staple, amplified. Forget those dry, store-bought imposters; we’re talking about a homemade version that will redefine your expectations.
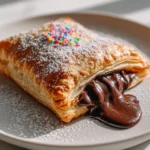
What makes these specific Chocolate Fudge Pop Tarts so special? It’s the glorious union of a buttery, flaky pastry crust — tender and golden — with a deeply rich, molten chocolate fudge filling that truly melts in your mouth. This isn’t just chocolate-flavored goo; it’s genuine, decadent fudge nestled inside, offering a gooey, warm center with every single bite. Then, we crown it all with a luscious chocolate glaze that adds just the right touch of sweetness and shine. It’s an elevated take on a beloved classic, made with love and superior ingredients right in your own kitchen.
Readers will absolutely adore these because they tap into that sweet spot between comforting familiarity and gourmet indulgence. Imagine pulling a tray of these warm, chocolatey wonders from your oven, the aroma filling your home. They’re perfect for a special breakfast, an afternoon treat, or even a delightful dessert. You’ll love the satisfaction of creating something so iconic from scratch, and your taste buds will thank you for the incredible upgrade. Get ready to experience the Chocolate Fudge Pop Tart in its most glorious form!
Ingredient Notes
Oh, you are in for such a treat with these Chocolate Fudge Pop Tarts! Crafting these beauties is a delightful journey, and while they might seem fancy, the ingredients are straightforward. Let’s talk about what makes them truly special and how you can tweak them to your heart’s content.
The Pastry
- Store-Bought Pie Crusts: My go-to for convenience! Two packages of refrigerated pie crusts (that’s four individual crusts) are usually perfect for a batch. They roll out beautifully and bake up wonderfully flaky.
- Puff Pastry: For an extra luxurious, super flaky texture, puff pastry is a fantastic choice. Just make sure to thaw it according to package directions. It’ll give your pop tarts an almost croissant-like crispness.
- Homemade Pie Dough: If you’re feeling ambitious and love to bake from scratch, a classic shortcrust pastry recipe will give you the most control over flavor and texture. Just remember to keep it cold!
- Substitution Tip: For a gluten-free version, simply opt for your favorite store-bought gluten-free pie crust or puff pastry. The rest of the recipe remains the same!
The Fudge Filling
This is where the magic truly happens, transforming a simple pastry into a decadent dessert!
- Semi-Sweet Chocolate Chips: These are my preferred choice because they offer that classic rich chocolate flavor without being overly sweet. You want a good quality brand for the best melt and taste.
- Unsweetened Cocoa Powder: A crucial ingredient for deepening that chocolate intensity and giving it that authentic fudge-like quality. Don’t skip this!
- Granulated Sugar: Just enough to sweeten the filling without making it cloyingly sweet, letting the chocolate shine.
- Milk or Cream: A splash of whole milk or heavy cream helps create a smooth, luscious fudge consistency. Dairy-free milk alternatives like almond or oat milk work perfectly if you prefer.
- Unsalted Butter: A small amount adds richness and helps the filling set up beautifully.
- Vanilla Extract: A teaspoon enhances all those wonderful chocolate notes. A good quality pure vanilla extract makes a difference!
- Pinch of Salt: Never underestimate what a tiny pinch of salt can do to elevate chocolate flavors. It really makes them pop!
- Substitution Tip: Feel free to experiment with different chocolates! Dark chocolate chips will give a more intense, less sweet filling, while milk chocolate chips will yield a creamier, sweeter fudge. A tiny hint of espresso powder (about 1/4 teaspoon) can also be added to enhance the chocolate without making it taste like coffee.
The Chocolate Glaze
The perfect finishing touch, adding an extra layer of chocolatey goodness and that iconic Pop Tart look.
- Powdered Sugar (Confectioners’ Sugar): Essential for a smooth, lump-free glaze.
- Unsweetened Cocoa Powder: Again, for that chocolate flavor and lovely brown color.
- Milk or Cream: Use a tiny bit at a time to achieve your desired glaze consistency – thick enough to coat but thin enough to spread. Dairy-free options work here too.
- Vanilla Extract: Another little flavor boost.
- Sprinkles: Totally optional, but let’s be real, a pop tart isn’t a pop tart without some fun sprinkles!
Step-by-Step Instructions
Alright, let’s get down to business and assemble these decadent Chocolate Fudge Pop Tarts. It’s easier than you think, I promise!
- Prepare Your Fudge Filling: In a small saucepan, combine the semi-sweet chocolate chips, unsweetened cocoa powder, granulated sugar, milk (or cream), unsalted butter, and a tiny pinch of salt. Heat over medium-low heat, stirring constantly, until everything is melted and smooth. Remove from heat and stir in the vanilla extract. Let the filling cool down to room temperature. It should be thick enough to spread but not too stiff. You can even pop it in the fridge for 15-20 minutes if you need it to thicken up faster.
- Preheat Oven & Prep Baking Sheets: Preheat your oven to 375°F (190°C). Line two large baking sheets with parchment paper. This is key for easy cleanup and preventing sticking!
- Roll Out the Pastry: Carefully unroll your refrigerated pie crusts onto a lightly floured surface. If using homemade dough, roll it out to about 1/8-inch thickness. Using a sharp knife or a pizza cutter, cut each round into four equally sized rectangles. You’ll end up with 8 rectangles per package of crusts (so 16 total if using two packages). Trim the edges to make them neat, then use the scraps to re-roll and cut a few more if you like.
- Assemble the Pop Tarts: Place half of your pastry rectangles onto the prepared baking sheets. Leave a little space between them. Spoon about 1-2 tablespoons of the cooled chocolate fudge filling onto the center of each rectangle, leaving a good 1/2-inch border around the edges. Don’t overfill, or it might leak!
- Seal Them Up: Lightly brush the edges of the pastry rectangles (the unfilled border) with a little bit of water or a beaten egg wash. This helps them seal better. Carefully place the remaining pastry rectangles on top of the filled ones, aligning the edges. Gently press down around the filling to remove any air pockets, then use the tines of a fork to crimp all around the edges. This creates that classic pop tart look and helps seal in the filling.
- Vent and Bake: Using a small knife or a fork, poke a few holes in the top of each assembled pop tart. This allows steam to escape during baking, preventing them from puffing up too much. Bake for 15-20 minutes, or until the pastry is golden brown and cooked through. Keep an eye on them, as oven temperatures can vary!
- Cool: Let the pop tarts cool on the baking sheets for about 5 minutes before carefully transferring them to a wire rack to cool completely. This step is important before glazing.
- Make the Glaze: While the pop tarts are cooling, whisk together the powdered sugar, cocoa powder, vanilla extract, and 1 tablespoon of milk (or cream) in a small bowl. Add more milk a tiny bit at a time (about 1/2 teaspoon at a time) until you reach a smooth, spreadable glaze consistency. You want it thick enough to coat the spoon but thin enough to drizzle.
- Glaze and Decorate: Once the pop tarts are completely cool, spread a generous spoonful of the chocolate glaze over the top of each one. Immediately sprinkle with your favorite sprinkles before the glaze sets.
- Serve & Enjoy!: Let the glaze set for a few minutes, then dive into your homemade Chocolate Fudge Pop Tarts!
Tips & Suggestions
Making these Chocolate Fudge Pop Tarts is such a rewarding experience, and with a few little tricks up your sleeve, you can ensure they turn out absolutely perfect every time. Here are some of my favorite tips:
- Don’t Overfill! This is probably the most crucial tip. Resist the urge to pack too much fudge filling into your pastry. Leaving a good 1/2-inch border ensures you can properly seal the edges, preventing leaks during baking. A little filling goes a long way, especially when it’s as rich and delicious as this fudge.
- Chill Your Dough: If your store-bought pie crusts feel a little warm or sticky, or if you’re using homemade dough, a quick 15-20 minute chill in the fridge after cutting the rectangles can help prevent shrinking during baking and makes them easier to handle. You can even chill the assembled pop tarts for 10-15 minutes before baking for extra insurance against leaks and maintaining shape.
- Seal with Authority: When crimping the edges with a fork, press down firmly. You want to create a good seal that locks in that yummy fudge. Brushing the edges with a little water or egg wash before placing the top pastry layer helps create a strong bond.
- Even Baking is Key: Ovens can be tricky! To ensure your pop tarts bake evenly and achieve that beautiful golden-brown color, I suggest rotating your baking sheets halfway through the baking time. Keep an eye on them, as some ovens run hotter than others.
- Cool Completely Before Glazing: I know it’s tempting to glaze them right out of the oven, but patience is a virtue here! If your pop tarts are still warm, the glaze will melt and run off, leaving you with a sad, sticky mess. Let them cool completely on a wire rack first.
- Adjust Glaze Consistency: When making the chocolate glaze, add the milk a tiny bit at a time. It’s much easier to add more liquid than to thicken it up. You’re aiming for a consistency that’s thick enough to coat a spoon and spread nicely, but not so thick that it rips the pastry, and not so thin that it just runs right off.
- Flavor Variations:
- Espresso Boost: Add 1/4 teaspoon of instant espresso powder to the fudge filling or the glaze to deepen the chocolate flavor without a coffee taste.
- Mint Chocolate: A few drops of peppermint extract in the fudge filling or glaze can transform these into a delightful mint chocolate treat.
- Orange Zest: A little finely grated orange zest (about 1/2 teaspoon) stirred into the fudge filling offers a bright, sophisticated counterpoint to the rich chocolate.
- Different Toppings: Instead of sprinkles, try a dusting of powdered sugar, mini chocolate chips, or even a drizzle of caramel sauce!
Storage
You’ve put in the effort to make these amazing Chocolate Fudge Pop Tarts, so let’s make sure they stay fresh and delicious for as long as possible!
- Room Temperature: Once the glaze has fully set, you can store your homemade pop tarts in an airtight container at room temperature for up to 2-3 days. This is my preferred method for immediate enjoyment.
- Refrigeration: If you need them to last a bit longer, or if your kitchen is particularly warm, store them in an airtight container in the refrigerator for up to 5-7 days. The pastry might firm up slightly, but a quick re-warming will sort that out.
- Freezing Baked Pop Tarts: Yes, you can freeze them! Once completely cooled and the glaze is fully set, wrap each pop tart individually in plastic wrap, then place them in a freezer-safe bag or container. They can be frozen for up to 1 month. To enjoy, thaw them overnight in the refrigerator or warm them gently in a toaster oven.
- Freezing Unbaked Pop Tarts: This is a fantastic make-ahead option! After assembling and crimping (before baking and poking holes), place the unbaked pop tarts on a parchment-lined baking sheet and freeze until solid. Once frozen, transfer them to a freezer-safe bag or container. They can be stored for up to 1 month. When ready to bake, you can bake them from frozen (add about 5-10 minutes to the baking time), or thaw them in the refrigerator first, then bake as directed. Don’t forget to poke the vent holes before baking!
- Reheating: For the best texture, I recommend reheating your pop tarts in a toaster oven or a regular oven at 300°F (150°C) for 5-10 minutes, or until warmed through. This helps crisp up the pastry again. Microwaving is an option for speed, but it can sometimes make the pastry a bit soft.
Enjoy your homemade Chocolate Fudge Pop Tarts!
Final Thoughts
Well, there you have it! I truly hope you’re as excited as I am about these incredible homemade Chocolate Fudge Pop Tarts. There’s just something magical about recreating a beloved treat, especially when the result is this much more delicious and satisfying. From the tender, golden crust to the rich, gooey chocolate fudge filling, every bite is pure bliss. Trust me, making these Chocolate Fudge Pop Tarts from scratch is not just cooking; it’s crafting joy. They are absolutely a must-try for anyone craving a truly special, chocolatey indulgence. Go on, give them a whirl – your taste buds will thank you!
Homemade Chocolate Fudge Pop Tarts – Easy & Irresistible
- Total Time: 50 minutes
- Yield: 16 pop tarts 1x
Description
Indulge in the nostalgic delight of Homemade Chocolate Fudge Pop Tarts, featuring a buttery pastry crust and a rich chocolate fudge filling. These decadent treats are perfect for breakfast, dessert, or any time you crave something sweet.
Ingredients
- 2 packages of refrigerated pie crusts (4 individual crusts)
- Puff pastry (optional, thawed according to package directions)
- Homemade pie dough (optional)
- Semi-Sweet Chocolate Chips
- Unsweetened Cocoa Powder
- Granulated Sugar
- Milk or Cream
- Unsalted Butter
- Vanilla Extract
- Pinch of Salt
- Powdered Sugar (Confectioners' Sugar)
- Unsweetened Cocoa Powder (for glaze)
- Milk or Cream (for glaze)
- Vanilla Extract (for glaze)
- Sprinkles (optional)
Instructions
- Prepare Your Fudge Filling: In a small saucepan, combine the semi-sweet chocolate chips, unsweetened cocoa powder, granulated sugar, milk (or cream), unsalted butter, and a tiny pinch of salt. Heat over medium-low heat, stirring constantly, until everything is melted and smooth. Remove from heat and stir in the vanilla extract. Let the filling cool down to room temperature.
- Preheat Oven & Prep Baking Sheets: Preheat your oven to 375°F (190°C). Line two large baking sheets with parchment paper.
- Roll Out the Pastry: Carefully unroll your refrigerated pie crusts onto a lightly floured surface. If using homemade dough, roll it out to about 1/8-inch thickness. Cut each round into four equally sized rectangles.
- Assemble the Pop Tarts: Place half of your pastry rectangles onto the prepared baking sheets. Spoon about 1-2 tablespoons of the cooled chocolate fudge filling onto the center of each rectangle, leaving a good 1/2-inch border around the edges.
- Seal Them Up: Lightly brush the edges of the pastry rectangles with a little bit of water or a beaten egg wash. Carefully place the remaining pastry rectangles on top of the filled ones, aligning the edges. Gently press down around the filling to remove any air pockets, then use the tines of a fork to crimp all around the edges.
- Vent and Bake: Using a small knife or a fork, poke a few holes in the top of each assembled pop tart. Bake for 15-20 minutes, or until the pastry is golden brown and cooked through.
- Cool: Let the pop tarts cool on the baking sheets for about 5 minutes before transferring them to a wire rack to cool completely.
- Make the Glaze: While the pop tarts are cooling, whisk together the powdered sugar, cocoa powder, vanilla extract, and 1 tablespoon of milk (or cream) in a small bowl. Add more milk a tiny bit at a time until you reach a smooth, spreadable glaze consistency.
- Glaze and Decorate: Once the pop tarts are completely cool, spread a generous spoonful of the chocolate glaze over the top of each one. Immediately sprinkle with your favorite sprinkles before the glaze sets.
- Serve & Enjoy!: Let the glaze set for a few minutes, then dive into your homemade Chocolate Fudge Pop Tarts!
- Prep Time: 30 mins
- Cook Time: 20 mins
- Category: Dessert
- Method: Baking
- Cuisine: American
Nutrition
- Serving Size: 1 pop tart
- Calories: 250
- Sugar: 15 g
- Sodium: 150 mg
- Fat: 12 g
- Saturated Fat: 7 g
- Unsaturated Fat: 4 g
- Trans Fat: 0 g
- Carbohydrates: 34 g
- Fiber: 1 g
- Protein: 3 g
- Cholesterol: 20 mg
Keywords: Don't overfill the pop tarts to prevent leaks. Chill your dough if it's warm or sticky. Ensure even baking by rotating the baking sheets halfway through. Cool completely before glazing to avoid melting the glaze.