Huli Huli Chicken is more than just a meal; it’s an experience that transports your taste buds straight to the sunny shores of Hawaii with every succulent bite. I am absolutely thrilled to share the secrets behind this iconic dish, which has captivated palates worldwide with its irresistible combination of sweet, savory, and tangy flavors.
Originating in the mid-20th century, the name “Huli Huli” itself comes from the Hawaiian word for “turn, turn,” a direct nod to the traditional method of cooking chicken on a rotisserie, constantly basting it with its unique, flavorful sauce. This diligent turning ensures every piece is infused deeply with that signature marinade, resulting in a perfectly caramelized crust and incredibly juicy, tender meat.
People adore Huli Huli Chicken not only for its explosive taste but also for its remarkable versatility, making it the ultimate crowd-pleaser for backyard barbecues, festive family gatherings, or even a simple, delightful weeknight dinner. I believe you’ll find this recipe surprisingly easy to master, bringing a touch of authentic aloha right into your own kitchen.

Ingredients:
-
For the Irresistible Huli Huli Marinade:
- 1 ½ cups (360ml) pineapple juice: This is the cornerstone of our Huli Huli Chicken marinade. Pineapple juice not only infuses a tropical sweetness but also contains bromelain, a natural enzyme that helps tenderize the chicken, ensuring every bite is incredibly juicy and succulent. Don’t skimp on this!
- ½ cup (120ml) low-sodium soy sauce: We opt for low-sodium to control the saltiness, allowing the other flavors to shine through without overpowering them. It brings a crucial umami depth and savory balance to the sweet notes.
- ½ cup (100g) packed light brown sugar: This provides that signature caramel sweetness that becomes wonderfully sticky and caramelized on the grill. It’s essential for achieving that beautiful, glossy crust on your Huli Huli Chicken.
- ¼ cup (60ml) rice vinegar: A touch of acidity is vital to cut through the sweetness and richness of the other ingredients, adding a bright tang that elevates the entire flavor profile.
- 2 tablespoons freshly grated ginger: Fresh ginger is non-negotiable for its pungent, warm, and aromatic zing. It provides a delightful counterpoint to the sweetness and truly brings an authentic Asian-inspired flavor to our Huli Huli Chicken.
- 4 cloves garlic, minced: Garlic adds an indispensable aromatic foundation. Freshly minced garlic delivers the best punch and aroma, so please avoid garlic powder if you can!
- 2 tablespoons ketchup: While it might seem unconventional, ketchup contributes a subtle tang, a hint of sweetness, and a lovely body to the marinade, helping it cling beautifully to the chicken during cooking.
- 1 tablespoon toasted sesame oil: Just a touch of this powerful oil adds a wonderfully nutty, earthy aroma that deeply enhances the overall depth of flavor in our Huli Huli Chicken.
- 1 teaspoon sriracha or red pepper flakes (optional, for a kick): If you like a little heat, this is your chance to add it! It’s entirely optional but can provide a fantastic subtle warmth that complements the sweet and savory notes without overpowering them.
-
For the Huli Huli Chicken:
- 3-4 lbs (1.4-1.8kg) chicken: You have options here! You can use a whole chicken, spatchcocked (butterflied) for even cooking, or go for bone-in, skin-on chicken pieces like thighs, drumsticks, or quarters. Bone-in pieces tend to stay juicier, and the skin gets wonderfully crispy. For a quicker cook, boneless, skinless thighs work well too, but adjust cooking times accordingly. Whichever cut you choose, Huli Huli Chicken is guaranteed to be a hit!
- 1 teaspoon salt: For seasoning the chicken directly before marinating.
- ½ teaspoon freshly ground black pepper: For seasoning the chicken.
-
Optional Garnishes:
- Toasted sesame seeds: For a beautiful presentation and an extra layer of nutty crunch.
- Chopped green onions (scallions): Adds a fresh, bright, and slightly pungent finish.
Preparing the Signature Huli Huli Chicken Marinade
The heart and soul of this incredible dish lie in its vibrant, sweet, and savory marinade. This is where the magic truly begins, transforming simple chicken into an unforgettable Huli Huli Chicken experience.
- Gather Your Ingredients: Take out a large mixing bowl or a sturdy pitcher. Having all your marinade ingredients measured and ready to go will make this process smooth and efficient. It’s always good practice to ensure your ginger is peeled and freshly grated, and your garlic is finely minced.
- Combine Wet Ingredients First: Pour the pineapple juice, low-sodium soy sauce, rice vinegar, and ketchup into your bowl. Give them a quick stir with a whisk to combine their base flavors evenly.
- Add the Sweetness and Aromatics: Now, add the packed light brown sugar. Make sure it’s packed tightly into your measuring cup for the correct consistency. Follow with the freshly grated ginger, minced garlic, and the toasted sesame oil. If you’re opting for a little heat, now is the time to add your sriracha or red pepper flakes.
- Whisk Until Fully Combined: With a whisk, vigorously stir all the ingredients together. Continue whisking for a good minute or two, ensuring that the brown sugar completely dissolves into the liquid. You want a homogeneous mixture, where all the flavors are perfectly melded. This step is crucial for an even flavor distribution throughout your Huli Huli Chicken. Taste a tiny bit and adjust if necessary – perhaps a touch more vinegar for tang, or sriracha for heat, though I find this ratio to be spot on!
- Reserve for Basting: Once your marinade is perfectly mixed, pour about ¾ cup (180ml) of it into a separate small saucepan or heatproof bowl. This reserved portion will be used later for basting the chicken as it cooks, giving your Huli Huli Chicken that fantastic glossy finish and reinforcing the flavors. Do not use this reserved marinade for basting until it has been brought to a rolling boil for at least 1-2 minutes to ensure food safety, as it will not have come into contact with raw chicken. Set aside the main bowl of marinade for the chicken.
Preparing the Chicken for Marination
Proper chicken preparation ensures maximum flavor absorption and even cooking. This step is key to making sure your Huli Huli Chicken is tender and flavorful from the inside out.
- Prepare the Chicken: If using a whole chicken, I highly recommend spatchcocking it (butterflying it by removing the backbone) for faster and more even cooking on the grill. If using pieces, ensure they are relatively similar in size for consistent cooking. Pat all chicken pieces thoroughly dry with paper towels. Removing excess moisture is vital, as it allows the marinade to adhere better and promotes a crispier skin later on.
- Season Lightly: Lightly sprinkle both sides of your chicken pieces with salt and freshly ground black pepper. Even though the marinade is flavorful, this initial seasoning enhances the chicken’s natural taste and helps to draw out some moisture, further aiding in marination.
- Marinate the Chicken: Place the prepared chicken pieces into a large, non-reactive dish (like a glass baking dish or a ceramic bowl) or a sturdy, gallon-sized resealable plastic bag. Pour the remaining Huli Huli marinade (the larger portion that hasn’t touched the reserved basting sauce) over the chicken, ensuring every piece is well coated. If using a dish, turn the chicken several times to ensure even coverage. If using a bag, press out most of the air and seal, then gently massage the bag to distribute the marinade.
- Refrigerate and Marinate: Cover the dish or place the sealed bag in the refrigerator. Marinate for at least 4 hours, but for the most incredibly flavorful Huli Huli Chicken, I strongly recommend marinating overnight (8-12 hours). You can even go up to 24 hours for a deeply infused flavor. The longer the marination, the more pronounced the Huli Huli Chicken flavor will be, and the more tender the chicken becomes thanks to the pineapple juice. If marinating for more than 4 hours, flip the chicken or massage the bag periodically to ensure all surfaces get equal time in the marinade.
- Bring to Room Temperature (Optional but Recommended): About 30-45 minutes before you plan to cook, remove the chicken from the refrigerator. Allowing it to come closer to room temperature helps it cook more evenly, reducing the risk of a raw center and an overcooked exterior. Discard any remaining marinade that has been in contact with the raw chicken.
Grilling Your Huli Huli Chicken to Perfection
Grilling is the traditional method for Huli Huli Chicken, imparting a wonderful smoky flavor and developing that irresistible caramelized crust. This is where the “Huli Huli” (which means “turn turn” in Hawaiian) really comes to life!
- Preheat Your Grill: Set up your grill for two-zone cooking (if possible). This means having one side with direct, medium-high heat (around 400-450°F / 200-230°C) and the other side with indirect, medium-low heat. If you don’t have two zones, preheat to a consistent medium-high. Clean your grill grates thoroughly with a wire brush and then lightly oil them to prevent sticking.
- Prepare the Basting Sauce: While the grill heats, take your reserved ¾ cup of Huli Huli marinade and pour it into a small saucepan. Bring it to a rolling boil over medium-high heat on your stovetop. Let it boil vigorously for 1-2 minutes to ensure it is completely safe for basting. Reduce the heat to low to keep it warm, or transfer it to a heatproof bowl next to the grill. This is your secret weapon for the ultimate Huli Huli Chicken glaze!
- Initial Sear (Direct Heat): Place the marinated chicken pieces skin-side down (if applicable) over the direct heat zone. Cook for 3-5 minutes per side, just long enough to get a nice sear and some light char marks. Don’t worry about cooking it through at this stage; we’re building flavor and color.
- Move to Indirect Heat and Cook Slowly: Once seared, move the chicken over to the indirect heat zone of your grill. Close the lid and cook for about 20-40 minutes, depending on the size and cut of your chicken. This slow cooking allows the chicken to cook through gently without burning the exterior.
- The “Huli Huli” Turns and Basting Begins: Every 5-7 minutes, open the lid and turn (Huli Huli!) the chicken pieces. After the first 15-20 minutes of indirect cooking, start basting generously with your boiled Huli Huli sauce. Continue turning and basting, ensuring all sides get a beautiful sticky, caramelized coating. You’ll notice the sauce thickening and turning a deep, rich mahogany color as it cooks onto the chicken. This constant turning and basting is what makes Huli Huli Chicken so distinctive and flavorful!
- Check for Doneness: Continue cooking until the internal temperature of the thickest part of the chicken reaches 165°F (74°C) when measured with an instant-read meat thermometer. For bone-in pieces, ensure the thermometer isn’t touching the bone. The skin should be deeply caramelized and slightly crispy.
- Final Caramelization (Optional): For an extra crispy and intensely caramelized finish, move the chicken back over to direct heat for the last 2-3 minutes, turning frequently and basting one last time. Watch carefully to prevent burning.
- Rest the Chicken: Once cooked, transfer the Huli Huli Chicken to a clean cutting board or serving platter. Loosely tent it with foil and let it rest for 5-10 minutes. Resting is critical! It allows the juices to redistribute throughout the meat, ensuring every bite is incredibly tender and moist.
Oven Roasting and Broiling Alternative for Huli Huli Chicken
No grill? No problem! You can still enjoy fantastic Huli Huli Chicken using your oven, achieving a similar sticky, sweet, and savory goodness with a beautiful caramelized exterior.
- Preheat Oven and Prepare Pan: Preheat your oven to 400°F (200°C). Line a large baking sheet with foil for easy cleanup, then place an oven-safe wire rack on top of the foil-lined pan. This setup allows air to circulate around the chicken, promoting even cooking and crispy skin.
- Prepare Basting Sauce: Just like with grilling, bring your reserved ¾ cup of Huli Huli marinade to a rolling boil in a small saucepan for 1-2 minutes to make it safe for basting. Keep it warm.
- Arrange Chicken on Rack: Place the marinated Huli Huli Chicken pieces (skin-side up, if applicable) in a single layer on the wire rack, ensuring there’s a little space between each piece for optimal air circulation. Discard any remaining marinade that touched raw chicken.
- Roast and Baste: Roast the chicken for 20 minutes. After 20 minutes, open the oven, and generously baste the chicken with your boiled Huli Huli sauce. Return to the oven and continue roasting, basting every 10-15 minutes, until the chicken is cooked through and reaches an internal temperature of 165°F (74°C). The total roasting time will vary depending on the size of your chicken pieces – typically 30-50 minutes for bone-in pieces, less for boneless.
- Broil for Caramelization: Once the chicken is cooked through, for that irresistible crispy, sticky, and deeply caramelized Huli Huli Chicken crust, switch your oven to the broiler setting (high). Position the oven rack about 6-8 inches from the broiler element. Broil for 3-5 minutes, watching very closely to prevent burning. You want a beautiful, glossy, dark brown exterior. Flip and broil for another 2-3 minutes if you want more char on the underside, basting lightly one last time if desired before the final minute.
- Rest and Serve: Carefully remove the pan from the oven. Transfer the Huli Huli Chicken to a clean cutting board or serving platter. Tent loosely with foil and let it rest for 5-10 minutes to allow the juices to redistribute, ensuring maximum tenderness and flavor.
Serving Your Delicious Huli Huli Chicken
Now for the best part – enjoying the fruits of your labor! Your Huli Huli Chicken is ready to be devoured.
- Garnish (Optional): Before serving, sprinkle your Huli Huli Chicken with toasted sesame seeds and chopped green onions for an appealing presentation and an added layer of flavor and texture.
- Slice and Serve: If you’ve cooked a spatchcocked whole chicken, carve it into serving pieces. For individual pieces, simply arrange them attractively on a platter.
- Pair with Hawaiian Staples: Huli Huli Chicken pairs wonderfully with classic Hawaiian-inspired sides. Think a scoop of fluffy white rice, a refreshing macaroni salad, or even grilled pineapple slices (which caramelize beautifully and complement the chicken’s flavors). A simple green salad or some steamed vegetables would also make a perfect accompaniment to complete your meal. However you serve it, your homemade Huli Huli Chicken will be a showstopper!

Conclusion:
So, there you have it – my absolute favorite recipe for a dish that truly transports your taste buds straight to the sun-drenched beaches of Hawaii. We’ve journeyed through the simple, yet incredibly rewarding, steps of creating a culinary masterpiece, and I truly hope you’re as excited as I am about bringing these vibrant flavors into your kitchen. This isn’t just any chicken dish; it’s an experience, a celebration of tropical zest and savory goodness. The magic of Huli Huli Chicken lies in its incredible, unforgettable balance of flavors. Imagine the sweet tang of pineapple, the deep umami of soy, the aromatic kick of fresh ginger, and the comforting warmth of garlic, all expertly blended into a sticky, glorious glaze. This marinade doesn’t just coat the chicken; it infuses it, caramelizing to perfection as it cooks, creating those irresistible charred edges and tender, juicy meat.
It’s a symphony for the senses, a dish that consistently receives rave reviews and prompts delighted groans of satisfaction every single time I serve it, whether at a casual backyard barbecue, a relaxed family dinner, or even a more festive gathering with friends. I’ve made this countless times over the years, and without fail, it disappears from the platter faster than I can bring it out to the table. It’s incredibly versatile, surprisingly easy to prepare even for novice cooks, and consistently delivers an unforgettable taste that will have everyone asking for the recipe and begging for seconds. Trust me, once you experience that glorious, sticky, caramelized glaze, infused with those incredible tropical notes and perfectly coating succulent chicken, you’ll understand why this Huli Huli Chicken recipe is an absolute game-changer in your kitchen repertoire. It’s more than just a meal; it’s an invitation to savor the moment, to share joy through food, and to bring a little bit of aloha into your home.
Elevate Your Meal: Serving Suggestions to Complete the Experience
Now, let’s talk about making this meal a complete showstopper. While the Huli Huli Chicken is undoubtedly the star of the plate, pairing it with the right accompaniments elevates the entire dining experience from simply delicious to truly extraordinary. My personal go-to side is always a generous serving of fluffy, perfectly cooked white rice – its neutral flavor and soft texture make it the ideal canvas for soaking up every last drop of that glorious, flavorful extra sauce. For those who crave a fresher, lighter contrast, a crisp, vibrant green salad tossed with a bright, citrusy vinaigrette is a fantastic choice, cutting through the richness of the chicken beautifully and adding a delightful crunch. And if you want to lean fully into the Hawaiian vibe and amplify the tropical theme, a scoop of creamy, traditional macaroni salad or a colorful, refreshing pineapple coleslaw would be absolutely divine, complementing the chicken’s flavors without overpowering them.
Don’t forget the power of grilled vegetables! Skewered bell peppers, tender asparagus spears, sweet red onions, or even thick slices of grilled pineapple (which caramelize beautifully and enhance the existing fruit notes in the marinade) make wonderful, healthy, and visually appealing additions to your plate. They add texture, color, and another layer of flavor that works harmoniously with the chicken. For those who enjoy a bit of a spicy kick, a sprinkle of red pepper flakes over the finished chicken or a side of homemade sriracha mayo can add an exciting and welcome dimension, creating a lovely contrast to the sweetness. To complete the island experience, consider serving your feast with a refreshing homemade iced tea, a sparkling lemonade, or even a tropical fruit punch. This dish isn’t just about the main course; it’s about crafting a full, delightful culinary journey that tantalizes all your senses and leaves a lasting impression.
Unleash Your Creativity: Variations and Your Culinary Adventure Awaits!
But the fun and creativity don’t stop there! One of the things I love most about this particular recipe for Huli Huli Chicken is its incredible adaptability and how easily you can make it your own. If you’re short on time but still craving those incredible, signature flavors, consider making Huli Huli Chicken skewers – simply thread chunks of chicken, along with bell peppers and pineapple pieces, onto skewers and grill them for a quicker cooking time and a fun, hand-held option. You can also experiment with different cuts of chicken; while thighs are fantastic for their inherent juiciness and rich flavor, chicken breasts work wonderfully too, especially if you marinate them for a little longer to ensure maximum flavor penetration and tenderness. Not a fan of grilling, or perhaps the weather isn’t cooperating? No problem at all! This chicken bakes beautifully in the oven, achieving a similar sticky glaze, or you can even pan-sear it to get a nice crust and then finish it off in the oven for even cooking.
For an even deeper, more complex flavor profile, let your chicken marinate overnight – the longer it bathes in that exquisite sauce, the more intense and delicious it will become, truly infusing every fiber of the meat. And please, don’t be afraid to adjust the sweetness or spice level to your personal preference. Add a little more brown sugar if you have a pronounced sweet tooth, or a dash more fresh ginger and minced garlic for an extra zing and aromatic punch. This recipe is a fantastic foundation, a flavorful canvas for your culinary creativity and experimentation. So, please, don’t just read about this incredible dish – go make it! I promise you, with every fiber of my being, that you won’t regret dedicating the time to create this truly special meal. Gather your ingredients, put on some cheerful island tunes, and let the intoxicating aroma of this fantastic Huli Huli Chicken fill your kitchen, transforming it into your own little slice of paradise. It’s a culinary journey worth taking, a taste sensation waiting to be discovered and savored.
Once you’ve created your own Hawaiian feast and indulged in the magic of this chicken, I would absolutely love to hear about your experience. Did you add a unique twist that became a new favorite? What were your go-to side dishes that perfectly complemented the flavors? Share your photos, your culinary triumphs, and any clever tips or discoveries you made along the way in the comments section below. Your feedback, your stories, and your shared passion for delicious food are incredibly invaluable to me, and they truly inspire me to keep exploring and sharing these beloved recipes with all of you. Happy cooking, my friends, and enjoy every single, glorious, mouthwatering bite!
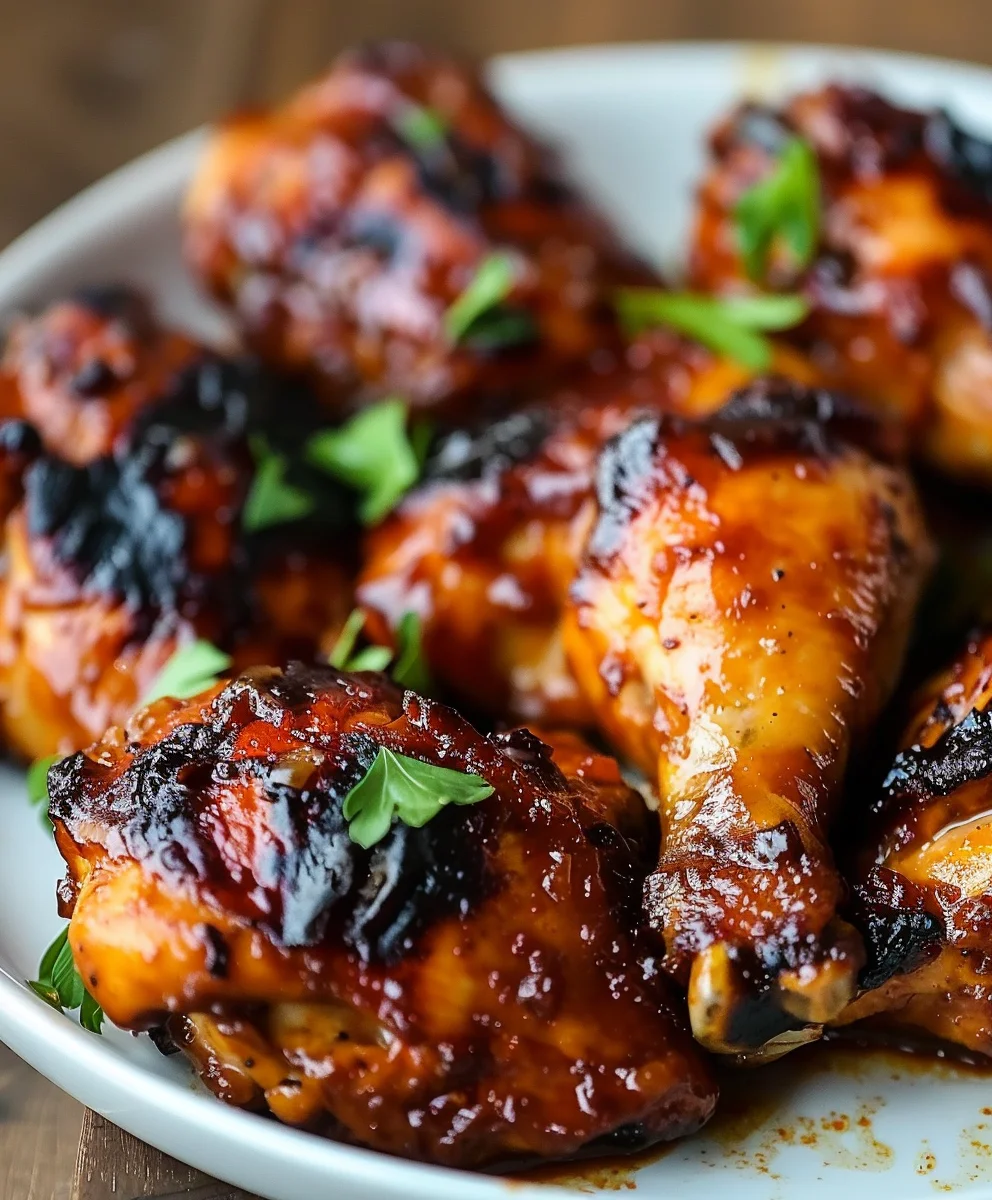
Huli Huli Chicken Recipe: Sweet, Smoky & Easy BBQ!
Huli Huli Chicken is a Hawaiian classic, known for its irresistible sweet, savory, and tangy flavors. The name ‘Huli Huli’ means ‘turn, turn,’ referring to the traditional rotisserie method that creates a perfectly caramelized crust and juicy, tender meat. This versatile dish is perfect for barbecues or weeknight dinners, bringing authentic aloha to your kitchen.
Ingredients
-
1 ½ cups (360ml) pineapple juice
-
½ cup (120ml) low-sodium soy sauce
-
½ cup (100g) packed light brown sugar
-
¼ cup (60ml) rice vinegar
-
2 tablespoons freshly grated ginger
-
4 cloves garlic, minced
-
2 tablespoons ketchup
-
1 tablespoon toasted sesame oil
-
1 teaspoon sriracha or red pepper flakes (optional)
-
3-4 lbs (1.4-1.8kg) chicken pieces (whole, spatchcocked, or bone-in, skin-on thighs/drumsticks)
-
1 teaspoon salt
-
½ teaspoon freshly ground black pepper
-
Toasted sesame seeds, for garnish (optional)
-
Chopped green onions (scallions), for garnish (optional)
Instructions
-
Step 1
{‘@type’: ‘HowToSection’, ‘name’: ‘Preparing the Signature Huli Huli Chicken Marinade’, ‘itemListElement’: [{‘@type’: ‘HowToStep’, ‘text’: ‘1. **Prepare Marinade:** In a large bowl, whisk together pineapple juice, low-sodium soy sauce, brown sugar, rice vinegar, ginger, garlic, ketchup, sesame oil, and sriracha (if using) until sugar dissolves.’}, {‘@type’: ‘HowToStep’, ‘text’: ‘2. **Reserve Basting Sauce:** Pour ¾ cup (180ml) of the marinade into a small saucepan. Bring to a rolling boil for 1-2 minutes for food safety, then keep warm or set aside for basting. Discard any marinade that has been in contact with raw chicken.’}]} -
Step 2
{‘@type’: ‘HowToSection’, ‘name’: ‘Preparing the Chicken for Marination’, ‘itemListElement’: [{‘@type’: ‘HowToStep’, ‘text’: ‘3. **Prepare Chicken:** Pat chicken pieces thoroughly dry. Season lightly with salt and freshly ground black pepper. Place chicken in a large non-reactive dish or resealable bag.’}, {‘@type’: ‘HowToStep’, ‘text’: ‘4. **Marinate Chicken:** Pour remaining (unboiled) marinade over chicken, ensuring all pieces are well coated. Refrigerate for at least 4 hours, ideally overnight (8-12 hours) for maximum flavor.’}, {‘@type’: ‘HowToStep’, ‘text’: ‘5. **Room Temperature (Optional):** About 30-45 minutes before cooking, remove chicken from refrigerator. Discard any remaining raw marinade.’}]} -
Step 3
{‘@type’: ‘HowToSection’, ‘name’: ‘Grilling Your Huli Huli Chicken to Perfection (Method 1)’, ‘itemListElement’: [{‘@type’: ‘HowToStep’, ‘text’: ‘6. **Preheat Grill:** Set up grill for two-zone cooking (direct medium-high heat: 400-450°F / 200-230°C; indirect medium-low heat). Clean and lightly oil grates.’}, {‘@type’: ‘HowToStep’, ‘text’: ‘7. **Grill Chicken:** Place chicken skin-side down over direct heat; sear for 3-5 minutes per side. Move to indirect heat, close lid, and cook for 20-40 minutes, turning every 5-7 minutes.’}, {‘@type’: ‘HowToStep’, ‘text’: ‘8. **Baste & Finish:** After 15-20 minutes of indirect cooking, start basting generously with the boiled reserved sauce, turning constantly to ensure even coating and caramelization. Continue cooking, turning and basting, until chicken reaches an internal temperature of 165°F (74°C). For an extra crispy finish, move to direct heat for the final 2-3 minutes, turning and basting lightly.’}, {‘@type’: ‘HowToStep’, ‘text’: ‘9. **Rest:** Transfer cooked Huli Huli Chicken to a clean cutting board or serving platter, tent loosely with foil, and let rest for 5-10 minutes before serving.’}]} -
Step 4
{‘@type’: ‘HowToSection’, ‘name’: ‘Oven Roasting and Broiling Alternative for Huli Huli Chicken (Method 2)’, ‘itemListElement’: [{‘@type’: ‘HowToStep’, ‘text’: ‘6. **Preheat Oven:** Preheat oven to 400°F (200°C). Line a large baking sheet with foil and place an oven-safe wire rack on top.’}, {‘@type’: ‘HowToStep’, ‘text’: ‘7. **Roast Chicken:** Arrange marinated chicken pieces (skin-side up) in a single layer on the wire rack. Roast for 20 minutes.’}, {‘@type’: ‘HowToStep’, ‘text’: ‘8. **Baste & Finish:** Open oven and generously baste the chicken with the boiled reserved Huli Huli sauce. Continue roasting, basting every 10-15 minutes, until chicken is cooked through and reaches an internal temperature of 165°F (74°C) (total roasting time typically 30-50 minutes).’}, {‘@type’: ‘HowToStep’, ‘text’: ‘9. **Broil for Caramelization:** For a crispy, caramelized crust, switch oven to broiler setting (high). Position rack 6-8 inches from element. Broil for 3-5 minutes, watching very closely to prevent burning.’}, {‘@type’: ‘HowToStep’, ‘text’: ’10. **Rest:** Carefully remove pan from oven. Transfer Huli Huli Chicken to a clean cutting board or serving platter, tent loosely with foil, and let rest for 5-10 minutes.’}]} -
Step 5
{‘@type’: ‘HowToSection’, ‘name’: ‘Serving Your Delicious Huli Huli Chicken’, ‘itemListElement’: [{‘@type’: ‘HowToStep’, ‘text’: ’11. **Serve:** Garnish with toasted sesame seeds and chopped green onions (optional). Serve with classic Hawaiian-inspired sides like white rice, macaroni salad, or grilled pineapple.’}]}
Important Information
Nutrition Facts (Per Serving)
It is important to consider this information as approximate and not to use it as definitive health advice.
Allergy Information
Please check ingredients for potential allergens and consult a health professional if in doubt.