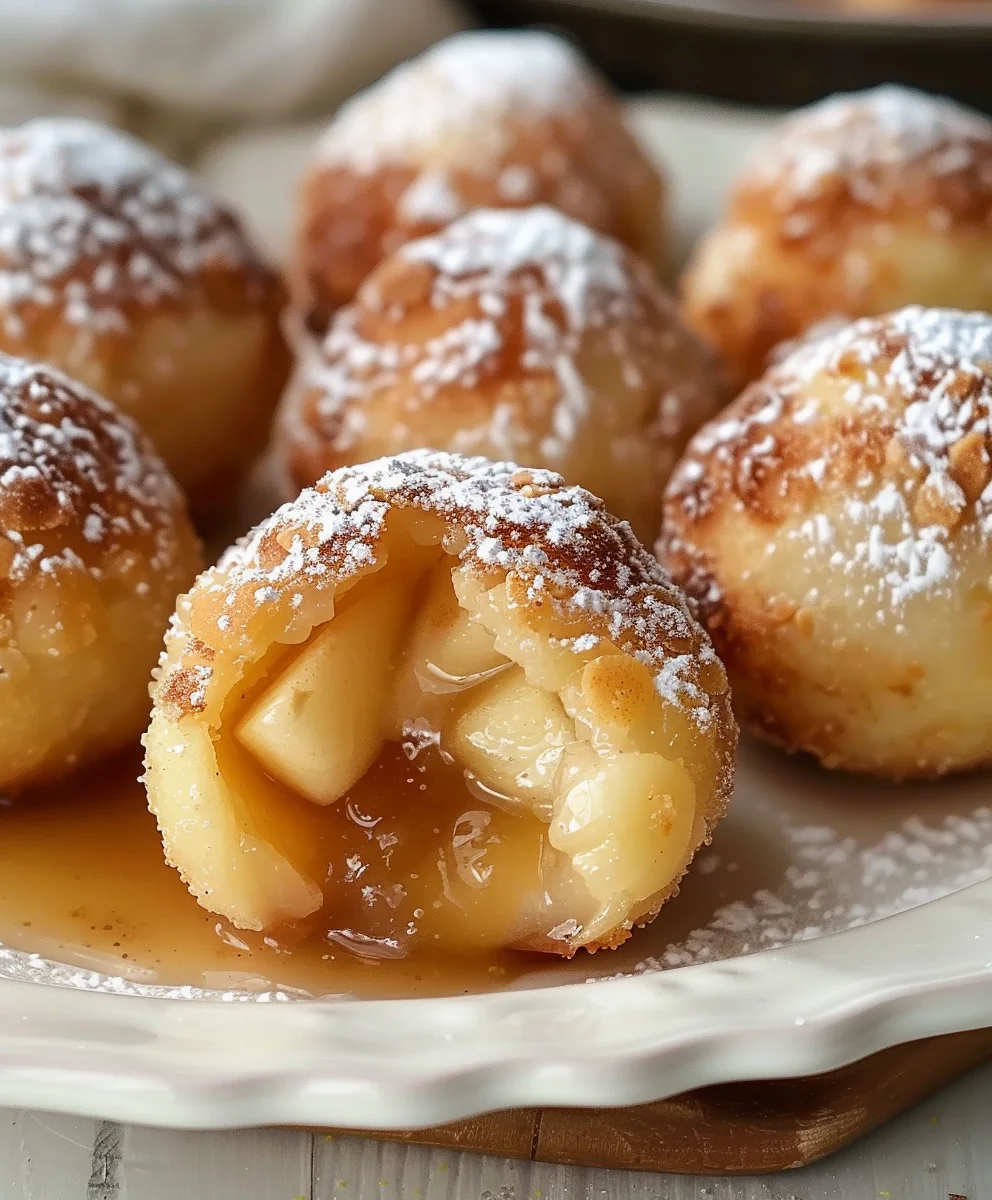
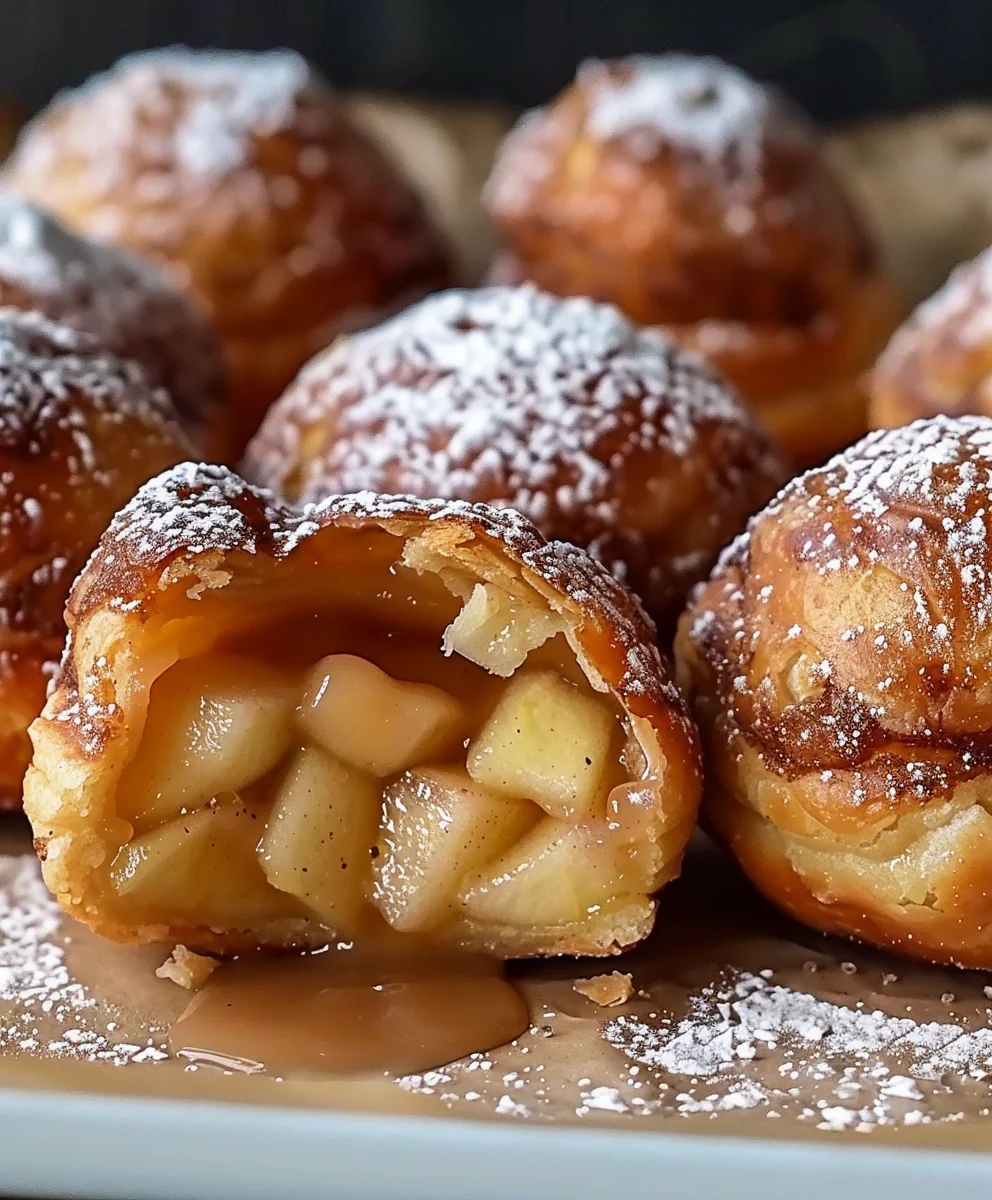
Apple Pie Bombs are truly a revelation for anyone who adores the classic dessert but craves a modern, convenient twist. These delightful, individual servings encapsulate all the comforting flavors of a traditional apple pie in a wonderfully portable package. While the concept of apple pie itself carries a rich American heritage, symbolizing warmth and home, these ‘bombs’ represent an innovative evolution, offering a less daunting baking experience without compromising on that beloved taste. I find myself constantly recommending these because of their irresistible combination of tender, spiced apple filling enveloped in a golden, flaky crust, often with a decadent glaze. They are perfectly sized for a quick dessert, a delightful breakfast treat, or an impressive addition to any potluck.
Experience the Joy of Each Bite
Imagine biting into a warm, gooey center bursting with sweet apple and cinnamon, encased in a perfectly crisp exterior. That’s the magic these Apple Pie Bombs deliver. Preparing these is surprisingly straightforward, making them an accessible baking project for enthusiasts of all skill levels. We are thrilled for you to embark on this culinary journey with us, creating treats that are sure to become a cherished favorite in your home and impress anyone lucky enough to try them.
Ingredients:
- For the Apple Pie Bombs:
- 2 cans (8 oz each) refrigerated crescent roll dough (such as Pillsbury Crescent Rolls)
- 3 medium-sized baking apples (about 1.5 lbs), I highly recommend Granny Smith or Honeycrisp for their texture and tartness
- ½ cup packed light brown sugar
- 1 teaspoon ground cinnamon
- ¼ teaspoon ground nutmeg (optional, but adds a lovely warmth!)
- 2 tablespoons unsalted butter
- 1 tablespoon fresh lemon juice
- 1 teaspoon pure vanilla extract
- Pinch of salt
- Additional melted butter for brushing (about 2-3 tablespoons)
- Additional cinnamon sugar for topping (about 2 tablespoons sugar mixed with ½ teaspoon cinnamon)
- For the Vanilla Glaze (Optional, but highly recommended for that extra touch!):
- 1 cup powdered sugar (confectioners’ sugar)
- 2 tablespoons milk (whole milk or half-and-half works best for richness)
- ½ teaspoon pure vanilla extract
- Pinch of salt
Prepare the Apple Filling:
- Prepare the Apples: First things first, let’s get those beautiful apples ready. Grab your three medium-sized baking apples. I usually go for Granny Smith because their tartness beautifully balances the sweetness of the other ingredients, and they hold their shape wonderfully during cooking. Honeycrisp are also a fantastic option if you prefer a slightly sweeter and crispier apple. Carefully peel each apple, then core them. Once peeled and cored, I like to finely dice them into small, uniform pieces. Think about quarter-inch cubes – no larger than that. Uniformity is key here, as it ensures they cook evenly and fit snugly into our “bombs” without creating awkward bulges. Uneven pieces can lead to some being too mushy and others still too firm, and we want perfection in every bite!
- Sauté the Apples: Now, let’s bring some warmth to our kitchen. In a medium-sized skillet or a non-stick frying pan, melt 2 tablespoons of unsalted butter over medium heat. Once the butter is glistening and fully melted, add your finely diced apples to the pan. Sauté the apples for about 3 to 5 minutes, stirring occasionally. We’re not looking to fully cook them at this stage; rather, we want to soften them slightly and begin to release their natural sugars and aromas. You’ll notice them becoming a bit more translucent around the edges.
- Flavor the Filling: It’s time to infuse these apples with those classic apple pie flavors! Reduce the heat to medium-low. To the apples, add ½ cup of packed light brown sugar, 1 teaspoon of ground cinnamon, and if you’re using it, ¼ teaspoon of ground nutmeg. Don’t forget that crucial pinch of salt – it genuinely enhances all the sweet flavors. Finally, pour in 1 tablespoon of fresh lemon juice. The lemon juice is your secret weapon here; it not only brightens the flavor profile, cutting through the sweetness, but also prevents the apples from browning excessively, keeping their lovely light color. Stir everything together until the apples are thoroughly coated in the fragrant spice and sugar mixture.
- Simmer to Perfection: Continue to simmer the apple mixture over medium-low heat for another 5 to 7 minutes. Stir frequently to prevent sticking and ensure even cooking. The goal here is to allow the apples to become tender but still retain a slight bite – we don’t want apple mush! The sugar will melt and combine with the apple juices, creating a wonderfully thick, syrupy sauce that will be absolutely divine inside our bombs. Once the apples are tender and the sauce has thickened, remove the skillet from the heat. Stir in 1 teaspoon of pure vanilla extract – this adds another layer of aromatic warmth that truly elevates the filling. Let the apple filling cool completely before you move on to the next step. Cooling is essential; hot filling will melt your crescent dough, making assembly a messy and frustrating endeavor. I often transfer it to a separate bowl and pop it in the fridge for 15-20 minutes to speed up this process.
Assemble the Apple Pie Bombs:
- Preheat and Prep: Before you even think about unwrapping that dough, preheat your oven to 375°F (190°C). This ensures your oven is perfectly heated and ready to go the moment your bombs are assembled, which is crucial for even baking. Line a large baking sheet with parchment paper. This simple step is a game-changer – it prevents sticking, makes cleanup a breeze, and ensures the bottoms of your bombs get perfectly golden brown. Also, take a moment to melt about 2-3 tablespoons of unsalted butter in a small bowl for brushing later, and in another small bowl, mix together your additional cinnamon sugar for topping (2 tablespoons sugar with ½ teaspoon cinnamon). Having everything ready makes the assembly process smooth and enjoyable.
- Unroll the Dough: Now for the fun part! Carefully unroll one can of refrigerated crescent roll dough onto a clean, dry surface, such as a large cutting board or your countertop. If you’re using dough that comes in a single sheet (not pre-perforated triangles), use a pizza cutter or a sharp knife to cut it into 8 equal triangles. If you’re using the standard pre-perforated kind, simply separate the dough along the perforations into 8 individual triangles. Repeat this process with the second can of dough, so you should have 16 triangles in total. Try to keep the dough as cold as possible; warm dough is much harder to work with and more prone to tearing.
- Fill the Triangles: This is where our “bombs” truly come to life. Take one crescent dough triangle. Using a small spoon, place approximately 1 to 1.5 tablespoons of your cooled apple filling onto the wider end of the dough triangle. Don’t overfill, no matter how tempting it is! Overfilling can make sealing difficult and may cause the bombs to burst open during baking, leading to a sticky, sugary mess on your baking sheet. We’re aiming for that perfect balance of dough and filling in every bite.
- Roll and Seal: Once the filling is in place, gently fold the wider end of the dough over the filling. Now, carefully roll the dough towards the narrower, pointed end of the triangle, just as you would roll a regular crescent roll. Once rolled, this is the most critical step for success: sealing! Take your fingers and pinch the seams of the dough together, especially at the sides and where the dough overlaps. You want to completely enclose the apple filling, forming a neat, compact “bomb.” Make sure there are no visible gaps or holes where the filling could escape. If your dough tears slightly, gently pinch it back together. A small tear isn’t the end of the world, but try to avoid large ones to keep the filling secure and moist inside.
- Arrange on Baking Sheet: As you finish assembling each apple pie bomb, place it seam-side down on your prepared parchment-lined baking sheet. Make sure to leave a little space between each bomb, about an inch or so, to allow for even baking and proper air circulation. Continue this process until all 16 dough triangles are filled, rolled, and sealed, forming neat little apple pie bombs on your baking sheet. Take a moment to admire your handiwork – they should look like plump, ready-to-burst packages of deliciousness!
Baking the Apple Pie Bombs:
- Brush and Sprinkle: Before they go into the oven, let’s give them that irresistible golden crust and extra flavor. Take your small bowl of melted unsalted butter and, using a pastry brush, lightly brush the tops and sides of each apple pie bomb with the melted butter. This not only helps them brown beautifully but also acts as a “glue” for our next step. Immediately after brushing with butter, sprinkle a generous amount of your cinnamon sugar mixture evenly over the tops of all the bombs. Don’t be shy here; that cinnamon sugar topping creates a delightful crunch and an explosion of classic apple pie flavor with every bite. The butter ensures the cinnamon sugar adheres perfectly, creating a beautiful caramelized crust as they bake.
- Bake to Golden Perfection: Carefully transfer the baking sheet with your beautifully prepared apple pie bombs into your preheated 375°F (190°C) oven. Bake for approximately 12 to 15 minutes. Baking time can vary slightly depending on your oven, so I always recommend keeping a close eye on them, especially during the last few minutes. You’ll know they’re done when the crescent roll dough is puffed up, golden brown, and absolutely irresistible looking. The cinnamon sugar on top should be caramelized and glistening. The intoxicating aroma that will fill your kitchen during this stage is simply heavenly and a sure sign that something delicious is happening!
- Cool Slightly: Once baked to perfection, carefully remove the baking sheet from the oven. Resist the urge to dive in immediately! While they look and smell amazing, the filling inside will be incredibly hot, and the dough needs a few minutes to set. Allow the apple pie bombs to cool on the baking sheet for about 5 to 10 minutes. This brief cooling period helps the filling to settle and firm up slightly, preventing it from being scalding hot and overly runny when you take that first glorious bite. After this initial cooling, you can transfer them to a wire rack to cool completely if you plan on adding the glaze, or simply serve them warm straight from the baking sheet.
Prepare the Glaze (Optional but Recommended!):
- Whisk the Glaze Ingredients: If you’ve decided to elevate your Apple Pie Bombs with a glorious vanilla glaze – and I wholeheartedly encourage you to do so! – let’s get that prepared while the bombs are cooling. In a medium-sized bowl, combine 1 cup of powdered sugar (also known as confectioners’ sugar), 2 tablespoons of milk (I find whole milk or half-and-half gives the richest, creamiest consistency), ½ teaspoon of pure vanilla extract, and that tiny but mighty pinch of salt.
- Achieve Perfect Consistency: Using a whisk, thoroughly combine all the ingredients. Start whisking gently at first to incorporate the powdered sugar without creating a dust cloud, then pick up the pace. Continue whisking until the mixture is completely smooth and free of any lumps. You’re aiming for a consistency that is thick enough to coat the back of a spoon but still thin enough to drizzle beautifully. If your glaze seems too thick, add a tiny splash more milk (about ¼ teaspoon at a time) and whisk again until it reaches your desired consistency. If it’s too thin, sift in another tablespoon or two of powdered sugar until it thickens up. Consistency is key for a perfect drizzle!
- Drizzle and Serve: Once your apple pie bombs have cooled for at least 10-15 minutes (they should still be warm, but not piping hot, otherwise the glaze will simply melt and run off), it’s time for the final flourish! You can either drizzle the glaze generously over all the bombs directly on the cooling rack, or you can individually dip the tops of each bomb into the glaze for a more uniform coating. My personal preference is to grab a spoon and drizzle it artfully over each one, creating lovely cascades of vanilla sweetness. Let the glaze set for a few minutes before serving. The delicate sweetness and creamy texture of the glaze perfectly complement the spiced apple filling and the flaky, buttery crust.
Serving Suggestions & Storage:
- Enjoy Them Warm: These Apple Pie Bombs are truly at their absolute best when served warm, ideally with the glaze still slightly soft. The warmth enhances all the comforting flavors, making each bite a truly blissful experience.
- Elevate the Experience: To take these from simply delicious to utterly decadent, consider serving them alongside a scoop of high-quality vanilla bean ice cream. The cold, creamy ice cream melting into the warm apple bomb creates an incredible contrast of temperatures and textures that is simply divine. A dollop of homemade whipped cream or a drizzle of caramel sauce would also be fantastic additions for an extra layer of indulgence. Imagine serving these at a family gathering or a cozy dessert night – they are always a crowd-pleaser!
- Storage: If by some miracle you happen to have any leftovers, these Apple Pie Bombs can be stored in an airtight container at room temperature for up to 2 days. If your kitchen is particularly warm or humid, or if they have the glaze, I recommend storing them in the refrigerator, where they’ll keep well for up to 3-4 days.
- Reheating: To reheat, simply pop them into a microwave for 15-20 seconds for a quick warm-up, or place them in a preheated oven at 300°F (150°C) for about 5-7 minutes until they are warmed through and the crust is crisp again. Reheating in the oven is my preferred method as it helps to restore the texture of the crust much better than the microwave, preventing any sogginess. Enjoy these delightful treats at any time – for breakfast with coffee, as a satisfying snack, or as a comforting dessert! They are a testament to the joy of homemade baking.

Conclusion:
So, there you have it – my absolute favorite recipe for these delightful, individual treats. If you’ve been searching for a dessert that marries convenience with an explosion of flavor, look no further. What makes these Apple Pie Bombs truly exceptional is their ingenious simplicity coupled with an undeniably nostalgic taste. Each bite delivers that comforting warmth of spiced apples, perfectly tender and bursting with their natural sweetness, encased in a golden, slightly crisp, and utterly delicious pastry shell. It’s the quintessential apple pie experience, but reimagined into a portable, pop-in-your-mouth format that’s simply irresistible. I promise you, once you try them, you’ll understand why they’ve become such a beloved staple in my kitchen. They’re less fuss than a traditional pie, yet they deliver all the satisfaction and heartwarming goodness. The flaky texture of the pastry contrasting with the soft, warm apple filling is a symphony for your taste buds, making them an instant crowd-pleaser for any occasion, from casual family desserts to impressive potluck contributions. They truly embody the spirit of homemade comfort with a playful twist, and that’s precisely why I encourage everyone to give them a go. The aroma alone as they bake is enough to make anyone’s mouth water, filling your home with the sweet, spicy scent of autumn – a perfect treat any time of year.
Now, let’s talk about taking your Apple Pie Bombs experience to the next level. While they are absolutely divine on their own, fresh from the oven, there are so many wonderful ways to enjoy them. For the ultimate indulgence, I highly recommend serving them à la mode with a generous scoop of vanilla bean ice cream. The cold, creamy ice cream melting into the warm pastry and apple filling is a match made in dessert heaven, creating an incredible play of temperatures and textures that will send your taste buds into a frenzy. A dollop of freshly whipped cream, perhaps infused with a hint of vanilla or cinnamon, also works wonders, adding a light, airy richness. If you’re looking for a simple yet elegant finish, a dusting of powdered sugar or a sprinkle of cinnamon sugar over the warm bombs is always a classic. Or, for those who love a bit more sweetness and shine, a quick glaze made from powdered sugar and a splash of milk or apple cider takes them to another level of delectable beauty. A drizzle of warm caramel sauce, either store-bought or homemade, also elevates the flavor profile, adding a buttery, sweet note that complements the apples beautifully. Imagine these little gems alongside your morning coffee or as a special afternoon treat with a cup of spiced tea – pure bliss!
Exploring Delicious Variations:
Don’t be afraid to get creative and make this recipe truly your own! While apple is classic, the possibilities for fruit fillings are endless. Why not try a batch with juicy tart cherries for a different kind of sweet-tart explosion, or perhaps ripe peaches for a taste of summer? Mixed berries, either fresh or frozen, would also be magnificent, offering a vibrant burst of color and flavor. You could even experiment with different spices – a pinch of nutmeg, allspice, or even a touch of ground ginger can add another layer of complexity to the apple filling. For those who love a bit of crunch, consider adding finely chopped toasted pecans or walnuts to the apple mixture before wrapping them up. Or, if you’re feeling ambitious, a sprinkle of streusel topping over the unbaked bombs will create an even more satisfying texture contrast. The beauty of this recipe lies in its adaptability, allowing you to tailor it to your personal preferences and whatever seasonal fruits you have on hand. Don’t be shy; experiment and discover your new favorite iteration! You might even find that using a different type of dough, like a tender biscuit dough for a chewier texture, creates a whole new delightful experience. The core concept of a warm, fruity filling encased in a golden, baked shell is so versatile, inviting endless culinary adventures.
So, what are you waiting for? I genuinely hope you feel inspired to roll up your sleeves and give these fantastic Apple Pie Bombs a try in your own kitchen very soon. They truly are a delightful experience to bake and an even more delightful experience to eat. I promise, the smiles you’ll see on the faces of your family and friends when they bite into these warm, comforting treats will be all the reward you need. And when you do, please, please come back and share your experience with me! I absolutely adore hearing about your culinary adventures. Did you try a unique variation? Did your kids help you make them? What was your favorite part? Your feedback, your photos, and your stories are what make this community so vibrant and exciting. So, grab your ingredients, preheat your oven, and prepare to create some truly unforgettable moments with these incredible Apple Pie Bombs. Happy baking, everyone!

Apple Pie Bombs
These delightful individual Apple Pie Bombs encapsulate all the comforting flavors of a traditional apple pie in a wonderfully portable package. A tender, spiced apple filling is enveloped in a golden, flaky biscuit crust, coated with cinnamon sugar, and baked to perfection. They’re ideal for a quick dessert, breakfast treat, or potluck addition.
Ingredients
-
2 medium apples, peeled, cored, and diced
-
2 tablespoons unsalted butter (for filling)
-
1/3 cup granulated sugar (for filling)
-
1 teaspoon ground cinnamon (for filling)
-
1 tablespoon cornstarch
-
2 tablespoons water
-
1 can refrigerated biscuit dough (8 biscuits)
-
1/2 cup unsalted butter, melted (for coating)
-
1 cup granulated sugar (for coating)
-
1 tablespoon ground cinnamon (for coating)
Instructions
-
Step 1
Dice apples into small, uniform pieces. In a medium skillet, melt 2 tablespoons butter over medium heat. Add diced apples and sauté for 3-5 minutes until slightly softened. Reduce heat to medium-low, add 1/3 cup granulated sugar and 1 teaspoon cinnamon. In a small bowl, whisk 1 tablespoon cornstarch with 2 tablespoons water, then stir into the apples. Simmer for 5-7 minutes, stirring, until apples are tender and sauce thickens. Remove from heat and let cool completely. -
Step 2
Preheat oven to 375°F (190°C). Line a baking sheet with parchment paper. In a small bowl, combine 1 cup granulated sugar and 1 tablespoon cinnamon for topping. Melt 1/2 cup unsalted butter in another small bowl for dipping. -
Step 3
Separate the biscuit dough into 8 individual biscuits. Flatten each biscuit slightly. Place about 1 to 1.5 tablespoons of the cooled apple filling onto the center of each flattened biscuit. Bring the edges of the dough together over the filling and pinch firmly to seal, forming a ball or pouch. Ensure no gaps where filling can escape. -
Step 4
Dip each assembled apple pie bomb into the melted butter, ensuring it’s fully coated. Then, roll it in the cinnamon sugar mixture until generously coated. Place seam-side down on the prepared baking sheet, leaving space between each. Bake for 12-15 minutes, or until puffed and golden brown. -
Step 5
Remove from oven and let cool on the baking sheet for 5-10 minutes. Serve warm. Optionally, drizzle with a simple vanilla glaze (not included in ingredients but suggested in source article). Store leftovers in an airtight container at room temperature for up to 2 days, or refrigerate for 3-4 days.
Important Information
Nutrition Facts (Per Serving)
It is important to consider this information as approximate and not to use it as definitive health advice.
Allergy Information
Please check ingredients for potential allergens and consult a health professional if in doubt.


