• Skip to primary navigation
  • Skip to main content
  • Skip to primary sidebar
Homesmad

Homesmad

  • Home
  • Breakfast & Brunch
  • Appetizers & Snacks
  • Dinner
  • Dessert
  • About
  • Privacy Policy
  • Contact
Homesmad
  • Home
  • Breakfast & Brunch
  • Appetizers & Snacks
  • Dinner
  • Dessert
  • About
  • Privacy Policy
  • Contact

Irresistible Boston Cream Pie Cookies – Your New Favorite!

October 23, 2025 by Lily author

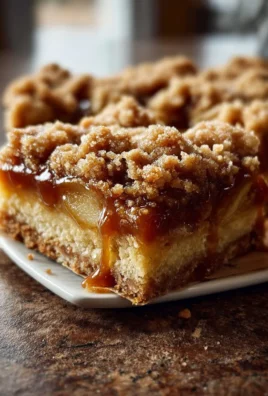
Boston Cream Pie Cookies – imagine taking all the beloved elements of that iconic dessert – the fluffy vanilla cake, the rich, silky custard filling, and the glistening chocolate ganache – and transforming them into a delightful, bite-sized confection. I’ve always been captivated by desserts that tell a story, and the original Boston Cream Pie certainly does, with its origins tracing back to Boston’s Omni Parker House Hotel in the mid-19th century. It even holds the esteemed title of Massachusetts’ official state dessert! Now, we’re giving that timeless classic a modern, incredibly convenient twist.

People adore these Boston Cream Pie Cookies not just for their nostalgic charm, but for the harmonious blend of textures and flavors: a soft, tender cookie base, an unbelievably creamy custard center, and a decadent chocolate topping that perfectly mimics the original pie. They offer all the sophisticated taste and elegance without the fuss of slicing a whole pie, making them ideal for sharing or simply enjoying as a personal treat. Get ready to experience a little piece of dessert history, reimagined!

Irresistible Boston Cream Pie Cookies – Your New Favorite! this RECIPE

Ingredients:

  • For the Silky Pastry Cream:

    • 1 cup (240ml) whole milk
    • 1/2 cup (100g) granulated sugar, divided
    • Pinch of salt
    • 2 large egg yolks
    • 2 tablespoons (15g) cornstarch
    • 2 tablespoons (28g) unsalted butter, cut into small pieces
    • 1 teaspoon pure vanilla extract
  • For the Soft Boston Cream Pie Cookies (Cookie Dough):

    • 1 cup (226g) unsalted butter, softened
    • 1 1/2 cups (300g) granulated sugar
    • 2 large eggs, at room temperature
    • 1 teaspoon pure vanilla extract
    • 3 cups (360g) all-purpose flour
    • 1 teaspoon baking powder
    • 1/2 teaspoon baking soda
    • 1/4 teaspoon salt
    • 1/2 cup (120ml) buttermilk (or make your own by adding 1/2 tablespoon lemon juice or white vinegar to 1/2 cup milk and letting it sit for 5 minutes)
  • For the Glossy Chocolate Ganache:

    • 1/2 cup (120ml) heavy cream
    • 1 cup (170g) semi-sweet chocolate chips (or finely chopped good quality semi-sweet chocolate)
    • 1 tablespoon (14g) unsalted butter, optional (for extra shine and smoothness)
    • 1/2 teaspoon pure vanilla extract

Making the Silky Pastry Cream for Your Boston Cream Pie Cookies

This step is absolutely critical and should be done ahead of time, as the pastry cream needs to chill thoroughly to set properly. A properly cooled and firm cream will give your Boston Cream Pie Cookies their signature luscious and stable filling. I always start with this part!

  1. Warm the Milk: In a medium saucepan, combine the whole milk, half of the granulated sugar (which is 1/4 cup or 50g), and a tiny pinch of salt. Heat this mixture over medium heat, stirring occasionally, until the sugar completely dissolves and the milk is just simmering. You’ll see small bubbles forming gently around the edges of the pan. It’s important not to let it boil vigorously. As soon as you see those gentle bubbles, remove the saucepan from the heat immediately.
  2. Whisk Egg Yolks: In a separate, clean medium bowl, whisk together the remaining 1/4 cup (50g) of granulated sugar, the two large egg yolks, and the cornstarch. Whisk vigorously for about 1-2 minutes until the mixture is pale yellow, completely smooth, and slightly thickened. This vigorous whisking is super important to ensure the cornstarch is fully incorporated and there are absolutely no lumps, which will guarantee a silky smooth cream for your Boston Cream Pie Cookies.
  3. Temper the Yolks: Now, we need to carefully temper the egg yolks. Slowly and gradually, ladle about half of the hot milk mixture into the egg yolk mixture while you continuously whisk. Pour very slowly and whisk constantly. This tempering process gently raises the temperature of the egg yolks, preventing them from scrambling when they hit the full heat. Take your time with this step!
  4. Combine and Cook: Pour the tempered egg yolk mixture back into the saucepan with the remaining hot milk. Return the saucepan to medium-low heat. Cook, stirring constantly with a sturdy whisk, making sure to scrape the bottom and get into the corners of the pan. This will prevent scorching. The mixture will begin to thicken quite considerably after about 3-5 minutes, taking on a texture similar to a thick pudding. Continue cooking and stirring until it’s thick enough to coat the back of a spoon, and when you drag your finger across the spoon, it leaves a distinct trail. You should also see a few large “plops” or bubbles indicating it has come to a gentle boil for a few seconds – this ensures the cornstarch is fully activated and the cream will set properly for your Boston Cream Pie Cookies.
  5. Finish the Cream: As soon as it reaches the desired thickness, remove the saucepan from the heat. Stir in the small pieces of unsalted butter and the pure vanilla extract until the butter is fully melted and completely incorporated. The butter adds a wonderful richness and a beautiful, smooth sheen to the pastry cream.
  6. Chill Thoroughly: Pour the hot pastry cream into a clean, shallow bowl or a pie plate. This shallow container helps it cool down faster. Immediately cover the surface of the cream directly with plastic wrap. This direct contact is vital to prevent a “skin” from forming on top. Place it in the refrigerator for at least 3-4 hours, or even better, overnight, until it is completely chilled and firm. A well-chilled and firm pastry cream is absolutely essential for the structure and stability of our delightful Boston Cream Pie Cookies. Don’t rush this step!

Preparing the Soft Cookie Dough for Boston Cream Pie Cookies

These cookies are specifically designed to be soft, pillowy, and cake-like, perfectly complementing the creamy vanilla filling and rich chocolate ganache of your finished Boston Cream Pie Cookies. They’re not your typical chewy cookie, but something much more special.

  1. Preheat and Prepare: Preheat your oven to a perfect 350°F (175°C). Line two large baking sheets with parchment paper or good quality silicone baking mats. This will prevent any sticking and ensure your cookies bake evenly and release easily.
  2. Cream Butter and Sugar: In a large mixing bowl, using an electric mixer (either a stand mixer fitted with the paddle attachment or a hand mixer), cream together the softened unsalted butter and the granulated sugar on medium-high speed. Beat them until the mixture is visibly light, fluffy, and significantly paler in color. This usually takes a good 3-5 minutes. Proper creaming here is key as it incorporates air into the butter, which is a secret weapon for achieving that wonderful soft, cake-like texture in your Boston Cream Pie Cookies.
  3. Add Eggs and Vanilla: Stop the mixer and scrape down the sides of the bowl with a spatula to ensure everything is well combined. Add the eggs one at a time, beating well after each addition until each egg is fully incorporated into the mixture. Then, mix in the pure vanilla extract. At this stage, the mixture might look a little bit curdled, but please don’t worry about it; it will all come together beautifully once we add the dry ingredients.
  4. Whisk Dry Ingredients: In a separate, medium-sized bowl, whisk together the all-purpose flour, baking powder, baking soda, and salt. Make sure to whisk thoroughly for about 30 seconds. This step ensures that the leavening agents (baking powder and baking soda) and salt are evenly distributed throughout the flour, which is crucial for uniform rising and flavor in your cookies.
  5. Combine Wet and Dry: With your mixer set to low speed, gradually add about one-third of the dry ingredients to the wet ingredients, mixing only until just combined. Next, pour in half of the buttermilk and mix until it’s just incorporated. Repeat this process, alternating with the remaining dry ingredients and buttermilk, always ending with the final portion of the dry ingredients. It’s incredibly important not to overmix the dough once the flour has been added, as this can develop the gluten too much and lead to tough, rather than soft, cookies. Mix only until no visible streaks of dry flour remain. The resulting dough will be soft and perhaps a little bit sticky, which is exactly what we want for these cakey Boston Cream Pie Cookies.
  6. Scoop the Cookies: Using a small cookie scoop (I recommend about 1.5 tablespoons for a good sandwich size) or two regular spoons, drop rounded spoonfuls of dough onto your prepared baking sheets. Make sure to leave about 2 inches of space between each cookie, as these will spread slightly during baking. For the most consistently beautiful Boston Cream Pie Cookies, try your best to make all the scooped dough mounds as uniform in size as possible.
  7. Optional Flattening: If you prefer a slightly flatter, more uniform cookie that will be easier to sandwich with the cream, you can gently press the tops of the scooped dough mounds down slightly with the back of a spoon or your fingertips. This step is entirely optional but can contribute to a smoother, more professional-looking finished Boston Cream Pie Cookie.

Baking the Perfectly Soft Boston Cream Pie Cookies

Baking these cookies just right is an art! It’s key to achieving that incredibly soft, cake-like texture that makes our Boston Cream Pie Cookies so wonderfully unique and reminiscent of the classic dessert.

  1. Bake Until Just Set: Place the baking sheets in your preheated oven and bake the cookies for approximately 10-12 minutes. You’ll know they’re ready when the edges are lightly golden and the centers appear set, but they should still look quite soft in the middle. It’s paramount not to overbake these cookies, as this will dry them out and diminish their desired cake-like quality. Keep in mind that exact baking time can vary depending on the calibration of your oven and the precise size of your cookie dough scoops.
  2. Cool on Baking Sheet: Once baked to perfection, carefully remove the baking sheets from the oven. Allow the cookies to cool on the hot baking sheets for about 5 minutes. This brief cooling period helps them to firm up slightly, making them much easier to handle without breaking before you transfer them.
  3. Transfer to Wire Rack: After the initial 5 minutes, gently transfer the cookies to a wire rack. Let them cool completely at room temperature. It is absolutely crucial that the cookies are entirely cool before you even think about filling them, otherwise, the beautiful pastry cream will melt and create a messy situation.

Crafting the Velvety Chocolate Ganache for Your Boston Cream Pie Cookies

This rich, dark, and glossy ganache is truly the crowning glory of our Boston Cream Pie Cookies, providing that unmistakable, decadent chocolate finish that makes them instantly recognizable and utterly delicious.

  1. Heat Heavy Cream: In a small saucepan, gently heat the heavy cream over medium heat until it just begins to simmer around the edges. Look for those tiny bubbles. Make sure it doesn’t come to a rapid boil. Alternatively, for convenience, you can heat the cream in a microwave-safe bowl until it’s hot and steamy, but again, not vigorously boiling.
  2. Melt Chocolate: Place your semi-sweet chocolate chips (or finely chopped good quality chocolate) in a heatproof bowl. Pour the hot heavy cream directly over the chocolate. Now, resist the urge to stir! Let it sit undisturbed for 5 minutes. This precious waiting time allows the heat from the cream to thoroughly melt the chocolate without scorching.
  3. Whisk Until Smooth: After the 5 minutes have passed, begin whisking gently. Start whisking from the center of the bowl and gradually work your way outwards until the ganache is completely smooth, beautifully glossy, and uniform in color and texture. If you’re using it, stir in the optional unsalted butter and the pure vanilla extract until they are fully incorporated and melted. The butter will add an extra layer of shine and a wonderfully smooth texture to your ganache.
  4. Achieve Dipping Consistency: Let the ganache sit at room temperature for about 15-20 minutes, stirring it occasionally. You’re looking for it to reach a thick, yet still pourable or dippable consistency. It shouldn’t be too runny, as it needs to set nicely on the cookies. If it happens to become too thick, you can gently rewarm it for a few seconds in the microwave or over a very low heat, stirring constantly. Conversely, if it’s still too thin, simply let it sit longer. The perfect ganache consistency is truly vital for creating beautiful, perfectly coated Boston Cream Pie Cookies.

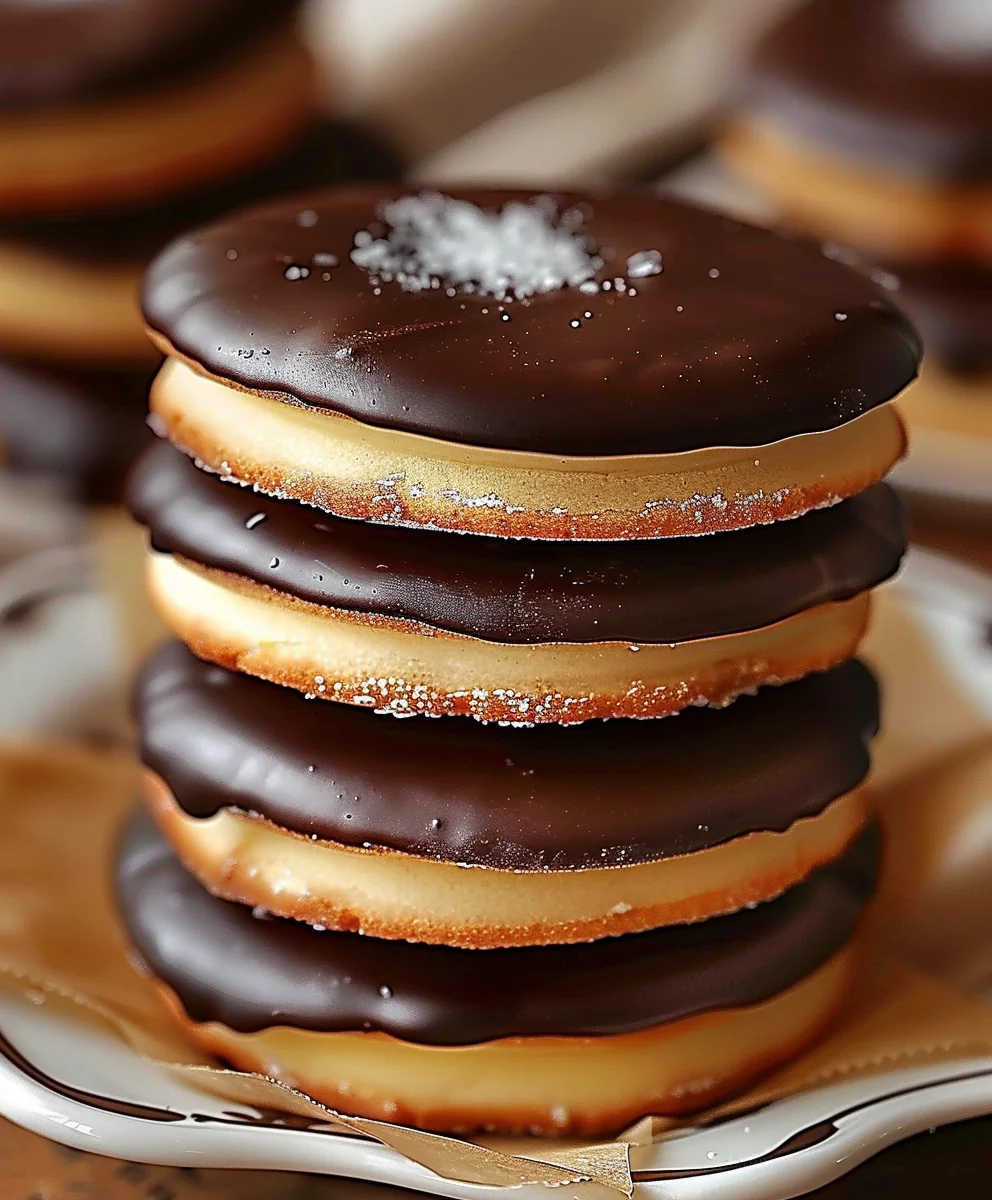
Assembling Your Irresistible Boston Cream Pie Cookies

This is the moment where all your careful work comes together to create these truly delightful Boston Cream Pie Cookies, mimicking the beloved classic dessert in a charming, portable form. Get ready for some serious deliciousness!

  1. Prepare Pastry Cream for Piping: Once the pastry cream is thoroughly chilled and gloriously firm, give it a good whisk or even beat it briefly with an electric mixer until it is perfectly smooth and creamy again. This step helps to break up any lumps that might have formed during chilling and makes it incredibly easy to pipe or spread. Transfer the smooth pastry cream to a piping bag fitted with a round tip (or simply use a sturdy zip-top bag with one corner snipped off for a quick, homemade piping bag).
  2. Match Cookie Pairs: Take a moment to look through all your beautifully cooled cookies and try to find pairs that are of similar size and shape. This little effort will make your finished Boston Cream Pie Cookies look much more uniform, professional, and appealing.
  3. Fill the Cookies: Take one cookie from a matched pair and gently turn it upside down. Pipe or spoon a generous dollop of the luscious pastry cream onto the flat side of the cookie. Make sure to leave a small border around the very edge. You want to add a good, satisfying amount of cream, but be careful not to overfill so much that it squishes out excessively when you add the top cookie.
  4. Top with Second Cookie: Carefully place the second cookie on top of the pastry cream, gently pressing down lightly until the cream spreads almost to the edges. Congratulations, you’ve just created the “pie” part of your individual Boston Cream Pie Cookies!
  5. Dip in Ganache: Hold each assembled cookie by the bottom (the cookie that does not have ganache). Dip the top half of the cookie into your prepared chocolate ganache. You can also spoon the ganache elegantly over the top of the cookies if you prefer a different look. Allow any excess ganache to drip off back into the bowl for a clean finish.
  6. Set the Ganache: Place the freshly dipped Boston Cream Pie Cookies onto a clean piece of parchment paper or onto a wire rack that’s set over parchment paper (to catch any drips). Allow the ganache to set at room temperature for about 30-60 minutes. If you’re eager to enjoy them sooner, you can pop them into the refrigerator for 15-20 minutes to speed up the setting process.
  7. Serve and Store: Once the chocolate ganache is beautifully set, your glorious Boston Cream Pie Cookies are officially ready to be devoured! Store any leftover Boston Cream Pie Cookies in an airtight container in the refrigerator for up to 3-4 days to keep them fresh. For the absolute best flavor and texture, I recommend letting them sit out at room temperature for about 15-20 minutes before serving. Enjoy the delightful and harmonious blend of the soft, cake-like cookie, the incredibly creamy vanilla filling, and the rich, decadent chocolate topping in every single bite of these amazing Boston Cream Pie Cookies! They are truly a special and unforgettable treat.

Irresistible Boston Cream Pie Cookies – Your New Favorite!

Conclusion:

If you’ve followed along with me on this culinary journey, you know by now that we’ve created something truly extraordinary. This isn’t just another cookie recipe; it’s an experience, a delightful fusion that takes a beloved classic and transforms it into a handheld masterpiece. I genuinely believe this recipe for Boston Cream Pie Cookies is an absolute must-try for anyone who appreciates the finer things in life, especially when those things involve decadent desserts that are both familiar and excitingly new. What makes these cookies so special, you ask? It’s the harmonious blend of textures and flavors – the perfectly soft, tender vanilla cookie base, cradling a dollop of rich, silky smooth pastry cream, all crowned with a glistening, luxurious chocolate ganache. Each bite delivers that unmistakable Boston cream pie essence, but in a charming, portable form that makes them impossible to resist. They’re impressive enough to wow guests, yet comforting enough to enjoy with a quiet cup of coffee on a lazy afternoon. It’s a recipe that promises not just a treat for your taste buds, but also a rewarding baking adventure, resulting in cookies that look as good as they taste.

I find these delectable cookies shine brightest when served slightly chilled, allowing the pastry cream to firm up beautifully and the ganache to develop a delightful snap. Imagine presenting a platter of these beauties at your next gathering – they’re guaranteed to be the star of the dessert table! For an extra special touch, pair them with a robust, freshly brewed coffee or a delicate cup of Earl Grey tea; the slight bitterness of the coffee or the subtle floral notes of the tea provide a wonderful contrast to the cookies’ sweetness. They also make an incredible after-dinner treat, a sophisticated finish to any meal, or even a delightful addition to a brunch spread. Honestly, there’s no wrong time to enjoy them!

But why stop there? The beauty of baking is in the endless possibilities for customization, and these Boston Cream Pie Cookies are wonderfully adaptable. If you’re feeling adventurous, consider infusing your pastry cream with a hint of orange zest or a touch of almond extract for a subtle flavor twist. You could even experiment with different types of chocolate for your ganache – perhaps a darker chocolate for a more intense cocoa hit, or a milk chocolate for an even sweeter, creamier finish. For those who love a bit of texture, a sprinkle of flaky sea salt on top of the ganache just before it sets can elevate the flavors to another dimension, adding a sophisticated edge. And if you’re looking to make them even more whimsical, try creating mini versions – perfect for bite-sized indulgence or as part of a varied dessert bar. Imagine a swirl of raspberry jam added to the center of the cream, just before applying the chocolate, for a fruity counterpoint! The possibilities truly are as vast as your imagination, and I encourage you to make this recipe your own, adding your unique culinary signature to these already perfect treats.

I truly hope you feel inspired to dive into your kitchen and give this recipe a try. There’s an immense satisfaction that comes from creating something so delicious from scratch, and I promise you, these cookies deliver on every front. From the moment you pull them from the oven to that final, blissful bite, every step of the process is rewarding. So, grab your apron, gather your ingredients, and prepare to bake some magic. And please, once you’ve made them – and I know you will – don’t keep your success a secret! I would absolutely love to hear about your experience. Did you add any unique twists? What did your friends and family think? Share your stories, your photos, and your tips in the comments below. Let’s build a community around the joy of baking and the sheer deliciousness of these unforgettable cookies. Happy baking, my friends!


Boston Cream Pie Cookies

Boston Cream Pie Cookies

Imagine all the beloved elements of Boston Cream Pie—fluffy vanilla cake, rich creamy vanilla filling, and glistening chocolate ganache—transformed into a delightful, bite-sized confection. These cookies offer a harmonious blend of textures and flavors, perfect for sharing or a personal treat, reimagining a timeless classic.

Prep Time
5 Minutes

Cook Time
25 Minutes

Total Time
30 Minutes

Servings
24 cookies

Ingredients

  • 1 cup unsalted butter, softened
  • 1 cup granulated sugar
  • 2 large eggs
  • 1 teaspoon vanilla extract
  • 2 cups all-purpose flour
  • 1 teaspoon baking powder
  • 1/2 teaspoon baking soda
  • 1/4 teaspoon salt
  • 1 cup heavy cream
  • 1/2 cup powdered sugar
  • 1 teaspoon vanilla extract (for cream filling)
  • 1 cup semi-sweet chocolate chips
  • 1 tablespoon vegetable oil

Instructions

  1. Step 1
    In a mixing bowl, beat 1 cup heavy cream, 1/2 cup powdered sugar, and 1 teaspoon vanilla extract (for cream filling) until stiff peaks form. Chill thoroughly in the refrigerator for at least 1-2 hours, or until very firm.
  2. Step 2
    Preheat your oven to 350°F (175°C). Line two large baking sheets with parchment paper. In a large mixing bowl, cream together 1 cup softened unsalted butter and 1 cup granulated sugar on medium-high speed for 3-5 minutes until light and fluffy. Beat in 2 large eggs one at a time, then mix in 1 teaspoon vanilla extract.
  3. Step 3
    In a separate medium bowl, whisk together 2 cups all-purpose flour, 1 teaspoon baking powder, 1/2 teaspoon baking soda, and 1/4 teaspoon salt. Gradually add the dry ingredients to the wet mixture on low speed, mixing only until just combined and no visible streaks of flour remain. Do not overmix.
  4. Step 4
    Using a 1.5 tablespoon scoop, drop rounded spoonfuls of dough onto prepared baking sheets, leaving 2 inches between each. Bake for approximately 10-12 minutes until the edges are lightly golden and the centers appear set but still soft. Do not overbake. Let cookies cool on the baking sheets for 5 minutes, then transfer to a wire rack to cool completely.
  5. Step 5
    In a small saucepan, heat 1 cup heavy cream until it just begins to simmer. Place 1 cup semi-sweet chocolate chips in a heatproof bowl. Pour the hot cream over the chocolate and let sit undisturbed for 5 minutes. Whisk gently until the ganache is smooth, glossy, and uniform. Stir in 1 tablespoon vegetable oil. Let the ganache cool at room temperature, stirring occasionally, for 15-20 minutes until it reaches a thick, dippable consistency.
  6. Step 6
    Once the cream filling is thoroughly chilled and firm, whisk it briefly until smooth, then transfer to a piping bag. Match cooled cookies into similar-sized pairs. Pipe or spoon a generous dollop of cream filling onto the flat side of one cookie, leaving a small border. Place the second cookie on top, gently pressing until the cream spreads almost to the edges.
  7. Step 7
    Hold each assembled cookie by the bottom and dip the top half into the prepared chocolate ganache, allowing any excess to drip off. Place the dipped cookies onto parchment paper or a wire rack set over parchment paper. Let the ganache set at room temperature for 30-60 minutes (or 15-20 minutes in the refrigerator to speed up the process).
  8. Step 8
    Serve your Boston Cream Pie Cookies once the ganache is set. Store any leftover cookies in an airtight container in the refrigerator for up to 3-4 days. For best texture, let them sit at room temperature for about 15-20 minutes before serving.

Important Information

Nutrition Facts (Per Serving)

It is important to consider this information as approximate and not to use it as definitive health advice.

Allergy Information

Please check ingredients for potential allergens and consult a health professional if in doubt.

« Previous Post
Greek Roasted Garlic Spinach White Pizza: Flavorful Delight
Next Post »
Cheesy Chicken Garlic Bread Sandwich: Ultimate Deliciousness

If you enjoyed this…

Fried Pineapple Coconut Crust: A Tropical Dessert Recipe

Cinnamon-Glazed Apple Fritter Bites: A Deliciously Easy Recipe to Satisfy Your Sweet Tooth

Delicious Easy Caramel Cookie Bars Recipe You Can’t Resist!

Primary Sidebar

Browse by Diet

BreakfastDinnerLunchDessertAppetizer

Sweet Peach Yogurt Parfait Delight

One of my fondest memories is from a lazy summer afternoon spent at my grandmother’s house. The sun filtered through the kitchen window, casting a warm glow over the table where she would create her culinary magic. It was during one of those blissful moments that I first tasted her Peach Yogurt Parfait with Honey and Granola. The sweet aroma of ripe peaches mingling with creamy yogurt and the crunch of granola was nothing short of heavenly. It felt like summer captured in a bowl, and I still remember the joy of diving in with a spoon, each layer revealing a new burst of flavor.

When I think about that parfait, I can almost hear the gentle hum of the bees outside, reminding me of the floral notes that honey brings to every bite. The vibrant yellows and soft oranges of the peaches contrast beautifully with the creamy white yogurt and the golden crunch of granola. It’s a dish that not only looks delightful but also tastes like a celebration of fresh, wholesome ingredients.

What makes my version of this Peach Yogurt Parfait special is the careful balance of flavors and textures. I use ripe, juicy peaches, drizzled with locally sourced honey, and a homemade granola that’s bursting with nuts and seeds for an extra crunch. It’s a simple dish, but every layer is crafted with love and attention.

Let me show you exactly how to make this delightful parfait, so you can bring a bit of that summer magic into your kitchen!

Sweet Peach Yogurt Parfait Delight

Why You’ll Love This Recipe

  • Delightfully creamy texture from the Greek yogurt, paired with the juicy sweetness of fresh peaches.
  • Ready in under 20 minutes, making it a quick and satisfying breakfast or snack option.
  • Budget-friendly, using common ingredients that you may already have in your pantry.
  • Customizable with your favorite granola and nuts, allowing you to tailor each parfait to your taste.
  • Perfectly balanced flavors with the bright acidity of lemon juice and the sweetness of honey enhancing the peaches.

Ingredients

  • For the Parfait:
  • 2 cups plain Greek yogurt (or vanilla yogurt for a sweeter option)
  • 2 large ripe peaches, diced (about 2 cups)
  • 1 tablespoon fresh lemon juice (to prevent browning of peaches)
  • 2 tablespoons honey (plus more for drizzling)
  • 1 teaspoon vanilla extract (optional for extra flavor)
  • For the Granola:
  • 1 cup granola (store-bought or homemade; see notes for a simple granola recipe)
  • 1/4 cup sliced almonds (optional for added crunch)
  • 1/4 cup shredded coconut (optional for added flavor)

Let’s dive into some key ingredients that make this Peach Yogurt Parfait so delightful! First, the Greek yogurt is not only creamy but also packed with protein, making it a satisfying option for breakfast or a snack. If you’re looking for a sweeter option, you can easily substitute it with vanilla yogurt, though it may alter the overall flavor balance. Next, the ripe peaches are the star of the show; their natural sweetness shines through, so I recommend choosing peaches that yield slightly to pressure, indicating they’re perfectly ripe. If peaches aren’t in season, feel free to use nectarines or even frozen peaches—just thaw them before use. Finally, honey adds a lovely floral sweetness that ties everything together. If you prefer, maple syrup can serve as a delicious substitute.

Step-by-Step Instructions

  1. Start by preparing the peaches. Wash them thoroughly, then slice and dice them into bite-sized pieces. In a medium bowl, toss the diced peaches with 1 tablespoon of fresh lemon juice to prevent browning. Set aside for about 5 minutes while the lemon juice works its magic.
  2. In a separate bowl, combine the Greek yogurt, 2 tablespoons of honey, and 1 teaspoon of vanilla extract if using. Stir the mixture until smooth and thoroughly blended. This should take about a minute. Avoid overmixing to maintain the creaminess of the yogurt.
  3. Now it’s time to layer your parfait. Grab a clear glass or bowl to showcase your beautiful creation. Start with a generous spoonful of the yogurt mixture at the bottom—about 1/4 cup will do. Use a spoon to spread it evenly.
  4. Add a layer of the diced peaches over the yogurt, ensuring they cover the yogurt completely. You might want to use about half of what you have prepared—roughly 1 cup. This layer should be visually appealing, so arrange the peaches neatly.
  5. Sprinkle 1/4 cup of granola over the peaches. This adds a delightful crunch. Make sure to distribute it evenly to ensure every bite has that satisfying texture. Avoid packing it down too tightly, as you want it to maintain its crunch.
  6. Repeat the layers: spoon in another 1/4 cup of yogurt, followed by another cup of peaches, and another sprinkle of granola. You should have at least two layers, but feel free to add more depending on your glass size.
  7. Finish off your parfait with a drizzle of honey on top for added sweetness and a touch of elegance. If you’re using sliced almonds or shredded coconut, sprinkle them on top now. It adds a lovely visual contrast and extra flavor.
  8. Serve immediately or refrigerate for up to 30 minutes before serving to allow the flavors to meld together. However, I recommend enjoying it fresh to maintain the granola’s crunch.

Pro Tips for the Best Peach Yogurt Parfait With Honey And Granola

  • Make sure to choose ripe peaches for the best flavor and texture. A common mistake is using unripe fruit, which can lead to a less enjoyable parfait. Look for peaches that are fragrant and slightly soft to the touch.
  • Use a clear glass to assemble your parfait; this not only makes for a beautiful presentation but also allows you to see the colorful layers, which adds to the enjoyment of eating it.
  • For an even creamier texture, consider whipping the Greek yogurt with a hand mixer for a couple of minutes before layering. This small adjustment makes a huge difference in mouthfeel.
  • Be mindful of the granola-to-yogurt ratio. Too much granola can overwhelm the parfait, while too little can make it feel too creamy. Aim for about 1/4 cup of granola per layer for the perfect balance.
  • If you’re making this for a gathering, consider preparing the yogurt and peaches ahead of time and layering them just before serving. This ensures the granola stays crunchy!

Variations & Serving Ideas

There are so many ways to get creative with your Peach Yogurt Parfait! For a tropical twist, swap out the peaches for mangoes or pineapples and top with coconut flakes. If you prefer a berry flavor, mix in some blueberries or strawberries with the peaches for added color and taste. For a nutty version, incorporate chopped walnuts or pecans instead of almonds.

As for serving ideas, this parfait pairs beautifully with a side of scrambled eggs for a hearty breakfast or fresh fruit salad for a light lunch. You might also enjoy it alongside whole grain toast with almond butter for an energizing snack. The contrast of flavors and textures will elevate your meal experience!

Storage, Make-Ahead & Reheating

The Peach Yogurt Parfait is best enjoyed fresh, but you can prepare some components ahead of time. Store the layered parfait in an airtight container in the refrigerator for up to 24 hours. However, be cautious; the granola may lose its crunch if stored too long. You can freeze the yogurt and peach mixture for up to 2 months; just remember to thaw it in the refrigerator overnight before serving.

If you plan to enjoy this dish the next day, it can taste even better as the flavors meld together. Just remember to add the granola right before serving to keep its delightful crunch!

Frequently Asked Questions

Can I make Peach Yogurt Parfait With Honey And Granola ahead of time?

Yes — in fact, it tastes even better the next day as the flavors meld. However, I recommend waiting to add the granola until just before serving to maintain its crunch.

What can I substitute for Greek yogurt?

If you prefer a lighter option, you can substitute Greek yogurt with regular yogurt or a dairy-free alternative like coconut yogurt. Just remember that this may alter the creaminess and flavor profile slightly.

Can I use frozen peaches for this parfait?

Absolutely! Just make sure to thaw the frozen peaches before using them. They will still add great flavor, though the texture may be slightly softer than fresh peaches.

How do I make the parfait vegan?

To make a vegan version, substitute the Greek yogurt with a plant-based yogurt alternative, and replace honey with maple syrup or agave nectar. This keeps the parfait sweet while adhering to a vegan diet.

What other fruits can I use in this recipe?

You can mix and match fruits based on your preference. Try using strawberries, blueberries, raspberries, or even bananas. Just make sure to adjust the lemon juice as needed to prevent browning.

Sweet Peach Yogurt Parfait Delight

Final Thoughts

The Peach Yogurt Parfait with Honey and Granola is a delightful blend of creamy yogurt, sweet peaches, and crunchy granola that creates a satisfying and nourishing treat. Each layer bursts with flavor, making it a perfect choice for breakfast or a light dessert.

This is the kind of recipe I come back to again and again, especially when I want something refreshing and wholesome to start my day. The harmony of sweet and tart flavors, combined with the delightful crunch, never fails to lift my spirits!

I encourage you to give this parfait a try and indulge in its comforting goodness. Feel free to share your results or even add your own twist—perhaps a sprinkle of cinnamon or a handful of nuts. Enjoy creating your perfect parfait!

Print
clock clock iconcutlery cutlery iconflag flag iconfolder folder iconinstagram instagram iconpinterest pinterest iconfacebook facebook iconprint print iconsquares squares iconheart heart iconheart solid heart solid icon

Peach Yogurt Parfait


  • Author: Lily author
  • Total Time: 15 minutes
  • Yield: 4 servings 1x
Pin Recipe
Print Recipe

Description

This Peach Yogurt Parfait combines creamy Greek yogurt, juicy peaches, and crunchy granola for a delightful treat. It’s a perfect breakfast or snack that captures the essence of summer in every bite.


Ingredients

Scale
  • For the Parfait:
  • 2 cups plain Greek yogurt (or vanilla yogurt for a sweeter option)
  • 2 large ripe peaches, diced (about 2 cups)
  • 1 tablespoon fresh lemon juice (to prevent browning of peaches)
  • 2 tablespoons honey (plus more for drizzling)
  • 1 teaspoon vanilla extract (optional for extra flavor)
  • For the Granola:
  • 1 cup granola (store-bought or homemade; see notes for a simple granola recipe)
  • 1/4 cup sliced almonds (optional for added crunch)
  • 1/4 cup shredded coconut (optional for added flavor)

Instructions

  1. Start by preparing the peaches. Wash them thoroughly, then slice and dice them into bite-sized pieces. In a medium bowl, toss the diced peaches with 1 tablespoon of fresh lemon juice to prevent browning. Set aside for about 5 minutes while the lemon juice works its magic.
  2. In a separate bowl, combine the Greek yogurt, 2 tablespoons of honey, and 1 teaspoon of vanilla extract if using. Stir the mixture until smooth and thoroughly blended. This should take about a minute. Avoid overmixing to maintain the creaminess of the yogurt.
  3. Now it’s time to layer your parfait. Grab a clear glass or bowl to showcase your beautiful creation. Start with a generous spoonful of the yogurt mixture at the bottom—about 1/4 cup will do. Use a spoon to spread it evenly.
  4. Add a layer of the diced peaches over the yogurt, ensuring they cover the yogurt completely. You might want to use about half of what you have prepared—roughly 1 cup. This layer should be visually appealing, so arrange the peaches neatly.
  5. Sprinkle 1/4 cup of granola over the peaches. This adds a delightful crunch. Make sure to distribute it evenly to ensure every bite has that satisfying texture. Avoid packing it down too tightly, as you want it to maintain its crunch.
  6. Repeat the layers: spoon in another 1/4 cup of yogurt, followed by another cup of peaches, and another sprinkle of granola. You should have at least two layers, but feel free to add more depending on your glass size.
  7. Finish off your parfait with a drizzle of honey on top for added sweetness and a touch of elegance. If you’re using sliced almonds or shredded coconut, sprinkle them on top now. It adds a lovely visual contrast and extra flavor.
  8. Serve immediately or refrigerate for up to 30 minutes before serving to allow the flavors to meld together. However, I recommend enjoying it fresh to maintain the granola’s crunch.
  • Prep Time: 15 mins
  • Cook Time: 0 mins
  • Category: Breakfast
  • Method: No-cook
  • Cuisine: American

Nutrition

  • Serving Size: 1 parfait
  • Calories: 250
  • Sugar: 20 g
  • Sodium: 50 mg
  • Fat: 5 g
  • Saturated Fat: 2 g
  • Unsaturated Fat: 3 g
  • Trans Fat: 0 g
  • Carbohydrates: 40 g
  • Fiber: 3 g
  • Protein: 10 g
  • Cholesterol: 10 mg

Keywords: Choose ripe peaches for the best flavor and texture. Use a clear glass for a beautiful presentation. For creaminess, consider whipping the yogurt before layering. Be mindful of the granola-to-yogurt ratio. Prepare yogurt and peaches ahead of time for gatherings, layering just before serving.

Did you make this recipe?

Share a photo and tag us — we can't wait to see what you've made!

Sun-Kissed Frozen Orange Cream Slush

As a child, summer days felt like they lasted forever. I remember the sticky heat wrapping around me as I played outside, my laughter mingling with the sounds of the neighborhood. But nothing could cool me down quite like the moment I’d spot my grandmother, laboring over her blender, whipping up her famous Frozen Orange Creamsicle Slush. That vibrant orange treat, with its frosty texture and sweet citrus aroma, was like a burst of sunshine in a cup. Just one sip, and I could feel the coolness wash over me, sparking pure joy.

This Frozen Orange Creamsicle Slush has a way of making you feel like a kid again. Its creamy, dreamy consistency is a delightful balance of bright orange and soft vanilla, inviting you to dive right in. The refreshing tang of orange dances on your tongue, while the smooth creaminess envelops you in a comforting embrace. It’s a nostalgic treat that’s perfect for hot summer afternoons or anytime you need a little pick-me-up.

What makes my version of this slush stand out is the addition of a hint of vanilla bean, which elevates the flavor and adds an extra layer of richness. Plus, it’s super easy to whip up with just a few simple ingredients that you probably already have on hand! So, if you’re ready to relive those sun-soaked memories, let me show you exactly how to make it.

Sun-Kissed Frozen Orange Cream Slush

Why You’ll Love This Recipe

  • Each slush is a perfect blend of creamy vanilla and zesty orange, creating a nostalgic flavor reminiscent of summer days.
  • This refreshing treat is ready in under 15 minutes, making it an ideal quick dessert for unexpected guests or hot afternoons.
  • With just 8 simple ingredients, it’s budget-friendly, ensuring you don’t have to break the bank to enjoy a delicious slush.
  • The slush has a perfectly smooth texture, thanks to the combination of ice and ice cream, providing a delightful contrast to the bright citrus flavors.
  • It’s highly customizable; you can easily adjust the sweetness and add fresh herbs for a unique twist that suits your taste.

Ingredients

  • 2 cups orange juice (freshly squeezed or store-bought)
  • 1 cup vanilla ice cream
  • 1 cup crushed ice
  • 1/2 cup milk (whole or 2%)
  • 1/4 cup granulated sugar (adjust based on sweetness preference)
  • 1 teaspoon vanilla extract
  • Zest of 1 orange (for added flavor)
  • Fresh orange slices and mint leaves (for garnish)

The star of this Frozen Orange Creamsicle Slush is the orange juice, which provides the vibrant, citrusy base. Freshly squeezed juice will yield the brightest flavor, but store-bought options can be just as convenient. If you’re opting for store-bought, choose 100% pure juice with no added sugars for the best results. Another essential ingredient is the vanilla ice cream; it adds creaminess and sweetness. You can substitute it with dairy-free ice cream if you’re looking for a vegan option. Whole or 2% milk complements the ice cream, creating a smooth blend. If you want a lower-calorie version, almond or oat milk can be good alternatives.

Lastly, the granulated sugar can be adjusted based on your sweetness preference. If you prefer a more natural sweetener, consider using honey or agave syrup. The orange zest enhances the flavor profile, providing an aromatic pop that brings the whole slush together. Don’t skip it! It adds an extra layer of brightness that makes this slush truly special.

Step-by-Step Instructions

  1. Start by preparing your ingredients. Gather 2 cups of orange juice, 1 cup of vanilla ice cream, and 1 cup of crushed ice. Make sure the ice is finely crushed, as larger chunks can make blending difficult.
  2. In a blender, combine the orange juice, vanilla ice cream, crushed ice, and 1/2 cup of milk. Add 1/4 cup of granulated sugar and 1 teaspoon of vanilla extract. If you like a sweeter slush, consider adding a bit more sugar at this stage.
  3. Add the zest of 1 orange to the blender. This step is crucial for enhancing the citrus flavor of your slush. Make sure not to include the bitter white pith—only the flavorful zest.
  4. Blend the mixture on medium-high speed for about 30-45 seconds. Stop once the ingredients are fully combined and the slush has a smooth, even consistency. If you notice large chunks of ice, blend for an additional 10-15 seconds. Avoid over-blending, as this can make the slush too liquidy.
  5. Once blended, taste the slush. If it needs more sweetness, add a little more sugar and blend for a few more seconds. If it’s too thick, you can add a splash of milk to reach your desired consistency.
  6. Pour the slush into glasses. This recipe typically serves 4, but you can easily double it for larger gatherings. Use a spoon to help guide the slush into the glasses if needed.
  7. Garnish each serving with fresh orange slices and mint leaves. The mint not only adds a pop of color but also a refreshing aroma that complements the citrus flavors beautifully.
  8. Serve immediately and enjoy! If you’ve made extra, you can refrigerate it for a short time, but it’s best enjoyed fresh.

Pro Tips for the Best Frozen Orange Creamsicle Slush

  • Don’t skip the orange zest! It’s a game-changer for flavor. Always zest before juicing to make it easier.
  • Use a high-powered blender for the best texture. A standard blender may struggle with ice, leading to uneven consistency. If you have a food processor, that can work too, but ensure the ice is finely crushed.
  • Adjust the ice-to-liquid ratio carefully. If your slush is too thick, it won’t blend well. Start with less ice and add more until you reach your preferred texture.
  • Be cautious with the sugar! Always start with the lower amount, as you can easily add more, but it’s hard to fix an overly sweet slush.
  • For a fun twist, consider adding a splash of coconut milk or a handful of fresh fruit like strawberries or pineapple. This not only enhances the flavor but also adds a beautiful color contrast.

Variations & Serving Ideas

There are countless ways to put a spin on your Frozen Orange Creamsicle Slush. Consider making a tropical version by adding in some pineapple juice or coconut milk for a delightful tropical twist. If you’re feeling adventurous, try incorporating a handful of frozen mango or peach slices for added sweetness. For a lighter version, swap out the vanilla ice cream for Greek yogurt for a creamy yet tangy alternative.

As for serving ideas, this refreshing slush pairs wonderfully with light summer dishes like grilled chicken skewers, fish tacos, or a simple salad topped with citrus vinaigrette. The bright, zesty flavors of the slush complement these dishes perfectly, making them an ideal pairing for a sunny day.

Storage, Make-Ahead & Reheating

This Frozen Orange Creamsicle Slush is best enjoyed fresh, but if you have leftovers, you can store them in an airtight container in the fridge for up to 2 days. Just keep in mind that the slush may lose some of its texture over time as the ice melts. It doesn’t freeze well, as the ice will turn into a solid block. If you must freeze it, blend again after thawing to restore the slushy consistency. This treat is best the day you make it, as the flavors meld together beautifully overnight, enhancing its deliciousness.

Frequently Asked Questions

Can I make Frozen Orange Creamsicle Slush ahead of time?

Yes — in fact, it tastes even better the next day as the flavors meld. However, it’s best to enjoy it fresh, as the texture can change if stored for too long. If you need to prepare it ahead, keep it in the fridge and re-blend before serving.

What kind of orange juice should I use?

For the best flavor, use freshly squeezed orange juice. However, if you’re short on time, opt for 100% pure store-bought juice without added sugars. This will ensure that your slush remains flavorful and refreshing.

Can I substitute the vanilla ice cream?

Absolutely! If you’re looking for a dairy-free option, coconut milk ice cream or a non-dairy vanilla ice cream can work wonderfully. They will still provide the creamy texture and sweetness you desire.

How can I adjust the sweetness of my slush?

You can easily adjust the sweetness by modifying the amount of sugar added. Start with 1/4 cup and taste the mixture before blending. If you prefer it sweeter, add more sugar gradually until it reaches your desired level.

What should I do if my slush is too thick?

If your slush is too thick, simply add a splash of milk or orange juice and blend again. This will help achieve a more drinkable consistency while maintaining the slushy texture. Adjust gradually to reach your preferred thickness.

Sun-Kissed Frozen Orange Cream Slush

Final Thoughts

The Frozen Orange Creamsicle Slush is a delightful blend of refreshing citrus and creamy goodness, making it a perfect treat for warm days or any time you crave a taste of nostalgia. The way the bright orange flavor dances with the creamy texture truly elevates this slush, transforming it into a satisfying escape from the everyday.

This is the kind of recipe I come back to again and again, especially when I’m looking to cool down or impress guests at a summer gathering. It’s simple to make and always brings smiles all around! I encourage you to try this recipe for yourself—don’t hesitate to share your results or even put your own spin on it. Happy slushing!

Print
clock clock iconcutlery cutlery iconflag flag iconfolder folder iconinstagram instagram iconpinterest pinterest iconfacebook facebook iconprint print iconsquares squares iconheart heart iconheart solid heart solid icon

Frozen Orange Creamsicle Slush


  • Author: Lily author
  • Total Time: 15 minutes
  • Yield: 4 servings 1x
Pin Recipe
Print Recipe

Description

This Frozen Orange Creamsicle Slush is a refreshing treat that combines creamy vanilla and zesty orange flavors. Perfect for hot summer days, it brings back nostalgic memories with every sip.


Ingredients

Scale
  • 2 cups orange juice (freshly squeezed or store-bought)
  • 1 cup vanilla ice cream
  • 1 cup crushed ice
  • 1/2 cup milk (whole or 2%)
  • 1/4 cup granulated sugar (adjust based on sweetness preference)
  • 1 teaspoon vanilla extract
  • Zest of 1 orange (for added flavor)
  • Fresh orange slices and mint leaves (for garnish)

Instructions

  1. Start by preparing your ingredients. Gather 2 cups of orange juice, 1 cup of vanilla ice cream, and 1 cup of crushed ice. Make sure the ice is finely crushed, as larger chunks can make blending difficult.
  2. In a blender, combine the orange juice, vanilla ice cream, crushed ice, and 1/2 cup of milk. Add 1/4 cup of granulated sugar and 1 teaspoon of vanilla extract. If you like a sweeter slush, consider adding a bit more sugar at this stage.
  3. Add the zest of 1 orange to the blender. This step is crucial for enhancing the citrus flavor of your slush. Make sure not to include the bitter white pith—only the flavorful zest.
  4. Blend the mixture on medium-high speed for about 30-45 seconds. Stop once the ingredients are fully combined and the slush has a smooth, even consistency. If you notice large chunks of ice, blend for an additional 10-15 seconds. Avoid over-blending, as this can make the slush too liquidy.
  5. Once blended, taste the slush. If it needs more sweetness, add a little more sugar and blend for a few more seconds. If it’s too thick, you can add a splash of milk to reach your desired consistency.
  6. Pour the slush into glasses. This recipe typically serves 4, but you can easily double it for larger gatherings. Use a spoon to help guide the slush into the glasses if needed.
  7. Garnish each serving with fresh orange slices and mint leaves. The mint not only adds a pop of color but also a refreshing aroma that complements the citrus flavors beautifully.
  8. Serve immediately and enjoy! If you’ve made extra, you can refrigerate it for a short time, but it's best enjoyed fresh.
  • Prep Time: 15 min
  • Cook Time: 0 min
  • Category: Dessert
  • Method: Blending
  • Cuisine: American

Nutrition

  • Serving Size: 1 serving
  • Calories: 200
  • Sugar: 30 g
  • Sodium: 50 mg
  • Fat: 5 g
  • Saturated Fat: 3 g
  • Unsaturated Fat: 2 g
  • Trans Fat: 0 g
  • Carbohydrates: 40 g
  • Fiber: 1 g
  • Protein: 2 g
  • Cholesterol: 20 mg

Keywords: Don't skip the orange zest! It's a game-changer for flavor. Always zest before juicing to make it easier.

Did you make this recipe?

Share a photo and tag us — we can't wait to see what you've made!

Zesty Lemon Poppy Seed Delight

One rainy afternoon, I found myself in my grandmother’s cozy kitchen, the kind that always smelled like warmth and love. She was whipping up her famous Lemon Poppy Seed Loaf, a recipe that had been passed down through generations. As the batter came together, the zesty aroma of fresh lemons filled the air, mingling perfectly with the nutty fragrance of poppy seeds. I can still picture her, apron-clad, as she expertly drizzled a vibrant citrus icing over the loaf, creating a glossy, sun-kissed finish that beckoned us to dive in. It was a moment that sparked my own passion for baking, and this recipe has become a cherished staple in my home ever since.

When you take a bite of this Lemon Poppy Seed Loaf, it’s like a burst of sunshine on your palate. The loaf is beautifully golden, with a tender crumb that melts in your mouth. Each slice is speckled with tiny poppy seeds, adding a delightful crunch that contrasts beautifully with the tangy sweetness of the lemon. And that citrus icing? It’s the finishing touch that elevates this loaf from ordinary to extraordinary, with its bright, zesty flavor dancing on your taste buds.

This recipe stands out because it embraces simplicity while delivering on flavor. I’ve added a hint of vanilla to the batter, enhancing the overall taste and making it even more indulgent. Trust me, once you make this Lemon Poppy Seed Loaf With Citrus Icing, it’ll become a go-to in your baking repertoire.

So, let me show you exactly how to make it!

Zesty Lemon Poppy Seed Delight

Why You’ll Love This Recipe

  • Moist and tender crumb that melts in your mouth, thanks to the perfect balance of butter and buttermilk.
  • Bright, zesty lemon flavor paired with crunchy poppy seeds, creating a delightful texture and taste experience.
  • Easy to whip up in just about an hour, perfect for last-minute gatherings or a cozy afternoon treat.
  • Budget-friendly with everyday ingredients, making it an accessible option for all home bakers.
  • The citrus icing adds a sweet tang that elevates the loaf, turning a simple recipe into a showstopper!

Ingredients

  • 1 ½ cups (190g) all-purpose flour
  • 1 teaspoon baking powder
  • ½ teaspoon baking soda
  • ½ teaspoon salt
  • 3 tablespoons poppy seeds
  • ½ cup (115g) unsalted butter, softened to room temperature
  • 1 cup (200g) granulated sugar
  • 2 large eggs
  • 1 teaspoon vanilla extract
  • 1 teaspoon lemon zest (from about 1 medium lemon)
  • ½ cup (120ml) buttermilk
  • 2 tablespoons fresh lemon juice

For the Citrus Icing:

  • 1 cup (120g) powdered sugar
  • 2 tablespoons fresh lemon juice
  • 1 tablespoon orange juice
  • 1 teaspoon lemon zest (for garnish, optional)

Let’s dive into the key ingredients that make this Lemon Poppy Seed Loaf so special. The all-purpose flour provides the structure and base for the loaf, while the baking powder and baking soda ensure it rises perfectly, giving the loaf a light texture. For a gluten-free variation, you could substitute the flour with a gluten-free all-purpose blend. Poppy seeds not only add a delightful crunch but also contribute to the unique flavor profile that pairs well with the citrus notes.

Unsalted butter is crucial for achieving the buttery richness that makes this loaf so moist. If you’re looking for a dairy-free option, coconut oil or a vegan butter can be used instead. The buttermilk is another essential component, providing acidity that activates the baking soda for a fluffy texture. If you don’t have buttermilk on hand, you can easily make a substitute by mixing ½ cup of milk with 1 tablespoon of vinegar or lemon juice and letting it sit for about 5 minutes.

Step-by-Step Instructions

  1. Preheat your oven to 350°F (175°C). Grease a 9×5-inch loaf pan or line it with parchment paper for easy removal later.
  2. In a medium mixing bowl, whisk together 1 ½ cups of all-purpose flour, 1 teaspoon of baking powder, ½ teaspoon of baking soda, ½ teaspoon of salt, and 3 tablespoons of poppy seeds. This helps to evenly distribute the baking agents and ensures a uniform rise.
  3. In a large mixing bowl, cream together ½ cup of softened unsalted butter and 1 cup of granulated sugar using an electric mixer on medium speed for about 3-4 minutes, until the mixture is light and fluffy. Make sure to scrape down the sides of the bowl occasionally.
  4. Add 2 large eggs, 1 teaspoon of vanilla extract, and 1 teaspoon of lemon zest to the creamed butter and sugar, mixing until fully combined. You want a smooth consistency, so ensure there are no lumps of butter.
  5. In a small bowl, combine ½ cup of buttermilk and 2 tablespoons of fresh lemon juice. Alternately add the dry ingredients and buttermilk mixture to the butter mixture, starting and ending with the dry ingredients. Mix just until combined; do not overmix, as this can lead to a dense loaf.
  6. Pour the batter into the prepared loaf pan. Smooth the top with a spatula, ensuring it’s even. Bake in the preheated oven for 50-60 minutes, or until a toothpick inserted in the center comes out clean. The edges should be lightly golden brown, and the center should feel just set.
  7. Once baked, remove the loaf from the oven and allow it to cool in the pan for about 10 minutes. Then, transfer it to a wire rack to cool completely. Resist the urge to slice too soon, as it will be crumbly if it’s still warm.
  8. While the loaf is cooling, prepare the citrus icing. In a medium bowl, whisk together 1 cup of powdered sugar, 2 tablespoons of fresh lemon juice, and 1 tablespoon of orange juice until smooth. If the icing is too thick, you can add a little more juice to reach your desired consistency.
  9. Once the loaf is completely cool, drizzle the citrus icing over the top. If you like, sprinkle with an additional teaspoon of lemon zest for an extra pop of flavor and color.

Pro Tips for the Best Lemon Poppy Seed Loaf With Citrus Icing

  • Be careful not to overmix your batter; this is a common mistake that can lead to a dense loaf. Mix just until the dry ingredients are incorporated for a light and fluffy texture.
  • Use room temperature ingredients, especially the butter and eggs. This helps to create a smoother batter and ensures even baking. Take your eggs out of the fridge about 30 minutes before you start.
  • For a more pronounced lemon flavor, consider adding a little lemon extract in addition to the zest and juice. Just a half teaspoon can elevate the citrus notes significantly.
  • When measuring your flour, spoon it into the measuring cup and level it off with a knife instead of scooping directly from the bag. This prevents packing and ensures you don’t end up with a dry loaf.
  • Invest in a good quality loaf pan; it makes a difference in heat distribution, which ensures even baking. If your pan is dark-coated, reduce the oven temperature by 25°F to prevent over-browning.

Variations & Serving Ideas

For a delightful twist, consider adding blueberries or raspberries to the batter for a fruity burst of flavor. You can also experiment with different citrus fruits—try lime or grapefruit zest and juice for a refreshing change. For a healthier option, substitute half of the all-purpose flour with whole wheat flour for added fiber without compromising too much on texture.

This Lemon Poppy Seed Loaf pairs beautifully with a light salad, such as a mixed greens salad with a vinaigrette, or a cup of tea for a cozy afternoon treat. It also complements a creamy cheese platter, as the acidity of the loaf balances rich cheeses perfectly. Lastly, a scoop of vanilla ice cream on the side creates a delightful contrast of temperatures and flavors!

Storage, Make-Ahead & Reheating

This Lemon Poppy Seed Loaf can be stored at room temperature for up to 3 days if wrapped tightly in plastic wrap. If you want to keep it longer, it freezes well for up to 3 months. To freeze, wrap the loaf tightly in plastic wrap and then in aluminum foil to prevent freezer burn.

When you’re ready to enjoy it again, simply thaw it in the fridge overnight. Reheat individual slices in the microwave for 15-20 seconds or in a toaster oven until warmed through. Interestingly, many people find that this loaf tastes even better the next day, as the flavors have time to meld!

Frequently Asked Questions

Can I make Lemon Poppy Seed Loaf With Citrus Icing ahead of time?

Yes — in fact, it tastes even better the next day! You can make the loaf a day in advance, allowing the flavors to develop. Just be sure to store it in an airtight container to maintain its moisture.

Can I substitute the poppy seeds?

Absolutely! If you don’t have poppy seeds on hand or prefer an alternative, you can use sesame seeds for a similar crunch or omit them entirely for a smooth loaf.

What can I use instead of buttermilk?

If you don’t have buttermilk, you can easily create a substitute by mixing ½ cup of milk (dairy or plant-based) with 1 tablespoon of vinegar or lemon juice. Let it sit for 5 minutes before using in the recipe.

How can I make this recipe gluten-free?

To make a gluten-free version of this Lemon Poppy Seed Loaf, substitute the all-purpose flour with a gluten-free all-purpose flour blend. Just ensure that the blend contains a binding agent like xanthan gum for the best results.

What is the best way to store leftover loaf?

Leftover Lemon Poppy Seed Loaf should be stored in an airtight container at room temperature for up to 3 days. For longer storage, wrap it tightly and freeze for up to 3 months. Thaw it before serving for the best texture.

Zesty Lemon Poppy Seed Delight

Final Thoughts

The Lemon Poppy Seed Loaf with Citrus Icing is truly a delightful treat that brings a burst of brightness to any occasion. The zesty lemon flavor combined with the subtle crunch of poppy seeds creates a satisfying balance, while the citrus icing adds a touch of sweetness that perfectly complements the loaf’s tanginess.

This is the kind of recipe I come back to again and again, especially when I want to brighten up a gloomy day or celebrate a small victory. The aroma that fills the kitchen as it bakes is absolutely heavenly! I encourage you to give this recipe a try; you might just find it becoming a beloved staple in your home. Don’t forget to share your results or even add your own unique twist—I can’t wait to see what you create!

Print
clock clock iconcutlery cutlery iconflag flag iconfolder folder iconinstagram instagram iconpinterest pinterest iconfacebook facebook iconprint print iconsquares squares iconheart heart iconheart solid heart solid icon

Lemon Poppy Seed Loaf


  • Author: Lily author
  • Total Time: 36 minute
  • Yield: 1 loaf 1x
Pin Recipe
Print Recipe

Description

This Lemon Poppy Seed Loaf is a delightful treat that combines zesty lemon flavor with crunchy poppy seeds. Topped with a citrus icing, it’s perfect for any occasion.


Ingredients

Scale
  • 1 ½ cups (190g) all-purpose flour
  • 1 teaspoon baking powder
  • ½ teaspoon baking soda
  • ½ teaspoon salt
  • 3 tablespoons poppy seeds
  • ½ cup (115g) unsalted butter, softened to room temperature
  • 1 cup (200g) granulated sugar
  • 2 large eggs
  • 1 teaspoon vanilla extract
  • 1 teaspoon lemon zest (from about 1 medium lemon)
  • ½ cup (120ml) buttermilk
  • 2 tablespoons fresh lemon juice
  • 1 cup (120g) powdered sugar
  • 2 tablespoons fresh lemon juice
  • 1 tablespoon orange juice
  • 1 teaspoon lemon zest (for garnish, optional)

Instructions

  1. Preheat your oven to 350°F (175°C). Grease a 9×5-inch loaf pan or line it with parchment paper for easy removal later.
  2. In a medium mixing bowl, whisk together 1 ½ cups of all-purpose flour, 1 teaspoon of baking powder, ½ teaspoon of baking soda, ½ teaspoon of salt, and 3 tablespoons of poppy seeds. This helps to evenly distribute the baking agents and ensures a uniform rise.
  3. In a large mixing bowl, cream together ½ cup of softened unsalted butter and 1 cup of granulated sugar using an electric mixer on medium speed for about 3-4 minutes, until the mixture is light and fluffy. Make sure to scrape down the sides of the bowl occasionally.
  4. Add 2 large eggs, 1 teaspoon of vanilla extract, and 1 teaspoon of lemon zest to the creamed butter and sugar, mixing until fully combined. You want a smooth consistency, so ensure there are no lumps of butter.
  5. In a small bowl, combine ½ cup of buttermilk and 2 tablespoons of fresh lemon juice. Alternately add the dry ingredients and buttermilk mixture to the butter mixture, starting and ending with the dry ingredients. Mix just until combined; do not overmix, as this can lead to a dense loaf.
  6. Pour the batter into the prepared loaf pan. Smooth the top with a spatula, ensuring it’s even. Bake in the preheated oven for 50-60 minutes, or until a toothpick inserted in the center comes out clean. The edges should be lightly golden brown, and the center should feel just set.
  7. Once baked, remove the loaf from the oven and allow it to cool in the pan for about 10 minutes. Then, transfer it to a wire rack to cool completely. Resist the urge to slice too soon, as it will be crumbly if it’s still warm.
  8. While the loaf is cooling, prepare the citrus icing. In a medium bowl, whisk together 1 cup of powdered sugar, 2 tablespoons of fresh lemon juice, and 1 tablespoon of orange juice until smooth. If the icing is too thick, you can add a little more juice to reach your desired consistency.
  9. Once the loaf is completely cool, drizzle the citrus icing over the top. If you like, sprinkle with an additional teaspoon of lemon zest for an extra pop of flavor and color.
  • Prep Time: 15 mins
  • Cook Time: 50-60 mins
  • Category: Dessert
  • Method: Baking
  • Cuisine: American

Nutrition

  • Serving Size: 1 slice
  • Calories: 200
  • Sugar: 15 g
  • Sodium: 150 mg
  • Fat: 8 g
  • Saturated Fat: 5 g
  • Unsaturated Fat: 3 g
  • Trans Fat: 0 g
  • Carbohydrates: 30 g
  • Fiber: 1 g
  • Protein: 3 g
  • Cholesterol: 40 mg

Keywords: Be careful not to overmix your batter; this is a common mistake that can lead to a dense loaf. Use room temperature ingredients for a smoother batter and even baking.

Did you make this recipe?

Share a photo and tag us — we can't wait to see what you've made!

  • Privacy Policy
  • Terms Of Service
  • Contact
  • About
  • GDPR

Copyright © 2025 Homesmad