• Skip to primary navigation
  • Skip to main content
  • Skip to primary sidebar
Homesmad

Homesmad

  • Home
  • Breakfast & Brunch
  • Appetizers & Snacks
  • Dinner
  • Dessert
  • About
  • Privacy Policy
  • Contact
Homesmad
  • Home
  • Breakfast & Brunch
  • Appetizers & Snacks
  • Dinner
  • Dessert
  • About
  • Privacy Policy
  • Contact

Irresistible High Protein Honey Garlic Chicken Mac & Cheese

November 4, 2025 by Lily author

High Protein Honey Garlic Butter Chicken With Mac Cheese isn’t just a meal; it’s a culinary revelation designed to satisfy your deepest comfort food cravings while simultaneously fueling your body with essential nutrients. I know, it sounds almost too good to be true, combining two all-time favorites into one harmonious, flavor-packed dish. We all adore macaroni and cheese for its undeniable creamy goodness, a staple that evokes cherished memories and provides instant comfort across cultures. And then there’s the irresistible allure of honey garlic chicken, a sweet and savory sensation that has captured palates worldwide with its sticky, glazed perfection. This recipe brings these beloved components together, elevating them with a focus on lean protein to support your active lifestyle.

Why You’ll Fall in Love with This Dish

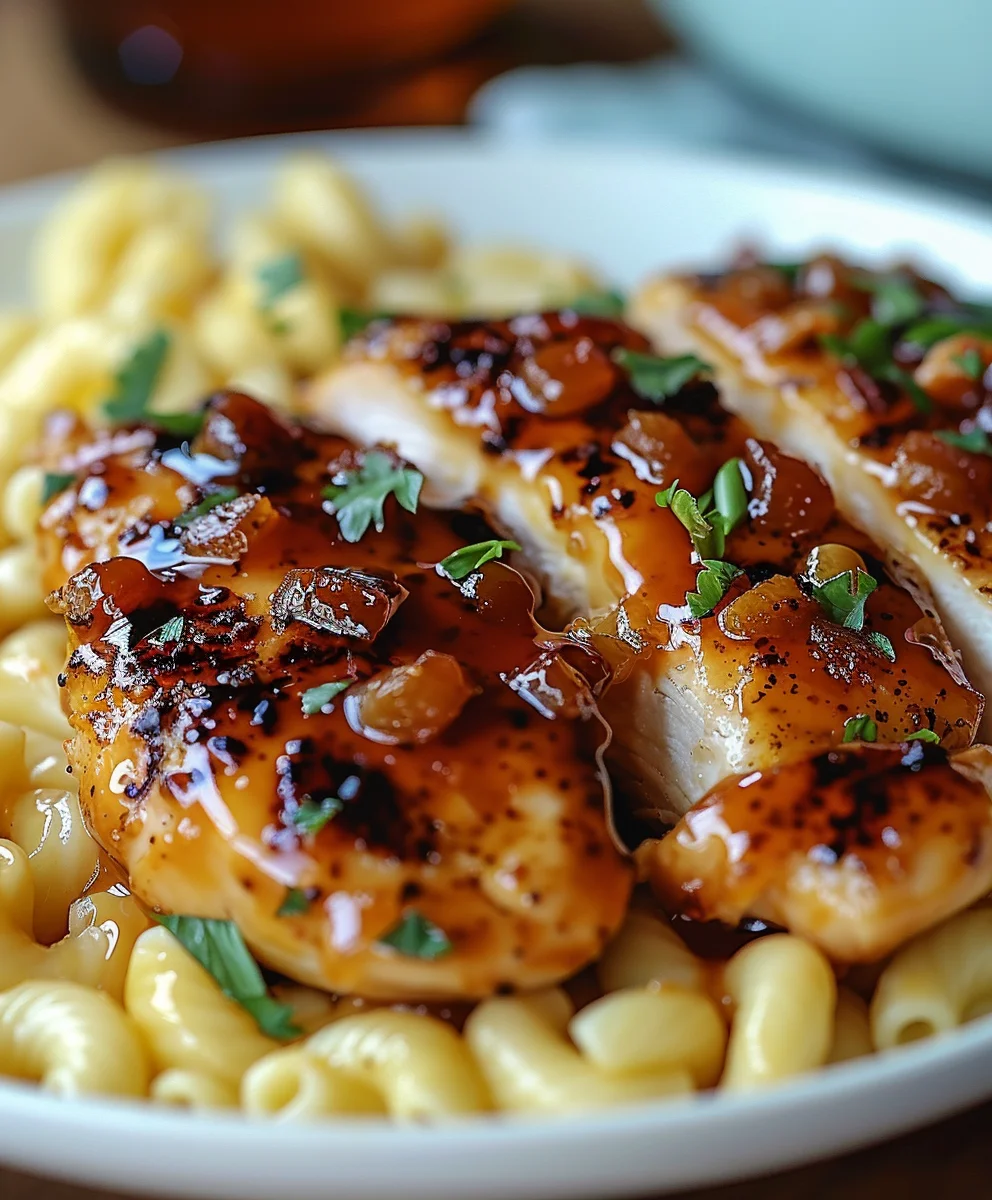
Imagine tender, juicy chicken pieces bathed in a luscious honey-garlic butter sauce, served alongside a rich, cheesy macaroni that’s been optimized for extra protein. This High Protein Honey Garlic Butter Chicken With Mac Cheese offers an incredible balance of flavors and textures – the savory, garlicky notes perfectly complement the sweet honey, while the creamy pasta provides a delightful contrast to the chicken’s tender bite. It’s incredibly convenient for a weeknight dinner, impressive enough for guests, and makes fantastic meal prep. You get the ultimate satisfying meal without compromising on your nutritional goals. Prepare to indulge!

Irresistible High Protein Honey Garlic Chicken Mac & Cheese this RECIPE

Ingredients:

For the High Protein Honey Garlic Butter Chicken:

  • 1.5 lbs (approximately 680g) Boneless, Skinless Chicken Breasts: I always go for organic or free-range if possible. You’ll want to slice these horizontally into 1/2-inch thick cutlets or pound them thin for quick, even cooking. This helps them soak up all that incredible flavor!
  • 1/4 cup Low-Sodium Soy Sauce: Or tamari for a gluten-free option. This provides that essential umami depth without excessive saltiness.
  • 1/4 cup Honey: Pure, natural honey is key here for that perfect balance of sweetness and a beautiful glaze.
  • 4-5 cloves Garlic: Minced very finely, or grated. I truly believe you can never have too much garlic, especially in a honey garlic sauce!
  • 1 tablespoon Fresh Ginger: Grated. The fresh, zesty kick of ginger brightens up the entire dish beautifully.
  • 2 tablespoons Unsalted Butter: Divided. We’ll use some for searing and some to finish the sauce for that rich, velvety texture.
  • 1 tablespoon Olive Oil or Avocado Oil: For searing the chicken. Choose an oil with a high smoke point.
  • 1 teaspoon Cornstarch: Mixed with 1 tablespoon cold water to create a slurry. This is my secret weapon for thickening the sauce to glossy perfection.
  • 1/2 teaspoon Smoked Paprika: For a subtle smoky depth and a gorgeous color.
  • 1/4 teaspoon Black Pepper: Freshly ground, always.
  • Pinch of Red Pepper Flakes (Optional): If you like a little heat to cut through the sweetness, this is a fantastic addition!

For the High Protein Mac and Cheese:

  • 12 oz (approximately 340g) High-Protein Pasta: Look for varieties made from chickpeas, lentils, or whole wheat, which typically offer significantly more protein than regular pasta. Elbow macaroni or shells work wonderfully for capturing all that cheesy goodness.
  • 4 tablespoons Unsalted Butter: Divided. This forms the base for our creamy roux.
  • 1/4 cup All-Purpose Flour: For making the roux. If you’re going gluten-free, a 1:1 gluten-free flour blend or even cornstarch can work, though the texture might vary slightly.
  • 3 cups Milk: I usually use 2% or whole milk for the creamiest result, but skim or unsweetened almond milk can also be used to keep it lighter without sacrificing too much flavor.
  • 8 oz (approximately 225g) Sharp Cheddar Cheese: Freshly grated from a block. Please, please, please grate your own! Pre-shredded cheese often contains anti-caking agents that can make your sauce gritty.
  • 4 oz (approximately 113g) Gruyère or Smoked Gouda Cheese: Grated. This adds a sophisticated, nutty, and slightly smoky flavor dimension that elevates the mac and cheese beyond basic.
  • 2 oz (approximately 56g) Cream Cheese (light or full fat): Cubed. This is my secret for an extra silky, unbelievably smooth sauce.
  • 1/2 cup Low-Fat Cottage Cheese or Plain Greek Yogurt: For an extra protein boost and incredible creaminess without adding too much fat. You won’t even taste it, I promise!
  • 1 teaspoon Dijon Mustard: This doesn’t make your mac and cheese taste like mustard; it enhances the savory notes of the cheese and helps balance the richness.
  • 1/2 teaspoon Onion Powder: For an underlying savory aromatic.
  • 1/4 teaspoon Garlic Powder: To complement our garlic-heavy chicken.
  • 1/4 teaspoon Smoked Paprika: Again, for color and a hint of smoky warmth.
  • Salt and Freshly Ground Black Pepper: To taste. Season generously, tasting as you go.

For Garnish (Optional):

  • Fresh Parsley or Cilantro: Chopped, for a pop of color and freshness.
  • Toasted Sesame Seeds: For a slight nutty crunch on the chicken.
  • Green Onions: Sliced, for a mild oniony bite.

Instructions:

Phase 1: Preparing the High Protein Honey Garlic Butter Chicken

  1. Prepare the Chicken: First things first, let’s get our chicken ready. Take your boneless, skinless chicken breasts and, if they’re thick, carefully slice them horizontally into thinner cutlets, about 1/2-inch thick. Alternatively, you can place them between two sheets of plastic wrap and pound them gently with a meat mallet or rolling pin until they are of an even thickness. This step is crucial for ensuring the chicken cooks quickly and evenly, becoming incredibly tender and allowing it to really absorb all those delicious flavors we’re about to introduce. Pat the chicken dry with paper towels – this helps achieve a beautiful sear!
  2. Make the Honey Garlic Sauce Base: In a medium bowl, whisk together the low-sodium soy sauce, honey, minced garlic, grated fresh ginger, smoked paprika, and black pepper. If you like a bit of a kick, now’s the time to stir in those red pepper flakes. This is going to be the heart and soul of our “High Protein Honey Garlic Butter Chicken,” so make sure it’s well combined. Set this mixture aside for a moment.
  3. Sear the Chicken: Heat 1 tablespoon of olive oil (or avocado oil) and 1 tablespoon of unsalted butter in a large skillet or pan over medium-high heat. You want the pan to be nice and hot but not smoking. Carefully add the chicken cutlets to the hot pan in a single layer, being careful not to overcrowd the pan. If necessary, cook the chicken in batches. Sear for 3-4 minutes per side, or until the chicken is golden brown and cooked through. It should have a lovely, slightly crispy exterior. Once cooked, remove the chicken from the pan and set it aside on a plate, tenting it loosely with foil to keep it warm and allow the juices to redistribute. Don’t worry if there are some browned bits left in the pan; those are flavor gold!
  4. Create the Luscious Honey Garlic Butter Sauce: Reduce the heat to medium-low. Add the remaining 1 tablespoon of unsalted butter to the same skillet. Once melted, pour in the reserved honey garlic sauce mixture. Bring it to a gentle simmer, scraping up any browned bits from the bottom of the pan with a wooden spoon – this adds immense depth of flavor to your sauce. Let it simmer for 2-3 minutes, allowing the flavors to meld and the sauce to slightly reduce.
  5. Thicken the Sauce: In a small bowl, whisk together the cornstarch with 1 tablespoon of cold water until smooth to create a slurry. Slowly pour the cornstarch slurry into the simmering sauce in the skillet while whisking continuously. Continue to whisk until the sauce thickens and becomes glossy and syrupy, typically another 1-2 minutes. It should coat the back of a spoon beautifully. This thickening step is crucial for that perfect restaurant-quality glaze!
  6. Coat the Chicken: Return the cooked chicken cutlets to the skillet, turning them gently to fully coat each piece with the thick, glistening honey garlic butter sauce. Allow the chicken to warm through in the sauce for about 1 minute. At this point, your kitchen will smell absolutely incredible, and you’ll be ready to dive in!

Phase 2: Crafting the High Protein Mac and Cheese

  1. Cook the High Protein Pasta: Bring a large pot of heavily salted water to a rolling boil. Add your high-protein pasta and cook according to package directions until it’s al dente – meaning it’s still firm to the bite. Undercooking by about a minute is a great trick, as it will finish cooking in the cheese sauce and prevent it from becoming mushy. Drain the pasta thoroughly and set it aside. Do not rinse the pasta; the residual starch helps the sauce cling better.
  2. Prepare the Roux: While your pasta is cooking, in a separate large, heavy-bottomed pot or Dutch oven, melt 4 tablespoons of unsalted butter over medium heat. Once the butter is fully melted and slightly foamy, sprinkle in the all-purpose flour. Whisk continuously for 1-2 minutes, cooking out the raw flour taste. You’re looking for a smooth, pale paste (a roux). This is the foundation for our wonderfully creamy cheese sauce.
  3. Add the Milk and Seasonings: Gradually pour in the milk, about 1/2 cup at a time, whisking vigorously after each addition to prevent lumps. Continue whisking until the mixture is smooth and thick. Once all the milk is incorporated and the sauce is simmering gently, stir in the Dijon mustard, onion powder, garlic powder, and smoked paprika. Continue to cook, stirring frequently, until the sauce thickens enough to coat the back of a spoon, usually about 5-7 minutes. It should be creamy and luscious.
  4. Incorporate the Cheeses for the Protein Boost: Reduce the heat to low. Now, it’s time for the magic! Add the freshly grated sharp cheddar and Gruyère (or smoked Gouda) cheeses, along with the cubed cream cheese. Stir constantly until all the cheeses are completely melted and the sauce is incredibly smooth and velvety. Next, fold in the cottage cheese or Greek yogurt. Keep stirring until it’s fully incorporated and no visible lumps remain. The sauce should be incredibly rich and uniform. This combination of cheeses and protein sources ensures our “High Protein Mac and Cheese” lives up to its name and delivers on flavor!
  5. Season the Cheese Sauce: Taste the cheese sauce and season generously with salt and freshly ground black pepper. Remember, cheese can be salty, so taste first and adjust as needed. You want the seasoning to complement the richness of the cheese without overpowering it.
  6. Combine Pasta and Cheese Sauce: Add the drained, al dente high-protein pasta directly into the pot with the glorious cheese sauce. Stir gently but thoroughly until every piece of pasta is beautifully coated in the thick, creamy, cheesy goodness. Ensure even distribution, so every bite is pure comfort.

Phase 3: Bringing it All Together & Finishing Touches

  1. Serve Immediately: This dish is best enjoyed fresh off the stove! Ladle generous portions of the High Protein Mac and Cheese onto plates. The steam rising from the creamy pasta will already be incredibly inviting.
  2. Plate with Honey Garlic Butter Chicken: Carefully arrange a few pieces of the High Protein Honey Garlic Butter Chicken alongside or on top of the mac and cheese. Make sure to spoon extra sauce from the skillet over the chicken – that rich, glossy glaze is too good to leave behind!
  3. Garnish and Enjoy: For an extra flourish and a touch of freshness, sprinkle with chopped fresh parsley or cilantro, a pinch of toasted sesame seeds, or some sliced green onions, if desired. The vibrant colors of the garnish will make the dish pop, and the fresh herbs provide a lovely contrast to the richness.
  4. A Moment to Savor: Take a moment to appreciate the incredible aroma before digging in. You’ve just created a truly satisfying, flavorful, and protein-packed meal that perfectly balances sweet, savory, and creamy textures. Each forkful will be a delightful combination of the tender, glazed chicken and the indulgent, cheesy pasta. Enjoy this magnificent “High Protein Honey Garlic Butter Chicken With Mac Cheese”!

Irresistible High Protein Honey Garlic Chicken Mac & Cheese

Conclusion:

And there you have it, friends! We’ve journeyed together through what I truly believe is a show-stopping, weeknight-saving, and utterly delicious meal. If you’ve been searching for that perfect dish to add to your rotation, something that delivers on flavor, comfort, and nutrition, then look no further. This recipe for High Protein Honey Garlic Butter Chicken With Mac Cheese isn’t just another meal; it’s an experience designed to bring joy and satisfaction to your table.

I can’t stress enough why this dish is an absolute must-try. The chicken, bathed in that irresistible sweet, savory, and slightly tangy honey garlic butter sauce, achieves a beautiful caramelization that locks in all its juicy tenderness. It’s truly a delight to the senses. Then, pair that succulent chicken with the creamy, cheesy comfort of homemade macaroni and cheese, and you’ve got a combination that simply can’t be beaten. It’s the kind of meal that makes everyone at the table happy, from the pickiest eaters to the most discerning palates. The high protein content ensures you’re not just eating something delicious, but something genuinely nourishing and sustaining, keeping you feeling full and energized long after the last bite.

Elevate Your Dining Experience with These Serving Suggestions!

While the combination of the chicken and mac and cheese is divine on its own, I love thinking about how to make every meal even more special. For a fresh contrast, consider serving this alongside a crisp, vibrant green salad with a light vinaigrette. The brightness of the greens will cut through the richness beautifully. A sprinkle of fresh parsley or chives over both the chicken and the mac and cheese just before serving adds a pop of color and an extra layer of herbaceous freshness that really makes the flavors sing. Don’t underestimate the power of a simple garnish!

For those who love a bit of heat, a drizzle of sriracha or a pinch of red pepper flakes stirred into the honey garlic butter sauce during the last few minutes of cooking will add a fantastic kick. If you’re feeling adventurous with the mac and cheese, try incorporating different cheeses! A blend of Gruyere and sharp cheddar can add a more complex, nutty flavor profile, or a touch of smoked gouda can introduce a lovely smoky depth. You could even fold in some steamed broccoli florets or sautéed spinach into the mac and cheese for an extra boost of vegetables, making it an even more complete one-pot-style meal. For a different texture, try topping your mac and cheese with toasted breadcrumbs mixed with a little parmesan and butter; it creates an irresistible crunchy topping that’s just heavenly. And if you have any leftover chicken, it’s fantastic sliced thin and added to a salad for lunch the next day, or even tucked into a warm tortilla for a quick and flavorful wrap.

Don’t Just Read It, Make It!

My greatest hope is that this recipe inspires you to get into your kitchen and create something truly memorable. There’s a special kind of satisfaction that comes from cooking a fantastic meal from scratch, and I promise you, this is one of those dishes that delivers that feeling in spades. Don’t be intimidated; the steps are straightforward, and the reward is immense. Imagine the smiles around your table, the delicious aromas filling your home, and the pure comfort of a meal made with love.

So, please, take the plunge! Give this High Protein Honey Garlic Butter Chicken With Mac Cheese a try. I’m absolutely certain you won’t regret it. And once you’ve experienced the magic, I would absolutely love to hear about it! What did you think? Did you try any of the variations? Did you come up with your own unique twist? Share your experiences, your photos, and your triumphs with me. Your feedback and creativity inspire me and the entire cooking community. Happy cooking, everyone!


Irresistible High Protein Honey Garlic Chicken Mac & Cheese

Irresistible High Protein Honey Garlic Chicken Mac & Cheese

High Protein Honey Garlic Butter Chicken With Mac Cheese isn’t just a meal; it’s a culinary revelation designed to satisfy your deepest comfort food cravings while simultaneously fueling your body with essential nutrients. Combining two all-time favorites into one harmonious, flavor-packed dish, this recipe brings beloved components together, elevating them with a focus on lean protein to support your active lifestyle.

Prep Time
15 Minutes

Cook Time
30 Minutes

Total Time
45 Minutes

Servings
3 servings

Ingredients

  • 2 skinless, boneless chicken breasts
  • 2 tablespoons olive oil
  • 3 tablespoons butter, divided
  • 3 cloves garlic, minced
  • 2 tablespoons honey
  • Salt and pepper, to taste
  • 8 ounces elbow macaroni
  • 2 tablespoons butter (for mac & cheese)
  • 2 tablespoons all-purpose flour
  • 2 cups milk
  • 1 ½ cups shredded sharp cheddar cheese
  • Chopped fresh parsley or chives, for garnish

Instructions

  1. Step 1
    Slice chicken breasts thin or pound to an even ½-inch thickness. Season with salt and pepper.
  2. Step 2
    Heat 2 tbsp olive oil and 1 tbsp butter in a skillet over medium-high heat. Sear chicken 3-4 minutes per side until golden brown and cooked through. Remove chicken and set aside.
  3. Step 3
    Reduce heat to medium-low. Add the remaining 2 tbsp butter to the same skillet. Stir in minced garlic for 30 seconds until fragrant.
  4. Step 4
    Pour in honey, scraping up any browned bits from the bottom of the pan. Simmer for 1-2 minutes until slightly thickened. Return the cooked chicken to the skillet, turning gently to coat each piece with the sauce. Warm through for 1 minute.
  5. Step 5
    Cook 8 oz elbow macaroni in a large pot of heavily salted boiling water until al dente. Drain thoroughly and set aside.
  6. Step 6
    In a separate large, heavy-bottomed pot, melt 2 tbsp butter over medium heat. Whisk in 2 tbsp all-purpose flour for 1-2 minutes to form a smooth, pale roux.
  7. Step 7
    Gradually whisk in 2 cups milk until the mixture is smooth and thick (about 5-7 minutes). Reduce heat to low. Add 1 ½ cups shredded sharp cheddar cheese, stirring constantly until completely melted and the sauce is smooth and velvety. Season with salt and pepper to taste.
  8. Step 8
    Add the drained macaroni directly into the pot with the cheese sauce. Stir gently but thoroughly until every piece of pasta is beautifully coated.
  9. Step 9
    Ladle generous portions of mac and cheese onto plates, then top with pieces of the honey garlic chicken. Spoon extra sauce over the chicken. Garnish with chopped fresh parsley or chives, if desired, and serve immediately.

Important Information

Nutrition Facts (Per Serving)

It is important to consider this information as approximate and not to use it as definitive health advice.

Allergy Information

Please check ingredients for potential allergens and consult a health professional if in doubt.

« Previous Post
Rotisserie Chicken Broccoli Pasta: Easy Family Dinner!
Next Post »
Delicious & Healthy Spaghetti Squash Au Gratin Recipe

If you enjoyed this…

Cajun Shrimp Sheet Pan Potato Wedges: Easy One-Pan Meal

Delicious Black Eyed Peas with Beef Bacon – Soul Food Recipe

Delicious Creamy Mushroom Chicken Recipe for Easy Dinners

Primary Sidebar

Browse by Diet

BreakfastDinnerLunchDessertAppetizer

Sweet Peach Yogurt Parfait Delight

One of my fondest memories is from a lazy summer afternoon spent at my grandmother’s house. The sun filtered through the kitchen window, casting a warm glow over the table where she would create her culinary magic. It was during one of those blissful moments that I first tasted her Peach Yogurt Parfait with Honey and Granola. The sweet aroma of ripe peaches mingling with creamy yogurt and the crunch of granola was nothing short of heavenly. It felt like summer captured in a bowl, and I still remember the joy of diving in with a spoon, each layer revealing a new burst of flavor.

When I think about that parfait, I can almost hear the gentle hum of the bees outside, reminding me of the floral notes that honey brings to every bite. The vibrant yellows and soft oranges of the peaches contrast beautifully with the creamy white yogurt and the golden crunch of granola. It’s a dish that not only looks delightful but also tastes like a celebration of fresh, wholesome ingredients.

What makes my version of this Peach Yogurt Parfait special is the careful balance of flavors and textures. I use ripe, juicy peaches, drizzled with locally sourced honey, and a homemade granola that’s bursting with nuts and seeds for an extra crunch. It’s a simple dish, but every layer is crafted with love and attention.

Let me show you exactly how to make this delightful parfait, so you can bring a bit of that summer magic into your kitchen!

Sweet Peach Yogurt Parfait Delight

Why You’ll Love This Recipe

  • Delightfully creamy texture from the Greek yogurt, paired with the juicy sweetness of fresh peaches.
  • Ready in under 20 minutes, making it a quick and satisfying breakfast or snack option.
  • Budget-friendly, using common ingredients that you may already have in your pantry.
  • Customizable with your favorite granola and nuts, allowing you to tailor each parfait to your taste.
  • Perfectly balanced flavors with the bright acidity of lemon juice and the sweetness of honey enhancing the peaches.

Ingredients

  • For the Parfait:
  • 2 cups plain Greek yogurt (or vanilla yogurt for a sweeter option)
  • 2 large ripe peaches, diced (about 2 cups)
  • 1 tablespoon fresh lemon juice (to prevent browning of peaches)
  • 2 tablespoons honey (plus more for drizzling)
  • 1 teaspoon vanilla extract (optional for extra flavor)
  • For the Granola:
  • 1 cup granola (store-bought or homemade; see notes for a simple granola recipe)
  • 1/4 cup sliced almonds (optional for added crunch)
  • 1/4 cup shredded coconut (optional for added flavor)

Let’s dive into some key ingredients that make this Peach Yogurt Parfait so delightful! First, the Greek yogurt is not only creamy but also packed with protein, making it a satisfying option for breakfast or a snack. If you’re looking for a sweeter option, you can easily substitute it with vanilla yogurt, though it may alter the overall flavor balance. Next, the ripe peaches are the star of the show; their natural sweetness shines through, so I recommend choosing peaches that yield slightly to pressure, indicating they’re perfectly ripe. If peaches aren’t in season, feel free to use nectarines or even frozen peaches—just thaw them before use. Finally, honey adds a lovely floral sweetness that ties everything together. If you prefer, maple syrup can serve as a delicious substitute.

Step-by-Step Instructions

  1. Start by preparing the peaches. Wash them thoroughly, then slice and dice them into bite-sized pieces. In a medium bowl, toss the diced peaches with 1 tablespoon of fresh lemon juice to prevent browning. Set aside for about 5 minutes while the lemon juice works its magic.
  2. In a separate bowl, combine the Greek yogurt, 2 tablespoons of honey, and 1 teaspoon of vanilla extract if using. Stir the mixture until smooth and thoroughly blended. This should take about a minute. Avoid overmixing to maintain the creaminess of the yogurt.
  3. Now it’s time to layer your parfait. Grab a clear glass or bowl to showcase your beautiful creation. Start with a generous spoonful of the yogurt mixture at the bottom—about 1/4 cup will do. Use a spoon to spread it evenly.
  4. Add a layer of the diced peaches over the yogurt, ensuring they cover the yogurt completely. You might want to use about half of what you have prepared—roughly 1 cup. This layer should be visually appealing, so arrange the peaches neatly.
  5. Sprinkle 1/4 cup of granola over the peaches. This adds a delightful crunch. Make sure to distribute it evenly to ensure every bite has that satisfying texture. Avoid packing it down too tightly, as you want it to maintain its crunch.
  6. Repeat the layers: spoon in another 1/4 cup of yogurt, followed by another cup of peaches, and another sprinkle of granola. You should have at least two layers, but feel free to add more depending on your glass size.
  7. Finish off your parfait with a drizzle of honey on top for added sweetness and a touch of elegance. If you’re using sliced almonds or shredded coconut, sprinkle them on top now. It adds a lovely visual contrast and extra flavor.
  8. Serve immediately or refrigerate for up to 30 minutes before serving to allow the flavors to meld together. However, I recommend enjoying it fresh to maintain the granola’s crunch.

Pro Tips for the Best Peach Yogurt Parfait With Honey And Granola

  • Make sure to choose ripe peaches for the best flavor and texture. A common mistake is using unripe fruit, which can lead to a less enjoyable parfait. Look for peaches that are fragrant and slightly soft to the touch.
  • Use a clear glass to assemble your parfait; this not only makes for a beautiful presentation but also allows you to see the colorful layers, which adds to the enjoyment of eating it.
  • For an even creamier texture, consider whipping the Greek yogurt with a hand mixer for a couple of minutes before layering. This small adjustment makes a huge difference in mouthfeel.
  • Be mindful of the granola-to-yogurt ratio. Too much granola can overwhelm the parfait, while too little can make it feel too creamy. Aim for about 1/4 cup of granola per layer for the perfect balance.
  • If you’re making this for a gathering, consider preparing the yogurt and peaches ahead of time and layering them just before serving. This ensures the granola stays crunchy!

Variations & Serving Ideas

There are so many ways to get creative with your Peach Yogurt Parfait! For a tropical twist, swap out the peaches for mangoes or pineapples and top with coconut flakes. If you prefer a berry flavor, mix in some blueberries or strawberries with the peaches for added color and taste. For a nutty version, incorporate chopped walnuts or pecans instead of almonds.

As for serving ideas, this parfait pairs beautifully with a side of scrambled eggs for a hearty breakfast or fresh fruit salad for a light lunch. You might also enjoy it alongside whole grain toast with almond butter for an energizing snack. The contrast of flavors and textures will elevate your meal experience!

Storage, Make-Ahead & Reheating

The Peach Yogurt Parfait is best enjoyed fresh, but you can prepare some components ahead of time. Store the layered parfait in an airtight container in the refrigerator for up to 24 hours. However, be cautious; the granola may lose its crunch if stored too long. You can freeze the yogurt and peach mixture for up to 2 months; just remember to thaw it in the refrigerator overnight before serving.

If you plan to enjoy this dish the next day, it can taste even better as the flavors meld together. Just remember to add the granola right before serving to keep its delightful crunch!

Frequently Asked Questions

Can I make Peach Yogurt Parfait With Honey And Granola ahead of time?

Yes — in fact, it tastes even better the next day as the flavors meld. However, I recommend waiting to add the granola until just before serving to maintain its crunch.

What can I substitute for Greek yogurt?

If you prefer a lighter option, you can substitute Greek yogurt with regular yogurt or a dairy-free alternative like coconut yogurt. Just remember that this may alter the creaminess and flavor profile slightly.

Can I use frozen peaches for this parfait?

Absolutely! Just make sure to thaw the frozen peaches before using them. They will still add great flavor, though the texture may be slightly softer than fresh peaches.

How do I make the parfait vegan?

To make a vegan version, substitute the Greek yogurt with a plant-based yogurt alternative, and replace honey with maple syrup or agave nectar. This keeps the parfait sweet while adhering to a vegan diet.

What other fruits can I use in this recipe?

You can mix and match fruits based on your preference. Try using strawberries, blueberries, raspberries, or even bananas. Just make sure to adjust the lemon juice as needed to prevent browning.

Sweet Peach Yogurt Parfait Delight

Final Thoughts

The Peach Yogurt Parfait with Honey and Granola is a delightful blend of creamy yogurt, sweet peaches, and crunchy granola that creates a satisfying and nourishing treat. Each layer bursts with flavor, making it a perfect choice for breakfast or a light dessert.

This is the kind of recipe I come back to again and again, especially when I want something refreshing and wholesome to start my day. The harmony of sweet and tart flavors, combined with the delightful crunch, never fails to lift my spirits!

I encourage you to give this parfait a try and indulge in its comforting goodness. Feel free to share your results or even add your own twist—perhaps a sprinkle of cinnamon or a handful of nuts. Enjoy creating your perfect parfait!

Print
clock clock iconcutlery cutlery iconflag flag iconfolder folder iconinstagram instagram iconpinterest pinterest iconfacebook facebook iconprint print iconsquares squares iconheart heart iconheart solid heart solid icon

Peach Yogurt Parfait


  • Author: Lily author
  • Total Time: 15 minutes
  • Yield: 4 servings 1x
Pin Recipe
Print Recipe

Description

This Peach Yogurt Parfait combines creamy Greek yogurt, juicy peaches, and crunchy granola for a delightful treat. It’s a perfect breakfast or snack that captures the essence of summer in every bite.


Ingredients

Scale
  • For the Parfait:
  • 2 cups plain Greek yogurt (or vanilla yogurt for a sweeter option)
  • 2 large ripe peaches, diced (about 2 cups)
  • 1 tablespoon fresh lemon juice (to prevent browning of peaches)
  • 2 tablespoons honey (plus more for drizzling)
  • 1 teaspoon vanilla extract (optional for extra flavor)
  • For the Granola:
  • 1 cup granola (store-bought or homemade; see notes for a simple granola recipe)
  • 1/4 cup sliced almonds (optional for added crunch)
  • 1/4 cup shredded coconut (optional for added flavor)

Instructions

  1. Start by preparing the peaches. Wash them thoroughly, then slice and dice them into bite-sized pieces. In a medium bowl, toss the diced peaches with 1 tablespoon of fresh lemon juice to prevent browning. Set aside for about 5 minutes while the lemon juice works its magic.
  2. In a separate bowl, combine the Greek yogurt, 2 tablespoons of honey, and 1 teaspoon of vanilla extract if using. Stir the mixture until smooth and thoroughly blended. This should take about a minute. Avoid overmixing to maintain the creaminess of the yogurt.
  3. Now it’s time to layer your parfait. Grab a clear glass or bowl to showcase your beautiful creation. Start with a generous spoonful of the yogurt mixture at the bottom—about 1/4 cup will do. Use a spoon to spread it evenly.
  4. Add a layer of the diced peaches over the yogurt, ensuring they cover the yogurt completely. You might want to use about half of what you have prepared—roughly 1 cup. This layer should be visually appealing, so arrange the peaches neatly.
  5. Sprinkle 1/4 cup of granola over the peaches. This adds a delightful crunch. Make sure to distribute it evenly to ensure every bite has that satisfying texture. Avoid packing it down too tightly, as you want it to maintain its crunch.
  6. Repeat the layers: spoon in another 1/4 cup of yogurt, followed by another cup of peaches, and another sprinkle of granola. You should have at least two layers, but feel free to add more depending on your glass size.
  7. Finish off your parfait with a drizzle of honey on top for added sweetness and a touch of elegance. If you’re using sliced almonds or shredded coconut, sprinkle them on top now. It adds a lovely visual contrast and extra flavor.
  8. Serve immediately or refrigerate for up to 30 minutes before serving to allow the flavors to meld together. However, I recommend enjoying it fresh to maintain the granola’s crunch.
  • Prep Time: 15 mins
  • Cook Time: 0 mins
  • Category: Breakfast
  • Method: No-cook
  • Cuisine: American

Nutrition

  • Serving Size: 1 parfait
  • Calories: 250
  • Sugar: 20 g
  • Sodium: 50 mg
  • Fat: 5 g
  • Saturated Fat: 2 g
  • Unsaturated Fat: 3 g
  • Trans Fat: 0 g
  • Carbohydrates: 40 g
  • Fiber: 3 g
  • Protein: 10 g
  • Cholesterol: 10 mg

Keywords: Choose ripe peaches for the best flavor and texture. Use a clear glass for a beautiful presentation. For creaminess, consider whipping the yogurt before layering. Be mindful of the granola-to-yogurt ratio. Prepare yogurt and peaches ahead of time for gatherings, layering just before serving.

Did you make this recipe?

Share a photo and tag us — we can't wait to see what you've made!

Sun-Kissed Frozen Orange Cream Slush

As a child, summer days felt like they lasted forever. I remember the sticky heat wrapping around me as I played outside, my laughter mingling with the sounds of the neighborhood. But nothing could cool me down quite like the moment I’d spot my grandmother, laboring over her blender, whipping up her famous Frozen Orange Creamsicle Slush. That vibrant orange treat, with its frosty texture and sweet citrus aroma, was like a burst of sunshine in a cup. Just one sip, and I could feel the coolness wash over me, sparking pure joy.

This Frozen Orange Creamsicle Slush has a way of making you feel like a kid again. Its creamy, dreamy consistency is a delightful balance of bright orange and soft vanilla, inviting you to dive right in. The refreshing tang of orange dances on your tongue, while the smooth creaminess envelops you in a comforting embrace. It’s a nostalgic treat that’s perfect for hot summer afternoons or anytime you need a little pick-me-up.

What makes my version of this slush stand out is the addition of a hint of vanilla bean, which elevates the flavor and adds an extra layer of richness. Plus, it’s super easy to whip up with just a few simple ingredients that you probably already have on hand! So, if you’re ready to relive those sun-soaked memories, let me show you exactly how to make it.

Sun-Kissed Frozen Orange Cream Slush

Why You’ll Love This Recipe

  • Each slush is a perfect blend of creamy vanilla and zesty orange, creating a nostalgic flavor reminiscent of summer days.
  • This refreshing treat is ready in under 15 minutes, making it an ideal quick dessert for unexpected guests or hot afternoons.
  • With just 8 simple ingredients, it’s budget-friendly, ensuring you don’t have to break the bank to enjoy a delicious slush.
  • The slush has a perfectly smooth texture, thanks to the combination of ice and ice cream, providing a delightful contrast to the bright citrus flavors.
  • It’s highly customizable; you can easily adjust the sweetness and add fresh herbs for a unique twist that suits your taste.

Ingredients

  • 2 cups orange juice (freshly squeezed or store-bought)
  • 1 cup vanilla ice cream
  • 1 cup crushed ice
  • 1/2 cup milk (whole or 2%)
  • 1/4 cup granulated sugar (adjust based on sweetness preference)
  • 1 teaspoon vanilla extract
  • Zest of 1 orange (for added flavor)
  • Fresh orange slices and mint leaves (for garnish)

The star of this Frozen Orange Creamsicle Slush is the orange juice, which provides the vibrant, citrusy base. Freshly squeezed juice will yield the brightest flavor, but store-bought options can be just as convenient. If you’re opting for store-bought, choose 100% pure juice with no added sugars for the best results. Another essential ingredient is the vanilla ice cream; it adds creaminess and sweetness. You can substitute it with dairy-free ice cream if you’re looking for a vegan option. Whole or 2% milk complements the ice cream, creating a smooth blend. If you want a lower-calorie version, almond or oat milk can be good alternatives.

Lastly, the granulated sugar can be adjusted based on your sweetness preference. If you prefer a more natural sweetener, consider using honey or agave syrup. The orange zest enhances the flavor profile, providing an aromatic pop that brings the whole slush together. Don’t skip it! It adds an extra layer of brightness that makes this slush truly special.

Step-by-Step Instructions

  1. Start by preparing your ingredients. Gather 2 cups of orange juice, 1 cup of vanilla ice cream, and 1 cup of crushed ice. Make sure the ice is finely crushed, as larger chunks can make blending difficult.
  2. In a blender, combine the orange juice, vanilla ice cream, crushed ice, and 1/2 cup of milk. Add 1/4 cup of granulated sugar and 1 teaspoon of vanilla extract. If you like a sweeter slush, consider adding a bit more sugar at this stage.
  3. Add the zest of 1 orange to the blender. This step is crucial for enhancing the citrus flavor of your slush. Make sure not to include the bitter white pith—only the flavorful zest.
  4. Blend the mixture on medium-high speed for about 30-45 seconds. Stop once the ingredients are fully combined and the slush has a smooth, even consistency. If you notice large chunks of ice, blend for an additional 10-15 seconds. Avoid over-blending, as this can make the slush too liquidy.
  5. Once blended, taste the slush. If it needs more sweetness, add a little more sugar and blend for a few more seconds. If it’s too thick, you can add a splash of milk to reach your desired consistency.
  6. Pour the slush into glasses. This recipe typically serves 4, but you can easily double it for larger gatherings. Use a spoon to help guide the slush into the glasses if needed.
  7. Garnish each serving with fresh orange slices and mint leaves. The mint not only adds a pop of color but also a refreshing aroma that complements the citrus flavors beautifully.
  8. Serve immediately and enjoy! If you’ve made extra, you can refrigerate it for a short time, but it’s best enjoyed fresh.

Pro Tips for the Best Frozen Orange Creamsicle Slush

  • Don’t skip the orange zest! It’s a game-changer for flavor. Always zest before juicing to make it easier.
  • Use a high-powered blender for the best texture. A standard blender may struggle with ice, leading to uneven consistency. If you have a food processor, that can work too, but ensure the ice is finely crushed.
  • Adjust the ice-to-liquid ratio carefully. If your slush is too thick, it won’t blend well. Start with less ice and add more until you reach your preferred texture.
  • Be cautious with the sugar! Always start with the lower amount, as you can easily add more, but it’s hard to fix an overly sweet slush.
  • For a fun twist, consider adding a splash of coconut milk or a handful of fresh fruit like strawberries or pineapple. This not only enhances the flavor but also adds a beautiful color contrast.

Variations & Serving Ideas

There are countless ways to put a spin on your Frozen Orange Creamsicle Slush. Consider making a tropical version by adding in some pineapple juice or coconut milk for a delightful tropical twist. If you’re feeling adventurous, try incorporating a handful of frozen mango or peach slices for added sweetness. For a lighter version, swap out the vanilla ice cream for Greek yogurt for a creamy yet tangy alternative.

As for serving ideas, this refreshing slush pairs wonderfully with light summer dishes like grilled chicken skewers, fish tacos, or a simple salad topped with citrus vinaigrette. The bright, zesty flavors of the slush complement these dishes perfectly, making them an ideal pairing for a sunny day.

Storage, Make-Ahead & Reheating

This Frozen Orange Creamsicle Slush is best enjoyed fresh, but if you have leftovers, you can store them in an airtight container in the fridge for up to 2 days. Just keep in mind that the slush may lose some of its texture over time as the ice melts. It doesn’t freeze well, as the ice will turn into a solid block. If you must freeze it, blend again after thawing to restore the slushy consistency. This treat is best the day you make it, as the flavors meld together beautifully overnight, enhancing its deliciousness.

Frequently Asked Questions

Can I make Frozen Orange Creamsicle Slush ahead of time?

Yes — in fact, it tastes even better the next day as the flavors meld. However, it’s best to enjoy it fresh, as the texture can change if stored for too long. If you need to prepare it ahead, keep it in the fridge and re-blend before serving.

What kind of orange juice should I use?

For the best flavor, use freshly squeezed orange juice. However, if you’re short on time, opt for 100% pure store-bought juice without added sugars. This will ensure that your slush remains flavorful and refreshing.

Can I substitute the vanilla ice cream?

Absolutely! If you’re looking for a dairy-free option, coconut milk ice cream or a non-dairy vanilla ice cream can work wonderfully. They will still provide the creamy texture and sweetness you desire.

How can I adjust the sweetness of my slush?

You can easily adjust the sweetness by modifying the amount of sugar added. Start with 1/4 cup and taste the mixture before blending. If you prefer it sweeter, add more sugar gradually until it reaches your desired level.

What should I do if my slush is too thick?

If your slush is too thick, simply add a splash of milk or orange juice and blend again. This will help achieve a more drinkable consistency while maintaining the slushy texture. Adjust gradually to reach your preferred thickness.

Sun-Kissed Frozen Orange Cream Slush

Final Thoughts

The Frozen Orange Creamsicle Slush is a delightful blend of refreshing citrus and creamy goodness, making it a perfect treat for warm days or any time you crave a taste of nostalgia. The way the bright orange flavor dances with the creamy texture truly elevates this slush, transforming it into a satisfying escape from the everyday.

This is the kind of recipe I come back to again and again, especially when I’m looking to cool down or impress guests at a summer gathering. It’s simple to make and always brings smiles all around! I encourage you to try this recipe for yourself—don’t hesitate to share your results or even put your own spin on it. Happy slushing!

Print
clock clock iconcutlery cutlery iconflag flag iconfolder folder iconinstagram instagram iconpinterest pinterest iconfacebook facebook iconprint print iconsquares squares iconheart heart iconheart solid heart solid icon

Frozen Orange Creamsicle Slush


  • Author: Lily author
  • Total Time: 15 minutes
  • Yield: 4 servings 1x
Pin Recipe
Print Recipe

Description

This Frozen Orange Creamsicle Slush is a refreshing treat that combines creamy vanilla and zesty orange flavors. Perfect for hot summer days, it brings back nostalgic memories with every sip.


Ingredients

Scale
  • 2 cups orange juice (freshly squeezed or store-bought)
  • 1 cup vanilla ice cream
  • 1 cup crushed ice
  • 1/2 cup milk (whole or 2%)
  • 1/4 cup granulated sugar (adjust based on sweetness preference)
  • 1 teaspoon vanilla extract
  • Zest of 1 orange (for added flavor)
  • Fresh orange slices and mint leaves (for garnish)

Instructions

  1. Start by preparing your ingredients. Gather 2 cups of orange juice, 1 cup of vanilla ice cream, and 1 cup of crushed ice. Make sure the ice is finely crushed, as larger chunks can make blending difficult.
  2. In a blender, combine the orange juice, vanilla ice cream, crushed ice, and 1/2 cup of milk. Add 1/4 cup of granulated sugar and 1 teaspoon of vanilla extract. If you like a sweeter slush, consider adding a bit more sugar at this stage.
  3. Add the zest of 1 orange to the blender. This step is crucial for enhancing the citrus flavor of your slush. Make sure not to include the bitter white pith—only the flavorful zest.
  4. Blend the mixture on medium-high speed for about 30-45 seconds. Stop once the ingredients are fully combined and the slush has a smooth, even consistency. If you notice large chunks of ice, blend for an additional 10-15 seconds. Avoid over-blending, as this can make the slush too liquidy.
  5. Once blended, taste the slush. If it needs more sweetness, add a little more sugar and blend for a few more seconds. If it’s too thick, you can add a splash of milk to reach your desired consistency.
  6. Pour the slush into glasses. This recipe typically serves 4, but you can easily double it for larger gatherings. Use a spoon to help guide the slush into the glasses if needed.
  7. Garnish each serving with fresh orange slices and mint leaves. The mint not only adds a pop of color but also a refreshing aroma that complements the citrus flavors beautifully.
  8. Serve immediately and enjoy! If you’ve made extra, you can refrigerate it for a short time, but it's best enjoyed fresh.
  • Prep Time: 15 min
  • Cook Time: 0 min
  • Category: Dessert
  • Method: Blending
  • Cuisine: American

Nutrition

  • Serving Size: 1 serving
  • Calories: 200
  • Sugar: 30 g
  • Sodium: 50 mg
  • Fat: 5 g
  • Saturated Fat: 3 g
  • Unsaturated Fat: 2 g
  • Trans Fat: 0 g
  • Carbohydrates: 40 g
  • Fiber: 1 g
  • Protein: 2 g
  • Cholesterol: 20 mg

Keywords: Don't skip the orange zest! It's a game-changer for flavor. Always zest before juicing to make it easier.

Did you make this recipe?

Share a photo and tag us — we can't wait to see what you've made!

Zesty Lemon Poppy Seed Delight

One rainy afternoon, I found myself in my grandmother’s cozy kitchen, the kind that always smelled like warmth and love. She was whipping up her famous Lemon Poppy Seed Loaf, a recipe that had been passed down through generations. As the batter came together, the zesty aroma of fresh lemons filled the air, mingling perfectly with the nutty fragrance of poppy seeds. I can still picture her, apron-clad, as she expertly drizzled a vibrant citrus icing over the loaf, creating a glossy, sun-kissed finish that beckoned us to dive in. It was a moment that sparked my own passion for baking, and this recipe has become a cherished staple in my home ever since.

When you take a bite of this Lemon Poppy Seed Loaf, it’s like a burst of sunshine on your palate. The loaf is beautifully golden, with a tender crumb that melts in your mouth. Each slice is speckled with tiny poppy seeds, adding a delightful crunch that contrasts beautifully with the tangy sweetness of the lemon. And that citrus icing? It’s the finishing touch that elevates this loaf from ordinary to extraordinary, with its bright, zesty flavor dancing on your taste buds.

This recipe stands out because it embraces simplicity while delivering on flavor. I’ve added a hint of vanilla to the batter, enhancing the overall taste and making it even more indulgent. Trust me, once you make this Lemon Poppy Seed Loaf With Citrus Icing, it’ll become a go-to in your baking repertoire.

So, let me show you exactly how to make it!

Zesty Lemon Poppy Seed Delight

Why You’ll Love This Recipe

  • Moist and tender crumb that melts in your mouth, thanks to the perfect balance of butter and buttermilk.
  • Bright, zesty lemon flavor paired with crunchy poppy seeds, creating a delightful texture and taste experience.
  • Easy to whip up in just about an hour, perfect for last-minute gatherings or a cozy afternoon treat.
  • Budget-friendly with everyday ingredients, making it an accessible option for all home bakers.
  • The citrus icing adds a sweet tang that elevates the loaf, turning a simple recipe into a showstopper!

Ingredients

  • 1 ½ cups (190g) all-purpose flour
  • 1 teaspoon baking powder
  • ½ teaspoon baking soda
  • ½ teaspoon salt
  • 3 tablespoons poppy seeds
  • ½ cup (115g) unsalted butter, softened to room temperature
  • 1 cup (200g) granulated sugar
  • 2 large eggs
  • 1 teaspoon vanilla extract
  • 1 teaspoon lemon zest (from about 1 medium lemon)
  • ½ cup (120ml) buttermilk
  • 2 tablespoons fresh lemon juice

For the Citrus Icing:

  • 1 cup (120g) powdered sugar
  • 2 tablespoons fresh lemon juice
  • 1 tablespoon orange juice
  • 1 teaspoon lemon zest (for garnish, optional)

Let’s dive into the key ingredients that make this Lemon Poppy Seed Loaf so special. The all-purpose flour provides the structure and base for the loaf, while the baking powder and baking soda ensure it rises perfectly, giving the loaf a light texture. For a gluten-free variation, you could substitute the flour with a gluten-free all-purpose blend. Poppy seeds not only add a delightful crunch but also contribute to the unique flavor profile that pairs well with the citrus notes.

Unsalted butter is crucial for achieving the buttery richness that makes this loaf so moist. If you’re looking for a dairy-free option, coconut oil or a vegan butter can be used instead. The buttermilk is another essential component, providing acidity that activates the baking soda for a fluffy texture. If you don’t have buttermilk on hand, you can easily make a substitute by mixing ½ cup of milk with 1 tablespoon of vinegar or lemon juice and letting it sit for about 5 minutes.

Step-by-Step Instructions

  1. Preheat your oven to 350°F (175°C). Grease a 9×5-inch loaf pan or line it with parchment paper for easy removal later.
  2. In a medium mixing bowl, whisk together 1 ½ cups of all-purpose flour, 1 teaspoon of baking powder, ½ teaspoon of baking soda, ½ teaspoon of salt, and 3 tablespoons of poppy seeds. This helps to evenly distribute the baking agents and ensures a uniform rise.
  3. In a large mixing bowl, cream together ½ cup of softened unsalted butter and 1 cup of granulated sugar using an electric mixer on medium speed for about 3-4 minutes, until the mixture is light and fluffy. Make sure to scrape down the sides of the bowl occasionally.
  4. Add 2 large eggs, 1 teaspoon of vanilla extract, and 1 teaspoon of lemon zest to the creamed butter and sugar, mixing until fully combined. You want a smooth consistency, so ensure there are no lumps of butter.
  5. In a small bowl, combine ½ cup of buttermilk and 2 tablespoons of fresh lemon juice. Alternately add the dry ingredients and buttermilk mixture to the butter mixture, starting and ending with the dry ingredients. Mix just until combined; do not overmix, as this can lead to a dense loaf.
  6. Pour the batter into the prepared loaf pan. Smooth the top with a spatula, ensuring it’s even. Bake in the preheated oven for 50-60 minutes, or until a toothpick inserted in the center comes out clean. The edges should be lightly golden brown, and the center should feel just set.
  7. Once baked, remove the loaf from the oven and allow it to cool in the pan for about 10 minutes. Then, transfer it to a wire rack to cool completely. Resist the urge to slice too soon, as it will be crumbly if it’s still warm.
  8. While the loaf is cooling, prepare the citrus icing. In a medium bowl, whisk together 1 cup of powdered sugar, 2 tablespoons of fresh lemon juice, and 1 tablespoon of orange juice until smooth. If the icing is too thick, you can add a little more juice to reach your desired consistency.
  9. Once the loaf is completely cool, drizzle the citrus icing over the top. If you like, sprinkle with an additional teaspoon of lemon zest for an extra pop of flavor and color.

Pro Tips for the Best Lemon Poppy Seed Loaf With Citrus Icing

  • Be careful not to overmix your batter; this is a common mistake that can lead to a dense loaf. Mix just until the dry ingredients are incorporated for a light and fluffy texture.
  • Use room temperature ingredients, especially the butter and eggs. This helps to create a smoother batter and ensures even baking. Take your eggs out of the fridge about 30 minutes before you start.
  • For a more pronounced lemon flavor, consider adding a little lemon extract in addition to the zest and juice. Just a half teaspoon can elevate the citrus notes significantly.
  • When measuring your flour, spoon it into the measuring cup and level it off with a knife instead of scooping directly from the bag. This prevents packing and ensures you don’t end up with a dry loaf.
  • Invest in a good quality loaf pan; it makes a difference in heat distribution, which ensures even baking. If your pan is dark-coated, reduce the oven temperature by 25°F to prevent over-browning.

Variations & Serving Ideas

For a delightful twist, consider adding blueberries or raspberries to the batter for a fruity burst of flavor. You can also experiment with different citrus fruits—try lime or grapefruit zest and juice for a refreshing change. For a healthier option, substitute half of the all-purpose flour with whole wheat flour for added fiber without compromising too much on texture.

This Lemon Poppy Seed Loaf pairs beautifully with a light salad, such as a mixed greens salad with a vinaigrette, or a cup of tea for a cozy afternoon treat. It also complements a creamy cheese platter, as the acidity of the loaf balances rich cheeses perfectly. Lastly, a scoop of vanilla ice cream on the side creates a delightful contrast of temperatures and flavors!

Storage, Make-Ahead & Reheating

This Lemon Poppy Seed Loaf can be stored at room temperature for up to 3 days if wrapped tightly in plastic wrap. If you want to keep it longer, it freezes well for up to 3 months. To freeze, wrap the loaf tightly in plastic wrap and then in aluminum foil to prevent freezer burn.

When you’re ready to enjoy it again, simply thaw it in the fridge overnight. Reheat individual slices in the microwave for 15-20 seconds or in a toaster oven until warmed through. Interestingly, many people find that this loaf tastes even better the next day, as the flavors have time to meld!

Frequently Asked Questions

Can I make Lemon Poppy Seed Loaf With Citrus Icing ahead of time?

Yes — in fact, it tastes even better the next day! You can make the loaf a day in advance, allowing the flavors to develop. Just be sure to store it in an airtight container to maintain its moisture.

Can I substitute the poppy seeds?

Absolutely! If you don’t have poppy seeds on hand or prefer an alternative, you can use sesame seeds for a similar crunch or omit them entirely for a smooth loaf.

What can I use instead of buttermilk?

If you don’t have buttermilk, you can easily create a substitute by mixing ½ cup of milk (dairy or plant-based) with 1 tablespoon of vinegar or lemon juice. Let it sit for 5 minutes before using in the recipe.

How can I make this recipe gluten-free?

To make a gluten-free version of this Lemon Poppy Seed Loaf, substitute the all-purpose flour with a gluten-free all-purpose flour blend. Just ensure that the blend contains a binding agent like xanthan gum for the best results.

What is the best way to store leftover loaf?

Leftover Lemon Poppy Seed Loaf should be stored in an airtight container at room temperature for up to 3 days. For longer storage, wrap it tightly and freeze for up to 3 months. Thaw it before serving for the best texture.

Zesty Lemon Poppy Seed Delight

Final Thoughts

The Lemon Poppy Seed Loaf with Citrus Icing is truly a delightful treat that brings a burst of brightness to any occasion. The zesty lemon flavor combined with the subtle crunch of poppy seeds creates a satisfying balance, while the citrus icing adds a touch of sweetness that perfectly complements the loaf’s tanginess.

This is the kind of recipe I come back to again and again, especially when I want to brighten up a gloomy day or celebrate a small victory. The aroma that fills the kitchen as it bakes is absolutely heavenly! I encourage you to give this recipe a try; you might just find it becoming a beloved staple in your home. Don’t forget to share your results or even add your own unique twist—I can’t wait to see what you create!

Print
clock clock iconcutlery cutlery iconflag flag iconfolder folder iconinstagram instagram iconpinterest pinterest iconfacebook facebook iconprint print iconsquares squares iconheart heart iconheart solid heart solid icon

Lemon Poppy Seed Loaf


  • Author: Lily author
  • Total Time: 25 minute
  • Yield: 1 loaf 1x
Pin Recipe
Print Recipe

Description

This Lemon Poppy Seed Loaf is a delightful treat that combines zesty lemon flavor with crunchy poppy seeds. Topped with a citrus icing, it’s perfect for any occasion.


Ingredients

Scale
  • 1 ½ cups (190g) all-purpose flour
  • 1 teaspoon baking powder
  • ½ teaspoon baking soda
  • ½ teaspoon salt
  • 3 tablespoons poppy seeds
  • ½ cup (115g) unsalted butter, softened to room temperature
  • 1 cup (200g) granulated sugar
  • 2 large eggs
  • 1 teaspoon vanilla extract
  • 1 teaspoon lemon zest (from about 1 medium lemon)
  • ½ cup (120ml) buttermilk
  • 2 tablespoons fresh lemon juice
  • 1 cup (120g) powdered sugar
  • 2 tablespoons fresh lemon juice
  • 1 tablespoon orange juice
  • 1 teaspoon lemon zest (for garnish, optional)

Instructions

  1. Preheat your oven to 350°F (175°C). Grease a 9×5-inch loaf pan or line it with parchment paper for easy removal later.
  2. In a medium mixing bowl, whisk together 1 ½ cups of all-purpose flour, 1 teaspoon of baking powder, ½ teaspoon of baking soda, ½ teaspoon of salt, and 3 tablespoons of poppy seeds. This helps to evenly distribute the baking agents and ensures a uniform rise.
  3. In a large mixing bowl, cream together ½ cup of softened unsalted butter and 1 cup of granulated sugar using an electric mixer on medium speed for about 3-4 minutes, until the mixture is light and fluffy. Make sure to scrape down the sides of the bowl occasionally.
  4. Add 2 large eggs, 1 teaspoon of vanilla extract, and 1 teaspoon of lemon zest to the creamed butter and sugar, mixing until fully combined. You want a smooth consistency, so ensure there are no lumps of butter.
  5. In a small bowl, combine ½ cup of buttermilk and 2 tablespoons of fresh lemon juice. Alternately add the dry ingredients and buttermilk mixture to the butter mixture, starting and ending with the dry ingredients. Mix just until combined; do not overmix, as this can lead to a dense loaf.
  6. Pour the batter into the prepared loaf pan. Smooth the top with a spatula, ensuring it’s even. Bake in the preheated oven for 50-60 minutes, or until a toothpick inserted in the center comes out clean. The edges should be lightly golden brown, and the center should feel just set.
  7. Once baked, remove the loaf from the oven and allow it to cool in the pan for about 10 minutes. Then, transfer it to a wire rack to cool completely. Resist the urge to slice too soon, as it will be crumbly if it’s still warm.
  8. While the loaf is cooling, prepare the citrus icing. In a medium bowl, whisk together 1 cup of powdered sugar, 2 tablespoons of fresh lemon juice, and 1 tablespoon of orange juice until smooth. If the icing is too thick, you can add a little more juice to reach your desired consistency.
  9. Once the loaf is completely cool, drizzle the citrus icing over the top. If you like, sprinkle with an additional teaspoon of lemon zest for an extra pop of flavor and color.
  • Prep Time: 15 mins
  • Cook Time: 50-60 mins
  • Category: Dessert
  • Method: Baking
  • Cuisine: American

Nutrition

  • Serving Size: 1 slice
  • Calories: 200
  • Sugar: 15 g
  • Sodium: 150 mg
  • Fat: 8 g
  • Saturated Fat: 5 g
  • Unsaturated Fat: 3 g
  • Trans Fat: 0 g
  • Carbohydrates: 30 g
  • Fiber: 1 g
  • Protein: 3 g
  • Cholesterol: 40 mg

Keywords: Be careful not to overmix your batter; this is a common mistake that can lead to a dense loaf. Use room temperature ingredients for a smoother batter and even baking.

Did you make this recipe?

Share a photo and tag us — we can't wait to see what you've made!

  • Privacy Policy
  • Terms Of Service
  • Contact
  • About
  • GDPR

Copyright © 2025 Homesmad