• Skip to primary navigation
  • Skip to main content
  • Skip to primary sidebar
Homesmad

Homesmad

  • Home
  • Breakfast & Brunch
  • Appetizers & Snacks
  • Dinner
  • Dessert
  • About
  • Privacy Policy
  • Contact
Homesmad
  • Home
  • Breakfast & Brunch
  • Appetizers & Snacks
  • Dinner
  • Dessert
  • About
  • Privacy Policy
  • Contact

Jalapeno Popper Eggrolls: Beef Bacon-Wrapped Bites!

March 19, 2026 by Lily author

Jalapeno Popper Eggrolls Beef Bacon Wrapped Bites

Oh boy, have I got a treat for you today! I’m beyond excited to share a recipe that takes everything you love about craveable appetizers and rolls it all into one unbelievably delicious package: the Jalapeno Popper Eggrolls Beef Bacon Wrapped Bites. Seriously, prepare yourselves for a flavor explosion that will have everyone asking for the recipe!

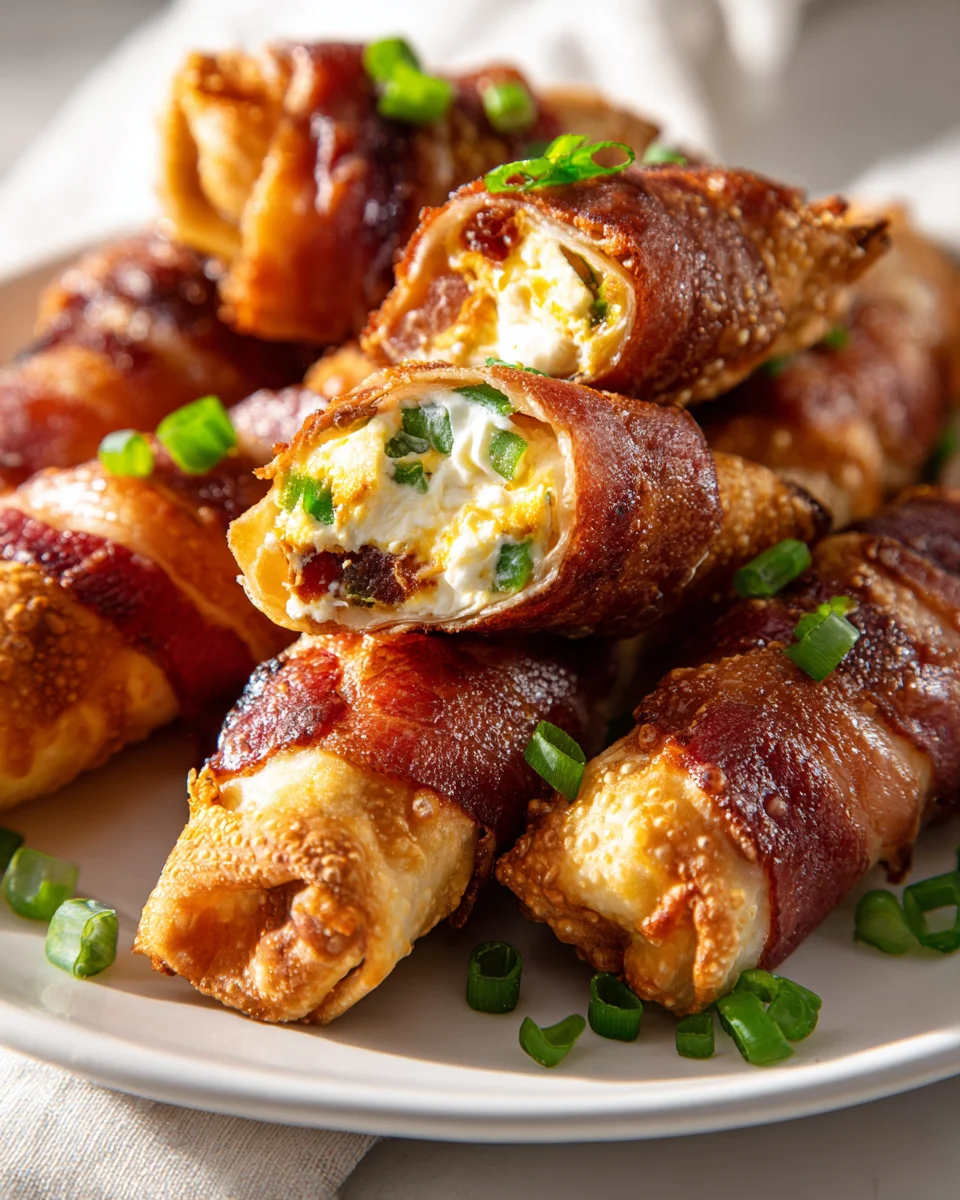
What makes this dish so special, you ask? Well, it’s a masterful fusion, a glorious collision of culinary worlds! We’re talking about the creamy, cheesy, spicy core of a classic jalapeno popper, lovingly tucked inside a golden, crispy eggroll wrapper. And because we believe in going all out for maximum deliciousness, each one is then wrapped in a strip of savory, irresistible beef bacon before being cooked to perfection. It’s a triple threat of texture and taste that truly elevates the appetizer game.

You are absolutely going to adore these bites! They are the ultimate crowd-pleaser, perfect for game day, parties, or any time you want to make a truly memorable snack. The combination of the fiery jalapeno, the rich, melted cheese, the satisfying crunch of the eggroll, and the salty, umami kick of the beef bacon creates an experience that’s completely addictive. Get ready to impress, because these Jalapeno Popper Eggrolls Beef Bacon Wrapped Bites are about to become your new favorite obsession!

Jalapeno Popper Eggrolls: Beef Bacon-Wrapped Bites! this RECIPE

Ingredient Notes

Hey there, fellow food adventurers! When whipping up these fantastic Jalapeno Popper Eggrolls Beef Bacon Wrapped Bites, getting your ingredients right is the first step to deliciousness. I’ve found that using quality ingredients makes all the difference in these savory, crispy, and utterly addictive bites.

  • Fresh Jalapeños: These are the star of the show! I typically use 3-4 medium-sized jalapeños. If you like a milder kick, make sure to remove all the seeds and white membranes inside. For a bit more heat, you can leave a few seeds in. Always handle them with gloves or wash your hands thoroughly after dicing to avoid irritation.
  • Cream Cheese: Full-fat cream cheese is my go-to here. It provides that essential rich, creamy texture and tangy balance that’s characteristic of a classic jalapeno popper. Make sure it’s softened at room temperature before mixing, as this ensures a smooth, lump-free filling. Don’t try to skimp with reduced-fat versions; the full-fat really makes these bites shine.
  • Shredded Cheese: A good sharp cheddar or a Monterey Jack works wonderfully for that melty, cheesy goodness. Sometimes I even use a Pepper Jack for an extra layer of spice, or a Colby Jack blend for a milder, creamier melt. Pre-shredded cheese is convenient, but shredding your own from a block often melts smoother and has a better flavor.
  • Cooked Ground Beef: This is where the “beef” in our “Beef Bacon Wrapped Bites” comes into play within the filling! I recommend using a lean ground beef (80/20 or 90/10) to avoid excessive grease. Make sure to thoroughly cook it and drain off any fat before incorporating it into your filling mixture. Season it simply with a little salt, pepper, garlic powder, and onion powder while browning to give it a solid flavor base.
  • Green Onions: Sliced green onions add a fresh, mild oniony bite and a pop of color to the filling. I usually use both the white and green parts.
  • Eggroll Wrappers: Standard square eggroll wrappers are perfect for this recipe. You can usually find them in the refrigerated section of your grocery store near the produce or tofu. Ensure they are fresh and not dried out, as this makes them much easier to work with without cracking.
  • Beef Bacon: This is the “beef bacon wrapped” element! Look for thinly sliced beef bacon. Its flavor profile is wonderfully savory and complements the rich filling. Thinner slices are easier to wrap around the eggroll bites and crisp up more effectively. You’ll need about 1/2 slice per bite, depending on the size of your bites and bacon.
  • Egg Wash: A simple whisked egg with a tablespoon of water or milk creates the perfect “glue” to seal your eggroll wrappers and helps them get beautifully golden brown when cooked.
  • Oil for Frying (or other cooking methods): If you’re frying, a neutral oil with a high smoke point like canola, vegetable, or peanut oil is ideal.

Step-by-Step Instructions

Alright, let’s get down to business and assemble these incredible Jalapeno Popper Eggrolls Beef Bacon Wrapped Bites! This is where the magic truly happens.

  1. Prepare Your Filling: First things first, get that ground beef ready. In a large skillet over medium-high heat, cook your ground beef, breaking it up with a spoon, until it’s fully browned. Drain off any excess fat thoroughly. Season the cooked beef with about 1/2 teaspoon each of salt, black pepper, garlic powder, and onion powder, then set it aside to cool slightly. In a separate large mixing bowl, combine the softened cream cheese, shredded cheddar cheese (or your cheese of choice), the diced jalapeños, and sliced green onions. Add the cooled, seasoned ground beef to this mixture. Stir everything together until it’s well combined and evenly distributed.
  2. Assemble the Eggrolls: Lay one eggroll wrapper flat on a clean, dry surface with a corner pointing towards you (like a diamond). Place about 2 tablespoons of your delicious filling in the center, forming a small log shape, leaving plenty of room on the edges. Dip your finger in the egg wash and moisten the edges of the wrapper, especially the top two corners. Fold the bottom corner up over the filling, tucking it snugly. Then, fold in the two side corners towards the center. Finally, roll the entire thing upwards towards the top corner, creating a tight eggroll. Make sure the top corner is sealed well with egg wash to prevent any filling from escaping. Repeat with the remaining wrappers and filling.
  3. Chill for Stability (Optional but Recommended): Once all your eggrolls are assembled, I highly recommend placing them on a baking sheet lined with parchment paper and popping them into the refrigerator for at least 30 minutes. This helps the filling firm up and the wrappers to set, making them easier to cut and wrap.
  4. Cut into Bites: After chilling, take each assembled eggroll and carefully cut it into 2 or 3 bite-sized pieces. I usually aim for 2-inch sections. A sharp knife is key here to get clean cuts.
  5. Wrap with Beef Bacon: Now for the beef bacon! Take a strip of beef bacon and cut it into segments, roughly 1.5 to 2 inches long (depending on the length needed to wrap around your eggroll bite). Wrap one segment of beef bacon around the circumference of each eggroll bite, making sure it’s snug. Secure the bacon with a toothpick, piercing through the bacon and the eggroll bite. This prevents the bacon from unraveling during cooking.
  6. Cook Your Bites: You have a few options here, depending on your preference!
    • Deep Frying (My Favorite for Crispiness): Heat about 2-3 inches of neutral oil in a heavy-bottomed pot or deep fryer to 350°F (175°C). Carefully lower 3-4 bites into the hot oil (don’t overcrowd the pot!). Fry for 3-5 minutes, turning occasionally, until the eggroll wrapper is golden brown and crispy, and the beef bacon is rendered and crispy.
    • Air Frying: Preheat your air fryer to 375°F (190°C). Lightly spray the eggroll bites with cooking spray. Arrange them in a single layer in the air fryer basket, ensuring they don’t touch. Air fry for 8-12 minutes, flipping halfway through, until they are golden brown and the bacon is crispy.
    • Baking: Preheat your oven to 400°F (200°C). Place the beef bacon-wrapped eggroll bites on a wire rack set over a baking sheet (this helps the bottom get crispy too). Bake for 15-20 minutes, flipping halfway through, until golden brown and the bacon is crispy.
  7. Serve Immediately: Once cooked, transfer the bites to a plate lined with paper towels to drain any excess oil. Remove the toothpicks if serving right away. Serve these beauties hot with your favorite dipping sauce!

Tips & Suggestions

Making these Jalapeno Popper Eggrolls Beef Bacon Wrapped Bites is a blast, and I’ve picked up a few tricks along the way to make them even better. Here are my top tips for absolute perfection:

  • Spice Level Customization: If you’re a heat-seeker like me, you can definitely leave some of the seeds and membranes in the jalapeños for an extra kick. For extreme heat, consider adding a pinch of cayenne pepper to the filling mixture. If you prefer things milder, make sure to thoroughly clean out all seeds and membranes from your jalapeños.
  • Don’t Overfill: This is a crucial one! Overfilling your eggroll wrappers is a recipe for disaster (and messy leakage). Stick to about 2 tablespoons of filling per wrapper. It might feel like a small amount, but it expands a bit during cooking, and it ensures a tighter, more secure roll.
  • Seal Them Tightly: That egg wash isn’t just for color; it’s your adhesive! Make sure all edges are thoroughly moistened and sealed to prevent the filling from oozing out during cooking. A tight roll also contributes to a crispier end product.
  • Uniform Bites: When you cut your assembled eggrolls into bites, try to make them as uniform in size as possible. This ensures they cook evenly, meaning no undercooked bacon or overly browned spots.
  • Secure the Bacon: Those toothpicks are your best friends here! Don’t skip them. They are essential for keeping the beef bacon wrapped snugly around each eggroll bite as it cooks and crisps up. You can remove them before serving, or leave them in to make them easier for guests to pick up.
  • Pre-Cooked Beef is Key: Ensure your ground beef is fully cooked and thoroughly drained before mixing it into the cream cheese filling. Excess grease will make your filling oily and could potentially make your eggrolls soggy.
  • Experiment with Dipping Sauces: While these bites are fantastic on their own, a good dipping sauce elevates them. My personal favorites include a creamy ranch, a spicy sriracha ranch, or a sweet chili sauce. Even a simple marinara or a chipotle aioli would be delicious!
  • Batch Cooking & Freezing: These make fantastic party appetizers, so consider making a larger batch. You can assemble them up to the beef bacon wrapping stage, then freeze them on a baking sheet before transferring them to a freezer-safe bag. Cook from frozen, adding a few extra minutes to the cooking time, and you’ve got instant party food!
  • Cooking Method Preferences:
    • Deep Frying gives the ultimate crispy exterior and evenly cooked bacon.
    • Air Frying is a healthier alternative that still delivers great crispiness with less oil.
    • Baking is the easiest and least messy, but the texture might be slightly less crispy than the other two methods. Using a wire rack is essential for baking to allow air circulation around all sides.

Storage

You’ve put in the effort, and now you might have some delicious Jalapeno Popper Eggrolls Beef Bacon Wrapped Bites left over, or you’re planning ahead. Here’s how I handle storage to keep them tasting great!

For Uncooked Bites:

If you’ve assembled your eggroll bites and wrapped them with beef bacon, but haven’t cooked them yet, you have a couple of options for storage:

  • Refrigeration: You can place the uncooked, bacon-wrapped bites on a baking sheet lined with parchment paper, cover them loosely with plastic wrap, and refrigerate for up to 24 hours. This is perfect if you’re doing some prep work the day before a party.
  • Freezing (Make Ahead): These bites freeze beautifully! Arrange the uncooked, bacon-wrapped bites (with toothpicks) in a single layer on a parchment-lined baking sheet. Place the baking sheet in the freezer for 1-2 hours, or until the bites are solid. Once frozen, transfer them to a freezer-safe airtight bag or container. They will keep well in the freezer for up to 1-2 months. When you’re ready to cook, you can usually cook them directly from frozen, adding an extra 5-10 minutes to your chosen cooking method (deep frying, air frying, or baking), making sure the internal temperature reaches a safe level and the bacon is crispy.

For Cooked Bites:

If you have leftovers after cooking, here’s how to store and reheat them:

  • Refrigeration: Allow the cooked eggroll bites to cool completely to room temperature. Then, place them in an airtight container and store them in the refrigerator for up to 3-4 days. While they won’t be as crispy as fresh, they’ll still be very tasty.
  • Reheating: For the best results when reheating cooked bites, I always recommend using an oven or an air fryer. This will help them regain some of their crispiness.
    • Oven: Preheat your oven to 350°F (175°C). Place the bites on a baking sheet and heat for 8-12 minutes, or until warmed through and the bacon crisps up again.
    • Air Fryer: Preheat your air fryer to 350°F (175°C). Place the bites in a single layer in the basket and air fry for 5-8 minutes, or until hot and crispy.
    • Microwave: While you can microwave them, I generally advise against it if you want to preserve any crispiness. The microwave will heat them through but will likely result in a softer, chewier texture. If you must use a microwave, heat in 30-second intervals until warmed through.

Jalapeno Popper Eggrolls: Beef Bacon-Wrapped Bites!

Final Thoughts

Wow! What a journey we’ve been on creating these incredible Jalapeno Popper Eggrolls Beef Bacon Wrapped Bites. Seriously, I can’t express enough how much I adore this dish. It masterfully combines everything you love about classic jalapeno poppers – that creamy, spicy, cheesy core – and elevates it with the irresistible crunch of an eggroll wrapper. Then, to top it all off, we wrap these delicious creations in savory beef bacon, adding a layer of smoky perfection that truly makes each bite unforgettable. Whether you’re looking for the ultimate party appetizer, a unique game-day snack, or just something deliciously different to treat yourself, these bites deliver on every front. They’re a burst of flavor and texture, a true testament to creative cooking, and I promise you, once you try the Jalapeno Popper Eggrolls Beef Bacon Wrapped Bites, you’ll be making them again and again. Enjoy every crispy, creamy, beef bacon-wrapped moment!

Print
clock clock iconcutlery cutlery iconflag flag iconfolder folder iconinstagram instagram iconpinterest pinterest iconfacebook facebook iconprint print iconsquares squares iconheart heart iconheart solid heart solid icon

Jalapeno Popper Eggrolls: Beef Bacon-Wrapped Bites!


  • Author: Lily author
  • Total Time: 7 minute
  • Yield: 4 servings 1x
Pin Recipe
Print Recipe

Description

These Jalapeno Popper Eggrolls are a delicious fusion of creamy, cheesy, and spicy flavors wrapped in crispy eggrolls and savory beef bacon. Perfect for parties or game day, they are sure to impress your guests!


Ingredients

Scale
  • 3–4 medium-sized fresh jalapeños
  • 8 oz full-fat cream cheese, softened
  • 1 cup shredded sharp cheddar cheese (or Monterey Jack, Pepper Jack, or Colby Jack)
  • 1 lb cooked ground beef (lean, 80/20 or 90/10)
  • 1/2 teaspoon salt
  • 1/2 teaspoon black pepper
  • 1/2 teaspoon garlic powder
  • 1/2 teaspoon onion powder
  • 2–3 sliced green onions (white and green parts)
  • Eggroll wrappers (standard square)
  • 1/2 slice thinly sliced beef bacon per bite
  • 1 egg (for egg wash)
  • 1 tablespoon water or milk (for egg wash)
  • Oil for frying (canola, vegetable, or peanut oil)

Instructions

  1. Prepare Your Filling: In a large skillet over medium-high heat, cook the ground beef, breaking it up with a spoon, until fully browned. Drain off any excess fat. Season the cooked beef with salt, black pepper, garlic powder, and onion powder, then set aside to cool slightly. In a separate large mixing bowl, combine the softened cream cheese, shredded cheese, diced jalapeños, and sliced green onions. Add the cooled, seasoned ground beef to this mixture and stir until well combined.
  2. Assemble the Eggrolls: Lay one eggroll wrapper flat on a clean surface with a corner pointing towards you. Place about 2 tablespoons of filling in the center, forming a small log shape. Moisten the edges of the wrapper with egg wash, fold the bottom corner up over the filling, tuck in the side corners, and roll upwards towards the top corner, sealing well with egg wash.
  3. Chill for Stability (Optional but Recommended): Place the assembled eggrolls on a baking sheet lined with parchment paper and refrigerate for at least 30 minutes.
  4. Cut into Bites: After chilling, carefully cut each eggroll into 2 or 3 bite-sized pieces.
  5. Wrap with Beef Bacon: Cut strips of beef bacon into segments and wrap one segment around each eggroll bite, securing with a toothpick.
  6. Cook Your Bites: For deep frying, heat oil to 350°F (175°C) and fry bites for 3-5 minutes until golden brown. For air frying, preheat to 375°F (190°C) and air fry for 8-12 minutes. For baking, preheat to 400°F (200°C) and bake for 15-20 minutes.
  7. Serve Immediately: Transfer cooked bites to a plate lined with paper towels and serve hot with your favorite dipping sauce.
  • Prep Time: 30 mins
  • Cook Time: 15-20 mins
  • Category: Appetizer
  • Method: Frying, Air Frying, Baking
  • Cuisine: American

Nutrition

  • Serving Size: 2-3 bites
  • Calories: 300
  • Sugar: 1 g
  • Sodium: 600 mg
  • Fat: 20 g
  • Saturated Fat: 8 g
  • Unsaturated Fat: 10 g
  • Trans Fat: 0 g
  • Carbohydrates: 15 g
  • Fiber: 1 g
  • Protein: 15 g
  • Cholesterol: 50 mg

Keywords: Customize the spice level by adjusting jalapeño seeds and membranes. Ensure to seal the eggrolls tightly and use toothpicks to secure the bacon. Experiment with different dipping sauces for added flavor.

Did you make this recipe?

Share a photo and tag us — we can't wait to see what you've made!

« Previous Post
Chick Fil A Style Mac And Cheese Recipe - Creamy & Delicious
Next Post »
Creamy Ground Chicken Pasta with Spinach - Easy & Quick

If you enjoyed this…

Best Honey Cinnamon Roasted Sweet Potato Cubes, Caramelized

Keto Corned Beef and Cheese Roll Ups – Low Carb Delight!

Easy Cheesy Jalapeno Ranch Chicken Poppers w/ Creamy Dip

Primary Sidebar

Browse by Diet

BreakfastDinnerLunchDessertAppetizer

Sweet Peach Yogurt Parfait Delight

One of my fondest memories is from a lazy summer afternoon spent at my grandmother’s house. The sun filtered through the kitchen window, casting a warm glow over the table where she would create her culinary magic. It was during one of those blissful moments that I first tasted her Peach Yogurt Parfait with Honey and Granola. The sweet aroma of ripe peaches mingling with creamy yogurt and the crunch of granola was nothing short of heavenly. It felt like summer captured in a bowl, and I still remember the joy of diving in with a spoon, each layer revealing a new burst of flavor.

When I think about that parfait, I can almost hear the gentle hum of the bees outside, reminding me of the floral notes that honey brings to every bite. The vibrant yellows and soft oranges of the peaches contrast beautifully with the creamy white yogurt and the golden crunch of granola. It’s a dish that not only looks delightful but also tastes like a celebration of fresh, wholesome ingredients.

What makes my version of this Peach Yogurt Parfait special is the careful balance of flavors and textures. I use ripe, juicy peaches, drizzled with locally sourced honey, and a homemade granola that’s bursting with nuts and seeds for an extra crunch. It’s a simple dish, but every layer is crafted with love and attention.

Let me show you exactly how to make this delightful parfait, so you can bring a bit of that summer magic into your kitchen!

Sweet Peach Yogurt Parfait Delight

Why You’ll Love This Recipe

  • Delightfully creamy texture from the Greek yogurt, paired with the juicy sweetness of fresh peaches.
  • Ready in under 20 minutes, making it a quick and satisfying breakfast or snack option.
  • Budget-friendly, using common ingredients that you may already have in your pantry.
  • Customizable with your favorite granola and nuts, allowing you to tailor each parfait to your taste.
  • Perfectly balanced flavors with the bright acidity of lemon juice and the sweetness of honey enhancing the peaches.

Ingredients

  • For the Parfait:
  • 2 cups plain Greek yogurt (or vanilla yogurt for a sweeter option)
  • 2 large ripe peaches, diced (about 2 cups)
  • 1 tablespoon fresh lemon juice (to prevent browning of peaches)
  • 2 tablespoons honey (plus more for drizzling)
  • 1 teaspoon vanilla extract (optional for extra flavor)
  • For the Granola:
  • 1 cup granola (store-bought or homemade; see notes for a simple granola recipe)
  • 1/4 cup sliced almonds (optional for added crunch)
  • 1/4 cup shredded coconut (optional for added flavor)

Let’s dive into some key ingredients that make this Peach Yogurt Parfait so delightful! First, the Greek yogurt is not only creamy but also packed with protein, making it a satisfying option for breakfast or a snack. If you’re looking for a sweeter option, you can easily substitute it with vanilla yogurt, though it may alter the overall flavor balance. Next, the ripe peaches are the star of the show; their natural sweetness shines through, so I recommend choosing peaches that yield slightly to pressure, indicating they’re perfectly ripe. If peaches aren’t in season, feel free to use nectarines or even frozen peaches—just thaw them before use. Finally, honey adds a lovely floral sweetness that ties everything together. If you prefer, maple syrup can serve as a delicious substitute.

Step-by-Step Instructions

  1. Start by preparing the peaches. Wash them thoroughly, then slice and dice them into bite-sized pieces. In a medium bowl, toss the diced peaches with 1 tablespoon of fresh lemon juice to prevent browning. Set aside for about 5 minutes while the lemon juice works its magic.
  2. In a separate bowl, combine the Greek yogurt, 2 tablespoons of honey, and 1 teaspoon of vanilla extract if using. Stir the mixture until smooth and thoroughly blended. This should take about a minute. Avoid overmixing to maintain the creaminess of the yogurt.
  3. Now it’s time to layer your parfait. Grab a clear glass or bowl to showcase your beautiful creation. Start with a generous spoonful of the yogurt mixture at the bottom—about 1/4 cup will do. Use a spoon to spread it evenly.
  4. Add a layer of the diced peaches over the yogurt, ensuring they cover the yogurt completely. You might want to use about half of what you have prepared—roughly 1 cup. This layer should be visually appealing, so arrange the peaches neatly.
  5. Sprinkle 1/4 cup of granola over the peaches. This adds a delightful crunch. Make sure to distribute it evenly to ensure every bite has that satisfying texture. Avoid packing it down too tightly, as you want it to maintain its crunch.
  6. Repeat the layers: spoon in another 1/4 cup of yogurt, followed by another cup of peaches, and another sprinkle of granola. You should have at least two layers, but feel free to add more depending on your glass size.
  7. Finish off your parfait with a drizzle of honey on top for added sweetness and a touch of elegance. If you’re using sliced almonds or shredded coconut, sprinkle them on top now. It adds a lovely visual contrast and extra flavor.
  8. Serve immediately or refrigerate for up to 30 minutes before serving to allow the flavors to meld together. However, I recommend enjoying it fresh to maintain the granola’s crunch.

Pro Tips for the Best Peach Yogurt Parfait With Honey And Granola

  • Make sure to choose ripe peaches for the best flavor and texture. A common mistake is using unripe fruit, which can lead to a less enjoyable parfait. Look for peaches that are fragrant and slightly soft to the touch.
  • Use a clear glass to assemble your parfait; this not only makes for a beautiful presentation but also allows you to see the colorful layers, which adds to the enjoyment of eating it.
  • For an even creamier texture, consider whipping the Greek yogurt with a hand mixer for a couple of minutes before layering. This small adjustment makes a huge difference in mouthfeel.
  • Be mindful of the granola-to-yogurt ratio. Too much granola can overwhelm the parfait, while too little can make it feel too creamy. Aim for about 1/4 cup of granola per layer for the perfect balance.
  • If you’re making this for a gathering, consider preparing the yogurt and peaches ahead of time and layering them just before serving. This ensures the granola stays crunchy!

Variations & Serving Ideas

There are so many ways to get creative with your Peach Yogurt Parfait! For a tropical twist, swap out the peaches for mangoes or pineapples and top with coconut flakes. If you prefer a berry flavor, mix in some blueberries or strawberries with the peaches for added color and taste. For a nutty version, incorporate chopped walnuts or pecans instead of almonds.

As for serving ideas, this parfait pairs beautifully with a side of scrambled eggs for a hearty breakfast or fresh fruit salad for a light lunch. You might also enjoy it alongside whole grain toast with almond butter for an energizing snack. The contrast of flavors and textures will elevate your meal experience!

Storage, Make-Ahead & Reheating

The Peach Yogurt Parfait is best enjoyed fresh, but you can prepare some components ahead of time. Store the layered parfait in an airtight container in the refrigerator for up to 24 hours. However, be cautious; the granola may lose its crunch if stored too long. You can freeze the yogurt and peach mixture for up to 2 months; just remember to thaw it in the refrigerator overnight before serving.

If you plan to enjoy this dish the next day, it can taste even better as the flavors meld together. Just remember to add the granola right before serving to keep its delightful crunch!

Frequently Asked Questions

Can I make Peach Yogurt Parfait With Honey And Granola ahead of time?

Yes — in fact, it tastes even better the next day as the flavors meld. However, I recommend waiting to add the granola until just before serving to maintain its crunch.

What can I substitute for Greek yogurt?

If you prefer a lighter option, you can substitute Greek yogurt with regular yogurt or a dairy-free alternative like coconut yogurt. Just remember that this may alter the creaminess and flavor profile slightly.

Can I use frozen peaches for this parfait?

Absolutely! Just make sure to thaw the frozen peaches before using them. They will still add great flavor, though the texture may be slightly softer than fresh peaches.

How do I make the parfait vegan?

To make a vegan version, substitute the Greek yogurt with a plant-based yogurt alternative, and replace honey with maple syrup or agave nectar. This keeps the parfait sweet while adhering to a vegan diet.

What other fruits can I use in this recipe?

You can mix and match fruits based on your preference. Try using strawberries, blueberries, raspberries, or even bananas. Just make sure to adjust the lemon juice as needed to prevent browning.

Sweet Peach Yogurt Parfait Delight

Final Thoughts

The Peach Yogurt Parfait with Honey and Granola is a delightful blend of creamy yogurt, sweet peaches, and crunchy granola that creates a satisfying and nourishing treat. Each layer bursts with flavor, making it a perfect choice for breakfast or a light dessert.

This is the kind of recipe I come back to again and again, especially when I want something refreshing and wholesome to start my day. The harmony of sweet and tart flavors, combined with the delightful crunch, never fails to lift my spirits!

I encourage you to give this parfait a try and indulge in its comforting goodness. Feel free to share your results or even add your own twist—perhaps a sprinkle of cinnamon or a handful of nuts. Enjoy creating your perfect parfait!

Print
clock clock iconcutlery cutlery iconflag flag iconfolder folder iconinstagram instagram iconpinterest pinterest iconfacebook facebook iconprint print iconsquares squares iconheart heart iconheart solid heart solid icon

Peach Yogurt Parfait


  • Author: Lily author
  • Total Time: 15 minutes
  • Yield: 4 servings 1x
Pin Recipe
Print Recipe

Description

This Peach Yogurt Parfait combines creamy Greek yogurt, juicy peaches, and crunchy granola for a delightful treat. It’s a perfect breakfast or snack that captures the essence of summer in every bite.


Ingredients

Scale
  • For the Parfait:
  • 2 cups plain Greek yogurt (or vanilla yogurt for a sweeter option)
  • 2 large ripe peaches, diced (about 2 cups)
  • 1 tablespoon fresh lemon juice (to prevent browning of peaches)
  • 2 tablespoons honey (plus more for drizzling)
  • 1 teaspoon vanilla extract (optional for extra flavor)
  • For the Granola:
  • 1 cup granola (store-bought or homemade; see notes for a simple granola recipe)
  • 1/4 cup sliced almonds (optional for added crunch)
  • 1/4 cup shredded coconut (optional for added flavor)

Instructions

  1. Start by preparing the peaches. Wash them thoroughly, then slice and dice them into bite-sized pieces. In a medium bowl, toss the diced peaches with 1 tablespoon of fresh lemon juice to prevent browning. Set aside for about 5 minutes while the lemon juice works its magic.
  2. In a separate bowl, combine the Greek yogurt, 2 tablespoons of honey, and 1 teaspoon of vanilla extract if using. Stir the mixture until smooth and thoroughly blended. This should take about a minute. Avoid overmixing to maintain the creaminess of the yogurt.
  3. Now it’s time to layer your parfait. Grab a clear glass or bowl to showcase your beautiful creation. Start with a generous spoonful of the yogurt mixture at the bottom—about 1/4 cup will do. Use a spoon to spread it evenly.
  4. Add a layer of the diced peaches over the yogurt, ensuring they cover the yogurt completely. You might want to use about half of what you have prepared—roughly 1 cup. This layer should be visually appealing, so arrange the peaches neatly.
  5. Sprinkle 1/4 cup of granola over the peaches. This adds a delightful crunch. Make sure to distribute it evenly to ensure every bite has that satisfying texture. Avoid packing it down too tightly, as you want it to maintain its crunch.
  6. Repeat the layers: spoon in another 1/4 cup of yogurt, followed by another cup of peaches, and another sprinkle of granola. You should have at least two layers, but feel free to add more depending on your glass size.
  7. Finish off your parfait with a drizzle of honey on top for added sweetness and a touch of elegance. If you’re using sliced almonds or shredded coconut, sprinkle them on top now. It adds a lovely visual contrast and extra flavor.
  8. Serve immediately or refrigerate for up to 30 minutes before serving to allow the flavors to meld together. However, I recommend enjoying it fresh to maintain the granola’s crunch.
  • Prep Time: 15 mins
  • Cook Time: 0 mins
  • Category: Breakfast
  • Method: No-cook
  • Cuisine: American

Nutrition

  • Serving Size: 1 parfait
  • Calories: 250
  • Sugar: 20 g
  • Sodium: 50 mg
  • Fat: 5 g
  • Saturated Fat: 2 g
  • Unsaturated Fat: 3 g
  • Trans Fat: 0 g
  • Carbohydrates: 40 g
  • Fiber: 3 g
  • Protein: 10 g
  • Cholesterol: 10 mg

Keywords: Choose ripe peaches for the best flavor and texture. Use a clear glass for a beautiful presentation. For creaminess, consider whipping the yogurt before layering. Be mindful of the granola-to-yogurt ratio. Prepare yogurt and peaches ahead of time for gatherings, layering just before serving.

Did you make this recipe?

Share a photo and tag us — we can't wait to see what you've made!

Sun-Kissed Frozen Orange Cream Slush

As a child, summer days felt like they lasted forever. I remember the sticky heat wrapping around me as I played outside, my laughter mingling with the sounds of the neighborhood. But nothing could cool me down quite like the moment I’d spot my grandmother, laboring over her blender, whipping up her famous Frozen Orange Creamsicle Slush. That vibrant orange treat, with its frosty texture and sweet citrus aroma, was like a burst of sunshine in a cup. Just one sip, and I could feel the coolness wash over me, sparking pure joy.

This Frozen Orange Creamsicle Slush has a way of making you feel like a kid again. Its creamy, dreamy consistency is a delightful balance of bright orange and soft vanilla, inviting you to dive right in. The refreshing tang of orange dances on your tongue, while the smooth creaminess envelops you in a comforting embrace. It’s a nostalgic treat that’s perfect for hot summer afternoons or anytime you need a little pick-me-up.

What makes my version of this slush stand out is the addition of a hint of vanilla bean, which elevates the flavor and adds an extra layer of richness. Plus, it’s super easy to whip up with just a few simple ingredients that you probably already have on hand! So, if you’re ready to relive those sun-soaked memories, let me show you exactly how to make it.

Sun-Kissed Frozen Orange Cream Slush

Why You’ll Love This Recipe

  • Each slush is a perfect blend of creamy vanilla and zesty orange, creating a nostalgic flavor reminiscent of summer days.
  • This refreshing treat is ready in under 15 minutes, making it an ideal quick dessert for unexpected guests or hot afternoons.
  • With just 8 simple ingredients, it’s budget-friendly, ensuring you don’t have to break the bank to enjoy a delicious slush.
  • The slush has a perfectly smooth texture, thanks to the combination of ice and ice cream, providing a delightful contrast to the bright citrus flavors.
  • It’s highly customizable; you can easily adjust the sweetness and add fresh herbs for a unique twist that suits your taste.

Ingredients

  • 2 cups orange juice (freshly squeezed or store-bought)
  • 1 cup vanilla ice cream
  • 1 cup crushed ice
  • 1/2 cup milk (whole or 2%)
  • 1/4 cup granulated sugar (adjust based on sweetness preference)
  • 1 teaspoon vanilla extract
  • Zest of 1 orange (for added flavor)
  • Fresh orange slices and mint leaves (for garnish)

The star of this Frozen Orange Creamsicle Slush is the orange juice, which provides the vibrant, citrusy base. Freshly squeezed juice will yield the brightest flavor, but store-bought options can be just as convenient. If you’re opting for store-bought, choose 100% pure juice with no added sugars for the best results. Another essential ingredient is the vanilla ice cream; it adds creaminess and sweetness. You can substitute it with dairy-free ice cream if you’re looking for a vegan option. Whole or 2% milk complements the ice cream, creating a smooth blend. If you want a lower-calorie version, almond or oat milk can be good alternatives.

Lastly, the granulated sugar can be adjusted based on your sweetness preference. If you prefer a more natural sweetener, consider using honey or agave syrup. The orange zest enhances the flavor profile, providing an aromatic pop that brings the whole slush together. Don’t skip it! It adds an extra layer of brightness that makes this slush truly special.

Step-by-Step Instructions

  1. Start by preparing your ingredients. Gather 2 cups of orange juice, 1 cup of vanilla ice cream, and 1 cup of crushed ice. Make sure the ice is finely crushed, as larger chunks can make blending difficult.
  2. In a blender, combine the orange juice, vanilla ice cream, crushed ice, and 1/2 cup of milk. Add 1/4 cup of granulated sugar and 1 teaspoon of vanilla extract. If you like a sweeter slush, consider adding a bit more sugar at this stage.
  3. Add the zest of 1 orange to the blender. This step is crucial for enhancing the citrus flavor of your slush. Make sure not to include the bitter white pith—only the flavorful zest.
  4. Blend the mixture on medium-high speed for about 30-45 seconds. Stop once the ingredients are fully combined and the slush has a smooth, even consistency. If you notice large chunks of ice, blend for an additional 10-15 seconds. Avoid over-blending, as this can make the slush too liquidy.
  5. Once blended, taste the slush. If it needs more sweetness, add a little more sugar and blend for a few more seconds. If it’s too thick, you can add a splash of milk to reach your desired consistency.
  6. Pour the slush into glasses. This recipe typically serves 4, but you can easily double it for larger gatherings. Use a spoon to help guide the slush into the glasses if needed.
  7. Garnish each serving with fresh orange slices and mint leaves. The mint not only adds a pop of color but also a refreshing aroma that complements the citrus flavors beautifully.
  8. Serve immediately and enjoy! If you’ve made extra, you can refrigerate it for a short time, but it’s best enjoyed fresh.

Pro Tips for the Best Frozen Orange Creamsicle Slush

  • Don’t skip the orange zest! It’s a game-changer for flavor. Always zest before juicing to make it easier.
  • Use a high-powered blender for the best texture. A standard blender may struggle with ice, leading to uneven consistency. If you have a food processor, that can work too, but ensure the ice is finely crushed.
  • Adjust the ice-to-liquid ratio carefully. If your slush is too thick, it won’t blend well. Start with less ice and add more until you reach your preferred texture.
  • Be cautious with the sugar! Always start with the lower amount, as you can easily add more, but it’s hard to fix an overly sweet slush.
  • For a fun twist, consider adding a splash of coconut milk or a handful of fresh fruit like strawberries or pineapple. This not only enhances the flavor but also adds a beautiful color contrast.

Variations & Serving Ideas

There are countless ways to put a spin on your Frozen Orange Creamsicle Slush. Consider making a tropical version by adding in some pineapple juice or coconut milk for a delightful tropical twist. If you’re feeling adventurous, try incorporating a handful of frozen mango or peach slices for added sweetness. For a lighter version, swap out the vanilla ice cream for Greek yogurt for a creamy yet tangy alternative.

As for serving ideas, this refreshing slush pairs wonderfully with light summer dishes like grilled chicken skewers, fish tacos, or a simple salad topped with citrus vinaigrette. The bright, zesty flavors of the slush complement these dishes perfectly, making them an ideal pairing for a sunny day.

Storage, Make-Ahead & Reheating

This Frozen Orange Creamsicle Slush is best enjoyed fresh, but if you have leftovers, you can store them in an airtight container in the fridge for up to 2 days. Just keep in mind that the slush may lose some of its texture over time as the ice melts. It doesn’t freeze well, as the ice will turn into a solid block. If you must freeze it, blend again after thawing to restore the slushy consistency. This treat is best the day you make it, as the flavors meld together beautifully overnight, enhancing its deliciousness.

Frequently Asked Questions

Can I make Frozen Orange Creamsicle Slush ahead of time?

Yes — in fact, it tastes even better the next day as the flavors meld. However, it’s best to enjoy it fresh, as the texture can change if stored for too long. If you need to prepare it ahead, keep it in the fridge and re-blend before serving.

What kind of orange juice should I use?

For the best flavor, use freshly squeezed orange juice. However, if you’re short on time, opt for 100% pure store-bought juice without added sugars. This will ensure that your slush remains flavorful and refreshing.

Can I substitute the vanilla ice cream?

Absolutely! If you’re looking for a dairy-free option, coconut milk ice cream or a non-dairy vanilla ice cream can work wonderfully. They will still provide the creamy texture and sweetness you desire.

How can I adjust the sweetness of my slush?

You can easily adjust the sweetness by modifying the amount of sugar added. Start with 1/4 cup and taste the mixture before blending. If you prefer it sweeter, add more sugar gradually until it reaches your desired level.

What should I do if my slush is too thick?

If your slush is too thick, simply add a splash of milk or orange juice and blend again. This will help achieve a more drinkable consistency while maintaining the slushy texture. Adjust gradually to reach your preferred thickness.

Sun-Kissed Frozen Orange Cream Slush

Final Thoughts

The Frozen Orange Creamsicle Slush is a delightful blend of refreshing citrus and creamy goodness, making it a perfect treat for warm days or any time you crave a taste of nostalgia. The way the bright orange flavor dances with the creamy texture truly elevates this slush, transforming it into a satisfying escape from the everyday.

This is the kind of recipe I come back to again and again, especially when I’m looking to cool down or impress guests at a summer gathering. It’s simple to make and always brings smiles all around! I encourage you to try this recipe for yourself—don’t hesitate to share your results or even put your own spin on it. Happy slushing!

Print
clock clock iconcutlery cutlery iconflag flag iconfolder folder iconinstagram instagram iconpinterest pinterest iconfacebook facebook iconprint print iconsquares squares iconheart heart iconheart solid heart solid icon

Frozen Orange Creamsicle Slush


  • Author: Lily author
  • Total Time: 15 minutes
  • Yield: 4 servings 1x
Pin Recipe
Print Recipe

Description

This Frozen Orange Creamsicle Slush is a refreshing treat that combines creamy vanilla and zesty orange flavors. Perfect for hot summer days, it brings back nostalgic memories with every sip.


Ingredients

Scale
  • 2 cups orange juice (freshly squeezed or store-bought)
  • 1 cup vanilla ice cream
  • 1 cup crushed ice
  • 1/2 cup milk (whole or 2%)
  • 1/4 cup granulated sugar (adjust based on sweetness preference)
  • 1 teaspoon vanilla extract
  • Zest of 1 orange (for added flavor)
  • Fresh orange slices and mint leaves (for garnish)

Instructions

  1. Start by preparing your ingredients. Gather 2 cups of orange juice, 1 cup of vanilla ice cream, and 1 cup of crushed ice. Make sure the ice is finely crushed, as larger chunks can make blending difficult.
  2. In a blender, combine the orange juice, vanilla ice cream, crushed ice, and 1/2 cup of milk. Add 1/4 cup of granulated sugar and 1 teaspoon of vanilla extract. If you like a sweeter slush, consider adding a bit more sugar at this stage.
  3. Add the zest of 1 orange to the blender. This step is crucial for enhancing the citrus flavor of your slush. Make sure not to include the bitter white pith—only the flavorful zest.
  4. Blend the mixture on medium-high speed for about 30-45 seconds. Stop once the ingredients are fully combined and the slush has a smooth, even consistency. If you notice large chunks of ice, blend for an additional 10-15 seconds. Avoid over-blending, as this can make the slush too liquidy.
  5. Once blended, taste the slush. If it needs more sweetness, add a little more sugar and blend for a few more seconds. If it’s too thick, you can add a splash of milk to reach your desired consistency.
  6. Pour the slush into glasses. This recipe typically serves 4, but you can easily double it for larger gatherings. Use a spoon to help guide the slush into the glasses if needed.
  7. Garnish each serving with fresh orange slices and mint leaves. The mint not only adds a pop of color but also a refreshing aroma that complements the citrus flavors beautifully.
  8. Serve immediately and enjoy! If you’ve made extra, you can refrigerate it for a short time, but it's best enjoyed fresh.
  • Prep Time: 15 min
  • Cook Time: 0 min
  • Category: Dessert
  • Method: Blending
  • Cuisine: American

Nutrition

  • Serving Size: 1 serving
  • Calories: 200
  • Sugar: 30 g
  • Sodium: 50 mg
  • Fat: 5 g
  • Saturated Fat: 3 g
  • Unsaturated Fat: 2 g
  • Trans Fat: 0 g
  • Carbohydrates: 40 g
  • Fiber: 1 g
  • Protein: 2 g
  • Cholesterol: 20 mg

Keywords: Don't skip the orange zest! It's a game-changer for flavor. Always zest before juicing to make it easier.

Did you make this recipe?

Share a photo and tag us — we can't wait to see what you've made!

Zesty Lemon Poppy Seed Delight

One rainy afternoon, I found myself in my grandmother’s cozy kitchen, the kind that always smelled like warmth and love. She was whipping up her famous Lemon Poppy Seed Loaf, a recipe that had been passed down through generations. As the batter came together, the zesty aroma of fresh lemons filled the air, mingling perfectly with the nutty fragrance of poppy seeds. I can still picture her, apron-clad, as she expertly drizzled a vibrant citrus icing over the loaf, creating a glossy, sun-kissed finish that beckoned us to dive in. It was a moment that sparked my own passion for baking, and this recipe has become a cherished staple in my home ever since.

When you take a bite of this Lemon Poppy Seed Loaf, it’s like a burst of sunshine on your palate. The loaf is beautifully golden, with a tender crumb that melts in your mouth. Each slice is speckled with tiny poppy seeds, adding a delightful crunch that contrasts beautifully with the tangy sweetness of the lemon. And that citrus icing? It’s the finishing touch that elevates this loaf from ordinary to extraordinary, with its bright, zesty flavor dancing on your taste buds.

This recipe stands out because it embraces simplicity while delivering on flavor. I’ve added a hint of vanilla to the batter, enhancing the overall taste and making it even more indulgent. Trust me, once you make this Lemon Poppy Seed Loaf With Citrus Icing, it’ll become a go-to in your baking repertoire.

So, let me show you exactly how to make it!

Zesty Lemon Poppy Seed Delight

Why You’ll Love This Recipe

  • Moist and tender crumb that melts in your mouth, thanks to the perfect balance of butter and buttermilk.
  • Bright, zesty lemon flavor paired with crunchy poppy seeds, creating a delightful texture and taste experience.
  • Easy to whip up in just about an hour, perfect for last-minute gatherings or a cozy afternoon treat.
  • Budget-friendly with everyday ingredients, making it an accessible option for all home bakers.
  • The citrus icing adds a sweet tang that elevates the loaf, turning a simple recipe into a showstopper!

Ingredients

  • 1 ½ cups (190g) all-purpose flour
  • 1 teaspoon baking powder
  • ½ teaspoon baking soda
  • ½ teaspoon salt
  • 3 tablespoons poppy seeds
  • ½ cup (115g) unsalted butter, softened to room temperature
  • 1 cup (200g) granulated sugar
  • 2 large eggs
  • 1 teaspoon vanilla extract
  • 1 teaspoon lemon zest (from about 1 medium lemon)
  • ½ cup (120ml) buttermilk
  • 2 tablespoons fresh lemon juice

For the Citrus Icing:

  • 1 cup (120g) powdered sugar
  • 2 tablespoons fresh lemon juice
  • 1 tablespoon orange juice
  • 1 teaspoon lemon zest (for garnish, optional)

Let’s dive into the key ingredients that make this Lemon Poppy Seed Loaf so special. The all-purpose flour provides the structure and base for the loaf, while the baking powder and baking soda ensure it rises perfectly, giving the loaf a light texture. For a gluten-free variation, you could substitute the flour with a gluten-free all-purpose blend. Poppy seeds not only add a delightful crunch but also contribute to the unique flavor profile that pairs well with the citrus notes.

Unsalted butter is crucial for achieving the buttery richness that makes this loaf so moist. If you’re looking for a dairy-free option, coconut oil or a vegan butter can be used instead. The buttermilk is another essential component, providing acidity that activates the baking soda for a fluffy texture. If you don’t have buttermilk on hand, you can easily make a substitute by mixing ½ cup of milk with 1 tablespoon of vinegar or lemon juice and letting it sit for about 5 minutes.

Step-by-Step Instructions

  1. Preheat your oven to 350°F (175°C). Grease a 9×5-inch loaf pan or line it with parchment paper for easy removal later.
  2. In a medium mixing bowl, whisk together 1 ½ cups of all-purpose flour, 1 teaspoon of baking powder, ½ teaspoon of baking soda, ½ teaspoon of salt, and 3 tablespoons of poppy seeds. This helps to evenly distribute the baking agents and ensures a uniform rise.
  3. In a large mixing bowl, cream together ½ cup of softened unsalted butter and 1 cup of granulated sugar using an electric mixer on medium speed for about 3-4 minutes, until the mixture is light and fluffy. Make sure to scrape down the sides of the bowl occasionally.
  4. Add 2 large eggs, 1 teaspoon of vanilla extract, and 1 teaspoon of lemon zest to the creamed butter and sugar, mixing until fully combined. You want a smooth consistency, so ensure there are no lumps of butter.
  5. In a small bowl, combine ½ cup of buttermilk and 2 tablespoons of fresh lemon juice. Alternately add the dry ingredients and buttermilk mixture to the butter mixture, starting and ending with the dry ingredients. Mix just until combined; do not overmix, as this can lead to a dense loaf.
  6. Pour the batter into the prepared loaf pan. Smooth the top with a spatula, ensuring it’s even. Bake in the preheated oven for 50-60 minutes, or until a toothpick inserted in the center comes out clean. The edges should be lightly golden brown, and the center should feel just set.
  7. Once baked, remove the loaf from the oven and allow it to cool in the pan for about 10 minutes. Then, transfer it to a wire rack to cool completely. Resist the urge to slice too soon, as it will be crumbly if it’s still warm.
  8. While the loaf is cooling, prepare the citrus icing. In a medium bowl, whisk together 1 cup of powdered sugar, 2 tablespoons of fresh lemon juice, and 1 tablespoon of orange juice until smooth. If the icing is too thick, you can add a little more juice to reach your desired consistency.
  9. Once the loaf is completely cool, drizzle the citrus icing over the top. If you like, sprinkle with an additional teaspoon of lemon zest for an extra pop of flavor and color.

Pro Tips for the Best Lemon Poppy Seed Loaf With Citrus Icing

  • Be careful not to overmix your batter; this is a common mistake that can lead to a dense loaf. Mix just until the dry ingredients are incorporated for a light and fluffy texture.
  • Use room temperature ingredients, especially the butter and eggs. This helps to create a smoother batter and ensures even baking. Take your eggs out of the fridge about 30 minutes before you start.
  • For a more pronounced lemon flavor, consider adding a little lemon extract in addition to the zest and juice. Just a half teaspoon can elevate the citrus notes significantly.
  • When measuring your flour, spoon it into the measuring cup and level it off with a knife instead of scooping directly from the bag. This prevents packing and ensures you don’t end up with a dry loaf.
  • Invest in a good quality loaf pan; it makes a difference in heat distribution, which ensures even baking. If your pan is dark-coated, reduce the oven temperature by 25°F to prevent over-browning.

Variations & Serving Ideas

For a delightful twist, consider adding blueberries or raspberries to the batter for a fruity burst of flavor. You can also experiment with different citrus fruits—try lime or grapefruit zest and juice for a refreshing change. For a healthier option, substitute half of the all-purpose flour with whole wheat flour for added fiber without compromising too much on texture.

This Lemon Poppy Seed Loaf pairs beautifully with a light salad, such as a mixed greens salad with a vinaigrette, or a cup of tea for a cozy afternoon treat. It also complements a creamy cheese platter, as the acidity of the loaf balances rich cheeses perfectly. Lastly, a scoop of vanilla ice cream on the side creates a delightful contrast of temperatures and flavors!

Storage, Make-Ahead & Reheating

This Lemon Poppy Seed Loaf can be stored at room temperature for up to 3 days if wrapped tightly in plastic wrap. If you want to keep it longer, it freezes well for up to 3 months. To freeze, wrap the loaf tightly in plastic wrap and then in aluminum foil to prevent freezer burn.

When you’re ready to enjoy it again, simply thaw it in the fridge overnight. Reheat individual slices in the microwave for 15-20 seconds or in a toaster oven until warmed through. Interestingly, many people find that this loaf tastes even better the next day, as the flavors have time to meld!

Frequently Asked Questions

Can I make Lemon Poppy Seed Loaf With Citrus Icing ahead of time?

Yes — in fact, it tastes even better the next day! You can make the loaf a day in advance, allowing the flavors to develop. Just be sure to store it in an airtight container to maintain its moisture.

Can I substitute the poppy seeds?

Absolutely! If you don’t have poppy seeds on hand or prefer an alternative, you can use sesame seeds for a similar crunch or omit them entirely for a smooth loaf.

What can I use instead of buttermilk?

If you don’t have buttermilk, you can easily create a substitute by mixing ½ cup of milk (dairy or plant-based) with 1 tablespoon of vinegar or lemon juice. Let it sit for 5 minutes before using in the recipe.

How can I make this recipe gluten-free?

To make a gluten-free version of this Lemon Poppy Seed Loaf, substitute the all-purpose flour with a gluten-free all-purpose flour blend. Just ensure that the blend contains a binding agent like xanthan gum for the best results.

What is the best way to store leftover loaf?

Leftover Lemon Poppy Seed Loaf should be stored in an airtight container at room temperature for up to 3 days. For longer storage, wrap it tightly and freeze for up to 3 months. Thaw it before serving for the best texture.

Zesty Lemon Poppy Seed Delight

Final Thoughts

The Lemon Poppy Seed Loaf with Citrus Icing is truly a delightful treat that brings a burst of brightness to any occasion. The zesty lemon flavor combined with the subtle crunch of poppy seeds creates a satisfying balance, while the citrus icing adds a touch of sweetness that perfectly complements the loaf’s tanginess.

This is the kind of recipe I come back to again and again, especially when I want to brighten up a gloomy day or celebrate a small victory. The aroma that fills the kitchen as it bakes is absolutely heavenly! I encourage you to give this recipe a try; you might just find it becoming a beloved staple in your home. Don’t forget to share your results or even add your own unique twist—I can’t wait to see what you create!

Print
clock clock iconcutlery cutlery iconflag flag iconfolder folder iconinstagram instagram iconpinterest pinterest iconfacebook facebook iconprint print iconsquares squares iconheart heart iconheart solid heart solid icon

Lemon Poppy Seed Loaf


  • Author: Lily author
  • Total Time: 52 minute
  • Yield: 1 loaf 1x
Pin Recipe
Print Recipe

Description

This Lemon Poppy Seed Loaf is a delightful treat that combines zesty lemon flavor with crunchy poppy seeds. Topped with a citrus icing, it’s perfect for any occasion.


Ingredients

Scale
  • 1 ½ cups (190g) all-purpose flour
  • 1 teaspoon baking powder
  • ½ teaspoon baking soda
  • ½ teaspoon salt
  • 3 tablespoons poppy seeds
  • ½ cup (115g) unsalted butter, softened to room temperature
  • 1 cup (200g) granulated sugar
  • 2 large eggs
  • 1 teaspoon vanilla extract
  • 1 teaspoon lemon zest (from about 1 medium lemon)
  • ½ cup (120ml) buttermilk
  • 2 tablespoons fresh lemon juice
  • 1 cup (120g) powdered sugar
  • 2 tablespoons fresh lemon juice
  • 1 tablespoon orange juice
  • 1 teaspoon lemon zest (for garnish, optional)

Instructions

  1. Preheat your oven to 350°F (175°C). Grease a 9×5-inch loaf pan or line it with parchment paper for easy removal later.
  2. In a medium mixing bowl, whisk together 1 ½ cups of all-purpose flour, 1 teaspoon of baking powder, ½ teaspoon of baking soda, ½ teaspoon of salt, and 3 tablespoons of poppy seeds. This helps to evenly distribute the baking agents and ensures a uniform rise.
  3. In a large mixing bowl, cream together ½ cup of softened unsalted butter and 1 cup of granulated sugar using an electric mixer on medium speed for about 3-4 minutes, until the mixture is light and fluffy. Make sure to scrape down the sides of the bowl occasionally.
  4. Add 2 large eggs, 1 teaspoon of vanilla extract, and 1 teaspoon of lemon zest to the creamed butter and sugar, mixing until fully combined. You want a smooth consistency, so ensure there are no lumps of butter.
  5. In a small bowl, combine ½ cup of buttermilk and 2 tablespoons of fresh lemon juice. Alternately add the dry ingredients and buttermilk mixture to the butter mixture, starting and ending with the dry ingredients. Mix just until combined; do not overmix, as this can lead to a dense loaf.
  6. Pour the batter into the prepared loaf pan. Smooth the top with a spatula, ensuring it’s even. Bake in the preheated oven for 50-60 minutes, or until a toothpick inserted in the center comes out clean. The edges should be lightly golden brown, and the center should feel just set.
  7. Once baked, remove the loaf from the oven and allow it to cool in the pan for about 10 minutes. Then, transfer it to a wire rack to cool completely. Resist the urge to slice too soon, as it will be crumbly if it’s still warm.
  8. While the loaf is cooling, prepare the citrus icing. In a medium bowl, whisk together 1 cup of powdered sugar, 2 tablespoons of fresh lemon juice, and 1 tablespoon of orange juice until smooth. If the icing is too thick, you can add a little more juice to reach your desired consistency.
  9. Once the loaf is completely cool, drizzle the citrus icing over the top. If you like, sprinkle with an additional teaspoon of lemon zest for an extra pop of flavor and color.
  • Prep Time: 15 mins
  • Cook Time: 50-60 mins
  • Category: Dessert
  • Method: Baking
  • Cuisine: American

Nutrition

  • Serving Size: 1 slice
  • Calories: 200
  • Sugar: 15 g
  • Sodium: 150 mg
  • Fat: 8 g
  • Saturated Fat: 5 g
  • Unsaturated Fat: 3 g
  • Trans Fat: 0 g
  • Carbohydrates: 30 g
  • Fiber: 1 g
  • Protein: 3 g
  • Cholesterol: 40 mg

Keywords: Be careful not to overmix your batter; this is a common mistake that can lead to a dense loaf. Use room temperature ingredients for a smoother batter and even baking.

Did you make this recipe?

Share a photo and tag us — we can't wait to see what you've made!

  • Privacy Policy
  • Terms Of Service
  • Contact
  • About
  • GDPR

Copyright © 2025 Homesmad