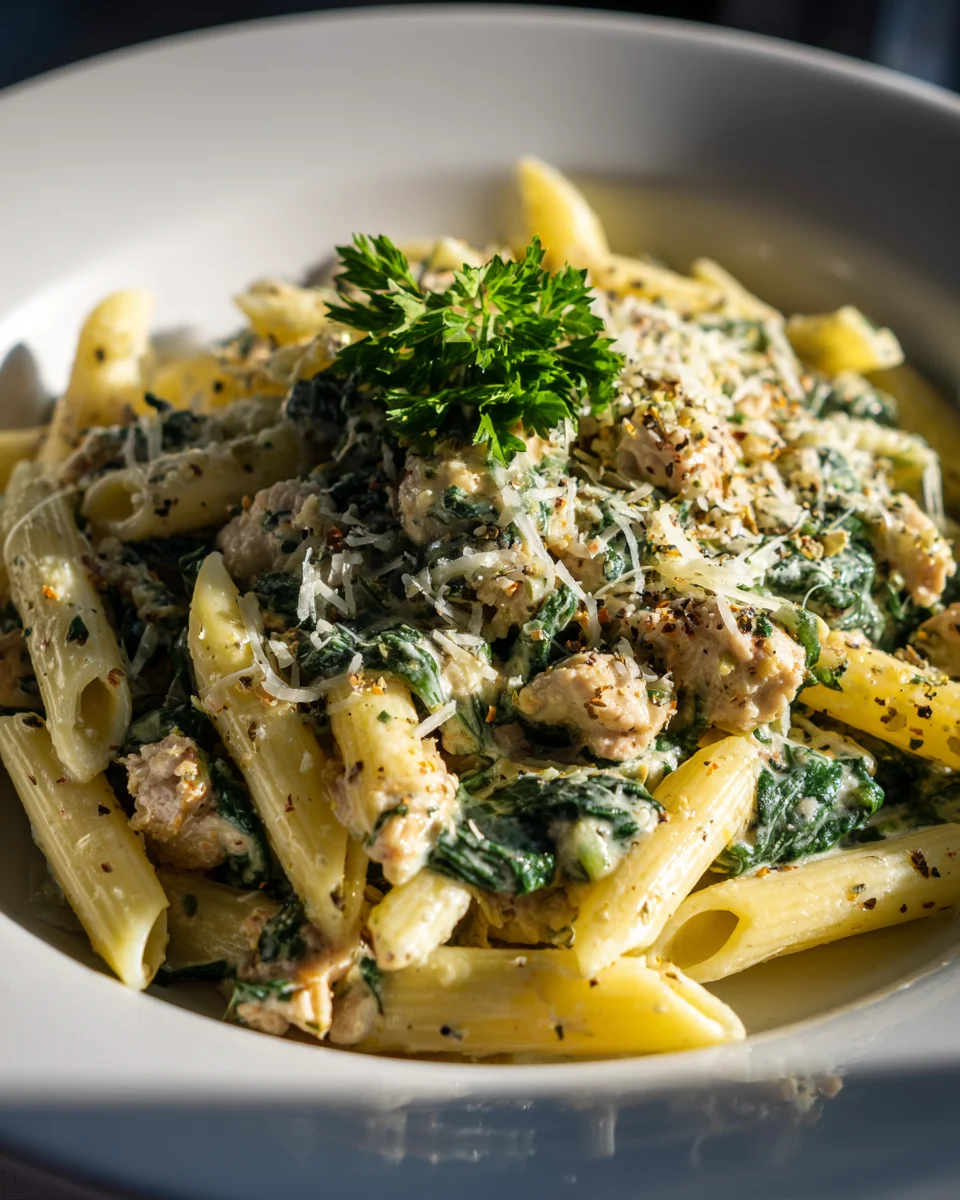
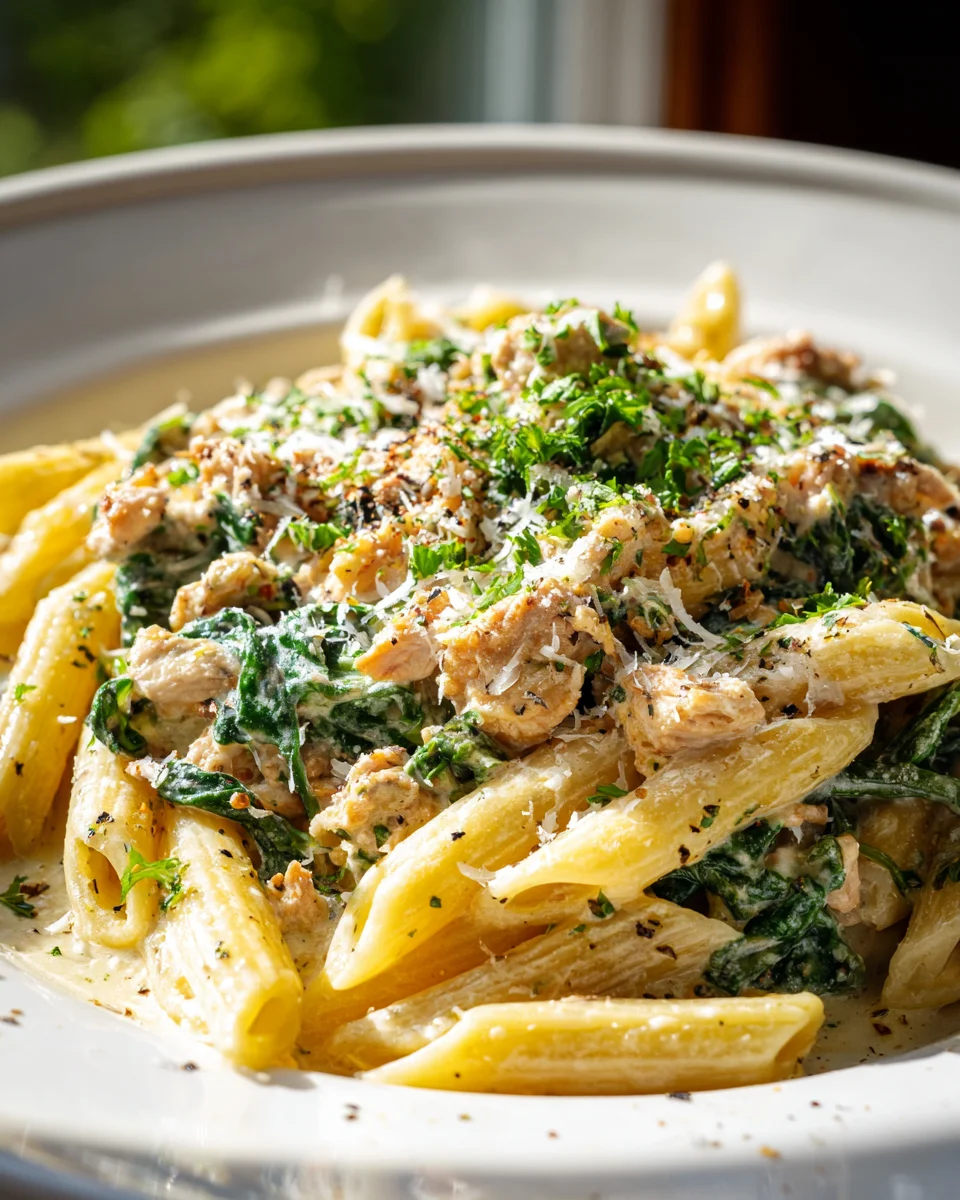
Creamy Ground Chicken Pasta With Spinach
Oh my goodness, let me tell you about one of my new favorite weeknight wonders: Creamy Ground Chicken Pasta With Spinach! If you’re anything like me, you’re always on the hunt for a dinner that feels comforting and special but doesn’t require hours in the kitchen. This dish is exactly that. What makes it truly special is the incredible balance of flavors and textures – tender ground chicken, wilted fresh spinach, and perfectly cooked pasta all coated in a rich, velvety cream sauce. It’s so satisfying and hearty, yet surprisingly quick to throw together.
I know you’re going to love this recipe because it hits all the right notes: it’s incredibly flavorful, family-friendly, and a fantastic way to sneak in some greens. Plus, the creamy sauce makes every bite feel like a warm hug. It’s the kind of dish that makes everyone at the table happy, without any fuss. Essentially, we’re talking about a delicious pasta meal featuring savory ground chicken browned to perfection, then simmered in a luscious, dairy-based sauce before fresh spinach is folded in to add a burst of color and nutrition. It’s a complete meal in one pot (well, mostly!) and I can’t wait for you to try it!
Ingredient Notes
Crafting a truly delicious Creamy Ground Chicken Pasta With Spinach starts with understanding the stars of the show. I find that a few key ingredients, and knowing how to choose and treat them, make all the difference in achieving that perfect balance of flavor and texture in this comforting dish.
Ground Chicken: This is my lean protein powerhouse for this recipe. I typically opt for ground chicken that’s around 90-93% lean. It cooks quickly and absorbs flavors beautifully. If you prefer a slightly richer taste, a blend with a bit more fat can work too, but I usually don’t find it necessary here. For substitutions, lean ground turkey is an excellent direct swap, offering a very similar texture and cook time. If you’re looking for a red meat alternative, lean ground beef would also be fantastic, though it will change the flavor profile slightly towards a heartier, beefier dish. Make sure to break it up well as it cooks to ensure it browns evenly and incorporates smoothly into the sauce.
Pasta: I love using a medium-sized pasta shape that can really grab onto that creamy sauce and bits of chicken and spinach. Penne, rigatoni, or even rotini are fantastic choices. Their ridges and tubes are perfect for cradling the creamy goodness. Don’t be afraid to experiment with other shapes like orecchiette or cavatappi! The key is to cook your pasta al dente, as it will continue to cook slightly when tossed with the hot sauce. This ensures it doesn’t become mushy.
Fresh Spinach: This leafy green adds a wonderful pop of color, a boost of nutrients, and a touch of freshness that balances the richness of the cream. I always recommend using fresh baby spinach as it wilts down quickly and has a milder flavor than mature spinach. You’ll need a surprisingly large amount before it cooks down – don’t be shy! If you can’t find fresh spinach, frozen chopped spinach can work in a pinch. Just be sure to thaw it and squeeze out as much excess water as possible before adding it to your pan to avoid diluting the sauce.
Heavy Cream: This is where the “creamy” in our “Creamy Ground Chicken Pasta” truly comes from! Heavy cream provides that luxurious, velvety texture and rich mouthfeel that makes this dish so comforting. I don’t typically recommend substitutions for heavy cream if you want that classic richness, but if you’re looking to lighten things up slightly, a combination of half-and-half and a tablespoon of cream cheese can create a similar creamy texture, though it might not be quite as thick. Avoid using just milk, as it’s prone to separating or curdling under high heat, and won’t give you the desired richness.
Chicken Broth: I use low-sodium chicken broth to add depth of flavor and help create the sauce without making it overly salty. It also helps to thin the heavy cream to the perfect consistency. Vegetable broth is a fine substitute if that’s what you have on hand, or even a good quality bouillon dissolved in hot water. I always taste before adding more salt when using broth, as sodium levels can vary widely.
Parmesan Cheese: Freshly grated Parmesan cheese is non-negotiable for me in this dish! It melts beautifully into the sauce, adding a salty, umami kick that elevates the entire dish. Pre-grated cheese often contains anti-caking agents that can make it melt unevenly and result in a slightly grainy texture. Pecorino Romano is another excellent, sharper alternative if you enjoy a bolder cheesy flavor.
Aromatics (Onion & Garlic): My foundational flavor builders! A finely diced yellow onion and plenty of minced fresh garlic create the aromatic base that really makes this dish sing. Don’t skimp on these; they provide crucial depth and warmth.
Step-by-Step Instructions
Making this Creamy Ground Chicken Pasta With Spinach is wonderfully straightforward, and I’ll walk you through how I get it done in my kitchen for maximum flavor and minimum fuss.
- Get Your Pasta Started: First things first, get a large pot of salted water boiling for your pasta. Once it’s at a rolling boil, add your chosen pasta (penne or rigatoni work great!). Cook it according to package directions until it’s al dente – that means tender but with a slight bite. Before draining, make sure to reserve about a cup of that starchy pasta water. It’s liquid gold for adjusting the sauce later! Drain the pasta and set it aside.
- Brown the Ground Chicken: While your pasta is cooking, heat a large skillet or Dutch oven over medium-high heat. Add a drizzle of olive oil. Once hot, add your ground chicken, breaking it up with a spoon as it cooks. Season generously with a pinch of salt and black pepper. Cook until the chicken is fully browned and no pink remains, usually about 5-7 minutes. If your chicken has rendered a lot of fat (though lean ground chicken usually doesn’t much), you can carefully drain off any excess before moving to the next step. Transfer the cooked chicken to a plate and set aside, leaving any delicious browned bits in the pan.
- Sauté the Aromatics: Reduce the heat to medium. Add another small drizzle of olive oil to the same skillet if needed. Toss in your finely diced onion and cook, stirring occasionally, until it softens and becomes translucent, about 3-5 minutes. Next, add the minced garlic and cook for just another minute until fragrant, being careful not to let it burn. Burnt garlic is a no-go!
- Wilt the Spinach: Now it’s time for the star green! Add the fresh spinach to the skillet in batches if necessary. It might seem like a lot, but trust me, it cooks down quickly. Stir until all the spinach has wilted completely, which usually only takes 2-3 minutes.
- Build the Creamy Sauce: Pour in the chicken broth and bring it to a gentle simmer, scraping up any browned bits from the bottom of the pan – that’s extra flavor! Stir in the heavy cream and bring the mixture back to a low simmer. Add your freshly grated Parmesan cheese and stir until it’s completely melted and the sauce is smooth and slightly thickened. Season the sauce with a little more salt, pepper, and perhaps a pinch of red pepper flakes if you like a touch of heat. Taste and adjust as needed.
- Combine and Finish: Return the cooked ground chicken to the skillet with the sauce. Add your drained, al dente pasta. Toss everything together thoroughly, making sure every strand of pasta and every piece of chicken is coated in that luscious creamy sauce. If the sauce seems too thick, add a splash or two of that reserved pasta water until it reaches your desired consistency.
- Serve Immediately: This dish is best enjoyed fresh from the pan. Garnish with a little extra Parmesan cheese and some fresh chopped parsley, if you like. Enjoy your incredibly satisfying Creamy Ground Chicken Pasta With Spinach!
Tips & Suggestions
I’ve made this Creamy Ground Chicken Pasta With Spinach countless times, and over the years, I’ve picked up a few tricks that really elevate it from good to absolutely amazing. Here are my favorite tips for a perfect bowl every time:
- Don’t Overcook the Pasta: This is crucial! Cook your pasta to a firm al dente, maybe even slightly less done than you normally would. It will continue to cook when you toss it with the hot sauce, and you want it to absorb some of that creamy goodness without turning mushy. Overcooked pasta can make the whole dish feel heavy.
- Embrace the Pasta Water: That starchy, salty pasta water is your secret weapon for a silky, perfectly consistent sauce. It helps to emulsify the sauce, making it cling beautifully to the pasta. If your sauce looks too thick, add a tablespoon or two at a time until it reaches your desired richness.
- Properly Brown Your Chicken: Don’t rush this step! Giving your ground chicken enough time to brown and develop those lovely crispy bits adds a tremendous amount of flavor to the dish. Those browned bits, or fond, will also add depth to your sauce when you deglaze the pan with broth.
- Freshly Grated Cheese is Best: I can’t stress this enough. Pre-shredded Parmesan often contains anti-caking agents that can make it clump and melt unevenly, leading to a gritty sauce. A block of good quality Parmesan that you grate yourself will melt smoothly and deliver superior flavor.
- Taste and Adjust Seasoning: Always taste your sauce before combining it with the pasta. Adjust salt, pepper, and any other seasonings like red pepper flakes or garlic powder to your liking. Remember that the chicken broth and Parmesan will contribute some saltiness, so be mindful when adding extra.
- Add a Bright Finish: A squeeze of fresh lemon juice stirred in at the very end, just before serving, can really brighten up the flavors and cut through the richness of the cream. A sprinkle of fresh parsley or basil also adds a lovely fresh aroma and color.
- Consider Extra Veggies: While spinach is wonderful, this recipe is also very adaptable. Feel free to sauté some sliced mushrooms, bell peppers, or even sun-dried tomatoes along with the onions and garlic for added texture and nutrients.
- Spice It Up: If you love a little heat, don’t hesitate to add a pinch of red pepper flakes with the garlic, or even a dash of your favorite hot sauce to the finished dish.
Storage
Creamy Ground Chicken Pasta With Spinach is definitely at its best when enjoyed fresh, right off the stove. The pasta is perfectly al dente, the sauce is at its silkiest, and the spinach is vibrant. However, I know life happens, and leftovers are a wonderful thing to have! Here’s how I handle storing and reheating this delicious dish.
Refrigeration:
Once your creamy pasta has cooled down to room temperature (don’t leave it out for more than two hours), transfer it to an airtight container. I find that glass containers work particularly well for pasta dishes. It will keep beautifully in the refrigerator for up to 3-4 days. The sauce might thicken up a bit as it chills, and the pasta will absorb more of the liquid, but don’t worry, we can easily fix that during reheating.
Reheating:
When you’re ready to enjoy your leftovers, reheating gently is key to bringing back that lovely creamy texture. My preferred method is on the stovetop:
- Stovetop: Place the desired portion of pasta in a skillet or saucepan over medium-low heat. As it warms up, the sauce will likely be very thick. Add a splash of chicken broth or milk (about 1-2 tablespoons per serving) to help loosen it up and bring it back to a creamy consistency. Stir gently and consistently until the pasta is heated through and the sauce is smooth and luscious again. Avoid high heat, as it can cause the sauce to separate.
- Microwave: You can also reheat individual portions in the microwave. Place the pasta in a microwave-safe dish, add a tablespoon or two of broth or milk, and cover loosely. Heat on medium power in 1-minute intervals, stirring in between, until heated through. Be cautious not to overheat, as this can dry out the chicken and make the sauce oily.
Freezing:
While technically possible, I generally don’t recommend freezing creamy pasta dishes like this one. The dairy in the heavy cream can sometimes separate or become grainy when thawed and reheated, leading to a less desirable texture. The spinach might also become quite watery and mushy after freezing and thawing. If you absolutely must freeze it, try to freeze just the chicken and sauce without the pasta, and then cook fresh pasta when you’re ready to serve. If you do freeze the entire dish, thaw it completely in the refrigerator overnight before reheating gently on the stovetop with extra broth or milk.
Final Thoughts
And there you have it, friends! We’ve reached the end of our culinary journey, and I genuinely hope you’re as excited as I am about this incredible dish. The Creamy Ground Chicken Pasta With Spinach isn’t just another meal; it’s a testament to how easily you can create something truly spectacular and comforting in your own kitchen. I absolutely love how effortlessly the lean ground chicken, vibrant spinach, and perfectly cooked pasta come together in that luxurious, savory cream sauce. It’s a symphony of flavors and textures that manages to be both hearty and incredibly fresh.
I really believe that once you experience the ease of preparation and the sheer deliciousness of this Creamy Ground Chicken Pasta With Spinach, it will become a fast favorite for your weeknight dinners, or even when you just need a little culinary hug. So, go ahead, gather your ingredients, and prepare to fall in love with a dish that promises to deliver warmth, satisfaction, and a whole lot of smiles. Happy cooking!
Creamy Ground Chicken Pasta with Spinach – Easy & Quick
- Total Time: 30 minutes
- Yield: 4 servings 1x
Description
This Creamy Ground Chicken Pasta with Spinach is a comforting and satisfying weeknight meal that comes together in no time. With tender ground chicken, fresh spinach, and a rich cream sauce, it’s a dish the whole family will love.
Ingredients
- 1 lb ground chicken
- 8 oz medium-sized pasta (penne, rigatoni, or rotini)
- 4 cups fresh baby spinach
- 1 cup heavy cream
- 1 cup low-sodium chicken broth
- 1/2 cup freshly grated Parmesan cheese
- 1 yellow onion, finely diced
- 4 cloves garlic, minced
- Olive oil
- Salt
- Black pepper
- Red pepper flakes (optional)
Instructions
- Get a large pot of salted water boiling for your pasta. Once boiling, add your chosen pasta and cook according to package directions until al dente. Reserve about a cup of starchy pasta water before draining the pasta and setting it aside.
- While the pasta is cooking, heat a large skillet or Dutch oven over medium-high heat. Add a drizzle of olive oil, then add the ground chicken, breaking it up with a spoon as it cooks. Season with salt and black pepper. Cook until fully browned, about 5-7 minutes. Transfer the cooked chicken to a plate and set aside, leaving any browned bits in the pan.
- Reduce the heat to medium. If needed, add another drizzle of olive oil to the skillet. Add the finely diced onion and cook until softened and translucent, about 3-5 minutes. Then, add the minced garlic and cook for another minute until fragrant.
- Add the fresh spinach to the skillet in batches if necessary, stirring until all the spinach has wilted completely, which takes about 2-3 minutes.
- Pour in the chicken broth and bring to a gentle simmer, scraping up any browned bits from the bottom of the pan. Stir in the heavy cream and bring back to a low simmer. Add the freshly grated Parmesan cheese and stir until melted and the sauce is smooth and slightly thickened. Season with additional salt, pepper, and red pepper flakes if desired.
- Return the cooked ground chicken to the skillet along with the drained pasta. Toss everything together thoroughly, ensuring every strand of pasta and piece of chicken is coated in the creamy sauce. If the sauce is too thick, add a splash or two of reserved pasta water until the desired consistency is reached.
- Serve immediately, garnished with extra Parmesan cheese and fresh chopped parsley if desired.
- Prep Time: 10 mins
- Cook Time: 20 mins
- Category: Dinner
- Method: Stovetop
- Cuisine: Italian
Nutrition
- Serving Size: 1 bowl
- Calories: 600
- Sugar: 3 g
- Sodium: 700 mg
- Fat: 30 g
- Saturated Fat: 15 g
- Unsaturated Fat: 10 g
- Trans Fat: 0 g
- Carbohydrates: 50 g
- Fiber: 3 g
- Protein: 35 g
- Cholesterol: 120 mg
Keywords: Don't overcook the pasta; it should be firm al dente. Use freshly grated cheese for the best texture and flavor. A squeeze of fresh lemon juice at the end can brighten the dish.