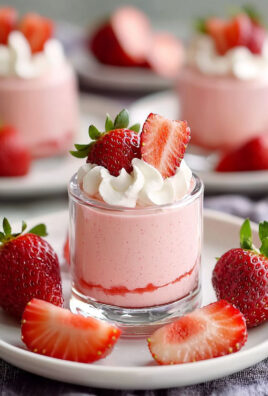
Greek Yogurt Strawberry Shortcake Cups
Oh, prepare yourselves, because I am absolutely bursting with excitement to share the recipe for Greek Yogurt Strawberry Shortcake Cups with you! Forget everything you thought you knew about shortcake, because this recipe takes that beloved classic and gives it a magnificent, fresh, and delightfully lighter twist. I’ve been dreaming up ways to enjoy the vibrant flavors of spring and summer without feeling weighed down, and these cups are the delicious answer.
What makes these Greek Yogurt Strawberry Shortcake Cups so special, you ask? It’s all about the ingenious swap of traditional whipped cream for creamy, tangy Greek yogurt. This isn’t just a substitute; it’s an elevation! The Greek yogurt brings a wonderful tang that perfectly balances the sweetness of the macerated strawberries, plus a welcome boost of protein. It transforms a decadent dessert into something that feels refreshingly bright and almost virtuous, making it perfect for an afternoon treat, a brunch addition, or a light dessert after any meal. You’ll love how these beautiful, individual cups come together, making serving a breeze and ensuring everyone gets their own little slice of heaven.
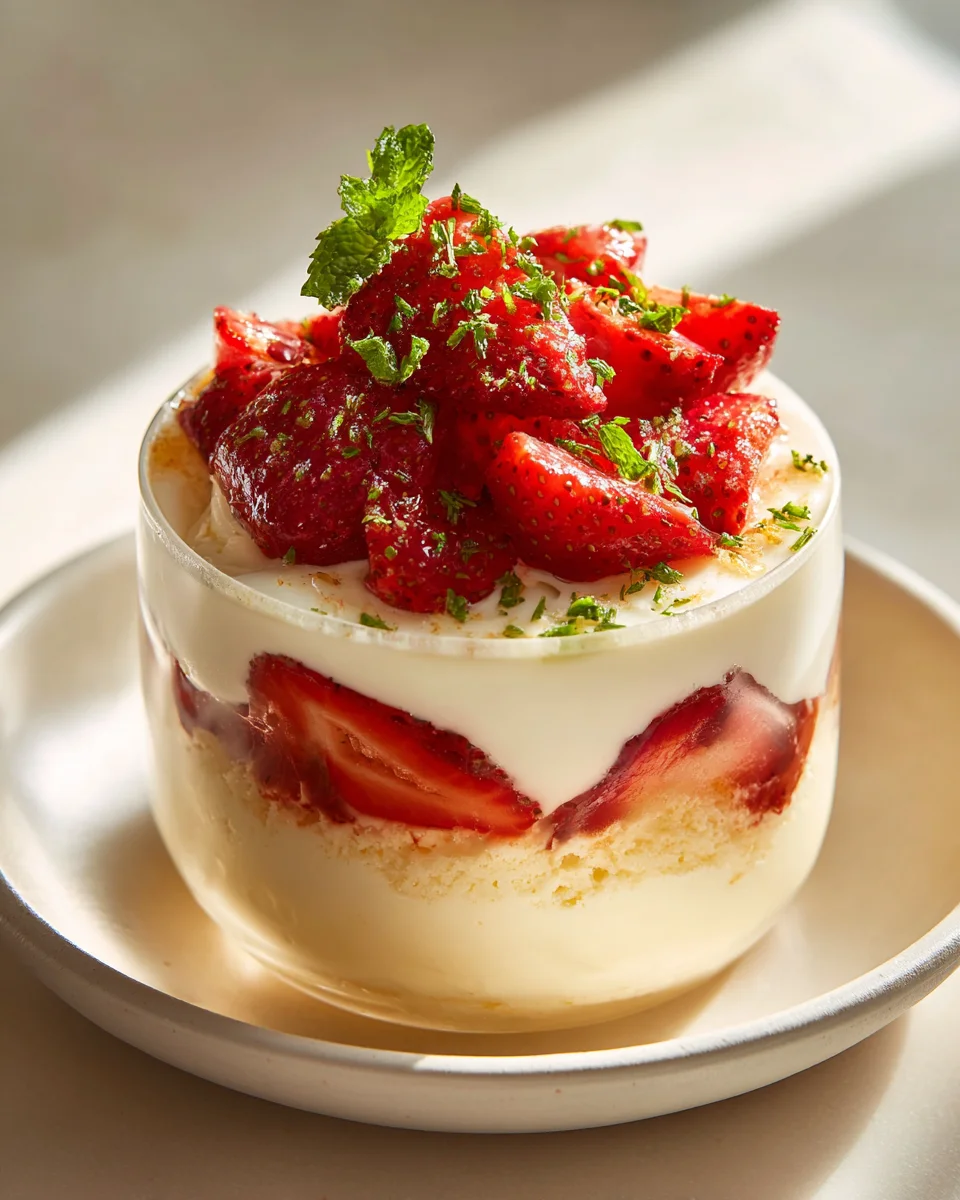
Get ready to fall head over heels for the convenience and sheer deliciousness of these individual shortcake cups. I promise you’ll adore how simple they are to assemble, yet they look incredibly impressive on any table. Each cup is a delightful layered creation: tender, sweet shortcake biscuit pieces (or even cake crumbles for ease!), generously piled with juicy, ripe strawberries that have been lightly sweetened, and then crowned with that lush, tangy Greek yogurt topping. It’s a symphony of textures and flavors in every single spoonful – a perfect balance of sweet, tart, and creamy that will have you coming back for more!
Ingredient Notes
Creating these delightful Greek Yogurt Strawberry Shortcake Cups is all about celebrating fresh, simple ingredients that come together in a symphony of flavors and textures. Here’s a closer look at what you’ll need and some handy substitutions I often use.
Greek Yogurt
- The Star: I always reach for plain, full-fat Greek yogurt. Its thick, creamy texture and tangy profile are absolutely essential for balancing the sweetness of the strawberries and providing that rich mouthfeel without being overly heavy. Full-fat versions tend to be less watery and offer a more luxurious base.
- Substitutions: If you’re looking to lighten things up, plain non-fat or low-fat Greek yogurt works well, but you might find it slightly thinner. Just be aware that it might not have the same creamy richness. You could also use vanilla Greek yogurt if you prefer, but I suggest reducing any added sweeteners since it’s already flavored. For a dairy-free option, a thick, plain coconut cream yogurt or almond yogurt can be a fantastic alternative, just ensure it’s unsweetened.
Fresh Strawberries
- Sweetness & Zing: Ripe, juicy strawberries are non-negotiable for these cups! I love the vibrant color and natural sweetness they bring. Slicing them and letting them macerate briefly with a touch of sugar helps them release their delicious juices, creating a beautiful syrup that soaks into the layers.
- Substitutions: While strawberries are classic, feel free to get creative with other berries. Raspberries, blueberries, or a mixed berry blend would be equally delicious. If fresh berries aren’t in season, you can use frozen sliced strawberries, thawed and drained of excess liquid, though the texture might be slightly softer.
Sweetener
- To Taste: I typically use a touch of maple syrup or honey to sweeten both the yogurt and the strawberries. This adds a lovely, subtle caramel note. Granulated sugar works perfectly fine too, or even a sugar substitute like stevia or erythritol if you’re watching your sugar intake.
- Substitutions: Feel free to adjust the amount of sweetener to your personal preference. A little goes a long way, especially if your strawberries are already very sweet.
Shortcake Component
- The Crumbly Goodness: For the “shortcake” part of these cups, I usually opt for something quick and easy that still delivers that buttery, slightly crumbly texture. My go-to is often a batch of homemade shortbread cookies crumbled, or a very simple, quick-bake biscuit recipe that I then break into pieces. Store-bought shortbread cookies are a fantastic shortcut if you’re pressed for time!
- Substitutions: You could also use crushed graham crackers for a slightly different flavor profile, or even pieces of plain sponge cake or ladyfingers for a softer, more cake-like layer. Gluten-free shortbread cookies or biscuits work wonderfully for those with dietary restrictions.
Vanilla Extract
- Aromatic Boost: Just a splash of good quality vanilla extract really enhances the overall flavor of the Greek yogurt mixture, adding warmth and depth.
- Substitutions: Almond extract could offer a different but equally delightful aroma. A tiny hint of lemon zest stirred into the yogurt can also brighten the flavors beautifully.
Whipped Cream (Optional)
- Classic Topping: While the Greek yogurt makes these cups inherently creamy, a dollop of freshly whipped cream on top is a classic shortcake touch that’s hard to resist. I whip heavy cream with a tiny bit of powdered sugar and vanilla until soft peaks form.
- Substitutions: For a lighter option, you can simply use an extra dollop of the sweetened Greek yogurt mixture. Dairy-free whipped toppings made from coconut cream are also readily available and work perfectly.
Step-by-Step Instructions
Assembling these Greek Yogurt Strawberry Shortcake Cups is so much fun and incredibly straightforward. Here’s how I put them together, layer by delicious layer:
-
Prepare Your Strawberries:
- First things first, I wash my fresh strawberries thoroughly and then hull them. I like to slice about two-thirds of the strawberries and finely dice the remaining third. The diced pieces add a lovely texture throughout the layers, while the slices look beautiful peeking out from the sides of the cup.
- In a medium bowl, I gently combine the sliced and diced strawberries with a tablespoon or two of maple syrup (or your chosen sweetener). I give them a gentle stir and let them sit for about 10-15 minutes. This step, called macerating, allows the strawberries to release their natural juices, creating a lovely, light syrup that will infuse wonderful flavor into your cups.
-
Prepare the Greek Yogurt Mixture:
- While the strawberries are doing their thing, I get my Greek yogurt ready. In another bowl, I spoon in the plain Greek yogurt. I add about a tablespoon of maple syrup (or honey/sugar) and a teaspoon of vanilla extract.
- I stir everything together until it’s smooth and well combined. At this point, I always taste it to make sure it’s sweetened just right for my preference. You can always add a little more sweetener if you like.
-
Prepare Your Shortcake Component:
- If I’m using store-bought shortbread cookies, I simply crumble them roughly into bite-sized pieces. If I’ve baked a quick shortcake biscuit, I let it cool slightly and then break it apart into similar-sized crumbs. The idea is to have irregular pieces that provide a delightful texture contrast. I aim for about 1/4 to 1/2-inch pieces.
-
Assemble Your Cups:
- Now for the fun part: layering! I grab individual serving cups, jars, or small glasses. I usually make 4-6 cups, depending on their size.
- Layer 1 (Bottom): I start with a generous spoonful of the shortcake crumbs at the very bottom of each cup.
- Layer 2: Next, I spoon about a quarter of the macerated strawberries (with their juices!) over the shortcake layer.
- Layer 3: Then, I add a dollop of the sweetened Greek yogurt mixture, spreading it gently to cover the strawberries.
- Repeat: I continue layering – more shortcake crumbs, then strawberries, then Greek yogurt – until my cup is full. I usually aim for at least two layers of each component. I like to finish with a beautiful layer of strawberries or a swirl of Greek yogurt on top.
-
Chill and Serve:
- Once assembled, I cover the cups loosely with plastic wrap and pop them into the refrigerator for at least 30 minutes. This chilling time allows the flavors to meld beautifully and for the shortcake crumbs to soften slightly from the strawberry juices and yogurt, creating that perfect shortcake texture.
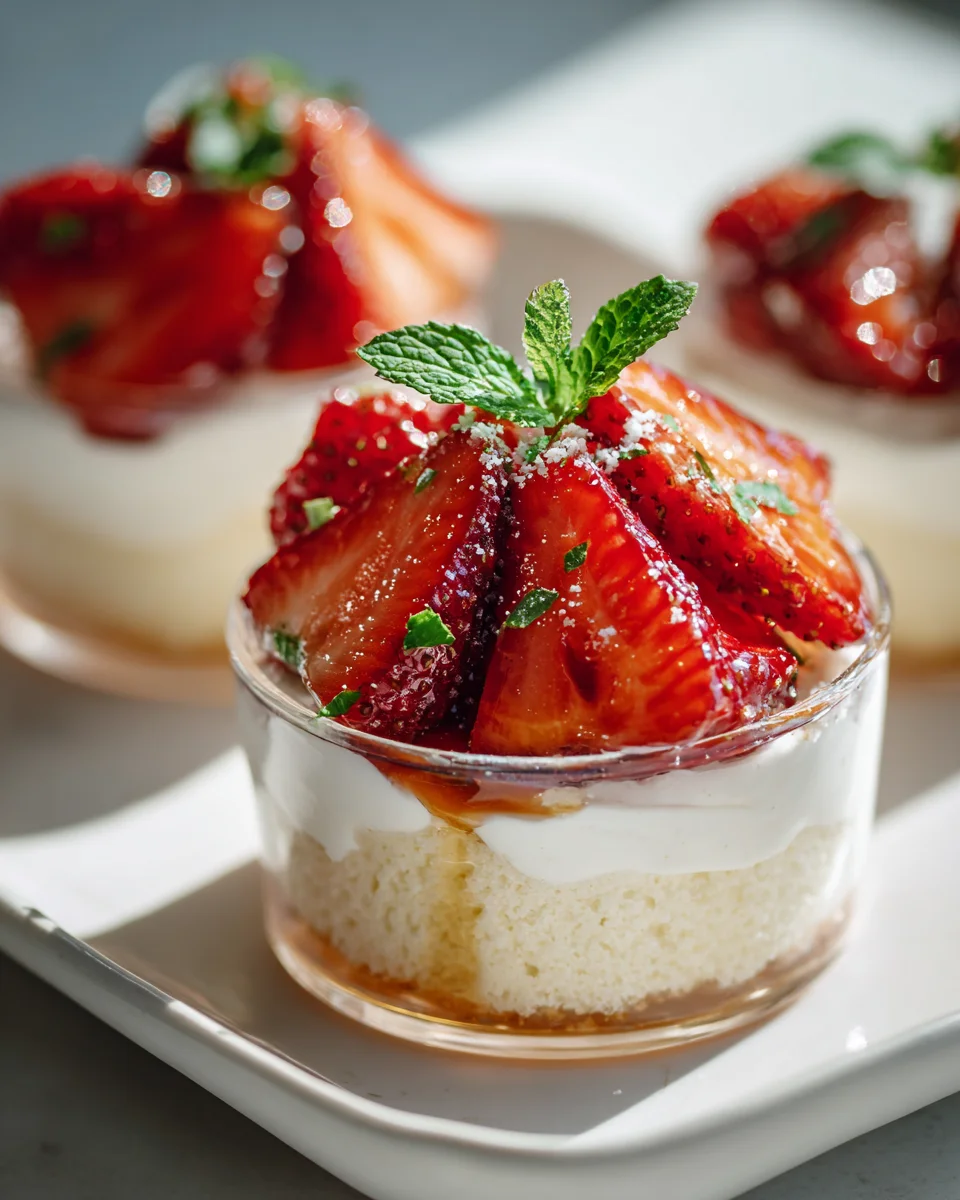
- Just before serving, I often add an optional dollop of freshly whipped cream or a few extra fresh strawberry slices on top for garnish. Enjoy!
Tips & Suggestions
I’ve made these Greek Yogurt Strawberry Shortcake Cups countless times, and over the years, I’ve picked up a few tricks to make them extra special. Here are my go-to tips and suggestions:
-
Don’t Skimp on Macerating:
This might seem like a small step, but letting the strawberries sit with sweetener for a bit really makes a difference. It deepens their flavor and creates that lovely juice that soaks into the other layers, making every bite more moist and delicious. If you’re really short on time, even 5 minutes helps!
-
Adjust Sweetness to Your Liking:
Taste as you go! The sweetness of your strawberries can vary, so always taste the macerated berries and the Greek yogurt mixture before layering. You can always add more sweetener, but you can’t take it away.
-
Vary Your Berries:
While strawberries are classic, don’t be afraid to experiment! A mix of raspberries and blueberries creates a gorgeous color contrast and a different flavor profile. Peaches or mixed summer fruits would also be incredible in this format.
-
Lemon Zest for Brightness:
A tiny bit of fresh lemon zest (about 1/2 teaspoon) stirred into the Greek yogurt mixture or even sprinkled over the strawberries can really brighten up the flavors and add a wonderful zing that complements the sweetness beautifully.
-
Layering Matters for Presentation:
If you’re using clear cups or jars, try to arrange some of the strawberry slices against the sides of the glass for a beautiful visual effect. It makes them even more appealing!
-
Consider Your “Shortcake” Base:
For a softer, more cake-like texture, you could use store-bought angel food cake or even a simple pound cake, cut into small cubes, instead of biscuits or shortbread. This creates a different, yet equally delicious, experience.
-
Make Ahead Magic:
These cups are fantastic for meal prep or entertaining. You can assemble them a few hours ahead of time, or even the night before. The shortcake component will soften slightly as it absorbs the juices and yogurt, which I personally love. If you prefer a crunchier shortcake, store the crumbs separately and add them right before serving or to the very top layer.
-
Garnish Creatively:
Beyond the classic whipped cream, consider a sprig of fresh mint, a sprinkle of toasted slivered almonds, or a light dusting of powdered sugar just before serving for an extra touch of elegance.
-
Perfect for Any Meal:
Don’t limit these to just dessert! They make a wonderfully satisfying and relatively healthy breakfast or brunch item, too. They’re also a lighter alternative to traditional shortcake, making them perfect for warm weather.
Storage
One of the best things about these Greek Yogurt Strawberry Shortcake Cups is how well they store, making them fantastic for meal prep or a quick dessert on demand. Here’s how I typically handle storage:
-
Refrigeration is Key:
Once assembled, these cups should always be stored in the refrigerator. The Greek yogurt and fresh strawberries need to be kept cold to maintain their freshness and prevent spoilage.
-
Cover Them Up:
I always cover each individual cup tightly with plastic wrap or use containers with airtight lids. This prevents the yogurt from absorbing any odors from the fridge and keeps the strawberries from drying out or wilting. It also helps maintain the moisture balance within the cups.
-
How Long Do They Last?
When properly covered and refrigerated, your Greek Yogurt Strawberry Shortcake Cups will stay fresh and delicious for about 2-3 days. The shortcake crumbs will soften over time as they absorb the moisture from the yogurt and strawberries, which creates a wonderful, tender texture that I personally enjoy. If you prefer a firmer shortcake texture, you might find them best within the first day.
-
Storing Components Separately for Maximum Freshness:
If you want to prepare ahead but want the absolute freshest texture, you can store the components separately:
- Macerated Strawberries: Keep them in an airtight container in the fridge for up to 3 days.
- Sweetened Greek Yogurt: Store this in a sealed container in the fridge for up to 4-5 days.
- Shortcake Crumbles: Keep these in an airtight container at room temperature if they are baked biscuits or shortbread (to maintain crispness), or in the fridge if they contain a lot of butter and you’re worried about them getting stale.
Then, simply assemble the cups right before you’re ready to serve for the freshest experience, especially if you desire a crispier shortcake layer.
-
Not Freezer-Friendly:
I wouldn’t recommend freezing these assembled shortcake cups. The Greek yogurt can separate and become grainy, and the texture of the fresh strawberries will become mushy upon thawing. It’s best to enjoy them fresh from the fridge within a few days.
Final Thoughts
Believe me when I say, you’re in for a truly delightful treat with these Greek Yogurt Strawberry Shortcake Cups!
I designed these Greek Yogurt Strawberry Shortcake Cups to be everything you love about the classic, but with a wonderfully fresh and lighter touch. The tangy Greek yogurt provides a beautiful counterpoint to the sweet, ripe strawberries and tender shortcake, creating a harmonious blend of flavors and textures in every individual serving. They are incredibly simple to assemble and offer that perfect balance of indulgence and wholesome goodness without the heavy feeling.
So, whether you’re looking for an effortless weeknight dessert, a charming addition to a brunch, or just a burst of summery joy, I wholeheartedly recommend giving these Greek Yogurt Strawberry Shortcake Cups a spot on your menu. I promise, they’re going to be a new favorite!

Quick & Healthy Greek Yogurt Strawberry Shortcake Cups
- Total Time: 15 minutes
- Yield: 4-6 servings
Description
These Greek Yogurt Strawberry Shortcake Cups are a delightful twist on a classic dessert, featuring creamy Greek yogurt and fresh strawberries. They are light, refreshing, and perfect for any occasion.
Ingredients
- Plain, full-fat Greek yogurt
- Ripe, juicy strawberries
- Maple syrup or honey (to taste)
- Granulated sugar or sugar substitute (to taste)
- Homemade shortbread cookies or quick-bake biscuit (or store-bought shortbread cookies)
- Vanilla extract
- Heavy cream (optional)
- Powdered sugar (optional)
Instructions
- Prepare Your Strawberries: Wash the fresh strawberries thoroughly and hull them. Slice about two-thirds of the strawberries and finely dice the remaining third. Combine the sliced and diced strawberries with a tablespoon or two of maple syrup (or your chosen sweetener) in a medium bowl. Let them sit for about 10-15 minutes to macerate.
- Prepare the Greek Yogurt Mixture: In another bowl, spoon in the plain Greek yogurt. Add about a tablespoon of maple syrup (or honey/sugar) and a teaspoon of vanilla extract. Stir until smooth and well combined, adjusting sweetness to taste.
- Prepare Your Shortcake Component: Crumble store-bought shortbread cookies into bite-sized pieces or break apart a baked quick shortcake biscuit into similar-sized crumbs.
- Assemble Your Cups: Grab individual serving cups, jars, or small glasses. Start with a generous spoonful of the shortcake crumbs at the bottom of each cup. Spoon about a quarter of the macerated strawberries over the shortcake layer, then add a dollop of the sweetened Greek yogurt mixture. Repeat layering with more shortcake crumbs, strawberries, and Greek yogurt until the cup is full.
- Chill and Serve: Cover the cups loosely with plastic wrap and refrigerate for at least 30 minutes. Just before serving, add an optional dollop of freshly whipped cream or extra strawberry slices on top for garnish.
- Prep Time: 15 mins
- Cook Time: 0 mins
- Category: Dessert
- Method: No cooking required
- Cuisine: American
Nutrition
- Serving Size: 1 cup
- Calories: 150
- Sugar: 10 g
- Sodium: 50 mg
- Fat: 5 g
- Saturated Fat: 3 g
- Unsaturated Fat: 2 g
- Trans Fat: 0 g
- Carbohydrates: 20 g
- Fiber: 2 g
- Protein: 6 g
- Cholesterol: 15 mg
Keywords: Don't skimp on macerating the strawberries to enhance their flavor. Adjust sweetness to your liking, and feel free to experiment with different berries or shortcake bases for variety.