Lemon cream cheese bread: just the name conjures images of sunshine, delicate sweetness, and a comforting slice of pure bliss, doesn’t it? Imagine sinking your teeth into a moist, tender loaf, the tangy lemon zest dancing on your tongue, perfectly balanced by the rich, creamy notes of the cream cheese swirl. This isn’t just bread; it’s an experience, a little slice of happiness baked right into your kitchen.
While the exact origins of lemon cream cheese bread are somewhat shrouded in mystery, the combination of citrus and dairy has been a beloved pairing in baking for centuries. Think of classic lemon cheesecakes or lemon curd tarts – the bright acidity of the lemon cuts through the richness of the dairy, creating a harmonious and irresistible flavor profile. This particular bread recipe likely evolved from similar flavor combinations, becoming a modern favorite for its ease of preparation and crowd-pleasing appeal.
But what is it about this bread that makes it so universally loved? For me, it’s the perfect balance of flavors and textures. The bread itself is soft and fluffy, while the cream cheese swirl adds a delightful creaminess and a subtle tang. The lemon brightens everything up, preventing it from being overly sweet. Plus, it’s incredibly versatile! Enjoy a slice for breakfast with your morning coffee, pack it in a lunchbox for a midday treat, or serve it as a delightful dessert after dinner. It’s a guaranteed hit, no matter the occasion. So, let’s get baking and bring a little sunshine into your day with this incredible recipe!

Ingredients:
- For the Bread:
- 3 cups all-purpose flour
- 1 teaspoon baking powder
- 1/2 teaspoon baking soda
- 1/4 teaspoon salt
- 1 cup (2 sticks) unsalted butter, softened
- 1 3/4 cups granulated sugar
- 4 large eggs
- 1 teaspoon vanilla extract
- 1 cup sour cream
- 1/4 cup milk
- Zest of 2 lemons
- For the Cream Cheese Swirl:
- 8 ounces cream cheese, softened
- 1/2 cup granulated sugar
- 1 large egg
- 1 tablespoon lemon juice
- 1 teaspoon vanilla extract
- For the Lemon Glaze:
- 2 cups powdered sugar
- 1/4 cup lemon juice (or more, to desired consistency)
- 1 tablespoon melted butter (optional, for shine)
- Zest of 1 lemon (optional, for garnish)
Preparing the Bread Batter:
- Combine Dry Ingredients: In a large bowl, whisk together the flour, baking powder, baking soda, and salt. This ensures that the leavening agents are evenly distributed throughout the batter, resulting in a more consistent rise.
- Cream Butter and Sugar: In a separate large bowl, cream together the softened butter and granulated sugar until light and fluffy. This step is crucial for incorporating air into the batter, which contributes to the bread’s tender texture. Use an electric mixer for best results, and scrape down the sides of the bowl occasionally to ensure even mixing. This usually takes about 3-5 minutes.
- Add Eggs: Beat in the eggs one at a time, making sure each egg is fully incorporated before adding the next. After adding the last egg, beat in the vanilla extract. Adding the eggs gradually helps to prevent the batter from curdling.
- Alternate Dry and Wet Ingredients: Gradually add the dry ingredients to the wet ingredients, alternating with the sour cream and milk. Begin and end with the dry ingredients. For example, add about 1/3 of the dry ingredients, then 1/2 of the sour cream and milk mixture, then another 1/3 of the dry ingredients, then the remaining sour cream and milk, and finally the remaining dry ingredients. Mix until just combined. Be careful not to overmix, as this can develop the gluten in the flour and result in a tough bread. Overmixing is a common mistake, so be gentle!
- Add Lemon Zest: Stir in the lemon zest until evenly distributed throughout the batter. The lemon zest adds a bright, citrusy flavor that complements the cream cheese swirl perfectly.
Preparing the Cream Cheese Swirl:
- Cream Cheese Mixture: In a medium bowl, beat together the softened cream cheese and sugar until smooth and creamy. Make sure your cream cheese is truly softened; otherwise, you’ll end up with lumps in your swirl.
- Add Egg, Lemon Juice, and Vanilla: Beat in the egg, lemon juice, and vanilla extract until well combined. The lemon juice adds a touch of tanginess that balances the sweetness of the cream cheese mixture.
Assembling and Baking the Bread:
- Prepare the Pan: Preheat your oven to 350°F (175°C). Grease and flour a 9×5 inch loaf pan. You can also use baking spray with flour. This will prevent the bread from sticking to the pan and ensure easy removal after baking.
- Layer the Batter: Pour about half of the bread batter into the prepared loaf pan, spreading it evenly.
- Add Cream Cheese Swirl: Spoon the cream cheese mixture over the bread batter in dollops. Use a knife or skewer to swirl the cream cheese mixture into the batter. Be careful not to over-swirl, as this can muddy the colors. You want to see distinct swirls of cream cheese.
- Top with Remaining Batter: Pour the remaining bread batter over the cream cheese swirl, spreading it evenly.
- Create More Swirls (Optional): If desired, you can add a few more dollops of the remaining cream cheese mixture on top of the batter and swirl it in gently. This will create a more visually appealing swirl on the top of the bread.
- Bake: Bake for 55-70 minutes, or until a wooden skewer inserted into the center comes out clean. The baking time may vary depending on your oven, so start checking for doneness around 55 minutes. If the top of the bread is browning too quickly, you can tent it with aluminum foil.
- Cool: Let the bread cool in the pan for 10-15 minutes before transferring it to a wire rack to cool completely. Cooling the bread in the pan helps to prevent it from crumbling.
Preparing the Lemon Glaze:
- Combine Ingredients: In a medium bowl, whisk together the powdered sugar, lemon juice, and melted butter (if using) until smooth. Add more lemon juice, one teaspoon at a time, until you reach your desired consistency. The glaze should be thick enough to coat the bread but thin enough to drizzle easily.
- Glaze the Bread: Once the bread is completely cool, drizzle the lemon glaze over the top. If desired, sprinkle with lemon zest for garnish.
- Let Glaze Set: Allow the glaze to set for about 15-20 minutes before slicing and serving. This will prevent the glaze from running when you cut the bread.
Tips for Success:
- Softened Butter and Cream Cheese: Make sure your butter and cream cheese are properly softened before starting. This will ensure that they cream together smoothly and evenly.
- Don’t Overmix: Overmixing the batter can result in a tough bread. Mix until just combined.
- Check for Doneness: Use a wooden skewer to check for doneness. If the skewer comes out clean, the bread is done.
- Cool Completely: Allow the bread to cool completely before glazing. This will prevent the glaze from melting and running.
- Storage: Store the bread in an airtight container at room temperature for up to 3 days, or in the refrigerator for up to a week.
Variations:
- Poppy Seed: Add 2 tablespoons of poppy seeds to the bread batter for a nutty flavor and texture.
- Blueberry: Fold in 1 cup of fresh or frozen blueberries to the bread batter for a burst of fruity flavor.
- Orange: Substitute orange zest and orange juice for the lemon zest and lemon juice for a different citrusy twist.
- Chocolate Chips: Add 1 cup of chocolate chips to the bread batter for a decadent treat.
Troubleshooting:
- Bread is Dry: Make sure you’re not overbaking the bread. Check for doneness with a wooden skewer, and tent the top with aluminum foil if it’s browning too quickly. Also, ensure you’re using the correct amount of sour cream and milk.
- Bread is Dense: This could be due to overmixing the batter or using too much flour. Measure the flour accurately, and mix until just combined.
- Cream Cheese Swirl Sinks: This could be due to the cream cheese mixture being too thin. Make sure your cream cheese is properly softened, and don’t add too much lemon juice.
- Glaze is Too Thin: Add more powdered sugar, one tablespoon at a time, until you reach your desired consistency.
- Glaze is Too Thick: Add more lemon juice, one teaspoon at a time, until you reach your desired consistency.
Conclusion:
This lemon cream cheese bread isn’t just another recipe; it’s a slice of sunshine baked into a loaf! From the tangy zest of lemon that dances on your tongue to the creamy, decadent swirl of cream cheese that melts in your mouth, every bite is an experience. I truly believe this is a must-try recipe for anyone who loves a little brightness in their baked goods. The combination of flavors is simply irresistible, and the texture is perfectly moist and tender.
But don’t just take my word for it! Imagine waking up on a weekend morning to the aroma of freshly baked lemon and cream cheese filling your kitchen. Picture yourself slicing a warm piece, the steam gently rising, and enjoying it with a cup of coffee or tea. It’s the perfect way to start your day, or a delightful treat to share with friends and family.
And the best part? It’s incredibly versatile! While I’ve shared my go-to recipe, feel free to get creative. For a more intense lemon flavor, add a tablespoon of lemon extract to the batter. If you’re a fan of poppy seeds, a tablespoon or two mixed into the batter will add a lovely texture and visual appeal. You could even experiment with different citrus fruits, like orange or grapefruit, for a unique twist.
Here are a few serving suggestions to elevate your lemon cream cheese bread experience:
* Classic Slice: Simply slice and serve warm, perhaps with a dusting of powdered sugar for an extra touch of sweetness.
* Toasted Delight: Toast a slice and spread with a little butter or cream cheese for a richer flavor.
* Berry Bliss: Serve alongside a bowl of fresh berries, like raspberries or blueberries, for a refreshing and colorful dessert.
* Ice Cream Indulgence: Warm a slice and top with a scoop of vanilla ice cream for a truly decadent treat.
* Brunch Staple: Include it as part of a brunch spread, alongside other pastries, fruits, and savory dishes.
I’m confident that this recipe will become a new favorite in your household. It’s easy to make, uses simple ingredients, and delivers incredible flavor. The slight tanginess of the lemon combined with the richness of the cream cheese creates a symphony of flavors that will leave you wanting more.
So, what are you waiting for? Gather your ingredients, preheat your oven, and get ready to bake a loaf of pure happiness. I’m so excited for you to try this recipe and experience the joy of homemade lemon cream cheese bread.
Once you’ve baked your masterpiece, I’d love to hear about your experience! Share your photos and comments on social media using [Your Hashtag Here] or leave a review on the recipe page. Let me know what variations you tried and how they turned out. I’m always eager to learn from your culinary adventures and see how you’ve made this recipe your own. Happy baking!
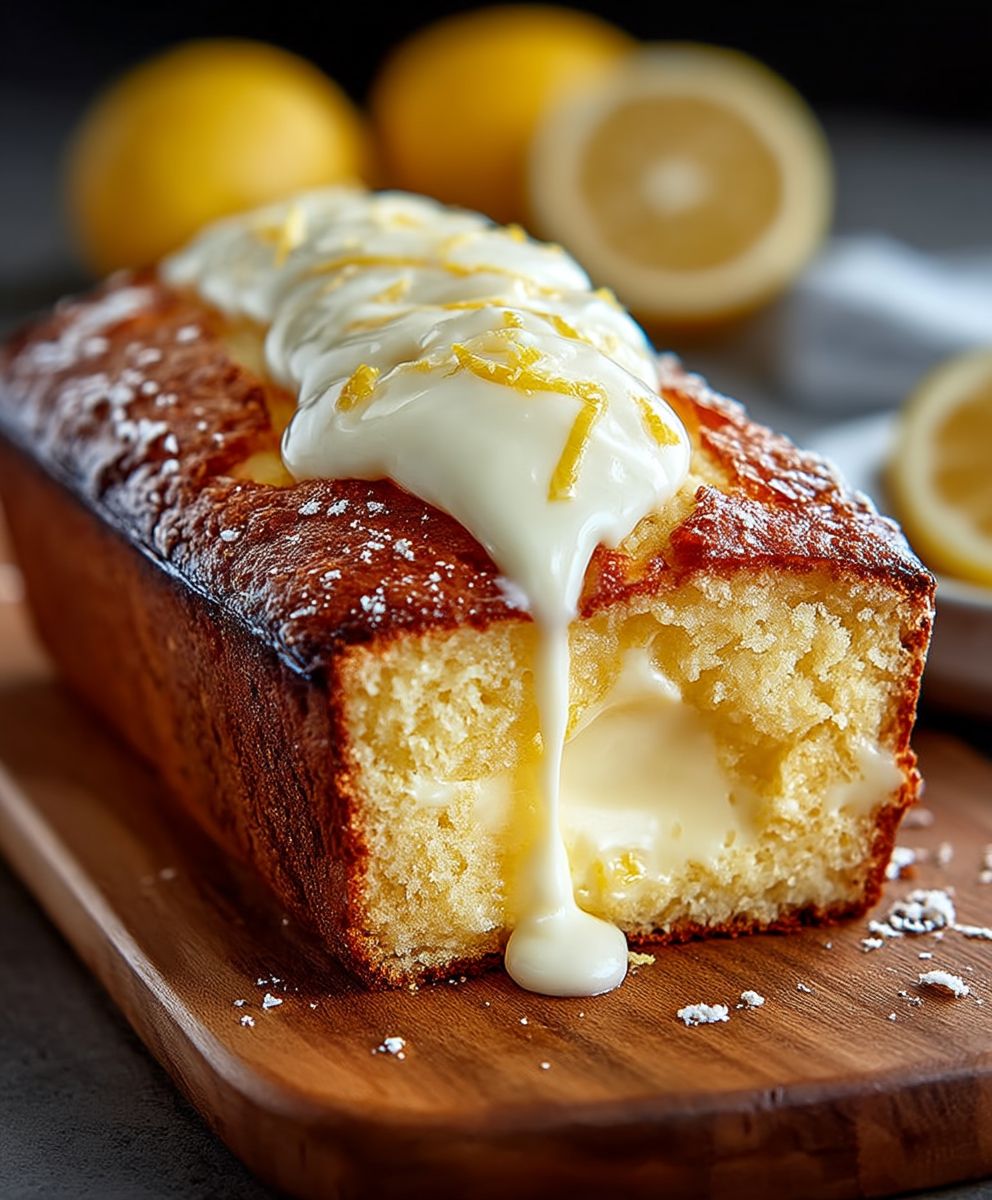
Lemon Cream Cheese Bread: The Ultimate Baking Guide
Moist and tender lemon bread with a creamy cream cheese swirl and a tangy lemon glaze. Perfect for breakfast, brunch, or dessert!
Ingredients
Instructions
Recipe Notes
- Make sure your butter and cream cheese are properly softened before starting.
- Overmixing the batter can result in a tough bread. Mix until just combined.
- Use a wooden skewer to check for doneness. If the skewer comes out clean, the bread is done.
- Allow the bread to cool completely before glazing.
- Store the bread in an airtight container at room temperature for up to 3 days, or in the refrigerator for up to a week.