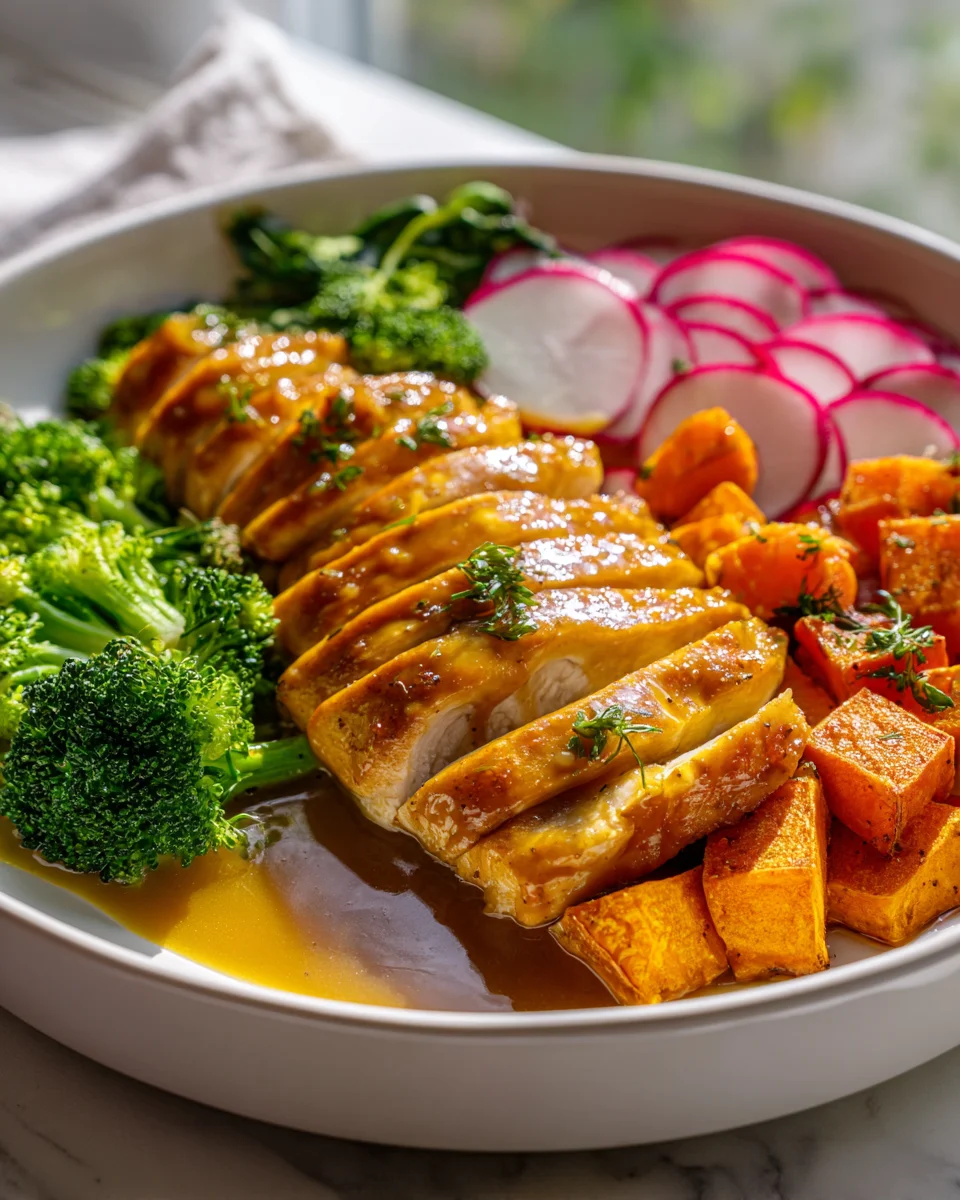
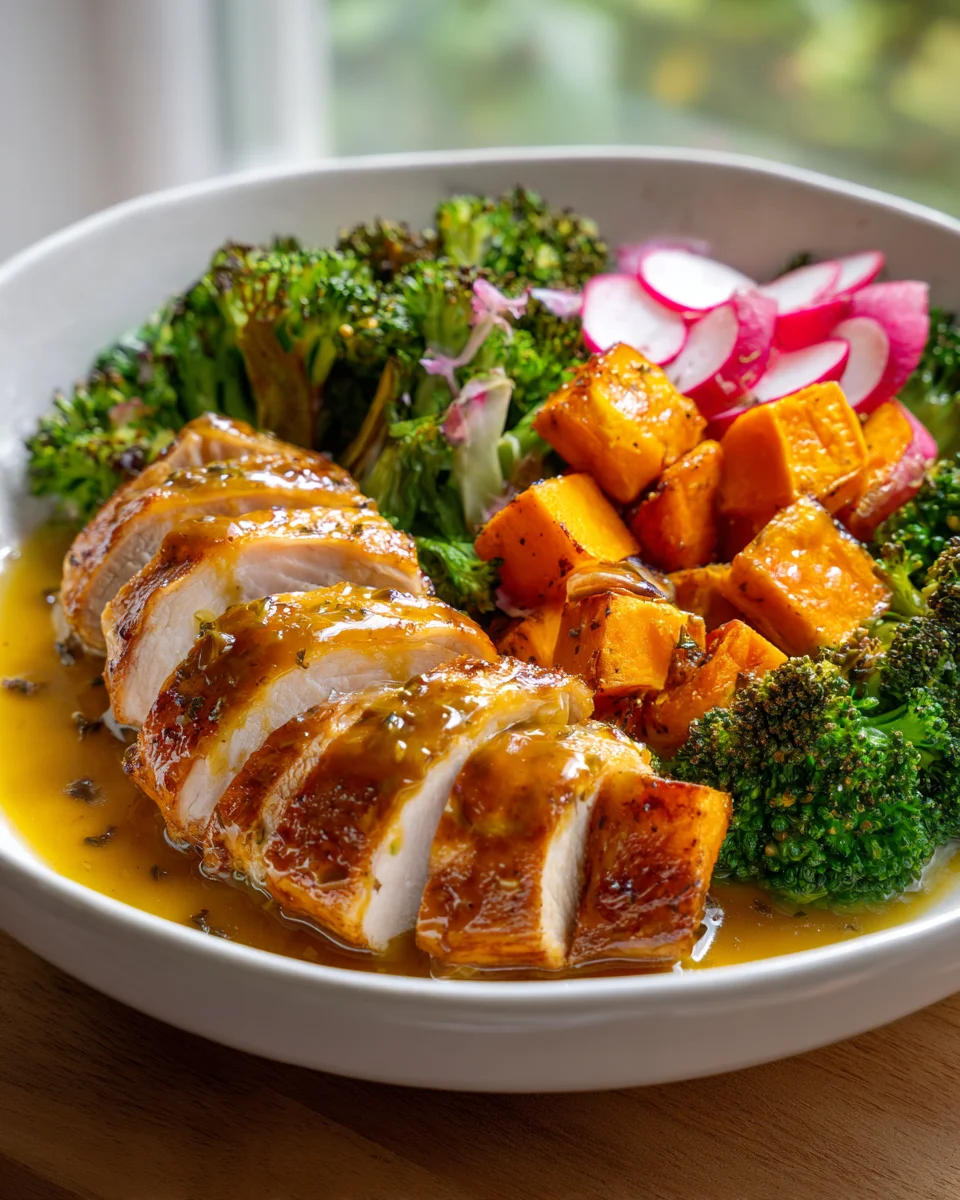
Maple Dijon Chicken Sweet Potato Veggie Bowls
Oh my goodness, do I have a winner for you today! I’m so excited to share one of my absolute favorite go-to recipes that brings so much joy to my dinner table: Maple Dijon Chicken Sweet Potato Veggie Bowls. What makes this dish truly special, you ask? It’s the perfect harmony of flavors – the irresistible sweetness of maple syrup perfectly balanced by the tangy kick of Dijon mustard, all coating succulent chicken, tender roasted sweet potatoes, and a vibrant medley of your favorite vegetables. The way everything caramelizes and becomes tender in the oven is pure magic!
I know you’re going to absolutely love these bowls because they are the epitome of a satisfying, easy-to-make, and incredibly healthy meal. Imagine coming home after a busy day and knowing that a delicious, flavor-packed dinner is just a simple sheet pan away (or a quick assembly after cooking!). It’s fantastic for weeknight meals, impressive enough for guests, and even better for meal prep throughout the week. Plus, it’s a brilliant way to get a ton of nourishing veggies onto your plate without sacrificing an ounce of flavor. It’s a complete meal in one, ready to nourish and delight.
In essence, you’re looking at juicy chicken pieces, naturally sweet and caramelized sweet potatoes, and whatever other colorful veggies your heart desires – think crisp broccoli, vibrant bell peppers, or tender green beans – all roasted to perfection with that incredible sweet and savory maple Dijon glaze. Everything comes together in one cohesive, comforting, and utterly delicious bowl that feels both wholesome and indulgent. Trust me, this recipe is about to become a staple in your kitchen!
Ingredient Notes
Crafting these Maple Dijon Chicken Sweet Potato Veggie Bowls is a joy, and the beauty of it lies in the simplicity of wholesome ingredients that come together to create something truly special. Here’s a closer look at what makes this dish sing, along with some friendly substitution ideas.
The Stars of the Show
- Chicken: I typically reach for boneless, skinless chicken breasts for this recipe because they cook quickly and absorb flavors beautifully. However, boneless, skinless chicken thighs are also fantastic if you prefer a richer, more succulent bite; they’re very forgiving and stay juicy. If you’re looking for an alternative, cubed beef sirloin or even firm tofu would work well, just adjust cooking times accordingly to ensure they’re cooked through and tender.
- Sweet Potatoes: These are the heart of our bowls, offering natural sweetness and a lovely texture when roasted. Any variety of sweet potato will do! If you don’t have sweet potatoes on hand, butternut squash, carrots, or even parsnips make excellent substitutes, providing that earthy sweetness and good fiber.
- Broccoli Florets: I love the way broccoli roasts, getting those slightly crispy, charred edges that add so much flavor. It’s also packed with nutrients. Cauliflower, green beans, or even Brussels sprouts would be delicious alternatives if broccoli isn’t your favorite or what you have available.
- Bell Peppers & Red Onion: I usually go for a mix of colorful bell peppers (red, yellow, orange) for visual appeal and a gentle sweetness. Red onion adds a fantastic savory note and softens beautifully in the oven. Feel free to use any color of bell pepper, and a yellow onion can stand in for red onion in a pinch.
The Irresistible Maple Dijon Sauce
- Maple Syrup: This is where the magic happens, giving our sauce its signature sweetness and a touch of unique, earthy flavor. I always recommend using pure maple syrup, not pancake syrup, for the best taste. If you’re out, honey or agave nectar can be used as a sweetener, though the flavor profile will shift slightly.
- Dijon Mustard: Its tangy, slightly spicy kick balances the sweetness of the maple syrup perfectly. A good quality smooth Dijon is my go-to. If you prefer a bit more texture, whole grain Dijon works too. In a pinch, a good quality brown mustard or even spicy brown mustard could be used, but be mindful of the spice level!
- Olive Oil: A good quality extra virgin olive oil helps emulsify the sauce and coats our ingredients for roasting. Avocado oil is another excellent choice with a high smoke point if you prefer.
- Garlic: Freshly minced garlic is always best for that pungent, aromatic depth. If you’re short on time, garlic powder is an acceptable substitute (about ¼ teaspoon for every clove).
- Apple Cider Vinegar: This adds a lovely bright acidity to the sauce, cutting through the richness and making the flavors pop. Lemon juice can also be used if you don’t have apple cider vinegar.
- Salt & Black Pepper: Essential for seasoning everything to perfection. I always recommend tasting and adjusting to your preference.
Step-by-Step Instructions
Let’s get cooking! These Maple Dijon Chicken Sweet Potato Veggie Bowls come together with surprising ease, mostly thanks to the magic of sheet pan roasting. Here’s how I bring them to life:
Prep Everything for Success
- Preheat and Prepare: First things first, I preheat my oven to 400°F (200°C). Then, I line a large baking sheet (or two, if my oven is smaller, to avoid overcrowding) with parchment paper for easy cleanup. Trust me, parchment paper is your best friend here!
- Chop Your Veggies: I start by peeling and cubing the sweet potatoes into about 1-inch pieces. I want them fairly uniform so they cook evenly. Next, I chop the broccoli into bite-sized florets, slice the bell peppers into strips, and thinly slice the red onion.
- Cube the Chicken: I cut my boneless, skinless chicken breasts (or thighs) into 1-inch cubes. Again, consistency is key for even cooking.
Whip Up the Maple Dijon Sauce
- Combine Wet Ingredients: In a medium bowl, I whisk together the pure maple syrup, Dijon mustard, olive oil, apple cider vinegar (or lemon juice), minced garlic, salt, and black pepper. I give it a good whisk until everything is well combined and looks like a creamy, delicious dressing. I set aside about ¼ cup of this sauce for drizzling over the finished bowls.
Toss, Roast, and Enjoy!
- First Roast – Sweet Potatoes: I place the cubed sweet potatoes on the prepared baking sheet. I drizzle them with a tablespoon or two of olive oil and a pinch of salt and pepper, then toss to coat. Because sweet potatoes take a bit longer to cook, I like to give them a head start. I roast them for about 10-15 minutes on their own. This helps them get tender before the other ingredients join the party.
- Add Chicken & Other Veggies: After the sweet potatoes have had their head start, I carefully remove the baking sheet from the oven. I add the cubed chicken, broccoli florets, bell pepper strips, and red onion slices to the same baking sheet. Then, I pour the majority of the maple Dijon sauce (leaving that ¼ cup aside) over everything. Using my hands or a spatula, I gently toss all the ingredients on the sheet pan, making sure everything is evenly coated in that glorious sauce. I spread everything out into a single layer – it’s crucial not to overcrowd the pan, as this ensures everything roasts instead of steams. If my pan looks too full, I’ll use a second one.
- Final Roast: I return the baking sheet to the oven and continue to roast for another 15-20 minutes, or until the chicken is cooked through (no longer pink inside) and the vegetables are tender and slightly caramelized. I usually give the pan a gentle shake or stir halfway through this final roasting period to ensure even cooking.
- Assemble Your Bowls: Once everything is perfectly roasted, I take the sheet pan out of the oven. I divide the chicken, sweet potatoes, and roasted veggies among serving bowls. Finally, I drizzle the reserved ¼ cup of maple Dijon sauce over each bowl for an extra burst of flavor. Sometimes I sprinkle with fresh chopped parsley or green onions for a pop of freshness and color.
Tips & Suggestions
These Maple Dijon Chicken Sweet Potato Veggie Bowls are already amazing, but here are some of my favorite tips and tricks to make them even better or adapt them to your lifestyle!
- Don’t Overcrowd the Pan: This is probably the most important tip for sheet pan meals! If you pile too many ingredients onto one baking sheet, they’ll steam instead of roast, leading to soggy veggies and chicken. If needed, use two baking sheets and rotate them halfway through cooking for even browning.
- Meal Prep Dream: This recipe is fantastic for meal prepping! I often make a big batch on Sunday. Once everything is cooked and cooled, I portion it out into individual airtight containers. They’re perfect for quick lunches or dinners throughout the week. You can even store the chicken and veggies separately if you like to keep textures distinct until serving.
- Vary Your Veggies: Feel free to customize the vegetables based on what’s in season or what you have in your fridge. Asparagus, zucchini, mushrooms, or even green beans would be delicious additions or substitutions. Just be mindful of their cooking times – softer veggies like zucchini might need to be added later in the roasting process.
- Spice It Up: If you enjoy a little heat, a pinch of red pepper flakes added to the maple Dijon sauce will give it a lovely subtle kick without overpowering the other flavors.
- Marinade for Deeper Flavor: For an even more flavorful chicken, you can cube the chicken and toss it with half of the maple Dijon sauce. Let it marinate in the refrigerator for at least 30 minutes, or even a few hours, before adding it to the sheet pan.
- Serving Suggestions: While these bowls are perfectly satisfying on their own, they’re also wonderful served over a bed of fluffy quinoa, brown rice, or even some fresh spinach or mixed greens for added bulk and nutrition.
- Crispy Edges: To encourage extra crispy edges on your sweet potatoes and veggies, ensure they are thoroughly dry after washing before tossing with oil and sauce. Moisture is the enemy of crispiness!
Storage
One of the best things about these Maple Dijon Chicken Sweet Potato Veggie Bowls is how well they store, making them ideal for meal prep!
- Refrigeration: Once the bowls are fully cooked, allow them to cool completely at room temperature. Then, transfer the chicken, sweet potatoes, and veggies to airtight containers. They will keep beautifully in the refrigerator for up to 3-4 days. This makes grabbing a healthy, homemade meal throughout the week incredibly convenient!
- Freezing (Cooked Components): While I typically prefer these fresh, you can freeze the cooked chicken and sweet potatoes if you wish. I recommend freezing them separately from the more delicate vegetables like broccoli and bell peppers, as those can become a bit mushy when thawed. Store them in freezer-safe airtight containers for up to 2-3 months.
- Reheating:
- From the Refrigerator: To reheat, simply place your desired portion in a microwave-safe dish and microwave on high for 1-2 minutes, or until heated through. Alternatively, you can reheat them in a preheated oven or air fryer at 350°F (175°C) for 5-10 minutes, which can help crisp up the veggies again.
- From the Freezer: If reheating from frozen, it’s best to thaw the components in the refrigerator overnight first. Then, follow the reheating instructions for refrigerated portions. For a quicker option, you can microwave from frozen, stirring occasionally, until hot.
Final Thoughts
And there you have it! I truly hope these Maple Dijon Chicken Sweet Potato Veggie Bowls become a staple in your meal rotation. What makes this recipe an absolute must-try is the incredible harmony of flavors: the warm sweetness of maple perfectly complementing the tangy kick of Dijon, all brought together with tender chicken and the comforting earthiness of roasted sweet potatoes and other vibrant veggies. It’s more than just a meal; it’s a wonderfully balanced, wholesome, and deeply satisfying experience in every single bite. I promise, these Maple Dijon Chicken Sweet Potato Veggie Bowls are a fantastic way to nourish your body and delight your taste buds, leaving you feeling happy and satisfied!
Maple Dijon Chicken Sweet Potato Bowls: Easy & Healthy
- Total Time: 45 minutes
- Yield: 4 servings
Description
Enjoy a delicious and healthy meal with these Maple Dijon Chicken Sweet Potato Veggie Bowls, combining succulent chicken and roasted sweet potatoes with vibrant vegetables. This dish is a perfect balance of sweet and savory flavors, making it a go-to for weeknight dinners or meal prep.
Ingredients
- Boneless, skinless chicken breasts or thighs
- Sweet potatoes
- Broccoli florets
- Bell peppers (red, yellow, orange)
- Red onion
- Pure maple syrup
- Dijon mustard
- Olive oil
- Garlic (minced)
- Apple cider vinegar or lemon juice
- Salt
- Black pepper
Instructions
- Preheat your oven to 400°F (200°C) and line a large baking sheet with parchment paper.
- Peel and cube the sweet potatoes into about 1-inch pieces. Chop the broccoli into bite-sized florets, slice the bell peppers into strips, and thinly slice the red onion.
- Cut the boneless, skinless chicken into 1-inch cubes.
- In a medium bowl, whisk together the pure maple syrup, Dijon mustard, olive oil, apple cider vinegar (or lemon juice), minced garlic, salt, and black pepper until well combined.
- Place the cubed sweet potatoes on the prepared baking sheet, drizzle with olive oil, and season with salt and pepper. Roast for about 10-15 minutes.
- Remove the baking sheet from the oven, add the cubed chicken, broccoli florets, bell pepper strips, and red onion slices. Pour the majority of the maple Dijon sauce over everything and toss to coat.
- Spread everything out into a single layer and return to the oven. Roast for another 15-20 minutes, or until the chicken is cooked through and the vegetables are tender.
- Divide the chicken, sweet potatoes, and roasted veggies among serving bowls and drizzle with the reserved maple Dijon sauce.
- Prep Time: 15 mins
- Cook Time: 30 mins
- Category: Dinner
- Method: Baking
- Cuisine: American
Nutrition
- Serving Size: 1 bowl
- Calories: 450
- Sugar: 10 g
- Sodium: 300 mg
- Fat: 15 g
- Saturated Fat: 2 g
- Unsaturated Fat: 10 g
- Trans Fat: 0 g
- Carbohydrates: 50 g
- Fiber: 8 g
- Protein: 30 g
- Cholesterol: 70 mg
Keywords: Don't overcrowd the pan to ensure even roasting. Feel free to customize the vegetables based on what’s in season. This recipe is great for meal prep and can be stored in airtight containers for up to 3-4 days in the refrigerator.