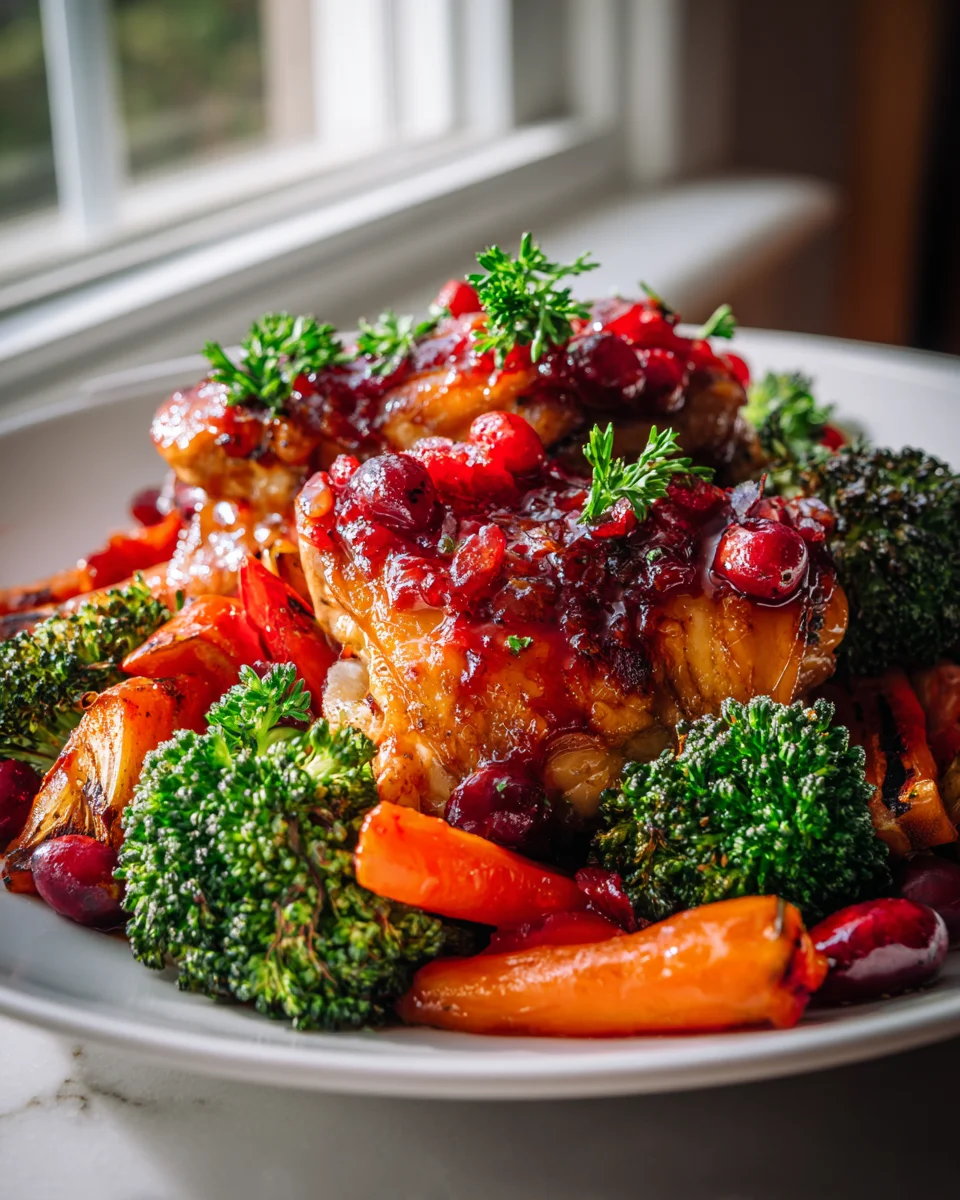
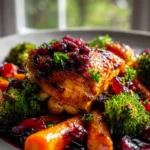
One Pan Honey Cranberry Chicken And Veggies
Oh my goodness, let me tell you, if there’s one recipe that has completely stolen my heart and saved my weeknights, it’s One Pan Honey Cranberry Chicken And Veggies. Forget about mountains of dishes and complicated steps; this dish is pure magic! What makes it so incredibly special? Well, for starters, it’s all cooked on one single pan. Yes, you read that right – that means super quick cleanup, which is a lifesaver on those busy evenings when you just want to relax after dinner.
You are absolutely going to adore the delicious blend of flavors in this dish. Imagine tender, juicy chicken pieces perfectly roasted alongside vibrant, wholesome veggies like sweet potatoes, Brussels sprouts, and carrots. But here’s the kicker: everything gets beautifully coated in a luscious, sticky, sweet, and tart honey-cranberry glaze. It’s a flavor combination that feels festive enough for a special occasion but is simple enough for any Monday night. It’s hearty, healthy, and incredibly satisfying, delivering a complete meal with minimal effort. Trust me, once you try this effortless masterpiece, it’ll be a regular in your dinner rotation!

Welcome to my absolute favorite easy weeknight meal: One Pan Honey Cranberry Chicken And Veggies! There’s nothing quite like the convenience of tossing everything onto a single baking sheet and letting your oven do all the hard work. This recipe truly delivers on flavor with tender, juicy chicken, perfectly roasted vegetables, and a sweet-tart honey-cranberry glaze that caramelizes beautifully. It’s a colorful, vibrant dish that’s perfect for a cozy family dinner, and honestly, the cleanup is an absolute dream. Let’s dive in!
Ingredient Notes
When I’m making my One Pan Honey Cranberry Chicken And Veggies, I like to be a bit flexible with the ingredients, especially the vegetables. Here’s what I typically use and some great substitutions if you want to mix things up:
- Chicken: For this recipe, I find that boneless, skinless chicken thighs are the absolute best choice. They stay incredibly juicy and tender throughout the roasting process, even with the higher heat required for perfectly crisp veggies. If you prefer chicken breasts, that’s totally fine! Just be mindful that they might cook a little faster and can dry out if overcooked, so you might want to consider cutting them into thicker pieces or checking their temperature a bit earlier. Turkey tenderloins, cut into similar-sized pieces, would also work beautifully if you’re looking for a poultry alternative.
- Vegetables: This is where you can really play around! I usually go for a mix of sturdy, roast-friendly vegetables.
- Potatoes: Baby potatoes (like Yukon Golds or red potatoes) cut into quarters, or sweet potatoes cubed, are fantastic. They get wonderfully tender on the inside and slightly crispy on the outside.
- Carrots: Chunky slices or baby carrots roast up sweet and soft.
- Broccoli or Cauliflower Florets: These add great texture and soak up the glaze beautifully.
- Brussels Sprouts: Halved Brussels sprouts caramelize wonderfully and add a lovely nutty flavor.
- Bell Peppers & Red Onion: These add sweetness and a pop of color. I usually chop them into large chunks so they don’t get too soft.
- Substitutions: Feel free to use parsnips, green beans (added halfway through cooking), or even sturdy greens like kale (added in the last 10-15 minutes). The key is to cut everything into roughly the same size so they cook evenly.
- Honey-Cranberry Glaze: This is the star of the show!
- Honey: Pure honey is essential for that lovely sweetness and helps create a beautiful caramelization. If you’re out of honey, pure maple syrup is a fantastic alternative that offers a similar sticky sweetness and depth of flavor.
- Dried Cranberries: These little gems burst with sweet-tart flavor when roasted. I usually toss them in with the veggies and chicken from the start. If you only have fresh or frozen cranberries, you can absolutely use them! I’d recommend adding them halfway through the cooking process so they don’t get too soft or burst too early, releasing too much liquid.
- Dijon Mustard: Don’t skip this! It adds a critical tangy counterpoint to the sweetness of the honey and really rounds out the flavor profile. A stone-ground mustard can also work in a pinch.
- Apple Cider Vinegar: A splash of this brightens everything up and cuts through the richness. Lemon juice or white wine vinegar can be used if you don’t have apple cider vinegar.
- Garlic: Fresh minced garlic is always my preference for robust flavor. Garlic powder can work, but use a bit less.
- Herbs & Seasonings: I love using dried rosemary and thyme; they pair wonderfully with chicken and cranberries. Salt and freshly ground black pepper are, of course, non-negotiable!
- Olive Oil: Just enough to help the glaze coat everything evenly and prevent sticking. Avocado oil is a good alternative.
Step-by-Step Instructions
Creating this One Pan Honey Cranberry Chicken And Veggies dish is wonderfully straightforward. Just follow these steps, and you’ll have a delicious, satisfying meal ready in no time!
- Preheat and Prep Your Pan: First things first, preheat your oven to 400°F (200°C). While it’s heating up, line a large, rimmed baking sheet with parchment paper. This is my secret weapon for easy cleanup – seriously, you’ll thank me later! If you don’t have parchment, a light coating of cooking spray will do, but parchment is king for this one.
- Chop Your Veggies: Wash and chop all your chosen vegetables. The most crucial tip here is to cut them into similar-sized pieces, roughly 1-inch chunks, so they all cook evenly. For potatoes, carrots, broccoli, and Brussels sprouts, aiming for this size works well. If you’re using bell peppers or onions, slightly larger chunks are fine as they soften faster.
- Prepare the Chicken: Pat your chicken thighs (or breasts) very dry with paper towels. This step is important for getting a nice sear and prevents the chicken from steaming. Cut any larger thighs into roughly 2-inch pieces if you want them to cook quicker or prefer smaller servings. Season them generously with a pinch of salt and pepper.
- Whisk the Glaze: In a medium bowl, whisk together the olive oil, honey, Dijon mustard, apple cider vinegar, minced garlic, dried rosemary, dried thyme, a good pinch of salt, and freshly ground black pepper. Make sure everything is well combined and the honey is fully incorporated.
- Combine and Toss: Place your chopped vegetables, dried cranberries, and chicken pieces onto the prepared baking sheet. Pour the honey-cranberry glaze evenly over everything. Using your hands (I find this is the best way!), toss gently until all the chicken and vegetables are thoroughly coated in the delicious glaze.
- Arrange for Roasting: Spread the chicken and vegetables out in a single layer across the baking sheet. This is critical for getting everything to roast beautifully and caramelize, rather than steam. If your baking sheet is overcrowded, use two pans to ensure everything has enough space. Overcrowding leads to soggy veggies and less-than-crisp chicken.
- Roast to Perfection: Place the baking sheet in your preheated oven. Roast for 25-35 minutes. Around the 20-minute mark, I like to gently flip the chicken pieces and give the vegetables a stir to ensure even browning. Continue roasting until the chicken is cooked through (an instant-read thermometer should register 165°F or 74°C when inserted into the thickest part of the chicken) and the vegetables are tender-crisp and beautifully caramelized.
- Optional Broil for Extra Crispness: If you like a little extra char or crispiness, you can turn on your oven’s broiler for the last 2-3 minutes. Keep a very close eye on it, as things can go from perfectly golden to burnt in a flash!
- Rest and Serve: Once cooked, remove the pan from the oven. Let the chicken and vegetables rest on the pan for 5 minutes before serving. This allows the chicken juices to redistribute, keeping it extra tender. Spoon any delicious pan juices over the chicken and veggies.
Tips & Suggestions
To make sure your One Pan Honey Cranberry Chicken And Veggies turns out perfectly every time, I’ve got a few extra tips and suggestions for you:
- Don’t Overcrowd the Pan: This is arguably the most important tip for any sheet pan meal! If your chicken and veggies are piled up, they’ll steam instead of roast, leading to soggy results. Use two baking sheets if necessary to ensure everything is in a single layer with a little space around each piece.
- Uniform Veggie Size: As mentioned in the instructions, cutting your vegetables into similar-sized pieces (about 1-inch) ensures they all cook at roughly the same rate. Harder vegetables like potatoes and carrots might need slightly smaller cuts than softer ones like bell peppers.
- Pat Chicken Dry: Taking a moment to pat your chicken pieces completely dry with paper towels before seasoning and glazing helps the skin (if any) crisp up and allows the glaze to stick better, leading to beautiful caramelization.
- Enhance the Flavor:
- Fresh Herbs: A sprinkle of fresh parsley, thyme, or even rosemary after roasting can brighten up the flavors and add a lovely visual appeal.
- Citrus Zest: A little orange zest mixed into the glaze or grated over the finished dish adds another layer of bright, complementary flavor that works beautifully with cranberries.
- Crunch Factor: For an extra textural element, toss in a handful of chopped pecans or walnuts during the last 10 minutes of roasting. They’ll toast lightly and add a wonderful crunch.
- Check Doneness with a Thermometer: The easiest way to ensure your chicken is perfectly cooked and safe to eat is to use an instant-read meat thermometer. The thickest part of the chicken should reach an internal temperature of 165°F (74°C). This prevents overcooking and ensures juicy results every time.
- Serve It Up: This dish is hearty enough on its own, but it also pairs wonderfully with a side of fluffy couscous, quinoa, brown rice, or a simple green salad with a light vinaigrette. The pan juices are a delicious sauce to drizzle over your chosen accompaniment!
Storage
I love making a larger batch of One Pan Honey Cranberry Chicken And Veggies because it makes for fantastic leftovers. Here’s how I store it:
- Cooling: Always allow the chicken and vegetables to cool completely to room temperature before storing. This prevents condensation from building up, which can make things soggy and promote bacterial growth.
- Refrigeration: Once cooled, transfer any leftovers to an airtight container. It will keep beautifully in the refrigerator for up to 3-4 days.
- Freezing: This dish freezes quite well! Place the cooled chicken and vegetables in a freezer-safe airtight container or heavy-duty freezer bags. It can be frozen for up to 2-3 months. Just be aware that some vegetables, particularly potatoes, might have a slightly softer texture after thawing and reheating, but the flavor will still be great.
- Reheating:
- From the Fridge: You can reheat individual portions in the microwave until warmed through. For a crispier texture, my preferred method is to reheat in a preheated oven (around 350°F or 175°C) for 10-15 minutes, or until hot, uncovered on a baking sheet.
- From the Freezer: Thaw the frozen leftovers overnight in the refrigerator. Then, reheat using one of the methods described above. If reheating directly from frozen, it will take longer in the oven, potentially 20-30 minutes, covered initially to prevent drying, then uncovered to crisp up.
Final Thoughts
I am so excited for you to experience the magic of One Pan Honey Cranberry Chicken And Veggies! This isn’t just another dinner; it’s a testament to how incredible a simple, wholesome meal can be. The harmonious blend of sticky-sweet honey and vibrant, tart cranberries coating tender chicken and perfectly roasted vegetables is something truly special. Every bite offers a delightful balance of flavors and textures, making it a dish that’s both comforting and incredibly satisfying. What I love most is how effortlessly it comes together, leaving you with very little cleanup but a whole lot of deliciousness. Trust me, One Pan Honey Cranberry Chicken And Veggies is a must-try for busy weeknights or whenever you crave a meal that tastes like you spent hours in the kitchen, without the fuss. I hope it becomes a cherished favorite in your home!
Easy One Pan Honey Cranberry Chicken & Veggies Dinner
- Total Time: 45 minutes
- Yield: 4 servings
Description
This One Pan Honey Cranberry Chicken And Veggies is a delightful weeknight meal that combines juicy chicken with vibrant vegetables, all coated in a sweet-tart honey-cranberry glaze. It’s easy to prepare and clean up, making it perfect for busy evenings.
Ingredients
- Boneless, skinless chicken thighs
- Baby potatoes (like Yukon Golds or red potatoes), cut into quarters
- Sweet potatoes, cubed
- Carrots, chunky slices or baby carrots
- Broccoli or cauliflower florets
- Brussels sprouts, halved
- Bell peppers, chopped into large chunks
- Red onion, chopped into large chunks
- Dried cranberries
- Honey
- Dijon mustard
- Apple cider vinegar
- Fresh minced garlic
- Dried rosemary
- Dried thyme
- Salt
- Freshly ground black pepper
- Olive oil
Instructions
- Preheat your oven to 400°F (200°C) and line a large, rimmed baking sheet with parchment paper.
- Wash and chop all your chosen vegetables into similar-sized pieces, roughly 1-inch chunks.
- Pat your chicken thighs (or breasts) very dry with paper towels and season them generously with salt and pepper.
- In a medium bowl, whisk together the olive oil, honey, Dijon mustard, apple cider vinegar, minced garlic, dried rosemary, dried thyme, salt, and black pepper until well combined.
- Place the chopped vegetables, dried cranberries, and chicken pieces onto the prepared baking sheet. Pour the honey-cranberry glaze evenly over everything and toss gently until coated.
- Spread the chicken and vegetables out in a single layer across the baking sheet.
- Place the baking sheet in your preheated oven and roast for 25-35 minutes, flipping the chicken and stirring the vegetables around the 20-minute mark.
- If desired, turn on your oven’s broiler for the last 2-3 minutes for extra crispiness, keeping a close eye on it.
- Once cooked, remove the pan from the oven and let the chicken and vegetables rest for 5 minutes before serving.
- Prep Time: 15 mins
- Cook Time: 30 mins
- Category: Dinner
- Method: Baking
- Cuisine: American
Nutrition
- Serving Size: 1 plate
- Calories: 450
- Sugar: 20 g
- Sodium: 600 mg
- Fat: 15 g
- Saturated Fat: 3 g
- Unsaturated Fat: 10 g
- Trans Fat: 0 g
- Carbohydrates: 50 g
- Fiber: 8 g
- Protein: 30 g
- Cholesterol: 100 mg
Keywords: Don't overcrowd the pan to ensure proper roasting. Cut vegetables into uniform sizes for even cooking. Pat chicken dry for better sear and glaze adherence.