• Skip to primary navigation
  • Skip to main content
  • Skip to primary sidebar
Homesmad

Homesmad

  • Home
  • Breakfast & Brunch
  • Appetizers & Snacks
  • Dinner
  • Dessert
  • About
  • Privacy Policy
  • Contact
Homesmad
  • Home
  • Breakfast & Brunch
  • Appetizers & Snacks
  • Dinner
  • Dessert
  • About
  • Privacy Policy
  • Contact

Mouthwatering One Pot Lasagna Soup: Dinner’s Never Been Easier!

October 7, 2025 by Lily author

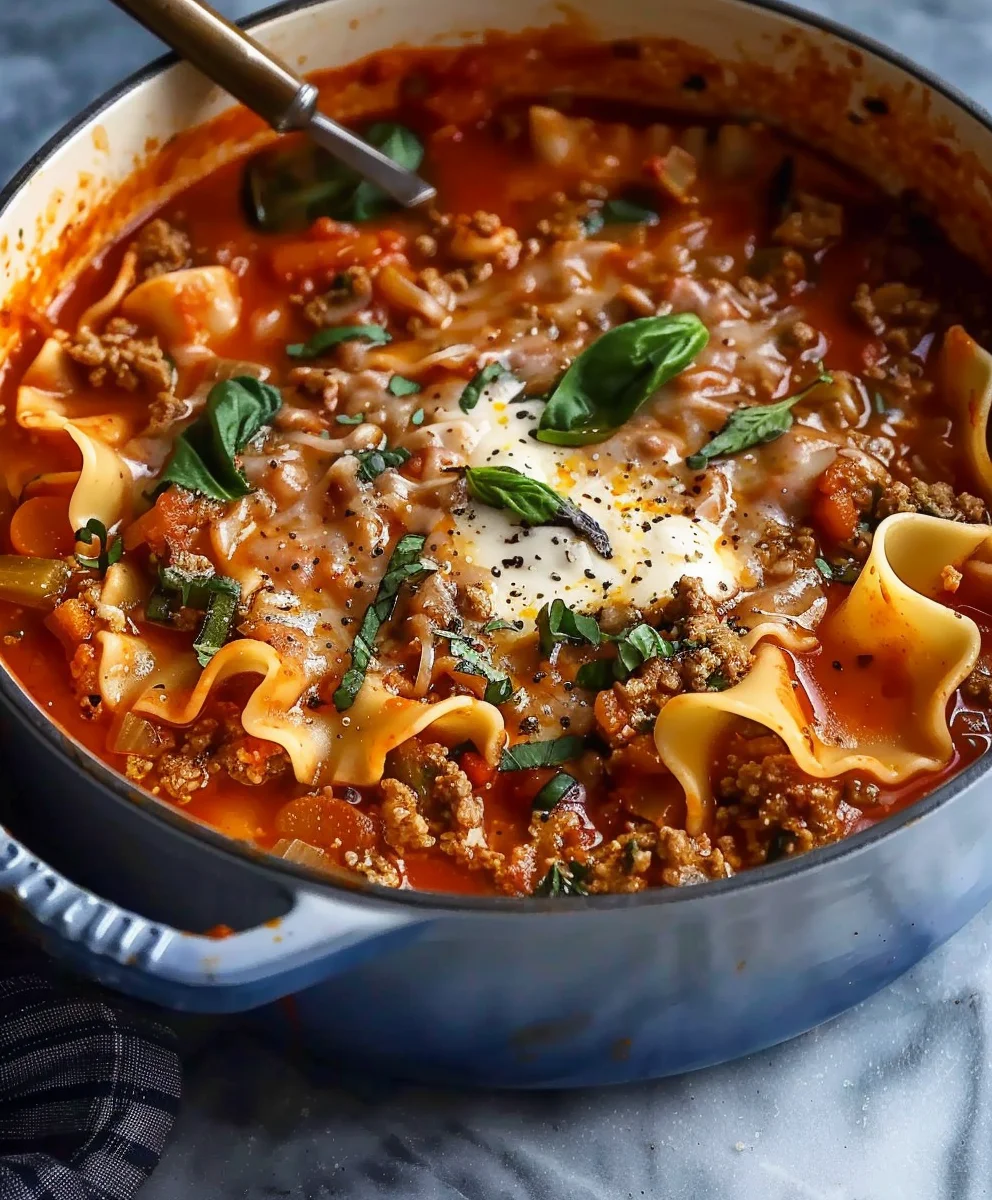
Mouthwatering One Pot Lasagna Soup is about to become your new weeknight hero. Imagine sinking your spoon into a bowl that captures all the rich, comforting flavors of your favorite classic lasagna – the savory meat, tangy tomatoes, tender pasta, and creamy, bubbling cheese – but without any of the laborious layering or the mountain of dishes to wash afterwards. This innovative approach takes the beloved Italian staple, traditionally celebrated for its intricate layers and deep history, and transforms it into an incredibly convenient and equally satisfying experience.

The Ultimate Comfort, Simplified

While traditional lasagna, with its roots tracing back to ancient Italy, is a culinary masterpiece, it often demands a significant time commitment. Our recipe offers a brilliant shortcut, designed for those who crave authentic flavors but need a more practical solution for busy evenings. People absolutely adore this dish not only for its incredible taste profile, which perfectly mimics the traditional dish, but also for its delightful texture – a hearty, warming soup that feels incredibly gourmet yet takes minimal effort. The true magic of this Mouthwatering One Pot Lasagna Soup is how it brings that profound depth of flavor and ultimate comfort straight to your table, proving that sometimes, the simplest methods yield the most extraordinary results.

Mouthwatering One Pot Lasagna Soup: Dinner's Never Been Easier! this RECIPE

Ingredients:

  • For the Meat & Aromatics:
    • 1 tablespoon olive oil (extra virgin is my preference!)
    • 1 pound ground Italian sausage (mild or spicy, depending on your preference – I often use a blend of both!)
    • 1 pound lean ground beef (80/20 is a good choice for flavor)
    • 1 large yellow onion, finely diced (about 1.5 cups)
    • 4-5 cloves garlic, minced (don’t skimp on the garlic, it adds so much character!)
  • For the Sauce Base:
    • 1 (28 ounce) can crushed tomatoes (look for good quality, it makes a difference)
    • 1 (15 ounce) can tomato sauce (unsalted if you can find it, gives you more control over seasoning)
    • 1 (6 ounce) can tomato paste (this is key for a deep, rich flavor)
    • 4 cups chicken broth or beef broth (low sodium is always a good idea, you can adjust salt later)
    • 1/2 cup water (or a splash more broth if you like a thinner soup)
  • For the Seasonings & Herbs:
    • 2 teaspoons dried oregano
    • 1 teaspoon dried basil
    • 1/2 teaspoon red pepper flakes (adjust to your heat preference, I love a little kick!)
    • 1 teaspoon granulated sugar (helps balance the acidity of the tomatoes)
    • 1 bay leaf
    • Salt and freshly ground black pepper to taste
    • 1/4 cup fresh basil, chopped (for garnish and a burst of freshness)
    • 2 tablespoons fresh parsley, chopped (for garnish)
  • For the Lasagna Elements:
    • 10-12 lasagna noodles, broken into 2-3 inch pieces (oven-ready or traditional, just snap them!)
  • For the Creamy Finish & Topping:
    • 1 (15 ounce) container ricotta cheese (whole milk for creaminess, please!)
    • 1/2 cup grated Parmesan cheese, plus more for serving
    • 1/4 cup fresh parsley, chopped (for mixing into the ricotta)
    • 1 large egg (optional, but helps bind the ricotta mixture)
    • 1 teaspoon Italian seasoning (for the ricotta mixture)
    • 1/2 teaspoon garlic powder (for the ricotta mixture)
    • 8 ounces fresh mozzarella cheese, shredded or diced (the kind that melts beautifully)

Prepping & Sautéing the Aromatics and Meat

  1. Heat the Pot and Brown the Meats: Begin by placing a large, heavy-bottomed pot or Dutch oven over medium-high heat. Add the olive oil and allow it to shimmer for a moment. Once hot, add the ground Italian sausage and ground beef. Break up the meat with a spoon as it cooks. Your goal here is to achieve a beautiful, even brown on all sides of the meat. This browning process is absolutely crucial for developing deep, rich flavors that will form the backbone of your Mouthwatering One Pot Lasagna Soup. Don’t rush this step! It usually takes about 8-10 minutes.

    Pro Tip for Flavor:

    Let the meat sit undisturbed for a minute or two at a time to encourage a proper sear before breaking it up further. Once thoroughly browned, carefully drain any excess grease from the pot. I usually tilt the pot and use a spoon to scoop out the fat, leaving just a thin layer for sautéing the aromatics. If you leave too much fat, your soup can become greasy.

  2. Sauté the Aromatics: With the meat pushed to one side or removed temporarily (if there’s a lot of fat), add the finely diced yellow onion to the pot. Reduce the heat to medium and cook the onion, stirring occasionally, until it becomes soft and translucent, which typically takes about 5-7 minutes. You’re looking for that lovely aroma to fill your kitchen!

    Once the onions are softened, add the minced garlic to the pot. Stir the garlic in with the onions and meat, cooking for just about 1 minute more. Be very careful not to burn the garlic, as burnt garlic can impart a bitter flavor to your entire soup. You’ll know it’s ready when you can really smell that amazing garlicky fragrance.

Building the Flavor Base and Simmering

  1. Toast the Tomato Paste and Spices: This is a step I never skip! Push the meat and aromatics to the side of the pot, creating a small clearing in the center. Add the can of tomato paste directly into this clearing. Let the tomato paste cook for 2-3 minutes, stirring it occasionally, until it darkens in color and smells slightly caramelized. This process, often called “toasting” the tomato paste, really deepens its flavor and removes any raw tomato taste.

    Now, sprinkle in the dried oregano, dried basil, red pepper flakes (if using), and granulated sugar over the tomato paste and aromatics. Stir everything together well, allowing the spices to toast for another minute with the tomato paste. This brief toasting helps to awaken their flavors and integrate them seamlessly into the sauce.
  2. Deglaze and Add Liquids: It’s time to build the liquid base of our soup! Pour in the chicken or beef broth and the 1/2 cup of water. Using a wooden spoon or a spatula, scrape the bottom of the pot vigorously to release any browned bits (fond) that have stuck. This is called deglazing, and those browned bits are packed with incredible flavor – you absolutely want them in your soup!

    Next, stir in the crushed tomatoes and the tomato sauce. Add the bay leaf to the pot. Bring the entire mixture to a gentle boil over medium-high heat, stirring occasionally. Once it reaches a boil, reduce the heat to low, cover the pot, and let it simmer for at least 20-30 minutes. This simmering time is crucial; it allows all the flavors to meld beautifully and develop a truly robust and rich base for your lasagna soup.

    Why Simmer?

    A good simmer is where the magic happens. The longer it simmers, within reason, the more complex and delicious your sauce will become. It allows the acidity of the tomatoes to mellow and the herbs and spices to fully infuse the liquid.

Adding the Pasta and Finishing the Soup

  1. Prepare the Ricotta Mixture: While the soup is simmering, let’s get our creamy ricotta topping ready. In a medium bowl, combine the ricotta cheese, 1/2 cup grated Parmesan cheese, chopped fresh parsley, the optional large egg, Italian seasoning, and garlic powder. Mix everything together until it’s well combined and creamy. Set this aside; it will be spooned on top of your soup bowls for that classic lasagna texture and flavor. This mixture provides a lovely contrast to the savory soup and adds a layer of richness.

    Egg in Ricotta?

    The egg in the ricotta mixture is completely optional but I find it helps to bind the mixture slightly, giving it a more cohesive texture, especially when served warm. If you prefer, you can omit it.

  2. Add the Lasagna Noodles: After the soup has simmered for its designated time, remove the lid. Give it a good stir. Now, carefully add the broken lasagna noodles to the pot. Gently push them down into the liquid to ensure they are fully submerged. You might need to stir them around a bit to prevent them from sticking together.

    Increase the heat to medium and bring the soup back to a gentle boil. Once boiling, reduce the heat to a simmer and cook uncovered, stirring frequently, for about 10-15 minutes, or until the lasagna noodles are tender to your liking. It’s really important to stir frequently during this stage, as the pasta starch can cause the noodles to stick to the bottom of the pot. Taste a noodle to check for doneness – it should be al dente, meaning it has a slight bite to it, not mushy. If the soup becomes too thick, you can add a splash more broth or water until it reaches your desired consistency.
  3. Melt the Mozzarella and Final Seasoning: Once the noodles are cooked, turn off the heat. Remove and discard the bay leaf. Stir in about half of the shredded mozzarella cheese directly into the hot soup until it’s melted and stretchy. This infuses a wonderful cheesy goodness throughout the soup base.

    Now, taste the soup and adjust the seasonings as needed. This is your moment to add more salt, pepper, or even a pinch more red pepper flakes if you desire. Remember, seasoning in layers is key to a truly delicious dish. You want to make sure the flavors are perfectly balanced.

    Final Flavor Check:

    Don’t be shy about tasting. A little extra salt can often make all the other flavors sing. If it tastes a bit flat, a small splash of red wine vinegar or a squeeze of lemon juice can also brighten it up.

Serving Suggestions & Customization

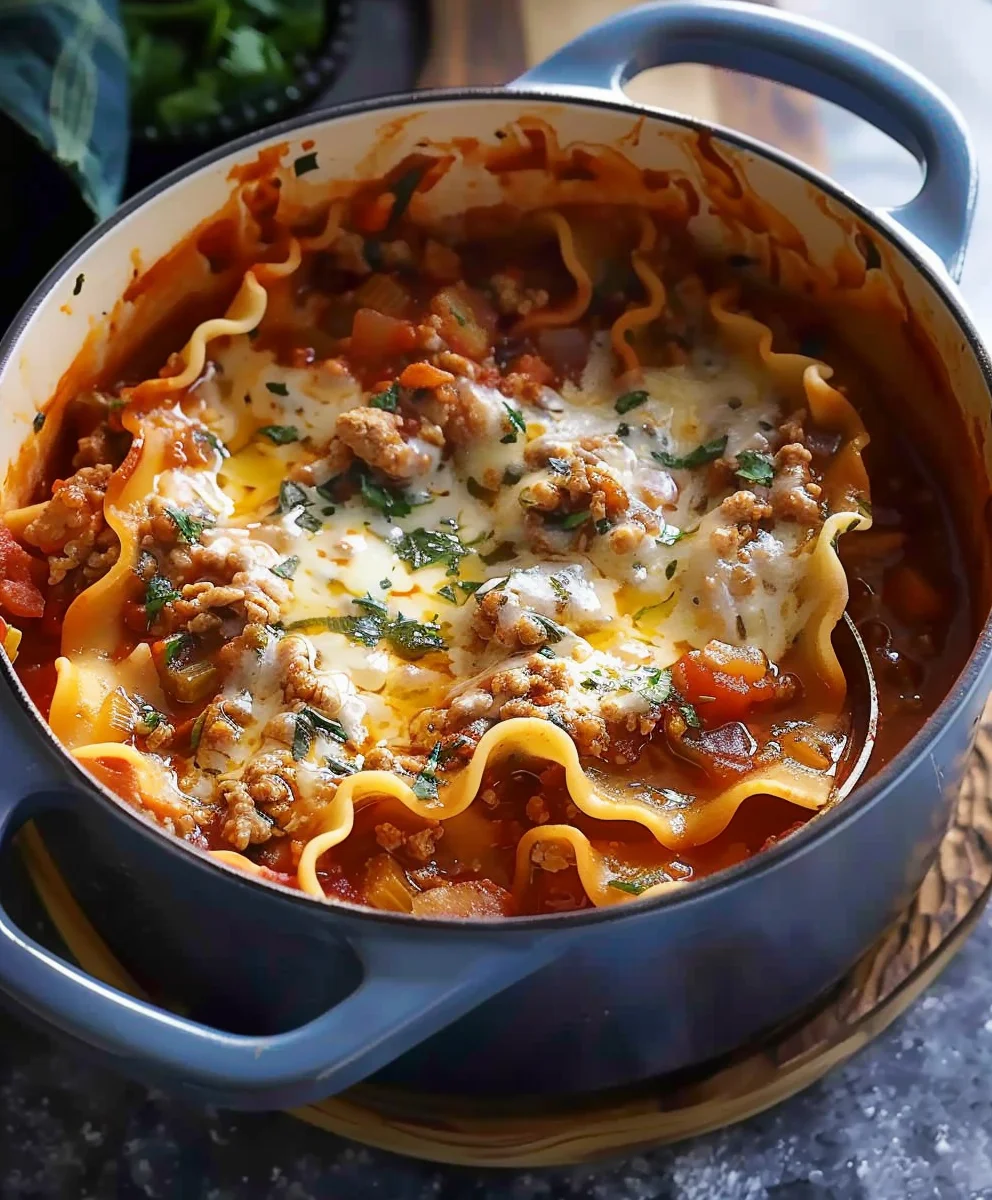
  1. Serve and Garnish: Ladle generous portions of the hot Mouthwatering One Pot Lasagna Soup into individual bowls. This soup is hearty, so a good portion will fill you right up!

    On top of each serving, dollop a spoonful or two of the prepared ricotta cheese mixture. Then, sprinkle generously with the remaining shredded fresh mozzarella cheese. The heat from the soup will gently warm the ricotta and start to melt the mozzarella, creating that irresistible gooey texture we all love in lasagna.

    Finally, garnish with a sprinkle of fresh chopped basil and fresh chopped parsley. A final dusting of grated Parmesan cheese is also highly recommended. The fresh herbs not only add beautiful color but also a vibrant, fresh aroma that perfectly complements the rich flavors of the soup.
  2. Enjoy Immediately: This soup is best enjoyed fresh, while the pasta is perfectly cooked and the cheese is wonderfully melty. Each spoonful should offer a harmonious blend of rich tomato, savory meat, tender pasta, and creamy cheese. It truly embodies all the comforting flavors of a classic lasagna, but in an easy, one-pot, soup form!

    Making it Your Own:

    Feel free to customize this recipe! You could add a handful of fresh spinach or kale during the last few minutes of cooking for added greens. For an even richer soup, a splash of heavy cream at the very end can create an incredibly luxurious texture. Some people also enjoy adding sliced mushrooms or bell peppers along with the onions for extra vegetables. Experiment and make it your signature “Mouthwatering One Pot Lasagna Soup.”

  3. Storage and Reheating: If you happen to have leftovers (which is rare in my house!), this soup stores wonderfully. Allow the soup to cool completely before transferring it to an airtight container. It will keep in the refrigerator for up to 3-4 days. When reheating, the pasta will continue to absorb liquid, so you may need to add a splash of extra broth or water to thin it out to your desired consistency. Reheat gently on the stovetop over low heat, stirring frequently, or in the microwave. I recommend storing the ricotta mixture separately and adding it fresh when serving leftovers for the best texture.

Mouthwatering One Pot Lasagna Soup: Dinner's Never Been Easier!

Conclusion:

Well, my friends, we’ve come to the end of our culinary journey for today, and I truly hope you’re feeling as excited as I am about this incredible dish. There’s just something profoundly satisfying about a recipe that delivers big on flavor, minimizes your time in the kitchen, and leaves you with barely any cleanup. That, right there, is the heart and soul of why this particular recipe is a certified must-try in my book. We’re talking about capturing all the soul-warming, cheesy, tomato-rich goodness of a classic lasagna, but transforming it into an effortlessly elegant soup that’s perfect for any occasion. It’s hearty enough to be a complete meal on its own, yet so surprisingly simple to assemble that it’s become my go-to for busy weeknights when I crave something comforting and delicious without the fuss.

What I adore most about this recipe is its ability to deliver complex, layered flavors with such straightforward execution. You get that rich, slow-simmered tomato base, the tender lasagna noodles that cook directly in the broth, and that glorious melty cheese pull that makes every spoonful an absolute delight. It’s a dish that genuinely feels like a warm hug in a bowl, perfect for chasing away those cooler evening chills or simply indulging in a moment of pure, unadulterated comfort food bliss. The aromatic blend of Italian herbs, the tang of the tomatoes, and the creamy richness of the cheeses all come together in a symphony of flavors that truly sings on your palate. I find myself making it again and again, and each time, it’s met with rave reviews from anyone lucky enough to share a bowl.

Serving Suggestions & Creative Variations for Your Mouthwatering One Pot Lasagna Soup:

While this soup is undeniably fantastic straight from the pot, a few simple additions can elevate your dining experience even further. For a truly authentic touch, I love to serve generous bowls of this Mouthwatering One Pot Lasagna Soup with a hefty sprinkle of freshly grated Parmesan cheese and a swirl of creamy ricotta, perhaps even a drizzle of good quality olive oil. A handful of fresh, vibrant basil leaves or finely chopped parsley adds a burst of freshness and a beautiful pop of color that really makes the dish sing. And let’s be honest, what’s a lasagna-inspired meal without some crusty garlic bread or a warm, soft focaccia for dipping? A simple green salad with a light vinaigrette also makes a wonderful, refreshing contrast to the richness of the soup.

But please, don’t stop there! This recipe is incredibly adaptable, inviting you to unleash your inner chef and customize it to your heart’s content. If you’re a meat lover, consider browning some spicy Italian sausage or lean ground beef along with your onions and garlic at the beginning. It adds another layer of savory depth that’s simply irresistible. For those looking to boost their veggie intake, this soup is a fantastic canvas for additional vegetables. Imagine stirring in a handful of fresh spinach or kale during the last few minutes of cooking, allowing it to wilt beautifully into the broth. Sautéed mushrooms, finely diced zucchini, or even bell peppers could also be wonderful additions, offering extra texture and nutrients. You could even experiment with different types of cheese; a blend of provolone and mozzarella, or a touch of smoked Gouda, could introduce fascinating new flavor profiles. For a creamier finish, a dollop of mascarpone or a splash of heavy cream stirred in at the very end can transform the texture into something even more luxurious. And if you like a little heat, a pinch more red pepper flakes can kick things up a notch!

Your Turn to Create and Share!

Now, it’s your turn! I’ve poured my heart into sharing this recipe, and I genuinely believe it deserves a spot in your regular rotation. I urge you, don’t just dream about it – go ahead and make it! Experience firsthand the ease, the aroma, and the sheer deliciousness that comes with every single spoonful of this incredible soup. It’s one of those recipes that truly brings joy to the table, creating cherished moments around good food. Once you’ve whipped up your own batch, I would absolutely love to hear about your experience. Did you add your own unique twist? What did your family think? Did it become an instant hit in your home, just as it has in mine? Please, don’t be shy! Come back and share your stories, your photos, and any brilliant variations you came up with. Your insights and culinary adventures inspire me, and I can’t wait to see what amazing things you create. Happy cooking, everyone!


Mouthwatering One Pot Lasagna Soup

Mouthwatering One Pot Lasagna Soup

Enjoy all the rich, comforting flavors of classic lasagna in a single pot! This easy One Pot Lasagna Soup features savory ground beef, tangy tomatoes, tender noodles, and a healthy addition of spinach, making dinner incredibly simple and satisfying without the fuss of layering.

Prep Time
20 Minutes

Cook Time
60 Minutes

Total Time
80 Minutes

Servings
6-8 servings

Ingredients

  • 1 tablespoon olive oil
  • 1 lb ground beef
  • 1/2 yellow onion, diced
  • 3 garlic cloves, finely minced
  • 2 tsp tomato paste
  • 1/2 tsp dried oregano
  • 1/4 tsp dried basil
  • 1/2 tsp garlic powder
  • 1/2 tsp onion powder
  • 1 tsp kosher salt, plus more as needed
  • freshly ground black pepper, to taste
  • 14 oz can crushed tomatoes
  • 32 oz chicken broth (4 cups), more if needed
  • 1 cup water
  • 6 oz lasagna noodles, broken up
  • 1 cup frozen chopped spinach

Instructions

  1. Step 1
    Heat olive oil in a large pot over medium-high heat. Add ground beef; brown, breaking it up, for 8-10 minutes. Drain excess fat. Add diced onion and cook until translucent, about 5-7 minutes. Stir in minced garlic and cook for 1 minute until fragrant.
  2. Step 2
    Push meat and aromatics to one side. Add tomato paste to the clearing; cook, stirring, for 2-3 minutes until darkened. Stir in dried oregano, dried basil, garlic powder, onion powder, salt, and pepper; cook for 1 minute.
  3. Step 3
    Pour in chicken broth and water, scraping up any browned bits from the bottom of the pot. Stir in crushed tomatoes. Bring to a boil, then reduce heat, cover, and simmer for 20-30 minutes to meld flavors.
  4. Step 4
    Uncover, add broken lasagna noodles, and push into the liquid. Bring to a gentle boil, then simmer, stirring frequently, for 10-15 minutes or until noodles are tender. Stir in frozen chopped spinach until wilted.
  5. Step 5
    Taste and adjust seasonings as needed. Ladle hot soup into bowls and serve immediately.
  6. Step 6
    Store cooled leftovers in an airtight container for 3-4 days in the refrigerator. Add extra broth or water when reheating, as pasta absorbs liquid.

Important Information

Nutrition Facts (Per Serving)

It is important to consider this information as approximate and not to use it as definitive health advice.

Allergy Information

Please check ingredients for potential allergens and consult a health professional if in doubt.

« Previous Post
Hocus Pocus Punch - Spooky Non-Alcoholic Halloween Drink
Next Post »
Sweet & Savory Maple Chicken Beef Bacon Sliders Recipe

If you enjoyed this…

Sweet Potato Cranberry Gratin: Festive & Flavorful

Cheesy Beef and Rice Delight Casserole

Low Carb Creamy Tuscan Chicken Recipe for Healthy Eating

Primary Sidebar

Browse by Diet

BreakfastDinnerLunchDessertAppetizer

Sweet Peach Yogurt Parfait Delight

One of my fondest memories is from a lazy summer afternoon spent at my grandmother’s house. The sun filtered through the kitchen window, casting a warm glow over the table where she would create her culinary magic. It was during one of those blissful moments that I first tasted her Peach Yogurt Parfait with Honey and Granola. The sweet aroma of ripe peaches mingling with creamy yogurt and the crunch of granola was nothing short of heavenly. It felt like summer captured in a bowl, and I still remember the joy of diving in with a spoon, each layer revealing a new burst of flavor.

When I think about that parfait, I can almost hear the gentle hum of the bees outside, reminding me of the floral notes that honey brings to every bite. The vibrant yellows and soft oranges of the peaches contrast beautifully with the creamy white yogurt and the golden crunch of granola. It’s a dish that not only looks delightful but also tastes like a celebration of fresh, wholesome ingredients.

What makes my version of this Peach Yogurt Parfait special is the careful balance of flavors and textures. I use ripe, juicy peaches, drizzled with locally sourced honey, and a homemade granola that’s bursting with nuts and seeds for an extra crunch. It’s a simple dish, but every layer is crafted with love and attention.

Let me show you exactly how to make this delightful parfait, so you can bring a bit of that summer magic into your kitchen!

Sweet Peach Yogurt Parfait Delight

Why You’ll Love This Recipe

  • Delightfully creamy texture from the Greek yogurt, paired with the juicy sweetness of fresh peaches.
  • Ready in under 20 minutes, making it a quick and satisfying breakfast or snack option.
  • Budget-friendly, using common ingredients that you may already have in your pantry.
  • Customizable with your favorite granola and nuts, allowing you to tailor each parfait to your taste.
  • Perfectly balanced flavors with the bright acidity of lemon juice and the sweetness of honey enhancing the peaches.

Ingredients

  • For the Parfait:
  • 2 cups plain Greek yogurt (or vanilla yogurt for a sweeter option)
  • 2 large ripe peaches, diced (about 2 cups)
  • 1 tablespoon fresh lemon juice (to prevent browning of peaches)
  • 2 tablespoons honey (plus more for drizzling)
  • 1 teaspoon vanilla extract (optional for extra flavor)
  • For the Granola:
  • 1 cup granola (store-bought or homemade; see notes for a simple granola recipe)
  • 1/4 cup sliced almonds (optional for added crunch)
  • 1/4 cup shredded coconut (optional for added flavor)

Let’s dive into some key ingredients that make this Peach Yogurt Parfait so delightful! First, the Greek yogurt is not only creamy but also packed with protein, making it a satisfying option for breakfast or a snack. If you’re looking for a sweeter option, you can easily substitute it with vanilla yogurt, though it may alter the overall flavor balance. Next, the ripe peaches are the star of the show; their natural sweetness shines through, so I recommend choosing peaches that yield slightly to pressure, indicating they’re perfectly ripe. If peaches aren’t in season, feel free to use nectarines or even frozen peaches—just thaw them before use. Finally, honey adds a lovely floral sweetness that ties everything together. If you prefer, maple syrup can serve as a delicious substitute.

Step-by-Step Instructions

  1. Start by preparing the peaches. Wash them thoroughly, then slice and dice them into bite-sized pieces. In a medium bowl, toss the diced peaches with 1 tablespoon of fresh lemon juice to prevent browning. Set aside for about 5 minutes while the lemon juice works its magic.
  2. In a separate bowl, combine the Greek yogurt, 2 tablespoons of honey, and 1 teaspoon of vanilla extract if using. Stir the mixture until smooth and thoroughly blended. This should take about a minute. Avoid overmixing to maintain the creaminess of the yogurt.
  3. Now it’s time to layer your parfait. Grab a clear glass or bowl to showcase your beautiful creation. Start with a generous spoonful of the yogurt mixture at the bottom—about 1/4 cup will do. Use a spoon to spread it evenly.
  4. Add a layer of the diced peaches over the yogurt, ensuring they cover the yogurt completely. You might want to use about half of what you have prepared—roughly 1 cup. This layer should be visually appealing, so arrange the peaches neatly.
  5. Sprinkle 1/4 cup of granola over the peaches. This adds a delightful crunch. Make sure to distribute it evenly to ensure every bite has that satisfying texture. Avoid packing it down too tightly, as you want it to maintain its crunch.
  6. Repeat the layers: spoon in another 1/4 cup of yogurt, followed by another cup of peaches, and another sprinkle of granola. You should have at least two layers, but feel free to add more depending on your glass size.
  7. Finish off your parfait with a drizzle of honey on top for added sweetness and a touch of elegance. If you’re using sliced almonds or shredded coconut, sprinkle them on top now. It adds a lovely visual contrast and extra flavor.
  8. Serve immediately or refrigerate for up to 30 minutes before serving to allow the flavors to meld together. However, I recommend enjoying it fresh to maintain the granola’s crunch.

Pro Tips for the Best Peach Yogurt Parfait With Honey And Granola

  • Make sure to choose ripe peaches for the best flavor and texture. A common mistake is using unripe fruit, which can lead to a less enjoyable parfait. Look for peaches that are fragrant and slightly soft to the touch.
  • Use a clear glass to assemble your parfait; this not only makes for a beautiful presentation but also allows you to see the colorful layers, which adds to the enjoyment of eating it.
  • For an even creamier texture, consider whipping the Greek yogurt with a hand mixer for a couple of minutes before layering. This small adjustment makes a huge difference in mouthfeel.
  • Be mindful of the granola-to-yogurt ratio. Too much granola can overwhelm the parfait, while too little can make it feel too creamy. Aim for about 1/4 cup of granola per layer for the perfect balance.
  • If you’re making this for a gathering, consider preparing the yogurt and peaches ahead of time and layering them just before serving. This ensures the granola stays crunchy!

Variations & Serving Ideas

There are so many ways to get creative with your Peach Yogurt Parfait! For a tropical twist, swap out the peaches for mangoes or pineapples and top with coconut flakes. If you prefer a berry flavor, mix in some blueberries or strawberries with the peaches for added color and taste. For a nutty version, incorporate chopped walnuts or pecans instead of almonds.

As for serving ideas, this parfait pairs beautifully with a side of scrambled eggs for a hearty breakfast or fresh fruit salad for a light lunch. You might also enjoy it alongside whole grain toast with almond butter for an energizing snack. The contrast of flavors and textures will elevate your meal experience!

Storage, Make-Ahead & Reheating

The Peach Yogurt Parfait is best enjoyed fresh, but you can prepare some components ahead of time. Store the layered parfait in an airtight container in the refrigerator for up to 24 hours. However, be cautious; the granola may lose its crunch if stored too long. You can freeze the yogurt and peach mixture for up to 2 months; just remember to thaw it in the refrigerator overnight before serving.

If you plan to enjoy this dish the next day, it can taste even better as the flavors meld together. Just remember to add the granola right before serving to keep its delightful crunch!

Frequently Asked Questions

Can I make Peach Yogurt Parfait With Honey And Granola ahead of time?

Yes — in fact, it tastes even better the next day as the flavors meld. However, I recommend waiting to add the granola until just before serving to maintain its crunch.

What can I substitute for Greek yogurt?

If you prefer a lighter option, you can substitute Greek yogurt with regular yogurt or a dairy-free alternative like coconut yogurt. Just remember that this may alter the creaminess and flavor profile slightly.

Can I use frozen peaches for this parfait?

Absolutely! Just make sure to thaw the frozen peaches before using them. They will still add great flavor, though the texture may be slightly softer than fresh peaches.

How do I make the parfait vegan?

To make a vegan version, substitute the Greek yogurt with a plant-based yogurt alternative, and replace honey with maple syrup or agave nectar. This keeps the parfait sweet while adhering to a vegan diet.

What other fruits can I use in this recipe?

You can mix and match fruits based on your preference. Try using strawberries, blueberries, raspberries, or even bananas. Just make sure to adjust the lemon juice as needed to prevent browning.

Sweet Peach Yogurt Parfait Delight

Final Thoughts

The Peach Yogurt Parfait with Honey and Granola is a delightful blend of creamy yogurt, sweet peaches, and crunchy granola that creates a satisfying and nourishing treat. Each layer bursts with flavor, making it a perfect choice for breakfast or a light dessert.

This is the kind of recipe I come back to again and again, especially when I want something refreshing and wholesome to start my day. The harmony of sweet and tart flavors, combined with the delightful crunch, never fails to lift my spirits!

I encourage you to give this parfait a try and indulge in its comforting goodness. Feel free to share your results or even add your own twist—perhaps a sprinkle of cinnamon or a handful of nuts. Enjoy creating your perfect parfait!

Print
clock clock iconcutlery cutlery iconflag flag iconfolder folder iconinstagram instagram iconpinterest pinterest iconfacebook facebook iconprint print iconsquares squares iconheart heart iconheart solid heart solid icon

Peach Yogurt Parfait


  • Author: Lily author
  • Total Time: 15 minutes
  • Yield: 4 servings 1x
Pin Recipe
Print Recipe

Description

This Peach Yogurt Parfait combines creamy Greek yogurt, juicy peaches, and crunchy granola for a delightful treat. It’s a perfect breakfast or snack that captures the essence of summer in every bite.


Ingredients

Scale
  • For the Parfait:
  • 2 cups plain Greek yogurt (or vanilla yogurt for a sweeter option)
  • 2 large ripe peaches, diced (about 2 cups)
  • 1 tablespoon fresh lemon juice (to prevent browning of peaches)
  • 2 tablespoons honey (plus more for drizzling)
  • 1 teaspoon vanilla extract (optional for extra flavor)
  • For the Granola:
  • 1 cup granola (store-bought or homemade; see notes for a simple granola recipe)
  • 1/4 cup sliced almonds (optional for added crunch)
  • 1/4 cup shredded coconut (optional for added flavor)

Instructions

  1. Start by preparing the peaches. Wash them thoroughly, then slice and dice them into bite-sized pieces. In a medium bowl, toss the diced peaches with 1 tablespoon of fresh lemon juice to prevent browning. Set aside for about 5 minutes while the lemon juice works its magic.
  2. In a separate bowl, combine the Greek yogurt, 2 tablespoons of honey, and 1 teaspoon of vanilla extract if using. Stir the mixture until smooth and thoroughly blended. This should take about a minute. Avoid overmixing to maintain the creaminess of the yogurt.
  3. Now it’s time to layer your parfait. Grab a clear glass or bowl to showcase your beautiful creation. Start with a generous spoonful of the yogurt mixture at the bottom—about 1/4 cup will do. Use a spoon to spread it evenly.
  4. Add a layer of the diced peaches over the yogurt, ensuring they cover the yogurt completely. You might want to use about half of what you have prepared—roughly 1 cup. This layer should be visually appealing, so arrange the peaches neatly.
  5. Sprinkle 1/4 cup of granola over the peaches. This adds a delightful crunch. Make sure to distribute it evenly to ensure every bite has that satisfying texture. Avoid packing it down too tightly, as you want it to maintain its crunch.
  6. Repeat the layers: spoon in another 1/4 cup of yogurt, followed by another cup of peaches, and another sprinkle of granola. You should have at least two layers, but feel free to add more depending on your glass size.
  7. Finish off your parfait with a drizzle of honey on top for added sweetness and a touch of elegance. If you’re using sliced almonds or shredded coconut, sprinkle them on top now. It adds a lovely visual contrast and extra flavor.
  8. Serve immediately or refrigerate for up to 30 minutes before serving to allow the flavors to meld together. However, I recommend enjoying it fresh to maintain the granola’s crunch.
  • Prep Time: 15 mins
  • Cook Time: 0 mins
  • Category: Breakfast
  • Method: No-cook
  • Cuisine: American

Nutrition

  • Serving Size: 1 parfait
  • Calories: 250
  • Sugar: 20 g
  • Sodium: 50 mg
  • Fat: 5 g
  • Saturated Fat: 2 g
  • Unsaturated Fat: 3 g
  • Trans Fat: 0 g
  • Carbohydrates: 40 g
  • Fiber: 3 g
  • Protein: 10 g
  • Cholesterol: 10 mg

Keywords: Choose ripe peaches for the best flavor and texture. Use a clear glass for a beautiful presentation. For creaminess, consider whipping the yogurt before layering. Be mindful of the granola-to-yogurt ratio. Prepare yogurt and peaches ahead of time for gatherings, layering just before serving.

Did you make this recipe?

Share a photo and tag us — we can't wait to see what you've made!

Sun-Kissed Frozen Orange Cream Slush

As a child, summer days felt like they lasted forever. I remember the sticky heat wrapping around me as I played outside, my laughter mingling with the sounds of the neighborhood. But nothing could cool me down quite like the moment I’d spot my grandmother, laboring over her blender, whipping up her famous Frozen Orange Creamsicle Slush. That vibrant orange treat, with its frosty texture and sweet citrus aroma, was like a burst of sunshine in a cup. Just one sip, and I could feel the coolness wash over me, sparking pure joy.

This Frozen Orange Creamsicle Slush has a way of making you feel like a kid again. Its creamy, dreamy consistency is a delightful balance of bright orange and soft vanilla, inviting you to dive right in. The refreshing tang of orange dances on your tongue, while the smooth creaminess envelops you in a comforting embrace. It’s a nostalgic treat that’s perfect for hot summer afternoons or anytime you need a little pick-me-up.

What makes my version of this slush stand out is the addition of a hint of vanilla bean, which elevates the flavor and adds an extra layer of richness. Plus, it’s super easy to whip up with just a few simple ingredients that you probably already have on hand! So, if you’re ready to relive those sun-soaked memories, let me show you exactly how to make it.

Sun-Kissed Frozen Orange Cream Slush

Why You’ll Love This Recipe

  • Each slush is a perfect blend of creamy vanilla and zesty orange, creating a nostalgic flavor reminiscent of summer days.
  • This refreshing treat is ready in under 15 minutes, making it an ideal quick dessert for unexpected guests or hot afternoons.
  • With just 8 simple ingredients, it’s budget-friendly, ensuring you don’t have to break the bank to enjoy a delicious slush.
  • The slush has a perfectly smooth texture, thanks to the combination of ice and ice cream, providing a delightful contrast to the bright citrus flavors.
  • It’s highly customizable; you can easily adjust the sweetness and add fresh herbs for a unique twist that suits your taste.

Ingredients

  • 2 cups orange juice (freshly squeezed or store-bought)
  • 1 cup vanilla ice cream
  • 1 cup crushed ice
  • 1/2 cup milk (whole or 2%)
  • 1/4 cup granulated sugar (adjust based on sweetness preference)
  • 1 teaspoon vanilla extract
  • Zest of 1 orange (for added flavor)
  • Fresh orange slices and mint leaves (for garnish)

The star of this Frozen Orange Creamsicle Slush is the orange juice, which provides the vibrant, citrusy base. Freshly squeezed juice will yield the brightest flavor, but store-bought options can be just as convenient. If you’re opting for store-bought, choose 100% pure juice with no added sugars for the best results. Another essential ingredient is the vanilla ice cream; it adds creaminess and sweetness. You can substitute it with dairy-free ice cream if you’re looking for a vegan option. Whole or 2% milk complements the ice cream, creating a smooth blend. If you want a lower-calorie version, almond or oat milk can be good alternatives.

Lastly, the granulated sugar can be adjusted based on your sweetness preference. If you prefer a more natural sweetener, consider using honey or agave syrup. The orange zest enhances the flavor profile, providing an aromatic pop that brings the whole slush together. Don’t skip it! It adds an extra layer of brightness that makes this slush truly special.

Step-by-Step Instructions

  1. Start by preparing your ingredients. Gather 2 cups of orange juice, 1 cup of vanilla ice cream, and 1 cup of crushed ice. Make sure the ice is finely crushed, as larger chunks can make blending difficult.
  2. In a blender, combine the orange juice, vanilla ice cream, crushed ice, and 1/2 cup of milk. Add 1/4 cup of granulated sugar and 1 teaspoon of vanilla extract. If you like a sweeter slush, consider adding a bit more sugar at this stage.
  3. Add the zest of 1 orange to the blender. This step is crucial for enhancing the citrus flavor of your slush. Make sure not to include the bitter white pith—only the flavorful zest.
  4. Blend the mixture on medium-high speed for about 30-45 seconds. Stop once the ingredients are fully combined and the slush has a smooth, even consistency. If you notice large chunks of ice, blend for an additional 10-15 seconds. Avoid over-blending, as this can make the slush too liquidy.
  5. Once blended, taste the slush. If it needs more sweetness, add a little more sugar and blend for a few more seconds. If it’s too thick, you can add a splash of milk to reach your desired consistency.
  6. Pour the slush into glasses. This recipe typically serves 4, but you can easily double it for larger gatherings. Use a spoon to help guide the slush into the glasses if needed.
  7. Garnish each serving with fresh orange slices and mint leaves. The mint not only adds a pop of color but also a refreshing aroma that complements the citrus flavors beautifully.
  8. Serve immediately and enjoy! If you’ve made extra, you can refrigerate it for a short time, but it’s best enjoyed fresh.

Pro Tips for the Best Frozen Orange Creamsicle Slush

  • Don’t skip the orange zest! It’s a game-changer for flavor. Always zest before juicing to make it easier.
  • Use a high-powered blender for the best texture. A standard blender may struggle with ice, leading to uneven consistency. If you have a food processor, that can work too, but ensure the ice is finely crushed.
  • Adjust the ice-to-liquid ratio carefully. If your slush is too thick, it won’t blend well. Start with less ice and add more until you reach your preferred texture.
  • Be cautious with the sugar! Always start with the lower amount, as you can easily add more, but it’s hard to fix an overly sweet slush.
  • For a fun twist, consider adding a splash of coconut milk or a handful of fresh fruit like strawberries or pineapple. This not only enhances the flavor but also adds a beautiful color contrast.

Variations & Serving Ideas

There are countless ways to put a spin on your Frozen Orange Creamsicle Slush. Consider making a tropical version by adding in some pineapple juice or coconut milk for a delightful tropical twist. If you’re feeling adventurous, try incorporating a handful of frozen mango or peach slices for added sweetness. For a lighter version, swap out the vanilla ice cream for Greek yogurt for a creamy yet tangy alternative.

As for serving ideas, this refreshing slush pairs wonderfully with light summer dishes like grilled chicken skewers, fish tacos, or a simple salad topped with citrus vinaigrette. The bright, zesty flavors of the slush complement these dishes perfectly, making them an ideal pairing for a sunny day.

Storage, Make-Ahead & Reheating

This Frozen Orange Creamsicle Slush is best enjoyed fresh, but if you have leftovers, you can store them in an airtight container in the fridge for up to 2 days. Just keep in mind that the slush may lose some of its texture over time as the ice melts. It doesn’t freeze well, as the ice will turn into a solid block. If you must freeze it, blend again after thawing to restore the slushy consistency. This treat is best the day you make it, as the flavors meld together beautifully overnight, enhancing its deliciousness.

Frequently Asked Questions

Can I make Frozen Orange Creamsicle Slush ahead of time?

Yes — in fact, it tastes even better the next day as the flavors meld. However, it’s best to enjoy it fresh, as the texture can change if stored for too long. If you need to prepare it ahead, keep it in the fridge and re-blend before serving.

What kind of orange juice should I use?

For the best flavor, use freshly squeezed orange juice. However, if you’re short on time, opt for 100% pure store-bought juice without added sugars. This will ensure that your slush remains flavorful and refreshing.

Can I substitute the vanilla ice cream?

Absolutely! If you’re looking for a dairy-free option, coconut milk ice cream or a non-dairy vanilla ice cream can work wonderfully. They will still provide the creamy texture and sweetness you desire.

How can I adjust the sweetness of my slush?

You can easily adjust the sweetness by modifying the amount of sugar added. Start with 1/4 cup and taste the mixture before blending. If you prefer it sweeter, add more sugar gradually until it reaches your desired level.

What should I do if my slush is too thick?

If your slush is too thick, simply add a splash of milk or orange juice and blend again. This will help achieve a more drinkable consistency while maintaining the slushy texture. Adjust gradually to reach your preferred thickness.

Sun-Kissed Frozen Orange Cream Slush

Final Thoughts

The Frozen Orange Creamsicle Slush is a delightful blend of refreshing citrus and creamy goodness, making it a perfect treat for warm days or any time you crave a taste of nostalgia. The way the bright orange flavor dances with the creamy texture truly elevates this slush, transforming it into a satisfying escape from the everyday.

This is the kind of recipe I come back to again and again, especially when I’m looking to cool down or impress guests at a summer gathering. It’s simple to make and always brings smiles all around! I encourage you to try this recipe for yourself—don’t hesitate to share your results or even put your own spin on it. Happy slushing!

Print
clock clock iconcutlery cutlery iconflag flag iconfolder folder iconinstagram instagram iconpinterest pinterest iconfacebook facebook iconprint print iconsquares squares iconheart heart iconheart solid heart solid icon

Frozen Orange Creamsicle Slush


  • Author: Lily author
  • Total Time: 15 minutes
  • Yield: 4 servings 1x
Pin Recipe
Print Recipe

Description

This Frozen Orange Creamsicle Slush is a refreshing treat that combines creamy vanilla and zesty orange flavors. Perfect for hot summer days, it brings back nostalgic memories with every sip.


Ingredients

Scale
  • 2 cups orange juice (freshly squeezed or store-bought)
  • 1 cup vanilla ice cream
  • 1 cup crushed ice
  • 1/2 cup milk (whole or 2%)
  • 1/4 cup granulated sugar (adjust based on sweetness preference)
  • 1 teaspoon vanilla extract
  • Zest of 1 orange (for added flavor)
  • Fresh orange slices and mint leaves (for garnish)

Instructions

  1. Start by preparing your ingredients. Gather 2 cups of orange juice, 1 cup of vanilla ice cream, and 1 cup of crushed ice. Make sure the ice is finely crushed, as larger chunks can make blending difficult.
  2. In a blender, combine the orange juice, vanilla ice cream, crushed ice, and 1/2 cup of milk. Add 1/4 cup of granulated sugar and 1 teaspoon of vanilla extract. If you like a sweeter slush, consider adding a bit more sugar at this stage.
  3. Add the zest of 1 orange to the blender. This step is crucial for enhancing the citrus flavor of your slush. Make sure not to include the bitter white pith—only the flavorful zest.
  4. Blend the mixture on medium-high speed for about 30-45 seconds. Stop once the ingredients are fully combined and the slush has a smooth, even consistency. If you notice large chunks of ice, blend for an additional 10-15 seconds. Avoid over-blending, as this can make the slush too liquidy.
  5. Once blended, taste the slush. If it needs more sweetness, add a little more sugar and blend for a few more seconds. If it’s too thick, you can add a splash of milk to reach your desired consistency.
  6. Pour the slush into glasses. This recipe typically serves 4, but you can easily double it for larger gatherings. Use a spoon to help guide the slush into the glasses if needed.
  7. Garnish each serving with fresh orange slices and mint leaves. The mint not only adds a pop of color but also a refreshing aroma that complements the citrus flavors beautifully.
  8. Serve immediately and enjoy! If you’ve made extra, you can refrigerate it for a short time, but it's best enjoyed fresh.
  • Prep Time: 15 min
  • Cook Time: 0 min
  • Category: Dessert
  • Method: Blending
  • Cuisine: American

Nutrition

  • Serving Size: 1 serving
  • Calories: 200
  • Sugar: 30 g
  • Sodium: 50 mg
  • Fat: 5 g
  • Saturated Fat: 3 g
  • Unsaturated Fat: 2 g
  • Trans Fat: 0 g
  • Carbohydrates: 40 g
  • Fiber: 1 g
  • Protein: 2 g
  • Cholesterol: 20 mg

Keywords: Don't skip the orange zest! It's a game-changer for flavor. Always zest before juicing to make it easier.

Did you make this recipe?

Share a photo and tag us — we can't wait to see what you've made!

Zesty Lemon Poppy Seed Delight

One rainy afternoon, I found myself in my grandmother’s cozy kitchen, the kind that always smelled like warmth and love. She was whipping up her famous Lemon Poppy Seed Loaf, a recipe that had been passed down through generations. As the batter came together, the zesty aroma of fresh lemons filled the air, mingling perfectly with the nutty fragrance of poppy seeds. I can still picture her, apron-clad, as she expertly drizzled a vibrant citrus icing over the loaf, creating a glossy, sun-kissed finish that beckoned us to dive in. It was a moment that sparked my own passion for baking, and this recipe has become a cherished staple in my home ever since.

When you take a bite of this Lemon Poppy Seed Loaf, it’s like a burst of sunshine on your palate. The loaf is beautifully golden, with a tender crumb that melts in your mouth. Each slice is speckled with tiny poppy seeds, adding a delightful crunch that contrasts beautifully with the tangy sweetness of the lemon. And that citrus icing? It’s the finishing touch that elevates this loaf from ordinary to extraordinary, with its bright, zesty flavor dancing on your taste buds.

This recipe stands out because it embraces simplicity while delivering on flavor. I’ve added a hint of vanilla to the batter, enhancing the overall taste and making it even more indulgent. Trust me, once you make this Lemon Poppy Seed Loaf With Citrus Icing, it’ll become a go-to in your baking repertoire.

So, let me show you exactly how to make it!

Zesty Lemon Poppy Seed Delight

Why You’ll Love This Recipe

  • Moist and tender crumb that melts in your mouth, thanks to the perfect balance of butter and buttermilk.
  • Bright, zesty lemon flavor paired with crunchy poppy seeds, creating a delightful texture and taste experience.
  • Easy to whip up in just about an hour, perfect for last-minute gatherings or a cozy afternoon treat.
  • Budget-friendly with everyday ingredients, making it an accessible option for all home bakers.
  • The citrus icing adds a sweet tang that elevates the loaf, turning a simple recipe into a showstopper!

Ingredients

  • 1 ½ cups (190g) all-purpose flour
  • 1 teaspoon baking powder
  • ½ teaspoon baking soda
  • ½ teaspoon salt
  • 3 tablespoons poppy seeds
  • ½ cup (115g) unsalted butter, softened to room temperature
  • 1 cup (200g) granulated sugar
  • 2 large eggs
  • 1 teaspoon vanilla extract
  • 1 teaspoon lemon zest (from about 1 medium lemon)
  • ½ cup (120ml) buttermilk
  • 2 tablespoons fresh lemon juice

For the Citrus Icing:

  • 1 cup (120g) powdered sugar
  • 2 tablespoons fresh lemon juice
  • 1 tablespoon orange juice
  • 1 teaspoon lemon zest (for garnish, optional)

Let’s dive into the key ingredients that make this Lemon Poppy Seed Loaf so special. The all-purpose flour provides the structure and base for the loaf, while the baking powder and baking soda ensure it rises perfectly, giving the loaf a light texture. For a gluten-free variation, you could substitute the flour with a gluten-free all-purpose blend. Poppy seeds not only add a delightful crunch but also contribute to the unique flavor profile that pairs well with the citrus notes.

Unsalted butter is crucial for achieving the buttery richness that makes this loaf so moist. If you’re looking for a dairy-free option, coconut oil or a vegan butter can be used instead. The buttermilk is another essential component, providing acidity that activates the baking soda for a fluffy texture. If you don’t have buttermilk on hand, you can easily make a substitute by mixing ½ cup of milk with 1 tablespoon of vinegar or lemon juice and letting it sit for about 5 minutes.

Step-by-Step Instructions

  1. Preheat your oven to 350°F (175°C). Grease a 9×5-inch loaf pan or line it with parchment paper for easy removal later.
  2. In a medium mixing bowl, whisk together 1 ½ cups of all-purpose flour, 1 teaspoon of baking powder, ½ teaspoon of baking soda, ½ teaspoon of salt, and 3 tablespoons of poppy seeds. This helps to evenly distribute the baking agents and ensures a uniform rise.
  3. In a large mixing bowl, cream together ½ cup of softened unsalted butter and 1 cup of granulated sugar using an electric mixer on medium speed for about 3-4 minutes, until the mixture is light and fluffy. Make sure to scrape down the sides of the bowl occasionally.
  4. Add 2 large eggs, 1 teaspoon of vanilla extract, and 1 teaspoon of lemon zest to the creamed butter and sugar, mixing until fully combined. You want a smooth consistency, so ensure there are no lumps of butter.
  5. In a small bowl, combine ½ cup of buttermilk and 2 tablespoons of fresh lemon juice. Alternately add the dry ingredients and buttermilk mixture to the butter mixture, starting and ending with the dry ingredients. Mix just until combined; do not overmix, as this can lead to a dense loaf.
  6. Pour the batter into the prepared loaf pan. Smooth the top with a spatula, ensuring it’s even. Bake in the preheated oven for 50-60 minutes, or until a toothpick inserted in the center comes out clean. The edges should be lightly golden brown, and the center should feel just set.
  7. Once baked, remove the loaf from the oven and allow it to cool in the pan for about 10 minutes. Then, transfer it to a wire rack to cool completely. Resist the urge to slice too soon, as it will be crumbly if it’s still warm.
  8. While the loaf is cooling, prepare the citrus icing. In a medium bowl, whisk together 1 cup of powdered sugar, 2 tablespoons of fresh lemon juice, and 1 tablespoon of orange juice until smooth. If the icing is too thick, you can add a little more juice to reach your desired consistency.
  9. Once the loaf is completely cool, drizzle the citrus icing over the top. If you like, sprinkle with an additional teaspoon of lemon zest for an extra pop of flavor and color.

Pro Tips for the Best Lemon Poppy Seed Loaf With Citrus Icing

  • Be careful not to overmix your batter; this is a common mistake that can lead to a dense loaf. Mix just until the dry ingredients are incorporated for a light and fluffy texture.
  • Use room temperature ingredients, especially the butter and eggs. This helps to create a smoother batter and ensures even baking. Take your eggs out of the fridge about 30 minutes before you start.
  • For a more pronounced lemon flavor, consider adding a little lemon extract in addition to the zest and juice. Just a half teaspoon can elevate the citrus notes significantly.
  • When measuring your flour, spoon it into the measuring cup and level it off with a knife instead of scooping directly from the bag. This prevents packing and ensures you don’t end up with a dry loaf.
  • Invest in a good quality loaf pan; it makes a difference in heat distribution, which ensures even baking. If your pan is dark-coated, reduce the oven temperature by 25°F to prevent over-browning.

Variations & Serving Ideas

For a delightful twist, consider adding blueberries or raspberries to the batter for a fruity burst of flavor. You can also experiment with different citrus fruits—try lime or grapefruit zest and juice for a refreshing change. For a healthier option, substitute half of the all-purpose flour with whole wheat flour for added fiber without compromising too much on texture.

This Lemon Poppy Seed Loaf pairs beautifully with a light salad, such as a mixed greens salad with a vinaigrette, or a cup of tea for a cozy afternoon treat. It also complements a creamy cheese platter, as the acidity of the loaf balances rich cheeses perfectly. Lastly, a scoop of vanilla ice cream on the side creates a delightful contrast of temperatures and flavors!

Storage, Make-Ahead & Reheating

This Lemon Poppy Seed Loaf can be stored at room temperature for up to 3 days if wrapped tightly in plastic wrap. If you want to keep it longer, it freezes well for up to 3 months. To freeze, wrap the loaf tightly in plastic wrap and then in aluminum foil to prevent freezer burn.

When you’re ready to enjoy it again, simply thaw it in the fridge overnight. Reheat individual slices in the microwave for 15-20 seconds or in a toaster oven until warmed through. Interestingly, many people find that this loaf tastes even better the next day, as the flavors have time to meld!

Frequently Asked Questions

Can I make Lemon Poppy Seed Loaf With Citrus Icing ahead of time?

Yes — in fact, it tastes even better the next day! You can make the loaf a day in advance, allowing the flavors to develop. Just be sure to store it in an airtight container to maintain its moisture.

Can I substitute the poppy seeds?

Absolutely! If you don’t have poppy seeds on hand or prefer an alternative, you can use sesame seeds for a similar crunch or omit them entirely for a smooth loaf.

What can I use instead of buttermilk?

If you don’t have buttermilk, you can easily create a substitute by mixing ½ cup of milk (dairy or plant-based) with 1 tablespoon of vinegar or lemon juice. Let it sit for 5 minutes before using in the recipe.

How can I make this recipe gluten-free?

To make a gluten-free version of this Lemon Poppy Seed Loaf, substitute the all-purpose flour with a gluten-free all-purpose flour blend. Just ensure that the blend contains a binding agent like xanthan gum for the best results.

What is the best way to store leftover loaf?

Leftover Lemon Poppy Seed Loaf should be stored in an airtight container at room temperature for up to 3 days. For longer storage, wrap it tightly and freeze for up to 3 months. Thaw it before serving for the best texture.

Zesty Lemon Poppy Seed Delight

Final Thoughts

The Lemon Poppy Seed Loaf with Citrus Icing is truly a delightful treat that brings a burst of brightness to any occasion. The zesty lemon flavor combined with the subtle crunch of poppy seeds creates a satisfying balance, while the citrus icing adds a touch of sweetness that perfectly complements the loaf’s tanginess.

This is the kind of recipe I come back to again and again, especially when I want to brighten up a gloomy day or celebrate a small victory. The aroma that fills the kitchen as it bakes is absolutely heavenly! I encourage you to give this recipe a try; you might just find it becoming a beloved staple in your home. Don’t forget to share your results or even add your own unique twist—I can’t wait to see what you create!

Print
clock clock iconcutlery cutlery iconflag flag iconfolder folder iconinstagram instagram iconpinterest pinterest iconfacebook facebook iconprint print iconsquares squares iconheart heart iconheart solid heart solid icon

Lemon Poppy Seed Loaf


  • Author: Lily author
  • Total Time: 13 minute
  • Yield: 1 loaf 1x
Pin Recipe
Print Recipe

Description

This Lemon Poppy Seed Loaf is a delightful treat that combines zesty lemon flavor with crunchy poppy seeds. Topped with a citrus icing, it’s perfect for any occasion.


Ingredients

Scale
  • 1 ½ cups (190g) all-purpose flour
  • 1 teaspoon baking powder
  • ½ teaspoon baking soda
  • ½ teaspoon salt
  • 3 tablespoons poppy seeds
  • ½ cup (115g) unsalted butter, softened to room temperature
  • 1 cup (200g) granulated sugar
  • 2 large eggs
  • 1 teaspoon vanilla extract
  • 1 teaspoon lemon zest (from about 1 medium lemon)
  • ½ cup (120ml) buttermilk
  • 2 tablespoons fresh lemon juice
  • 1 cup (120g) powdered sugar
  • 2 tablespoons fresh lemon juice
  • 1 tablespoon orange juice
  • 1 teaspoon lemon zest (for garnish, optional)

Instructions

  1. Preheat your oven to 350°F (175°C). Grease a 9×5-inch loaf pan or line it with parchment paper for easy removal later.
  2. In a medium mixing bowl, whisk together 1 ½ cups of all-purpose flour, 1 teaspoon of baking powder, ½ teaspoon of baking soda, ½ teaspoon of salt, and 3 tablespoons of poppy seeds. This helps to evenly distribute the baking agents and ensures a uniform rise.
  3. In a large mixing bowl, cream together ½ cup of softened unsalted butter and 1 cup of granulated sugar using an electric mixer on medium speed for about 3-4 minutes, until the mixture is light and fluffy. Make sure to scrape down the sides of the bowl occasionally.
  4. Add 2 large eggs, 1 teaspoon of vanilla extract, and 1 teaspoon of lemon zest to the creamed butter and sugar, mixing until fully combined. You want a smooth consistency, so ensure there are no lumps of butter.
  5. In a small bowl, combine ½ cup of buttermilk and 2 tablespoons of fresh lemon juice. Alternately add the dry ingredients and buttermilk mixture to the butter mixture, starting and ending with the dry ingredients. Mix just until combined; do not overmix, as this can lead to a dense loaf.
  6. Pour the batter into the prepared loaf pan. Smooth the top with a spatula, ensuring it’s even. Bake in the preheated oven for 50-60 minutes, or until a toothpick inserted in the center comes out clean. The edges should be lightly golden brown, and the center should feel just set.
  7. Once baked, remove the loaf from the oven and allow it to cool in the pan for about 10 minutes. Then, transfer it to a wire rack to cool completely. Resist the urge to slice too soon, as it will be crumbly if it’s still warm.
  8. While the loaf is cooling, prepare the citrus icing. In a medium bowl, whisk together 1 cup of powdered sugar, 2 tablespoons of fresh lemon juice, and 1 tablespoon of orange juice until smooth. If the icing is too thick, you can add a little more juice to reach your desired consistency.
  9. Once the loaf is completely cool, drizzle the citrus icing over the top. If you like, sprinkle with an additional teaspoon of lemon zest for an extra pop of flavor and color.
  • Prep Time: 15 mins
  • Cook Time: 50-60 mins
  • Category: Dessert
  • Method: Baking
  • Cuisine: American

Nutrition

  • Serving Size: 1 slice
  • Calories: 200
  • Sugar: 15 g
  • Sodium: 150 mg
  • Fat: 8 g
  • Saturated Fat: 5 g
  • Unsaturated Fat: 3 g
  • Trans Fat: 0 g
  • Carbohydrates: 30 g
  • Fiber: 1 g
  • Protein: 3 g
  • Cholesterol: 40 mg

Keywords: Be careful not to overmix your batter; this is a common mistake that can lead to a dense loaf. Use room temperature ingredients for a smoother batter and even baking.

Did you make this recipe?

Share a photo and tag us — we can't wait to see what you've made!

  • Privacy Policy
  • Terms Of Service
  • Contact
  • About
  • GDPR

Copyright © 2025 Homesmad