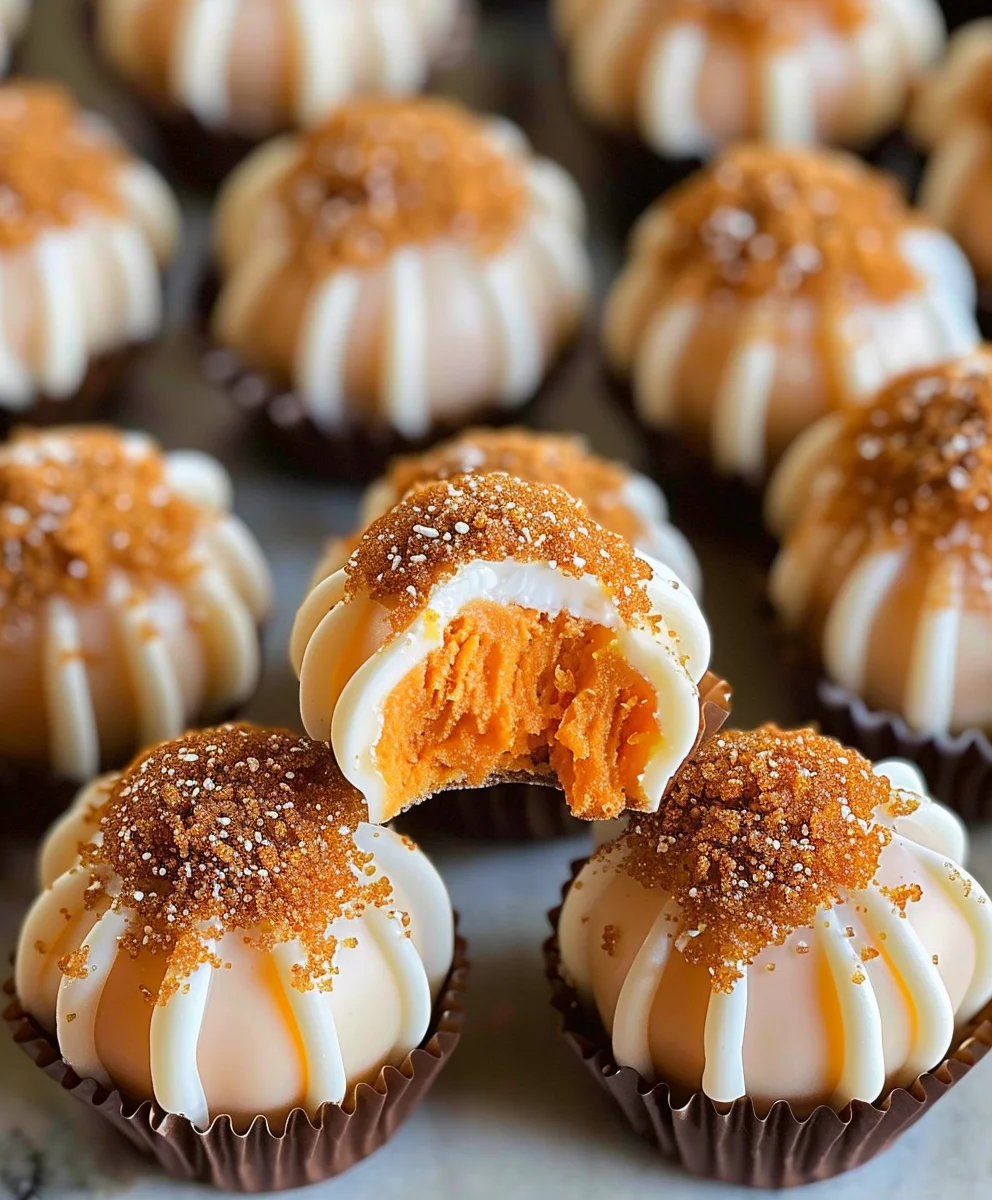
Pumpkin Cheesecake Truffles are perhaps the most delightful embodiment of autumn’s embrace, capturing all the warmth and spice of your favorite season in one exquisite, bite-sized treat. I am absolutely thrilled to share the secrets behind these irresistible confections with you today. Imagine the velvety smooth texture of classic cheesecake, infused with the comforting flavors of pumpkin puree and a medley of aromatic spices like cinnamon, nutmeg, and ginger, all enrobed in a delicate shell of white chocolate.
Why You’ll Fall in Love with These Truffles!
These aren’t just any dessert; they are a miniature celebration, offering a burst of rich, creamy flavor that melts in your mouth, leaving you craving another. While traditional truffles boast a rich European history, our beloved Pumpkin Cheesecake Truffles represent a modern culinary evolution, perfectly marrying the perennial popularity of pumpkin spice desserts with the elegance of a no-bake, easy-to-manage confection. They have quickly become a staple for fall gatherings, holiday parties, or simply as a luxurious personal indulgence, adored for their convenience and impressive presentation without the fuss of a full cheesecake. It’s this unparalleled combination of convenience, incredible taste, and festive flair that makes them so beloved. Preparing these truffles is a joy, promising a delightful reward that will undoubtedly impress anyone fortunate enough to try them.

Ingredients:
- For the Pumpkin Cheesecake Filling:
- 8 ounces (1 block) full-fat cream cheese, softened to room temperature
- ½ cup pumpkin puree (100% pure pumpkin, not pumpkin pie filling)
- ½ cup powdered sugar (confectioners’ sugar), sifted
- 1 teaspoon pure vanilla extract
- ½ teaspoon ground cinnamon
- ¼ teaspoon ground nutmeg
- ⅛ teaspoon ground ginger
- Pinch of ground cloves (optional, but highly recommended for depth)
- For the Graham Cracker Crust Base:
- 1 ½ cups finely crushed graham cracker crumbs (about 10-12 full graham cracker sheets)
- ¼ cup unsalted butter, melted
- 2 tablespoons granulated sugar
- Pinch of salt
- For the Chocolate Coating:
- 12 ounces good quality white chocolate, dark chocolate, or milk chocolate (I often use white chocolate for aesthetic appeal with the pumpkin color), finely chopped or in chip form
- 1 tablespoon coconut oil or vegetable shortening (optional, for smoother dipping consistency)
- For Decoration (Optional, but fun!):
- Extra finely crushed graham cracker crumbs
- A sprinkle of pumpkin pie spice
- White chocolate drizzle (if using dark/milk coating)
- Orange or autumnal sprinkles
- Edible glitter
Preparing the Pumpkin Cheesecake Base
- Prepare the Graham Cracker Crust: My first step when making these delightful Pumpkin Cheesecake Truffles is always to get the base ready. In a medium-sized bowl, combine the finely crushed graham cracker crumbs, granulated sugar, and a small pinch of salt. Make sure the crumbs are really fine; this helps them bind better. I like to use a food processor for this, pulsing until they resemble fine sand. Once combined, pour in the melted unsalted butter. Use a fork or a spatula to mix everything thoroughly until the crumbs are uniformly moistened. The mixture should clump together when pressed, indicating it’s ready. Set this aside for now; we’ll incorporate it into our cheesecake filling for that classic pie crust texture and flavor that complements the pumpkin so beautifully. This base adds a wonderful layer of complexity to our truffles, elevating them beyond just a simple pumpkin ball.
- Cream the Cream Cheese: In the bowl of a stand mixer fitted with the paddle attachment, or using a large bowl and a hand mixer, place the softened full-fat cream cheese. It’s absolutely vital that your cream cheese is at room temperature. If it’s too cold, you’ll end up with lumps and a chunky texture, and nobody wants lumpy Pumpkin Cheesecake Truffles! Beat the cream cheese on medium speed for about 2-3 minutes, until it becomes incredibly smooth, light, and fluffy. Make sure to scrape down the sides and bottom of the bowl frequently with a rubber spatula to ensure no unmixed pockets remain. This initial beating step is key to achieving a wonderfully smooth, uniform, and velvety texture for our truffle filling, which is essential for a truly luxurious bite. Don’t rush this part; a properly creamed base makes all the difference.
- Add Pumpkin and Flavorings: Once your cream cheese is perfectly smooth, it’s time to introduce the star of the show: pumpkin! Add the ½ cup of 100% pure pumpkin puree to the cream cheese mixture. Make sure you’re using pure pumpkin, not pumpkin pie filling, as the latter already contains spices and sugar that would throw off our carefully balanced recipe. Next, add the sifted powdered sugar. Sifting is important here to prevent any small lumps from forming in your luscious pumpkin cheesecake mixture, ensuring a consistently smooth result. Follow this with the pure vanilla extract, ground cinnamon, ground nutmeg, ground ginger, and the optional (but highly recommended!) pinch of ground cloves. These warm, aromatic spices are what give our Pumpkin Cheesecake Truffles that signature fall flavor profile that everyone adores, transforming a simple dessert into a seasonal sensation.
- Combine Until Smooth and Creamy: With all the ingredients in the bowl, beat the mixture on medium-low speed. Start slow to avoid a cloud of powdered sugar, then increase the speed slightly. Continue beating for another 2-3 minutes, or until the pumpkin, sugar, and spices are fully incorporated, and the mixture is incredibly smooth and creamy. Again, don’t forget to stop and scrape down the sides and bottom of the bowl multiple times. You want a uniformly colored, velvety smooth consistency that tastes like pure autumn delight. This thorough mixing ensures that every single truffle will have that perfect balance of sweet, tangy, and warmly spiced pumpkin flavor. Look for a pale orange hue and a texture that’s thick but still pliable.
- Fold in the Graham Cracker Mixture: Now, let’s bring back our prepared graham cracker crust. Gently fold the entire graham cracker mixture into the pumpkin cheesecake filling using a rubber spatula. You want to incorporate it just until it’s evenly distributed throughout the filling. Overmixing at this stage can make the truffles tough, so be gentle and use a light hand. This step adds a fantastic textural element and that iconic cheesecake base flavor, making these Pumpkin Cheesecake Truffles truly taste like a bite-sized pumpkin cheesecake. The crumbs provide a wonderful subtle crunch that contrasts beautifully with the creamy filling, giving each truffle an added dimension of taste and texture that is incredibly satisfying and reminiscent of a full-sized pumpkin pie or cheesecake.
Chilling the Truffle Mixture (Crucial Step!)
- Chill the Mixture: This is arguably one of the most critical steps for perfect Pumpkin Cheesecake Truffles. Cover the bowl tightly with plastic wrap, pressing it directly onto the surface of the mixture to prevent a skin from forming, and refrigerate the mixture for a minimum of 4 hours, or preferably overnight. The longer it chills, the firmer it will become, making it much easier to scoop and roll into uniform truffle shapes without them becoming a sticky mess. Resist the urge to skip or shorten this step! A well-chilled mixture is key to preventing sticky, shapeless truffles and ensuring they hold their form beautifully. Trust me, the waiting is worth it for the ultimate truffle experience. If the mixture is not firm enough, your truffles will be difficult to handle and coat properly, potentially melting into your warm chocolate and ruining your efforts. Patience is a virtue here, leading to perfectly shaped and easily coated truffles.
Forming the Pumpkin Cheesecake Truffles
- Prepare for Rolling: Line a large baking sheet with parchment paper or wax paper. This will prevent your rolled truffles from sticking as they await their chocolate bath, making for an easy transfer. You might also want to set out a small bowl of warm water and a clean towel for cleaning your hands between rolling batches; this helps keep your hands from getting too sticky and ensures smoother truffles. Having everything prepped before you start rolling will make the process much more efficient and enjoyable.
- Scoop and Roll: Once the pumpkin cheesecake mixture is thoroughly chilled and firm, it’s time for the fun part – rolling! Using a small cookie scoop (about 1 tablespoon in size, which yields a perfect bite-sized truffle) or two teaspoons, scoop out portions of the mixture. Roll each portion gently between your palms to form smooth, round balls, approximately 1-inch in diameter. Don’t worry if they aren’t perfectly spherical; a little rustic charm is part of the appeal, especially for homemade treats. As you roll, the warmth of your hands can soften the mixture, so work quickly to maintain the truffle’s shape. If the mixture becomes too soft to handle, pop it back into the refrigerator for 10-15 minutes to firm up again before continuing. Place the rolled truffles on your prepared baking sheet as you finish each one. The more consistent you are with your size, the more uniform your final batch of Pumpkin Cheesecake Truffles will look, which is aesthetically pleasing when serving.
- Second Chill (Important for Coating!): Once all the truffles are rolled and resting on the parchment-lined baking sheet, place the entire sheet back into the refrigerator for another 30-60 minutes. This second chill is super important because it ensures the truffles are very cold and firm before dipping. This extreme coldness will help the chocolate coating set quickly and prevent the truffles from melting and disintegrating into the warm chocolate. It also creates a better, more robust bond between the truffle and the chocolate, resulting in a cleaner, less messy, and more durable coating process. A properly chilled truffle will allow the chocolate to adhere beautifully without creating a thick, uneven shell or causing the truffle itself to become too soft during the dipping process.
Coating the Pumpkin Cheesecake Truffles
- Melt the Chocolate: While your truffles are undergoing their final chill, prepare your chocolate coating. Finely chop your chosen good quality chocolate (white, dark, or milk). The finer the chop, the more evenly and quickly it will melt. Place about two-thirds of the chopped chocolate into a microwave-safe bowl. If you’re using coconut oil or vegetable shortening for a smoother, more fluid dipping consistency (which I highly recommend for ease of coating), add it now. Microwave on 50% power in 30-second intervals, stirring thoroughly after each interval with a rubber spatula. This gentle, gradual approach prevents the chocolate from burning, seizing, or becoming grainy. Once about three-quarters of the chocolate is melted and smooth, with a few small lumps remaining, remove it from the microwave.
- Temper the Chocolate (Optional but Recommended for Shine and Snap): For a truly professional finish on your Pumpkin Cheesecake Truffles, you can temper the chocolate. Add the remaining one-third of the chopped chocolate (known as “seed” chocolate) to the partially melted chocolate. Stir continuously with a rubber spatula until all the chocolate is melted and the mixture is completely smooth and glossy. This technique helps stabilize the chocolate crystals, giving your truffles a beautiful, shiny finish and a satisfying snap when bitten, as well as preventing bloom (those unattractive white streaks that can appear on untempered chocolate as it cools). If you’re not tempering, just ensure all the chocolate is smoothly melted and consistently warm, but not hot. The ideal temperature for dipping is usually around 88-91°F (31-33°C) for dark chocolate, and a bit lower for milk and white chocolate.
- Dip the Truffles: This is where the magic happens! Remove the thoroughly chilled truffles from the refrigerator. Using a dipping tool, a fork, or even a toothpick inserted into the truffle, carefully dip each truffle into the melted chocolate, ensuring it’s completely submerged. Lift the truffle out and gently tap off any excess chocolate against the rim of the bowl. You want a thin, even coating that fully encases the truffle. A thick, heavy layer of chocolate can be overwhelming and detract from the delicate flavors of the pumpkin cheesecake. Working swiftly is key here, as the cold truffle will cause the chocolate to start setting almost immediately.
-
Place on Parchment and Decorate: Carefully place the coated truffle back onto the prepared parchment-lined baking sheet. Work quickly to decorate while the chocolate is still wet and pliable. This is your moment to get creative and personalize your Pumpkin Cheesecake Truffles!
- For a simple yet elegant touch, sprinkle a tiny bit of extra finely crushed graham cracker crumbs or a dash of pumpkin pie spice on top of the wet chocolate. This instantly tells your guests these are indeed Pumpkin Cheesecake Truffles and enhances their visual appeal.
- If you’re using white chocolate for coating, a drizzle of contrasting dark chocolate can look stunning. Melt a small amount of dark chocolate and use a spoon or a piping bag with a tiny hole to create thin, artistic lines or patterns.
- Autumnal sprinkles in colors like orange, brown, and gold, or edible glitter can add a festive, celebratory touch, making them perfect for any fall gathering or holiday spread.
Once decorated, allow the chocolate to set completely. You can let them set at cool room temperature if your kitchen is cool, or place the baking sheet back into the refrigerator for about 15-20 minutes to speed up the setting process and ensure the chocolate is firm and dry to the touch.
Storage and Serving
- Final Set and Storage: Once the chocolate coating is completely firm and dry, indicating it has fully set, carefully transfer the Pumpkin Cheesecake Truffles to an airtight container. These delightful treats need to be stored in the refrigerator due to their cream cheese and pumpkin base. They will keep beautifully, maintaining their freshness and delicious flavor for up to one week, though I highly doubt they’ll last that long once your family and friends discover these irresistible bites! For the absolute best flavor and texture, I always recommend letting them sit at room temperature for about 10-15 minutes before serving. This brief period takes the chill off slightly, which enhances their creamy texture and allows the complex, warm spices and pumpkin flavors to truly sing and come to the forefront.
- Serving Suggestions and Enjoyment: Present your beautiful Pumpkin Cheesecake Truffles on a festive platter, perhaps garnished with a few autumn leaves or small gourds for a charming display. They are absolutely perfect for fall holidays like Thanksgiving, festive Halloween parties, cozy Friendsgiving gatherings, or simply as a comforting and luxurious treat on a crisp autumn evening alongside a warm cup of coffee or tea. The rich, spiced pumpkin cheesecake filling, combined with the subtle crunch of graham cracker bits and the smooth, snappy chocolate coating, creates an irresistible symphony of flavors and textures in every single bite. Each truffle delivers that quintessential pumpkin spice warmth, enveloped in a luxurious cheesecake experience that is both elegant and comforting. They also make wonderful edible gifts for neighbors, teachers, or hosts – a homemade treat truly speaks volumes! Experiment with different chocolate coatings – a dark chocolate coating will provide a more intense, slightly bitter contrast to the sweet pumpkin, while white chocolate lets the pumpkin color peek through a bit more subtly and offers a sweeter profile. No matter how you choose to coat and decorate them, these Pumpkin Cheesecake Truffles are guaranteed to be a hit and a delightful, memorable addition to any seasonal dessert spread. Enjoy the fruits of your labor, these truly are a labor of love that pays off in every delicious mouthful!
Conclusion:
And there you have it, my dear friends! We’ve reached the sweet end of our journey, and I genuinely hope you’re as excited about these delightful treats as I am. This recipe for Pumpkin Cheesecake Truffles isn’t just another dessert; it’s an experience, a little bite of autumn magic that will undoubtedly steal the show at any gathering or make a quiet evening at home feel extra special. I truly believe it’s a must-try for anyone who loves the comforting flavors of fall combined with the creamy decadence of cheesecake. What makes these truffles so irresistible, you ask? Well, it’s that perfect harmony of spiced pumpkin puree, rich cream cheese, and a hint of warming spices, all enveloped in a luscious chocolate shell. They strike an ideal balance – not too sweet, wonderfully creamy, and surprisingly easy to whip up, even for novice bakers. The texture is simply divine: a smooth, melt-in-your-mouth interior with a satisfying snap from the chocolate coating. Trust me, once you make these, you’ll wonder how you ever got through autumn without them. They’re impressive without being overly complicated, making you look like a culinary genius with minimal effort. It’s the kind of recipe that brings joy to both the maker and the eater, a true testament to the simple pleasures of homemade sweets.
Now, let’s talk about making these beauties truly your own! While the classic rendition is absolutely perfect, there are so many ways to customize your Pumpkin Cheesecake Truffles to suit your taste or occasion. For serving, I love arranging them on a beautiful platter alongside a piping hot mug of spiced apple cider or a robust cup of coffee; the slight bitterness of the coffee beautifully complements their sweetness. They also make fantastic edible gifts, packaged in small boxes with a pretty ribbon – your friends and family will adore them! Consider serving them as part of a dessert buffet, where their vibrant color and unique shape will stand out among cakes and cookies. They’re also perfect as a delightful after-dinner mint alternative, a sophisticated little treat to end a meal. If you’re feeling adventurous, why not experiment with different coatings? A white chocolate shell with a dusting of cinnamon sugar offers a lighter aesthetic and a softer sweetness, while a dark chocolate coating provides a rich, intense contrast that chocoholics will adore. You could even roll some in crushed graham cracker crumbs for an extra cheesecake crust texture, or finely chopped pecans for a nutty crunch. For a festive touch, try drizzling them with contrasting colored chocolate or sprinkling them with edible glitter or autumn-themed sprinkles before the chocolate sets. Want to amp up the spice? Add a pinch more ground ginger or a dash of allspice to the filling. You could even introduce a tiny drop of maple extract for an extra layer of seasonal flavor. The beauty of these truffles is their versatility; don’t be afraid to get creative and make them uniquely yours. Imagine them with a small, candied pecan tucked into the center before rolling – a delightful surprise with every bite!
So, what are you waiting for? I wholeheartedly encourage you to roll up your sleeves, gather your ingredients, and give these incredible Pumpkin Cheesecake Truffles a try. I promise you won’t regret it! There’s an immense satisfaction that comes from creating something so delicious from scratch, and these truffles offer that joy in spades. Whether you’re making them for a holiday celebration, a cozy family evening, or just because you deserve a treat, they are sure to bring smiles. And once you’ve experienced the magic, I would absolutely love to hear all about it! Did you try any variations? What was your favorite coating? How did your friends and family react? Please share your triumphs, your photos, and your invaluable feedback in the comments below. Your experiences not only inspire me but also help other home cooks in our community. Let’s create a delicious ripple effect, spreading the joy of homemade desserts far and wide. Happy baking, everyone, and get ready to fall in love with your new favorite autumn indulgence!
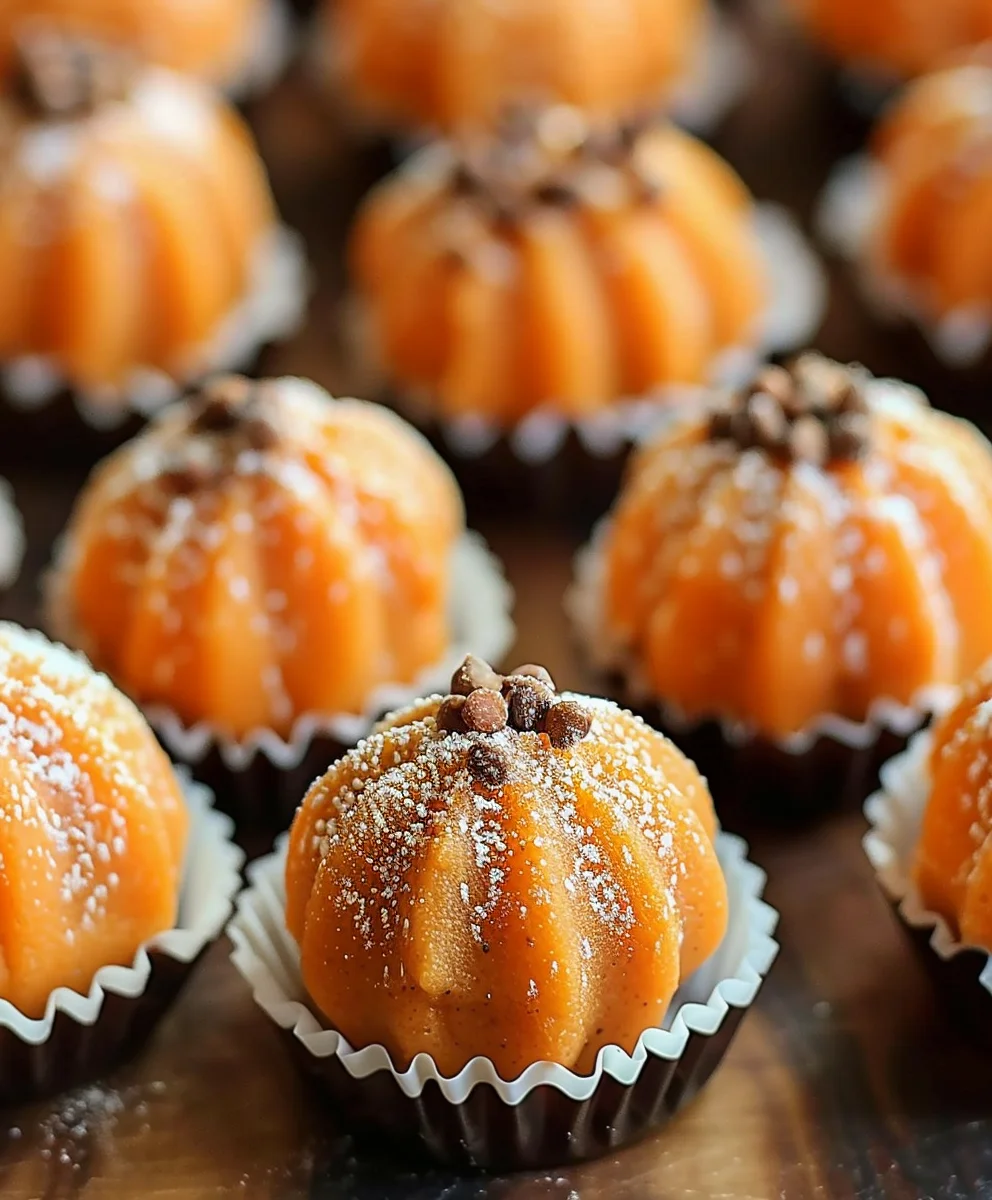
No-Bake Pumpkin Cheesecake Truffles
These delightful no-bake Pumpkin Cheesecake Truffles capture autumn’s warmth and spice in a bite-sized treat. Velvety smooth cheesecake infused with pumpkin and pumpkin pie spice, all enrobed in a delicate white chocolate shell.
Ingredients
-
1 tbsp butter, melted
-
4 oz cream cheese, softened
-
1/2 cup pumpkin puree
-
1 (14 oz) can sweetened condensed milk
-
1 1/2 tsp pumpkin pie spice
-
1/2 cup graham cracker crumbs
-
1/3 cup white chocolate chips
-
Optional: orange food coloring
-
Optional: granulated sugar for rolling
Instructions
-
Step 1
Combine 1/2 cup graham cracker crumbs and 1 tbsp melted butter in a bowl. Mix until uniformly moistened and set aside. -
Step 2
In a separate bowl, beat 4 oz softened cream cheese until smooth and fluffy. Add 1/2 cup pumpkin puree, 1 (14 oz) can sweetened condensed milk, and 1 1/2 tsp pumpkin pie spice. Beat until well combined and creamy. Optionally, mix in a few drops of orange food coloring for enhanced color. -
Step 3
Gently fold the prepared graham cracker base into the pumpkin cheesecake filling until evenly distributed. Cover the bowl tightly with plastic wrap and refrigerate for a minimum of 4 hours, or preferably overnight, until the mixture is very firm. -
Step 4
Line a large baking sheet with parchment paper. Scoop out portions of the thoroughly chilled mixture (about 1 tablespoon each) and roll gently between your palms to form smooth, 1-inch balls. Place them on the prepared baking sheet. Refrigerate the rolled truffles for another 30-60 minutes to ensure they are very cold and firm. -
Step 5
While truffles undergo their second chill, gently melt 1/3 cup white chocolate chips in a microwave-safe bowl (use 50% power, stirring every 30 seconds) until completely smooth. Dip each thoroughly chilled truffle into the melted chocolate, ensuring it’s fully coated. Lift and gently tap off any excess chocolate. -
Step 6
Place coated truffles back on the parchment-lined baking sheet. While the chocolate is still wet, sprinkle with optional granulated sugar or additional graham cracker crumbs for decoration. Refrigerate for 15-20 minutes until the chocolate coating is completely firm and dry. -
Step 7
Once fully set, carefully transfer the truffles to an airtight container and store in the refrigerator for up to one week. For the best flavor and creamy texture, allow truffles to sit at room temperature for 10-15 minutes before serving.
Important Information
Nutrition Facts (Per Serving)
It is important to consider this information as approximate and not to use it as definitive health advice.
Allergy Information
Please check ingredients for potential allergens and consult a health professional if in doubt.