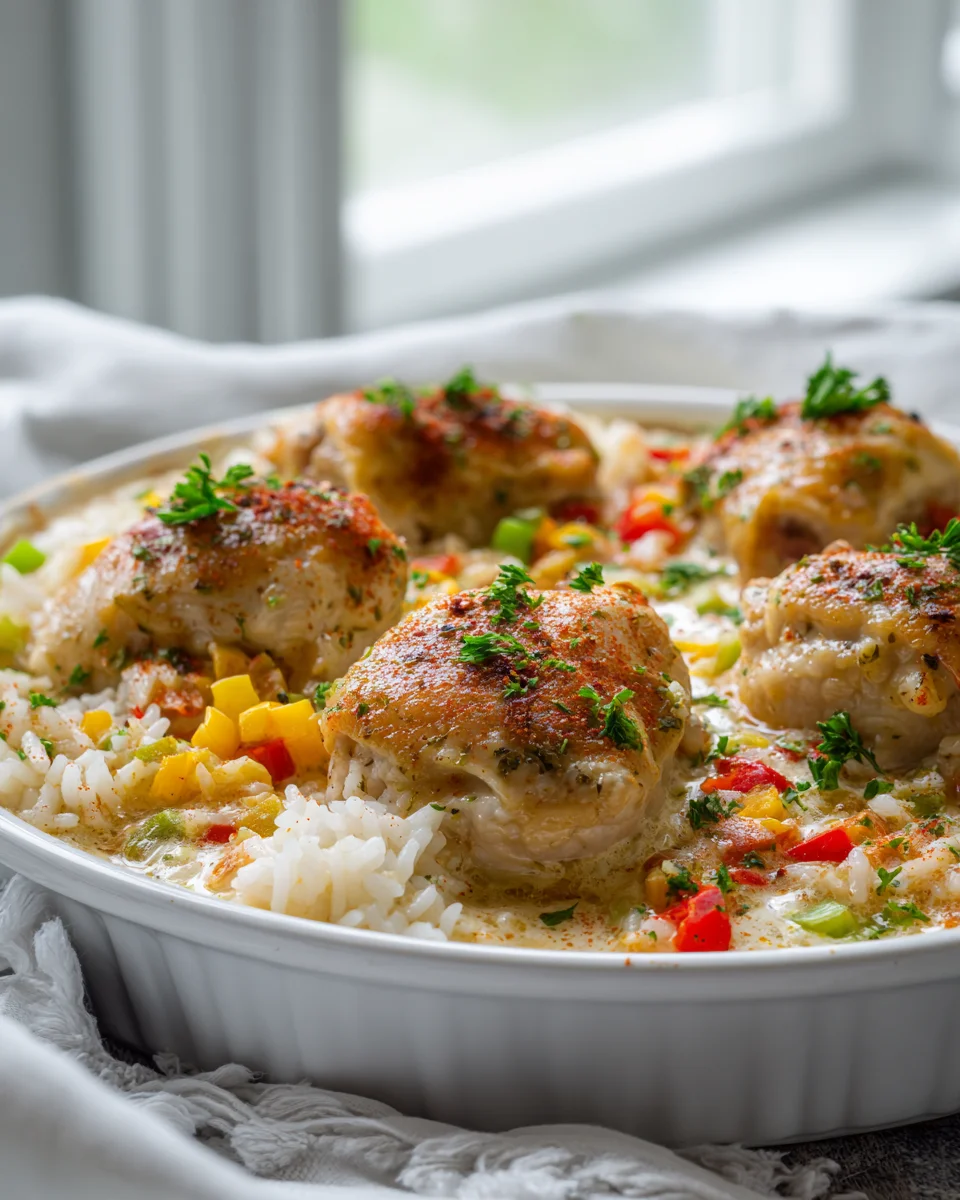
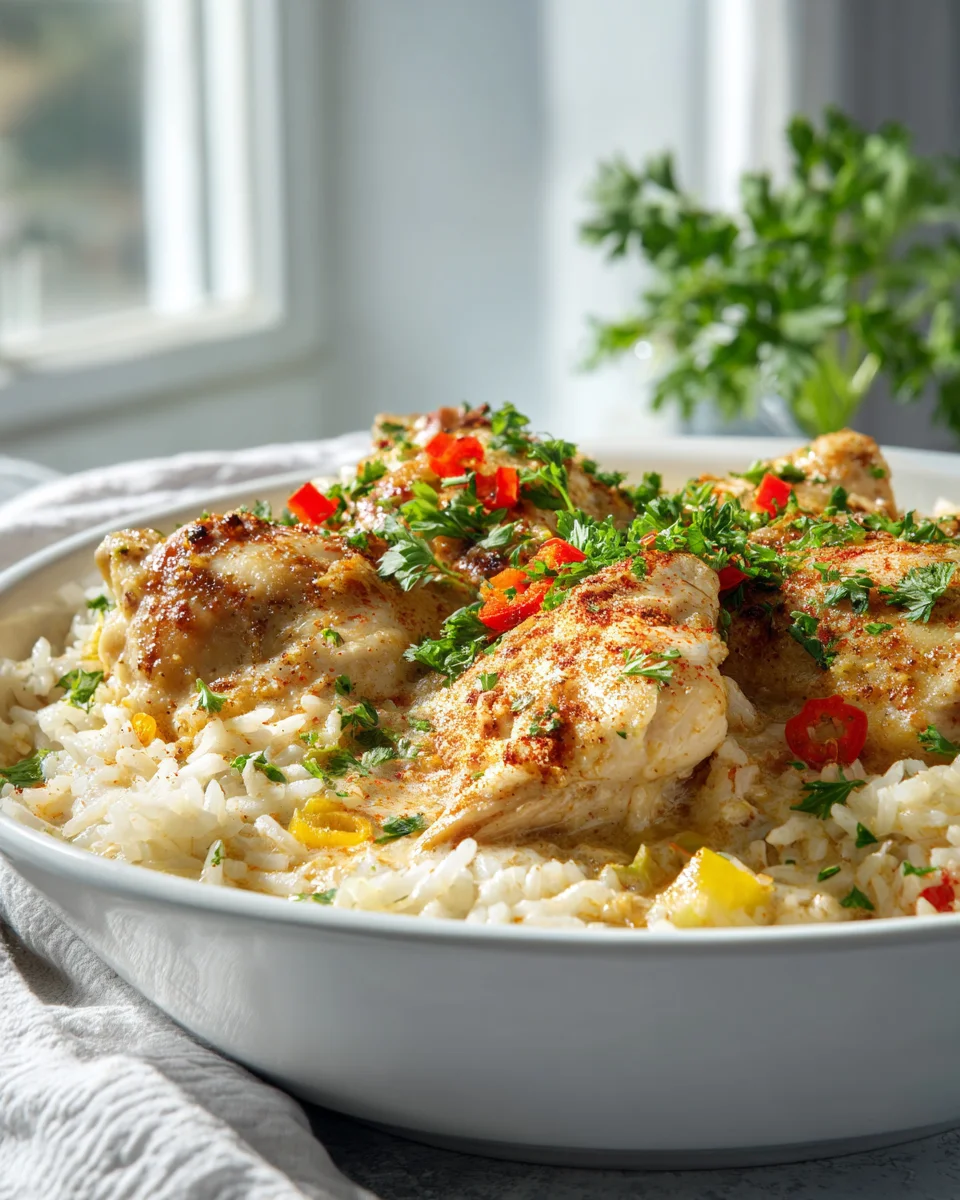
One Pot Angel Chicken And Rice Bake
Oh, I am absolutely thrilled to introduce you to one of my all-time favorite weeknight wonders: One Pot Angel Chicken And Rice Bake! When those busy evenings roll around and you’re craving something incredibly comforting, utterly delicious, and blessedly simple, this is the recipe you’ll turn to again and again. It truly lives up to its “angel” name, making dinner feel like a heavenly experience without any of the fuss.
What makes this dish so special, you ask? Well, for starters, the clue is right there in the title: it’s all made in one pot! That means minimal cleanup, which, let’s be honest, is a weeknight miracle in itself. Beyond the incredible convenience, the magic truly happens in the flavor and texture. We’re talking unbelievably tender, juicy chicken and perfectly cooked, creamy rice, all bathed in a rich, savory sauce that infuses every single bite with pure comfort. It’s hearty, it’s wholesome, and it feels like a warm hug in a bowl.
You are going to absolutely love this recipe because it’s the ultimate hassle-free meal that doesn’t compromise on taste. It’s fantastic for feeding a hungry family, perfect for impressing guests without breaking a sweat, or simply treating yourself to a deeply satisfying dinner. Imagine succulent pieces of chicken and fluffy rice baking together in a dreamy, flavorful sauce until everything is tender, golden, and absolutely irresistible. This One Pot Angel Chicken And Rice Bake is a complete meal in one pan, designed to make your life easier and your taste buds sing!
Ingredient Notes
Oh, I absolutely adore this One Pot Angel Chicken And Rice Bake because it delivers such incredible flavor with minimal fuss! The magic really comes down to a few key ingredients that transform simple chicken and rice into a creamy, savory dream. Let me walk you through what you’ll need and some handy substitutions I’ve tried.
- Boneless, Skinless Chicken Breasts: These are my go-to for this recipe because they cook relatively quickly and stay tender. I usually cut them into 1-inch pieces, but you could also leave them as whole cutlets for a more dramatic presentation, just be sure to adjust baking time slightly to ensure they’re cooked through. If you prefer, boneless, skinless chicken thighs are a fantastic alternative; they tend to stay even juicier and add a richer flavor.
- Long-Grain White Rice: This is the foundation of our bake, soaking up all those delicious flavors. Jasmine or Basmati rice work beautifully here too, lending their subtle aromatic notes. I don’t recommend instant rice as the liquid ratio and cooking time will be very different. If you wanted to use brown rice, you’d need to increase the liquid significantly and extend the baking time, likely by 20-30 minutes, so it’s something to experiment with if you’re comfortable.
- Cream of Chicken Soup: This is one of the pillars of the “angel” sauce, providing a rich, creamy base. If you’re not a fan, cream of mushroom or cream of celery soup are excellent substitutes that will still give you that velvety texture and umami depth. You could even use a “healthy request” version if you’re watching sodium.
- Cream Cheese: Ah, the other half of the angel sauce magic! When it melts, it creates this incredible tang and adds to the luxurious creaminess that makes this dish so comforting. I always use full-fat block cream cheese for the best results, ensuring it’s softened to room temperature for easier mixing. Neufchâtel cheese is a great lighter alternative if you want to reduce some fat without sacrificing too much on texture.
- Italian Dressing Mix Packet: This little packet is a powerhouse of flavor! It contains a blend of herbs, spices, and sometimes a hint of garlic and onion that perfectly seasons the entire dish. If you don’t have a packet on hand, you can make your own blend using 1 tablespoon dried oregano, 1 tablespoon dried basil, 1 teaspoon garlic powder, 1 teaspoon onion powder, ½ teaspoon dried thyme, and ½ teaspoon salt. Just mix it all together!
- Chicken Broth: This provides the necessary liquid for the rice to cook in and infuses it with even more chicken flavor. Low-sodium chicken broth is my preference, as the soup and dressing mix already contain some salt, allowing me to adjust seasonings precisely. Vegetable broth is a perfectly acceptable substitute if that’s what you have available.
- Olive Oil: Just a touch for searing the chicken, which isn’t strictly necessary for a one-pot bake, but I find it adds a nice layer of flavor and helps brown the chicken slightly before everything goes into the oven. Any neutral cooking oil like canola or avocado oil would work just as well.
- Fresh Parsley (for garnish): Totally optional, but I love how a sprinkle of fresh chopped parsley brightens up the dish both visually and with a hint of fresh flavor right before serving.
You’ll find this combination creates a deeply satisfying, creamy, and flavorful meal that truly lives up to its “angel” name. It’s hearty, comforting, and perfect for a family dinner.
Step-by-Step Instructions
Preparing this One Pot Angel Chicken And Rice Bake is wonderfully straightforward, which is why I love it so much for busy weeknights! The beauty of a one-pot dish is truly in its simplicity. Here’s how I get it done:
- Preheat and Prep: First things first, I preheat my oven to 375°F (190°C). While the oven is warming up, I grab my trusty oven-safe Dutch oven or a large, heavy-bottomed pot with a lid. This is where all the magic will happen! I like to ensure my chicken breasts are cut into even 1-inch pieces, which helps them cook consistently.
- Sear the Chicken (Optional but Recommended): I start by adding a tablespoon of olive oil to my pot and placing it over medium-high heat on the stovetop. Once the oil shimmers, I add the chicken pieces and sear them for about 3-4 minutes, just until they’re lightly browned on the outside. They don’t need to be cooked through at this stage; we’re just building a little extra flavor. After searing, I remove the chicken from the pot and set it aside for a moment. This step creates some delicious fond (those browned bits at the bottom of the pot) which adds incredible depth to the final dish.
- Combine Rice and Liquid: Now, without cleaning the pot (those flavor bits are gold!), I add the uncooked long-grain white rice directly into the pot. I then pour in the chicken broth, stirring to scrape up any browned bits from the bottom of the pot. This is an important step to prevent rice from sticking and to incorporate all that lovely flavor. I give it a good stir to ensure the rice is evenly distributed at the bottom.
- Layer in the Creaminess: Next, I evenly dollop the softened cream cheese over the rice layer. It doesn’t need to be perfectly spread, as it will melt and incorporate during baking. Then, I pour in the cream of chicken soup right over the cream cheese. Finally, I sprinkle the entire packet of Italian dressing mix evenly over the top of the soup and cream cheese. Don’t stir it yet! Keeping these layers distinct initially helps them melt and meld into that perfect “angel” sauce.
- Return Chicken and Bake: Gently, I place the seared chicken pieces back into the pot, nestling them among the creamy layers. Again, I resist the urge to stir everything together at this point. I put the lid securely on my pot and transfer it to the preheated oven. I let it bake for 30 minutes.
- The Final Stir and Rest: After 30 minutes, I carefully remove the pot from the oven. The rice should be mostly cooked, and the creamy components will be softened and bubbly. Now, it’s time to stir! I gently stir everything together until the cream cheese and soup are fully incorporated, creating that luscious, uniform “angel” sauce that coats every grain of rice and piece of chicken. If the sauce seems a little thick for your liking, you can add a splash more hot chicken broth (1/4 cup at a time) and stir until desired consistency is reached. I then replace the lid and let the dish rest for another 5-10 minutes off the heat. This resting period allows the rice to absorb any remaining liquid and for the flavors to fully meld, resulting in a perfectly tender and creamy bake.
- Serve and Enjoy: I usually garnish with a sprinkle of fresh chopped parsley before serving. That’s it! A deliciously creamy, savory, and incredibly easy one-pot meal ready to be enjoyed.
Tips & Suggestions
Over the years of making this One Pot Angel Chicken And Rice Bake, I’ve picked up a few tricks and variations that really elevate the dish. Here are my go-to tips to ensure your bake is absolutely perfect every time:
- Don’t Peek Too Much: I know it’s tempting to lift the lid and check on the rice, but try to resist! Every time you open the lid, heat and steam escape, which prolongs the cooking time for the rice and can affect its texture. Let it bake undisturbed for the initial 30 minutes for best results.
- Soften Your Cream Cheese: This is a small step that makes a huge difference. I always make sure my cream cheese is at room temperature before adding it to the pot. It melts and incorporates much more smoothly into the sauce, preventing any lumps and ensuring that wonderfully creamy texture we’re aiming for.
- Adjust Liquid for Rice: The type of rice can sometimes require slight adjustments in liquid. If after the resting period, your rice seems a little too firm, you can stir in another 1/4 to 1/2 cup of hot chicken broth, cover, and let it sit for an additional 5-10 minutes. Conversely, if it seems too wet, leaving the lid off for the last few minutes of resting can help some moisture evaporate.
- Prevent Dry Chicken: Cutting the chicken into smaller, uniform pieces helps it cook evenly and prevents it from drying out while the rice finishes. If you prefer to use whole chicken breasts, you might want to slightly reduce the initial searing time and ensure your oven temperature is accurate to prevent overcooking. The creamy sauce also goes a long way in keeping the chicken moist.
- Spice it Up (or Down): The Italian dressing mix provides a great baseline, but feel free to personalize! I sometimes add a pinch of red pepper flakes for a subtle kick, or a dash of garlic powder if I’m craving extra garlic flavor. A sprinkle of dried dill also works wonderfully with the creamy sauce and chicken.
- Add Veggies: This dish is super versatile for adding vegetables. I often stir in a cup of frozen peas or corn during the final stirring step, allowing them to warm through with the residual heat. You could also sauté some diced carrots or bell peppers with the chicken in the beginning for added nutrients and color. Fresh spinach wilts beautifully if stirred in at the very end.
- Cheese Topping: For an extra layer of deliciousness, I sometimes sprinkle about ½ cup of shredded mozzarella or a cheddar-jack blend over the top after the initial 30-minute bake, then cover and let it melt during the resting period. It adds a lovely cheesy crust!
- Serving Suggestions: This bake is a complete meal on its own, but it pairs beautifully with a simple side salad dressed with a light vinaigrette to cut through the richness. A slice of crusty bread is also perfect for soaking up any extra creamy sauce.
Storage
One of the best things about this One Pot Angel Chicken And Rice Bake is that it makes fantastic leftovers! It’s such a comforting meal to have on hand for quick lunches or dinners. Here’s how I typically store and reheat it:
- Refrigeration: Once the dish has cooled completely (which is important for food safety, don’t let it sit out at room temperature for more than two hours), I transfer any leftovers into an airtight container. This will keep beautifully in the refrigerator for up to 3-4 days. The flavors actually tend to deepen a bit overnight, making it even more delicious on day two!
- Freezing: This dish freezes remarkably well. After it has cooled completely, I portion it into individual freezer-safe containers or heavy-duty freezer bags. Be sure to remove as much air as possible from the bags to prevent freezer burn. It can be stored in the freezer for up to 2-3 months. When I’m ready to enjoy it, I usually let it thaw in the refrigerator overnight before reheating.
- Reheating from Refrigerator:
- Microwave: This is my go-to method for quick reheating. I place a single serving in a microwave-safe dish, add a splash of chicken broth or water (about 1-2 tablespoons) to help keep the rice moist, cover it loosely, and microwave on high for 2-3 minutes, stirring halfway through, until heated through.
- Stovetop: For a larger portion or if I prefer not to use the microwave, I transfer the leftovers to a pot or skillet over medium-low heat. Again, I add a splash of chicken broth or water to prevent drying and sticking, cover, and stir occasionally until it’s heated through, about 5-8 minutes.
- Oven: If I’m reheating a larger batch, I’ll place it in an oven-safe dish, add a bit of broth, cover it with foil, and bake at 300°F (150°C) for about 20-25 minutes, or until warmed through.
- Reheating from Frozen:
- Microwave: If reheating directly from frozen, this will take longer. I’d microwave it on 50% power for 5-7 minutes, then stir, add a splash of liquid, and continue on high power until heated through, stirring occasionally.
- Oven: For frozen portions, transfer to an oven-safe dish, add a bit of liquid, cover with foil, and bake at 325°F (160°C) for 30-45 minutes, or until hot in the center.
- Important Note: Always ensure the chicken and rice are heated to an internal temperature of 165°F (74°C) for food safety, especially when reheating. The creamy sauce can sometimes make it seem warm when the center isn’t quite there yet, so a quick check with a food thermometer is always a good idea.
Final Thoughts
And there you have it! My hope is that you’re now ready to experience the magic of this incredible dish. I truly believe that the One Pot Angel Chicken And Rice Bake is more than just a meal; it’s a weeknight hero, a comforting hug in a bowl, and a testament to how utterly delicious simple cooking can be. The ease of a single pot combined with the tender, flavorful chicken and perfectly cooked, creamy rice makes for an unbeatable combination.
From busy weeknights to relaxed family dinners, this recipe delivers maximum flavor with minimal fuss. It’s a dish that promises satisfied smiles and clean plates every time you serve it. So go ahead, give the One Pot Angel Chicken And Rice Bake a try – I promise you won’t be disappointed!

One Pot Angel Chicken & Rice Bake: Quick & Easy Dinner!
- Total Time: 45 minutes
- Yield: 4 servings
Description
This One Pot Angel Chicken And Rice Bake is the ultimate hassle-free meal that combines tender chicken and creamy rice in a rich, savory sauce. Perfect for busy weeknights, it delivers incredible flavor with minimal fuss.
Ingredients
- Boneless, Skinless Chicken Breasts
- Long-Grain White Rice
- Cream of Chicken Soup
- Cream Cheese
- Italian Dressing Mix Packet
- Chicken Broth
- Olive Oil
- Fresh Parsley (for garnish)
Instructions
- Preheat the oven to 375°F (190°C) and prepare a large, heavy-bottomed pot with a lid.
- Add a tablespoon of olive oil to the pot over medium-high heat. Once shimmering, add the chicken pieces and sear for about 3-4 minutes until lightly browned. Remove the chicken and set aside.
- Add uncooked long-grain white rice to the pot and pour in the chicken broth, stirring to scrape up any browned bits from the bottom.
- Dollop softened cream cheese over the rice, then pour in the cream of chicken soup, and sprinkle the Italian dressing mix over the top without stirring.
- Return the seared chicken pieces to the pot, nestling them among the creamy layers. Cover the pot and transfer it to the preheated oven. Bake for 30 minutes.
- After 30 minutes, remove the pot from the oven and stir everything together until the cream cheese and soup are fully incorporated. If the sauce is too thick, add a splash more hot chicken broth and stir until desired consistency is reached. Let it rest for another 5-10 minutes off the heat.
- Garnish with fresh chopped parsley before serving.
- Prep Time: 15 mins
- Cook Time: 30 mins
- Category: Dinner
- Method: Baking
- Cuisine: American
Nutrition
- Serving Size: 1 bowl
- Calories: 450
- Sugar: 2 g
- Sodium: 800 mg
- Fat: 20 g
- Saturated Fat: 10 g
- Unsaturated Fat: 8 g
- Trans Fat: 0 g
- Carbohydrates: 45 g
- Fiber: 2 g
- Protein: 30 g
- Cholesterol: 90 mg
Keywords: Ensure cream cheese is softened for easier mixing. Adjust liquid based on rice type, and consider adding vegetables or cheese for extra flavor.