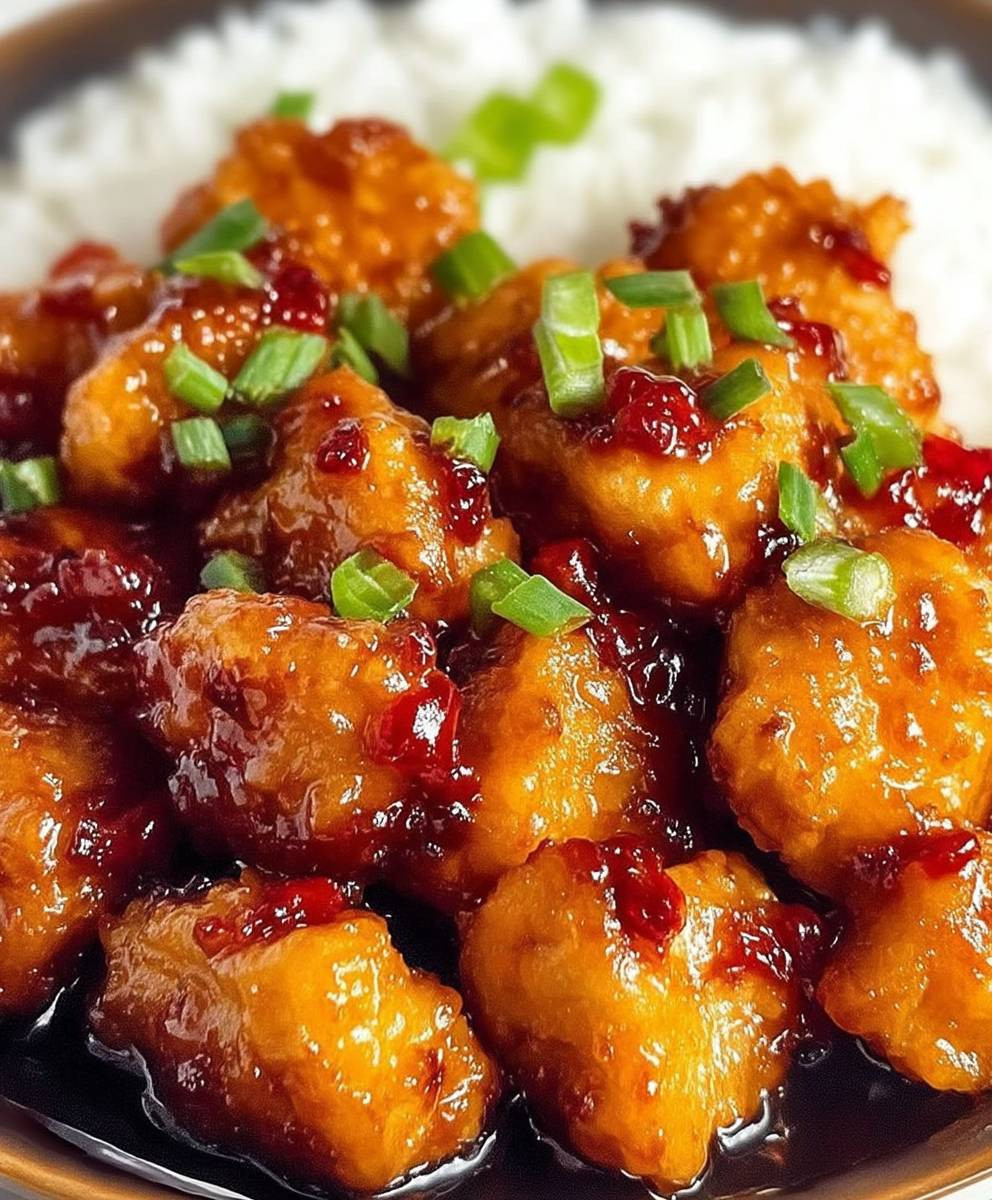
Orange Chicken Panda Express is a dish that needs no introduction. Imagine biting into crispy, golden-brown chicken pieces, each one glazed in a tangy, sweet, and slightly spicy orange sauce. It’s an explosion of flavor that dances on your taste buds, leaving you craving more. Have you ever wondered how to recreate this iconic American-Chinese takeout favorite in your own kitchen?
While “orange chicken” isn’t a traditional dish found in mainland China, it’s a brilliant adaptation that caters to the American palate. Its roots can be traced back to the broader category of sweet and sour Chinese cuisine, but the specific orange flavor profile has made it a uniquely beloved dish in the United States. Panda Express, of course, has played a significant role in popularizing this dish, making it a staple in food courts and takeout menus across the country.
People adore Orange Chicken Panda Express for its perfect balance of textures and tastes. The crispy chicken provides a satisfying crunch, while the sticky, flavorful sauce offers a delightful combination of sweetness, acidity, and a hint of spice. It’s also incredibly convenient – a quick and easy meal that can be enjoyed on its own or paired with rice and vegetables. In this recipe, I’ll guide you through each step, ensuring that you can achieve that authentic Panda Express taste right at home. Get ready to impress your family and friends with your newfound culinary skills!

Ingredients:
- For the Chicken:
- 2 lbs boneless, skinless chicken thighs, cut into 1-inch cubes
- 1 cup cornstarch
- 1/2 cup all-purpose flour
- 1 teaspoon salt
- 1/2 teaspoon black pepper
- 1 large egg, beaten
- 1/4 cup water
- Vegetable oil, for frying (about 4-6 cups)
- For the Orange Sauce:
- 1 cup orange juice, freshly squeezed is best!
- 1/2 cup rice vinegar
- 1/2 cup granulated sugar
- 1/4 cup soy sauce (low sodium preferred)
- 2 tablespoons orange zest
- 1 tablespoon cornstarch
- 1 tablespoon water
- 1 tablespoon sesame oil
- 1 tablespoon grated fresh ginger
- 2 cloves garlic, minced
- 1/4 teaspoon red pepper flakes (optional, for heat)
- For Serving:
- Cooked white rice, brown rice, or quinoa
- Sesame seeds, for garnish
- Chopped green onions, for garnish
Preparing the Chicken:
- Prepare the Chicken Cubes: Start by cutting your chicken thighs into uniform 1-inch cubes. This ensures even cooking. Pat the chicken dry with paper towels. This is crucial for getting a crispy coating. Excess moisture will steam the chicken instead of frying it.
- Make the Breading Mixture: In a large bowl, whisk together the cornstarch, all-purpose flour, salt, and pepper. This dry mixture will create the base for our crispy coating. Make sure there are no lumps in the cornstarch.
- Create the Egg Wash: In a separate bowl, whisk together the beaten egg and water. This will help the dry mixture adhere to the chicken. The water thins the egg slightly, making it easier to coat the chicken evenly.
- First Dip: Dredge each chicken cube in the dry cornstarch mixture, ensuring it’s fully coated. Shake off any excess. This first layer helps the egg wash stick better.
- Second Dip: Dip the coated chicken into the egg wash, making sure it’s completely submerged. Let any excess egg drip off.
- Final Coat: Return the chicken to the dry cornstarch mixture and coat it thoroughly again, pressing the mixture onto the chicken to ensure a good coating. This double coating is what gives the chicken that extra crispy texture.
- Rest (Optional but Recommended): Place the breaded chicken on a wire rack for about 15-20 minutes. This allows the coating to set and adhere better during frying, resulting in a crispier final product.
Frying the Chicken:
- Heat the Oil: Pour vegetable oil into a large, deep pot or Dutch oven until it’s about 2-3 inches deep. Heat the oil over medium-high heat to 350-375°F (175-190°C). Use a deep-fry thermometer to monitor the temperature. Maintaining the correct temperature is essential for crispy, evenly cooked chicken. If the oil is too cool, the chicken will absorb too much oil and become soggy. If it’s too hot, the outside will burn before the inside is cooked.
- Fry in Batches: Carefully add the chicken to the hot oil in batches, being careful not to overcrowd the pot. Overcrowding will lower the oil temperature and result in soggy chicken. Fry for about 3-4 minutes per batch, or until the chicken is golden brown and cooked through. The internal temperature of the chicken should reach 165°F (74°C).
- Remove and Drain: Use a slotted spoon or spider to remove the fried chicken from the oil and place it on a wire rack lined with paper towels to drain excess oil. This helps maintain the crispiness.
- Repeat: Repeat the frying process with the remaining chicken, ensuring the oil temperature remains consistent.
Making the Orange Sauce:
- Combine Wet Ingredients: In a medium saucepan, whisk together the orange juice, rice vinegar, sugar, and soy sauce.
- Add Aromatics: Add the orange zest, sesame oil, grated ginger, minced garlic, and red pepper flakes (if using) to the saucepan.
- Cornstarch Slurry: In a small bowl, whisk together the cornstarch and water to create a slurry. This will help thicken the sauce. Make sure there are no lumps in the slurry.
- Simmer the Sauce: Bring the orange juice mixture to a simmer over medium heat.
- Thicken the Sauce: Slowly pour the cornstarch slurry into the simmering sauce, whisking constantly to prevent lumps from forming.
- Cook Until Thickened: Continue to simmer and whisk the sauce for about 2-3 minutes, or until it has thickened to your desired consistency. It should be thick enough to coat the back of a spoon.
- Taste and Adjust: Taste the sauce and adjust the seasoning as needed. If it’s too sweet, add a splash of rice vinegar. If it’s not sweet enough, add a little more sugar. If you want more heat, add a pinch more red pepper flakes.
Combining and Serving:
- Combine Chicken and Sauce: Add the fried chicken to the saucepan with the orange sauce. Toss to coat the chicken evenly. Make sure every piece is nicely covered in that delicious sauce!
- Heat Through: Heat the chicken and sauce together for another minute or two, allowing the flavors to meld.
- Serve Immediately: Serve the orange chicken immediately over cooked white rice, brown rice, or quinoa.
- Garnish: Garnish with sesame seeds and chopped green onions for added flavor and visual appeal.
Tips for the Best Orange Chicken:
- Use Fresh Orange Juice: Freshly squeezed orange juice makes a huge difference in the flavor of the sauce. It’s brighter and more vibrant than store-bought juice.
- Don’t Overcrowd the Pan: When frying the chicken, make sure not to overcrowd the pan. This will lower the oil temperature and result in soggy chicken. Fry in batches for best results.
- Adjust the Sweetness and Spice: The sweetness and spice level of the orange sauce can be adjusted to your liking. Add more sugar for a sweeter sauce, or more red pepper flakes for a spicier sauce.
- Keep it Crispy: To keep the chicken crispy, serve it immediately after tossing it with the sauce. If you’re not serving it right away, store the chicken and sauce separately and combine them just before serving.
- Double Fry for Extra Crispiness: For even crispier chicken, you can double fry it. Fry the chicken once at a lower temperature (325°F) for about 5 minutes, then remove it and let it cool slightly. Then, fry it again at a higher temperature (375°F) for another 2-3 minutes, or until golden brown and crispy.
Conclusion:
And there you have it! This isn’t just another recipe; it’s your passport to recreating that iconic Orange Chicken Panda Express experience right in your own kitchen. I know, I know, sometimes homemade versions can fall flat, but trust me on this one. The perfect balance of tangy citrus, savory soy sauce, and just a hint of sweetness makes this dish utterly irresistible. It’s a symphony of flavors that will have your taste buds singing!
But why is this recipe a must-try? Beyond the incredible taste, it’s about control. You get to choose the quality of your ingredients, ensuring a healthier and potentially even more delicious outcome than the takeout version. Plus, there’s a certain satisfaction that comes from mastering a dish you love. Imagine the look on your family’s faces when you announce that tonight, you’re serving up homemade Orange Chicken Panda Express!
Now, let’s talk serving suggestions and variations. While this Orange Chicken is fantastic served simply over steamed rice (Jasmine rice is my personal favorite!), don’t be afraid to get creative.
Serving Suggestions:
* Classic Combo: Serve it with a side of steamed broccoli or green beans for a complete and balanced meal.
* Noodle Bowl: Toss the Orange Chicken with lo mein noodles or chow mein for a heartier dish.
* Lettuce Wraps: For a lighter option, serve the chicken in crisp lettuce cups with shredded carrots and a drizzle of sriracha mayo.
* Fried Rice Upgrade: Add diced Orange Chicken to your favorite fried rice recipe for an extra burst of flavor.
Variations to Explore:
* Spice It Up: Add a pinch of red pepper flakes or a dash of chili oil to the sauce for a spicier kick.
* Pineapple Power: Incorporate chunks of pineapple into the sauce for a tropical twist.
* Sesame Seeds: Garnish with toasted sesame seeds for added texture and nutty flavor.
* Vegetarian Option: Substitute the chicken with tofu or cauliflower florets for a vegetarian-friendly version. Just be sure to adjust the cooking time accordingly.
I truly believe this recipe will become a staple in your household. It’s quick, easy, and delivers that craveable Orange Chicken flavor we all know and love. It’s perfect for busy weeknights, impromptu gatherings, or simply when you’re in the mood for something comforting and delicious.
So, what are you waiting for? Gather your ingredients, put on your apron, and get cooking! I’m confident you’ll be amazed at how easy it is to recreate this restaurant favorite at home.
But the real fun begins after you’ve tried it. I’m dying to know what you think! Did you make any modifications? What did your family say? Did you find that this Orange Chicken Panda Express recipe hit the spot?
Please, please, please share your experience in the comments below. I love hearing from you all and learning about your culinary adventures. Your feedback helps me improve my recipes and inspires others to give them a try. Don’t be shy – let me know what you loved, what you changed, and any tips you have for making this recipe even better. Happy cooking, and I can’t wait to hear from you!
Orange Chicken Panda Express: A Delicious & Easy Recipe
Crispy, golden-brown chicken coated in a tangy, sweet, and savory homemade orange sauce. Better than takeout and easy to make at home!
Ingredients
Instructions
Recipe Notes
- Use fresh orange juice for the best flavor.
- Don’t overcrowd the pan when frying the chicken.
- Adjust the sweetness and spice level of the orange sauce to your liking.
- Serve immediately after tossing with the sauce to keep the chicken crispy.
- For extra crispy chicken, double fry it. Fry the chicken once at a lower temperature (325°F) for about 5 minutes, then remove it and let it cool slightly. Then, fry it again at a higher temperature (375°F) for another 2-3 minutes, or until golden brown and crispy.