Oreo Poke Cake: Prepare to be amazed by the easiest, most decadent dessert you’ll ever make! Imagine a moist, tender cake, riddled with pockets of creamy, Oreo-infused goodness, topped with a cloud of whipped cream and even more crushed Oreos. Sounds heavenly, right? This isn’t just a cake; it’s an experience, a symphony of textures and flavors that will have everyone begging for seconds.
While the exact origins of poke cakes are debated, they gained immense popularity in the 1970s, becoming a staple at potlucks and family gatherings. The beauty of a poke cake lies in its simplicity and adaptability. It’s a blank canvas for your culinary creativity, and the Oreo Poke Cake variation is a modern twist on a classic favorite.
People adore this dish for several reasons. First, it’s incredibly easy to make, even for novice bakers. Second, the combination of moist cake, creamy filling, and crunchy Oreo cookies is simply irresistible. The texture contrast is delightful, and the flavor is a perfect balance of sweet and chocolatey. Finally, it’s a crowd-pleaser! Whether you’re hosting a birthday party, a holiday gathering, or simply craving a sweet treat, this Oreo Poke Cake is guaranteed to be a hit. So, grab your ingredients, and let’s get baking!

Ingredients:
- 1 box (15.25 oz) chocolate cake mix (plus ingredients called for on the box, usually eggs, oil, and water)
- 1 (14 oz) can sweetened condensed milk
- 1 (12 oz) jar hot fudge topping
- 1 (8 oz) container frozen whipped topping, thawed
- 1 package (14.3 oz) Oreo cookies, divided
- 1 cup milk
Baking the Cake
Okay, let’s get started! First things first, we need to bake our chocolate cake. This is the foundation of our delicious Oreo Poke Cake, so let’s make sure it’s perfect. Don’t worry, it’s super easy!
- Prepare the Cake Batter: Follow the instructions on the back of your chocolate cake mix box. Usually, this involves combining the cake mix with eggs, oil, and water. Make sure to mix everything thoroughly until you have a smooth batter. I like to use an electric mixer for this, but a good old-fashioned whisk works just fine too! Just be sure to get rid of any lumps.
- Bake the Cake: Pour the batter into a greased and floured 9×13 inch baking pan. This size is perfect for a poke cake because it gives us enough surface area for all those delicious holes! Bake according to the instructions on the box. The baking time will vary depending on your oven, but usually, it’s around 25-30 minutes.
- Check for Doneness: To make sure the cake is fully baked, insert a toothpick into the center. If it comes out clean or with just a few moist crumbs, it’s ready! If it comes out with wet batter, bake for a few more minutes and check again. Overbaking will make the cake dry, so keep a close eye on it.
- Cool the Cake: Once the cake is baked, remove it from the oven and let it cool completely in the pan. This is important because we don’t want the sweetened condensed milk and hot fudge to melt when we pour them on. I usually let it cool for at least an hour, or even longer if I have the time.
Poking and Soaking
Now for the fun part – poking holes in the cake! This is what makes it a “poke cake,” and it’s how we get all that delicious flavor infused throughout. Get ready to transform your ordinary chocolate cake into an Oreo masterpiece!
- Poke the Holes: Once the cake is completely cool, use the handle of a wooden spoon or a fork to poke holes all over the surface. Make sure the holes are evenly spaced and go all the way down to the bottom of the cake. I usually poke about 1-inch apart. The more holes, the more flavor!
- Pour the Sweetened Condensed Milk: Slowly and evenly pour the sweetened condensed milk over the cake, making sure it seeps into all the holes. This will make the cake incredibly moist and sweet. Don’t worry if it seems like a lot – the cake will absorb it all!
- Add the Hot Fudge Topping: Next, warm the hot fudge topping in the microwave for about 30 seconds, or until it’s easily pourable. Then, drizzle it over the cake, again making sure it gets into all those lovely holes. The combination of chocolate cake, sweetened condensed milk, and hot fudge is simply divine!
- Chill the Cake: Cover the cake with plastic wrap and refrigerate for at least 2 hours, or even better, overnight. This allows the cake to fully absorb the sweetened condensed milk and hot fudge, and it also makes it easier to frost.
Oreo Topping and Assembly
The final step is to add the Oreo topping and assemble our masterpiece! This is where we really bring the Oreo flavor to the forefront. Get ready for a truly decadent and irresistible dessert!
- Prepare the Oreo Crumbs: While the cake is chilling, prepare the Oreo crumbs. Place about 3/4 of the Oreo cookies in a food processor and pulse until they are finely crushed. If you don’t have a food processor, you can put the cookies in a resealable bag and crush them with a rolling pin.
- Whip the Cream (if using homemade): If you’re using homemade whipped cream, now is the time to make it. In a large bowl, combine heavy cream, powdered sugar, and vanilla extract. Beat with an electric mixer until stiff peaks form. Be careful not to overbeat, or you’ll end up with butter!
- Frost the Cake: Once the cake is chilled, remove it from the refrigerator and frost it with the thawed whipped topping. Spread it evenly over the entire surface of the cake.
- Sprinkle with Oreo Crumbs: Sprinkle the crushed Oreo crumbs generously over the whipped topping. This will give the cake a beautiful Oreo look and add a delicious crunch.
- Garnish with Oreo Cookies: For an extra touch of Oreo goodness, cut the remaining Oreo cookies in half and arrange them on top of the cake. This will make it look even more appealing and let everyone know exactly what they’re in for!
- Chill Again (Optional): If you have time, chill the cake for another 30 minutes before serving. This will help the whipped topping set and make it easier to slice.
- Serve and Enjoy!: Slice the cake into squares and serve. Get ready for rave reviews! This Oreo Poke Cake is always a crowd-pleaser.
Tips and Variations
Want to customize your Oreo Poke Cake? Here are a few tips and variations to try:
- Different Cake Mix: While chocolate cake is the classic choice, you can also use vanilla, white, or even red velvet cake mix.
- Different Pudding: Instead of sweetened condensed milk and hot fudge, you can use chocolate pudding or Oreo pudding. Just poke the holes and pour the pudding over the cake.
- Add Chocolate Chips: Sprinkle chocolate chips over the cake before frosting it for an extra chocolatey treat.
- Use Different Cookies: Experiment with different flavors of Oreo cookies, such as Golden Oreos or Mint Oreos.
- Make it a Parfait: Layer the cake, whipped topping, and Oreo crumbs in individual glasses for a fun and elegant dessert.
- Add a Drizzle: Drizzle melted white chocolate or dark chocolate over the finished cake for a beautiful presentation.
- Make it Gluten-Free: Use a gluten-free chocolate cake mix and gluten-free Oreo cookies to make this cake gluten-free.
- Add a Cream Cheese Frosting: Instead of whipped topping, use a cream cheese frosting for a richer and tangier flavor.
Storing Leftovers
If you happen to have any leftovers (which is unlikely!), store them in an airtight container in the refrigerator for up to 3 days. The cake will stay moist and delicious.
Make Ahead Tips
This Oreo Poke Cake is a great make-ahead dessert. You can bake the cake and poke the holes a day in advance. Just cover it tightly with plastic wrap and store it at room temperature. Then, the next day, pour the sweetened condensed milk and hot fudge over the cake and chill it for at least 2 hours before frosting and topping it.
Why This Recipe Works
This recipe works because it’s simple, delicious, and customizable. The combination of chocolate cake, sweetened condensed milk, hot fudge, whipped topping, and Oreo cookies is a match made in heaven. The poke cake method ensures that every bite is moist and flavorful. And the best part is, it’s so easy to make that anyone can do it!
Conclusion:
This Oreo poke cake isn’t just dessert; it’s an experience, a nostalgic trip back to childhood with a grown-up twist. The moist, chocolatey cake, the creamy, dreamy filling, and the crunchy Oreo topping create a symphony of textures and flavors that will have everyone begging for seconds. It’s the perfect balance of sweet and satisfying, making it a guaranteed crowd-pleaser for any occasion. I truly believe this is a must-try recipe for anyone who loves Oreos and wants to impress their friends and family with a show-stopping dessert that’s surprisingly easy to make.
But the best part? It’s incredibly versatile! While I’ve shared my go-to recipe, feel free to get creative and put your own spin on it. For a richer, more decadent experience, try using a dark chocolate cake mix instead of regular chocolate. Or, if you’re feeling adventurous, experiment with different Oreo flavors! Golden Oreos would add a lovely vanilla twist, while mint Oreos would create a refreshing and festive treat.
Serving suggestions are endless. A simple dollop of whipped cream or a scoop of vanilla ice cream is always a classic choice. But you could also drizzle it with chocolate syrup, caramel sauce, or even a homemade Oreo crumb topping for extra indulgence. For a more elegant presentation, try slicing the cake into individual squares and arranging them on a platter with fresh berries.
And don’t forget about variations! If you’re short on time, you can use store-bought whipped topping instead of making your own. You can also adjust the amount of Oreos to your liking – more for extra crunch, less for a more subtle flavor. If you want to make it even easier, use a pre-made cake from the bakery and just focus on the filling and topping. The possibilities are truly endless!
I’ve made this Oreo poke cake countless times, and it’s always a hit. It’s the perfect dessert to bring to potlucks, birthday parties, or even just a casual weeknight dinner. It’s also a great recipe to make with kids – they’ll love helping to crush the Oreos and poke the holes in the cake.
I’m so confident that you’ll love this recipe that I urge you to try it out for yourself. Don’t be intimidated by the multiple steps – it’s actually quite simple and straightforward. And trust me, the end result is well worth the effort.
Once you’ve made it, I’d love to hear about your experience! Did you make any variations? What did your friends and family think? Share your photos and comments in the comments section below. I’m always looking for new ideas and inspiration, and I’m sure other readers would love to hear about your success (or even your mishaps!).
So go ahead, grab your ingredients, and get baking! I promise you won’t regret it. This Oreo poke cake is a guaranteed winner, and I can’t wait to hear what you think. Happy baking! And remember, the most important ingredient is always love! Enjoy!
Oreo Poke Cake: Delicious Recipe & Easy Instructions
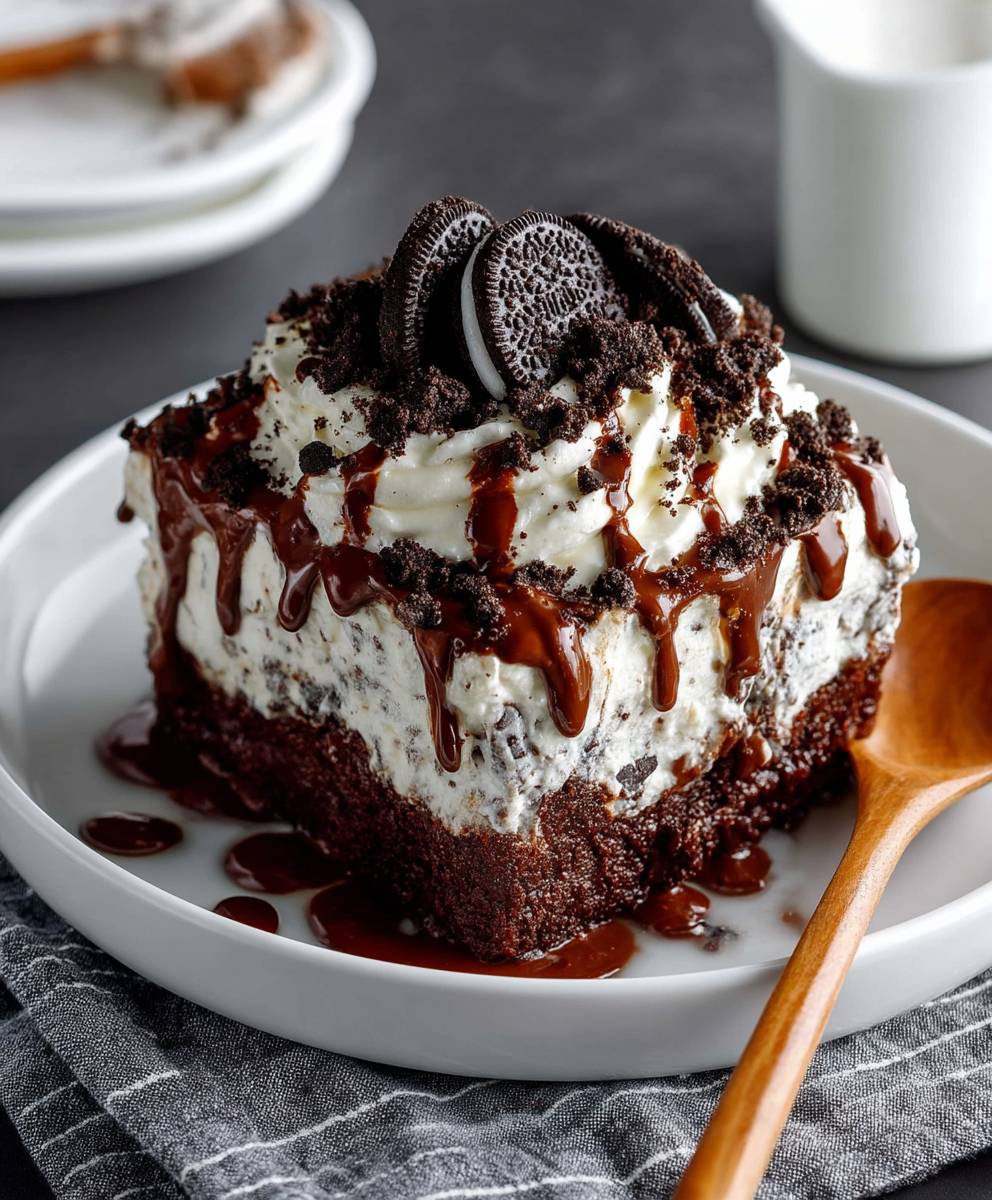
Moist chocolate cake soaked in sweetened condensed milk and hot fudge, topped with whipped cream and crushed Oreos. Easy and delicious!
Ingredients
Instructions
Recipe Notes
- For best results, cool the cake completely before poking and soaking.
- Chilling the cake allows the sweetened condensed milk and hot fudge to fully absorb.
- You can substitute vanilla, white, or red velvet cake mix for the chocolate cake mix.
- Try using chocolate pudding or Oreo pudding instead of sweetened condensed milk and hot fudge.
- Add chocolate chips before frosting for extra chocolate flavor.
- Experiment with different Oreo flavors.
- Store leftovers in an airtight container in the refrigerator for up to 3 days.
- The cake can be baked and poked a day in advance. Cover tightly and store at room temperature. Add the sweetened condensed milk and hot fudge the next day.