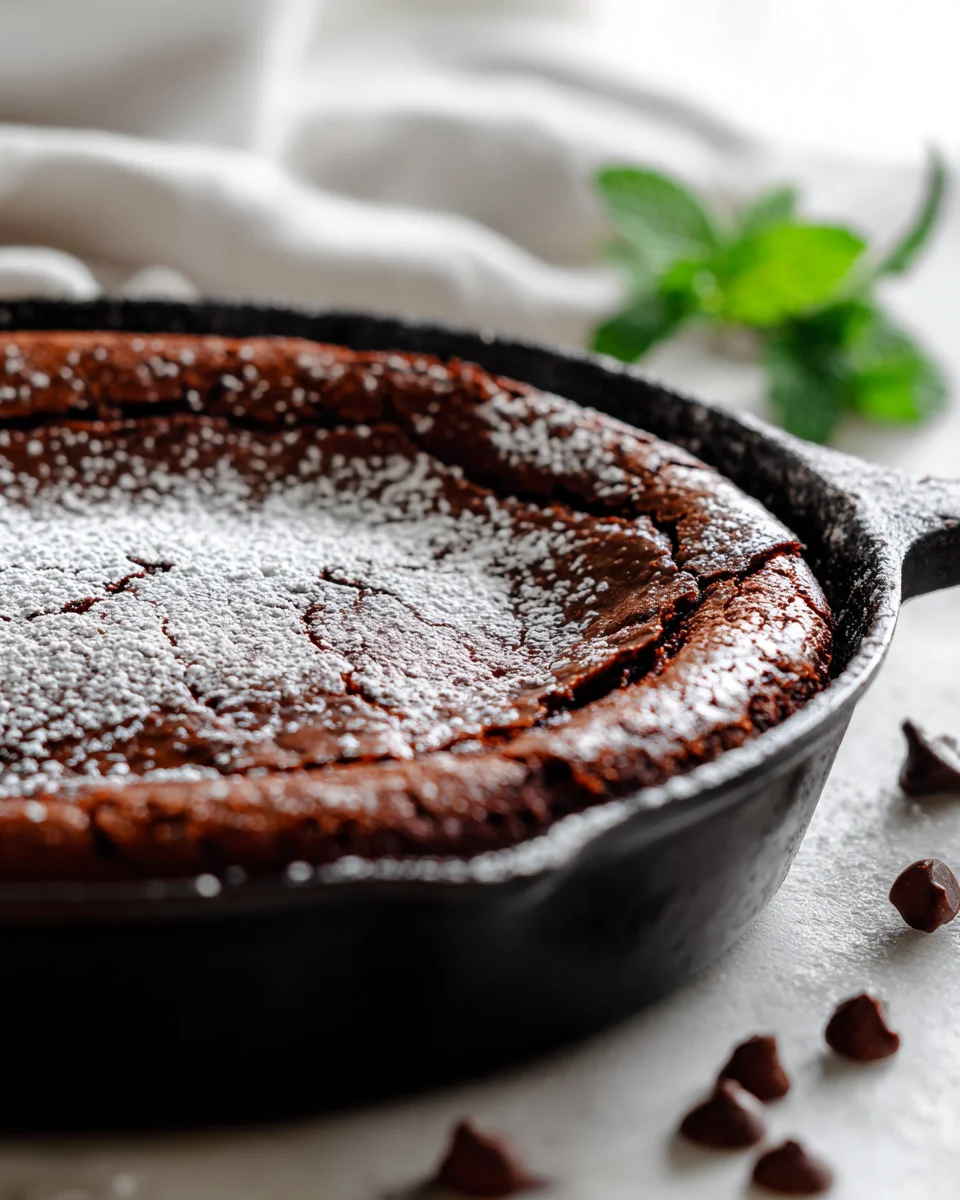
Skillet Brownie With Crackly Top
Oh my goodness, get ready to meet your new favorite dessert obsession! There’s just something inherently cozy and utterly irresistible about baking and serving a warm dessert right in the pan, and this Skillet Brownie With Crackly Top takes that comfort to a whole new level. This isn’t just any brownie; it’s a celebration of all things rich, fudgy, and incredibly satisfying.
What makes this recipe truly special, you ask? Well, it’s all in the name! The magic starts with that beautiful cast-iron skillet, which ensures even baking and a fantastic rustic presentation straight from the oven to your table. But the real star, the crowning glory that sets it apart, is that absolutely perfect, thin, shiny, crackly crust that forms on top. It’s the hallmark of a truly great brownie, offering a delightful textural contrast that gives way to the most decadent, molten chocolate interior you could ever dream of.
Readers will absolutely adore this Skillet Brownie With Crackly Top because it’s the ultimate crowd-pleaser – incredibly easy to whip up, yet it looks incredibly impressive. Imagine a deep, dark chocolate brownie, baked until just set at the edges but still wonderfully gooey and fudgy in the middle, all tucked into a beautiful skillet. It’s perfect for sharing (or not!), whether you’re having a cozy night in, hosting a dinner party, or simply craving an epic chocolate fix. Serve it warm with a generous scoop of vanilla bean ice cream, and prepare for pure bliss. Trust me, once you experience that incredible crackly top and ultra-fudgy center, you’ll never go back to plain brownies again!

Ingredient Notes
Hello, fellow brownie lover! To achieve that perfect Skillet Brownie with the irresistible crackly top and fudgy center, the ingredients we choose and how we treat them are paramount. I’ve found that a few key elements really make all the difference, creating a dessert that’s both comforting and impressive.
- Good Quality Chocolate: This is the soul of our brownie! I usually opt for a combination of unsweetened cocoa powder for deep chocolate flavor and semi-sweet or dark chocolate (around 60-70% cocoa) for that luxurious melt. You can use chocolate chips, but I really prefer a chopped chocolate bar; it melts smoother and provides a richer base.
- Substitution: Feel free to adjust the type of chocolate to your preference. If you like it sweeter, use more semi-sweet. If you crave intense dark chocolate, go for 70% or higher. Just be aware that very high cocoa percentages might make your brownies a tad less sweet, so you might want to slightly increase the sugar.
- Unsalted Butter: Butter brings richness, moisture, and helps with that wonderful fudgy texture. Unsalted butter allows us to control the exact amount of salt in the recipe, ensuring perfect balance. We’ll be melting this, which is key for achieving that dense, chewy brownie texture rather than a cakey one.
- Substitution: While butter is ideal, you could use a high-quality plant-based butter substitute for a dairy-free version, or even a neutral oil like canola or vegetable oil. However, be aware that oil can change the texture slightly, making it perhaps a bit less rich and fudgy, and the crackly top might be less pronounced. Ghee could also work, offering a similar richness to butter.
- Granulated Sugar: Not just for sweetness, granulated sugar is a critical player in achieving that coveted crackly top. When whisked vigorously with the warm melted butter and eggs, it partially dissolves. As the brownies bake, this dissolved sugar rises to the surface and caramelizes, creating that thin, shiny, crackly crust we all adore.
- Substitution: You can experiment with a portion of light brown sugar (say, up to half the amount) for added chewiness and a hint of caramel flavor, but using all brown sugar can sometimes make the crackly top less prominent. Coconut sugar can be used for a slightly less refined option, but it will also impact the crackly top and overall sweetness.
- Large Eggs: Eggs act as a binder, provide structure, and contribute significantly to moisture. For that crackly top, whisking the eggs with the warm sugar and butter is crucial. The warmth helps the sugar dissolve, and the whisking incorporates air, which helps create that delicate crust as the brownies bake. I always recommend using room temperature eggs for better emulsification.
- All-Purpose Flour: We want just enough flour to hold everything together without making our brownies cakey. A minimal amount ensures a dense, fudgy result. Over-measuring or over-mixing the flour can lead to a tougher, cake-like texture, which is definitely not what we’re going for in a Skillet Brownie.
- Substitution: For a gluten-free option, a good quality 1:1 gluten-free baking blend that contains xanthan gum usually works well. Just be sure to check the specific brand’s recommendations for brownie recipes, as results can vary.
- Vanilla Extract: A splash of good quality vanilla extract really amplifies the chocolate flavor, adding a layer of warmth and complexity. Don’t skip it!
- Substitution: If you don’t have vanilla, a tiny pinch of instant coffee granules or espresso powder can also enhance chocolate flavor without making the brownies taste like coffee. Just a quarter teaspoon is usually enough.
- Salt: A pinch of salt is essential to balance the sweetness and really make the chocolate flavor sing. It prevents the brownies from tasting one-dimensional. I often use fine sea salt.
- Optional Add-ins: Don’t forget the fun! Extra chocolate chips (milk, dark, or white), chopped nuts (walnuts, pecans), or even a swirl of peanut butter can elevate your skillet brownie. A sprinkle of flaky sea salt on top before baking is also a fantastic addition, enhancing both flavor and appearance.
Step-by-Step Instructions
Let’s get baking! This process is designed to give you the most fudgy, intensely chocolatey Skillet Brownie with that beautiful, signature crackly top.
- Preheat & Prep Your Skillet: First things first, preheat your oven to 350°F (175°C). Then, grab your favorite 9- or 10-inch cast iron skillet. I like to lightly grease mine with a little butter or non-stick spray, just to be sure nothing sticks, although with a well-seasoned cast iron, it might not even be necessary.
- Melt Chocolate & Butter: In a medium, microwave-safe bowl or a double boiler, combine your chopped semi-sweet/dark chocolate and the unsalted butter. Gently melt them together. If using a microwave, heat in 30-second intervals, stirring well after each, until smooth and fully melted. If using a double boiler, stir until completely combined and glossy. Set aside to cool slightly. We want it warm, but not scorching hot when we add the eggs.
- Whisk Eggs & Sugar (The Crackly Top Secret!): In a large mixing bowl, crack your large eggs and add the granulated sugar. Now, here’s the magic step for that crackly top: whisk these together vigorously for about 2-3 minutes. You want the mixture to lighten in color, become slightly thick, and have ribbons form when you lift the whisk. The warmth from the slightly cooled chocolate mixture will help the sugar dissolve as we combine the two, which is key to forming that lovely crust.
- Combine Wet Ingredients: Slowly pour the slightly cooled melted chocolate and butter mixture into the egg and sugar mixture, whisking continuously until everything is beautifully combined and smooth. Stir in the vanilla extract and salt.
- Add Dry Ingredients: Sift the all-purpose flour into the wet mixture. Using a spatula or wooden spoon, gently fold the flour in until just combined. The key here is not to overmix; overmixing develops the gluten in the flour, which can lead to a tougher, more cake-like brownie. A few streaks of flour are fine; they’ll disappear during baking. If you’re adding optional chocolate chips or nuts, fold them in now.
- Pour into Skillet & Bake: Pour the brownie batter evenly into your prepared cast iron skillet. Use your spatula to spread it smoothly to the edges.
- Bake to Perfection: Place the skillet in your preheated oven and bake for 25-30 minutes. You’re looking for the edges to be set, and the center to still have a slight jiggle – it will continue to set as it cools. A toothpick inserted near the edge should come out with moist crumbs, not wet batter. For that ultra-fudgy center, it’s better to underbake slightly than overbake.
- Cool Completely (Crucial!): This is probably the hardest step for me because the aroma is so enticing! Once out of the oven, resist the urge to dive in immediately. Let your Skillet Brownie cool completely in the skillet on a wire rack for at least 1-2 hours, or even longer. This cooling period is absolutely vital for the brownies to set properly and achieve their ultimate fudgy texture. Trying to slice them too early will result in a messy, gooey (albeit delicious) crumb.
Tips & Suggestions
Crafting the perfect Skillet Brownie with that glorious crackly top is an art, but these tips will help you master it every time!
- Don’t Overbake: I cannot stress this enough! The number one mistake people make with brownies is baking them too long. For a truly fudgy center, you want to pull the skillet out of the oven when the edges are set and a toothpick inserted into the center comes out with moist crumbs, not liquid batter. If it comes out clean, you’ve likely overbaked. The residual heat in the cast iron skillet will continue to cook the brownies as they cool, so remember that carryover cooking is your friend.
- The Crackly Top Secret – Warm Sugar & Eggs: To really nail that signature crackly top, ensure your melted butter and chocolate mixture isn’t piping hot when you add it to the eggs and sugar, but still warm. The warmth helps dissolve the granulated sugar more effectively when you whisk it vigorously with the eggs. This dissolved sugar then caramelizes beautifully on the surface during baking, forming that thin, shiny crust. Whisking for a full 2-3 minutes until light and fluffy is essential!
- Embrace Your Cast Iron: A cast iron skillet is truly ideal for this recipe. It conducts and retains heat incredibly well, ensuring even baking and those wonderfully crisp edges that marry perfectly with the fudgy interior. If you don’t have one, any oven-safe skillet of similar size will work, but you might find the edges aren’t quite as crisp.
- Let it Cool, Seriously: I know, it’s torturous, but allowing the brownie to cool completely in the skillet is non-negotiable for the best texture. This allows the brownies to set up properly, becoming dense and fudgy. Warm brownies from the skillet are undeniably delicious with a scoop of ice cream, but for clean slices and the ultimate fudgy bite, patience is a virtue.
- Amp Up the Flavor:
- Salt: A sprinkle of flaky sea salt over the top of the batter before baking not only looks beautiful but also enhances the chocolate flavor dramatically.
- Espresso Powder: A teaspoon of instant espresso powder or coffee granules can deepen the chocolate flavor without making the brownies taste like coffee. Just add it with the dry ingredients.
- Extra Chocolate: After pouring the batter into the skillet, press a few extra chocolate chips or chunks into the top for melty pockets of goodness.
- Serving Suggestions: While amazing on its own, a warm slice (gently reheated if it’s cooled) served with a scoop of vanilla bean ice cream, a dollop of whipped cream, or a drizzle of caramel sauce takes this Skillet Brownie to an indulgent new level.
Storage
Congratulations on your beautiful Skillet Brownie! Now that you’ve perfected it, here’s how to keep it fresh and delicious for as long as possible (which, let’s be honest, usually isn’t very long in my house!).
- Room Temperature: Once your skillet brownie has cooled completely, you can store it right in the skillet. Simply cover the skillet tightly with aluminum foil or plastic wrap. It will stay fresh and wonderfully fudgy at room temperature for up to 3-4 days. The crackly top might soften slightly after the first day, but the fudginess will remain.
- Refrigeration: If you prefer your brownies extra dense and chewy, or if you live in a very warm climate, you can refrigerate them. Again, ensure the skillet is tightly covered. Refrigerated brownies will last for about a week. Just be aware that chilling can make them firmer, so you might want to bring them to room temperature or gently warm them before serving for optimal texture.
- Freezing: Yes, you can freeze your skillet brownie! This is a fantastic option if you want to make it ahead or save some for a later craving.
- For Slices: Once completely cool, cut the brownie into individual slices. Wrap each slice tightly in plastic wrap, then place them in a freezer-safe airtight container or a heavy-duty freezer bag.
- For the Whole Brownie (out of skillet): If you want to freeze the whole brownie (once cooled, remove from skillet if possible), wrap it tightly in several layers of plastic wrap, then a layer of aluminum foil.
Brownies can be frozen for up to 2-3 months.
- Thawing & Reheating:
- From Frozen: To thaw, simply take the desired amount of slices (or the whole brownie) out of the freezer and let them come to room temperature on your countertop for a few hours.
- Gently Warm: For that “just baked” experience, you can gently warm individual slices. Pop a slice into the microwave for 10-20 seconds, or place it in a preheated oven (around 300°F/150°C) for about 5-10 minutes, until just warmed through. Be careful not to overheat, or they can dry out.
Final Thoughts
And there you have it! My ultimate take on a truly satisfying dessert. The Skillet Brownie With Crackly Top is more than just a brownie; it’s an experience. That beautiful, shatteringly crisp top, a signature of perfection, gives way to an impossibly fudgy, warm interior that just melts in your mouth. It’s the ultimate combination of textures and deep, rich chocolate flavor, all conveniently baked in one pan.
I genuinely believe this recipe for Skillet Brownie With Crackly Top is a must-try for any chocolate lover. It’s comforting, easy to achieve, and utterly unforgettable. The joy of pulling that warm skillet from the oven and digging into such a decadent treat is something truly special. I promise you, once you taste this perfectly balanced dessert, it will become a cherished go-to in your kitchen. So go ahead, treat yourself and your loved ones to this delightful creation!
Perfect Skillet Brownie | Crackly Top, Melt-in-Mouth Gooey
- Total Time: 45 minutes
- Yield: 8 servings 1x
Description
Indulge in the ultimate dessert experience with this Skillet Brownie, featuring a rich, fudgy interior and a signature crackly top. Perfect for sharing, this warm treat is sure to impress at any gathering.
Ingredients
- 1 cup chopped semi-sweet or dark chocolate (around 60-70% cocoa)
- 1/2 cup unsalted butter
- 1 cup granulated sugar
- 2 large eggs
- 1/2 cup all-purpose flour
- 1 teaspoon vanilla extract
- 1/4 teaspoon salt
- Optional: extra chocolate chips, chopped nuts (walnuts, pecans), or a swirl of peanut butter
Instructions
- Preheat your oven to 350°F (175°C) and lightly grease a 9- or 10-inch cast iron skillet.
- In a medium, microwave-safe bowl or a double boiler, combine the chopped chocolate and unsalted butter. Melt together until smooth and set aside to cool slightly.
- In a large mixing bowl, crack the eggs and add the granulated sugar. Whisk vigorously for about 2-3 minutes until the mixture lightens in color and thickens.
- Slowly pour the slightly cooled chocolate and butter mixture into the egg and sugar mixture, whisking continuously until smooth. Stir in the vanilla extract and salt.
- Sift the all-purpose flour into the wet mixture and gently fold it in until just combined. Avoid overmixing.
- Pour the brownie batter evenly into the prepared skillet and spread it smoothly to the edges.
- Bake in the preheated oven for 25-30 minutes, until the edges are set and the center has a slight jiggle.
- Allow the brownie to cool completely in the skillet on a wire rack for at least 1-2 hours before slicing.
- Prep Time: 15 mins
- Cook Time: 30 mins
- Category: Dessert
- Method: Baking
- Cuisine: American
Nutrition
- Serving Size: 1 slice
- Calories: 250
- Sugar: 20 g
- Sodium: 150 mg
- Fat: 15 g
- Saturated Fat: 9 g
- Unsaturated Fat: 6 g
- Trans Fat: 0 g
- Carbohydrates: 30 g
- Fiber: 2 g
- Protein: 3 g
- Cholesterol: 50 mg
Keywords: For a dairy-free version, substitute unsalted butter with a high-quality plant-based butter or neutral oil. Ensure the melted chocolate and butter mixture is warm, not hot, when combined with the eggs and sugar for the best crackly top.