Pumpkin Crisp: the very words conjure up images of cozy autumn evenings, the scent of cinnamon and spice wafting through the air, and the comforting warmth of a dessert that’s both incredibly easy to make and utterly irresistible. Have you ever craved a dessert that captures the essence of fall in every bite? A dessert that’s less fussy than pie but delivers all the same comforting flavors? Then look no further! This Pumpkin Crisp recipe is about to become your new go-to autumn treat.
While pumpkin pie often takes center stage during Thanksgiving, pumpkin crisp offers a delightful twist on tradition. Its origins are rooted in the American tradition of fruit crisps and crumbles, adapted to showcase the beloved flavors of pumpkin. It’s a celebration of the harvest season, a simple yet elegant way to enjoy the bounty of autumn.
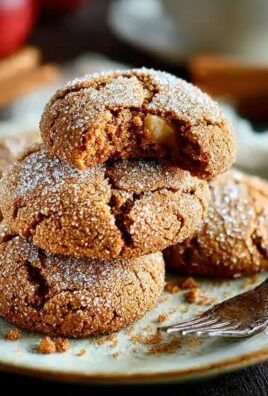
What makes pumpkin crisp so universally loved? It’s the perfect combination of textures: a creamy, spiced pumpkin filling nestled beneath a buttery, crunchy oat topping. The warm spices like cinnamon, nutmeg, and ginger create a symphony of flavors that dance on your tongue. Plus, it’s incredibly convenient! Unlike pumpkin pie, which can be time-consuming to prepare, pumpkin crisp comes together quickly and easily, making it perfect for busy weeknights or last-minute gatherings. Get ready to experience the magic of fall with this delightful dessert!

Ingredients:
- For the Pumpkin Layer:
- 1 (15 ounce) can pumpkin puree (not pumpkin pie filling)
- 1 (12 ounce) can evaporated milk
- 1 cup granulated sugar
- 2 large eggs, lightly beaten
- 1 teaspoon ground cinnamon
- 1/2 teaspoon ground ginger
- 1/4 teaspoon ground cloves
- 1/4 teaspoon salt
- For the Crisp Topping:
- 1 cup all-purpose flour
- 1 cup packed light brown sugar
- 1 cup rolled oats (not instant)
- 1/2 teaspoon baking powder
- 1/4 teaspoon salt
- 1 cup (2 sticks) cold unsalted butter, cut into small cubes
- 1 cup chopped pecans or walnuts (optional)
Preparing the Pumpkin Layer:
Okay, let’s get started with the heart of our Pumpkin Crisp – the pumpkin layer! This is where all that delicious pumpkin flavor comes from. Don’t worry, it’s super easy.
- Preheat your oven: First things first, preheat your oven to 350°F (175°C). This ensures that the crisp cooks evenly and the topping gets nice and golden brown.
- Prepare your baking dish: Lightly grease a 9×13 inch baking dish. You can use butter, cooking spray, or even a little bit of vegetable oil. This will prevent the pumpkin layer from sticking to the bottom of the dish.
- Combine the wet ingredients: In a large bowl, whisk together the pumpkin puree, evaporated milk, granulated sugar, and eggs. Make sure everything is well combined and there are no lumps of pumpkin.
- Add the spices: Now, add the ground cinnamon, ground ginger, ground cloves, and salt to the pumpkin mixture. Whisk again until all the spices are evenly distributed. This is what gives the pumpkin layer that warm, comforting fall flavor.
- Pour into the baking dish: Pour the pumpkin mixture into the prepared baking dish, spreading it evenly.
Making the Crisp Topping:
Now for the fun part – the crisp topping! This is what gives the Pumpkin Crisp its delightful texture and adds a touch of sweetness and nutty flavor. The key here is to use cold butter, which will create those lovely crumbly bits that we all love.
- Combine the dry ingredients: In a separate large bowl, whisk together the all-purpose flour, packed light brown sugar, rolled oats, baking powder, and salt. Make sure everything is well combined.
- Cut in the cold butter: Add the cold, cubed butter to the dry ingredients. Using a pastry blender or your fingertips, cut the butter into the dry ingredients until the mixture resembles coarse crumbs. This is where the cold butter is crucial – it creates pockets of fat that will melt during baking, resulting in a flaky and crumbly topping. If you’re using your fingertips, work quickly to prevent the butter from melting too much.
- Add the nuts (optional): If you’re using chopped pecans or walnuts, add them to the crisp topping mixture and stir to combine. The nuts add a nice crunch and nutty flavor that complements the pumpkin perfectly.
Assembling and Baking the Pumpkin Crisp:
We’re almost there! Now it’s time to put everything together and bake our Pumpkin Crisp to golden brown perfection.
- Sprinkle the topping over the pumpkin layer: Evenly sprinkle the crisp topping over the pumpkin layer in the baking dish. Make sure to cover the entire surface of the pumpkin layer so that every bite has that delicious crisp topping.
- Bake in the preheated oven: Bake in the preheated oven for 45-55 minutes, or until the topping is golden brown and the pumpkin layer is set. You can test the pumpkin layer by inserting a knife into the center – if it comes out clean, it’s done. If the topping starts to brown too quickly, you can loosely cover the baking dish with aluminum foil for the last 15-20 minutes of baking.
- Let it cool slightly: Remove the Pumpkin Crisp from the oven and let it cool slightly before serving. This allows the pumpkin layer to set up a bit more and prevents you from burning your mouth!
Serving Suggestions:
Now for the best part – enjoying your homemade Pumpkin Crisp! Here are a few serving suggestions to take it to the next level:
- Serve warm: Pumpkin Crisp is best served warm, straight from the oven.
- Top with vanilla ice cream: A scoop of vanilla ice cream is the perfect complement to the warm, spiced pumpkin flavor.
- Drizzle with caramel sauce: A drizzle of caramel sauce adds a touch of extra sweetness and richness.
- Whipped cream: A dollop of whipped cream is a classic topping that adds a light and airy texture.
- Dust with powdered sugar: A light dusting of powdered sugar adds a touch of elegance.
Tips and Tricks for the Perfect Pumpkin Crisp:
Here are a few extra tips and tricks to ensure that your Pumpkin Crisp turns out perfectly every time:
- Use pumpkin puree, not pumpkin pie filling: Pumpkin pie filling already contains spices and sugar, which will throw off the balance of the recipe.
- Use cold butter for the crisp topping: Cold butter is essential for creating a crumbly topping.
- Don’t overbake: Overbaking can result in a dry pumpkin layer. Bake until the topping is golden brown and the pumpkin layer is set.
- Adjust the spices to your liking: If you prefer a stronger spice flavor, you can add more cinnamon, ginger, or cloves.
- Add other toppings: Feel free to experiment with other toppings, such as chocolate chips, shredded coconut, or chopped nuts.
- Make it ahead of time: You can assemble the Pumpkin Crisp ahead of time and store it in the refrigerator until you’re ready to bake it. Just add a few minutes to the baking time.
- Store leftovers: Store leftover Pumpkin Crisp in the refrigerator for up to 3 days. Reheat in the oven or microwave before serving.
Variations:
Want to mix things up a bit? Here are a few variations on the classic Pumpkin Crisp recipe:
- Apple Pumpkin Crisp: Add a layer of sliced apples to the bottom of the baking dish before pouring in the pumpkin mixture.
- Cranberry Pumpkin Crisp: Add a layer of fresh or frozen cranberries to the bottom of the baking dish before pouring in the pumpkin mixture.
- Gingerbread Pumpkin Crisp: Add 1 teaspoon of ground ginger and 1/2 teaspoon of ground cloves to the crisp topping mixture.
- Chocolate Chip Pumpkin Crisp: Add 1 cup of chocolate chips to the pumpkin mixture or sprinkle them over the crisp topping.
- Vegan Pumpkin Crisp: Use vegan butter and a flax egg (1 tablespoon ground flaxseed mixed with 3 tablespoons water) in place of the butter and eggs.
Troubleshooting:
Sometimes things don’t go exactly as planned. Here are a few common problems and how to fix them:
- Topping is too dry: Add a tablespoon or two of melted butter to the topping mixture and stir to combine.
- Topping is too wet: Add a tablespoon or two of flour to the topping mixture and stir to combine.
- Pumpkin layer is too runny: Make sure you’re using pumpkin puree, not pumpkin pie filling. You can also add a tablespoon or two of cornstarch to the pumpkin mixture.
- Topping is burning: Loosely cover the baking dish with aluminum foil for the last 15-20 minutes of baking.
Nutritional Information (Approximate):
Please note that the nutritional information is an estimate and may vary depending on the specific ingredients used.
- Calories: Approximately 350-400 per serving
- Fat: 15-20 grams
- Saturated Fat: 8-12 grams
- Cholesterol: 50-75 mg
- Sodium: 150-200 mg
- Carbohydrates: 50-60 grams
- Fiber: 3-5 grams
- Sugar: 30-40 grams
- Protein: 4-6 grams

Conclusion:
And there you have it! This Pumpkin Crisp recipe is truly a must-try, especially as the leaves begin to turn and the air gets that crisp autumn bite. It’s more than just a dessert; it’s a warm hug in a dish, a comforting reminder of cozy evenings and shared laughter. The combination of the spiced pumpkin filling with the buttery, crunchy topping is simply irresistible. It’s the kind of dessert that disappears quickly, leaving everyone wanting just one more bite.
What makes this recipe so special? It’s the ease of preparation combined with the incredible flavor payoff. You don’t need to be a seasoned baker to whip up this crowd-pleaser. The ingredients are simple, the steps are straightforward, and the result is a dessert that tastes like you spent hours slaving away in the kitchen. Plus, the aroma that fills your home while it bakes is pure autumnal bliss!
But the best part? This Pumpkin Crisp is incredibly versatile! Feel free to get creative and make it your own. For a truly decadent experience, serve it warm with a scoop of vanilla ice cream or a dollop of freshly whipped cream. A sprinkle of chopped pecans or walnuts adds a delightful nutty crunch. If you’re feeling adventurous, try drizzling a little caramel sauce over the top.
Looking for variations? You can easily adapt this recipe to suit your dietary needs or preferences. For a gluten-free version, simply substitute the all-purpose flour in the topping with a gluten-free blend. To make it vegan, use a plant-based butter alternative and ensure your brown sugar is vegan-friendly. You could even add a layer of cream cheese filling between the pumpkin and the topping for an extra layer of richness. Imagine that!
Another fun variation is to use different types of squash. Butternut squash or sweet potato would work beautifully in place of the pumpkin, offering a slightly different flavor profile but equally delicious results. You could also experiment with different spices. A pinch of cardamom or ginger would add a warm, exotic touch.
I truly believe this Pumpkin Crisp will become a new family favorite. It’s perfect for holiday gatherings, potlucks, or simply a cozy night in. It’s a dessert that brings people together and creates lasting memories.
So, what are you waiting for? Preheat your oven, gather your ingredients, and get ready to experience the magic of this incredible dessert. I’m confident you’ll love it as much as I do.
And now, for the most important part: I want to hear about your experience! Did you try this recipe? What variations did you make? How did your family and friends react? Please, share your thoughts and photos in the comments below. I can’t wait to see your creations and hear your stories. Happy baking! Let me know if you found the perfect scoop of ice cream to pair with it! I’m always looking for new ideas. Don’t be shy, your feedback helps me improve and inspires others to try this delightful treat. Let’s spread the pumpkin love!
Pumpkin Crisp: The Ultimate Fall Dessert Recipe
Warm and comforting Pumpkin Crisp with a spiced pumpkin base and a buttery, oat-filled crisp topping. Perfect for fall gatherings!
Ingredients
Instructions
Recipe Notes
- Use pumpkin puree, not pumpkin pie filling.
- Cold butter is essential for a crumbly topping.
- Don’t overbake to avoid a dry pumpkin layer.
- Adjust spices to your preference.
- Experiment with toppings like chocolate chips or coconut.
- Assemble ahead of time and refrigerate until ready to bake (add a few minutes to baking time).
- Store leftovers in the refrigerator for up to 3 days. Reheat before serving.