
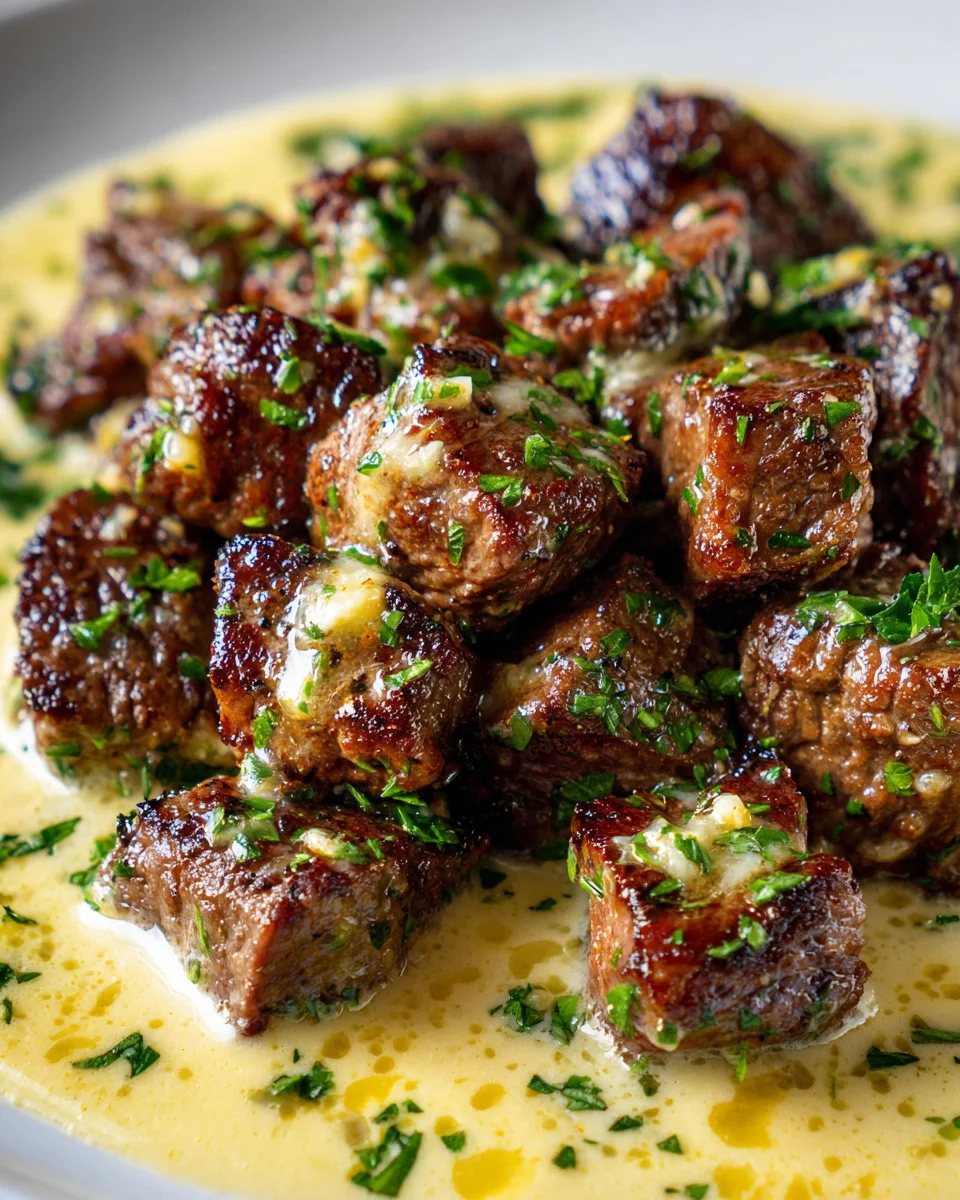
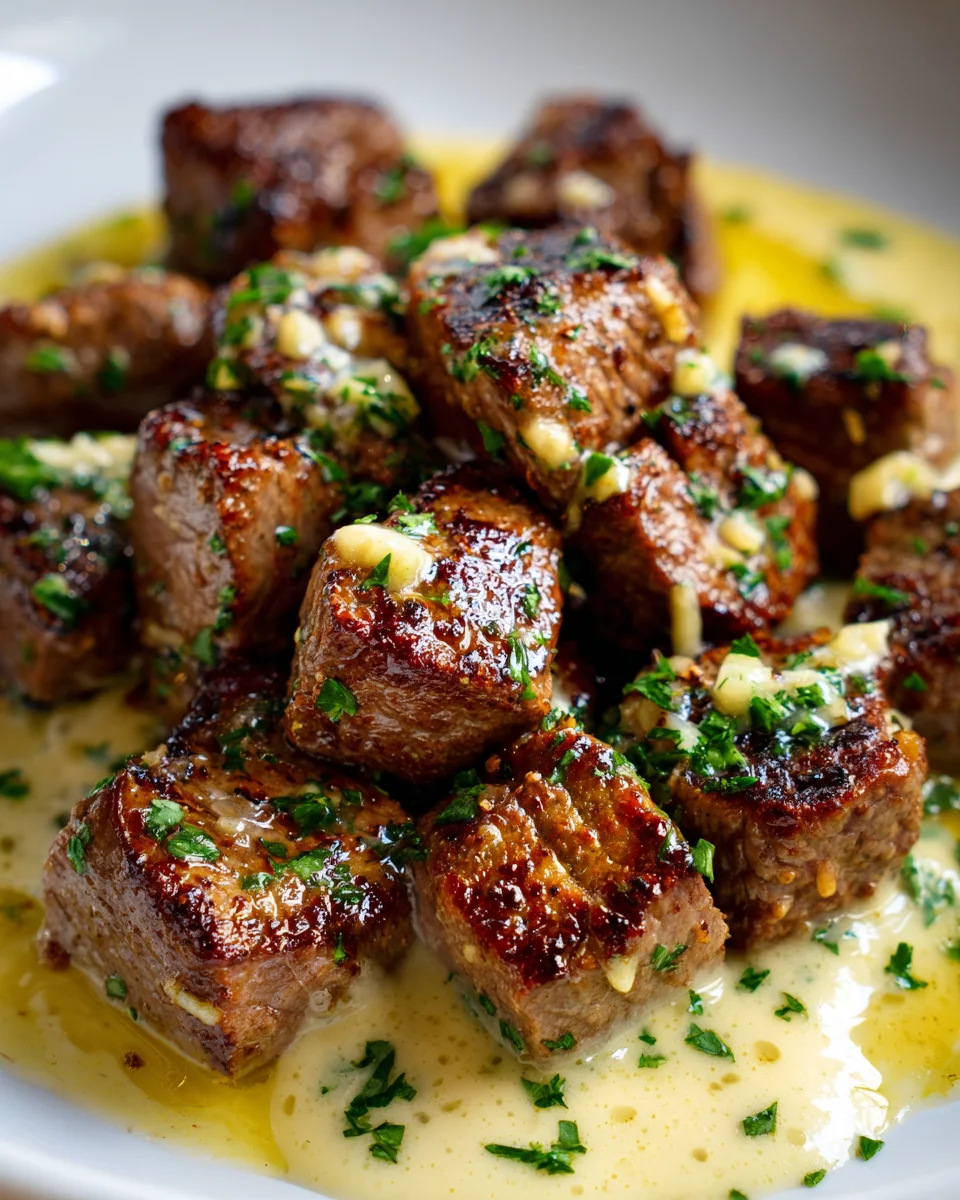
Steak Bites With Garlic Butter And Creamy Parmesan Sauce
Steak Bites With Garlic Butter And Creamy Parmesan Sauce – get ready, because you’re about to discover a recipe that’s going to revolutionize your weeknight dinners and special occasions alike! I’m absolutely thrilled to share this culinary gem with you. What makes this dish so incredibly special, you ask? It’s the harmonious marriage of perfectly seared, tender beef bites, infused with the irresistible aroma of garlic butter, all brought together by a luscious, velvety Parmesan cream sauce that coats every single piece. Trust me, every bite is an experience of pure, unadulterated bliss!
I know you’re going to fall head over heels for this recipe because it delivers that incredible steakhouse experience right in your own kitchen without all the fuss. Imagine succulent pieces of beef, golden-brown and juicy, glistening with fragrant garlic butter, all mingling with a rich, cheesy sauce that’s just begging to be savored. It’s comforting, it’s decadent, and it feels incredibly indulgent, whether you’re serving it as a show-stopping appetizer or a luxurious main course. This dish is truly a game-changer, promising an explosion of savory, creamy flavor in every mouthful. Get ready to impress!
Hey there, fellow food enthusiasts! Get ready to dive into one of my absolute favorite hearty and incredibly flavorful dishes: Steak Bites With Garlic Butter And Creamy Parmesan Sauce. This recipe takes tender, juicy beef steak, coats it in fragrant garlic butter, and then pairs it with an unbelievably rich and smooth Parmesan sauce. It’s perfect for a cozy dinner, an impressive date night meal, or even as a decadent appetizer. I promise, once you try this, it’ll be on regular rotation in your kitchen!
Ingredient Notes
Crafting these delectable steak bites with their rich sauce starts with selecting the right ingredients. Here’s a rundown of what you’ll need and some handy substitutions:
- For the Steak Bites:
- Beef Steak: I usually reach for boneless sirloin, ribeye, or beef tenderloin for steak bites. These cuts are naturally tender and cook up beautifully. Sirloin is a fantastic balance of flavor and tenderness without breaking the bank, while ribeye offers incredible marbling for extra juiciness. Tenderloin is the most tender, offering a melt-in-your-mouth experience. Cut your chosen steak into 1-inch pieces.
- Olive Oil: A good quality olive oil with a high smoke point is essential for searing the steak to get that perfect crust. Vegetable oil or avocado oil also work well.
- Salt and Freshly Ground Black Pepper: Don’t underestimate the power of generous seasoning! These are your core flavor builders for the steak.
- For the Garlic Butter:
- Unsalted Butter: Using unsalted butter allows you to control the overall saltiness of the dish. If you only have salted, simply reduce the amount of added salt elsewhere.
- Fresh Garlic: This is a non-negotiable for me! Freshly minced garlic provides an incomparable aroma and flavor that really shines through. If you’re in a pinch, pre-minced garlic can be used, but I highly recommend fresh.
- Fresh Parsley: Chopped fresh parsley adds a lovely pop of color and a fresh, herbaceous note that brightens up the rich flavors. Chives would also be a good alternative.
- For the Creamy Parmesan Sauce:
- Heavy Cream: This is the backbone of our luscious sauce, providing richness and body. Do not substitute with half-and-half or milk, as they will not achieve the same creamy consistency and may curdle.
- Cream Cheese: A little cream cheese, softened, makes the sauce extra smooth and helps stabilize it, preventing it from separating. Mascarpone cheese is an excellent, even richer alternative if you have it on hand.
- Parmesan Cheese: Please, please, please use freshly grated Parmesan cheese! It melts into the sauce seamlessly and offers superior flavor compared to pre-grated varieties, which often contain anti-caking agents that can make the sauce grainy.
- Garlic Powder and Onion Powder: These seasonings enhance the savory depth of the sauce without adding texture.
- Salt and Black Pepper: To taste, ensuring the sauce is perfectly seasoned.
- Optional: Beef Broth or Water: A splash can be used to thin the sauce if it becomes too thick.
Step-by-Step Instructions
Let’s get cooking! Follow these steps to create your incredibly delicious Steak Bites With Garlic Butter And Creamy Parmesan Sauce.
- Prepare the Steak:
- Pat your beef steak dry with paper towels. This is crucial for achieving a good sear. Cut the steak into roughly 1-inch bite-sized cubes.
- Season the steak generously with salt and freshly ground black pepper on all sides. Don’t be shy here; the seasoning will build layers of flavor.
- Cook the Steak Bites:
- Heat 1 tablespoon of olive oil in a large, heavy-bottomed skillet (cast iron works wonderfully) over medium-high heat until shimmering and almost smoking.
- Add the seasoned steak bites to the hot skillet in a single layer, ensuring not to overcrowd the pan. Cook in batches if necessary. Overcrowding will steam the meat instead of searing it, preventing that beautiful crust.
- Sear for 2-3 minutes per side for medium-rare to medium doneness, turning to get a crust on as many sides as possible. Adjust cooking time for your preferred level of doneness.
- Remove the cooked steak bites from the skillet and set them aside on a plate. They will continue to cook slightly as they rest.
- Make the Garlic Butter:
- Reduce the heat to medium-low. To the same skillet (no need to clean it, those bits of flavor are gold!), add the unsalted butter.
- Once the butter is melted, add the minced fresh garlic and sauté for about 30-60 seconds, until fragrant but not browned or burnt.
- Remove the skillet from the heat and stir in the chopped fresh parsley.
- Return the cooked steak bites to the skillet and toss them gently in the garlic butter until they are evenly coated. Set aside while you make the sauce.
- Prepare the Creamy Parmesan Sauce:
- In a separate medium saucepan, melt a tablespoon of butter over medium heat.
- Add a teaspoon of minced garlic (optional, but I love extra garlic!) and sauté for about 30 seconds until fragrant.
- Pour in the heavy cream and bring it to a gentle simmer, stirring occasionally. Do not let it boil vigorously.
- Reduce the heat to low and whisk in the softened cream cheese until it’s completely melted and the sauce is smooth.
- Stir in the freshly grated Parmesan cheese, whisking constantly until it melts and the sauce thickens.
- Season the sauce with garlic powder, onion powder, salt, and black pepper to taste. If the sauce becomes too thick, you can whisk in a splash of beef broth or water until it reaches your desired consistency.
- Serve:
- Plate the garlic butter steak bites and generously spoon the creamy Parmesan sauce over the top, or serve the sauce on the side for dipping.
- Garnish with a little extra fresh parsley, if desired. Enjoy immediately!
Tips & Suggestions
To truly elevate your Steak Bites With Garlic Butter And Creamy Parmesan Sauce, here are a few extra tips and suggestions I’ve learned along the way:
- Don’t Skip Patting the Steak Dry: This cannot be stressed enough! Excess moisture on the steak surface prevents a good sear, leading to steamed rather than crusty steak bites.
- High Heat for Searing: Get your skillet really hot before adding the steak. A screaming hot pan gives you that beautiful, flavorful crust quickly, keeping the inside tender.
- Cook in Batches: Resist the urge to crowd the pan. Cooking smaller batches allows the steak to sear properly and ensures even cooking.
- Rest the Meat: After cooking, letting the steak bites rest for a few minutes (even while you make the garlic butter or sauce) allows the juices to redistribute, resulting in more tender and juicy meat.
- Fresh Garlic is Best: For both the garlic butter and the sauce, fresh garlic delivers a much more vibrant and aromatic flavor profile.
- Freshly Grated Parmesan: This is another absolute game-changer for the sauce. Pre-grated cheese often has additives that can make the sauce grainy and prevents it from melting smoothly. Invest in a block and grate it yourself – it’s worth the effort!
- Adjust Sauce Consistency: If your Parmesan sauce gets too thick as it sits, simply whisk in a tablespoon or two of warm beef broth or heavy cream until it reaches your desired pourable consistency.
- Serving Suggestions: These steak bites are fantastic on their own, but they also pair beautifully with a variety of sides. Think creamy mashed potatoes, al dente pasta (like fettuccine or penne), roasted asparagus or broccoli, or a simple side salad to cut through the richness. Don’t forget some crusty bread for soaking up every last bit of that amazing sauce!
- Spice It Up: For a little kick, add a pinch of red pepper flakes to the garlic butter or the Parmesan sauce.
Storage
If you happen to have any leftovers of these delicious Steak Bites With Garlic Butter And Creamy Parmesan Sauce (which I highly doubt!), here’s how to store and reheat them:
- Refrigeration:
- Store the steak bites and the creamy Parmesan sauce separately in airtight containers in the refrigerator. This helps maintain the quality of both components.
- They will keep well for 3-4 days.
- Freezing:
- I generally don’t recommend freezing the creamy Parmesan sauce. Dairy-based sauces tend to separate and become grainy upon thawing and reheating, significantly affecting their texture.
- Cooked steak bites can be frozen in an airtight container for up to 2-3 months. However, be aware that the texture may change slightly upon thawing and reheating.
- Reheating:
- For Steak Bites: Gently reheat the steak bites in a skillet over low-medium heat until warmed through, being careful not to overcook them, which can make them tough. You can also microwave them briefly, but the skillet method helps maintain a better texture.
- For Creamy Parmesan Sauce: Reheat the sauce gently in a small saucepan over low heat, whisking frequently. If it’s too thick, add a splash of heavy cream or beef broth to bring it back to a smooth, pourable consistency. Avoid high heat, as it can cause the sauce to separate.
Final Thoughts
So there you have it! My absolute favorite way to turn a simple meal into something truly extraordinary. These Steak Bites With Garlic Butter And Creamy Parmesan Sauce are more than just a dish; they’re an experience I promise you won’t forget. From the moment those succulent beef bites, rich with fragrant garlicky butter, meet that velvety, indulgent Parmesan sauce, you’ll understand why this recipe is a game-changer.
It’s the perfect balance of savory, rich, and utterly comforting, yet it feels incredibly gourmet. Whether you’re aiming to impress guests or simply treat yourself to a restaurant-quality meal at home without the fuss, these Steak Bites With Garlic Butter And Creamy Parmesan Sauce are the recipe you’ve been searching for. Don’t hesitate to dive in and create this incredible dish – your taste buds will truly thank you!

Steak Bites: Ultimate Garlic Butter & Creamy Parmesan Sauce
- Total Time: 45 minutes
- Yield: 4 servings
Description
Discover the ultimate weeknight dinner with these succulent steak bites coated in fragrant garlic butter and a rich creamy Parmesan sauce. Perfect for impressing guests or enjoying a luxurious meal at home!
Ingredients
- Beef Steak (boneless sirloin, ribeye, or beef tenderloin, cut into 1-inch pieces)
- Olive Oil
- Salt and Freshly Ground Black Pepper
- Unsalted Butter
- Fresh Garlic (minced)
- Fresh Parsley (chopped)
- Heavy Cream
- Cream Cheese (softened)
- Parmesan Cheese (freshly grated)
- Garlic Powder
- Onion Powder
- Salt and Black Pepper (to taste)
- Optional: Beef Broth or Water (to thin the sauce)
Instructions
- Pat your beef steak dry with paper towels and cut it into roughly 1-inch bite-sized cubes.
- Season the steak generously with salt and freshly ground black pepper on all sides.
- Heat 1 tablespoon of olive oil in a large, heavy-bottomed skillet over medium-high heat until shimmering and almost smoking.
- Add the seasoned steak bites to the hot skillet in a single layer, ensuring not to overcrowd the pan. Cook in batches if necessary.
- Sear for 2-3 minutes per side for medium-rare to medium doneness, turning to get a crust on as many sides as possible.
- Remove the cooked steak bites from the skillet and set them aside on a plate.
- Reduce the heat to medium-low and add the unsalted butter to the same skillet.
- Once the butter is melted, add the minced fresh garlic and sauté for about 30-60 seconds until fragrant.
- Remove the skillet from the heat and stir in the chopped fresh parsley.
- Return the cooked steak bites to the skillet and toss them gently in the garlic butter until they are evenly coated.
- In a separate medium saucepan, melt a tablespoon of butter over medium heat.
- Add a teaspoon of minced garlic (optional) and sauté for about 30 seconds until fragrant.
- Pour in the heavy cream and bring it to a gentle simmer, stirring occasionally.
- Reduce the heat to low and whisk in the softened cream cheese until it's completely melted and the sauce is smooth.
- Stir in the freshly grated Parmesan cheese, whisking constantly until it melts and the sauce thickens.
- Season the sauce with garlic powder, onion powder, salt, and black pepper to taste.
- If the sauce becomes too thick, whisk in a splash of beef broth or water until it reaches your desired consistency.
- Plate the garlic butter steak bites and generously spoon the creamy Parmesan sauce over the top, or serve the sauce on the side for dipping.
- Garnish with a little extra fresh parsley, if desired. Enjoy immediately!
- Prep Time: 15 mins
- Cook Time: 30 mins
- Category: Dinner
- Method: Searing and Saucing
- Cuisine: American
Nutrition
- Serving Size: 1 bowl
- Calories: 450
- Sugar: 2 g
- Sodium: 800 mg
- Fat: 30 g
- Saturated Fat: 15 g
- Unsaturated Fat: 10 g
- Trans Fat: 0 g
- Carbohydrates: 5 g
- Fiber: 0 g
- Protein: 40 g
- Cholesterol: 120 mg
Keywords: Patting the steak dry is crucial for a good sear. Use freshly grated Parmesan for the best flavor and texture. Adjust sauce consistency with beef broth or cream if needed.