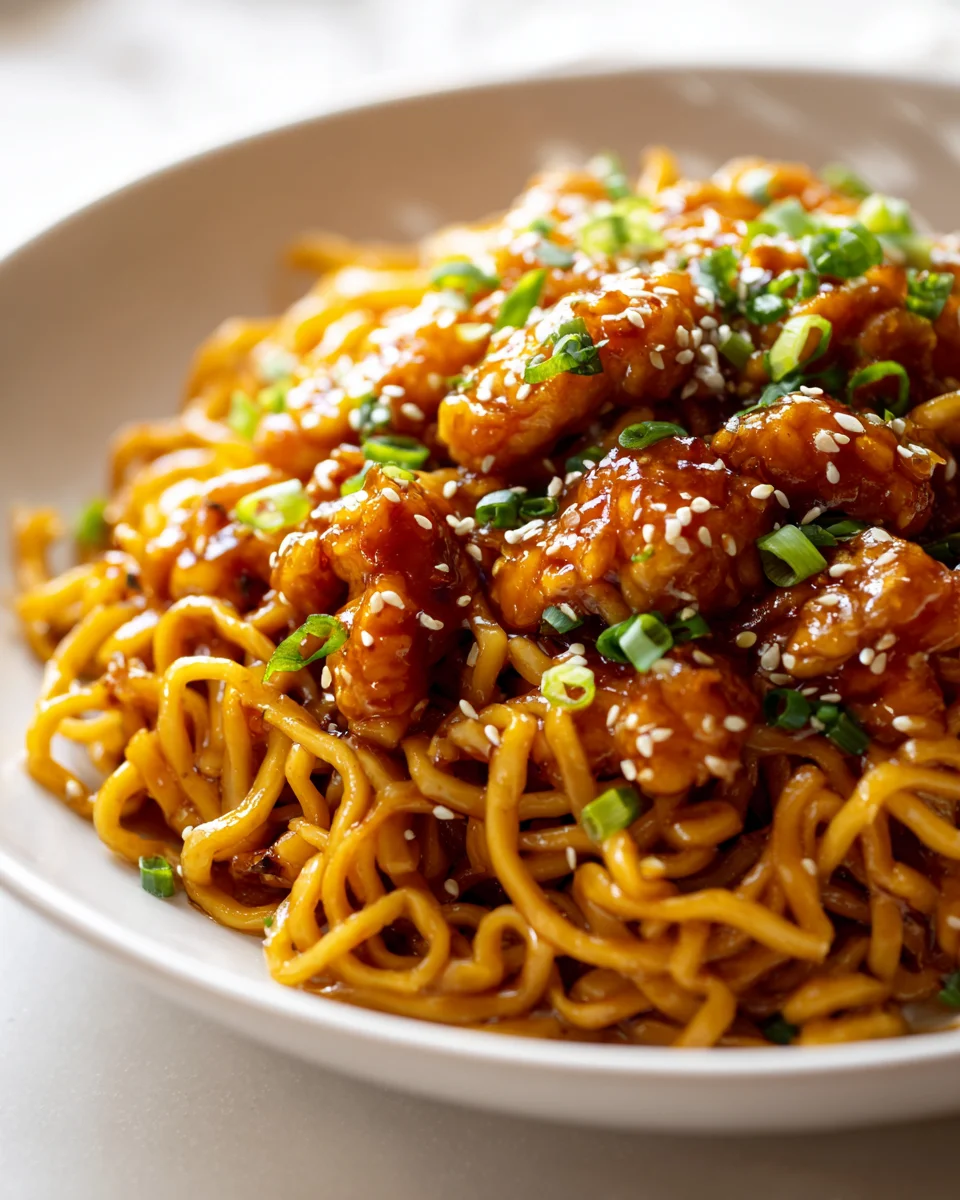
Sticky Garlic Chicken Noodles Irresistible
Oh my goodness, get ready for a new favorite weeknight dinner that will have everyone begging for more! Seriously, I’m not just saying this, but Sticky Garlic Chicken Noodles Irresistible truly lives up to its name. I promise, this recipe is about to become a regular in your rotation!
What makes this dish so utterly special? It’s all in that incredible, glossy, deeply savory, and yes, perfectly sticky garlic sauce that clings impeccably to every single strand of noodle and every tender piece of chicken. It’s a flavor bomb that hits all the right notes!
You’ll absolutely adore how quickly this comes together, transforming simple ingredients into a meal that feels like a decadent treat. It’s the ultimate comfort food with an irresistible punch of flavor, making it perfect for busy evenings when you crave something extraordinary without the fuss. It’s the kind of dish that disappears from plates almost as fast as you serve it!
Imagine succulent pieces of chicken, stir-fried until golden, then tossed with perfectly chewy noodles and crisp-tender veggies (if you like!) in that glorious, sweet-and-savory garlic glaze. Every bite is a harmonious blend of textures and an explosion of garlicky, umami-rich goodness that you just can’t get enough of. Get ready to fall head over heels for these noodles!

Ingredient Notes
Making truly Sticky Garlic Chicken Noodles Irresistible starts with understanding a few key players. I always choose ingredients that pack a punch, but I also know that life happens, and substitutions are sometimes necessary. Here’s what I love to use and what works well if you need to swap things around.
- Chicken: For this recipe, I absolutely adore using boneless, skinless chicken thighs. They stay incredibly juicy and tender, even when coated in that glorious sticky sauce. Their fat content helps render out flavor and prevent them from drying out. However, if you prefer, boneless, skinless chicken breast cut into bite-sized pieces works perfectly fine too – just be mindful not to overcook it, as it can dry out quicker than thighs. Slice it against the grain for maximum tenderness!
- Noodles: The star of any noodle dish! I typically reach for ramen noodles (the dried block kind, without the seasoning packet) because they cook quickly and soak up the sauce beautifully. Lo mein noodles are another fantastic option if you want a thicker, chewier texture. In a pinch, even spaghetti or linguine can be used; just ensure they are cooked al dente according to package directions, as they’ll continue to cook slightly when tossed with the hot sauce.
- Garlic: This is a “garlic” chicken dish, so naturally, I go big! Fresh garlic is non-negotiable for that pungent, aromatic foundation. I usually use at least 6-8 cloves, sometimes more, finely minced. The flavor difference between fresh and jarred minced garlic is significant here, but if you’re in a real pinch, good quality jarred minced garlic can work. Just know you might need a little extra to achieve that signature “irresistible” kick.
- Ginger: Fresh ginger complements the garlic perfectly, adding a warm, zesty undertone. I like to grate or finely mince about a tablespoon. If fresh ginger isn’t available, about 1/2 teaspoon of ground ginger powder can be used, though the fresh flavor is truly unmatched.
- Soy Sauce: I always opt for low-sodium soy sauce. This allows me to control the saltiness of the dish without compromising on that essential umami flavor. If you’re gluten-free, tamari is an excellent 1:1 substitute.
- Sweetener (Honey/Brown Sugar): This is where the “sticky” magic truly happens! A combination of honey and light brown sugar creates that perfect balance of sweetness and viscosity. Maple syrup can be a good substitute for honey if you prefer, offering a slightly different, earthy sweetness. If you’re out of brown sugar, granulated white sugar can work, but you might lose a little of that caramel note.
- Rice Vinegar: Essential for balancing the sweetness and richness with a touch of tang. Rice vinegar (not seasoned rice vinegar, which often contains sugar) is my preference. Apple cider vinegar can be used as a substitute if you don’t have rice vinegar, though it has a slightly stronger, fruitier tang.
- Sesame Oil: A tiny drizzle of toasted sesame oil at the very end is crucial for that authentic, nutty aroma that brings everything together. Don’t skip this if you can help it! A little goes a long way.
- Broth (Non-Alcohol Alternative): Often, Asian-inspired sauces call for cooking wine like mirin or sherry. To keep this recipe accessible and delicious for everyone, I use a splash of low-sodium chicken or vegetable broth. It provides that essential liquid for the sauce without adding alcohol. A tiny pinch of sugar can be added to the broth if you’re looking to mimic the subtle sweetness often found in mirin.
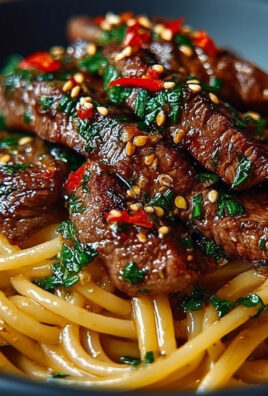
- For Meat Swap (Beef instead of Chicken): If you’re looking for a change from chicken, thinly sliced beef is an outstanding choice. I recommend using cuts like sirloin, flank steak, or even beef tenderloin, sliced against the grain into thin strips. The cooking time will be slightly different – beef often cooks faster than chicken thighs – so keep an eye on it to ensure it remains tender and doesn’t overcook.
Step-by-Step Instructions
Let’s get cooking! These steps will guide you to perfectly Sticky Garlic Chicken Noodles Irresistible, ensuring every component is cooked to perfection and coated in that amazing sauce.
- Prepare Your Ingredients: First, let’s get organized. Cut your chicken thighs into bite-sized pieces (about 1-inch chunks). Mince your garlic and ginger. In a medium bowl, whisk together your sauce ingredients: soy sauce, honey, brown sugar, rice vinegar, and chicken broth. Set aside. This prep makes the cooking process smooth and quick!
- Cook the Chicken: Heat a large skillet or wok over medium-high heat. Add a tablespoon of neutral oil (like canola or vegetable oil). Once shimmering, add the chicken pieces in a single layer, ensuring not to overcrowd the pan. Cook for 3-4 minutes per side until golden brown and cooked through. If you have a lot of chicken, cook it in batches to ensure a good sear. Remove the cooked chicken from the skillet and set aside on a plate.
- Cook the Noodles: While the chicken is cooking, bring a pot of water to a boil. Add your noodles and cook according to package directions until al dente. Drain well and set aside. I like to toss them with a tiny bit of oil (about a teaspoon) to prevent them from sticking together.
- Sauté Aromatics and Build the Sauce: Reduce the heat to medium. Add another teaspoon of oil to the same skillet if needed. Add the minced garlic and ginger. Sauté for about 30-60 seconds, stirring constantly, until fragrant. Be careful not to burn the garlic! Pour in your prepared sauce mixture. Bring it to a gentle simmer, stirring occasionally.
- Thicken the Sauce and Combine: Let the sauce simmer for 2-3 minutes, or until it starts to thicken slightly and becomes glossy. If you prefer a thicker sauce, you can create a slurry with 1 tablespoon of cornstarch mixed with 2 tablespoons of cold water and whisk it into the simmering sauce. Continue to cook for another minute until it reaches your desired consistency.
- Toss Everything Together: Return the cooked chicken to the skillet with the sauce. Add the drained noodles. Using tongs, gently toss everything together until the chicken and noodles are thoroughly coated in the sticky garlic sauce. Cook for another 1-2 minutes, allowing the noodles to absorb the flavors and heat through.
- Finish and Serve: Remove from heat. Drizzle with a teaspoon of toasted sesame oil and toss one last time. Serve immediately, garnished with chopped green onions and a sprinkle of sesame seeds. Get ready to enjoy your Sticky Garlic Chicken Noodles Irresistible!
Tips & Suggestions
To truly make your Sticky Garlic Chicken Noodles Irresistible, I’ve got a few extra tricks up my sleeve. These tips will help you perfect the flavors and texture, ensuring a fantastic meal every time!
- Don’t Crowd the Pan: This is a golden rule for crispy chicken! When searing the chicken, work in batches if necessary. Crowding the pan lowers the temperature, steaming the chicken instead of giving it that beautiful golden-brown sear. That sear adds so much flavor.
- Taste and Adjust the Sauce: Always taste your sauce before combining it with everything. Do you like it sweeter? Add a touch more honey or brown sugar. Too sweet? A splash more rice vinegar or soy sauce can balance it. It’s your kitchen, make it perfect for your palate!
- Garlic Galore: This recipe is called “Sticky Garlic Chicken Noodles” for a reason! I recommend erring on the side of more garlic than less. However, if you’re not a huge garlic fan, you can certainly reduce the amount. But trust me, the generous amount of fresh garlic is key to its “irresistible” factor.
- Watch the Sauce Thickness: The sauce will naturally thicken a bit as it simmers, and it will continue to thicken slightly as it cools and coats the noodles. If you like a super thick, clingy sauce, a cornstarch slurry (1 tbsp cornstarch + 2 tbsp cold water) is your best friend. Add it gradually, stirring constantly, until you reach your desired consistency.
- Add Some Veggies: This dish is fantastic as is, but it’s also incredibly versatile for adding vegetables. Broccoli florets, sliced bell peppers, snap peas, shredded carrots, or even baby spinach can be tossed in during the last few minutes of sauce simmering or with the chicken. They add color, nutrition, and extra texture.
- Garnish is Key: Don’t underestimate the power of a good garnish! Toasted sesame seeds add a lovely crunch and nutty flavor, while chopped green onions provide a fresh, mild oniony bite and a pop of color. A drizzle of chili oil or a sprinkle of red pepper flakes can also add a delightful kick.
- Spice It Up: If you love heat, feel free to add a pinch of red pepper flakes to the garlic and ginger when you’re sautéing them, or stir a dash of Sriracha or your favorite hot sauce into the finished dish.
Storage
One of the best things about these Sticky Garlic Chicken Noodles Irresistible is that they make fantastic leftovers! Here’s how I store and reheat them to keep them delicious.
- Refrigeration: Once cooled to room temperature, transfer any leftover noodles and chicken to an airtight container. They will keep beautifully in the refrigerator for up to 3-4 days. The flavors often deepen overnight, making them even more enjoyable the next day!
-
Reheating:
- Microwave: For a quick reheat, place a portion in a microwave-safe dish. Add a splash of water or chicken broth (about 1-2 tablespoons) to help loosen the sauce and prevent the noodles from drying out. Cover loosely and microwave on medium power, stirring occasionally, until heated through.
- Stovetop: For the best texture, especially if you have a larger portion, reheat on the stovetop. Place the leftovers in a non-stick skillet over medium-low heat. Add a splash of water or broth. Stir gently and cook until heated through, about 5-7 minutes. This method helps the noodles regain some of their original texture and prevents them from becoming too soft.
- Freezing: I generally do not recommend freezing this dish. While technically possible, the noodles tend to become very mushy and the chicken’s texture can change significantly upon thawing and reheating. For the best experience, enjoy it fresh or as refrigerated leftovers.
Final Thoughts
Well, there you have it! Your culinary journey ends with a triumph, and your kitchen should now be filled with the most amazing aromas. I truly believe that the Sticky Garlic Chicken Noodles Irresistible is more than just a meal; it’s an experience designed to delight every single one of your taste buds.
The way the tender chicken soaks up that incredibly sticky, sweet, and pungent garlic sauce, perfectly coating every single strand of noodle, is simply divine. It’s that perfect balance of savory depth and a touch of sweetness that makes each bite utterly, well, irresistible! This isn’t just another weeknight dinner; it’s the kind of dish that brings smiles, demands second helpings, and leaves a lasting impression.
I find myself craving its unique blend of savory goodness and that amazing stickiness again and again. So go on, dive into a generous bowl of your homemade Sticky Garlic Chicken Noodles Irresistible, and prepare to be utterly charmed. I know you’ll absolutely love it!

Sticky Garlic Chicken Noodles: Irresistible Dinner!
- Total Time: 35 minutes
- Yield: 4 servings 1x
Description
Get ready for a new favorite weeknight dinner that will have everyone begging for more! Sticky Garlic Chicken Noodles is the ultimate comfort food with an irresistible punch of flavor.
Ingredients
- 1 lb boneless, skinless chicken thighs (cut into bite-sized pieces)
- Ramen noodles (dried block kind, without the seasoning packet)
- 6–8 cloves fresh garlic (finely minced)
- 1 tablespoon fresh ginger (grated or finely minced)
- 1/4 cup low-sodium soy sauce
- 2 tablespoons honey
- 2 tablespoons light brown sugar
- 1 tablespoon rice vinegar
- 1/4 cup low-sodium chicken or vegetable broth
- 1 teaspoon toasted sesame oil
- 1 tablespoon neutral oil (like canola or vegetable oil)
- 1 tablespoon cornstarch (optional, for thickening)
- 2 tablespoons cold water (optional, for thickening)
- Chopped green onions (for garnish)
- Sesame seeds (for garnish)
- Pinch of sugar (optional, for broth)
- 1/2 teaspoon ground ginger (if fresh ginger isn't available)
- Maple syrup (optional substitute for honey)
- Apple cider vinegar (optional substitute for rice vinegar)
- Granulated white sugar (optional substitute for brown sugar)
- Thinly sliced beef (as a meat swap)
Instructions
- Prepare Your Ingredients: Cut your chicken thighs into bite-sized pieces (about 1-inch chunks). Mince your garlic and ginger. In a medium bowl, whisk together your sauce ingredients: soy sauce, honey, brown sugar, rice vinegar, and chicken broth. Set aside.
- Cook the Chicken: Heat a large skillet or wok over medium-high heat. Add a tablespoon of neutral oil. Once shimmering, add the chicken pieces in a single layer. Cook for 3-4 minutes per side until golden brown and cooked through. Remove the cooked chicken from the skillet and set aside.
- Cook the Noodles: While the chicken is cooking, bring a pot of water to a boil. Add your noodles and cook according to package directions until al dente. Drain well and set aside.
- Sauté Aromatics and Build the Sauce: Reduce the heat to medium. Add another teaspoon of oil to the same skillet if needed. Add the minced garlic and ginger. Sauté for about 30-60 seconds until fragrant. Pour in your prepared sauce mixture. Bring it to a gentle simmer.
- Thicken the Sauce and Combine: Let the sauce simmer for 2-3 minutes until it starts to thicken slightly. If you prefer a thicker sauce, create a slurry with cornstarch and cold water and whisk it into the simmering sauce. Continue to cook for another minute.
- Toss Everything Together: Return the cooked chicken to the skillet with the sauce. Add the drained noodles. Using tongs, gently toss everything together until thoroughly coated in the sticky garlic sauce. Cook for another 1-2 minutes.
- Finish and Serve: Remove from heat. Drizzle with a teaspoon of toasted sesame oil and toss one last time. Serve immediately, garnished with chopped green onions and sesame seeds.
- Prep Time: 15 mins
- Cook Time: 20 mins
- Category: Dinner
- Method: Stir-frying
- Cuisine: Asian
Nutrition
- Serving Size: 1 bowl
- Calories: 450
- Sugar: 15 g
- Sodium: 800 mg
- Fat: 10 g
- Saturated Fat: 2 g
- Unsaturated Fat: 8 g
- Trans Fat: 0 g
- Carbohydrates: 60 g
- Fiber: 2 g
- Protein: 30 g
- Cholesterol: 90 mg
Keywords: Don't crowd the pan when cooking the chicken for a good sear. Always taste your sauce before combining it with the noodles and chicken to adjust sweetness or tanginess to your preference. Feel free to add vegetables like broccoli or bell peppers for extra nutrition and color.