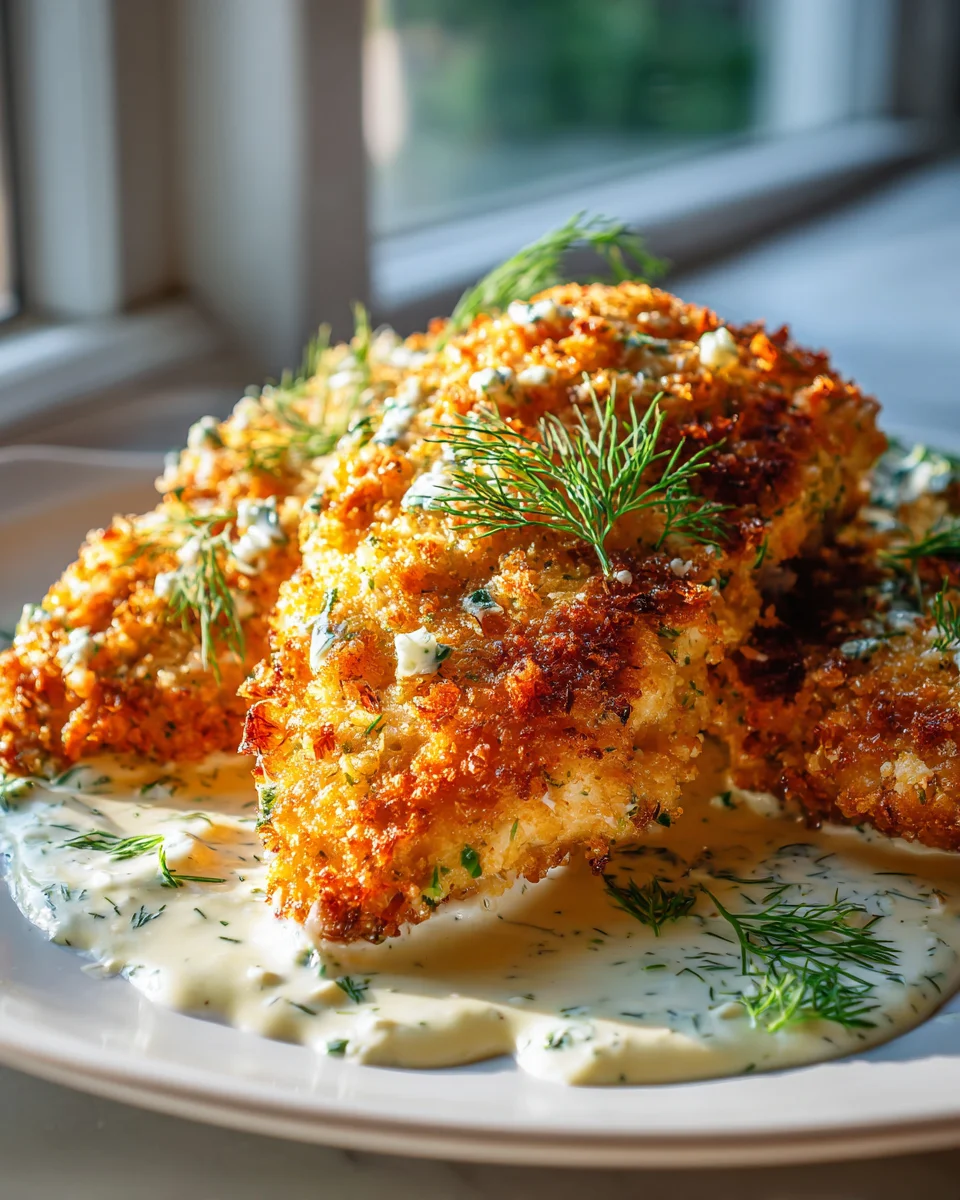
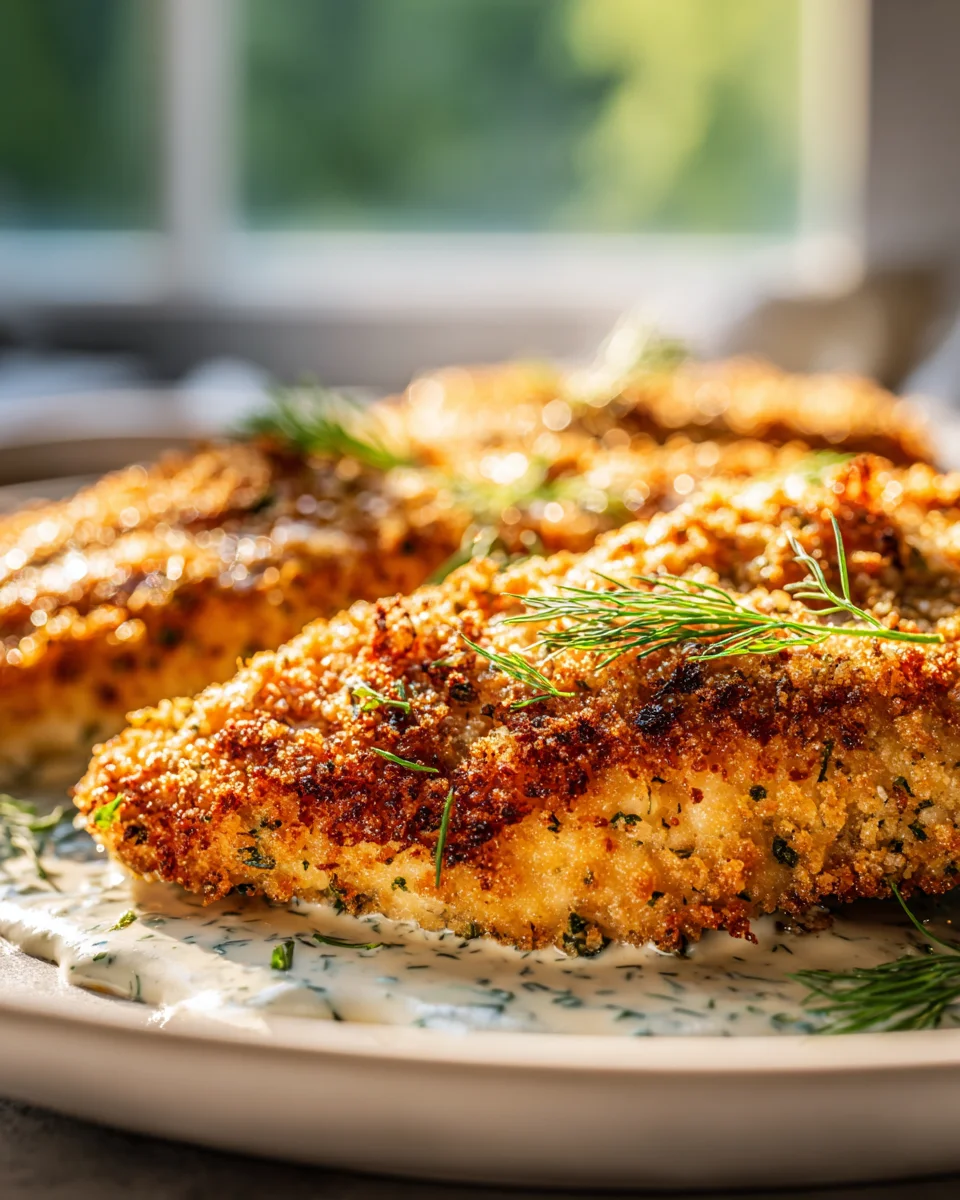
Dill Pickle Parmesan Chicken
Oh, prepare yourselves, because I’m about to introduce you to a dinner recipe that’s going to completely blow your socks off! When I first thought about combining dill pickles with Parmesan and chicken, even I raised an eyebrow. But trust me, this Dill Pickle Parmesan Chicken is a revelation, a true culinary adventure that will surprise and delight your taste buds in the best way possible.
What makes this dish so incredibly special, you ask? It’s the magical marriage of unexpected flavors. We’re taking that beloved, bright, briny tang of dill pickles and melding it with the rich, nutty, umami goodness of Parmesan cheese, all coating tender, juicy chicken. It’s bold, it’s vibrant, and it’s unlike anything you’ve had before. This isn’t just chicken dinner; it’s an experience!
I promise you’re going to love this recipe because it brings a fantastic, exciting twist to your weekly meal rotation. Tired of the same old chicken? This is your delicious escape! Readers adore it for its surprisingly harmonious flavor profile and how incredibly satisfying it is. Imagine succulent chicken breasts or thighs, enveloped in a golden, crispy crust bursting with that signature dill pickle zing and savory Parmesan. It’s perfectly pan-fried or baked to achieve a mouthwatering exterior and a wonderfully juicy interior. Get ready to fall in love with your new favorite chicken dish!
Ingredient Notes
Diving into the delicious world of Dill Pickle Parmesan Chicken means understanding the star players that make this dish truly special. I’ve carefully chosen these ingredients to give you the perfect balance of savory, tangy, and crispy goodness.
- Chicken Breasts: I always reach for boneless, skinless chicken breasts for this recipe. Their mild flavor makes them the perfect canvas for our dill pickle magic. Aim for about 1.5 to 2 pounds, which usually translates to 4 medium-sized breasts. For even cooking and tenderness, I highly recommend pounding them to about ½-inch thickness. You can also use boneless, skinless chicken thighs if you prefer dark meat; just be aware they might require a slightly longer cooking time.
- Dill Pickle Brine: This is where the magic happens! Don’t throw out that brine from your pickle jar. It’s the secret ingredient that infuses the chicken with that wonderful tangy, briny flavor. I suggest using a good quality dill pickle brine without too many added sugars. About 1 cup should be sufficient for marinating. If you don’t have enough on hand, you can purchase it separately or even use the liquid from a jar of store-bought pickles.
- All-Purpose Flour: My go-to for creating that initial coating. It helps the egg wash adhere better to the chicken. If you’re looking for a gluten-free option, a good quality gluten-free all-purpose flour blend works perfectly here, creating a similar crisp texture.
- Eggs: Essential for our dredging station! I use 2-3 large eggs, whisked well, to create the binder for our breadcrumb coating. They help achieve that beautiful golden crust.
- Panko Breadcrumbs: For me, Panko breadcrumbs are non-negotiable for their superior crispiness. They create a light, airy, and incredibly crunchy crust that traditional breadcrumbs just can’t match. If you can’t find Panko, regular plain breadcrumbs will work, but the texture won’t be quite as pronounced. For a gluten-free alternative, there are excellent gluten-free Panko options available that deliver fantastic results.
- Parmesan Cheese: Freshly grated Parmesan cheese makes all the difference! Its nutty, salty flavor blends beautifully with the dill and pickle notes. I usually grate about ½ cup from a block, but pre-grated high-quality Parmesan also works in a pinch. If you’re a fan of a sharper taste, Pecorino Romano can be a lovely substitution.
- Fresh Dill: The “dill” in Dill Pickle Parmesan Chicken! Fresh dill provides an aromatic, herbaceous burst that complements the pickle flavor perfectly. I chop about ¼ cup finely. While dried dill can be used in a pinch, I strongly encourage fresh for its vibrant flavor and aroma.
- Garlic Powder: A teaspoon of garlic powder adds a foundational savory note that really ties all the flavors together without overpowering them.
- Salt and Black Pepper: Essential seasonings! I use kosher salt and freshly ground black pepper to taste, adjusting as needed based on the saltiness of your pickle brine and Parmesan cheese.
- Olive Oil or Vegetable Oil: For pan-frying. I typically use about 2-3 tablespoons of good quality olive oil or a neutral vegetable oil like canola or sunflower oil for frying the chicken to a beautiful golden crisp.
Step-by-Step Instructions
Let’s get cooking! I’m excited to guide you through creating this incredibly flavorful Dill Pickle Parmesan Chicken. Follow these steps, and you’ll have a fantastic meal on your table in no time.
- Prepare and Marinate the Chicken:
- First things first, I like to get my chicken ready. Place each chicken breast between two sheets of plastic wrap or in a large freezer bag. Using a meat mallet or the bottom of a heavy skillet, pound each breast to an even ½-inch thickness. This ensures they cook evenly and become wonderfully tender.
- Next, transfer the pounded chicken breasts to a shallow dish or a large resealable bag. Pour the dill pickle brine over the chicken, making sure each piece is well coated. Marinate in the refrigerator for at least 30 minutes, but no longer than 2 hours. I find 1 hour to be ideal for absorbing that tangy flavor without over-tenderizing the chicken.
- Set Up Your Dredging Station:
- While the chicken is marinating, I set up my dredging station. This makes the coating process smooth and efficient. You’ll need three shallow dishes or pie plates.
- In the first dish, place the all-purpose flour.
- In the second dish, whisk the eggs until they are light and frothy.
- In the third dish, combine the Panko breadcrumbs, grated Parmesan cheese, fresh dill, garlic powder, ½ teaspoon of salt, and ¼ teaspoon of black pepper. Mix these ingredients thoroughly until everything is well combined.
- Coat the Chicken:
- Once the chicken has marinated, remove it from the brine, letting any excess drip off. Pat the chicken lightly with paper towels to remove some surface moisture; this helps the coating stick better.
- Working with one piece at a time, first dredge the chicken in the flour, shaking off any excess.
- Next, dip it into the whisked eggs, letting any extra egg drip off.
- Finally, coat the chicken generously in the Panko-Parmesan mixture, pressing gently to ensure the breadcrumbs adhere well to all sides. Set the coated chicken aside on a clean plate or wire rack. I recommend chilling them for 10-15 minutes at this stage if you have time, as it helps the coating set and reduces the chance of it falling off during cooking.
- Pan-Fry to Golden Perfection:
- Heat 2-3 tablespoons of olive oil or vegetable oil in a large skillet over medium-high heat. You want the oil hot enough so a sprinkle of breadcrumbs sizzles immediately.
- Carefully place 2-3 pieces of coated chicken in the hot skillet, being careful not to overcrowd the pan (I usually cook in batches).
- Cook for 4-6 minutes per side, or until the chicken is golden brown, crispy, and cooked through. The internal temperature should reach 165°F (74°C).
- Once cooked, transfer the chicken to a plate lined with paper towels to drain any excess oil.
- Serve and Enjoy:
- Serve your Dill Pickle Parmesan Chicken immediately, garnished with extra fresh dill if desired. It’s absolutely delightful on its own, or paired with your favorite sides.
Tips & Suggestions
To ensure your Dill Pickle Parmesan Chicken is absolutely perfect every time, I’ve gathered some of my favorite tips and suggestions. These small details can make a big difference in flavor and texture!
- Don’t Over-Marinate: While dill pickle brine is wonderful for infusing flavor and tenderizing, its acidity can actually start to “cook” and toughen the chicken if left too long. I stick to a maximum of 2 hours for marinating. For me, 30 minutes to an hour is usually perfect for imparting that signature tangy taste.
- Pound it Thin and Even: I can’t stress this enough! Pounding the chicken breasts to an even thickness (around ½ inch) is crucial. It guarantees that every part of the chicken cooks at the same rate, preventing dry edges and ensuring tender, juicy results throughout.
- The Power of Fresh Dill: While dried dill can be used, fresh dill brings such a vibrant, aromatic quality that really elevates the “dill pickle” experience. I always opt for fresh when possible, both in the breading mixture and as a garnish.
- Keep Your Dredging Station Tidy: When coating the chicken, I use one hand for the wet ingredients (flour and egg) and the other hand for the dry ingredients (breadcrumbs). This helps keep your hands cleaner and prevents a clumpy, messy coating.
- Don’t Overcrowd the Pan: Frying chicken in batches is key to achieving that perfectly crispy crust. Overcrowding the skillet lowers the oil temperature, leading to steamed (rather than fried) and soggy chicken. Give each piece enough space to sizzle and brown properly.
- Check for Doneness: The best way to ensure your chicken is perfectly cooked and safe to eat is to use an instant-read meat thermometer. The internal temperature should reach 165°F (74°C) at its thickest part. This prevents undercooked chicken and keeps it from drying out.
- Serving Suggestions: This Dill Pickle Parmesan Chicken is incredibly versatile! I love serving it with creamy mashed potatoes to contrast the crispy texture, a simple green salad with a light vinaigrette, or roasted asparagus for a complete meal. It also pairs wonderfully with rice pilaf or even just a squeeze of fresh lemon juice and an extra sprinkle of dill.
- Amp Up the Pickle Flavor: For an extra pickle punch, consider finely dicing a few actual dill pickles and mixing them into the breadcrumb coating. You could also serve a dollop of dill dip or a few extra pickle slices alongside the cooked chicken.
Storage
After all the effort of making this delicious Dill Pickle Parmesan Chicken, you’ll want to make sure any leftovers are stored and reheated properly to maintain their flavor and texture. Here’s what I recommend:
- Refrigeration:
- Once your Dill Pickle Parmesan Chicken has cooled completely to room temperature (usually within an hour or two), I transfer any leftovers to an airtight container.
- You can store the cooked chicken in the refrigerator for up to 3-4 days. While the chicken will still be tasty, the crispiness of the breading may soften over time.
- Reheating:
- To bring back some of that wonderful crispiness, I highly recommend reheating the chicken in the oven or an air fryer.
- Oven Method: Preheat your oven to 350°F (175°C). Place the chicken pieces on a baking sheet, ideally on a wire rack set over the baking sheet to allow air circulation. Reheat for about 10-15 minutes, or until warmed through and the coating has re-crisped.
- Air Fryer Method: If you have an air fryer, this is my go-to for reheating! Place the chicken in the air fryer basket in a single layer (you might need to work in batches). Air fry at 350°F (175°C) for 5-8 minutes, flipping halfway through, until hot and crispy.
- Microwave: While the microwave is convenient, I generally avoid it for reheating breaded chicken as it tends to make the coating soggy. However, if time is of the essence and crispiness isn’t a priority, you can microwave on medium power until heated through.
- Freezing:
- Yes, you can freeze cooked Dill Pickle Parmesan Chicken! Once the chicken is completely cool, I wrap each piece individually in plastic wrap, then place them in a freezer-safe bag or airtight container.
- It will keep well in the freezer for up to 2-3 months.
- To reheat from frozen, you can either thaw the chicken in the refrigerator overnight and then reheat using the oven or air fryer method above, or reheat directly from frozen in a preheated oven at 375°F (190°C) for 20-30 minutes, or until heated through and crispy.
Final Thoughts
And there you have it! I truly hope you’re feeling inspired to try this wonderfully unique and incredibly delicious Dill Pickle Parmesan Chicken. It’s a dish that takes familiar flavors and twists them into something unexpectedly brilliant. The delightful tang of the dill pickle, combined with the savory, nutty crust of parmesan, perfectly complements the tender chicken, creating a symphony of flavors that truly has to be tasted to be believed. I promise, it’s a game-changer that will surprise and delight your taste buds, proving that sometimes the best combinations are the most unconventional. Don’t wait – make this Dill Pickle Parmesan Chicken a staple in your kitchen, and prepare to fall in love with its irresistible charm!
Tangy Dill Pickle Parmesan Chicken – Easy Weeknight Meal
- Total Time: 45 minutes
- Yield: 4 servings 1x
Description
This Dill Pickle Parmesan Chicken combines the bright, briny tang of dill pickles with the rich, nutty flavor of Parmesan cheese, all enveloping tender chicken for a truly unique dinner experience. It’s a bold and vibrant dish that will surprise and delight your taste buds!
Ingredients
- 1.5 to 2 pounds boneless, skinless chicken breasts (about 4 medium-sized breasts)
- 1 cup dill pickle brine
- All-purpose flour (for coating)
- 2–3 large eggs, whisked
- Panko breadcrumbs
- ½ cup freshly grated Parmesan cheese
- ¼ cup fresh dill, chopped finely
- 1 teaspoon garlic powder
- Kosher salt, to taste
- Freshly ground black pepper, to taste
- 2–3 tablespoons olive oil or vegetable oil
Instructions
- Prepare and Marinate the Chicken: Place each chicken breast between two sheets of plastic wrap or in a large freezer bag. Pound each breast to an even ½-inch thickness. Transfer the pounded chicken breasts to a shallow dish or a large resealable bag. Pour the dill pickle brine over the chicken, ensuring each piece is well coated. Marinate in the refrigerator for at least 30 minutes, but no longer than 2 hours.
- Set Up Your Dredging Station: While the chicken is marinating, set up three shallow dishes or pie plates. In the first dish, place the all-purpose flour. In the second dish, whisk the eggs until light and frothy. In the third dish, combine the Panko breadcrumbs, grated Parmesan cheese, fresh dill, garlic powder, ½ teaspoon of salt, and ¼ teaspoon of black pepper. Mix thoroughly.
- Coat the Chicken: Remove the chicken from the brine, letting excess drip off. Pat lightly with paper towels. Dredge each piece in flour, dip in whisked eggs, and coat generously in the Panko-Parmesan mixture. Set aside on a clean plate or wire rack.
- Pan-Fry to Golden Perfection: Heat 2-3 tablespoons of olive oil or vegetable oil in a large skillet over medium-high heat. Place 2-3 pieces of coated chicken in the hot skillet, cooking for 4-6 minutes per side until golden brown and cooked through (internal temperature should reach 165°F/74°C). Transfer to a plate lined with paper towels to drain excess oil.
- Serve and Enjoy: Serve the Dill Pickle Parmesan Chicken immediately, garnished with extra fresh dill if desired.
- Prep Time: 15 mins
- Cook Time: 30 mins
- Category: Dinner
- Method: Pan-frying
- Cuisine: American
Nutrition
- Serving Size: 1 piece
- Calories: 350
- Sugar: 1 g
- Sodium: 800 mg
- Fat: 20 g
- Saturated Fat: 5 g
- Unsaturated Fat: 15 g
- Trans Fat: 0 g
- Carbohydrates: 20 g
- Fiber: 1 g
- Protein: 30 g
- Cholesterol: 150 mg
Keywords: Don't over-marinate the chicken to prevent it from becoming tough. Pounding the chicken to an even thickness ensures even cooking. Fresh dill is recommended for the best flavor. Avoid overcrowding the pan while frying to maintain crispiness.