• Skip to primary navigation
  • Skip to main content
  • Skip to primary sidebar
Homesmad

Homesmad

  • Home
  • Breakfast & Brunch
  • Appetizers & Snacks
  • Dinner
  • Dessert
  • About
  • Privacy Policy
  • Contact
Homesmad
  • Home
  • Breakfast & Brunch
  • Appetizers & Snacks
  • Dinner
  • Dessert
  • About
  • Privacy Policy
  • Contact

Tortilla Pizza Rolls: Quick & Easy Kid-Friendly Snack!

October 8, 2025 by Lily author

Tortilla Pizza Rolls are revolutionizing snack time and quick meals in countless homes, and I’m incredibly excited to share this delightful recipe with you. Imagine all the beloved flavors of a classic pizza, neatly tucked into a crispy, golden tortilla and baked to perfection—it’s an ingenious twist that truly elevates simple ingredients into something extraordinary. This recipe promises both ease and incredible taste, making it an instant favorite for anyone who tries it.

While the humble tortilla boasts ancient roots in Mesoamerican cuisine and pizza’s lineage traces back to Naples, the concept of combining them into these fantastic rolls is a wonderfully modern innovation. It speaks to our contemporary desire for culinary creativity and effortless deliciousness, blending two universally cherished food items into one irresistible treat. This dish doesn’t come with centuries of tradition, but rather represents a clever, accessible fusion that has quickly become a household favorite for its sheer convenience and adaptability.

People adore these Tortilla Pizza Rolls for so many compelling reasons. Firstly, their unparalleled convenience makes them a perfect solution for busy weeknights, impromptu gatherings, or even as a fun, customizable project for the kids. The satisfying crunch of the baked tortilla paired with the gooey, melted cheese and savory toppings creates an unforgettable texture and flavor combination that’s hard to resist. They offer the comforting familiarity of pizza without the fuss of traditional dough, making them an instant win for any occasion and a guaranteed crowd-pleaser.

Tortilla Pizza Rolls: Quick & Easy Kid-Friendly Snack! this RECIPE

Ingredients:

  • For the Tortilla Pizza Rolls Base:
    • 8-10 large (10-inch) flour tortillas – I find these are the perfect size for a substantial roll, offering enough surface area to pack in delicious fillings without becoming too unwieldy. However, if you prefer smaller, more bite-sized rolls, 8-inch tortillas work beautifully too, just adjust your filling amounts slightly. Whole wheat tortillas can also be a fantastic option for a nuttier flavor and added fiber.
    • 1/2 cup (120ml) pizza sauce – Your favorite brand works wonderfully here! I sometimes even make my own with crushed tomatoes, garlic, and Italian herbs for an extra special touch, but a good quality jarred sauce makes this recipe incredibly quick and convenient.
    • 1 ½ cups (170g) shredded mozzarella cheese – The quintessential pizza cheese, it melts beautifully and provides that delightful stringy texture we all crave in a good Tortilla Pizza Roll. I always go for a low-moisture, part-skim variety for the best melt and less grease.
    • ¼ cup (25g) grated Parmesan cheese – A sprinkle of Parmesan adds a wonderful salty, umami depth that complements the mozzarella perfectly, enhancing the overall cheesy flavor profile of your Tortilla Pizza Rolls.
  • For the Fillings (Choose your favorites!):
    • 1/2 cup (80g) mini pepperoni slices – A classic for a reason! They get delightfully crispy around the edges and deliver that iconic pizza flavor that everyone loves. If you only have larger slices, a quick chop will help them distribute more evenly.
    • 1/2 cup (80g) cooked, crumbled sausage or diced ham – Adds a hearty, savory element that makes these rolls more filling. Ensure any meat fillings are fully cooked and cooled before adding them to your rolls.
    • 1/4 cup (30g) finely diced bell peppers (any color) – For a touch of sweetness, vibrant color, and a slight crunch. Red, green, or yellow bell peppers all work wonderfully and add a fresh note to your Tortilla Pizza Rolls.
    • 1/4 cup (30g) finely diced red onion – Provides a little bite and aromatic flavor. If you’re not a fan of raw onion, you can briefly sauté it before adding it to your rolls for a milder taste.
    • 1/4 cup (30g) sliced black olives – A briny counterpoint to the rich cheese and sauce. If you prefer green olives, chop them finely to avoid making the rolls too bulky.
    • 1/4 cup (20g) sliced mushrooms – Earthy and tender when baked. For best results, I sometimes quickly sauté them to remove excess moisture before adding them to the rolls.
    • 1/2 cup (15g) fresh baby spinach, roughly chopped – A fantastic way to sneak in some greens, and it wilts down beautifully into the cheesy filling.
    • Optional additions: Cooked, shredded chicken, small pineapple tidbits (drained very well!), or thinly sliced jalapeños for a delightful kick. Don’t be afraid to experiment with your favorite pizza toppings!
  • For Seasoning and Finishing:
    • 1 teaspoon Italian seasoning – A blend of dried herbs like oregano, basil, thyme, and rosemary that brings all those classic pizza flavors together. It’s absolutely essential for that authentic taste in your Tortilla Pizza Rolls.
    • 1/2 teaspoon garlic powder – Enhances the savory notes of the sauce and cheese, giving it a rich, aromatic foundation.
    • 1/4 teaspoon onion powder – Adds another layer of aromatic depth, complementing the garlic powder beautifully.
    • Pinch of red pepper flakes (optional, for a bit of heat) – I love a little warmth and find it really elevates the flavor profile, but feel free to omit if you prefer a milder taste.
    • Salt and freshly ground black pepper to taste – Always essential for balancing and enhancing the flavors of all your ingredients.
    • 2 tablespoons olive oil or melted butter – For brushing the outside of the rolls, ensuring a golden, crispy finish and preventing the tortillas from drying out. Either works great, but olive oil provides a slightly healthier fat and a lovely aroma.
    • Fresh basil or parsley, chopped (for garnish, optional) – A sprinkle of fresh herbs at the end brightens everything up, adding a lovely aroma and a pop of color to your finished Tortilla Pizza Rolls.

Gathering and Prepping Your Ingredients

  1. Preheat your oven and prepare your baking sheet: I always like to start by preheating my oven to a comfortable 375°F (190°C). This ensures that once your Tortilla Pizza Rolls are assembled, they can go straight into a hot oven, promoting even cooking and a beautifully golden exterior. A properly preheated oven is key to achieving that desirable crispness. While the oven warms up, line a large baking sheet with parchment paper. Trust me on this one; parchment paper is a lifesaver for easy cleanup and preventing any sticky cheese from adhering to the pan. If you don’t have parchment, a light spray of cooking oil will work in a pinch, but parchment is definitely my preferred method for these delightful rolls as it guarantees a non-stick surface.
  2. Prepare your fillings: This is where the magic truly begins and you can let your creativity shine! If you’re using mini pepperonis, they’re likely ready to go. However, if you’ve opted for larger pepperoni slices, I recommend giving them a rough chop so they distribute more evenly throughout your Tortilla Pizza Rolls and don’t create awkward bulges when rolling. For any vegetables like bell peppers, onions, or mushrooms, make sure they are finely diced or thinly sliced. This ensures they cook through quickly in the oven and don’t create overly bulky spots in your rolls. If using spinach, a quick rough chop helps it integrate better and prevents long strands from making the rolls difficult to slice. Cooked chicken or sausage should also be shredded or crumbled and cooled slightly before mixing with other ingredients to prevent the tortillas from getting soggy. The key here is uniformity and small pieces, allowing for a smooth rolling process and consistent flavor in every bite of your Tortilla Pizza Roll.
  3. Combine your cheeses and seasonings: In a medium bowl, combine your shredded mozzarella cheese, grated Parmesan cheese, Italian seasoning, garlic powder, onion powder, and a pinch of red pepper flakes if you’re like me and enjoy a little kick. Give this mixture a good toss with a spoon or your hands (make sure they’re clean!) to ensure all the herbs and spices are evenly distributed throughout the cheese. This step is important because it guarantees that every bite of your Tortilla Pizza Roll will be bursting with flavor, not just plain cheese. It’s these little details that elevate the overall taste.
  4. Set up your assembly line: To make the rolling process as efficient and enjoyable as possible, I highly recommend setting up an assembly line. Have your tortillas stacked nearby, your pizza sauce ready with a spoon or small spatula, your prepared filling ingredients in separate bowls, and your seasoned cheese mixture within easy reach. Finally, have your prepared baking sheet close by. This organized approach makes assembling your Tortilla Pizza Rolls quick and fun, especially if you have little helpers in the kitchen. A clean workspace also helps keep things tidy.

Assembling Your Tortilla Pizza Rolls

  1. Prepare your workspace: Lay one large flour tortilla flat on a clean, dry surface. I prefer to work on a large cutting board or a clean kitchen counter. You want plenty of space to spread your ingredients and comfortably roll the tortilla without making a mess. Take a moment to appreciate the blank canvas you have before you; soon, it will be transformed into a delicious Tortilla Pizza Roll! If your tortillas are cold from the fridge, letting them sit at room temperature for 10-15 minutes can make them more pliable and easier to roll without cracking.
  2. Spread the sauce: Spoon about 1-2 tablespoons of pizza sauce onto the tortilla. Using the back of the spoon or a small spatula, spread the sauce evenly over the entire surface of the tortilla, leaving about a half-inch border around the edges. This border is crucial, as it helps prevent the fillings from oozing out during rolling and baking, ensuring a cleaner, more contained Tortilla Pizza Roll. Don’t be tempted to overload on the sauce, as too much can make your rolls soggy and difficult to crisp up. We’re aiming for a flavorful base, not a swimming pool!
  3. Layer on the cheese: Sprinkle a generous portion of your seasoned cheese mixture evenly over the sauced tortilla. I usually use about 1/4 to 1/3 cup per tortilla, depending on how cheesy I’m feeling that day and how many fillings I’m adding. Make sure to cover the sauce almost completely, as this cheese layer acts as a delicious glue to hold everything together and create that classic pizza melt. This cheese layer is truly the heart of any good Tortilla Pizza Roll.
  4. Add your chosen fillings: Now comes the fun part – customize your Tortilla Pizza Rolls! Evenly distribute your chosen fillings over the cheese layer. Remember, less is often more when it comes to rolling. I usually stick to 1-2 tablespoons of total toppings per tortilla to avoid overfilling, which can make rolling difficult and lead to burst rolls in the oven. For instance, if I’m making classic pepperoni rolls, I’d sprinkle about 1.5 tablespoons of mini pepperonis. If I’m doing a veggie option, I might do a tablespoon of diced bell peppers and a tablespoon of chopped spinach. The goal is a nice, even layer that isn’t too thick, allowing for a tight, stable roll.
  5. Roll ’em up! This is the trickiest part, but with a little practice, you’ll be a pro. Starting from one edge (the one closest to you), tightly roll the tortilla away from you. As you roll, try to keep the fillings tucked in securely with your fingers. A tight roll is key to ensuring your Tortilla Pizza Rolls hold their shape and don’t unravel during baking. Continue rolling until you reach the opposite edge, forming a snug log. Once rolled, place the seam-side down on your cutting board or counter. Repeat this process with the remaining tortillas and fillings, creating a delicious array of customized Tortilla Pizza Rolls that are ready for slicing.
  6. Slice into individual rolls: Using a sharp knife, carefully slice each rolled tortilla into 6-8 pieces, each about 1 to 1.5 inches thick. I find that a slightly serrated knife works best for cutting through the tortilla and fillings without squishing them too much. As you slice, be gentle and use a steady, sawing motion to maintain the integrity of each individual Tortilla Pizza Roll. If you want more bite-sized pieces, you can certainly cut them thinner, but I find this size to be perfect for dipping and easy handling.
  7. Arrange on the baking sheet: Carefully transfer the sliced Tortilla Pizza Rolls, cut-side up, to your prepared baking sheet. Arrange them in a single layer, making sure they are not touching each other. This allows for even air circulation around each roll, promoting crispy edges and uniform baking. I usually leave about a half-inch to an inch of space between each roll to prevent them from steaming instead of baking. This small detail makes a big difference in the final texture of your Tortilla Pizza Rolls.
  8. Brush with olive oil or melted butter: In a small bowl, lightly whisk your olive oil or melt your butter. Using a pastry brush, gently brush the tops and sides of each Tortilla Pizza Roll with the oil or butter. This step is so important! It helps them brown beautifully in the oven, giving them a lovely golden color and a wonderfully crispy texture on the outside, which contrasts perfectly with the gooey, cheesy interior. Don’t skip this for truly irresistible results; it’s the secret to that perfectly golden crust!

Baking Your Perfect Tortilla Pizza Rolls

  1. Bake to golden perfection: Place the baking sheet with your Tortilla Pizza Rolls into your preheated 375°F (190°C) oven. Bake for 12-18 minutes. The exact baking time can vary depending on your oven and how loaded your rolls are, so keep a close eye on them. You’re looking for the cheese to be fully melted and bubbly, and the edges of the tortillas to be golden brown and slightly crispy. Sometimes, I even like to let them go an extra minute or two for a really dark, crispy edge and an extra firm base. If you notice some rolls browning faster than others, you can rotate the baking sheet halfway through baking for more even results. This ensures every single Tortilla Pizza Roll is cooked to absolute perfection, with a glorious golden hue.
  2. Rest briefly: Once they’ve reached that beautiful golden perfection, carefully remove the baking sheet from the oven. I know it’s tempting to dive right in, but allow the Tortilla Pizza Rolls to cool on the baking sheet for about 2-3 minutes. This brief resting period helps the cheese set slightly, preventing it from oozing out excessively when you pick them up, and also makes them a bit easier to handle as they’ll be incredibly hot. This short wait is well worth it for a more enjoyable eating experience!

Serving Suggestions and Variations

  1. Garnish and serve: Transfer your warm Tortilla Pizza Rolls to a serving platter. For an extra pop of color and fresh flavor, I love to sprinkle them with some freshly chopped basil or parsley. This not only makes them look more appealing but also adds a wonderful aromatic freshness. They are absolutely delicious served immediately, straight out of the oven, while the cheese is still wonderfully gooey and the tortillas are crisp – truly their peak deliciousness!
  2. Dipping delights: These Tortilla Pizza Rolls are fantastic on their own, but they are absolutely heavenly when paired with your favorite dipping sauces. A small bowl of extra pizza sauce for dipping is a classic choice, mimicking the traditional pizza experience and adding another layer of tomatoey goodness. Ranch dressing is another incredibly popular option, especially for kids (and many adults!) who enjoy its creamy tanginess. For a little extra sophistication, I sometimes serve them with a creamy garlic dip or even a warm marinara sauce that has a touch of red wine for depth. Don’t hesitate to experiment with what you have on hand or what your family loves – the right dip can truly elevate these already amazing Tortilla Pizza Rolls!
  3. Creative filling variations: The beauty of these Tortilla Pizza Rolls lies in their versatility. Feel free to get creative with your fillings! This recipe is a fantastic canvas for whatever flavors you’re craving.

    • BBQ Chicken: Swap the pizza sauce for your favorite tangy BBQ sauce, add cooked shredded chicken, a sprinkle of finely diced red onion, and a mix of mozzarella and sharp cheddar cheese. This creates a smoky, sweet, and savory roll that’s utterly addictive.
    • Veggie Supreme: Load up on finely diced bell peppers (a mix of colors looks great!), red onion, sautéed mushrooms, sliced black olives, and fresh baby spinach for a colorful and nutritious roll. You can even add a touch of sun-dried tomatoes for an extra burst of flavor.
    • Hawaiian: A controversial but beloved classic! Use small pieces of cooked ham and well-drained pineapple tidbits. The key here is to drain the pineapple very thoroughly to prevent sogginess. Add a tiny pinch of red pepper flakes for a sweet and spicy kick that some people adore.
    • Spicy Italian: For those who love a bit of heat, layer in mini pepperoni, some spicy Italian sausage (cooked and crumbled), and a generous amount of red pepper flakes. You could even add a few thinly sliced pickled jalapeños for an extra kick.
    • Breakfast Rolls: Transform them into a breakfast delight! Scramble some eggs, mix with crumbled cooked bacon or sausage, and a little cheese. For these, use a very light amount of sauce, or omit it altogether and let the egg mixture bind the fillings. Serve these with a side of salsa or hot sauce for a hearty morning treat.

    The possibilities are truly endless, and these rolls are a fantastic way to use up small amounts of leftover cooked meats or vegetables you might have in your fridge, minimizing food waste while maximizing flavor!

  4. Make-ahead and storage tips: These Tortilla Pizza Rolls are wonderful for meal prep, a party appetizer, or simply having a quick snack on hand!

    • To prepare ahead: You can assemble and slice the rolls, arrange them on the baking sheet, and cover them tightly with plastic wrap. Store them in the refrigerator for up to 24 hours. When ready to bake, remove them from the fridge about 15-20 minutes beforehand to come closer to room temperature, then brush with oil/butter and bake as directed, potentially adding a few extra minutes (2-4 minutes) to the baking time to ensure they’re thoroughly heated and crispy.
    • Freezing uncooked rolls: For longer storage, you can freeze the unbaked sliced rolls. Arrange them on a baking sheet in a single layer and freeze until solid (about 2 hours). Once frozen, transfer them to a freezer-safe bag or airtight container, ensuring as much air is removed as possible to prevent freezer burn. They can be stored for up to 1 month. When you’re ready to bake, you can bake them directly from frozen (no need to thaw), adding about 5-10 minutes to the original baking time (so, 17-28 minutes total) and brushing with oil/butter just before baking. This makes for a super convenient weeknight meal or last-minute appetizer!
    • Storing leftovers: Any leftover baked Tortilla Pizza Rolls can be stored in an airtight container in the refrigerator for up to 3-4 days. Make sure they are completely cooled before storing to prevent condensation.
    • Reheating: Reheat them in a preheated oven or toaster oven at 350°F (175°C) for about 5-10 minutes until warmed through and re-crisped. The microwave can work in a pinch for speed, but they tend to lose their crispness and can become a bit chewy. For the best texture, always opt for the oven or toaster oven.

    With these tips, you can always have a batch of delicious Tortilla Pizza Rolls ready for a quick snack, appetizer, or an easy meal, making them a true kitchen hero! Enjoy every cheesy, crispy bite!

Tortilla Pizza Rolls: Quick & Easy Kid-Friendly Snack!

Conclusion:

And there you have it, my friends! We’ve reached the grand finale of our culinary adventure, and I sincerely hope you’re feeling as excited as I am about this incredible recipe. If there’s one dish I could urge you to try this week, it would undoubtedly be these phenomenal

Tortilla Pizza Rolls. They are truly a game-changer in the world of quick, satisfying, and utterly delicious snacks or light meals. What makes them an absolute must-try, you ask? Well, it’s their undeniable simplicity combined with a flavor profile that hits all the right notes. Imagine a crispy, golden exterior giving way to a warm, gooey, cheesy center, bursting with your favorite pizza toppings. It’s that perfect marriage of texture and taste that makes these rolls so incredibly addictive and universally appealing.

I’ve personally witnessed the magic of these rolls transforming a mundane afternoon into a mini celebration, and they’re consistently the first to disappear at any gathering. They require minimal effort, common pantry staples, and deliver maximum satisfaction. For busy weeknights, impromptu get-togethers, or just a spontaneous craving for something comforting and cheesy, these Tortilla Pizza Rolls rise to the occasion every single time. Trust me, once you make them, you’ll wonder how you ever lived without this recipe!

Serving Suggestions & Creative Variations:

The beauty of these Tortilla Pizza Rolls lies not just in their ease but also in their incredible versatility. While they are absolutely divine on their own, a few clever additions can elevate your experience even further. For dipping, consider a classic warm marinara sauce, a creamy ranch dressing, or even a zesty garlic aioli for an extra kick. They pair wonderfully as an appetizer alongside a fresh, crisp garden salad, making for a surprisingly balanced and delightful lunch. Alternatively, serve them with a hearty bowl of tomato or minestrone soup for a comforting and complete meal on a chilly evening. For game day or party platters, arrange them neatly with an array of dipping sauces, and watch them vanish!

But why stop there? This recipe is a fantastic canvas for your own culinary creativity! Experiment with different cheeses; a blend of mozzarella and cheddar is classic, but provolone, Monterey Jack, or even a sprinkle of sharp Parmesan can add wonderful depth. Don’t shy away from incorporating finely diced vegetables – bell peppers, onions (sautéed beforehand for extra sweetness), mushrooms, black olives, or even a handful of fresh spinach can be folded in. For the meat lovers, mini pepperoni, crumbled cooked sausage, diced ham, or even shredded leftover chicken can turn these into a more substantial bite. Feeling adventurous? Swap out the marinara for a pesto sauce for a vibrant, herbaceous twist, or try a smoky BBQ sauce for a unique flavor profile. You could even venture into a completely different realm by making sweet variations – think cinnamon sugar with a cream cheese swirl, or fruit preserves for a dessert-like treat. The possibilities are truly endless, and each variation offers a delightful new discovery.

Your Turn: Get Rolling!

Now that I’ve shared all my tips, tricks, and enthusiasm, it’s your turn to experience the joy of making these fantastic Tortilla Pizza Rolls. I truly believe you’re going to fall head over heels for their simplicity, their incredible taste, and the sheer convenience they offer. Don’t hesitate any longer; gather your ingredients, set aside a few minutes, and embark on this delicious journey. I promise you won’t regret it.

Once you’ve whipped up your own batch, I would absolutely love to hear about your experience! Did you stick to the classic? Did you create a daring new variation with unique toppings or sauces? Did they become an instant family favorite? Your feedback and creative ideas are what make this community so vibrant and inspiring. So, please, come back and share your delightful creations, your personal twists, and any genius serving suggestions you discover. Let’s spread the pizza roll love!


Tortilla Pizza Rolls

Tortilla Pizza Rolls

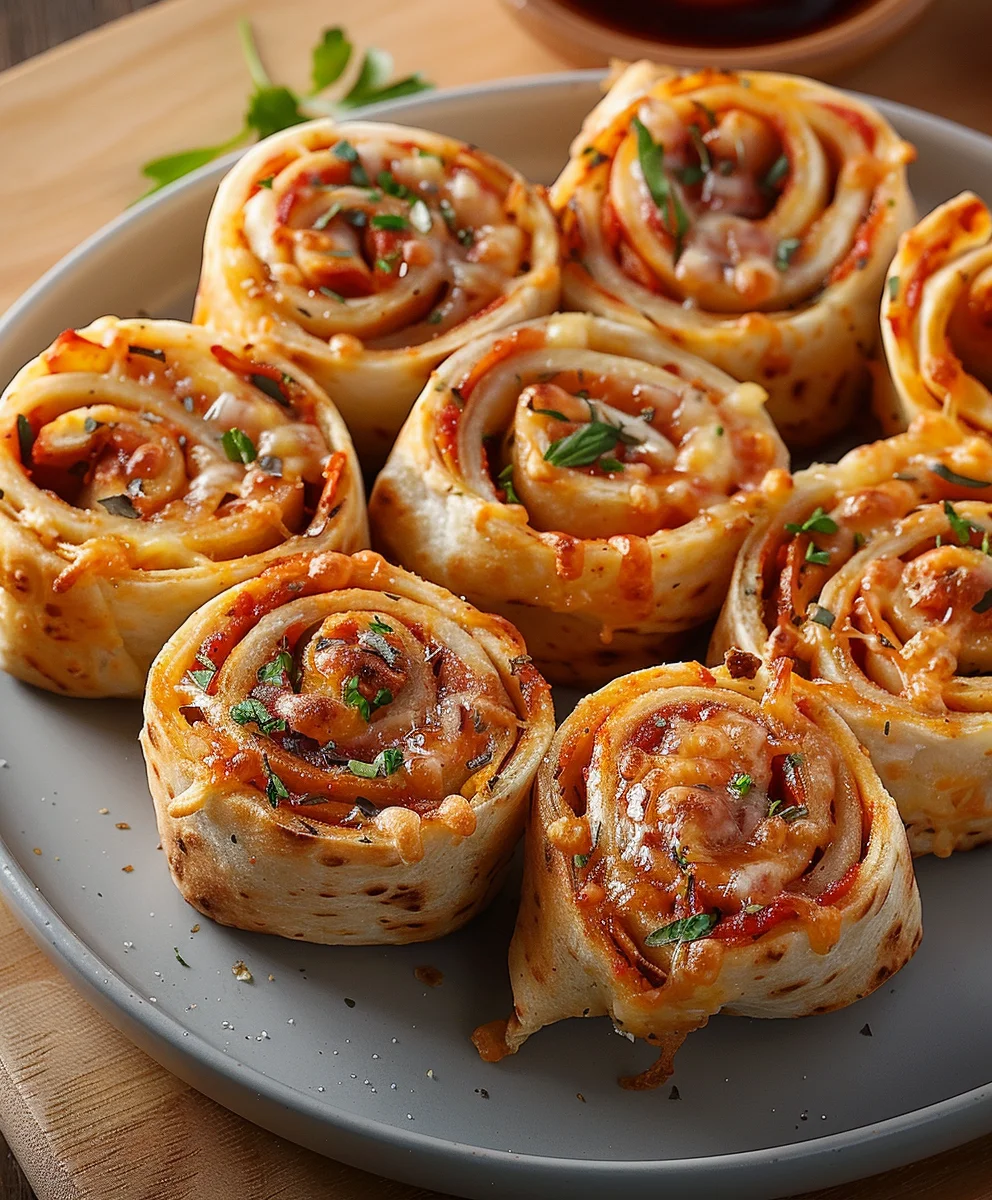
Tortilla Pizza Rolls are a quick, easy, and kid-friendly snack, transforming classic pizza flavors into crispy, golden tortilla rolls. This delightful fusion is perfect for busy weeknights, gatherings, or a fun customizable project, offering satisfying crunch with gooey melted cheese and savory toppings without the fuss of traditional pizza dough.

Prep Time
25 Minutes

Cook Time
18 Minutes

Total Time
43 Minutes

Servings
60-80 rolls (8-10 servings)

Ingredients

  • 8-10 large flour tortillas
  • 1/2 cup pizza sauce
  • 1 cup shredded mozzarella cheese
  • 1/4 cup grated Parmesan cheese
  • 1/2 cup mini beef pepperoni slices OR diced cooked beef ham
  • 1/4 cup chopped bell peppers
  • 1 teaspoon Italian seasoning
  • 1/2 teaspoon garlic powder
  • 1/4 teaspoon onion powder
  • Pinch of red pepper flakes (optional)
  • Salt and freshly ground black pepper to taste
  • 2 tablespoons olive oil or melted butter
  • Fresh basil or parsley, chopped (for garnish, optional)

Instructions

  1. Step 1
    Preheat oven to 375°F (190°C) and line a large baking sheet with parchment paper.
  2. Step 2
    In a medium bowl, combine shredded mozzarella, grated Parmesan, Italian seasoning, garlic powder, onion powder, and optional red pepper flakes. Toss well.
  3. Step 3
    Lay one large flour tortilla flat. Spread 1-2 tablespoons of pizza sauce evenly, leaving a half-inch border.
  4. Step 4
    Sprinkle the seasoned cheese mixture over the sauce, then add your chosen fillings (e.g., mini beef pepperoni, chopped bell peppers). Avoid overfilling.
  5. Step 5
    Tightly roll the tortilla into a snug log, starting from the edge closest to you. Place seam-side down. Repeat for remaining tortillas.
  6. Step 6
    Slice each rolled tortilla into 6-8 pieces, approximately 1 to 1.5 inches thick, using a sharp knife.
  7. Step 7
    Arrange the sliced rolls, cut-side up, in a single layer on the prepared baking sheet, ensuring they do not touch.
  8. Step 8
    Lightly brush the tops and sides of each Tortilla Pizza Roll with olive oil or melted butter.
  9. Step 9
    Bake for 12-18 minutes, or until the cheese is bubbly and the tortillas are golden brown and crispy. Rotate the baking sheet halfway if needed for even baking.
  10. Step 10
    Remove from oven and let cool on the baking sheet for 2-3 minutes. Garnish with fresh basil or parsley if desired. Serve warm with your favorite dipping sauces.

Important Information

Nutrition Facts (Per Serving)

It is important to consider this information as approximate and not to use it as definitive health advice.

Allergy Information

Please check ingredients for potential allergens and consult a health professional if in doubt.

« Previous Post
Best French Salted Butter Cookies Recipe – Perfectly Buttery!
Next Post »
Sweet & Spicy Honey Pepper Chicken Mac & Cheese

If you enjoyed this…

Caramelized Onion Dip: The Ultimate Guide to Making the Perfect Dip

Basil Lemonade: The Ultimate Refreshing Summer Drink Recipe

Witches Brew Lemonade: A Spooky & Delicious Halloween Drink

Primary Sidebar

Browse by Diet

BreakfastDinnerLunchDessertAppetizer

Sweet Peach Yogurt Parfait Delight

One of my fondest memories is from a lazy summer afternoon spent at my grandmother’s house. The sun filtered through the kitchen window, casting a warm glow over the table where she would create her culinary magic. It was during one of those blissful moments that I first tasted her Peach Yogurt Parfait with Honey and Granola. The sweet aroma of ripe peaches mingling with creamy yogurt and the crunch of granola was nothing short of heavenly. It felt like summer captured in a bowl, and I still remember the joy of diving in with a spoon, each layer revealing a new burst of flavor.

When I think about that parfait, I can almost hear the gentle hum of the bees outside, reminding me of the floral notes that honey brings to every bite. The vibrant yellows and soft oranges of the peaches contrast beautifully with the creamy white yogurt and the golden crunch of granola. It’s a dish that not only looks delightful but also tastes like a celebration of fresh, wholesome ingredients.

What makes my version of this Peach Yogurt Parfait special is the careful balance of flavors and textures. I use ripe, juicy peaches, drizzled with locally sourced honey, and a homemade granola that’s bursting with nuts and seeds for an extra crunch. It’s a simple dish, but every layer is crafted with love and attention.

Let me show you exactly how to make this delightful parfait, so you can bring a bit of that summer magic into your kitchen!

Sweet Peach Yogurt Parfait Delight

Why You’ll Love This Recipe

  • Delightfully creamy texture from the Greek yogurt, paired with the juicy sweetness of fresh peaches.
  • Ready in under 20 minutes, making it a quick and satisfying breakfast or snack option.
  • Budget-friendly, using common ingredients that you may already have in your pantry.
  • Customizable with your favorite granola and nuts, allowing you to tailor each parfait to your taste.
  • Perfectly balanced flavors with the bright acidity of lemon juice and the sweetness of honey enhancing the peaches.

Ingredients

  • For the Parfait:
  • 2 cups plain Greek yogurt (or vanilla yogurt for a sweeter option)
  • 2 large ripe peaches, diced (about 2 cups)
  • 1 tablespoon fresh lemon juice (to prevent browning of peaches)
  • 2 tablespoons honey (plus more for drizzling)
  • 1 teaspoon vanilla extract (optional for extra flavor)
  • For the Granola:
  • 1 cup granola (store-bought or homemade; see notes for a simple granola recipe)
  • 1/4 cup sliced almonds (optional for added crunch)
  • 1/4 cup shredded coconut (optional for added flavor)

Let’s dive into some key ingredients that make this Peach Yogurt Parfait so delightful! First, the Greek yogurt is not only creamy but also packed with protein, making it a satisfying option for breakfast or a snack. If you’re looking for a sweeter option, you can easily substitute it with vanilla yogurt, though it may alter the overall flavor balance. Next, the ripe peaches are the star of the show; their natural sweetness shines through, so I recommend choosing peaches that yield slightly to pressure, indicating they’re perfectly ripe. If peaches aren’t in season, feel free to use nectarines or even frozen peaches—just thaw them before use. Finally, honey adds a lovely floral sweetness that ties everything together. If you prefer, maple syrup can serve as a delicious substitute.

Step-by-Step Instructions

  1. Start by preparing the peaches. Wash them thoroughly, then slice and dice them into bite-sized pieces. In a medium bowl, toss the diced peaches with 1 tablespoon of fresh lemon juice to prevent browning. Set aside for about 5 minutes while the lemon juice works its magic.
  2. In a separate bowl, combine the Greek yogurt, 2 tablespoons of honey, and 1 teaspoon of vanilla extract if using. Stir the mixture until smooth and thoroughly blended. This should take about a minute. Avoid overmixing to maintain the creaminess of the yogurt.
  3. Now it’s time to layer your parfait. Grab a clear glass or bowl to showcase your beautiful creation. Start with a generous spoonful of the yogurt mixture at the bottom—about 1/4 cup will do. Use a spoon to spread it evenly.
  4. Add a layer of the diced peaches over the yogurt, ensuring they cover the yogurt completely. You might want to use about half of what you have prepared—roughly 1 cup. This layer should be visually appealing, so arrange the peaches neatly.
  5. Sprinkle 1/4 cup of granola over the peaches. This adds a delightful crunch. Make sure to distribute it evenly to ensure every bite has that satisfying texture. Avoid packing it down too tightly, as you want it to maintain its crunch.
  6. Repeat the layers: spoon in another 1/4 cup of yogurt, followed by another cup of peaches, and another sprinkle of granola. You should have at least two layers, but feel free to add more depending on your glass size.
  7. Finish off your parfait with a drizzle of honey on top for added sweetness and a touch of elegance. If you’re using sliced almonds or shredded coconut, sprinkle them on top now. It adds a lovely visual contrast and extra flavor.
  8. Serve immediately or refrigerate for up to 30 minutes before serving to allow the flavors to meld together. However, I recommend enjoying it fresh to maintain the granola’s crunch.

Pro Tips for the Best Peach Yogurt Parfait With Honey And Granola

  • Make sure to choose ripe peaches for the best flavor and texture. A common mistake is using unripe fruit, which can lead to a less enjoyable parfait. Look for peaches that are fragrant and slightly soft to the touch.
  • Use a clear glass to assemble your parfait; this not only makes for a beautiful presentation but also allows you to see the colorful layers, which adds to the enjoyment of eating it.
  • For an even creamier texture, consider whipping the Greek yogurt with a hand mixer for a couple of minutes before layering. This small adjustment makes a huge difference in mouthfeel.
  • Be mindful of the granola-to-yogurt ratio. Too much granola can overwhelm the parfait, while too little can make it feel too creamy. Aim for about 1/4 cup of granola per layer for the perfect balance.
  • If you’re making this for a gathering, consider preparing the yogurt and peaches ahead of time and layering them just before serving. This ensures the granola stays crunchy!

Variations & Serving Ideas

There are so many ways to get creative with your Peach Yogurt Parfait! For a tropical twist, swap out the peaches for mangoes or pineapples and top with coconut flakes. If you prefer a berry flavor, mix in some blueberries or strawberries with the peaches for added color and taste. For a nutty version, incorporate chopped walnuts or pecans instead of almonds.

As for serving ideas, this parfait pairs beautifully with a side of scrambled eggs for a hearty breakfast or fresh fruit salad for a light lunch. You might also enjoy it alongside whole grain toast with almond butter for an energizing snack. The contrast of flavors and textures will elevate your meal experience!

Storage, Make-Ahead & Reheating

The Peach Yogurt Parfait is best enjoyed fresh, but you can prepare some components ahead of time. Store the layered parfait in an airtight container in the refrigerator for up to 24 hours. However, be cautious; the granola may lose its crunch if stored too long. You can freeze the yogurt and peach mixture for up to 2 months; just remember to thaw it in the refrigerator overnight before serving.

If you plan to enjoy this dish the next day, it can taste even better as the flavors meld together. Just remember to add the granola right before serving to keep its delightful crunch!

Frequently Asked Questions

Can I make Peach Yogurt Parfait With Honey And Granola ahead of time?

Yes — in fact, it tastes even better the next day as the flavors meld. However, I recommend waiting to add the granola until just before serving to maintain its crunch.

What can I substitute for Greek yogurt?

If you prefer a lighter option, you can substitute Greek yogurt with regular yogurt or a dairy-free alternative like coconut yogurt. Just remember that this may alter the creaminess and flavor profile slightly.

Can I use frozen peaches for this parfait?

Absolutely! Just make sure to thaw the frozen peaches before using them. They will still add great flavor, though the texture may be slightly softer than fresh peaches.

How do I make the parfait vegan?

To make a vegan version, substitute the Greek yogurt with a plant-based yogurt alternative, and replace honey with maple syrup or agave nectar. This keeps the parfait sweet while adhering to a vegan diet.

What other fruits can I use in this recipe?

You can mix and match fruits based on your preference. Try using strawberries, blueberries, raspberries, or even bananas. Just make sure to adjust the lemon juice as needed to prevent browning.

Sweet Peach Yogurt Parfait Delight

Final Thoughts

The Peach Yogurt Parfait with Honey and Granola is a delightful blend of creamy yogurt, sweet peaches, and crunchy granola that creates a satisfying and nourishing treat. Each layer bursts with flavor, making it a perfect choice for breakfast or a light dessert.

This is the kind of recipe I come back to again and again, especially when I want something refreshing and wholesome to start my day. The harmony of sweet and tart flavors, combined with the delightful crunch, never fails to lift my spirits!

I encourage you to give this parfait a try and indulge in its comforting goodness. Feel free to share your results or even add your own twist—perhaps a sprinkle of cinnamon or a handful of nuts. Enjoy creating your perfect parfait!

Print
clock clock iconcutlery cutlery iconflag flag iconfolder folder iconinstagram instagram iconpinterest pinterest iconfacebook facebook iconprint print iconsquares squares iconheart heart iconheart solid heart solid icon

Peach Yogurt Parfait


  • Author: Lily author
  • Total Time: 15 minutes
  • Yield: 4 servings 1x
Pin Recipe
Print Recipe

Description

This Peach Yogurt Parfait combines creamy Greek yogurt, juicy peaches, and crunchy granola for a delightful treat. It’s a perfect breakfast or snack that captures the essence of summer in every bite.


Ingredients

Scale
  • For the Parfait:
  • 2 cups plain Greek yogurt (or vanilla yogurt for a sweeter option)
  • 2 large ripe peaches, diced (about 2 cups)
  • 1 tablespoon fresh lemon juice (to prevent browning of peaches)
  • 2 tablespoons honey (plus more for drizzling)
  • 1 teaspoon vanilla extract (optional for extra flavor)
  • For the Granola:
  • 1 cup granola (store-bought or homemade; see notes for a simple granola recipe)
  • 1/4 cup sliced almonds (optional for added crunch)
  • 1/4 cup shredded coconut (optional for added flavor)

Instructions

  1. Start by preparing the peaches. Wash them thoroughly, then slice and dice them into bite-sized pieces. In a medium bowl, toss the diced peaches with 1 tablespoon of fresh lemon juice to prevent browning. Set aside for about 5 minutes while the lemon juice works its magic.
  2. In a separate bowl, combine the Greek yogurt, 2 tablespoons of honey, and 1 teaspoon of vanilla extract if using. Stir the mixture until smooth and thoroughly blended. This should take about a minute. Avoid overmixing to maintain the creaminess of the yogurt.
  3. Now it’s time to layer your parfait. Grab a clear glass or bowl to showcase your beautiful creation. Start with a generous spoonful of the yogurt mixture at the bottom—about 1/4 cup will do. Use a spoon to spread it evenly.
  4. Add a layer of the diced peaches over the yogurt, ensuring they cover the yogurt completely. You might want to use about half of what you have prepared—roughly 1 cup. This layer should be visually appealing, so arrange the peaches neatly.
  5. Sprinkle 1/4 cup of granola over the peaches. This adds a delightful crunch. Make sure to distribute it evenly to ensure every bite has that satisfying texture. Avoid packing it down too tightly, as you want it to maintain its crunch.
  6. Repeat the layers: spoon in another 1/4 cup of yogurt, followed by another cup of peaches, and another sprinkle of granola. You should have at least two layers, but feel free to add more depending on your glass size.
  7. Finish off your parfait with a drizzle of honey on top for added sweetness and a touch of elegance. If you’re using sliced almonds or shredded coconut, sprinkle them on top now. It adds a lovely visual contrast and extra flavor.
  8. Serve immediately or refrigerate for up to 30 minutes before serving to allow the flavors to meld together. However, I recommend enjoying it fresh to maintain the granola’s crunch.
  • Prep Time: 15 mins
  • Cook Time: 0 mins
  • Category: Breakfast
  • Method: No-cook
  • Cuisine: American

Nutrition

  • Serving Size: 1 parfait
  • Calories: 250
  • Sugar: 20 g
  • Sodium: 50 mg
  • Fat: 5 g
  • Saturated Fat: 2 g
  • Unsaturated Fat: 3 g
  • Trans Fat: 0 g
  • Carbohydrates: 40 g
  • Fiber: 3 g
  • Protein: 10 g
  • Cholesterol: 10 mg

Keywords: Choose ripe peaches for the best flavor and texture. Use a clear glass for a beautiful presentation. For creaminess, consider whipping the yogurt before layering. Be mindful of the granola-to-yogurt ratio. Prepare yogurt and peaches ahead of time for gatherings, layering just before serving.

Did you make this recipe?

Share a photo and tag us — we can't wait to see what you've made!

Sun-Kissed Frozen Orange Cream Slush

As a child, summer days felt like they lasted forever. I remember the sticky heat wrapping around me as I played outside, my laughter mingling with the sounds of the neighborhood. But nothing could cool me down quite like the moment I’d spot my grandmother, laboring over her blender, whipping up her famous Frozen Orange Creamsicle Slush. That vibrant orange treat, with its frosty texture and sweet citrus aroma, was like a burst of sunshine in a cup. Just one sip, and I could feel the coolness wash over me, sparking pure joy.

This Frozen Orange Creamsicle Slush has a way of making you feel like a kid again. Its creamy, dreamy consistency is a delightful balance of bright orange and soft vanilla, inviting you to dive right in. The refreshing tang of orange dances on your tongue, while the smooth creaminess envelops you in a comforting embrace. It’s a nostalgic treat that’s perfect for hot summer afternoons or anytime you need a little pick-me-up.

What makes my version of this slush stand out is the addition of a hint of vanilla bean, which elevates the flavor and adds an extra layer of richness. Plus, it’s super easy to whip up with just a few simple ingredients that you probably already have on hand! So, if you’re ready to relive those sun-soaked memories, let me show you exactly how to make it.

Sun-Kissed Frozen Orange Cream Slush

Why You’ll Love This Recipe

  • Each slush is a perfect blend of creamy vanilla and zesty orange, creating a nostalgic flavor reminiscent of summer days.
  • This refreshing treat is ready in under 15 minutes, making it an ideal quick dessert for unexpected guests or hot afternoons.
  • With just 8 simple ingredients, it’s budget-friendly, ensuring you don’t have to break the bank to enjoy a delicious slush.
  • The slush has a perfectly smooth texture, thanks to the combination of ice and ice cream, providing a delightful contrast to the bright citrus flavors.
  • It’s highly customizable; you can easily adjust the sweetness and add fresh herbs for a unique twist that suits your taste.

Ingredients

  • 2 cups orange juice (freshly squeezed or store-bought)
  • 1 cup vanilla ice cream
  • 1 cup crushed ice
  • 1/2 cup milk (whole or 2%)
  • 1/4 cup granulated sugar (adjust based on sweetness preference)
  • 1 teaspoon vanilla extract
  • Zest of 1 orange (for added flavor)
  • Fresh orange slices and mint leaves (for garnish)

The star of this Frozen Orange Creamsicle Slush is the orange juice, which provides the vibrant, citrusy base. Freshly squeezed juice will yield the brightest flavor, but store-bought options can be just as convenient. If you’re opting for store-bought, choose 100% pure juice with no added sugars for the best results. Another essential ingredient is the vanilla ice cream; it adds creaminess and sweetness. You can substitute it with dairy-free ice cream if you’re looking for a vegan option. Whole or 2% milk complements the ice cream, creating a smooth blend. If you want a lower-calorie version, almond or oat milk can be good alternatives.

Lastly, the granulated sugar can be adjusted based on your sweetness preference. If you prefer a more natural sweetener, consider using honey or agave syrup. The orange zest enhances the flavor profile, providing an aromatic pop that brings the whole slush together. Don’t skip it! It adds an extra layer of brightness that makes this slush truly special.

Step-by-Step Instructions

  1. Start by preparing your ingredients. Gather 2 cups of orange juice, 1 cup of vanilla ice cream, and 1 cup of crushed ice. Make sure the ice is finely crushed, as larger chunks can make blending difficult.
  2. In a blender, combine the orange juice, vanilla ice cream, crushed ice, and 1/2 cup of milk. Add 1/4 cup of granulated sugar and 1 teaspoon of vanilla extract. If you like a sweeter slush, consider adding a bit more sugar at this stage.
  3. Add the zest of 1 orange to the blender. This step is crucial for enhancing the citrus flavor of your slush. Make sure not to include the bitter white pith—only the flavorful zest.
  4. Blend the mixture on medium-high speed for about 30-45 seconds. Stop once the ingredients are fully combined and the slush has a smooth, even consistency. If you notice large chunks of ice, blend for an additional 10-15 seconds. Avoid over-blending, as this can make the slush too liquidy.
  5. Once blended, taste the slush. If it needs more sweetness, add a little more sugar and blend for a few more seconds. If it’s too thick, you can add a splash of milk to reach your desired consistency.
  6. Pour the slush into glasses. This recipe typically serves 4, but you can easily double it for larger gatherings. Use a spoon to help guide the slush into the glasses if needed.
  7. Garnish each serving with fresh orange slices and mint leaves. The mint not only adds a pop of color but also a refreshing aroma that complements the citrus flavors beautifully.
  8. Serve immediately and enjoy! If you’ve made extra, you can refrigerate it for a short time, but it’s best enjoyed fresh.

Pro Tips for the Best Frozen Orange Creamsicle Slush

  • Don’t skip the orange zest! It’s a game-changer for flavor. Always zest before juicing to make it easier.
  • Use a high-powered blender for the best texture. A standard blender may struggle with ice, leading to uneven consistency. If you have a food processor, that can work too, but ensure the ice is finely crushed.
  • Adjust the ice-to-liquid ratio carefully. If your slush is too thick, it won’t blend well. Start with less ice and add more until you reach your preferred texture.
  • Be cautious with the sugar! Always start with the lower amount, as you can easily add more, but it’s hard to fix an overly sweet slush.
  • For a fun twist, consider adding a splash of coconut milk or a handful of fresh fruit like strawberries or pineapple. This not only enhances the flavor but also adds a beautiful color contrast.

Variations & Serving Ideas

There are countless ways to put a spin on your Frozen Orange Creamsicle Slush. Consider making a tropical version by adding in some pineapple juice or coconut milk for a delightful tropical twist. If you’re feeling adventurous, try incorporating a handful of frozen mango or peach slices for added sweetness. For a lighter version, swap out the vanilla ice cream for Greek yogurt for a creamy yet tangy alternative.

As for serving ideas, this refreshing slush pairs wonderfully with light summer dishes like grilled chicken skewers, fish tacos, or a simple salad topped with citrus vinaigrette. The bright, zesty flavors of the slush complement these dishes perfectly, making them an ideal pairing for a sunny day.

Storage, Make-Ahead & Reheating

This Frozen Orange Creamsicle Slush is best enjoyed fresh, but if you have leftovers, you can store them in an airtight container in the fridge for up to 2 days. Just keep in mind that the slush may lose some of its texture over time as the ice melts. It doesn’t freeze well, as the ice will turn into a solid block. If you must freeze it, blend again after thawing to restore the slushy consistency. This treat is best the day you make it, as the flavors meld together beautifully overnight, enhancing its deliciousness.

Frequently Asked Questions

Can I make Frozen Orange Creamsicle Slush ahead of time?

Yes — in fact, it tastes even better the next day as the flavors meld. However, it’s best to enjoy it fresh, as the texture can change if stored for too long. If you need to prepare it ahead, keep it in the fridge and re-blend before serving.

What kind of orange juice should I use?

For the best flavor, use freshly squeezed orange juice. However, if you’re short on time, opt for 100% pure store-bought juice without added sugars. This will ensure that your slush remains flavorful and refreshing.

Can I substitute the vanilla ice cream?

Absolutely! If you’re looking for a dairy-free option, coconut milk ice cream or a non-dairy vanilla ice cream can work wonderfully. They will still provide the creamy texture and sweetness you desire.

How can I adjust the sweetness of my slush?

You can easily adjust the sweetness by modifying the amount of sugar added. Start with 1/4 cup and taste the mixture before blending. If you prefer it sweeter, add more sugar gradually until it reaches your desired level.

What should I do if my slush is too thick?

If your slush is too thick, simply add a splash of milk or orange juice and blend again. This will help achieve a more drinkable consistency while maintaining the slushy texture. Adjust gradually to reach your preferred thickness.

Sun-Kissed Frozen Orange Cream Slush

Final Thoughts

The Frozen Orange Creamsicle Slush is a delightful blend of refreshing citrus and creamy goodness, making it a perfect treat for warm days or any time you crave a taste of nostalgia. The way the bright orange flavor dances with the creamy texture truly elevates this slush, transforming it into a satisfying escape from the everyday.

This is the kind of recipe I come back to again and again, especially when I’m looking to cool down or impress guests at a summer gathering. It’s simple to make and always brings smiles all around! I encourage you to try this recipe for yourself—don’t hesitate to share your results or even put your own spin on it. Happy slushing!

Print
clock clock iconcutlery cutlery iconflag flag iconfolder folder iconinstagram instagram iconpinterest pinterest iconfacebook facebook iconprint print iconsquares squares iconheart heart iconheart solid heart solid icon

Frozen Orange Creamsicle Slush


  • Author: Lily author
  • Total Time: 15 minutes
  • Yield: 4 servings 1x
Pin Recipe
Print Recipe

Description

This Frozen Orange Creamsicle Slush is a refreshing treat that combines creamy vanilla and zesty orange flavors. Perfect for hot summer days, it brings back nostalgic memories with every sip.


Ingredients

Scale
  • 2 cups orange juice (freshly squeezed or store-bought)
  • 1 cup vanilla ice cream
  • 1 cup crushed ice
  • 1/2 cup milk (whole or 2%)
  • 1/4 cup granulated sugar (adjust based on sweetness preference)
  • 1 teaspoon vanilla extract
  • Zest of 1 orange (for added flavor)
  • Fresh orange slices and mint leaves (for garnish)

Instructions

  1. Start by preparing your ingredients. Gather 2 cups of orange juice, 1 cup of vanilla ice cream, and 1 cup of crushed ice. Make sure the ice is finely crushed, as larger chunks can make blending difficult.
  2. In a blender, combine the orange juice, vanilla ice cream, crushed ice, and 1/2 cup of milk. Add 1/4 cup of granulated sugar and 1 teaspoon of vanilla extract. If you like a sweeter slush, consider adding a bit more sugar at this stage.
  3. Add the zest of 1 orange to the blender. This step is crucial for enhancing the citrus flavor of your slush. Make sure not to include the bitter white pith—only the flavorful zest.
  4. Blend the mixture on medium-high speed for about 30-45 seconds. Stop once the ingredients are fully combined and the slush has a smooth, even consistency. If you notice large chunks of ice, blend for an additional 10-15 seconds. Avoid over-blending, as this can make the slush too liquidy.
  5. Once blended, taste the slush. If it needs more sweetness, add a little more sugar and blend for a few more seconds. If it’s too thick, you can add a splash of milk to reach your desired consistency.
  6. Pour the slush into glasses. This recipe typically serves 4, but you can easily double it for larger gatherings. Use a spoon to help guide the slush into the glasses if needed.
  7. Garnish each serving with fresh orange slices and mint leaves. The mint not only adds a pop of color but also a refreshing aroma that complements the citrus flavors beautifully.
  8. Serve immediately and enjoy! If you’ve made extra, you can refrigerate it for a short time, but it's best enjoyed fresh.
  • Prep Time: 15 min
  • Cook Time: 0 min
  • Category: Dessert
  • Method: Blending
  • Cuisine: American

Nutrition

  • Serving Size: 1 serving
  • Calories: 200
  • Sugar: 30 g
  • Sodium: 50 mg
  • Fat: 5 g
  • Saturated Fat: 3 g
  • Unsaturated Fat: 2 g
  • Trans Fat: 0 g
  • Carbohydrates: 40 g
  • Fiber: 1 g
  • Protein: 2 g
  • Cholesterol: 20 mg

Keywords: Don't skip the orange zest! It's a game-changer for flavor. Always zest before juicing to make it easier.

Did you make this recipe?

Share a photo and tag us — we can't wait to see what you've made!

Zesty Lemon Poppy Seed Delight

One rainy afternoon, I found myself in my grandmother’s cozy kitchen, the kind that always smelled like warmth and love. She was whipping up her famous Lemon Poppy Seed Loaf, a recipe that had been passed down through generations. As the batter came together, the zesty aroma of fresh lemons filled the air, mingling perfectly with the nutty fragrance of poppy seeds. I can still picture her, apron-clad, as she expertly drizzled a vibrant citrus icing over the loaf, creating a glossy, sun-kissed finish that beckoned us to dive in. It was a moment that sparked my own passion for baking, and this recipe has become a cherished staple in my home ever since.

When you take a bite of this Lemon Poppy Seed Loaf, it’s like a burst of sunshine on your palate. The loaf is beautifully golden, with a tender crumb that melts in your mouth. Each slice is speckled with tiny poppy seeds, adding a delightful crunch that contrasts beautifully with the tangy sweetness of the lemon. And that citrus icing? It’s the finishing touch that elevates this loaf from ordinary to extraordinary, with its bright, zesty flavor dancing on your taste buds.

This recipe stands out because it embraces simplicity while delivering on flavor. I’ve added a hint of vanilla to the batter, enhancing the overall taste and making it even more indulgent. Trust me, once you make this Lemon Poppy Seed Loaf With Citrus Icing, it’ll become a go-to in your baking repertoire.

So, let me show you exactly how to make it!

Zesty Lemon Poppy Seed Delight

Why You’ll Love This Recipe

  • Moist and tender crumb that melts in your mouth, thanks to the perfect balance of butter and buttermilk.
  • Bright, zesty lemon flavor paired with crunchy poppy seeds, creating a delightful texture and taste experience.
  • Easy to whip up in just about an hour, perfect for last-minute gatherings or a cozy afternoon treat.
  • Budget-friendly with everyday ingredients, making it an accessible option for all home bakers.
  • The citrus icing adds a sweet tang that elevates the loaf, turning a simple recipe into a showstopper!

Ingredients

  • 1 ½ cups (190g) all-purpose flour
  • 1 teaspoon baking powder
  • ½ teaspoon baking soda
  • ½ teaspoon salt
  • 3 tablespoons poppy seeds
  • ½ cup (115g) unsalted butter, softened to room temperature
  • 1 cup (200g) granulated sugar
  • 2 large eggs
  • 1 teaspoon vanilla extract
  • 1 teaspoon lemon zest (from about 1 medium lemon)
  • ½ cup (120ml) buttermilk
  • 2 tablespoons fresh lemon juice

For the Citrus Icing:

  • 1 cup (120g) powdered sugar
  • 2 tablespoons fresh lemon juice
  • 1 tablespoon orange juice
  • 1 teaspoon lemon zest (for garnish, optional)

Let’s dive into the key ingredients that make this Lemon Poppy Seed Loaf so special. The all-purpose flour provides the structure and base for the loaf, while the baking powder and baking soda ensure it rises perfectly, giving the loaf a light texture. For a gluten-free variation, you could substitute the flour with a gluten-free all-purpose blend. Poppy seeds not only add a delightful crunch but also contribute to the unique flavor profile that pairs well with the citrus notes.

Unsalted butter is crucial for achieving the buttery richness that makes this loaf so moist. If you’re looking for a dairy-free option, coconut oil or a vegan butter can be used instead. The buttermilk is another essential component, providing acidity that activates the baking soda for a fluffy texture. If you don’t have buttermilk on hand, you can easily make a substitute by mixing ½ cup of milk with 1 tablespoon of vinegar or lemon juice and letting it sit for about 5 minutes.

Step-by-Step Instructions

  1. Preheat your oven to 350°F (175°C). Grease a 9×5-inch loaf pan or line it with parchment paper for easy removal later.
  2. In a medium mixing bowl, whisk together 1 ½ cups of all-purpose flour, 1 teaspoon of baking powder, ½ teaspoon of baking soda, ½ teaspoon of salt, and 3 tablespoons of poppy seeds. This helps to evenly distribute the baking agents and ensures a uniform rise.
  3. In a large mixing bowl, cream together ½ cup of softened unsalted butter and 1 cup of granulated sugar using an electric mixer on medium speed for about 3-4 minutes, until the mixture is light and fluffy. Make sure to scrape down the sides of the bowl occasionally.
  4. Add 2 large eggs, 1 teaspoon of vanilla extract, and 1 teaspoon of lemon zest to the creamed butter and sugar, mixing until fully combined. You want a smooth consistency, so ensure there are no lumps of butter.
  5. In a small bowl, combine ½ cup of buttermilk and 2 tablespoons of fresh lemon juice. Alternately add the dry ingredients and buttermilk mixture to the butter mixture, starting and ending with the dry ingredients. Mix just until combined; do not overmix, as this can lead to a dense loaf.
  6. Pour the batter into the prepared loaf pan. Smooth the top with a spatula, ensuring it’s even. Bake in the preheated oven for 50-60 minutes, or until a toothpick inserted in the center comes out clean. The edges should be lightly golden brown, and the center should feel just set.
  7. Once baked, remove the loaf from the oven and allow it to cool in the pan for about 10 minutes. Then, transfer it to a wire rack to cool completely. Resist the urge to slice too soon, as it will be crumbly if it’s still warm.
  8. While the loaf is cooling, prepare the citrus icing. In a medium bowl, whisk together 1 cup of powdered sugar, 2 tablespoons of fresh lemon juice, and 1 tablespoon of orange juice until smooth. If the icing is too thick, you can add a little more juice to reach your desired consistency.
  9. Once the loaf is completely cool, drizzle the citrus icing over the top. If you like, sprinkle with an additional teaspoon of lemon zest for an extra pop of flavor and color.

Pro Tips for the Best Lemon Poppy Seed Loaf With Citrus Icing

  • Be careful not to overmix your batter; this is a common mistake that can lead to a dense loaf. Mix just until the dry ingredients are incorporated for a light and fluffy texture.
  • Use room temperature ingredients, especially the butter and eggs. This helps to create a smoother batter and ensures even baking. Take your eggs out of the fridge about 30 minutes before you start.
  • For a more pronounced lemon flavor, consider adding a little lemon extract in addition to the zest and juice. Just a half teaspoon can elevate the citrus notes significantly.
  • When measuring your flour, spoon it into the measuring cup and level it off with a knife instead of scooping directly from the bag. This prevents packing and ensures you don’t end up with a dry loaf.
  • Invest in a good quality loaf pan; it makes a difference in heat distribution, which ensures even baking. If your pan is dark-coated, reduce the oven temperature by 25°F to prevent over-browning.

Variations & Serving Ideas

For a delightful twist, consider adding blueberries or raspberries to the batter for a fruity burst of flavor. You can also experiment with different citrus fruits—try lime or grapefruit zest and juice for a refreshing change. For a healthier option, substitute half of the all-purpose flour with whole wheat flour for added fiber without compromising too much on texture.

This Lemon Poppy Seed Loaf pairs beautifully with a light salad, such as a mixed greens salad with a vinaigrette, or a cup of tea for a cozy afternoon treat. It also complements a creamy cheese platter, as the acidity of the loaf balances rich cheeses perfectly. Lastly, a scoop of vanilla ice cream on the side creates a delightful contrast of temperatures and flavors!

Storage, Make-Ahead & Reheating

This Lemon Poppy Seed Loaf can be stored at room temperature for up to 3 days if wrapped tightly in plastic wrap. If you want to keep it longer, it freezes well for up to 3 months. To freeze, wrap the loaf tightly in plastic wrap and then in aluminum foil to prevent freezer burn.

When you’re ready to enjoy it again, simply thaw it in the fridge overnight. Reheat individual slices in the microwave for 15-20 seconds or in a toaster oven until warmed through. Interestingly, many people find that this loaf tastes even better the next day, as the flavors have time to meld!

Frequently Asked Questions

Can I make Lemon Poppy Seed Loaf With Citrus Icing ahead of time?

Yes — in fact, it tastes even better the next day! You can make the loaf a day in advance, allowing the flavors to develop. Just be sure to store it in an airtight container to maintain its moisture.

Can I substitute the poppy seeds?

Absolutely! If you don’t have poppy seeds on hand or prefer an alternative, you can use sesame seeds for a similar crunch or omit them entirely for a smooth loaf.

What can I use instead of buttermilk?

If you don’t have buttermilk, you can easily create a substitute by mixing ½ cup of milk (dairy or plant-based) with 1 tablespoon of vinegar or lemon juice. Let it sit for 5 minutes before using in the recipe.

How can I make this recipe gluten-free?

To make a gluten-free version of this Lemon Poppy Seed Loaf, substitute the all-purpose flour with a gluten-free all-purpose flour blend. Just ensure that the blend contains a binding agent like xanthan gum for the best results.

What is the best way to store leftover loaf?

Leftover Lemon Poppy Seed Loaf should be stored in an airtight container at room temperature for up to 3 days. For longer storage, wrap it tightly and freeze for up to 3 months. Thaw it before serving for the best texture.

Zesty Lemon Poppy Seed Delight

Final Thoughts

The Lemon Poppy Seed Loaf with Citrus Icing is truly a delightful treat that brings a burst of brightness to any occasion. The zesty lemon flavor combined with the subtle crunch of poppy seeds creates a satisfying balance, while the citrus icing adds a touch of sweetness that perfectly complements the loaf’s tanginess.

This is the kind of recipe I come back to again and again, especially when I want to brighten up a gloomy day or celebrate a small victory. The aroma that fills the kitchen as it bakes is absolutely heavenly! I encourage you to give this recipe a try; you might just find it becoming a beloved staple in your home. Don’t forget to share your results or even add your own unique twist—I can’t wait to see what you create!

Print
clock clock iconcutlery cutlery iconflag flag iconfolder folder iconinstagram instagram iconpinterest pinterest iconfacebook facebook iconprint print iconsquares squares iconheart heart iconheart solid heart solid icon

Lemon Poppy Seed Loaf


  • Author: Lily author
  • Total Time: 33 minute
  • Yield: 1 loaf 1x
Pin Recipe
Print Recipe

Description

This Lemon Poppy Seed Loaf is a delightful treat that combines zesty lemon flavor with crunchy poppy seeds. Topped with a citrus icing, it’s perfect for any occasion.


Ingredients

Scale
  • 1 ½ cups (190g) all-purpose flour
  • 1 teaspoon baking powder
  • ½ teaspoon baking soda
  • ½ teaspoon salt
  • 3 tablespoons poppy seeds
  • ½ cup (115g) unsalted butter, softened to room temperature
  • 1 cup (200g) granulated sugar
  • 2 large eggs
  • 1 teaspoon vanilla extract
  • 1 teaspoon lemon zest (from about 1 medium lemon)
  • ½ cup (120ml) buttermilk
  • 2 tablespoons fresh lemon juice
  • 1 cup (120g) powdered sugar
  • 2 tablespoons fresh lemon juice
  • 1 tablespoon orange juice
  • 1 teaspoon lemon zest (for garnish, optional)

Instructions

  1. Preheat your oven to 350°F (175°C). Grease a 9×5-inch loaf pan or line it with parchment paper for easy removal later.
  2. In a medium mixing bowl, whisk together 1 ½ cups of all-purpose flour, 1 teaspoon of baking powder, ½ teaspoon of baking soda, ½ teaspoon of salt, and 3 tablespoons of poppy seeds. This helps to evenly distribute the baking agents and ensures a uniform rise.
  3. In a large mixing bowl, cream together ½ cup of softened unsalted butter and 1 cup of granulated sugar using an electric mixer on medium speed for about 3-4 minutes, until the mixture is light and fluffy. Make sure to scrape down the sides of the bowl occasionally.
  4. Add 2 large eggs, 1 teaspoon of vanilla extract, and 1 teaspoon of lemon zest to the creamed butter and sugar, mixing until fully combined. You want a smooth consistency, so ensure there are no lumps of butter.
  5. In a small bowl, combine ½ cup of buttermilk and 2 tablespoons of fresh lemon juice. Alternately add the dry ingredients and buttermilk mixture to the butter mixture, starting and ending with the dry ingredients. Mix just until combined; do not overmix, as this can lead to a dense loaf.
  6. Pour the batter into the prepared loaf pan. Smooth the top with a spatula, ensuring it’s even. Bake in the preheated oven for 50-60 minutes, or until a toothpick inserted in the center comes out clean. The edges should be lightly golden brown, and the center should feel just set.
  7. Once baked, remove the loaf from the oven and allow it to cool in the pan for about 10 minutes. Then, transfer it to a wire rack to cool completely. Resist the urge to slice too soon, as it will be crumbly if it’s still warm.
  8. While the loaf is cooling, prepare the citrus icing. In a medium bowl, whisk together 1 cup of powdered sugar, 2 tablespoons of fresh lemon juice, and 1 tablespoon of orange juice until smooth. If the icing is too thick, you can add a little more juice to reach your desired consistency.
  9. Once the loaf is completely cool, drizzle the citrus icing over the top. If you like, sprinkle with an additional teaspoon of lemon zest for an extra pop of flavor and color.
  • Prep Time: 15 mins
  • Cook Time: 50-60 mins
  • Category: Dessert
  • Method: Baking
  • Cuisine: American

Nutrition

  • Serving Size: 1 slice
  • Calories: 200
  • Sugar: 15 g
  • Sodium: 150 mg
  • Fat: 8 g
  • Saturated Fat: 5 g
  • Unsaturated Fat: 3 g
  • Trans Fat: 0 g
  • Carbohydrates: 30 g
  • Fiber: 1 g
  • Protein: 3 g
  • Cholesterol: 40 mg

Keywords: Be careful not to overmix your batter; this is a common mistake that can lead to a dense loaf. Use room temperature ingredients for a smoother batter and even baking.

Did you make this recipe?

Share a photo and tag us — we can't wait to see what you've made!

  • Privacy Policy
  • Terms Of Service
  • Contact
  • About
  • GDPR

Copyright © 2025 Homesmad