Turkey Cheese Sliders: A Culinary Delight
Turkey Cheese Sliders – the very name conjures up images of warm, gooey cheese melting over juicy turkey, all nestled in a soft, pillowy bun. These aren’t just any sliders; they’re a testament to the simple pleasures of delicious, comforting food. I’ve perfected this recipe over years, drawing inspiration from classic American diner fare and elevating it with a few gourmet touches.
While the exact origins of the slider are a bit hazy, lost somewhere in the annals of American culinary history, the concept of small, bite-sized sandwiches has always held a special place in our hearts. Think of them as the ultimate party food, the perfect appetizer, or even a satisfyingly quick weeknight meal. Their compact size makes them incredibly versatile, adaptable to countless flavor combinations and perfect for any occasion.
What makes Turkey Cheese Sliders so universally loved? It’s the delightful interplay of textures and tastes, of course! The tender turkey breast offers a lean protein counterpoint to the rich, creamy cheese. The soft bun provides a yielding embrace, while the optional additions of crisp lettuce, juicy tomato, or tangy pickles add layers of flavor and freshness. The convenience factor is another major draw; these sliders are remarkably quick to assemble, making them ideal for busy weeknights or impromptu gatherings.
Whether you’re a seasoned chef or a kitchen novice, this recipe for Turkey Cheese Sliders is sure to become a staple in your culinary repertoire. Let’s dive in and create some culinary magic together!

Ingredients:
- 1 lb ground turkey
- 1/2 cup finely chopped onion
- 1/4 cup finely chopped green bell pepper
- 2 cloves garlic, minced
- 1 teaspoon dried oregano
- 1/2 teaspoon dried basil
- 1/4 teaspoon salt
- 1/4 teaspoon black pepper
- 1/4 cup breadcrumbs
- 1 large egg, lightly beaten
- 1/2 cup shredded cheddar cheese
- 1/2 cup shredded mozzarella cheese
- 1/4 cup mayonnaise
- 1 tablespoon Dijon mustard
- 12 slider buns
- Butter, for toasting buns
- Lettuce leaves, for serving (optional)
- Tomato slices, for serving (optional)
Preparing the Turkey Mixture
- In a large bowl, I gently combine the ground turkey, onion, green bell pepper, garlic, oregano, basil, salt, and pepper. I make sure to mix everything thoroughly but avoid overmixing, as this can make the turkey patties tough.
- Next, I stir in the breadcrumbs and the beaten egg. Again, I mix until just combined. It’s important not to overmix at this stage; a slightly lumpy mixture is perfectly fine.
- Once the mixture is well combined, I gently fold in half of the shredded cheddar cheese and half of the shredded mozzarella cheese. I reserve the remaining cheese for topping the sliders later.
- I divide the turkey mixture into 12 equal portions. I find it easiest to use a kitchen scale to ensure even portions, but you can also eyeball it if you’re comfortable.
- I shape each portion into a small, flat patty, about 3 inches in diameter and about 1/2 inch thick. This ensures even cooking and prevents the patties from becoming too thick or thin.
Cooking the Turkey Patties
- I heat a large skillet over medium heat. I add a little bit of oil to the pan to prevent sticking. You can use any neutral oil like vegetable or canola oil.
- I carefully place the turkey patties in the skillet, making sure not to overcrowd the pan. Working in batches if necessary, I cook the patties for about 4-5 minutes per side, or until they are cooked through and nicely browned. I use a meat thermometer to ensure the internal temperature reaches 165°F (74°C).
- Important Note: Don’t press down on the patties while they’re cooking, as this will release the juices and result in dry patties. Let them cook undisturbed until they are nicely browned on both sides.
- Once the patties are cooked, I remove them from the skillet and set them aside on a plate lined with paper towels to drain any excess grease.
Making the Sauce and Assembling the Sliders
- While the turkey patties are cooking, I prepare the sauce. In a small bowl, I whisk together the mayonnaise and Dijon mustard until well combined. I set this aside.
- I lightly butter the cut sides of the slider buns and toast them in a skillet or toaster oven until lightly golden brown. This adds a nice texture and flavor to the sliders.
- To assemble the sliders, I spread a generous amount of the mayonnaise-mustard sauce on the bottom half of each bun. I then top with a cooked turkey patty.
- Next, I sprinkle the remaining cheddar and mozzarella cheese over each patty. I find that a generous amount of cheese adds a delicious, melty element to the sliders.
- I add lettuce and tomato slices to the sliders, if desired. These additions add freshness and a nice crunch to the sliders.
- Finally, I top each slider with the other half of the bun and serve immediately. These sliders are best enjoyed fresh and warm.
Tips and Variations
- For extra flavor, you can marinate the ground turkey in a mixture of olive oil, lemon juice, garlic, and herbs for at least 30 minutes before cooking.
- Feel free to experiment with different types of cheese. Pepper jack, provolone, or Swiss cheese would all be delicious additions.
- If you prefer spicier sliders, add a pinch of red pepper flakes to the turkey mixture.
- For a healthier option, you can use whole wheat slider buns.
- These sliders can be made ahead of time and reheated. Simply store them in an airtight container in the refrigerator and reheat them in a skillet or microwave before serving.
Serving Suggestions
- Serve these Turkey Cheese Sliders as an appetizer, main course, or part of a larger buffet spread.
- Pair them with your favorite sides, such as potato salad, coleslaw, or french fries.
- These sliders are perfect for game day, parties, or a casual weeknight dinner.
Conclusion:
So there you have it – my recipe for incredibly delicious Turkey Cheese Sliders! I truly believe this recipe is a must-try for several reasons. First, it’s incredibly versatile. The basic recipe is simple to follow, even for beginner cooks, yet it offers endless possibilities for customization. Want a spicier kick? Add a pinch of cayenne pepper to the turkey mixture. Prefer a different cheese? Experiment with provolone, pepper jack, or even a sharp cheddar – the possibilities are truly endless!
Secondly, these sliders are incredibly convenient. They’re perfect for a quick weeknight dinner, a casual get-together with friends, or even a fun game-day snack. The prep time is minimal, and the cooking time is even faster, meaning you can spend less time in the kitchen and more time enjoying the company of your loved ones. And let’s be honest, who doesn’t love a slider? The perfect bite-sized portion of deliciousness!
Thirdly, and perhaps most importantly, these Turkey Cheese Sliders are absolutely delicious. The juicy turkey, the melty cheese, the perfectly toasted buns – it’s a flavor combination that’s hard to beat. The savory turkey is complemented beautifully by the richness of the cheese, creating a truly satisfying and unforgettable culinary experience. I’ve personally tested this recipe countless times, and each time, it’s been a resounding success with everyone who’s tried it.
Speaking of trying it, I wholeheartedly encourage you to give my Turkey Cheese Sliders recipe a go! I’m confident that you’ll love them as much as I do. And once you’ve mastered the basic recipe, don’t be afraid to get creative. Try adding some caramelized onions for a touch of sweetness, or some crispy bacon for extra smoky flavor. You could even incorporate different herbs and spices to create your own unique twist on this classic.
For serving suggestions, I recommend these Turkey Cheese Sliders alongside a crisp side salad, some creamy potato salad, or even some classic coleslaw. They also pair wonderfully with a variety of dipping sauces, such as ranch dressing, BBQ sauce, or even a spicy mayo. For a truly indulgent experience, serve them with a side of sweet potato fries or onion rings.
Serving Variations:
- Miniature Muffins: Bake the turkey mixture in mini muffin tins for adorable individual portions.
- Lettuce Wraps: For a lower-carb option, skip the buns and serve the turkey and cheese mixture in crisp lettuce cups.
- Gourmet Sliders: Elevate your sliders with artisan bread rolls and gourmet cheeses.
After you’ve made your own batch of these amazing Turkey Cheese Sliders, I’d love to hear about your experience! Share your photos and feedback on social media using the hashtag #TurkeyCheeseSliders. I can’t wait to see your creations and hear about your culinary adventures. Remember, cooking should be fun and creative, so don’t be afraid to experiment and make this recipe your own. Happy cooking!
Don’t forget to rate and review the recipe below! Your feedback helps others discover this delicious and easy-to-make Turkey Cheese Slider recipe.
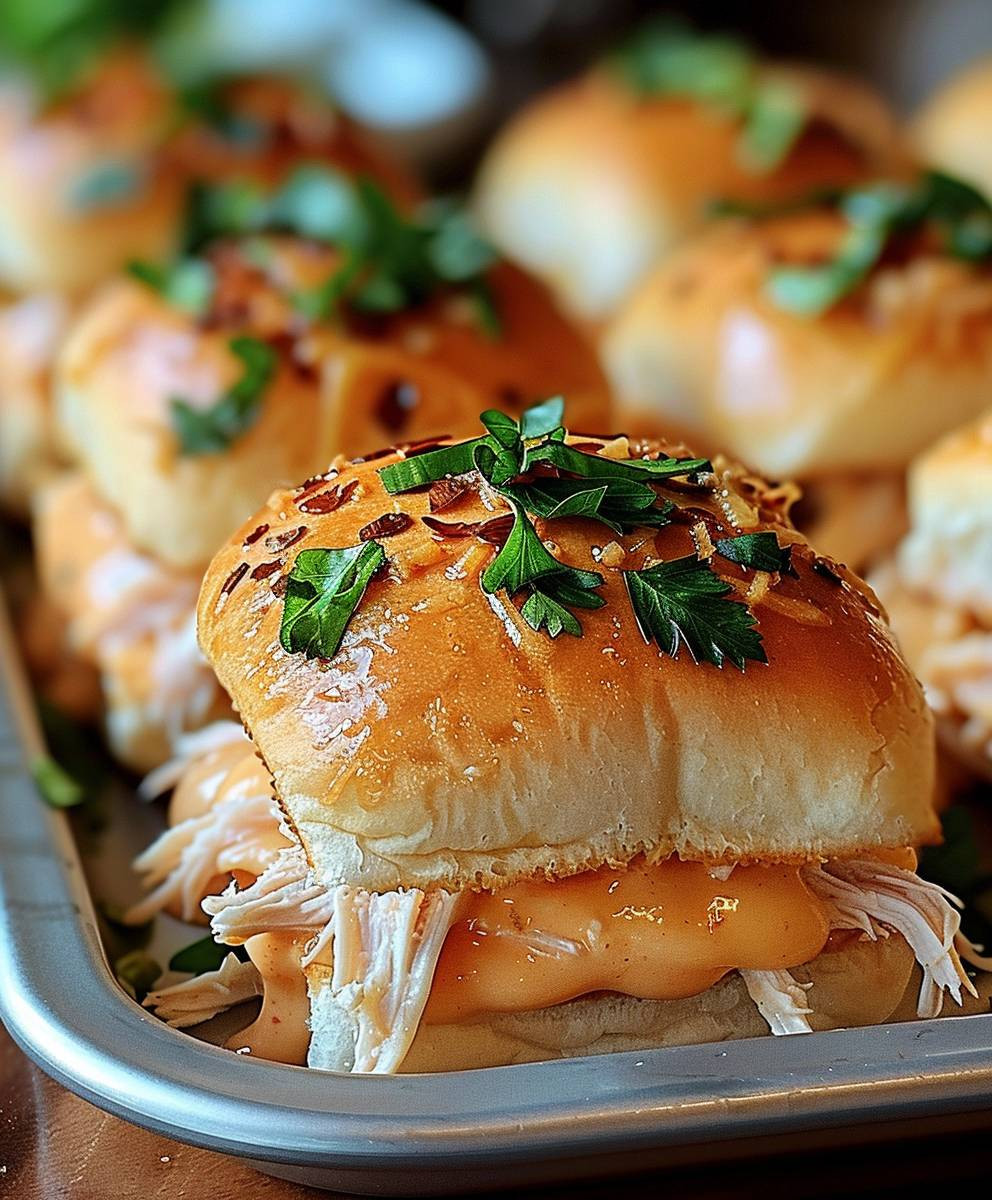
Turkey Cheese Sliders: A Delicious & Easy Recipe
Juicy turkey patties with melted cheese and tangy mayo-mustard sauce on mini buns. Perfect for parties or a quick weeknight meal!
Ingredients
Instructions
Recipe Notes
- For extra flavor, marinate the ground turkey for at least 30 minutes before cooking.
- Experiment with different cheeses (pepper jack, provolone, Swiss).
- Add red pepper flakes for spicier sliders.
- Use whole wheat buns for a healthier option.
- Leftovers can be stored in an airtight container and reheated.