• Skip to primary navigation
  • Skip to main content
  • Skip to primary sidebar
Homesmad

Homesmad

  • Home
  • Breakfast & Brunch
  • Appetizers & Snacks
  • Dinner
  • Dessert
  • About
  • Privacy Policy
  • Contact
Homesmad
  • Home
  • Breakfast & Brunch
  • Appetizers & Snacks
  • Dinner
  • Dessert
  • About
  • Privacy Policy
  • Contact

Warm Spiced Apple Cinnamon Snickerdoodle Cookies

November 2, 2025 by Lily author

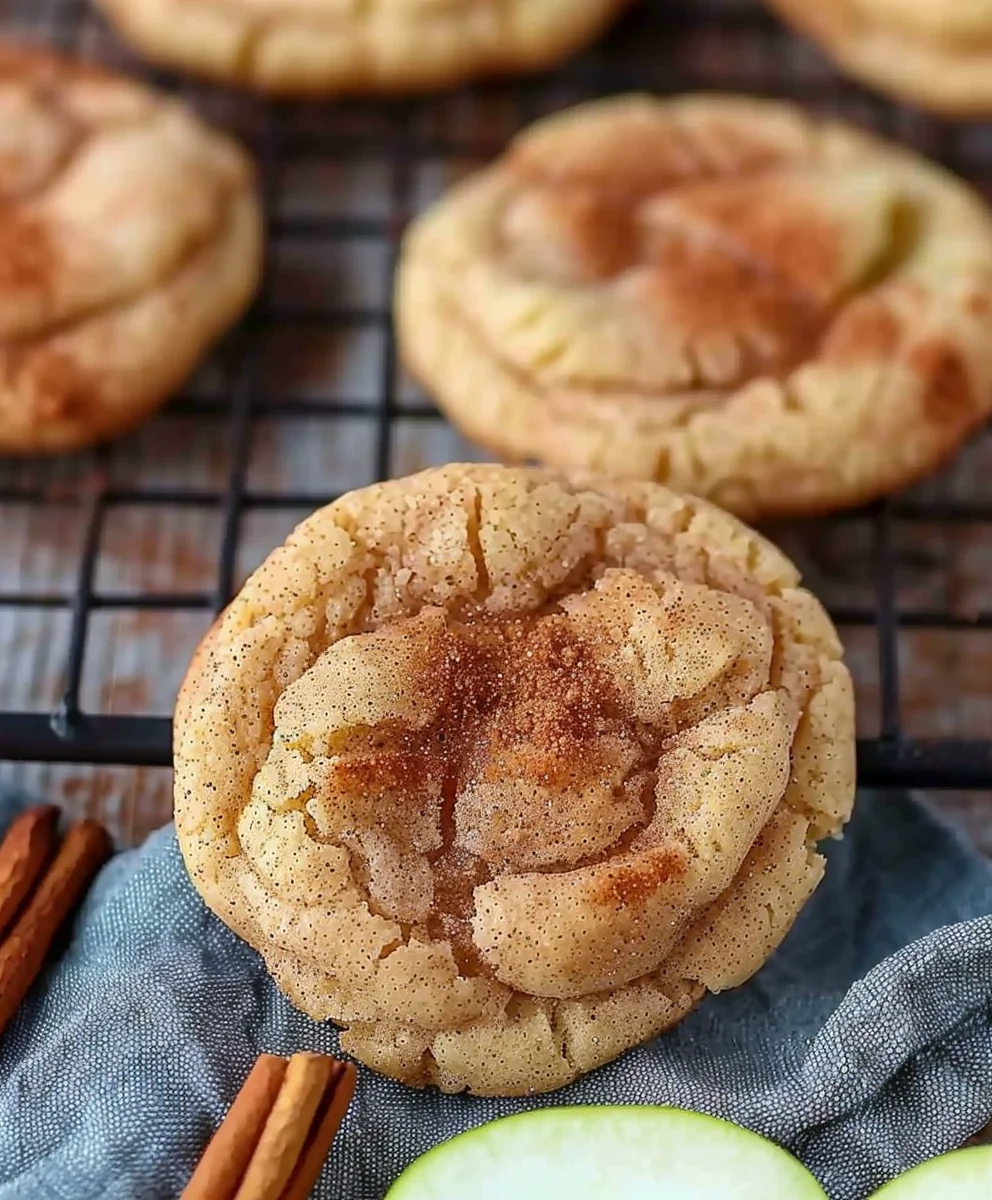
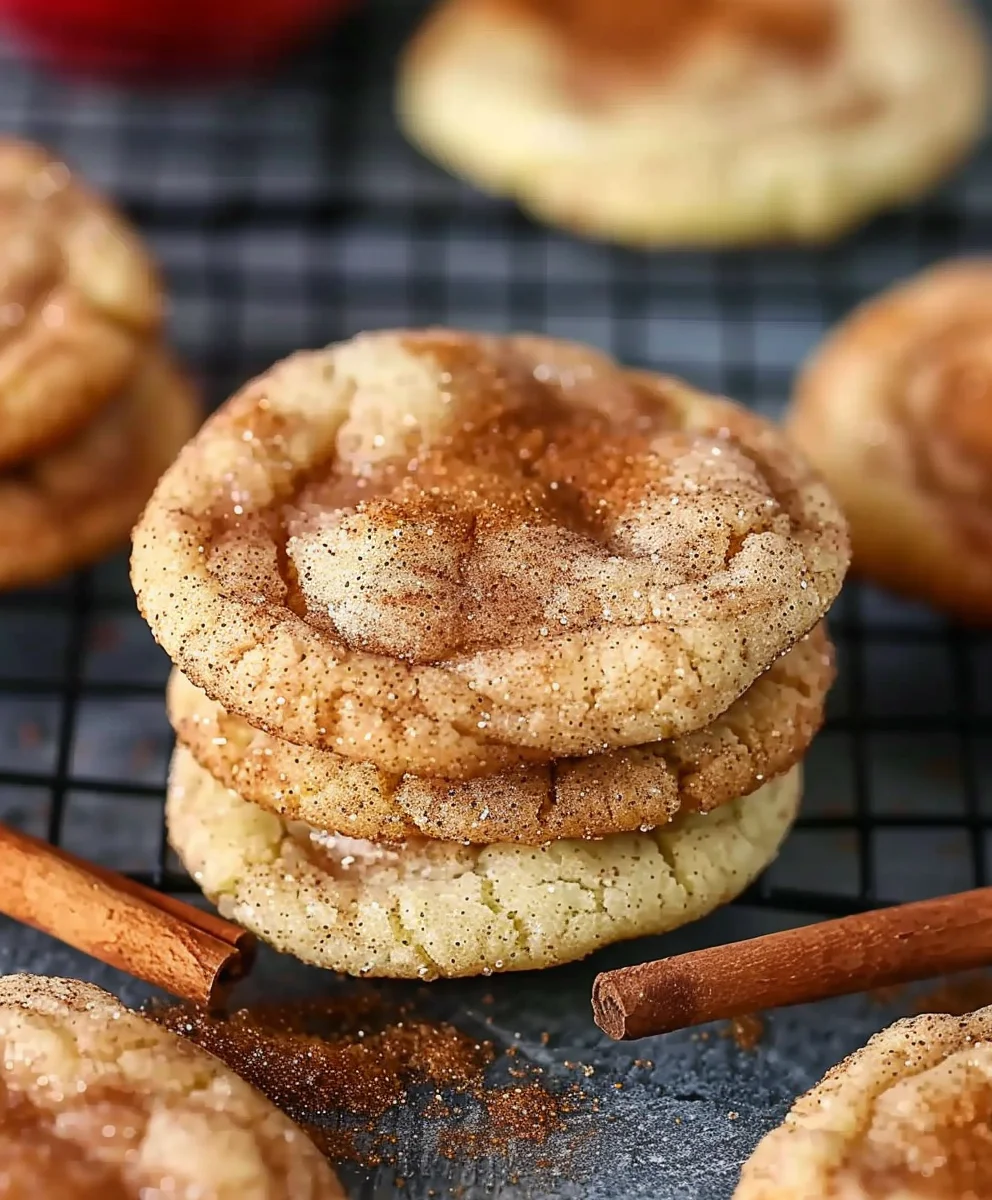
Spiced Apple Cinnamon Snickerdoodle Cookies are not just a treat; they are an experience, a delightful fusion that promises to fill your home with an irresistible aroma and your heart with pure comfort. Imagine the classic, beloved snickerdoodle, known for its soft, chewy center and crisp, cinnamon-sugar-dusted exterior, now elevated with the warm, comforting essence of spiced apples. This isn’t just another cookie; it’s a nostalgic journey wrapped in a modern, incredibly flavorful package.

A Beloved Classic Reimagined

The original snickerdoodle cookie boasts a rich history, believed to have originated in New England, possibly with Dutch or German roots, its whimsical name perhaps derived from a Pennsylvania Dutch word or even a nonsensical rhyme. We’ve taken that cherished tradition and infused it with the quintessential flavors of autumn: sweet, tender apple pieces and a blend of complementary warm spices, creating a truly unique and memorable dessert. It’s a testament to how simple ingredients can come together to create something truly extraordinary, transforming an old favorite into a captivating new sensation.

Why You’ll Fall in Love with These Cookies

People absolutely adore this dish for countless reasons. The magic lies in the symphony of textures and flavors; you get the familiar sugary crunch, followed by a pillowy soft interior, now interspersed with tender, subtly tart apple bits that add an incredible moistness and depth. The delicate balance of cinnamon, nutmeg, and a hint of allspice perfectly complements the apple, creating a warm, inviting taste that is both sophisticated and deeply comforting. Baking a batch of these Spiced Apple Cinnamon Snickerdoodle Cookies is more than just making dessert; it’s about crafting moments, whether you’re sharing them with loved ones or savoring one with a quiet cup of tea. They are surprisingly easy to make, yet deliver an impressive gourmet flair that will undoubtedly make them a staple in your recipe collection.

Warm Spiced Apple Cinnamon Snickerdoodle Cookies this RECIPE

Ingredients:

Creating the most delightful Spiced Apple Cinnamon Snickerdoodle Cookies starts with a precise and thoughtful selection of ingredients. Each component plays a vital role in achieving that perfect chewy texture, rich flavor, and signature spiced aroma we’re aiming for. Trust me, the extra care in preparing these ingredients will truly shine through in your final batch!

  • For the Cookie Dough:
    • 2 ½ cups (300g) all-purpose flour, spooned and leveled. I always recommend sifting your flour for cookies; it helps prevent lumps and ensures a lighter texture, which is especially lovely for Spiced Apple Cinnamon Snickerdoodle Cookies.
    • 2 teaspoons cream of tartar. This is non-negotiable for a classic snickerdoodle! It gives these cookies their characteristic tanginess and contributes to that wonderfully chewy texture. Without it, they’re just cinnamon sugar cookies, and we’re going for something special here.
    • 1 teaspoon baking soda. Our primary leavening agent, working in conjunction with the cream of tartar to give our cookies lift and a tender crumb.
    • 1 ½ teaspoons ground cinnamon. This goes directly into the dough to infuse every bite with warmth before we even get to the coating. It’s foundational for a truly “cinnamon” snickerdoodle.
    • ½ teaspoon ground nutmeg. Adding a beautiful depth of flavor that perfectly complements the apple and cinnamon.
    • ¼ teaspoon ground ginger. A subtle kick that enhances the “spiced” element without overpowering the other flavors.
    • ⅛ teaspoon ground cloves. Just a hint to round out the spice profile and add complexity.
    • ½ teaspoon fine sea salt. Essential for balancing the sweetness and enhancing all the delicious flavors in our Spiced Apple Cinnamon Snickerdoodle Cookies.
    • 1 cup (226g) unsalted butter, softened to room temperature. This is crucial for proper creaming. If your butter is too cold, it won’t incorporate enough air; if it’s too warm, it can result in greasy, flat cookies.
    • 1 ½ cups (300g) granulated sugar, plus extra for the coating. This provides sweetness and helps with browning and crisp edges.
    • ¼ cup (50g) light brown sugar, packed. The brown sugar adds a lovely hint of molasses flavor and contributes to a chewier, more moist cookie.
    • 2 large eggs, at room temperature. Room temperature eggs emulsify better with the butter and sugar, creating a smoother dough.
    • 1 ½ teaspoons pure vanilla extract. Use the best quality you can find; it makes a noticeable difference in the overall flavor profile.
    • ½ cup (120g) unsweetened apple butter, at room temperature. Ah, the secret ingredient that makes these truly Spiced Apple Cinnamon Snickerdoodle Cookies! It provides deep apple flavor and moisture without adding chunky fruit bits, ensuring a smooth, uniform dough. Make sure it’s unsweetened or very lightly sweetened to control the overall sugar level.
  • For the Cinnamon-Sugar Coating:
    • ½ cup (100g) granulated sugar.
    • 1 tablespoon ground cinnamon. You want a generous amount here to really coat each cookie and give it that iconic snickerdoodle finish.

Equipment You’ll Need:

Having the right tools at hand makes the baking process so much smoother and more enjoyable. For these Spiced Apple Cinnamon Snickerdoodle Cookies, a few key pieces of equipment will set you up for success:

  • Stand mixer with paddle attachment (or a large bowl and a hand mixer)
  • Large mixing bowls
  • Whisk
  • Rubber spatula
  • Measuring cups and spoons
  • Baking sheets
  • Parchment paper (highly recommended for non-stick and easy cleanup)
  • Small shallow dish or plate for the cinnamon-sugar coating
  • Cookie scoop (1.5 to 2 tablespoons, for uniform cookies)
  • Wire cooling racks

Instructions:

Let’s get baking! Follow these detailed steps to create the most incredible Spiced Apple Cinnamon Snickerdoodle Cookies you’ve ever tasted. I promise, it’s worth every moment!

Phase 1: Preparing the Cinnamon-Sugar Coating

  1. First things first, let’s get our signature snickerdoodle coating ready. In a small, shallow dish or plate, combine the ½ cup of granulated sugar and 1 tablespoon of ground cinnamon for the coating. Whisk them together thoroughly until the cinnamon is evenly distributed throughout the sugar. You want a consistent, fragrant mix. Set this aside; we’ll be rolling our beautiful dough balls in this mixture later. This coating is what gives Spiced Apple Cinnamon Snickerdoodle Cookies their irresistible crackly exterior and extra burst of spice.

Phase 2: Preparing the Apple Butter and Dry Ingredients

  1. Before we dive into the main dough, ensure your ½ cup of unsweetened apple butter is at room temperature. This is important for smooth incorporation into the wet ingredients later. If it’s cold, it might cause the butter mixture to seize up slightly. Just set it out on the counter a bit before you start, or give it a very brief microwave zap (10-15 seconds) if you’re in a hurry.
  2. In a medium bowl, whisk together all of your dry ingredients: the 2 ½ cups of all-purpose flour, 2 teaspoons of cream of tartar, 1 teaspoon of baking soda, 1 ½ teaspoons of ground cinnamon, ½ teaspoon of ground nutmeg, ¼ teaspoon of ground ginger, ⅛ teaspoon of ground cloves, and ½ teaspoon of fine sea salt. Whisk vigorously for about 30 seconds to ensure all the leavening agents and those glorious spices are perfectly distributed. This step is crucial for consistent flavor and rise in every single one of your Spiced Apple Cinnamon Snickerdoodle Cookies. Set this bowl aside.

Phase 3: Creaming Wet Ingredients and Combining

  1. In the bowl of your stand mixer fitted with the paddle attachment (or a large mixing bowl with a hand mixer), add the 1 cup (226g) of softened unsalted butter, 1 ½ cups (300g) of granulated sugar, and ¼ cup (50g) of light brown sugar. Cream these together on medium-high speed for about 3-4 minutes, or until the mixture is truly light, fluffy, and pale in color. This process incorporates air into the butter, which contributes to the cookies’ light texture. Don’t rush this step; it’s foundational for the best Spiced Apple Cinnamon Snickerdoodle Cookies. Scrape down the sides of the bowl with a rubber spatula halfway through to ensure everything is evenly mixed.
  2. Reduce the mixer speed to low. Add the 2 large room temperature eggs, one at a time, mixing well after each addition until just combined. After the second egg, scrape down the sides of the bowl again.
  3. Next, add the 1 ½ teaspoons of pure vanilla extract and the ½ cup of room temperature unsweetened apple butter. Mix on low speed until just combined. The mixture might look a little curdled at this point, especially if your apple butter was a bit cool, but don’t worry, it will come together as we add the dry ingredients.
  4. With the mixer still on low speed, gradually add your dry ingredient mixture to the wet ingredients. Add about a third of the dry mixture at a time, mixing until just barely combined before adding the next portion. Stop mixing as soon as no pockets of dry flour are visible. It’s incredibly important not to overmix the dough at this stage! Overmixing develops gluten, which can lead to tough, dense cookies instead of the soft, chewy Spiced Apple Cinnamon Snickerdoodle Cookies we’re striving for. A few streaks of flour are better than an overmixed dough.

Phase 4: Chilling the Dough (Crucial for Spiced Apple Cinnamon Snickerdoodle Cookies!)

  1. Once your dough is mixed, remove the bowl from the stand mixer. Cover the bowl tightly with plastic wrap. Now, here’s a step you absolutely cannot skip for truly amazing Spiced Apple Cinnamon Snickerdoodle Cookies: refrigerate the dough for at least 2 hours, or preferably overnight. Chilling the dough does a few wonderful things:
    • It helps the flavors meld and deepen, particularly allowing those warm apple and spice notes to fully develop.
    • It solidifies the butter, which prevents the cookies from spreading too much during baking, resulting in a thicker, chewier cookie.
    • It makes the dough much easier to handle and roll.

    If you can chill it overnight, you’ll be rewarded with even richer flavors and a better texture. Don’t compromise on this step for the ultimate Spiced Apple Cinnamon Snickerdoodle Cookies experience!

Phase 5: Rolling and Baking Your Spiced Apple Cinnamon Snickerdoodle Cookies

  1. When you’re ready to bake, preheat your oven to 375°F (190°C). Line two large baking sheets with parchment paper. Parchment paper is a fantastic aid here, preventing sticking and ensuring even baking for your cookies.
  2. Retrieve your chilled dough from the refrigerator. If it’s been chilling overnight, it might be quite firm. Let it sit out at room temperature for 10-15 minutes to soften just enough to scoop without too much effort, but don’t let it get warm.
  3. Using a 1.5 to 2-tablespoon cookie scoop (a uniform scoop ensures even baking!), portion out the dough. Roll each scoop of dough between your palms to form a smooth ball.
  4. Now, roll each dough ball generously in the prepared cinnamon-sugar mixture from Phase 1. Make sure it’s completely coated on all sides. Don’t be shy with the coating; it’s what gives Spiced Apple Cinnamon Snickerdoodle Cookies their iconic look and delightful crunch.
  5. Place the coated dough balls on the prepared baking sheets, spacing them about 2 inches apart. They will spread, so give them room! I usually fit 12 cookies per standard baking sheet.
  6. Bake one sheet at a time in the preheated oven for 9-11 minutes. The exact baking time will depend on your oven and the size of your cookies. You’re looking for edges that are just set and very lightly golden, while the centers still look soft and slightly puffy. It’s crucial not to overbake these cookies! Overbaking will lead to dry, crumbly cookies rather than the soft, chewy Spiced Apple Cinnamon Snickerdoodle Cookies we want.
  7. If you’re baking multiple sheets, rotate the baking sheet halfway through the baking time for even cooking. Once baked, remove the baking sheet from the oven.

Phase 6: Cooling and Storing

  1. Let the freshly baked Spiced Apple Cinnamon Snickerdoodle Cookies cool on the baking sheet for about 5 minutes. They will be very soft right out of the oven, and this short cooling period allows them to set up slightly.
  2. After 5 minutes, carefully transfer the cookies from the baking sheet to a wire cooling rack to cool completely. Cooling them on a rack prevents the bottoms from getting soggy and ensures they cool evenly.
  3. Once completely cool, store your delicious Spiced Apple Cinnamon Snickerdoodle Cookies in an airtight container at room temperature for up to 3-4 days. They tend to soften and become even chewier on the second day, making them perhaps even more irresistible!

Tips for Perfect Spiced Apple Cinnamon Snickerdoodle Cookies:

  • Room Temperature Matters:

    Ensure your butter, eggs, and apple butter are all at room temperature. This is not just a suggestion; it’s key to achieving a smooth, well-emulsified dough and the perfect texture for your Spiced Apple Cinnamon Snickerdoodle Cookies.

  • Measure Flour Correctly:

    Too much flour can make your cookies dry and tough. Always spoon your flour into the measuring cup and then level it off with the back of a knife. Never scoop directly from the bag.

  • Don’t Overmix the Dough:

    As mentioned, overmixing develops gluten, which leads to tough cookies. Mix only until the ingredients are just combined.

  • Chill Time is Your Friend:

    The minimum 2-hour chill time (or overnight!) is absolutely essential. It deepens the flavors, prevents excessive spreading, and makes the dough easier to handle. Patience truly pays off with these Spiced Apple Cinnamon Snickerdoodle Cookies.

  • Bake in Batches:

    Don’t crowd your baking sheets. Give the cookies enough space to spread and bake evenly. If you put too many on one sheet, they might not brown properly and could merge into one giant cookie.

  • Adjust Baking Time:

    Ovens vary. Keep an eye on your cookies during the last few minutes of baking. The ideal cookie will have set edges but a slightly soft center. If they look too puffy and pale after 9 minutes, give them another minute or two.

  • For Extra Apple Prowess:

    If you love an intense apple flavor, consider adding a tiny bit of finely minced dried apple (about ¼ cup, rehydrated briefly and patted dry) along with the dry ingredients. This will add texture and a concentrated burst of apple to your Spiced Apple Cinnamon Snickerdoodle Cookies.

  • Quality Apple Butter:

    Since apple butter is a star ingredient here, using a good quality, flavorful unsweetened apple butter will significantly impact the final taste of your Spiced Apple Cinnamon Snickerdoodle Cookies.

Warm Spiced Apple Cinnamon Snickerdoodle Cookies

Conclusion:

Well, my friends, we’ve reached the sweet end of our journey, and I genuinely hope you’re feeling as inspired and ready to bake as I am to share these incredible treats with you. If there’s one recipe you absolutely must add to your baking repertoire this season, or frankly, any season, it’s this one. These aren’t just cookies; they’re a warm hug, a sweet memory waiting to be made, and a delightful symphony of flavors that will truly elevate your dessert game. The combination of tender apples, fragrant cinnamon, and that signature snickerdoodle tang creates an irresistible alchemy. I promise you, the moment that first batch of Spiced Apple Cinnamon Snickerdoodle Cookies emerges from your oven, filling your kitchen with its intoxicating aroma, you’ll understand why I’m so passionate about them. The soft, chewy texture, perfectly balanced with pockets of spiced apple goodness and rolled in that iconic cinnamon-sugar crust, is simply unparalleled. Each bite is a little piece of comfort, a joyful burst of autumn sunshine, no matter what the calendar says.

Now, let’s talk about how to best enjoy these glorious creations. While they are undeniably perfect on their own, fresh from the cooling rack, there are so many wonderful ways to serve and savor them. Imagine them nestled alongside a steaming mug of your favorite coffee or a robust Earl Grey tea on a crisp morning – pure bliss! For an extra special treat, I love crumbling one slightly over a scoop of vanilla bean ice cream; the warm cookie against the cold ice cream creates a sensational contrast. They’re also an absolutely fantastic addition to any holiday cookie platter, guaranteed to be a crowd-pleaser and stand out from the usual suspects. A glass of cold milk is, of course, a timeless pairing that brings out all their comforting qualities. Don’t shy away from packing a few in lunchboxes for a delightful midday pick-me-up or wrapping them up thoughtfully as a homemade gift for friends, family, or even appreciative neighbors. Trust me, a plate of these cookies makes for the best kind of surprise.

But the fun doesn’t stop there! Part of the joy of baking is making a recipe your own, and these cookies are wonderfully adaptable. Feel free to experiment with the spice blend if you’re feeling adventurous. A touch of nutmeg or allspice could add another layer of warmth, or a tiny pinch of ground cloves might deepen the autumnal notes. If you’re a chocolate lover, a handful of white chocolate chips folded into the dough would be a decadent addition, complementing the apple and cinnamon beautifully. For a richer texture, consider adding finely chopped pecans or walnuts – just a quarter cup would suffice – toasted lightly before adding them to enhance their flavor. You could even drizzle a simple powdered sugar glaze (made with powdered sugar and a tiny bit of apple cider or milk) over the cooled cookies for an extra touch of sweetness and visual appeal. This recipe truly is a canvas for your creativity, allowing you to tailor it to your personal preferences and make these amazing Spiced Apple Cinnamon Snickerdoodle Cookies uniquely yours every time you bake them.

So, what are you waiting for? This recipe is more than just ingredients and steps; it’s an invitation to create, to share, and to experience pure baking joy. I truly hope you’ll give these phenomenal cookies a try very soon. Don’t be shy – dive in, preheat that oven, and let the magic happen in your kitchen. I am genuinely eager to hear about your baking adventures and see your delicious results. Please, share your creations, your serving suggestions, or any variations you come up with in the comments below or on social media! Tag me, let me know how they turned out, and tell me who you shared them with. There’s nothing I love more than seeing our baking community come alive with shared passion and delicious outcomes. Happy baking, everyone, and get ready to fall head over heels for these unforgettable cookies!


Warm Spiced Apple Cinnamon Snickerdoodle Cookies

Warm Spiced Apple Cinnamon Snickerdoodle Cookies

These Warm Spiced Apple Cinnamon Snickerdoodle Cookies combine the classic snickerdoodle’s soft, chewy center and cinnamon-sugar crust with the comforting essence of spiced apples, offering a unique and memorable dessert experience.

Prep Time
20 Minutes

Cook Time
25 Minutes

Total Time
45 Minutes

Servings
36 cookies

Ingredients

  • 3 cups + 2 tbsp all-purpose flour
  • 2 tsp cream of tartar
  • 1 tsp baking soda
  • 1.5 tsp ground cinnamon (for dough)
  • 0.5 tsp ground nutmeg
  • 0.25 tsp ground ginger
  • 0.125 tsp ground cloves
  • 0.5 tsp fine sea salt
  • 1 cup unsalted butter, softened
  • 1 cup granulated sugar (for dough)
  • 0.25 cup light brown sugar, packed
  • 2 large eggs
  • 1.5 tsp pure vanilla extract
  • 0.5 cup unsweetened apple butter
  • 0.5 cup granulated sugar (for coating)
  • 1 tbsp ground cinnamon (for coating)

Instructions

  1. Step 1
    In a shallow dish, combine 0.5 cup granulated sugar and 1 tablespoon ground cinnamon for the coating. Whisk well and set aside.
  2. Step 2
    Ensure 0.5 cup unsweetened apple butter is at room temperature. In a medium bowl, whisk together 3 cups + 2 tbsp all-purpose flour, 2 tsp cream of tartar, 1 tsp baking soda, 1.5 tsp ground cinnamon, 0.5 tsp ground nutmeg, 0.25 tsp ground ginger, 0.125 tsp ground cloves, and 0.5 tsp fine sea salt. Whisk vigorously for 30 seconds and set aside.
  3. Step 3
    In a stand mixer, cream 1 cup softened unsalted butter, 1 cup granulated sugar (for dough), and 0.25 cup light brown sugar on medium-high speed for 3-4 minutes until light and fluffy. Scrape down the bowl.
  4. Step 4
    Reduce mixer speed to low. Add 2 large eggs, one at a time, mixing until just combined. Add 1.5 tsp pure vanilla extract and 0.5 cup room temperature unsweetened apple butter; mix until just combined.
  5. Step 5
    With the mixer on low speed, gradually add the dry ingredient mixture to the wet ingredients in thirds, mixing until just barely combined after each addition. Do not overmix; stop when no dry flour pockets are visible.
  6. Step 6
    Cover the dough tightly with plastic wrap and refrigerate for at least 2 hours, or preferably overnight. Chilling is crucial for flavor development, preventing spreading, and easier handling.
  7. Step 7
    When ready to bake, preheat oven to 375°F (190°C). Line two large baking sheets with parchment paper. If dough is too firm after chilling, let it sit at room temperature for 10-15 minutes.
  8. Step 8
    Using a 1.5 to 2-tablespoon cookie scoop, portion out the dough. Roll each scoop into a smooth ball between your palms, then generously coat it in the prepared cinnamon-sugar mixture.
  9. Step 9
    Place coated dough balls 2 inches apart on the prepared baking sheets. Bake one sheet at a time for 9-11 minutes, or until edges are just set and lightly golden, and centers are still soft and slightly puffy. Do not overbake. Rotate baking sheet halfway through if baking multiple sheets.
  10. Step 10
    Let baked cookies cool on the baking sheet for about 5 minutes, then carefully transfer them to a wire cooling rack to cool completely. Store completely cool cookies in an airtight container at room temperature for up to 3-4 days.

Important Information

Nutrition Facts (Per Serving)

It is important to consider this information as approximate and not to use it as definitive health advice.

Allergy Information

Please check ingredients for potential allergens and consult a health professional if in doubt.

« Previous Post
High Protein Honey Garlic Shrimp: Quick & Flavorful Meal!
Next Post »
Irresistible Apple Pumpkin Muffins with Crumb Topping

If you enjoyed this…

Strawberry Cheesecake Brownies: The Ultimate Dessert Recipe

Raspberry Lemon Cupcakes: The Ultimate Recipe for Zesty Delight

Best Ever Butterscotch Chocolate Chip Cookies with Sea Salt

Primary Sidebar

Browse by Diet

BreakfastDinnerLunchDessertAppetizer

Sweet Peach Yogurt Parfait Delight

One of my fondest memories is from a lazy summer afternoon spent at my grandmother’s house. The sun filtered through the kitchen window, casting a warm glow over the table where she would create her culinary magic. It was during one of those blissful moments that I first tasted her Peach Yogurt Parfait with Honey and Granola. The sweet aroma of ripe peaches mingling with creamy yogurt and the crunch of granola was nothing short of heavenly. It felt like summer captured in a bowl, and I still remember the joy of diving in with a spoon, each layer revealing a new burst of flavor.

When I think about that parfait, I can almost hear the gentle hum of the bees outside, reminding me of the floral notes that honey brings to every bite. The vibrant yellows and soft oranges of the peaches contrast beautifully with the creamy white yogurt and the golden crunch of granola. It’s a dish that not only looks delightful but also tastes like a celebration of fresh, wholesome ingredients.

What makes my version of this Peach Yogurt Parfait special is the careful balance of flavors and textures. I use ripe, juicy peaches, drizzled with locally sourced honey, and a homemade granola that’s bursting with nuts and seeds for an extra crunch. It’s a simple dish, but every layer is crafted with love and attention.

Let me show you exactly how to make this delightful parfait, so you can bring a bit of that summer magic into your kitchen!

Sweet Peach Yogurt Parfait Delight

Why You’ll Love This Recipe

  • Delightfully creamy texture from the Greek yogurt, paired with the juicy sweetness of fresh peaches.
  • Ready in under 20 minutes, making it a quick and satisfying breakfast or snack option.
  • Budget-friendly, using common ingredients that you may already have in your pantry.
  • Customizable with your favorite granola and nuts, allowing you to tailor each parfait to your taste.
  • Perfectly balanced flavors with the bright acidity of lemon juice and the sweetness of honey enhancing the peaches.

Ingredients

  • For the Parfait:
  • 2 cups plain Greek yogurt (or vanilla yogurt for a sweeter option)
  • 2 large ripe peaches, diced (about 2 cups)
  • 1 tablespoon fresh lemon juice (to prevent browning of peaches)
  • 2 tablespoons honey (plus more for drizzling)
  • 1 teaspoon vanilla extract (optional for extra flavor)
  • For the Granola:
  • 1 cup granola (store-bought or homemade; see notes for a simple granola recipe)
  • 1/4 cup sliced almonds (optional for added crunch)
  • 1/4 cup shredded coconut (optional for added flavor)

Let’s dive into some key ingredients that make this Peach Yogurt Parfait so delightful! First, the Greek yogurt is not only creamy but also packed with protein, making it a satisfying option for breakfast or a snack. If you’re looking for a sweeter option, you can easily substitute it with vanilla yogurt, though it may alter the overall flavor balance. Next, the ripe peaches are the star of the show; their natural sweetness shines through, so I recommend choosing peaches that yield slightly to pressure, indicating they’re perfectly ripe. If peaches aren’t in season, feel free to use nectarines or even frozen peaches—just thaw them before use. Finally, honey adds a lovely floral sweetness that ties everything together. If you prefer, maple syrup can serve as a delicious substitute.

Step-by-Step Instructions

  1. Start by preparing the peaches. Wash them thoroughly, then slice and dice them into bite-sized pieces. In a medium bowl, toss the diced peaches with 1 tablespoon of fresh lemon juice to prevent browning. Set aside for about 5 minutes while the lemon juice works its magic.
  2. In a separate bowl, combine the Greek yogurt, 2 tablespoons of honey, and 1 teaspoon of vanilla extract if using. Stir the mixture until smooth and thoroughly blended. This should take about a minute. Avoid overmixing to maintain the creaminess of the yogurt.
  3. Now it’s time to layer your parfait. Grab a clear glass or bowl to showcase your beautiful creation. Start with a generous spoonful of the yogurt mixture at the bottom—about 1/4 cup will do. Use a spoon to spread it evenly.
  4. Add a layer of the diced peaches over the yogurt, ensuring they cover the yogurt completely. You might want to use about half of what you have prepared—roughly 1 cup. This layer should be visually appealing, so arrange the peaches neatly.
  5. Sprinkle 1/4 cup of granola over the peaches. This adds a delightful crunch. Make sure to distribute it evenly to ensure every bite has that satisfying texture. Avoid packing it down too tightly, as you want it to maintain its crunch.
  6. Repeat the layers: spoon in another 1/4 cup of yogurt, followed by another cup of peaches, and another sprinkle of granola. You should have at least two layers, but feel free to add more depending on your glass size.
  7. Finish off your parfait with a drizzle of honey on top for added sweetness and a touch of elegance. If you’re using sliced almonds or shredded coconut, sprinkle them on top now. It adds a lovely visual contrast and extra flavor.
  8. Serve immediately or refrigerate for up to 30 minutes before serving to allow the flavors to meld together. However, I recommend enjoying it fresh to maintain the granola’s crunch.

Pro Tips for the Best Peach Yogurt Parfait With Honey And Granola

  • Make sure to choose ripe peaches for the best flavor and texture. A common mistake is using unripe fruit, which can lead to a less enjoyable parfait. Look for peaches that are fragrant and slightly soft to the touch.
  • Use a clear glass to assemble your parfait; this not only makes for a beautiful presentation but also allows you to see the colorful layers, which adds to the enjoyment of eating it.
  • For an even creamier texture, consider whipping the Greek yogurt with a hand mixer for a couple of minutes before layering. This small adjustment makes a huge difference in mouthfeel.
  • Be mindful of the granola-to-yogurt ratio. Too much granola can overwhelm the parfait, while too little can make it feel too creamy. Aim for about 1/4 cup of granola per layer for the perfect balance.
  • If you’re making this for a gathering, consider preparing the yogurt and peaches ahead of time and layering them just before serving. This ensures the granola stays crunchy!

Variations & Serving Ideas

There are so many ways to get creative with your Peach Yogurt Parfait! For a tropical twist, swap out the peaches for mangoes or pineapples and top with coconut flakes. If you prefer a berry flavor, mix in some blueberries or strawberries with the peaches for added color and taste. For a nutty version, incorporate chopped walnuts or pecans instead of almonds.

As for serving ideas, this parfait pairs beautifully with a side of scrambled eggs for a hearty breakfast or fresh fruit salad for a light lunch. You might also enjoy it alongside whole grain toast with almond butter for an energizing snack. The contrast of flavors and textures will elevate your meal experience!

Storage, Make-Ahead & Reheating

The Peach Yogurt Parfait is best enjoyed fresh, but you can prepare some components ahead of time. Store the layered parfait in an airtight container in the refrigerator for up to 24 hours. However, be cautious; the granola may lose its crunch if stored too long. You can freeze the yogurt and peach mixture for up to 2 months; just remember to thaw it in the refrigerator overnight before serving.

If you plan to enjoy this dish the next day, it can taste even better as the flavors meld together. Just remember to add the granola right before serving to keep its delightful crunch!

Frequently Asked Questions

Can I make Peach Yogurt Parfait With Honey And Granola ahead of time?

Yes — in fact, it tastes even better the next day as the flavors meld. However, I recommend waiting to add the granola until just before serving to maintain its crunch.

What can I substitute for Greek yogurt?

If you prefer a lighter option, you can substitute Greek yogurt with regular yogurt or a dairy-free alternative like coconut yogurt. Just remember that this may alter the creaminess and flavor profile slightly.

Can I use frozen peaches for this parfait?

Absolutely! Just make sure to thaw the frozen peaches before using them. They will still add great flavor, though the texture may be slightly softer than fresh peaches.

How do I make the parfait vegan?

To make a vegan version, substitute the Greek yogurt with a plant-based yogurt alternative, and replace honey with maple syrup or agave nectar. This keeps the parfait sweet while adhering to a vegan diet.

What other fruits can I use in this recipe?

You can mix and match fruits based on your preference. Try using strawberries, blueberries, raspberries, or even bananas. Just make sure to adjust the lemon juice as needed to prevent browning.

Sweet Peach Yogurt Parfait Delight

Final Thoughts

The Peach Yogurt Parfait with Honey and Granola is a delightful blend of creamy yogurt, sweet peaches, and crunchy granola that creates a satisfying and nourishing treat. Each layer bursts with flavor, making it a perfect choice for breakfast or a light dessert.

This is the kind of recipe I come back to again and again, especially when I want something refreshing and wholesome to start my day. The harmony of sweet and tart flavors, combined with the delightful crunch, never fails to lift my spirits!

I encourage you to give this parfait a try and indulge in its comforting goodness. Feel free to share your results or even add your own twist—perhaps a sprinkle of cinnamon or a handful of nuts. Enjoy creating your perfect parfait!

Print
clock clock iconcutlery cutlery iconflag flag iconfolder folder iconinstagram instagram iconpinterest pinterest iconfacebook facebook iconprint print iconsquares squares iconheart heart iconheart solid heart solid icon

Peach Yogurt Parfait


  • Author: Lily author
  • Total Time: 15 minutes
  • Yield: 4 servings 1x
Pin Recipe
Print Recipe

Description

This Peach Yogurt Parfait combines creamy Greek yogurt, juicy peaches, and crunchy granola for a delightful treat. It’s a perfect breakfast or snack that captures the essence of summer in every bite.


Ingredients

Scale
  • For the Parfait:
  • 2 cups plain Greek yogurt (or vanilla yogurt for a sweeter option)
  • 2 large ripe peaches, diced (about 2 cups)
  • 1 tablespoon fresh lemon juice (to prevent browning of peaches)
  • 2 tablespoons honey (plus more for drizzling)
  • 1 teaspoon vanilla extract (optional for extra flavor)
  • For the Granola:
  • 1 cup granola (store-bought or homemade; see notes for a simple granola recipe)
  • 1/4 cup sliced almonds (optional for added crunch)
  • 1/4 cup shredded coconut (optional for added flavor)

Instructions

  1. Start by preparing the peaches. Wash them thoroughly, then slice and dice them into bite-sized pieces. In a medium bowl, toss the diced peaches with 1 tablespoon of fresh lemon juice to prevent browning. Set aside for about 5 minutes while the lemon juice works its magic.
  2. In a separate bowl, combine the Greek yogurt, 2 tablespoons of honey, and 1 teaspoon of vanilla extract if using. Stir the mixture until smooth and thoroughly blended. This should take about a minute. Avoid overmixing to maintain the creaminess of the yogurt.
  3. Now it’s time to layer your parfait. Grab a clear glass or bowl to showcase your beautiful creation. Start with a generous spoonful of the yogurt mixture at the bottom—about 1/4 cup will do. Use a spoon to spread it evenly.
  4. Add a layer of the diced peaches over the yogurt, ensuring they cover the yogurt completely. You might want to use about half of what you have prepared—roughly 1 cup. This layer should be visually appealing, so arrange the peaches neatly.
  5. Sprinkle 1/4 cup of granola over the peaches. This adds a delightful crunch. Make sure to distribute it evenly to ensure every bite has that satisfying texture. Avoid packing it down too tightly, as you want it to maintain its crunch.
  6. Repeat the layers: spoon in another 1/4 cup of yogurt, followed by another cup of peaches, and another sprinkle of granola. You should have at least two layers, but feel free to add more depending on your glass size.
  7. Finish off your parfait with a drizzle of honey on top for added sweetness and a touch of elegance. If you’re using sliced almonds or shredded coconut, sprinkle them on top now. It adds a lovely visual contrast and extra flavor.
  8. Serve immediately or refrigerate for up to 30 minutes before serving to allow the flavors to meld together. However, I recommend enjoying it fresh to maintain the granola’s crunch.
  • Prep Time: 15 mins
  • Cook Time: 0 mins
  • Category: Breakfast
  • Method: No-cook
  • Cuisine: American

Nutrition

  • Serving Size: 1 parfait
  • Calories: 250
  • Sugar: 20 g
  • Sodium: 50 mg
  • Fat: 5 g
  • Saturated Fat: 2 g
  • Unsaturated Fat: 3 g
  • Trans Fat: 0 g
  • Carbohydrates: 40 g
  • Fiber: 3 g
  • Protein: 10 g
  • Cholesterol: 10 mg

Keywords: Choose ripe peaches for the best flavor and texture. Use a clear glass for a beautiful presentation. For creaminess, consider whipping the yogurt before layering. Be mindful of the granola-to-yogurt ratio. Prepare yogurt and peaches ahead of time for gatherings, layering just before serving.

Did you make this recipe?

Share a photo and tag us — we can't wait to see what you've made!

Sun-Kissed Frozen Orange Cream Slush

As a child, summer days felt like they lasted forever. I remember the sticky heat wrapping around me as I played outside, my laughter mingling with the sounds of the neighborhood. But nothing could cool me down quite like the moment I’d spot my grandmother, laboring over her blender, whipping up her famous Frozen Orange Creamsicle Slush. That vibrant orange treat, with its frosty texture and sweet citrus aroma, was like a burst of sunshine in a cup. Just one sip, and I could feel the coolness wash over me, sparking pure joy.

This Frozen Orange Creamsicle Slush has a way of making you feel like a kid again. Its creamy, dreamy consistency is a delightful balance of bright orange and soft vanilla, inviting you to dive right in. The refreshing tang of orange dances on your tongue, while the smooth creaminess envelops you in a comforting embrace. It’s a nostalgic treat that’s perfect for hot summer afternoons or anytime you need a little pick-me-up.

What makes my version of this slush stand out is the addition of a hint of vanilla bean, which elevates the flavor and adds an extra layer of richness. Plus, it’s super easy to whip up with just a few simple ingredients that you probably already have on hand! So, if you’re ready to relive those sun-soaked memories, let me show you exactly how to make it.

Sun-Kissed Frozen Orange Cream Slush

Why You’ll Love This Recipe

  • Each slush is a perfect blend of creamy vanilla and zesty orange, creating a nostalgic flavor reminiscent of summer days.
  • This refreshing treat is ready in under 15 minutes, making it an ideal quick dessert for unexpected guests or hot afternoons.
  • With just 8 simple ingredients, it’s budget-friendly, ensuring you don’t have to break the bank to enjoy a delicious slush.
  • The slush has a perfectly smooth texture, thanks to the combination of ice and ice cream, providing a delightful contrast to the bright citrus flavors.
  • It’s highly customizable; you can easily adjust the sweetness and add fresh herbs for a unique twist that suits your taste.

Ingredients

  • 2 cups orange juice (freshly squeezed or store-bought)
  • 1 cup vanilla ice cream
  • 1 cup crushed ice
  • 1/2 cup milk (whole or 2%)
  • 1/4 cup granulated sugar (adjust based on sweetness preference)
  • 1 teaspoon vanilla extract
  • Zest of 1 orange (for added flavor)
  • Fresh orange slices and mint leaves (for garnish)

The star of this Frozen Orange Creamsicle Slush is the orange juice, which provides the vibrant, citrusy base. Freshly squeezed juice will yield the brightest flavor, but store-bought options can be just as convenient. If you’re opting for store-bought, choose 100% pure juice with no added sugars for the best results. Another essential ingredient is the vanilla ice cream; it adds creaminess and sweetness. You can substitute it with dairy-free ice cream if you’re looking for a vegan option. Whole or 2% milk complements the ice cream, creating a smooth blend. If you want a lower-calorie version, almond or oat milk can be good alternatives.

Lastly, the granulated sugar can be adjusted based on your sweetness preference. If you prefer a more natural sweetener, consider using honey or agave syrup. The orange zest enhances the flavor profile, providing an aromatic pop that brings the whole slush together. Don’t skip it! It adds an extra layer of brightness that makes this slush truly special.

Step-by-Step Instructions

  1. Start by preparing your ingredients. Gather 2 cups of orange juice, 1 cup of vanilla ice cream, and 1 cup of crushed ice. Make sure the ice is finely crushed, as larger chunks can make blending difficult.
  2. In a blender, combine the orange juice, vanilla ice cream, crushed ice, and 1/2 cup of milk. Add 1/4 cup of granulated sugar and 1 teaspoon of vanilla extract. If you like a sweeter slush, consider adding a bit more sugar at this stage.
  3. Add the zest of 1 orange to the blender. This step is crucial for enhancing the citrus flavor of your slush. Make sure not to include the bitter white pith—only the flavorful zest.
  4. Blend the mixture on medium-high speed for about 30-45 seconds. Stop once the ingredients are fully combined and the slush has a smooth, even consistency. If you notice large chunks of ice, blend for an additional 10-15 seconds. Avoid over-blending, as this can make the slush too liquidy.
  5. Once blended, taste the slush. If it needs more sweetness, add a little more sugar and blend for a few more seconds. If it’s too thick, you can add a splash of milk to reach your desired consistency.
  6. Pour the slush into glasses. This recipe typically serves 4, but you can easily double it for larger gatherings. Use a spoon to help guide the slush into the glasses if needed.
  7. Garnish each serving with fresh orange slices and mint leaves. The mint not only adds a pop of color but also a refreshing aroma that complements the citrus flavors beautifully.
  8. Serve immediately and enjoy! If you’ve made extra, you can refrigerate it for a short time, but it’s best enjoyed fresh.

Pro Tips for the Best Frozen Orange Creamsicle Slush

  • Don’t skip the orange zest! It’s a game-changer for flavor. Always zest before juicing to make it easier.
  • Use a high-powered blender for the best texture. A standard blender may struggle with ice, leading to uneven consistency. If you have a food processor, that can work too, but ensure the ice is finely crushed.
  • Adjust the ice-to-liquid ratio carefully. If your slush is too thick, it won’t blend well. Start with less ice and add more until you reach your preferred texture.
  • Be cautious with the sugar! Always start with the lower amount, as you can easily add more, but it’s hard to fix an overly sweet slush.
  • For a fun twist, consider adding a splash of coconut milk or a handful of fresh fruit like strawberries or pineapple. This not only enhances the flavor but also adds a beautiful color contrast.

Variations & Serving Ideas

There are countless ways to put a spin on your Frozen Orange Creamsicle Slush. Consider making a tropical version by adding in some pineapple juice or coconut milk for a delightful tropical twist. If you’re feeling adventurous, try incorporating a handful of frozen mango or peach slices for added sweetness. For a lighter version, swap out the vanilla ice cream for Greek yogurt for a creamy yet tangy alternative.

As for serving ideas, this refreshing slush pairs wonderfully with light summer dishes like grilled chicken skewers, fish tacos, or a simple salad topped with citrus vinaigrette. The bright, zesty flavors of the slush complement these dishes perfectly, making them an ideal pairing for a sunny day.

Storage, Make-Ahead & Reheating

This Frozen Orange Creamsicle Slush is best enjoyed fresh, but if you have leftovers, you can store them in an airtight container in the fridge for up to 2 days. Just keep in mind that the slush may lose some of its texture over time as the ice melts. It doesn’t freeze well, as the ice will turn into a solid block. If you must freeze it, blend again after thawing to restore the slushy consistency. This treat is best the day you make it, as the flavors meld together beautifully overnight, enhancing its deliciousness.

Frequently Asked Questions

Can I make Frozen Orange Creamsicle Slush ahead of time?

Yes — in fact, it tastes even better the next day as the flavors meld. However, it’s best to enjoy it fresh, as the texture can change if stored for too long. If you need to prepare it ahead, keep it in the fridge and re-blend before serving.

What kind of orange juice should I use?

For the best flavor, use freshly squeezed orange juice. However, if you’re short on time, opt for 100% pure store-bought juice without added sugars. This will ensure that your slush remains flavorful and refreshing.

Can I substitute the vanilla ice cream?

Absolutely! If you’re looking for a dairy-free option, coconut milk ice cream or a non-dairy vanilla ice cream can work wonderfully. They will still provide the creamy texture and sweetness you desire.

How can I adjust the sweetness of my slush?

You can easily adjust the sweetness by modifying the amount of sugar added. Start with 1/4 cup and taste the mixture before blending. If you prefer it sweeter, add more sugar gradually until it reaches your desired level.

What should I do if my slush is too thick?

If your slush is too thick, simply add a splash of milk or orange juice and blend again. This will help achieve a more drinkable consistency while maintaining the slushy texture. Adjust gradually to reach your preferred thickness.

Sun-Kissed Frozen Orange Cream Slush

Final Thoughts

The Frozen Orange Creamsicle Slush is a delightful blend of refreshing citrus and creamy goodness, making it a perfect treat for warm days or any time you crave a taste of nostalgia. The way the bright orange flavor dances with the creamy texture truly elevates this slush, transforming it into a satisfying escape from the everyday.

This is the kind of recipe I come back to again and again, especially when I’m looking to cool down or impress guests at a summer gathering. It’s simple to make and always brings smiles all around! I encourage you to try this recipe for yourself—don’t hesitate to share your results or even put your own spin on it. Happy slushing!

Print
clock clock iconcutlery cutlery iconflag flag iconfolder folder iconinstagram instagram iconpinterest pinterest iconfacebook facebook iconprint print iconsquares squares iconheart heart iconheart solid heart solid icon

Frozen Orange Creamsicle Slush


  • Author: Lily author
  • Total Time: 15 minutes
  • Yield: 4 servings 1x
Pin Recipe
Print Recipe

Description

This Frozen Orange Creamsicle Slush is a refreshing treat that combines creamy vanilla and zesty orange flavors. Perfect for hot summer days, it brings back nostalgic memories with every sip.


Ingredients

Scale
  • 2 cups orange juice (freshly squeezed or store-bought)
  • 1 cup vanilla ice cream
  • 1 cup crushed ice
  • 1/2 cup milk (whole or 2%)
  • 1/4 cup granulated sugar (adjust based on sweetness preference)
  • 1 teaspoon vanilla extract
  • Zest of 1 orange (for added flavor)
  • Fresh orange slices and mint leaves (for garnish)

Instructions

  1. Start by preparing your ingredients. Gather 2 cups of orange juice, 1 cup of vanilla ice cream, and 1 cup of crushed ice. Make sure the ice is finely crushed, as larger chunks can make blending difficult.
  2. In a blender, combine the orange juice, vanilla ice cream, crushed ice, and 1/2 cup of milk. Add 1/4 cup of granulated sugar and 1 teaspoon of vanilla extract. If you like a sweeter slush, consider adding a bit more sugar at this stage.
  3. Add the zest of 1 orange to the blender. This step is crucial for enhancing the citrus flavor of your slush. Make sure not to include the bitter white pith—only the flavorful zest.
  4. Blend the mixture on medium-high speed for about 30-45 seconds. Stop once the ingredients are fully combined and the slush has a smooth, even consistency. If you notice large chunks of ice, blend for an additional 10-15 seconds. Avoid over-blending, as this can make the slush too liquidy.
  5. Once blended, taste the slush. If it needs more sweetness, add a little more sugar and blend for a few more seconds. If it’s too thick, you can add a splash of milk to reach your desired consistency.
  6. Pour the slush into glasses. This recipe typically serves 4, but you can easily double it for larger gatherings. Use a spoon to help guide the slush into the glasses if needed.
  7. Garnish each serving with fresh orange slices and mint leaves. The mint not only adds a pop of color but also a refreshing aroma that complements the citrus flavors beautifully.
  8. Serve immediately and enjoy! If you’ve made extra, you can refrigerate it for a short time, but it's best enjoyed fresh.
  • Prep Time: 15 min
  • Cook Time: 0 min
  • Category: Dessert
  • Method: Blending
  • Cuisine: American

Nutrition

  • Serving Size: 1 serving
  • Calories: 200
  • Sugar: 30 g
  • Sodium: 50 mg
  • Fat: 5 g
  • Saturated Fat: 3 g
  • Unsaturated Fat: 2 g
  • Trans Fat: 0 g
  • Carbohydrates: 40 g
  • Fiber: 1 g
  • Protein: 2 g
  • Cholesterol: 20 mg

Keywords: Don't skip the orange zest! It's a game-changer for flavor. Always zest before juicing to make it easier.

Did you make this recipe?

Share a photo and tag us — we can't wait to see what you've made!

Zesty Lemon Poppy Seed Delight

One rainy afternoon, I found myself in my grandmother’s cozy kitchen, the kind that always smelled like warmth and love. She was whipping up her famous Lemon Poppy Seed Loaf, a recipe that had been passed down through generations. As the batter came together, the zesty aroma of fresh lemons filled the air, mingling perfectly with the nutty fragrance of poppy seeds. I can still picture her, apron-clad, as she expertly drizzled a vibrant citrus icing over the loaf, creating a glossy, sun-kissed finish that beckoned us to dive in. It was a moment that sparked my own passion for baking, and this recipe has become a cherished staple in my home ever since.

When you take a bite of this Lemon Poppy Seed Loaf, it’s like a burst of sunshine on your palate. The loaf is beautifully golden, with a tender crumb that melts in your mouth. Each slice is speckled with tiny poppy seeds, adding a delightful crunch that contrasts beautifully with the tangy sweetness of the lemon. And that citrus icing? It’s the finishing touch that elevates this loaf from ordinary to extraordinary, with its bright, zesty flavor dancing on your taste buds.

This recipe stands out because it embraces simplicity while delivering on flavor. I’ve added a hint of vanilla to the batter, enhancing the overall taste and making it even more indulgent. Trust me, once you make this Lemon Poppy Seed Loaf With Citrus Icing, it’ll become a go-to in your baking repertoire.

So, let me show you exactly how to make it!

Zesty Lemon Poppy Seed Delight

Why You’ll Love This Recipe

  • Moist and tender crumb that melts in your mouth, thanks to the perfect balance of butter and buttermilk.
  • Bright, zesty lemon flavor paired with crunchy poppy seeds, creating a delightful texture and taste experience.
  • Easy to whip up in just about an hour, perfect for last-minute gatherings or a cozy afternoon treat.
  • Budget-friendly with everyday ingredients, making it an accessible option for all home bakers.
  • The citrus icing adds a sweet tang that elevates the loaf, turning a simple recipe into a showstopper!

Ingredients

  • 1 ½ cups (190g) all-purpose flour
  • 1 teaspoon baking powder
  • ½ teaspoon baking soda
  • ½ teaspoon salt
  • 3 tablespoons poppy seeds
  • ½ cup (115g) unsalted butter, softened to room temperature
  • 1 cup (200g) granulated sugar
  • 2 large eggs
  • 1 teaspoon vanilla extract
  • 1 teaspoon lemon zest (from about 1 medium lemon)
  • ½ cup (120ml) buttermilk
  • 2 tablespoons fresh lemon juice

For the Citrus Icing:

  • 1 cup (120g) powdered sugar
  • 2 tablespoons fresh lemon juice
  • 1 tablespoon orange juice
  • 1 teaspoon lemon zest (for garnish, optional)

Let’s dive into the key ingredients that make this Lemon Poppy Seed Loaf so special. The all-purpose flour provides the structure and base for the loaf, while the baking powder and baking soda ensure it rises perfectly, giving the loaf a light texture. For a gluten-free variation, you could substitute the flour with a gluten-free all-purpose blend. Poppy seeds not only add a delightful crunch but also contribute to the unique flavor profile that pairs well with the citrus notes.

Unsalted butter is crucial for achieving the buttery richness that makes this loaf so moist. If you’re looking for a dairy-free option, coconut oil or a vegan butter can be used instead. The buttermilk is another essential component, providing acidity that activates the baking soda for a fluffy texture. If you don’t have buttermilk on hand, you can easily make a substitute by mixing ½ cup of milk with 1 tablespoon of vinegar or lemon juice and letting it sit for about 5 minutes.

Step-by-Step Instructions

  1. Preheat your oven to 350°F (175°C). Grease a 9×5-inch loaf pan or line it with parchment paper for easy removal later.
  2. In a medium mixing bowl, whisk together 1 ½ cups of all-purpose flour, 1 teaspoon of baking powder, ½ teaspoon of baking soda, ½ teaspoon of salt, and 3 tablespoons of poppy seeds. This helps to evenly distribute the baking agents and ensures a uniform rise.
  3. In a large mixing bowl, cream together ½ cup of softened unsalted butter and 1 cup of granulated sugar using an electric mixer on medium speed for about 3-4 minutes, until the mixture is light and fluffy. Make sure to scrape down the sides of the bowl occasionally.
  4. Add 2 large eggs, 1 teaspoon of vanilla extract, and 1 teaspoon of lemon zest to the creamed butter and sugar, mixing until fully combined. You want a smooth consistency, so ensure there are no lumps of butter.
  5. In a small bowl, combine ½ cup of buttermilk and 2 tablespoons of fresh lemon juice. Alternately add the dry ingredients and buttermilk mixture to the butter mixture, starting and ending with the dry ingredients. Mix just until combined; do not overmix, as this can lead to a dense loaf.
  6. Pour the batter into the prepared loaf pan. Smooth the top with a spatula, ensuring it’s even. Bake in the preheated oven for 50-60 minutes, or until a toothpick inserted in the center comes out clean. The edges should be lightly golden brown, and the center should feel just set.
  7. Once baked, remove the loaf from the oven and allow it to cool in the pan for about 10 minutes. Then, transfer it to a wire rack to cool completely. Resist the urge to slice too soon, as it will be crumbly if it’s still warm.
  8. While the loaf is cooling, prepare the citrus icing. In a medium bowl, whisk together 1 cup of powdered sugar, 2 tablespoons of fresh lemon juice, and 1 tablespoon of orange juice until smooth. If the icing is too thick, you can add a little more juice to reach your desired consistency.
  9. Once the loaf is completely cool, drizzle the citrus icing over the top. If you like, sprinkle with an additional teaspoon of lemon zest for an extra pop of flavor and color.

Pro Tips for the Best Lemon Poppy Seed Loaf With Citrus Icing

  • Be careful not to overmix your batter; this is a common mistake that can lead to a dense loaf. Mix just until the dry ingredients are incorporated for a light and fluffy texture.
  • Use room temperature ingredients, especially the butter and eggs. This helps to create a smoother batter and ensures even baking. Take your eggs out of the fridge about 30 minutes before you start.
  • For a more pronounced lemon flavor, consider adding a little lemon extract in addition to the zest and juice. Just a half teaspoon can elevate the citrus notes significantly.
  • When measuring your flour, spoon it into the measuring cup and level it off with a knife instead of scooping directly from the bag. This prevents packing and ensures you don’t end up with a dry loaf.
  • Invest in a good quality loaf pan; it makes a difference in heat distribution, which ensures even baking. If your pan is dark-coated, reduce the oven temperature by 25°F to prevent over-browning.

Variations & Serving Ideas

For a delightful twist, consider adding blueberries or raspberries to the batter for a fruity burst of flavor. You can also experiment with different citrus fruits—try lime or grapefruit zest and juice for a refreshing change. For a healthier option, substitute half of the all-purpose flour with whole wheat flour for added fiber without compromising too much on texture.

This Lemon Poppy Seed Loaf pairs beautifully with a light salad, such as a mixed greens salad with a vinaigrette, or a cup of tea for a cozy afternoon treat. It also complements a creamy cheese platter, as the acidity of the loaf balances rich cheeses perfectly. Lastly, a scoop of vanilla ice cream on the side creates a delightful contrast of temperatures and flavors!

Storage, Make-Ahead & Reheating

This Lemon Poppy Seed Loaf can be stored at room temperature for up to 3 days if wrapped tightly in plastic wrap. If you want to keep it longer, it freezes well for up to 3 months. To freeze, wrap the loaf tightly in plastic wrap and then in aluminum foil to prevent freezer burn.

When you’re ready to enjoy it again, simply thaw it in the fridge overnight. Reheat individual slices in the microwave for 15-20 seconds or in a toaster oven until warmed through. Interestingly, many people find that this loaf tastes even better the next day, as the flavors have time to meld!

Frequently Asked Questions

Can I make Lemon Poppy Seed Loaf With Citrus Icing ahead of time?

Yes — in fact, it tastes even better the next day! You can make the loaf a day in advance, allowing the flavors to develop. Just be sure to store it in an airtight container to maintain its moisture.

Can I substitute the poppy seeds?

Absolutely! If you don’t have poppy seeds on hand or prefer an alternative, you can use sesame seeds for a similar crunch or omit them entirely for a smooth loaf.

What can I use instead of buttermilk?

If you don’t have buttermilk, you can easily create a substitute by mixing ½ cup of milk (dairy or plant-based) with 1 tablespoon of vinegar or lemon juice. Let it sit for 5 minutes before using in the recipe.

How can I make this recipe gluten-free?

To make a gluten-free version of this Lemon Poppy Seed Loaf, substitute the all-purpose flour with a gluten-free all-purpose flour blend. Just ensure that the blend contains a binding agent like xanthan gum for the best results.

What is the best way to store leftover loaf?

Leftover Lemon Poppy Seed Loaf should be stored in an airtight container at room temperature for up to 3 days. For longer storage, wrap it tightly and freeze for up to 3 months. Thaw it before serving for the best texture.

Zesty Lemon Poppy Seed Delight

Final Thoughts

The Lemon Poppy Seed Loaf with Citrus Icing is truly a delightful treat that brings a burst of brightness to any occasion. The zesty lemon flavor combined with the subtle crunch of poppy seeds creates a satisfying balance, while the citrus icing adds a touch of sweetness that perfectly complements the loaf’s tanginess.

This is the kind of recipe I come back to again and again, especially when I want to brighten up a gloomy day or celebrate a small victory. The aroma that fills the kitchen as it bakes is absolutely heavenly! I encourage you to give this recipe a try; you might just find it becoming a beloved staple in your home. Don’t forget to share your results or even add your own unique twist—I can’t wait to see what you create!

Print
clock clock iconcutlery cutlery iconflag flag iconfolder folder iconinstagram instagram iconpinterest pinterest iconfacebook facebook iconprint print iconsquares squares iconheart heart iconheart solid heart solid icon

Lemon Poppy Seed Loaf


  • Author: Lily author
  • Total Time: 26 minute
  • Yield: 1 loaf 1x
Pin Recipe
Print Recipe

Description

This Lemon Poppy Seed Loaf is a delightful treat that combines zesty lemon flavor with crunchy poppy seeds. Topped with a citrus icing, it’s perfect for any occasion.


Ingredients

Scale
  • 1 ½ cups (190g) all-purpose flour
  • 1 teaspoon baking powder
  • ½ teaspoon baking soda
  • ½ teaspoon salt
  • 3 tablespoons poppy seeds
  • ½ cup (115g) unsalted butter, softened to room temperature
  • 1 cup (200g) granulated sugar
  • 2 large eggs
  • 1 teaspoon vanilla extract
  • 1 teaspoon lemon zest (from about 1 medium lemon)
  • ½ cup (120ml) buttermilk
  • 2 tablespoons fresh lemon juice
  • 1 cup (120g) powdered sugar
  • 2 tablespoons fresh lemon juice
  • 1 tablespoon orange juice
  • 1 teaspoon lemon zest (for garnish, optional)

Instructions

  1. Preheat your oven to 350°F (175°C). Grease a 9×5-inch loaf pan or line it with parchment paper for easy removal later.
  2. In a medium mixing bowl, whisk together 1 ½ cups of all-purpose flour, 1 teaspoon of baking powder, ½ teaspoon of baking soda, ½ teaspoon of salt, and 3 tablespoons of poppy seeds. This helps to evenly distribute the baking agents and ensures a uniform rise.
  3. In a large mixing bowl, cream together ½ cup of softened unsalted butter and 1 cup of granulated sugar using an electric mixer on medium speed for about 3-4 minutes, until the mixture is light and fluffy. Make sure to scrape down the sides of the bowl occasionally.
  4. Add 2 large eggs, 1 teaspoon of vanilla extract, and 1 teaspoon of lemon zest to the creamed butter and sugar, mixing until fully combined. You want a smooth consistency, so ensure there are no lumps of butter.
  5. In a small bowl, combine ½ cup of buttermilk and 2 tablespoons of fresh lemon juice. Alternately add the dry ingredients and buttermilk mixture to the butter mixture, starting and ending with the dry ingredients. Mix just until combined; do not overmix, as this can lead to a dense loaf.
  6. Pour the batter into the prepared loaf pan. Smooth the top with a spatula, ensuring it’s even. Bake in the preheated oven for 50-60 minutes, or until a toothpick inserted in the center comes out clean. The edges should be lightly golden brown, and the center should feel just set.
  7. Once baked, remove the loaf from the oven and allow it to cool in the pan for about 10 minutes. Then, transfer it to a wire rack to cool completely. Resist the urge to slice too soon, as it will be crumbly if it’s still warm.
  8. While the loaf is cooling, prepare the citrus icing. In a medium bowl, whisk together 1 cup of powdered sugar, 2 tablespoons of fresh lemon juice, and 1 tablespoon of orange juice until smooth. If the icing is too thick, you can add a little more juice to reach your desired consistency.
  9. Once the loaf is completely cool, drizzle the citrus icing over the top. If you like, sprinkle with an additional teaspoon of lemon zest for an extra pop of flavor and color.
  • Prep Time: 15 mins
  • Cook Time: 50-60 mins
  • Category: Dessert
  • Method: Baking
  • Cuisine: American

Nutrition

  • Serving Size: 1 slice
  • Calories: 200
  • Sugar: 15 g
  • Sodium: 150 mg
  • Fat: 8 g
  • Saturated Fat: 5 g
  • Unsaturated Fat: 3 g
  • Trans Fat: 0 g
  • Carbohydrates: 30 g
  • Fiber: 1 g
  • Protein: 3 g
  • Cholesterol: 40 mg

Keywords: Be careful not to overmix your batter; this is a common mistake that can lead to a dense loaf. Use room temperature ingredients for a smoother batter and even baking.

Did you make this recipe?

Share a photo and tag us — we can't wait to see what you've made!

  • Privacy Policy
  • Terms Of Service
  • Contact
  • About
  • GDPR

Copyright © 2025 Homesmad