• Skip to primary navigation
  • Skip to main content
  • Skip to primary sidebar
Homesmad

Homesmad

  • Home
  • Breakfast & Brunch
  • Appetizers & Snacks
  • Dinner
  • Dessert
  • About
  • Privacy Policy
  • Contact
Homesmad
  • Home
  • Breakfast & Brunch
  • Appetizers & Snacks
  • Dinner
  • Dessert
  • About
  • Privacy Policy
  • Contact

White Garlic Pizza Sauce: Creamy & Perfect for Homemade Pizza

October 27, 2025 by Lily author

White Garlic Pizza Sauce Creamy Perfect For Homemade Pizza is not merely a recipe; it’s an invitation to transform your next pizza night into an unforgettable gourmet experience. Are you ready to transcend the ordinary red and embark on a culinary journey that promises a world of rich, savory flavor? We firmly believe that an truly exceptional pizza begins with an extraordinary sauce, and this particular recipe delivers precisely that, promising a delightful departure from the commonplace.

While the classic tomato-based sauces undeniably hold a cherished place in culinary tradition, the elegant simplicity and profound deliciousness of white pizza, particularly when crafted with a decadent garlic-infused base, has expertly carved out its own esteemed niche in modern cuisine. It represents a sophisticated evolution, offering a beloved alternative that has captivated palates in bustling city pizzerias and cozy home kitchens around the globe, becoming a testament to innovative flavor profiles.

Why This Sauce Will Be Your New Favorite

What truly elevates this sauce to a beloved staple is its unparalleled combination of exquisite taste and luxurious texture. Imagine a lusciously smooth, incredibly creamy consistency that generously coats your palate, delivering a profound burst of aromatic garlic, subtly enhanced with complementary herbs. This isn’t just a sauce; it’s a foundational layer that beautifully complements a vast array of toppings, allowing their individual flavors to shine without being overshadowed. People adore the sheer convenience of creating such a high-end flavor profile with minimal effort, making this White Garlic Pizza Sauce Creamy Perfect For Homemade Pizza the ultimate choice for both novice and experienced home chefs. We are confident that once you experience its magic, it will become a permanent and celebrated fixture in your culinary repertoire.

White Garlic Pizza Sauce: Creamy & Perfect for Homemade Pizza this RECIPE

Ingredients:

  • For the White Garlic Pizza Sauce:
    • 3 tablespoons unsalted butter
    • 4-5 cloves garlic, minced (or 2 tablespoons pre-minced garlic)
    • 3 tablespoons all-purpose flour
    • 1 ¾ cups whole milk, warmed slightly
    • ½ cup heavy cream
    • ½ teaspoon onion powder
    • ¼ teaspoon dried oregano
    • Pinch of red pepper flakes (optional, for a little kick)
    • ½ teaspoon salt, or to taste
    • ¼ teaspoon black pepper, freshly ground, or to taste
    • ¼ cup grated Parmesan cheese
  • For the Chicken Topping:
    • 1 pound boneless, skinless chicken breasts or thighs
    • 1 tablespoon olive oil
    • ½ teaspoon garlic powder
    • ½ teaspoon onion powder
    • ¼ teaspoon paprika
    • Salt and freshly ground black pepper to taste
  • For the Pizza:
    • 1 pound pizza dough (store-bought or your favorite homemade recipe), at room temperature
    • 1 ½ cups shredded mozzarella cheese, divided
    • ½ cup grated Parmesan cheese, divided
    • ½ cup crumbled feta cheese (optional, but highly recommended for a tangy note)
    • 2 tablespoons fresh parsley, chopped (for garnish)
    • Cornmeal or semolina, for dusting the pizza peel

Making Your White Garlic Pizza Sauce Creamy Perfect For Homemade Pizza

This is where the magic begins! Creating your own White Garlic Pizza Sauce Creamy Perfect For Homemade Pizza is incredibly rewarding, and it truly elevates your homemade pizza experience to a gourmet level. This sauce is rich, deeply flavorful with a wonderful garlic aroma, and boasts a velvety smooth texture that perfectly complements a variety of toppings.

  1. Sauté the Garlic: In a medium saucepan or skillet, melt the 3 tablespoons of unsalted butter over medium heat. Once the butter is melted and shimmering, add your minced garlic. Cook the garlic for about 1-2 minutes, stirring frequently, until it becomes fragrant and slightly softened. Be very careful not to let the garlic brown or burn, as this can make it bitter. We’re aiming for a lovely golden hue and a sweet, aromatic base for our sauce. This initial step is crucial for infusing the butter with that essential garlicky goodness that will define our incredible white sauce.
  2. Whisk in the Flour (Roux): Sprinkle the 3 tablespoons of all-purpose flour over the cooked garlic and butter. Immediately begin whisking continuously for 1-2 minutes. You’re creating a roux here, which is the foundation of our thick and creamy sauce. The flour should cook out a bit, losing its raw taste, and will absorb all the butter, forming a thick paste. This step helps to ensure that your sauce will be smooth and lump-free, and it also adds a subtle nutty flavor to the base. Keep whisking to prevent any lumps from forming.
  3. Gradually Add Milk: Slowly, and I mean slowly, begin to pour in the slightly warmed whole milk, a little at a time, while whisking vigorously. It’s important to add the milk in small increments – about ¼ to ½ cup at a time – and whisk each addition completely into the roux before adding more. This gradual process is key to achieving a perfectly smooth sauce without any lumps. As you add the milk, the sauce will thicken. Continue whisking until all the milk has been incorporated and the sauce begins to visibly thicken, reaching a consistency similar to a gravy or a thin béchamel.
  4. Stir in the Heavy Cream and Seasonings: Once the sauce has thickened nicely, reduce the heat to low. Now, pour in the ½ cup of heavy cream. This is what truly makes our White Garlic Pizza Sauce Creamy Perfect For Homemade Pizza. The heavy cream adds an incredible richness and a luxurious mouthfeel that you won’t get with just milk. Stir in the onion powder, dried oregano, and the pinch of red pepper flakes if you’re using them. Season with ½ teaspoon of salt and ¼ teaspoon of freshly ground black pepper. Give it a good stir to combine all the flavors.
  5. Simmer and Finish: Let the sauce gently simmer on low heat for another 3-5 minutes, stirring occasionally, to allow all the flavors to meld beautifully and the sauce to thicken further. The consistency you’re looking for is one that coats the back of a spoon. It should be thick enough to stay on the pizza without being watery, but still spreadable. Before removing from the heat, stir in the ¼ cup of grated Parmesan cheese. The Parmesan not only adds a wonderful savory depth but also contributes to the overall creaminess and slight tang of the sauce. Taste and adjust seasonings as needed – you might want a little more salt, pepper, or even a touch more garlic powder if you’re a true garlic fiend!
  6. Cooling and Storage: Remove the finished White Garlic Pizza Sauce Creamy Perfect For Homemade Pizza from the heat. If you’re not using it immediately, transfer it to an airtight container. If you leave it in the saucepan, it will continue to cook slightly from residual heat. Allow it to cool completely before refrigerating. This sauce can be made a day or two in advance, and its flavors actually deepen with a little time in the fridge. Before using, you might need to warm it gently and give it a good whisk to restore its smooth, spreadable consistency. Remember, this incredibly creamy and flavorful white garlic pizza sauce is truly perfect for homemade pizza, serving as the star base for your culinary creation!

Preparing the Chicken Topping

While your amazing white garlic pizza sauce is cooling or resting, let’s get our delicious chicken topping ready. This chicken adds a fantastic savory, lean protein element to our pizza.

  1. Prepare the Chicken: Pat your 1 pound of boneless, skinless chicken breasts or thighs dry with paper towels. This helps ensure a better sear and keeps the chicken from steaming. Cut the chicken into bite-sized pieces, roughly ½ to ¾-inch cubes. Uniform pieces will cook more evenly.
  2. Season the Chicken: In a medium bowl, toss the chicken pieces with 1 tablespoon of olive oil, ½ teaspoon of garlic powder, ½ teaspoon of onion powder, ¼ teaspoon of paprika, and salt and freshly ground black pepper to taste. Make sure all the chicken pieces are evenly coated with the seasonings. You can let this sit for 10-15 minutes at room temperature for the flavors to meld, but it’s not strictly necessary if you’re in a hurry.
  3. Cook the Chicken: Heat a large skillet over medium-high heat. Once the skillet is hot, add the seasoned chicken in a single layer, being careful not to overcrowd the pan. If necessary, cook the chicken in two batches to ensure it browns properly and cooks through evenly. Cook for 5-7 minutes, stirring occasionally, until the chicken is cooked through, no longer pink in the center, and has a nice golden-brown crust.
  4. Cool the Chicken: Remove the cooked chicken from the skillet and transfer it to a plate. Allow it to cool slightly before using it on your pizza. This prevents it from making your pizza dough soggy. If you cook it too far in advance, cover and refrigerate, then bring it closer to room temperature before assembling.

Prepping Your Pizza Dough

The foundation of any great pizza starts with the dough! Whether you’re using store-bought or a homemade recipe, proper handling is key.

  1. Bring Dough to Room Temperature: If your pizza dough has been refrigerated, make sure to take it out at least 30-60 minutes (or even longer, depending on your environment and the dough type) before you plan to stretch it. Room temperature dough is much more pliable and easier to work with, minimizing tears and allowing you to achieve a rounder shape.
  2. Preheat Your Oven and Pizza Stone/Steel: This is a critical step for achieving a crispy crust. Place your pizza stone or steel (if using) in your oven. Preheat your oven to its highest setting, typically between 475°F (245°C) and 550°F (290°C). Allow it to preheat for at least 30 minutes, or even an hour, after it reaches temperature. This ensures the stone/steel is screaming hot, which is essential for a perfectly cooked pizza base. If you don’t have a stone or steel, an inverted baking sheet works as a good alternative.
  3. Prepare Your Work Surface and Pizza Peel: Lightly flour your clean work surface. If you’re using a pizza peel, sprinkle a generous amount of cornmeal or semolina over its surface. This acts like tiny ball bearings, allowing the pizza to easily slide off the peel and into the hot oven. Don’t skip the cornmeal/semolina, or you might end up with a sticky situation!
  4. Stretch the Dough: Carefully transfer your dough ball to your floured surface. Using your fingertips, gently press the dough from the center outwards, leaving a slightly thicker edge for the crust. Avoid pressing down on the very edge. You can also carefully lift and stretch the dough, letting gravity help, or use a rolling pin if you prefer a thinner, more uniform crust. Aim for a round shape, roughly 12-14 inches in diameter, depending on your oven and preference. Once stretched, carefully transfer the dough to your prepared pizza peel. Give it a gentle shake to ensure it’s not sticking. If it sticks, lift and add more cornmeal underneath.

Assembling Your Delicious White Garlic Pizza

Now for the exciting part – bringing all these incredible components together to create your ultimate homemade pizza! This is where our White Garlic Pizza Sauce Creamy Perfect For Homemade Pizza truly shines.

  1. Spread the White Garlic Sauce: Take your cooled White Garlic Pizza Sauce Creamy Perfect For Homemade Pizza and spoon a generous amount onto the stretched pizza dough. Using the back of a spoon or a small spatula, spread the sauce evenly over the dough, leaving about a ½ to 1-inch border around the edge for the crust. Don’t be shy with the sauce; its creamy texture and rich garlic flavor are the stars of this pizza! Ensure even coverage so every bite is infused with its deliciousness.
  2. Layer the Cheese Base: Sprinkle half of your shredded mozzarella cheese (about ¾ cup) evenly over the white garlic sauce. This initial layer of mozzarella acts as a protective barrier, keeping the other toppings from making the crust soggy, and provides a gooey foundation.
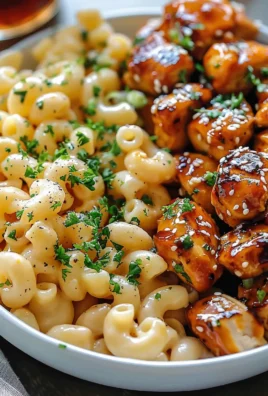
  3. Add the Cooked Chicken: Distribute your cooked chicken pieces evenly over the mozzarella. Try to avoid clumping the chicken in one spot to ensure balanced flavor in every slice.
  4. Add More Cheese and Feta: Now, sprinkle the remaining ¾ cup of mozzarella cheese over the chicken. Then, scatter the crumbled feta cheese (if using) over the top. The feta adds a fantastic salty tang that perfectly cuts through the richness of the white garlic sauce and the chicken. This combination of cheeses will melt beautifully, creating a wonderfully complex cheesy layer.
  5. Final Parmesan Dusting: Finish the topping with a sprinkle of about ¼ cup of grated Parmesan cheese over everything. This final layer of Parmesan will brown beautifully in the oven, adding another layer of savory depth and a golden crust.

Baking Your Homemade Masterpiece

The moment of truth! Baking your pizza at a high temperature is key to achieving that desirable crispy crust and perfectly melted, bubbly cheese.

  1. Launch the Pizza: Once your oven and pizza stone/steel have been preheated for at least 30 minutes to an hour, carefully open the oven door. With a swift, confident motion, slide the pizza from the peel directly onto the hot pizza stone or steel. If you don’t have a peel, you can use a large, flat cutting board or the back of a baking sheet dusted with cornmeal, or simply assemble the pizza directly on parchment paper on an inverted baking sheet. Close the oven door quickly to prevent heat from escaping.
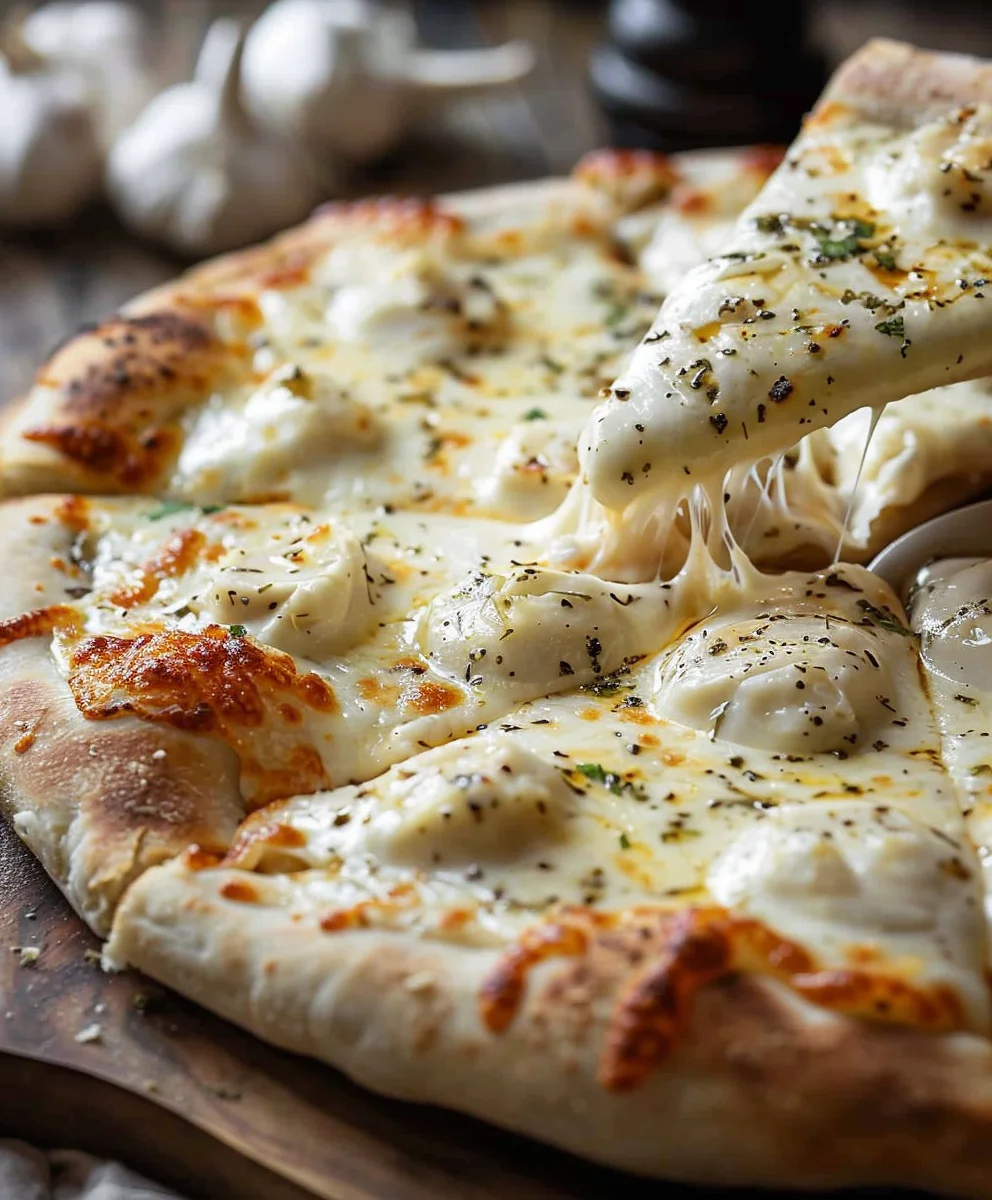
  2. Bake Until Golden: Bake the pizza for 8-12 minutes, or until the crust is golden brown, the cheese is bubbly and melted, and you see some delicious charred spots on the crust and cheese. Keep a close eye on it, especially towards the end, as oven temperatures can vary. The high heat is what gives you that restaurant-quality crispy crust and perfectly cooked toppings.
  3. Rotate (Optional): If you notice one side of your pizza cooking faster than the other, you can carefully rotate it halfway through the baking process using the peel. This helps ensure even cooking.
  4. Remove and Rest: Once the pizza is perfectly baked, carefully remove it from the oven using your pizza peel and transfer it to a cutting board or a wire rack. It’s important to let the pizza rest for 2-3 minutes before slicing. This allows the cheese to set slightly and prevents all the delicious toppings from sliding off when you cut into it.
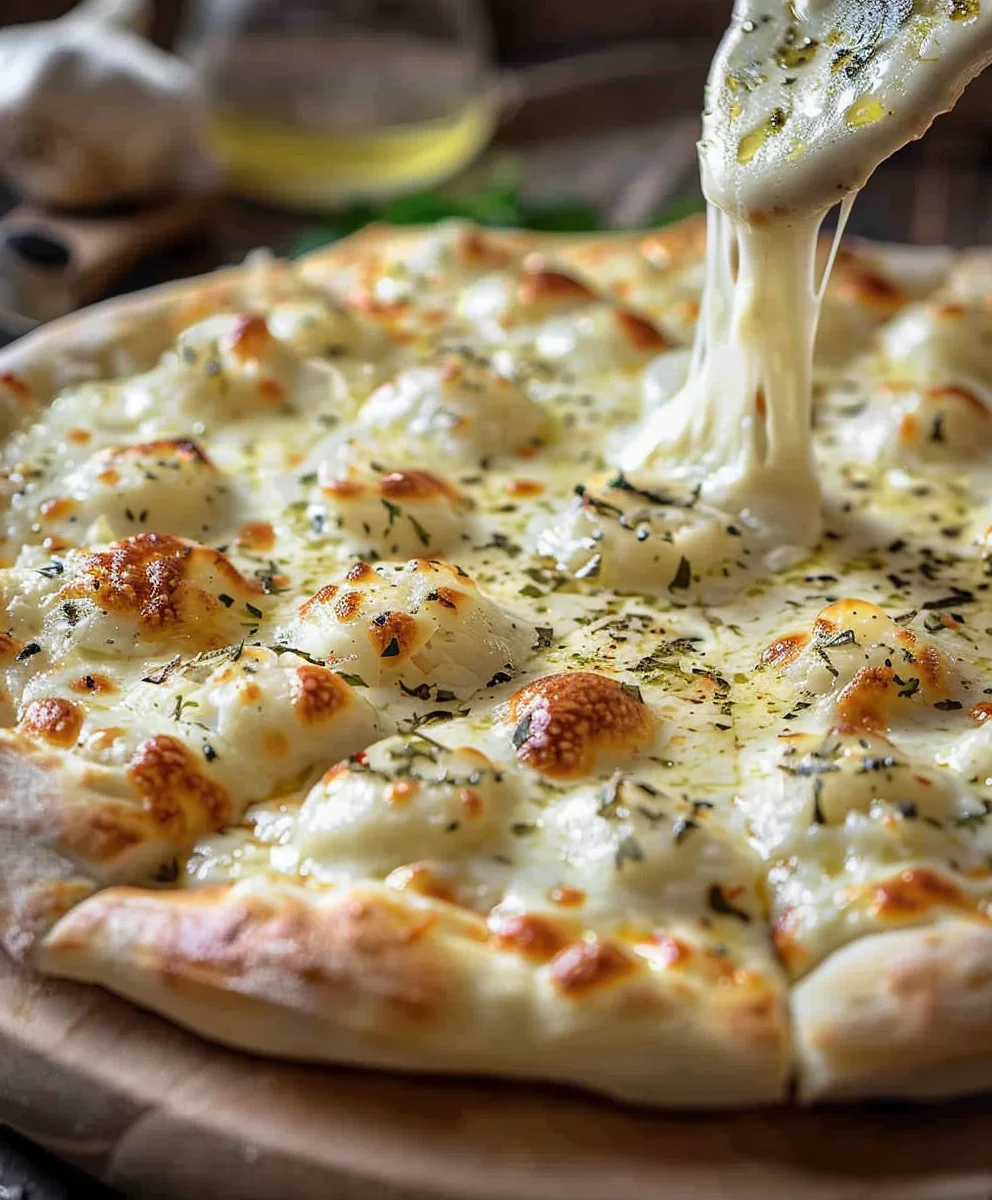
  5. Garnish and Serve: Garnish your beautiful White Garlic Pizza Sauce Creamy Perfect For Homemade Pizza with fresh chopped parsley. The fresh green herbs add a lovely pop of color and a touch of freshness that brightens the whole dish. Slice into wedges and serve immediately while hot and fresh! Enjoy the fruits of your labor and the incredible flavors of your homemade creation.

Chef’s Notes and Tips for the Perfect White Garlic Pizza

To ensure your homemade white garlic pizza is always a showstopper, here are a few extra tips and considerations. These small details can make a big difference in the final outcome, making your pizza truly unforgettable.

  1. Consistency of the White Garlic Sauce: The goal for our White Garlic Pizza Sauce Creamy Perfect For Homemade Pizza is a thick but spreadable consistency. If your sauce feels too thick after cooling, you can thin it out with a tablespoon or two of warm milk or even a touch of chicken broth while gently reheating it. If it’s too thin, you can try simmering it for a few more minutes, stirring frequently, to allow it to reduce and thicken, or whisk in a very small slurry of cornstarch (1 teaspoon cornstarch mixed with 1 tablespoon cold water) and simmer for another minute until thickened.
  2. Garlic Intensity: If you are a true garlic lover, feel free to increase the amount of minced garlic in the sauce to 6 or even 7 cloves. Alternatively, after the sauce is finished, you can stir in a small amount (½ teaspoon) of fresh garlic powder for an extra punch without adding more raw garlic. Remember, the garlic is a key player in making this particular white garlic pizza sauce creamy and so perfect for homemade pizza, so customize it to your heart’s content!
  3. Cheese Choices: While mozzarella and Parmesan are classic, don’t hesitate to experiment! Provolone, fontina, or even a smoked gouda could add unique layers of flavor. Just ensure you still use a good melting cheese as your primary base for that satisfying cheese pull. The feta adds a lovely salty contrast that I highly recommend for this white sauce pizza.
  4. Pre-Cooked Toppings are Best: Always pre-cook any meat or hearty vegetables (like mushrooms, onions, or bell peppers) that you plan to put on your pizza. Raw vegetables often release too much moisture during baking, which can make your crust soggy, and meats might not cook through completely in the short pizza baking time. For example, sautéing mushrooms or caramelizing onions beforehand adds a depth of flavor that raw versions simply can’t provide.
  5. Don’t Overload: It’s tempting to pile on the toppings, but resist the urge! An overloaded pizza will likely result in a soggy crust and uneven cooking. Less is often more, allowing each ingredient, especially the star White Garlic Pizza Sauce Creamy Perfect For Homemade Pizza, to truly shine through. A good rule of thumb is to be able to see a bit of the sauce through your toppings.
  6. Fresh Herbs for Finish: Always add fresh herbs like parsley, basil, or oregano after the pizza comes out of the oven. The high heat can wilt or burn them, diminishing their vibrant flavor and color. A sprinkle of fresh herbs at the end adds a burst of freshness and a beautiful visual appeal.
  7. Reheating Leftovers: The best way to reheat leftover pizza and maintain a crispy crust is in a dry skillet on the stovetop over medium heat for a few minutes, covered, until the cheese is melted. You can also use a toaster oven or even a regular oven preheated to 350°F (175°C) for 5-7 minutes. Microwaving tends to make the crust soggy.
  8. Experiment with Crust: If you’re using store-bought dough, consider trying different types, such as whole wheat, thin crust, or even gluten-free options. Each will give your pizza a unique texture and flavor profile, which can be a fun way to vary your homemade pizza nights. You might find that the specific characteristics of your chosen dough interact differently with the creaminess of the White Garlic Pizza Sauce Creamy Perfect For Homemade Pizza.
  9. A Touch of Spice: For those who love a bit of heat, consider adding more red pepper flakes to the sauce or sprinkling them over the finished pizza. A drizzle of chili oil after baking can also provide a wonderful kick that complements the rich garlic notes beautifully.

White Garlic Pizza Sauce: Creamy & Perfect for Homemade Pizza

Conclusion:

As we wrap up our culinary journey with this incredible recipe, I truly hope you’re feeling as excited as I am about the possibilities it holds for your next homemade pizza night. This isn’t just another sauce recipe; it’s a revelation. I genuinely believe that mastering this particular sauce will fundamentally change the way you approach homemade pizza, transforming what might have been a good meal into an absolutely unforgettable feast. It’s the kind of recipe that makes people ask for your secret, and the best part is, you’ll be happy to share because it’s so straightforward yet yields such spectacular results. The rich, aromatic blend of garlic, the velvety texture, and the subtle yet profound flavor profile are what elevate this from a simple condiment to the star of the show.

I can confidently say that this White Garlic Pizza Sauce Creamy Perfect For Homemade Pizza is an absolute game-changer. It delivers a depth of flavor that is often missing from traditional tomato-based sauces, offering a sophisticated alternative that still manages to be incredibly comforting and approachable. Imagine that first bite: a perfectly crisp crust, melted cheese, your favorite toppings, all bound together by this luscious, garlicky creaminess. It’s a symphony of textures and tastes that will delight your palate and leave you craving more. This sauce doesn’t just complement your pizza; it defines it, creating a base that is both robust and delicately balanced, allowing the other ingredients to shine while also holding its own as a foundational flavor.

Serving Suggestions & Creative Variations to Explore

While this sauce is undeniably the star for pizza, its versatility extends far beyond the confines of a dough circle. Let’s talk pizza first, though! For a classic and undeniably delicious experience, pair this sauce with a simple margherita-style pizza, using fresh mozzarella, a sprinkle of Parmesan, and a generous scattering of fresh basil leaves after baking. The creaminess of the sauce works wonders with the salty cheese and herbaceous notes. Alternatively, venture into a “chicken alfredo” pizza territory: top with cooked, shredded chicken, some caramelized onions, and a blend of mozzarella and provolone. For a vegetarian delight, roasted mushrooms, spinach, and feta cheese make an exquisite combination, allowing the earthy flavors to meld beautifully with the garlic and cream. Don’t shy away from adding a touch of heat either; a sprinkle of red pepper flakes on top before baking can add a fantastic kick that brightens the entire flavor profile. Think about smoky elements too – a touch of smoked gouda or some thinly sliced smoked ham could introduce another layer of complexity that is truly irresistible.

Beyond the Pizza Stone: New Culinary Adventures

But why stop at pizza? This incredible sauce has a myriad of other uses that will elevate your everyday meals. Consider using it as a gourmet base for a pasta dish; toss freshly cooked fettuccine or linguine with this sauce, adding grilled shrimp or sautéed vegetables for a quick and elegant dinner. It also makes an exceptional dip! Serve it warm with crusty bread, toasted pita wedges, or a colorful array of fresh crudités for an appetizer that will disappear in minutes at any gathering. Imagine it as a rich, flavorful spread for sandwiches or wraps, adding a creamy, garlicky punch to your lunchtime routine. I’ve even used it as a sauce for baked chicken or fish, drizzling it over the protein before baking to infuse it with its wonderful aroma and moisture. For a decadent side, try tossing roasted potatoes or asparagus with a spoonful of this sauce just before serving. The possibilities are truly endless, limited only by your imagination, and each new application promises a delightful experience.

Feeling adventurous? I encourage you to experiment with variations on the sauce itself. For an extra layer of herbaceousness, whisk in some finely chopped fresh parsley or chives at the very end. A pinch of nutmeg can add an unexpected warmth and depth, especially if you’re using it in a pasta dish. If you prefer a bit more tang, a tiny squeeze of lemon juice can brighten the flavors beautifully. For those who love a bit of a spicy kick, a dash of cayenne pepper or a very finely minced jalapeño could be incorporated while cooking the garlic. Don’t be afraid to make this recipe truly your own; it’s a fantastic canvas for your culinary creativity.

Your Turn: Create, Enjoy, and Share!

Now that you have all the tools and inspiration, the most important step is to actually make this magnificent sauce. I implore you to set aside some time, gather your ingredients, and embark on this delicious journey. I promise you won’t regret it. The reward of creating something so profoundly flavorful from scratch is immense, and the joy of sharing it with loved ones is even greater. This recipe is designed to bring smiles to faces and warmth to homes.

Once you’ve experienced the magic of this sauce, I would absolutely love to hear about it! Please come back and share your experiences, your favorite topping combinations, or any unique ways you’ve adapted it in the comments section below. Did you try it with artichokes? Did you make a garlic bread from scratch with it? Your insights and stories are invaluable to me and to our growing community of food enthusiasts. Your feedback helps inspire others and enriches our shared culinary adventure. So, roll up your sleeves, preheat that oven, and get ready to enjoy the best homemade pizza you’ve ever tasted. Happy cooking!


White Garlic Pizza Sauce: Creamy & Perfect for Homemade Pizza

White Garlic Pizza Sauce: Creamy & Perfect for Homemade Pizza

Transform your next pizza night with this creamy, rich garlic-infused white pizza sauce. It offers a delightful gourmet departure from classic tomato-based sauces, perfect for homemade pizzas.

Prep Time
15 Minutes

Cook Time
10 Minutes

Total Time
25 Minutes

Servings
About 1.5 cups (enough for one 12-14 inch pizza)

Ingredients

  • 4-5 cloves garlic, minced
  • 2 tbsp unsalted butter
  • ¾ cup heavy cream (or milk/plant-based milk)
  • ¼ cup grated Parmesan cheese (optional)
  • ½ tsp salt
  • ¼ tsp black pepper
  • Pinch of nutmeg (optional)
  • ¼ tsp dried oregano (or other herbs, optional)

Instructions

  1. Step 1
    In a medium saucepan, melt 2 tbsp unsalted butter over medium heat. Add 4-5 cloves minced garlic and cook for 1-2 minutes until fragrant and slightly softened. Do not brown the garlic.
  2. Step 2
    Pour in ¾ cup heavy cream (or milk/plant-based milk). Add ½ tsp salt, ¼ tsp black pepper, a pinch of nutmeg (optional), and ¼ tsp dried oregano (or other herbs). Bring to a gentle simmer, then reduce heat to low.
  3. Step 3
    Gently simmer the sauce for 3-5 minutes, stirring occasionally, until it slightly thickens to coat the back of a spoon. Stir in ¼ cup grated Parmesan cheese (if using). Taste and adjust seasonings as needed.
  4. Step 4
    Remove the finished sauce from heat. Use warm on your pizza, or allow it to cool completely before transferring to an airtight container for refrigeration. Reheat gently and whisk before use if stored.

Important Information

Nutrition Facts (Per Serving)

It is important to consider this information as approximate and not to use it as definitive health advice.

Allergy Information

Please check ingredients for potential allergens and consult a health professional if in doubt.

« Previous Post
Pretzel Chicken with Mustard Cheddar Sauce - Easy Dinner!
Next Post »
Ultimate Philly Cheesesteak Meatloaf Recipe – Must-Try!

If you enjoyed this…

Savory Key West Grilled Chicken Recipe for Flavorful Meals

Buttery German Potato Pancakes

Buttery German Potato Pancakes

Dill Pickle Parmesan Chicken Recipe – So Delicious!

Primary Sidebar

Browse by Diet

BreakfastDinnerLunchDessertAppetizer

Sweet Peach Yogurt Parfait Delight

One of my fondest memories is from a lazy summer afternoon spent at my grandmother’s house. The sun filtered through the kitchen window, casting a warm glow over the table where she would create her culinary magic. It was during one of those blissful moments that I first tasted her Peach Yogurt Parfait with Honey and Granola. The sweet aroma of ripe peaches mingling with creamy yogurt and the crunch of granola was nothing short of heavenly. It felt like summer captured in a bowl, and I still remember the joy of diving in with a spoon, each layer revealing a new burst of flavor.

When I think about that parfait, I can almost hear the gentle hum of the bees outside, reminding me of the floral notes that honey brings to every bite. The vibrant yellows and soft oranges of the peaches contrast beautifully with the creamy white yogurt and the golden crunch of granola. It’s a dish that not only looks delightful but also tastes like a celebration of fresh, wholesome ingredients.

What makes my version of this Peach Yogurt Parfait special is the careful balance of flavors and textures. I use ripe, juicy peaches, drizzled with locally sourced honey, and a homemade granola that’s bursting with nuts and seeds for an extra crunch. It’s a simple dish, but every layer is crafted with love and attention.

Let me show you exactly how to make this delightful parfait, so you can bring a bit of that summer magic into your kitchen!

Sweet Peach Yogurt Parfait Delight

Why You’ll Love This Recipe

  • Delightfully creamy texture from the Greek yogurt, paired with the juicy sweetness of fresh peaches.
  • Ready in under 20 minutes, making it a quick and satisfying breakfast or snack option.
  • Budget-friendly, using common ingredients that you may already have in your pantry.
  • Customizable with your favorite granola and nuts, allowing you to tailor each parfait to your taste.
  • Perfectly balanced flavors with the bright acidity of lemon juice and the sweetness of honey enhancing the peaches.

Ingredients

  • For the Parfait:
  • 2 cups plain Greek yogurt (or vanilla yogurt for a sweeter option)
  • 2 large ripe peaches, diced (about 2 cups)
  • 1 tablespoon fresh lemon juice (to prevent browning of peaches)
  • 2 tablespoons honey (plus more for drizzling)
  • 1 teaspoon vanilla extract (optional for extra flavor)
  • For the Granola:
  • 1 cup granola (store-bought or homemade; see notes for a simple granola recipe)
  • 1/4 cup sliced almonds (optional for added crunch)
  • 1/4 cup shredded coconut (optional for added flavor)

Let’s dive into some key ingredients that make this Peach Yogurt Parfait so delightful! First, the Greek yogurt is not only creamy but also packed with protein, making it a satisfying option for breakfast or a snack. If you’re looking for a sweeter option, you can easily substitute it with vanilla yogurt, though it may alter the overall flavor balance. Next, the ripe peaches are the star of the show; their natural sweetness shines through, so I recommend choosing peaches that yield slightly to pressure, indicating they’re perfectly ripe. If peaches aren’t in season, feel free to use nectarines or even frozen peaches—just thaw them before use. Finally, honey adds a lovely floral sweetness that ties everything together. If you prefer, maple syrup can serve as a delicious substitute.

Step-by-Step Instructions

  1. Start by preparing the peaches. Wash them thoroughly, then slice and dice them into bite-sized pieces. In a medium bowl, toss the diced peaches with 1 tablespoon of fresh lemon juice to prevent browning. Set aside for about 5 minutes while the lemon juice works its magic.
  2. In a separate bowl, combine the Greek yogurt, 2 tablespoons of honey, and 1 teaspoon of vanilla extract if using. Stir the mixture until smooth and thoroughly blended. This should take about a minute. Avoid overmixing to maintain the creaminess of the yogurt.
  3. Now it’s time to layer your parfait. Grab a clear glass or bowl to showcase your beautiful creation. Start with a generous spoonful of the yogurt mixture at the bottom—about 1/4 cup will do. Use a spoon to spread it evenly.
  4. Add a layer of the diced peaches over the yogurt, ensuring they cover the yogurt completely. You might want to use about half of what you have prepared—roughly 1 cup. This layer should be visually appealing, so arrange the peaches neatly.
  5. Sprinkle 1/4 cup of granola over the peaches. This adds a delightful crunch. Make sure to distribute it evenly to ensure every bite has that satisfying texture. Avoid packing it down too tightly, as you want it to maintain its crunch.
  6. Repeat the layers: spoon in another 1/4 cup of yogurt, followed by another cup of peaches, and another sprinkle of granola. You should have at least two layers, but feel free to add more depending on your glass size.
  7. Finish off your parfait with a drizzle of honey on top for added sweetness and a touch of elegance. If you’re using sliced almonds or shredded coconut, sprinkle them on top now. It adds a lovely visual contrast and extra flavor.
  8. Serve immediately or refrigerate for up to 30 minutes before serving to allow the flavors to meld together. However, I recommend enjoying it fresh to maintain the granola’s crunch.

Pro Tips for the Best Peach Yogurt Parfait With Honey And Granola

  • Make sure to choose ripe peaches for the best flavor and texture. A common mistake is using unripe fruit, which can lead to a less enjoyable parfait. Look for peaches that are fragrant and slightly soft to the touch.
  • Use a clear glass to assemble your parfait; this not only makes for a beautiful presentation but also allows you to see the colorful layers, which adds to the enjoyment of eating it.
  • For an even creamier texture, consider whipping the Greek yogurt with a hand mixer for a couple of minutes before layering. This small adjustment makes a huge difference in mouthfeel.
  • Be mindful of the granola-to-yogurt ratio. Too much granola can overwhelm the parfait, while too little can make it feel too creamy. Aim for about 1/4 cup of granola per layer for the perfect balance.
  • If you’re making this for a gathering, consider preparing the yogurt and peaches ahead of time and layering them just before serving. This ensures the granola stays crunchy!

Variations & Serving Ideas

There are so many ways to get creative with your Peach Yogurt Parfait! For a tropical twist, swap out the peaches for mangoes or pineapples and top with coconut flakes. If you prefer a berry flavor, mix in some blueberries or strawberries with the peaches for added color and taste. For a nutty version, incorporate chopped walnuts or pecans instead of almonds.

As for serving ideas, this parfait pairs beautifully with a side of scrambled eggs for a hearty breakfast or fresh fruit salad for a light lunch. You might also enjoy it alongside whole grain toast with almond butter for an energizing snack. The contrast of flavors and textures will elevate your meal experience!

Storage, Make-Ahead & Reheating

The Peach Yogurt Parfait is best enjoyed fresh, but you can prepare some components ahead of time. Store the layered parfait in an airtight container in the refrigerator for up to 24 hours. However, be cautious; the granola may lose its crunch if stored too long. You can freeze the yogurt and peach mixture for up to 2 months; just remember to thaw it in the refrigerator overnight before serving.

If you plan to enjoy this dish the next day, it can taste even better as the flavors meld together. Just remember to add the granola right before serving to keep its delightful crunch!

Frequently Asked Questions

Can I make Peach Yogurt Parfait With Honey And Granola ahead of time?

Yes — in fact, it tastes even better the next day as the flavors meld. However, I recommend waiting to add the granola until just before serving to maintain its crunch.

What can I substitute for Greek yogurt?

If you prefer a lighter option, you can substitute Greek yogurt with regular yogurt or a dairy-free alternative like coconut yogurt. Just remember that this may alter the creaminess and flavor profile slightly.

Can I use frozen peaches for this parfait?

Absolutely! Just make sure to thaw the frozen peaches before using them. They will still add great flavor, though the texture may be slightly softer than fresh peaches.

How do I make the parfait vegan?

To make a vegan version, substitute the Greek yogurt with a plant-based yogurt alternative, and replace honey with maple syrup or agave nectar. This keeps the parfait sweet while adhering to a vegan diet.

What other fruits can I use in this recipe?

You can mix and match fruits based on your preference. Try using strawberries, blueberries, raspberries, or even bananas. Just make sure to adjust the lemon juice as needed to prevent browning.

Sweet Peach Yogurt Parfait Delight

Final Thoughts

The Peach Yogurt Parfait with Honey and Granola is a delightful blend of creamy yogurt, sweet peaches, and crunchy granola that creates a satisfying and nourishing treat. Each layer bursts with flavor, making it a perfect choice for breakfast or a light dessert.

This is the kind of recipe I come back to again and again, especially when I want something refreshing and wholesome to start my day. The harmony of sweet and tart flavors, combined with the delightful crunch, never fails to lift my spirits!

I encourage you to give this parfait a try and indulge in its comforting goodness. Feel free to share your results or even add your own twist—perhaps a sprinkle of cinnamon or a handful of nuts. Enjoy creating your perfect parfait!

Print
clock clock iconcutlery cutlery iconflag flag iconfolder folder iconinstagram instagram iconpinterest pinterest iconfacebook facebook iconprint print iconsquares squares iconheart heart iconheart solid heart solid icon

Peach Yogurt Parfait


  • Author: Lily author
  • Total Time: 15 minutes
  • Yield: 4 servings 1x
Pin Recipe
Print Recipe

Description

This Peach Yogurt Parfait combines creamy Greek yogurt, juicy peaches, and crunchy granola for a delightful treat. It’s a perfect breakfast or snack that captures the essence of summer in every bite.


Ingredients

Scale
  • For the Parfait:
  • 2 cups plain Greek yogurt (or vanilla yogurt for a sweeter option)
  • 2 large ripe peaches, diced (about 2 cups)
  • 1 tablespoon fresh lemon juice (to prevent browning of peaches)
  • 2 tablespoons honey (plus more for drizzling)
  • 1 teaspoon vanilla extract (optional for extra flavor)
  • For the Granola:
  • 1 cup granola (store-bought or homemade; see notes for a simple granola recipe)
  • 1/4 cup sliced almonds (optional for added crunch)
  • 1/4 cup shredded coconut (optional for added flavor)

Instructions

  1. Start by preparing the peaches. Wash them thoroughly, then slice and dice them into bite-sized pieces. In a medium bowl, toss the diced peaches with 1 tablespoon of fresh lemon juice to prevent browning. Set aside for about 5 minutes while the lemon juice works its magic.
  2. In a separate bowl, combine the Greek yogurt, 2 tablespoons of honey, and 1 teaspoon of vanilla extract if using. Stir the mixture until smooth and thoroughly blended. This should take about a minute. Avoid overmixing to maintain the creaminess of the yogurt.
  3. Now it’s time to layer your parfait. Grab a clear glass or bowl to showcase your beautiful creation. Start with a generous spoonful of the yogurt mixture at the bottom—about 1/4 cup will do. Use a spoon to spread it evenly.
  4. Add a layer of the diced peaches over the yogurt, ensuring they cover the yogurt completely. You might want to use about half of what you have prepared—roughly 1 cup. This layer should be visually appealing, so arrange the peaches neatly.
  5. Sprinkle 1/4 cup of granola over the peaches. This adds a delightful crunch. Make sure to distribute it evenly to ensure every bite has that satisfying texture. Avoid packing it down too tightly, as you want it to maintain its crunch.
  6. Repeat the layers: spoon in another 1/4 cup of yogurt, followed by another cup of peaches, and another sprinkle of granola. You should have at least two layers, but feel free to add more depending on your glass size.
  7. Finish off your parfait with a drizzle of honey on top for added sweetness and a touch of elegance. If you’re using sliced almonds or shredded coconut, sprinkle them on top now. It adds a lovely visual contrast and extra flavor.
  8. Serve immediately or refrigerate for up to 30 minutes before serving to allow the flavors to meld together. However, I recommend enjoying it fresh to maintain the granola’s crunch.
  • Prep Time: 15 mins
  • Cook Time: 0 mins
  • Category: Breakfast
  • Method: No-cook
  • Cuisine: American

Nutrition

  • Serving Size: 1 parfait
  • Calories: 250
  • Sugar: 20 g
  • Sodium: 50 mg
  • Fat: 5 g
  • Saturated Fat: 2 g
  • Unsaturated Fat: 3 g
  • Trans Fat: 0 g
  • Carbohydrates: 40 g
  • Fiber: 3 g
  • Protein: 10 g
  • Cholesterol: 10 mg

Keywords: Choose ripe peaches for the best flavor and texture. Use a clear glass for a beautiful presentation. For creaminess, consider whipping the yogurt before layering. Be mindful of the granola-to-yogurt ratio. Prepare yogurt and peaches ahead of time for gatherings, layering just before serving.

Did you make this recipe?

Share a photo and tag us — we can't wait to see what you've made!

Sun-Kissed Frozen Orange Cream Slush

As a child, summer days felt like they lasted forever. I remember the sticky heat wrapping around me as I played outside, my laughter mingling with the sounds of the neighborhood. But nothing could cool me down quite like the moment I’d spot my grandmother, laboring over her blender, whipping up her famous Frozen Orange Creamsicle Slush. That vibrant orange treat, with its frosty texture and sweet citrus aroma, was like a burst of sunshine in a cup. Just one sip, and I could feel the coolness wash over me, sparking pure joy.

This Frozen Orange Creamsicle Slush has a way of making you feel like a kid again. Its creamy, dreamy consistency is a delightful balance of bright orange and soft vanilla, inviting you to dive right in. The refreshing tang of orange dances on your tongue, while the smooth creaminess envelops you in a comforting embrace. It’s a nostalgic treat that’s perfect for hot summer afternoons or anytime you need a little pick-me-up.

What makes my version of this slush stand out is the addition of a hint of vanilla bean, which elevates the flavor and adds an extra layer of richness. Plus, it’s super easy to whip up with just a few simple ingredients that you probably already have on hand! So, if you’re ready to relive those sun-soaked memories, let me show you exactly how to make it.

Sun-Kissed Frozen Orange Cream Slush

Why You’ll Love This Recipe

  • Each slush is a perfect blend of creamy vanilla and zesty orange, creating a nostalgic flavor reminiscent of summer days.
  • This refreshing treat is ready in under 15 minutes, making it an ideal quick dessert for unexpected guests or hot afternoons.
  • With just 8 simple ingredients, it’s budget-friendly, ensuring you don’t have to break the bank to enjoy a delicious slush.
  • The slush has a perfectly smooth texture, thanks to the combination of ice and ice cream, providing a delightful contrast to the bright citrus flavors.
  • It’s highly customizable; you can easily adjust the sweetness and add fresh herbs for a unique twist that suits your taste.

Ingredients

  • 2 cups orange juice (freshly squeezed or store-bought)
  • 1 cup vanilla ice cream
  • 1 cup crushed ice
  • 1/2 cup milk (whole or 2%)
  • 1/4 cup granulated sugar (adjust based on sweetness preference)
  • 1 teaspoon vanilla extract
  • Zest of 1 orange (for added flavor)
  • Fresh orange slices and mint leaves (for garnish)

The star of this Frozen Orange Creamsicle Slush is the orange juice, which provides the vibrant, citrusy base. Freshly squeezed juice will yield the brightest flavor, but store-bought options can be just as convenient. If you’re opting for store-bought, choose 100% pure juice with no added sugars for the best results. Another essential ingredient is the vanilla ice cream; it adds creaminess and sweetness. You can substitute it with dairy-free ice cream if you’re looking for a vegan option. Whole or 2% milk complements the ice cream, creating a smooth blend. If you want a lower-calorie version, almond or oat milk can be good alternatives.

Lastly, the granulated sugar can be adjusted based on your sweetness preference. If you prefer a more natural sweetener, consider using honey or agave syrup. The orange zest enhances the flavor profile, providing an aromatic pop that brings the whole slush together. Don’t skip it! It adds an extra layer of brightness that makes this slush truly special.

Step-by-Step Instructions

  1. Start by preparing your ingredients. Gather 2 cups of orange juice, 1 cup of vanilla ice cream, and 1 cup of crushed ice. Make sure the ice is finely crushed, as larger chunks can make blending difficult.
  2. In a blender, combine the orange juice, vanilla ice cream, crushed ice, and 1/2 cup of milk. Add 1/4 cup of granulated sugar and 1 teaspoon of vanilla extract. If you like a sweeter slush, consider adding a bit more sugar at this stage.
  3. Add the zest of 1 orange to the blender. This step is crucial for enhancing the citrus flavor of your slush. Make sure not to include the bitter white pith—only the flavorful zest.
  4. Blend the mixture on medium-high speed for about 30-45 seconds. Stop once the ingredients are fully combined and the slush has a smooth, even consistency. If you notice large chunks of ice, blend for an additional 10-15 seconds. Avoid over-blending, as this can make the slush too liquidy.
  5. Once blended, taste the slush. If it needs more sweetness, add a little more sugar and blend for a few more seconds. If it’s too thick, you can add a splash of milk to reach your desired consistency.
  6. Pour the slush into glasses. This recipe typically serves 4, but you can easily double it for larger gatherings. Use a spoon to help guide the slush into the glasses if needed.
  7. Garnish each serving with fresh orange slices and mint leaves. The mint not only adds a pop of color but also a refreshing aroma that complements the citrus flavors beautifully.
  8. Serve immediately and enjoy! If you’ve made extra, you can refrigerate it for a short time, but it’s best enjoyed fresh.

Pro Tips for the Best Frozen Orange Creamsicle Slush

  • Don’t skip the orange zest! It’s a game-changer for flavor. Always zest before juicing to make it easier.
  • Use a high-powered blender for the best texture. A standard blender may struggle with ice, leading to uneven consistency. If you have a food processor, that can work too, but ensure the ice is finely crushed.
  • Adjust the ice-to-liquid ratio carefully. If your slush is too thick, it won’t blend well. Start with less ice and add more until you reach your preferred texture.
  • Be cautious with the sugar! Always start with the lower amount, as you can easily add more, but it’s hard to fix an overly sweet slush.
  • For a fun twist, consider adding a splash of coconut milk or a handful of fresh fruit like strawberries or pineapple. This not only enhances the flavor but also adds a beautiful color contrast.

Variations & Serving Ideas

There are countless ways to put a spin on your Frozen Orange Creamsicle Slush. Consider making a tropical version by adding in some pineapple juice or coconut milk for a delightful tropical twist. If you’re feeling adventurous, try incorporating a handful of frozen mango or peach slices for added sweetness. For a lighter version, swap out the vanilla ice cream for Greek yogurt for a creamy yet tangy alternative.

As for serving ideas, this refreshing slush pairs wonderfully with light summer dishes like grilled chicken skewers, fish tacos, or a simple salad topped with citrus vinaigrette. The bright, zesty flavors of the slush complement these dishes perfectly, making them an ideal pairing for a sunny day.

Storage, Make-Ahead & Reheating

This Frozen Orange Creamsicle Slush is best enjoyed fresh, but if you have leftovers, you can store them in an airtight container in the fridge for up to 2 days. Just keep in mind that the slush may lose some of its texture over time as the ice melts. It doesn’t freeze well, as the ice will turn into a solid block. If you must freeze it, blend again after thawing to restore the slushy consistency. This treat is best the day you make it, as the flavors meld together beautifully overnight, enhancing its deliciousness.

Frequently Asked Questions

Can I make Frozen Orange Creamsicle Slush ahead of time?

Yes — in fact, it tastes even better the next day as the flavors meld. However, it’s best to enjoy it fresh, as the texture can change if stored for too long. If you need to prepare it ahead, keep it in the fridge and re-blend before serving.

What kind of orange juice should I use?

For the best flavor, use freshly squeezed orange juice. However, if you’re short on time, opt for 100% pure store-bought juice without added sugars. This will ensure that your slush remains flavorful and refreshing.

Can I substitute the vanilla ice cream?

Absolutely! If you’re looking for a dairy-free option, coconut milk ice cream or a non-dairy vanilla ice cream can work wonderfully. They will still provide the creamy texture and sweetness you desire.

How can I adjust the sweetness of my slush?

You can easily adjust the sweetness by modifying the amount of sugar added. Start with 1/4 cup and taste the mixture before blending. If you prefer it sweeter, add more sugar gradually until it reaches your desired level.

What should I do if my slush is too thick?

If your slush is too thick, simply add a splash of milk or orange juice and blend again. This will help achieve a more drinkable consistency while maintaining the slushy texture. Adjust gradually to reach your preferred thickness.

Sun-Kissed Frozen Orange Cream Slush

Final Thoughts

The Frozen Orange Creamsicle Slush is a delightful blend of refreshing citrus and creamy goodness, making it a perfect treat for warm days or any time you crave a taste of nostalgia. The way the bright orange flavor dances with the creamy texture truly elevates this slush, transforming it into a satisfying escape from the everyday.

This is the kind of recipe I come back to again and again, especially when I’m looking to cool down or impress guests at a summer gathering. It’s simple to make and always brings smiles all around! I encourage you to try this recipe for yourself—don’t hesitate to share your results or even put your own spin on it. Happy slushing!

Print
clock clock iconcutlery cutlery iconflag flag iconfolder folder iconinstagram instagram iconpinterest pinterest iconfacebook facebook iconprint print iconsquares squares iconheart heart iconheart solid heart solid icon

Frozen Orange Creamsicle Slush


  • Author: Lily author
  • Total Time: 15 minutes
  • Yield: 4 servings 1x
Pin Recipe
Print Recipe

Description

This Frozen Orange Creamsicle Slush is a refreshing treat that combines creamy vanilla and zesty orange flavors. Perfect for hot summer days, it brings back nostalgic memories with every sip.


Ingredients

Scale
  • 2 cups orange juice (freshly squeezed or store-bought)
  • 1 cup vanilla ice cream
  • 1 cup crushed ice
  • 1/2 cup milk (whole or 2%)
  • 1/4 cup granulated sugar (adjust based on sweetness preference)
  • 1 teaspoon vanilla extract
  • Zest of 1 orange (for added flavor)
  • Fresh orange slices and mint leaves (for garnish)

Instructions

  1. Start by preparing your ingredients. Gather 2 cups of orange juice, 1 cup of vanilla ice cream, and 1 cup of crushed ice. Make sure the ice is finely crushed, as larger chunks can make blending difficult.
  2. In a blender, combine the orange juice, vanilla ice cream, crushed ice, and 1/2 cup of milk. Add 1/4 cup of granulated sugar and 1 teaspoon of vanilla extract. If you like a sweeter slush, consider adding a bit more sugar at this stage.
  3. Add the zest of 1 orange to the blender. This step is crucial for enhancing the citrus flavor of your slush. Make sure not to include the bitter white pith—only the flavorful zest.
  4. Blend the mixture on medium-high speed for about 30-45 seconds. Stop once the ingredients are fully combined and the slush has a smooth, even consistency. If you notice large chunks of ice, blend for an additional 10-15 seconds. Avoid over-blending, as this can make the slush too liquidy.
  5. Once blended, taste the slush. If it needs more sweetness, add a little more sugar and blend for a few more seconds. If it’s too thick, you can add a splash of milk to reach your desired consistency.
  6. Pour the slush into glasses. This recipe typically serves 4, but you can easily double it for larger gatherings. Use a spoon to help guide the slush into the glasses if needed.
  7. Garnish each serving with fresh orange slices and mint leaves. The mint not only adds a pop of color but also a refreshing aroma that complements the citrus flavors beautifully.
  8. Serve immediately and enjoy! If you’ve made extra, you can refrigerate it for a short time, but it's best enjoyed fresh.
  • Prep Time: 15 min
  • Cook Time: 0 min
  • Category: Dessert
  • Method: Blending
  • Cuisine: American

Nutrition

  • Serving Size: 1 serving
  • Calories: 200
  • Sugar: 30 g
  • Sodium: 50 mg
  • Fat: 5 g
  • Saturated Fat: 3 g
  • Unsaturated Fat: 2 g
  • Trans Fat: 0 g
  • Carbohydrates: 40 g
  • Fiber: 1 g
  • Protein: 2 g
  • Cholesterol: 20 mg

Keywords: Don't skip the orange zest! It's a game-changer for flavor. Always zest before juicing to make it easier.

Did you make this recipe?

Share a photo and tag us — we can't wait to see what you've made!

Zesty Lemon Poppy Seed Delight

One rainy afternoon, I found myself in my grandmother’s cozy kitchen, the kind that always smelled like warmth and love. She was whipping up her famous Lemon Poppy Seed Loaf, a recipe that had been passed down through generations. As the batter came together, the zesty aroma of fresh lemons filled the air, mingling perfectly with the nutty fragrance of poppy seeds. I can still picture her, apron-clad, as she expertly drizzled a vibrant citrus icing over the loaf, creating a glossy, sun-kissed finish that beckoned us to dive in. It was a moment that sparked my own passion for baking, and this recipe has become a cherished staple in my home ever since.

When you take a bite of this Lemon Poppy Seed Loaf, it’s like a burst of sunshine on your palate. The loaf is beautifully golden, with a tender crumb that melts in your mouth. Each slice is speckled with tiny poppy seeds, adding a delightful crunch that contrasts beautifully with the tangy sweetness of the lemon. And that citrus icing? It’s the finishing touch that elevates this loaf from ordinary to extraordinary, with its bright, zesty flavor dancing on your taste buds.

This recipe stands out because it embraces simplicity while delivering on flavor. I’ve added a hint of vanilla to the batter, enhancing the overall taste and making it even more indulgent. Trust me, once you make this Lemon Poppy Seed Loaf With Citrus Icing, it’ll become a go-to in your baking repertoire.

So, let me show you exactly how to make it!

Zesty Lemon Poppy Seed Delight

Why You’ll Love This Recipe

  • Moist and tender crumb that melts in your mouth, thanks to the perfect balance of butter and buttermilk.
  • Bright, zesty lemon flavor paired with crunchy poppy seeds, creating a delightful texture and taste experience.
  • Easy to whip up in just about an hour, perfect for last-minute gatherings or a cozy afternoon treat.
  • Budget-friendly with everyday ingredients, making it an accessible option for all home bakers.
  • The citrus icing adds a sweet tang that elevates the loaf, turning a simple recipe into a showstopper!

Ingredients

  • 1 ½ cups (190g) all-purpose flour
  • 1 teaspoon baking powder
  • ½ teaspoon baking soda
  • ½ teaspoon salt
  • 3 tablespoons poppy seeds
  • ½ cup (115g) unsalted butter, softened to room temperature
  • 1 cup (200g) granulated sugar
  • 2 large eggs
  • 1 teaspoon vanilla extract
  • 1 teaspoon lemon zest (from about 1 medium lemon)
  • ½ cup (120ml) buttermilk
  • 2 tablespoons fresh lemon juice

For the Citrus Icing:

  • 1 cup (120g) powdered sugar
  • 2 tablespoons fresh lemon juice
  • 1 tablespoon orange juice
  • 1 teaspoon lemon zest (for garnish, optional)

Let’s dive into the key ingredients that make this Lemon Poppy Seed Loaf so special. The all-purpose flour provides the structure and base for the loaf, while the baking powder and baking soda ensure it rises perfectly, giving the loaf a light texture. For a gluten-free variation, you could substitute the flour with a gluten-free all-purpose blend. Poppy seeds not only add a delightful crunch but also contribute to the unique flavor profile that pairs well with the citrus notes.

Unsalted butter is crucial for achieving the buttery richness that makes this loaf so moist. If you’re looking for a dairy-free option, coconut oil or a vegan butter can be used instead. The buttermilk is another essential component, providing acidity that activates the baking soda for a fluffy texture. If you don’t have buttermilk on hand, you can easily make a substitute by mixing ½ cup of milk with 1 tablespoon of vinegar or lemon juice and letting it sit for about 5 minutes.

Step-by-Step Instructions

  1. Preheat your oven to 350°F (175°C). Grease a 9×5-inch loaf pan or line it with parchment paper for easy removal later.
  2. In a medium mixing bowl, whisk together 1 ½ cups of all-purpose flour, 1 teaspoon of baking powder, ½ teaspoon of baking soda, ½ teaspoon of salt, and 3 tablespoons of poppy seeds. This helps to evenly distribute the baking agents and ensures a uniform rise.
  3. In a large mixing bowl, cream together ½ cup of softened unsalted butter and 1 cup of granulated sugar using an electric mixer on medium speed for about 3-4 minutes, until the mixture is light and fluffy. Make sure to scrape down the sides of the bowl occasionally.
  4. Add 2 large eggs, 1 teaspoon of vanilla extract, and 1 teaspoon of lemon zest to the creamed butter and sugar, mixing until fully combined. You want a smooth consistency, so ensure there are no lumps of butter.
  5. In a small bowl, combine ½ cup of buttermilk and 2 tablespoons of fresh lemon juice. Alternately add the dry ingredients and buttermilk mixture to the butter mixture, starting and ending with the dry ingredients. Mix just until combined; do not overmix, as this can lead to a dense loaf.
  6. Pour the batter into the prepared loaf pan. Smooth the top with a spatula, ensuring it’s even. Bake in the preheated oven for 50-60 minutes, or until a toothpick inserted in the center comes out clean. The edges should be lightly golden brown, and the center should feel just set.
  7. Once baked, remove the loaf from the oven and allow it to cool in the pan for about 10 minutes. Then, transfer it to a wire rack to cool completely. Resist the urge to slice too soon, as it will be crumbly if it’s still warm.
  8. While the loaf is cooling, prepare the citrus icing. In a medium bowl, whisk together 1 cup of powdered sugar, 2 tablespoons of fresh lemon juice, and 1 tablespoon of orange juice until smooth. If the icing is too thick, you can add a little more juice to reach your desired consistency.
  9. Once the loaf is completely cool, drizzle the citrus icing over the top. If you like, sprinkle with an additional teaspoon of lemon zest for an extra pop of flavor and color.

Pro Tips for the Best Lemon Poppy Seed Loaf With Citrus Icing

  • Be careful not to overmix your batter; this is a common mistake that can lead to a dense loaf. Mix just until the dry ingredients are incorporated for a light and fluffy texture.
  • Use room temperature ingredients, especially the butter and eggs. This helps to create a smoother batter and ensures even baking. Take your eggs out of the fridge about 30 minutes before you start.
  • For a more pronounced lemon flavor, consider adding a little lemon extract in addition to the zest and juice. Just a half teaspoon can elevate the citrus notes significantly.
  • When measuring your flour, spoon it into the measuring cup and level it off with a knife instead of scooping directly from the bag. This prevents packing and ensures you don’t end up with a dry loaf.
  • Invest in a good quality loaf pan; it makes a difference in heat distribution, which ensures even baking. If your pan is dark-coated, reduce the oven temperature by 25°F to prevent over-browning.

Variations & Serving Ideas

For a delightful twist, consider adding blueberries or raspberries to the batter for a fruity burst of flavor. You can also experiment with different citrus fruits—try lime or grapefruit zest and juice for a refreshing change. For a healthier option, substitute half of the all-purpose flour with whole wheat flour for added fiber without compromising too much on texture.

This Lemon Poppy Seed Loaf pairs beautifully with a light salad, such as a mixed greens salad with a vinaigrette, or a cup of tea for a cozy afternoon treat. It also complements a creamy cheese platter, as the acidity of the loaf balances rich cheeses perfectly. Lastly, a scoop of vanilla ice cream on the side creates a delightful contrast of temperatures and flavors!

Storage, Make-Ahead & Reheating

This Lemon Poppy Seed Loaf can be stored at room temperature for up to 3 days if wrapped tightly in plastic wrap. If you want to keep it longer, it freezes well for up to 3 months. To freeze, wrap the loaf tightly in plastic wrap and then in aluminum foil to prevent freezer burn.

When you’re ready to enjoy it again, simply thaw it in the fridge overnight. Reheat individual slices in the microwave for 15-20 seconds or in a toaster oven until warmed through. Interestingly, many people find that this loaf tastes even better the next day, as the flavors have time to meld!

Frequently Asked Questions

Can I make Lemon Poppy Seed Loaf With Citrus Icing ahead of time?

Yes — in fact, it tastes even better the next day! You can make the loaf a day in advance, allowing the flavors to develop. Just be sure to store it in an airtight container to maintain its moisture.

Can I substitute the poppy seeds?

Absolutely! If you don’t have poppy seeds on hand or prefer an alternative, you can use sesame seeds for a similar crunch or omit them entirely for a smooth loaf.

What can I use instead of buttermilk?

If you don’t have buttermilk, you can easily create a substitute by mixing ½ cup of milk (dairy or plant-based) with 1 tablespoon of vinegar or lemon juice. Let it sit for 5 minutes before using in the recipe.

How can I make this recipe gluten-free?

To make a gluten-free version of this Lemon Poppy Seed Loaf, substitute the all-purpose flour with a gluten-free all-purpose flour blend. Just ensure that the blend contains a binding agent like xanthan gum for the best results.

What is the best way to store leftover loaf?

Leftover Lemon Poppy Seed Loaf should be stored in an airtight container at room temperature for up to 3 days. For longer storage, wrap it tightly and freeze for up to 3 months. Thaw it before serving for the best texture.

Zesty Lemon Poppy Seed Delight

Final Thoughts

The Lemon Poppy Seed Loaf with Citrus Icing is truly a delightful treat that brings a burst of brightness to any occasion. The zesty lemon flavor combined with the subtle crunch of poppy seeds creates a satisfying balance, while the citrus icing adds a touch of sweetness that perfectly complements the loaf’s tanginess.

This is the kind of recipe I come back to again and again, especially when I want to brighten up a gloomy day or celebrate a small victory. The aroma that fills the kitchen as it bakes is absolutely heavenly! I encourage you to give this recipe a try; you might just find it becoming a beloved staple in your home. Don’t forget to share your results or even add your own unique twist—I can’t wait to see what you create!

Print
clock clock iconcutlery cutlery iconflag flag iconfolder folder iconinstagram instagram iconpinterest pinterest iconfacebook facebook iconprint print iconsquares squares iconheart heart iconheart solid heart solid icon

Lemon Poppy Seed Loaf


  • Author: Lily author
  • Total Time: 13 minute
  • Yield: 1 loaf 1x
Pin Recipe
Print Recipe

Description

This Lemon Poppy Seed Loaf is a delightful treat that combines zesty lemon flavor with crunchy poppy seeds. Topped with a citrus icing, it’s perfect for any occasion.


Ingredients

Scale
  • 1 ½ cups (190g) all-purpose flour
  • 1 teaspoon baking powder
  • ½ teaspoon baking soda
  • ½ teaspoon salt
  • 3 tablespoons poppy seeds
  • ½ cup (115g) unsalted butter, softened to room temperature
  • 1 cup (200g) granulated sugar
  • 2 large eggs
  • 1 teaspoon vanilla extract
  • 1 teaspoon lemon zest (from about 1 medium lemon)
  • ½ cup (120ml) buttermilk
  • 2 tablespoons fresh lemon juice
  • 1 cup (120g) powdered sugar
  • 2 tablespoons fresh lemon juice
  • 1 tablespoon orange juice
  • 1 teaspoon lemon zest (for garnish, optional)

Instructions

  1. Preheat your oven to 350°F (175°C). Grease a 9×5-inch loaf pan or line it with parchment paper for easy removal later.
  2. In a medium mixing bowl, whisk together 1 ½ cups of all-purpose flour, 1 teaspoon of baking powder, ½ teaspoon of baking soda, ½ teaspoon of salt, and 3 tablespoons of poppy seeds. This helps to evenly distribute the baking agents and ensures a uniform rise.
  3. In a large mixing bowl, cream together ½ cup of softened unsalted butter and 1 cup of granulated sugar using an electric mixer on medium speed for about 3-4 minutes, until the mixture is light and fluffy. Make sure to scrape down the sides of the bowl occasionally.
  4. Add 2 large eggs, 1 teaspoon of vanilla extract, and 1 teaspoon of lemon zest to the creamed butter and sugar, mixing until fully combined. You want a smooth consistency, so ensure there are no lumps of butter.
  5. In a small bowl, combine ½ cup of buttermilk and 2 tablespoons of fresh lemon juice. Alternately add the dry ingredients and buttermilk mixture to the butter mixture, starting and ending with the dry ingredients. Mix just until combined; do not overmix, as this can lead to a dense loaf.
  6. Pour the batter into the prepared loaf pan. Smooth the top with a spatula, ensuring it’s even. Bake in the preheated oven for 50-60 minutes, or until a toothpick inserted in the center comes out clean. The edges should be lightly golden brown, and the center should feel just set.
  7. Once baked, remove the loaf from the oven and allow it to cool in the pan for about 10 minutes. Then, transfer it to a wire rack to cool completely. Resist the urge to slice too soon, as it will be crumbly if it’s still warm.
  8. While the loaf is cooling, prepare the citrus icing. In a medium bowl, whisk together 1 cup of powdered sugar, 2 tablespoons of fresh lemon juice, and 1 tablespoon of orange juice until smooth. If the icing is too thick, you can add a little more juice to reach your desired consistency.
  9. Once the loaf is completely cool, drizzle the citrus icing over the top. If you like, sprinkle with an additional teaspoon of lemon zest for an extra pop of flavor and color.
  • Prep Time: 15 mins
  • Cook Time: 50-60 mins
  • Category: Dessert
  • Method: Baking
  • Cuisine: American

Nutrition

  • Serving Size: 1 slice
  • Calories: 200
  • Sugar: 15 g
  • Sodium: 150 mg
  • Fat: 8 g
  • Saturated Fat: 5 g
  • Unsaturated Fat: 3 g
  • Trans Fat: 0 g
  • Carbohydrates: 30 g
  • Fiber: 1 g
  • Protein: 3 g
  • Cholesterol: 40 mg

Keywords: Be careful not to overmix your batter; this is a common mistake that can lead to a dense loaf. Use room temperature ingredients for a smoother batter and even baking.

Did you make this recipe?

Share a photo and tag us — we can't wait to see what you've made!

  • Privacy Policy
  • Terms Of Service
  • Contact
  • About
  • GDPR

Copyright © 2025 Homesmad