Cheesy Halloween Breadstick Bones are here to add a delightful (and slightly spooky!) twist to your festive spread this October! Are you ready to conjure up a treat that’s both deliciously savory and perfectly thematic for the season? I know I am, and I’m thrilled to share this surprisingly simple yet incredibly effective recipe with you.
Halloween, a time steeped in ancient traditions and modern revelry, has evolved into a vibrant celebration of all things fun, frightful, and, crucially, food-related. While carving pumpkins and choosing costumes are quintessential, the joy of preparing themed treats truly brings the spirit of the holiday alive in our homes. These breadstick bones, with their playfully eerie appearance, tap into that very essence, transforming a humble breadstick into an edible work of art that’s sure to draw gasps of delight before bites of pure enjoyment.
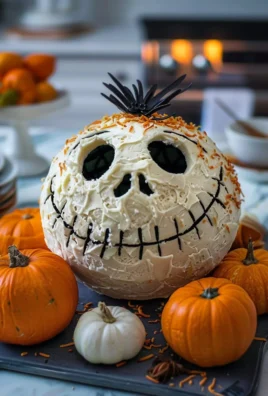
Why Everyone Loves This Spooktacular Snack
What makes these so utterly irresistible? Imagine warm, soft, golden-baked bread, generously infused with rich, gooey cheese that stretches with every pull. The subtle hint of garlic and herbs elevates the flavor profile, making each ‘bone’ a savory masterpiece. Their playful, bone-like shape makes them an instant hit, especially with younger trick-or-treaters and party guests, adding a whimsical touch to any Halloween gathering. They’re fantastic as a pre-dinner snack, a unique party appetizer, or even a fun side dish. Trust me, these Cheesy Halloween Breadstick Bones are guaranteed to be a hit, disappearing faster than a ghost in the night!

Ingredients:
-
For the Dough:
- 1 cup (240ml) warm milk (around 105-115°F / 40-46°C)
- 2 ¼ teaspoons (7g) active dry yeast (one standard packet)
- 1 tablespoon granulated sugar, plus a pinch for the yeast
- 3 ½ – 4 cups (420-480g) all-purpose flour, plus more for dusting
- 1 teaspoon salt
- ¼ cup (56g) unsalted butter, melted
- 1 large egg, lightly beaten
-
For the Cheesy Filling:
- 1 ½ cups (170g) shredded low-moisture mozzarella cheese
- ½ cup (50g) shredded sharp cheddar cheese
- ¼ cup (25g) grated Parmesan cheese
- 1 teaspoon garlic powder
- ½ teaspoon dried Italian seasoning
- Pinch of red pepper flakes (optional, for a little kick)
-
For the Topping and Finishing:
- 2 tablespoons unsalted butter, melted
- 1-2 cloves garlic, minced (or ½ teaspoon garlic powder)
- 1 tablespoon fresh parsley, finely chopped (optional, for garnish)
- Optional: Red food coloring and a small amount of olive oil for “blood” effect
- Your favorite marinara or pizza sauce for dipping
Crafting the Spooky-Good Dough for Your Cheesy Halloween Breadstick Bones
-
Activate the Yeast and Begin Our Dough Journey:
We’re going to start by waking up our yeast. In a large mixing bowl, or the bowl of your stand mixer, pour in the warm milk. Make sure it’s not too hot (it could kill the yeast) or too cold (it won’t activate properly). A good rule of thumb is that it should feel comfortably warm to the touch, like a baby’s bath. Sprinkle the 1 tablespoon of granulated sugar and the active dry yeast over the milk. Give it a gentle stir and then let it sit undisturbed for about 5-10 minutes. You’ll know it’s ready when a foamy, creamy layer forms on the surface. This foam is a clear sign that your yeast is alive and ready to make some wonderfully fluffy breadstick bones! If you don’t see any foam, your yeast might be old or the milk temperature was off, and it’s best to start again with fresh yeast. -
Combine the Dry Ingredients:
While our yeast is proofing, let’s prepare our dry ingredients. In a separate medium bowl, whisk together 3 ½ cups of the all-purpose flour and the salt. I always start with 3 ½ cups and keep the remaining ½ cup nearby for adjustments during kneading. The exact amount of flour can vary slightly depending on humidity and how accurately you measure, so it’s always good to be flexible. -
Bring Everything Together for the Dough:
Once your yeast mixture is nice and bubbly, it’s time to add the rest of the wet ingredients. Pour in the melted butter and the lightly beaten egg into the yeast mixture. Give it a good whisk to combine everything thoroughly. Now, gradually add the dry flour mixture to the wet ingredients. If you’re using a stand mixer, attach the dough hook and mix on low speed until a shaggy dough forms. If you’re mixing by hand, use a sturdy spoon or a Danish dough whisk until the ingredients are just combined. We’re looking for a cohesive mass, not a perfectly smooth dough just yet. -
Knead the Dough to Perfection:
Now comes the fun part – kneading! Turn the shaggy dough out onto a lightly floured surface. If using a stand mixer, continue kneading with the dough hook on medium-low speed. Knead for about 8-10 minutes, or until the dough is smooth, elastic, and no longer sticky. If you’re kneading by hand, push the dough away from you with the heels of your hands, then fold it back towards you, rotate, and repeat. You might need to add a little more flour, a tablespoon at a time, if the dough is too sticky, but be careful not to add too much, as this can make your breadsticks tough. The dough should bounce back slowly when you gently poke it with your finger. This extensive kneading is crucial for developing the gluten, which gives our Cheesy Halloween Breadstick Bones their delightful chewiness. -
The First Rise – Letting the Dough Grow:
Lightly grease a large bowl with a little olive oil or cooking spray. Place the kneaded dough into the bowl, turning it once to coat the entire surface with oil. This prevents it from drying out. Cover the bowl tightly with plastic wrap or a clean kitchen towel. Place it in a warm, draft-free place for about 1 to 1 ½ hours, or until the dough has doubled in size. A good spot is often a slightly warm oven (turned off, of course!) or near a sunny window. Patience here is key; a proper first rise contributes significantly to the light and airy texture of our breadstick bones.
Preparing the Ghastly Cheesy Filling
-
Grate and Combine the Cheeses:
While our dough is on its first rise, let’s prepare the irresistible cheesy filling. In a medium bowl, combine the shredded mozzarella cheese, shredded cheddar cheese, and grated Parmesan cheese. Using a variety of cheeses adds depth of flavor and different melting properties, making our Cheesy Halloween Breadstick Bones truly exceptional. -
Season the Cheesy Goodness:
To our cheese mixture, add the garlic powder and dried Italian seasoning. If you like a little heat, now is the time to toss in that pinch of red pepper flakes. Mix everything together thoroughly with a spoon or your hands, ensuring the seasonings are evenly distributed throughout the cheese. Give it a taste – you want to make sure it’s seasoned to your liking. We’re creating a simple yet incredibly flavorful filling that will burst out of our breadstick bones.
Shaping the Eerie Breadstick Bones
-
Punch Down and Divide the Dough:
Once your dough has gloriously doubled in size, gently punch it down to release the air. Turn the dough out onto a lightly floured surface. Knead it lightly for a minute or two to bring it back together. Now, we need to divide the dough into equal portions. For breadstick bones, I usually aim for 12-16 pieces, depending on how large you want your bones to be. You can use a kitchen scale for precision, or simply eyeball it. Roll each portion into a small ball. Consistency in size will ensure even baking of your Cheesy Halloween Breadstick Bones. -
Roll and Fill Each Dough Piece:
Take one dough ball and, on your lightly floured surface, roll it out into a rectangle or oval shape, roughly 4-5 inches long and 2-3 inches wide. You want it thin enough to roll, but not so thin that the cheese will easily break through. Spoon about 1 ½ to 2 tablespoons of the cheesy filling onto one half of the rolled-out dough, leaving a small border around the edges. -
Seal and Shape the Bone Structure:
Fold the other half of the dough over the cheese filling, creating a sealed pocket. Pinch the edges very firmly to seal the cheese inside. It’s super important to get a good seal here; otherwise, your delicious cheese might escape during baking! Now, gently roll the sealed dough into a cylindrical shape, about 6-8 inches long. To create the “bone” effect, use your fingers to pinch and indent both ends of the cylinder, creating two “knuckles” on each end, with a slightly thinner shaft in the middle. You can also make a slight indentation in the middle of each “knuckle” to give it more of a realistic bone shape. Repeat this process with the remaining dough balls and cheese filling. -
The Second Rise – Developing More Flavor and Air:
Line two large baking sheets with parchment paper. Carefully transfer your shaped breadstick bones to the prepared baking sheets, leaving about 1-2 inches of space between each one to allow for expansion. Cover the baking sheets loosely with plastic wrap or a clean kitchen towel. Let them rise again in a warm, draft-free place for another 30-45 minutes, or until visibly puffy. This second rise enhances the texture and ensures our Cheesy Halloween Breadstick Bones are light and fluffy, not dense.
Baking Your Cheesy Halloween Breadstick Bones to Golden Perfection
-
Preheat the Oven:
About 15 minutes before the end of the second rise, preheat your oven to 375°F (190°C). Make sure your oven rack is in the middle position for even baking. -
Prepare for Baking:
In a small bowl, melt 2 tablespoons of unsalted butter. If using fresh garlic, add the minced garlic to the melted butter and stir. If using garlic powder, simply add it to the butter. Just before placing the breadsticks in the oven, lightly brush the tops of each breadstick bone with this garlic butter mixture. This will give them a beautiful golden crust and add an extra layer of savory flavor. -
Bake Until Golden Brown:
Place the baking sheets into the preheated oven. Bake for 18-22 minutes, rotating the baking sheets halfway through, until the breadstick bones are puffed up, golden brown, and cooked through. Keep a close eye on them towards the end, as oven temperatures can vary. We want that perfect golden hue, signaling that our Cheesy Halloween Breadstick Bones are crisp on the outside and wonderfully soft on the inside.
The Final Frightful Touches and Serving Suggestions
-
Garlic Butter Glaze and Optional Garnish:
Once your Cheesy Halloween Breadstick Bones are out of the oven, immediately brush them again with any remaining garlic butter mixture. If you’re using fresh chopped parsley, sprinkle it over the warm breadsticks for a fresh, aromatic finish. The heat from the breadsticks will help the butter and parsley adhere beautifully. -
Optional “Bloody” Effect for Extra Spookiness:
For an extra ghoulish touch, you can create a “bloody” effect. In a tiny bowl, mix a few drops of red food coloring with a teaspoon of olive oil. Using a very small, clean paintbrush or a skewer, carefully dab or streak this mixture onto a few areas of your breadstick bones, making them look like freshly excavated archaeological finds. This really elevates the Halloween theme! -
Serve Warm with Dipping Sauce:
Allow the Cheesy Halloween Breadstick Bones to cool for a few minutes on the baking sheets before transferring them to a serving platter. Serve them warm with a side of your favorite marinara sauce, pizza sauce, or even a spicy arrabbiata for a little extra scare. These are absolutely best enjoyed fresh out of the oven, while the cheese is still ooey-gooey and the bread is wonderfully soft. They are truly a delightful and spooky treat that will be the talk of any Halloween gathering! -
Storage Tips:
If by some miracle you have any leftover Cheesy Halloween Breadstick Bones, store them in an airtight container at room temperature for up to 2 days. For best results, reheat them briefly in a preheated oven at 350°F (175°C) for about 5-7 minutes, or until warmed through and slightly crispy again. Avoid the microwave, as it can make them a bit chewy.

Conclusion:
As we wrap up this culinary adventure, I truly hope you’re feeling as excited as I am about bringing a touch of spooky fun to your kitchen this Halloween season. I’ve shared with you a recipe that I believe is more than just food; it’s an experience, a conversation starter, and a fantastic way to celebrate. These aren’t just any breadsticks; they are designed to delight both the young and the young at heart, merging the playful spirit of Halloween with the undeniable comfort of warm, gooey cheese and soft, savory bread. What makes these
Cheesy Halloween Breadstick Bones
a true must-try is their incredible versatility and undeniable appeal. They’re surprisingly simple to make, even for novice bakers, yet they yield a result that looks impressively creative. Imagine the smiles, the oohs and aahs, as you present a platter of these perfectly “bone-shaped” delights. They are the ideal blend of festive novelty and delicious comfort food, guaranteed to be a centerpiece at any Halloween gathering, from a casual family dinner to a full-blown costume party. The aroma alone, as they bake to golden perfection, is enough to get anyone in the holiday spirit.
I find them to be utterly irresistible fresh out of the oven, their savory cheese pull a delightful testament to their gooey goodness. But the fun doesn’t stop there! These breadstick bones are incredibly adaptable, making them perfect for various serving styles. For a truly classic experience, I love serving them with a vibrant marinara sauce, perhaps in a small cauldron-shaped bowl for an extra spooky touch. You could even swirl a little sour cream into your marinara to create a ghost-like swirl on top. Beyond marinara, think about a creamy garlic dip, a spicy queso for those who like a kick, or even a simple ranch dressing. They’re also fantastic alongside a hearty chili or a warming tomato soup, acting as the perfect dipper. Imagine a ghostly white bean dip, perhaps with olive “spider” eyes, paired with these savory bones – a visual and culinary treat!
Elevate Your Halloween Feast with Creative Variations:
Don’t hesitate to get creative with your
Cheesy Halloween Breadstick Bones
! You could experiment with different cheeses – a sharp cheddar blend for a bolder flavor, some spicy pepper jack for an adult twist, or even a smoked gouda to add an unexpected depth. For an aromatic boost, try brushing them with melted garlic butter before baking, or sprinkle a pinch of Italian seasoning or dried oregano over the cheese. If you’re feeling adventurous, a touch of red pepper flakes can add a subtle warmth. For an even more ghastly appearance, consider adding a sprinkle of black sesame seeds before baking for a “charred” bone effect, or a pinch of finely chopped fresh parsley for a touch of green contrast that really makes the bone shape pop. Another fun variation could be to slightly twist the dough before forming the “knuckles” to give them a gnarled, ancient bone look. If you’re making a big batch, they can be partially baked, cooled, and then reheated just before serving for ultimate freshness, or even frozen unbaked and baked straight from the freezer (adding a few extra minutes to the baking time).
Now that I’ve shared all my tips and tricks, it’s your turn! I genuinely encourage you to roll up your sleeves, gather your ingredients, and give these fantastic
Cheesy Halloween Breadstick Bones
a try this season. They’re an absolute blast to make, especially if you involve your family or friends in the shaping process – it’s a wonderful way to create lasting memories together. Once you’ve pulled your own magnificent creations from the oven, I would absolutely love to hear about your experience. Did you try a new dip? Did your kids help with the shaping? What creative variations did you come up with? Please share your triumphs, your funny moments, and your serving suggestions with us in the comments below. Let’s build a community of Halloween food enthusiasts! Happy baking, and have a wonderfully spooky and delicious Halloween!

Cheesy Halloween Breadstick Bones
Cheesy Halloween Breadstick Bones are here to add a delightful (and slightly spooky!) twist to your festive spread this October! Ready to conjure up a treat that’s both deliciously savory and perfectly thematic for the season? This surprisingly simple yet incredibly effective recipe is shared with you.
Ingredients
-
1 pound pizza dough
-
All-purpose flour, for dusting
-
2 tablespoons unsalted butter, melted
-
½ cup grated Parmesan cheese
-
1 cup shredded mozzarella cheese
-
Marinara sauce, for dipping
Instructions
-
Step 1
Preheat oven to 375°F (190°C). Line two large baking sheets with parchment paper. -
Step 2
In a medium bowl, combine shredded mozzarella and grated Parmesan cheese. -
Step 3
On a lightly floured surface, roll out the pizza dough into a rectangle, approximately 12×16 inches. Cut the dough into 12-16 strips, about 1 to 1.5 inches wide. -
Step 4
Spoon 1½ to 2 tablespoons of the cheese mixture onto one half of each dough strip. Fold the other half of the dough over the cheese, then pinch the edges very firmly to seal the cheese inside. -
Step 5
Gently roll each sealed dough strip into a cylindrical shape, about 6-8 inches long. Use your fingers to pinch and indent both ends of the cylinder to create two ‘knuckles’ and a thinner ‘shaft’ in the middle, resembling a bone. Place shaped breadstick bones on the prepared baking sheets, leaving 1-2 inches between each. -
Step 6
Lightly brush the tops of the breadstick bones with the melted unsalted butter. Bake for 18-22 minutes, rotating the baking sheets halfway through, until golden brown and puffed. -
Step 7
Once out of the oven, brush with any remaining melted butter. Serve warm with your favorite marinara sauce for dipping. -
Step 8
Store leftovers in an airtight container at room temperature for up to 2 days. Reheat in a 350°F (175°C) oven for 5-7 minutes for best results.
Important Information
Nutrition Facts (Per Serving)
It is important to consider this information as approximate and not to use it as definitive health advice.
Allergy Information
Please check ingredients for potential allergens and consult a health professional if in doubt.