Irresistible Apple Crumble Cheesecake Recipe Youll Crave Again. Have you ever found yourself torn between the comforting warmth of a classic apple crumble and the luxurious creaminess of a perfectly baked cheesecake? Today, I am absolutely thrilled to share a creation that harmoniously marries these two beloved desserts into one truly spectacular treat. This isn’t just a dessert; it’s an experience that tantalizes every taste bud, offering the best of both worlds in a single, magnificent slice.
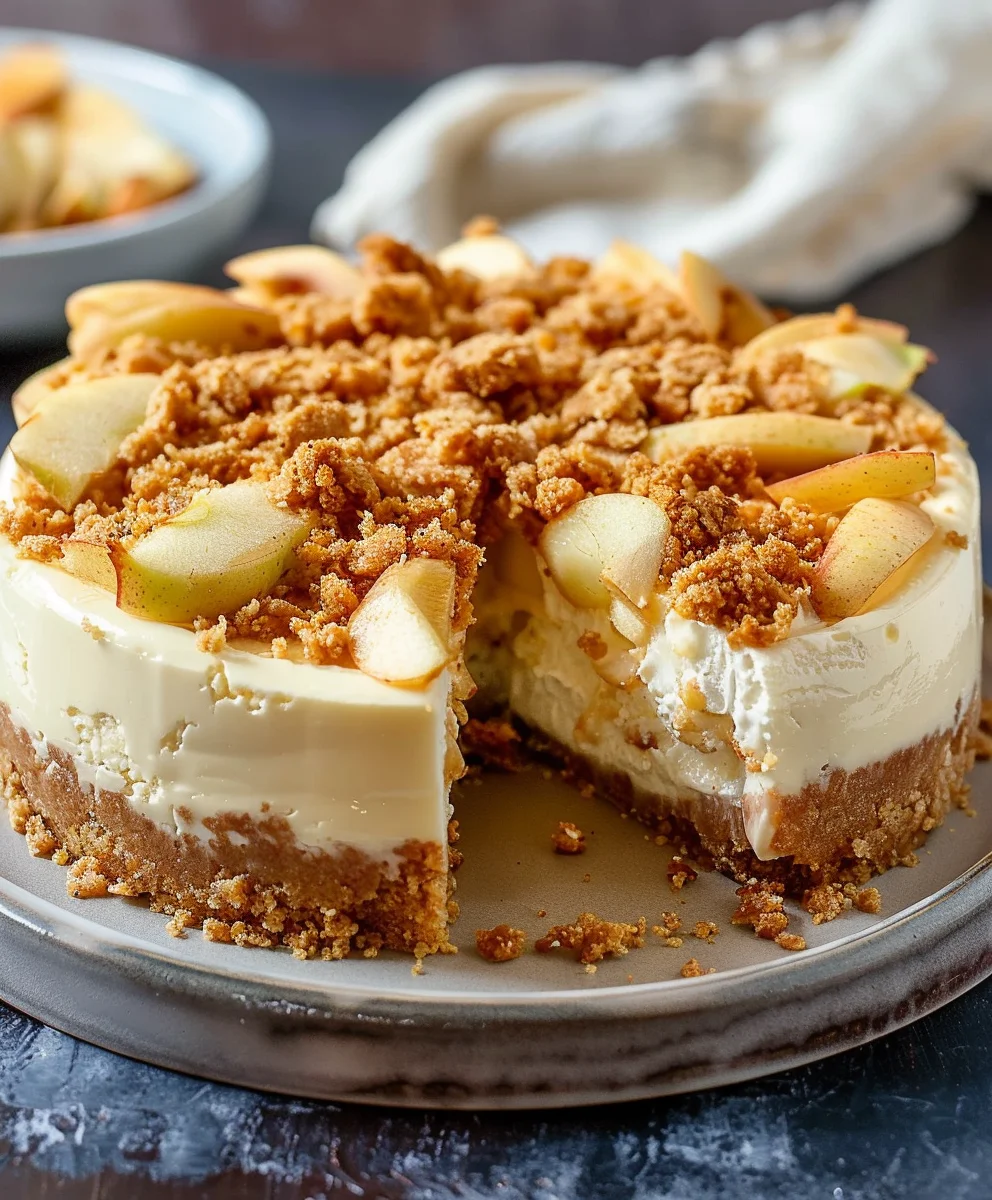
The apple crumble, with its humble British origins, has long been a cherished comfort food, while the cheesecake, a culinary delight with roots tracing back to ancient Greece, evolved into the creamy sensation we know today in America. When these two legends combine, the result is nothing short of magical. Imagine a rich, velvety cheesecake filling, bursting with the sweet and tart notes of tender, spiced apples, all crowned with a golden, buttery crumble topping. It’s the kind of dessert that elicits gasps of delight and requests for second helpings. People adore this dish because it delivers a symphony of textures—the smooth, melt-in-your-mouth cheesecake, the soft, fruit-laden layer, and the wonderfully crunchy crumble. It’s a showstopper perfect for any gathering, yet comforting enough for a cozy evening. I promise you, mastering this “Irresistible Apple Crumble Cheesecake Recipe Youll Crave Again” will become your new signature bake.

Ingredients:
- For the Spiced Apple Filling:
- 3 medium-sized Granny Smith apples (or a mix of Granny Smith and Honeycrisp for balanced sweetness and tartness), peeled, cored, and diced into ½-inch pieces
- 2 tablespoons unsalted butter
- ¼ cup light brown sugar, packed
- ½ teaspoon ground cinnamon
- ¼ teaspoon ground nutmeg
- 1 tablespoon fresh lemon juice
- For the Buttery Graham Cracker Crust:
- 1½ cups finely crushed graham cracker crumbs (about 10-12 full graham cracker sheets)
- ¼ cup granulated sugar
- ½ teaspoon ground cinnamon
- 6 tablespoons unsalted butter, melted
- For the Velvety Cheesecake Filling:
- 3 (8-ounce) packages full-fat cream cheese, softened at room temperature for at least 1 hour
- 1 cup granulated sugar
- 2 large eggs, at room temperature
- ½ cup sour cream, at room temperature
- 1 teaspoon pure vanilla extract
- ½ teaspoon fresh lemon zest (optional, but highly recommended for brightness)
- Pinch of salt
- For the Crunchy Crumble Topping:
- ½ cup all-purpose flour
- ¼ cup light brown sugar, packed
- ¼ cup granulated sugar
- ½ teaspoon ground cinnamon
- ¼ teaspoon ground nutmeg
- ¼ teaspoon salt
- 6 tablespoons cold unsalted butter, cut into small cubes
- For Garnish (Optional):
- Caramel sauce, for drizzling
- Additional dusting of ground cinnamon
Preparing the Flavorful Spiced Apple Filling
Let’s kick things off by preparing our delicious spiced apple filling. This is the heart of our Irresistible Apple Crumble Cheesecake, so we want to make sure the apples are perfectly tender and infused with warm spices. First, gather your diced apples, butter, brown sugar, cinnamon, nutmeg, and lemon juice. In a medium-sized skillet, melt the 2 tablespoons of unsalted butter over medium heat. Once the butter is glistening and fully melted, add the diced apples to the pan. Give them a good stir to coat them evenly in the butter. Now, sprinkle in the ¼ cup of light brown sugar, ½ teaspoon of ground cinnamon, and ¼ teaspoon of ground nutmeg. Stir everything together until the apples are well coated with the sugar and spices. The aroma filling your kitchen will already be heavenly, I promise!
Continue to cook the apples for about 8 to 10 minutes, stirring occasionally. We’re looking for the apples to soften considerably but still retain a slight bite; they shouldn’t turn into complete mush. They should be tender enough to easily pierce with a fork. As they cook, the sugars will caramelize slightly, creating a beautiful syrupy coating. Once the apples have reached this perfect tender-crisp stage, remove the skillet from the heat. Stir in the 1 tablespoon of fresh lemon juice. The lemon juice isn’t just for flavor; it also helps to brighten the apples and prevent them from browning too much. Transfer these beautifully cooked apples to a shallow dish and spread them out in a single layer. This helps them cool down quickly, which is essential before we fold them into our cheesecake batter. Let them cool completely at room temperature while we move on to the next steps. Trust me, you don’t want to add warm apples to a cold cheesecake batter!
Crafting the Crunchy Graham Cracker Crust
Next up, let’s create the sturdy and flavorful foundation for our cheesecake – the graham cracker crust. This simple step is crucial for giving our Irresistible Apple Crumble Cheesecake that classic tangy and sweet base. Preheat your oven to 350°F (175°C). You’ll also want to grab a 9-inch springform pan. It’s a good idea to lightly grease the bottom and sides of the springform pan to ensure easy removal later. Some people like to line the bottom with parchment paper, which is also a great trick for preventing sticking.
In a medium-sized bowl, combine the 1½ cups of finely crushed graham cracker crumbs, ¼ cup of granulated sugar, and ½ teaspoon of ground cinnamon. Use a fork or a whisk to mix these dry ingredients together thoroughly. We want an even distribution of sugar and cinnamon throughout the crumbs. Once they’re well combined, pour in the 6 tablespoons of melted unsalted butter. Now, use your fork or a spoon to mix everything together until the crumbs are uniformly moistened. The mixture should resemble wet sand – if you squeeze a bit between your fingers, it should hold its shape. If it feels too dry, you can add another teaspoon or two of melted butter, but be careful not to overdo it, as too much butter can make the crust greasy.
Pour the moistened graham cracker mixture into the prepared springform pan. Using the bottom of a flat-bottomed glass or your clean fingers, firmly press the mixture evenly across the bottom of the pan and slightly up the sides, creating a nice, compact crust. The key here is to press firmly so that the crust doesn’t crumble apart when you slice your cheesecake. Once you’re satisfied with the crust, place the springform pan into your preheated oven and bake for 8 to 10 minutes. This pre-baking step helps to set the crust and makes it nice and crisp, preventing it from becoming soggy once the filling is added. After baking, remove the crust from the oven and set it aside to cool completely while we prepare the cheesecake filling. Reduce your oven temperature to 325°F (160°C) for the cheesecake baking.
Whipping Up the Silky Cheesecake Filling
Now for the star of the show – the creamy, dreamy cheesecake filling! This is where we need to pay attention to detail to achieve that perfectly smooth, crack-free texture that makes any cheesecake irresistible. Make sure your three 8-ounce packages of full-fat cream cheese are at room temperature. This is absolutely critical! Cold cream cheese will result in a lumpy batter, no matter how much you mix it. It should be soft enough that you can easily press a finger into it.
In a large mixing bowl, using an electric mixer fitted with the paddle attachment (or a hand mixer), beat the softened cream cheese on medium speed until it’s completely smooth and creamy. This should take about 2 to 3 minutes. Scrape down the sides and bottom of the bowl frequently to ensure there are no lumps hiding. Next, gradually add the 1 cup of granulated sugar to the cream cheese, beating on medium speed until well combined and the mixture is light and fluffy, about another 2 to 3 minutes. Continue to scrape the bowl down thoroughly.
Reduce the mixer speed to low. Add the ½ cup of room-temperature sour cream, 1 teaspoon of pure vanilla extract, ½ teaspoon of fresh lemon zest (if using), and a pinch of salt. Mix on low speed just until combined. It’s very important not to overmix at this stage! Overmixing incorporates too much air into the batter, which can lead to cracks in your baked cheesecake. Finally, add the two large eggs, one at a time, mixing on low speed only until each egg is just incorporated. Stop mixing as soon as you no longer see streaks of egg yolk. Overmixing the eggs is the most common cause of cheesecake cracks.
Once your cheesecake batter is smooth and well-mixed, gently fold in the completely cooled spiced apple filling that we prepared earlier. Use a spatula to carefully incorporate the apples, ensuring they are evenly distributed throughout the batter without deflating it. Now, pour this luscious cheesecake batter into your cooled graham cracker crust in the springform pan. Gently tap the pan on the counter a few times to release any large air bubbles. Your cheesecake is almost ready for its baking journey!
Preparing the Crunchy Crumble Topping
While our cheesecake is getting ready, let’s quickly whip up the irresistible crumble topping that will crown our dessert. This adds a fantastic textural contrast and an extra burst of apple pie flavor. In a medium-sized bowl, combine the ½ cup of all-purpose flour, ¼ cup of packed light brown sugar, ¼ cup of granulated sugar, ½ teaspoon of ground cinnamon, ¼ teaspoon of ground nutmeg, and ¼ teaspoon of salt. Whisk these dry ingredients together until they are well blended.
Now, add the 6 tablespoons of cold unsalted butter, which you’ve cut into small cubes. Using your fingertips, a pastry blender, or two forks, work the butter into the dry ingredients until the mixture resembles coarse crumbs. Some pieces should be pea-sized, while others can be smaller. The key is to keep the butter cold so that it creates that wonderful crumbly texture when baked. Avoid overworking the mixture with your warm hands, as this can melt the butter too much. Once the crumble topping is ready, set it aside. We will add this during the final stages of baking.
Baking Your Masterpiece
Baking a cheesecake perfectly can feel a little daunting, but with a few simple steps, you’ll achieve a beautifully smooth and creamy result. We’re going to use a water bath, which is a fantastic technique to ensure even baking and prevent cracks. Wrap the bottom and sides of your springform pan tightly with several layers of heavy-duty aluminum foil. Make sure it goes all the way up the sides, as we don’t want any water seeping into our precious cheesecake. Place the foil-wrapped springform pan into a larger roasting pan.
Carefully pour the cheesecake batter into the prepared crust. Place the roasting pan into your preheated 325°F (160°C) oven. Now, very carefully pour hot water into the roasting pan, around the springform pan, until it reaches about halfway up the sides of the springform pan. Be extra careful not to splash any water into the cheesecake batter itself.
Bake the cheesecake for 60 minutes. After 60 minutes, carefully remove the roasting pan from the oven. Gently sprinkle the prepared crumble topping evenly over the surface of the cheesecake. Return the roasting pan with the cheesecake and water bath to the oven and continue to bake for another 25 to 35 minutes, or until the edges of the cheesecake are set, but the center (about a 2-inch diameter) still has a slight jiggle when you gently shake the pan. The internal temperature, if you have a thermometer, should be around 145-150°F (63-65°C). The crumble topping should be golden brown and crisp.
Once baked, turn off the oven, but leave the cheesecake inside with the oven door ajar for 1 hour. This slow cooling process is crucial for preventing cracks. After 1 hour, carefully remove the cheesecake from the oven and the water bath. Remove the foil from around the springform pan. Let the cheesecake cool completely on a wire rack at room temperature for another 2 to 3 hours.
The Grand Finale: Chilling and Assembling
Patience is truly a virtue when it comes to cheesecake, especially for our Irresistible Apple Crumble Cheesecake. Once your cheesecake has cooled to room temperature, loosely cover it with plastic wrap (avoid touching the crumble topping if possible) and transfer it to the refrigerator. It needs to chill for at least 6 to 8 hours, but ideally overnight. This extended chilling time allows the cheesecake to firm up properly, develop its full flavor, and become sliceable without falling apart. Don’t rush this step, as it’s just as important as the baking!
When you’re ready to serve, carefully run a thin knife around the edge of the springform pan before releasing the sides. This helps to ensure a clean release. Slice the chilled cheesecake using a sharp, thin knife. For the cleanest slices, wipe your knife clean with a damp cloth and warm it slightly between each cut. This technique works wonders!
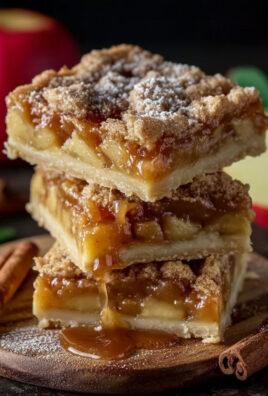
Serve individual slices of this magnificent creation. For an extra touch of indulgence, drizzle each slice with some caramel sauce and, if you like, a tiny sprinkle of extra cinnamon. The combination of the smooth, creamy apple-infused cheesecake, the crunchy spiced crumble, and a hint of sweet caramel is simply divine. Each bite of this Irresistible Apple Crumble Cheesecake will have you craving more!
Tips for Success and Storage
Achieving Cheesecake Perfection:
- Room Temperature Ingredients are Key: I cannot stress this enough. Ensure your cream cheese, eggs, and sour cream are all at room temperature. This is the single most important factor for achieving a smooth, lump-free batter and preventing overmixing. Plan ahead and take them out of the fridge at least an hour (or two for cream cheese) before you start.
- Don’t Overmix: While you want to beat the cream cheese until it’s super smooth, once you start adding sugar and especially the eggs, switch to low speed and mix just until combined. Overmixing incorporates too much air, which expands during baking and then collapses during cooling, leading to unsightly cracks.
- The Water Bath Advantage: A water bath creates a moist, steamy environment in the oven, which helps the cheesecake bake gently and evenly. This prevents the edges from baking too quickly and cracking, ensuring a beautifully smooth top. Make sure your springform pan is well-wrapped in heavy-duty foil to prevent any leaks.
- Slow Cooling is Crucial: Rapid changes in temperature are a cheesecake’s worst enemy, leading to cracks. Cooling the cheesecake slowly in the turned-off oven with the door ajar, and then gradually at room temperature, allows it to adjust without thermal shock.
- Patience with Chilling: Seriously, resist the urge to cut into it early! Proper chilling allows the cheesecake to fully set, making it firm, dense, and easy to slice. It also allows the flavors to meld and deepen, resulting in a much more delicious experience.
Storing Your Irresistible Apple Crumble Cheesecake:
To enjoy your cheesecake at its best, store it properly. Cover the cooled and chilled cheesecake tightly with plastic wrap or aluminum foil. You can store the whole cheesecake in the springform pan (after removing the sides if desired and leaving the base) or transfer individual slices to an airtight container. Your Irresistible Apple Crumble Cheesecake will keep beautifully in the refrigerator for up to 5 days.
If you’re lucky enough to have leftovers (it’s rare with this recipe!), this cheesecake also freezes surprisingly well. To freeze, place the entire cheesecake (or individual slices) on a baking sheet and freeze until solid. Once frozen, wrap it tightly in several layers of plastic wrap, then a layer of aluminum foil. Label with the date. It can be stored in the freezer for up to 1 month. To thaw, simply transfer it to the refrigerator overnight, then let it sit at room temperature for about 30 minutes before serving for the best texture and flavor. This preparation makes it easy to enjoy a slice of this magnificent dessert whenever the craving strikes!
Conclusion:
So, there you have it – my comprehensive guide to creating a truly unforgettable dessert experience. We’ve journeyed through the steps of crafting something that isn’t just a treat, but a culinary masterpiece, one that perfectly marries two beloved classics into a single, sensational creation. This isn’t just another cheesecake; it’s a symphony of textures and flavors designed to delight every single one of your senses. Imagine the silken, creamy tang of a perfectly baked cheesecake, infused with subtle vanilla notes, meeting the tender, spiced warmth of baked apples. Then, just when you think it couldn’t get any better, a golden, buttery crumble topping adds that quintessential crunch, making every single bite a moment of pure bliss. It’s the kind of dessert that transcends seasons, comforting in winter and delightfully refreshing on a cool summer evening. The unique marriage of classic apple crumble and luscious cheesecake creates a duality that appeals to every palate, offering both familiar comfort and exciting novelty. It’s elegant enough for a special occasion, yet delightfully simple to enjoy on a quiet afternoon with a cup of coffee. The visual appeal alone, with its distinct layers and inviting crumble, is enough to make anyone’s mouth water. Trust me when I say, once you taste this, you’ll understand exactly why it deserves a permanent spot in your recipe collection. Ultimately, what we’ve created here is not merely a dessert; it’s truly an Irresistible Apple Crumble Cheesecake Recipe You’ll Crave Again.
Serving Suggestions & Creative Variations:
Now, while this cheesecake is absolutely divine on its own, I love exploring ways to elevate the experience further and make it truly your own. Serving it slightly warm allows the spiced apple notes to truly sing, melting ever so gently on your tongue, perhaps alongside a generous scoop of high-quality vanilla bean ice cream or a dollop of freshly whipped cream. For an extra touch of decadence, a drizzle of warm salted caramel sauce or a sprinkle of toasted pecans before serving adds another layer of flavor and texture that is simply divine. A light dusting of cinnamon or powdered sugar can also add a beautiful finish and a hint of extra sweetness. And don’t be afraid to make it your own! Consider experimenting with different apple varieties – a mix of crisp Granny Smith for tartness and sweet Honeycrisp can create a more complex and balanced flavor profile. Or, venture into new spices, adding a pinch of nutmeg, allspice, or even a touch of ginger to the apple filling for a deeper, warmer aroma that perfectly complements the season. For those feeling adventurous, a handful of dried cranberries, chopped walnuts, or even a sprinkle of candied ginger can be folded into the crumble topping, adding a delightful chew and nutty crunch. If you’re looking to cater to different dietary needs, you could explore gluten-free oat crumbles or even try a plant-based cream cheese for the filling – the core concept remains wonderfully adaptable to various preferences. This recipe is a fantastic canvas for your culinary creativity, inviting you to experiment and discover your own favorite twists and personal touches.
So, what are you waiting for? I wholeheartedly encourage you to roll up your sleeves and try this recipe. Don’t be intimidated; follow the steps, and you’ll be rewarded with something truly spectacular that will impress everyone lucky enough to taste it. And once you’ve created your masterpiece, I would absolutely love for you to share your experience with me! Tag us on social media with your beautiful creations, tell us about any unique twists you added, or simply share your joy in the comments below. Your feedback and photos truly make my day and inspire others to give it a go. Let’s build a community of enthusiastic bakers who appreciate the finer things in life, starting with this incredible cheesecake!
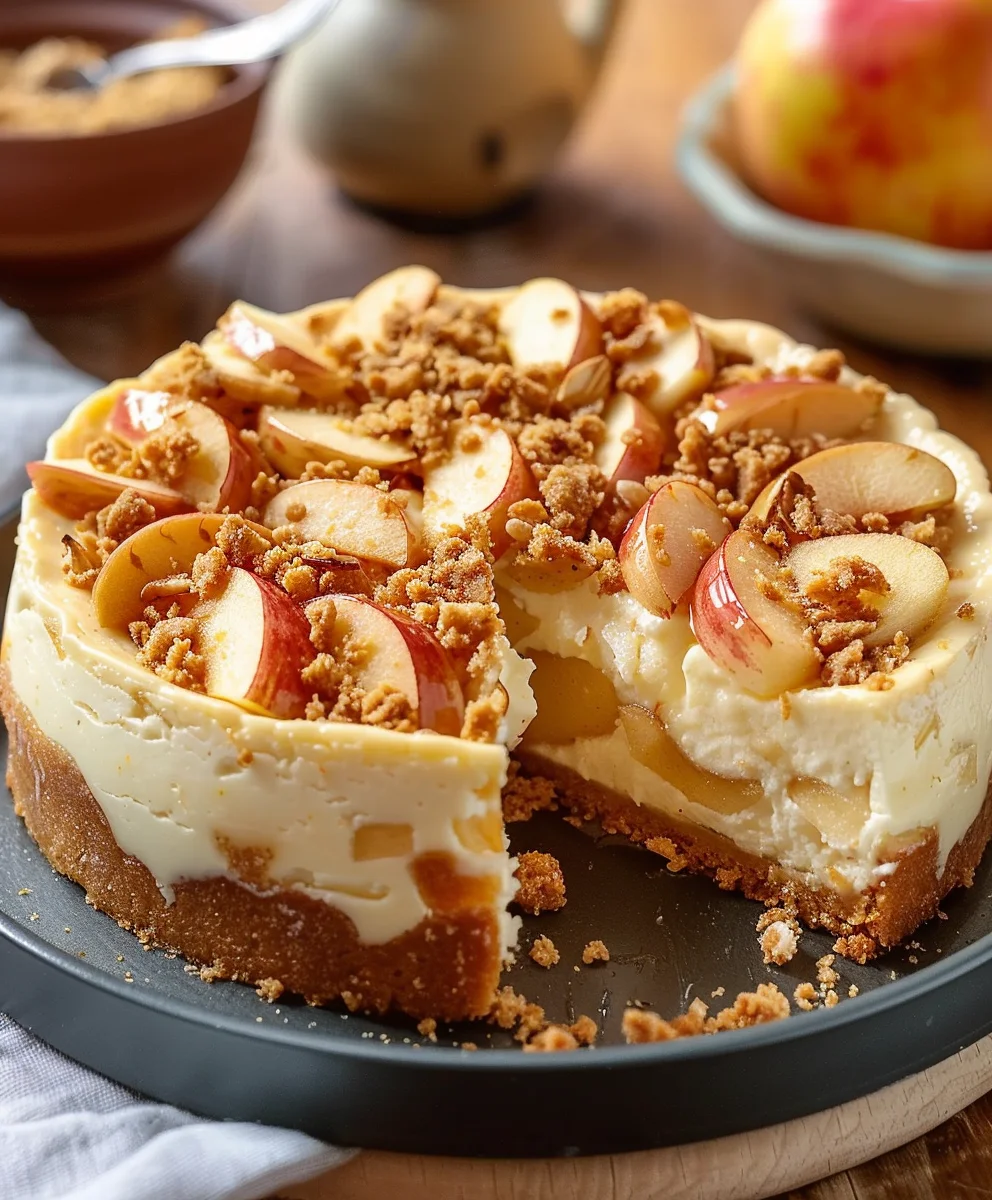
Irresistible Apple Crumble Cheesecake Recipe You’ll Crave Again
Imagine a rich, velvety cheesecake filling, bursting with the sweet and tart notes of tender, spiced apples, all crowned with a golden, buttery crumble topping. It’s the kind of dessert that elicits gasps of delight and requests for second helpings.
Ingredients
-
2 cups (200g) graham cracker crumbs
-
½ cup (115g) unsalted butter, melted
-
2 tablespoons granulated sugar
-
24 oz (680g) cream cheese, softened
-
1 cup (200g) granulated sugar
-
1 teaspoon vanilla extract
-
3 large eggs
-
1 cup (240ml) sour cream
-
3 medium apples, peeled and diced
-
⅓ cup (70g) brown sugar
-
1 teaspoon cinnamon
-
2 tablespoons cornstarch
-
2 tablespoons water
-
1 tablespoon lemon juice
-
¾ cup (95g) all-purpose flour
Instructions
-
Step 1
In a skillet, combine diced apples, ⅓ cup brown sugar, 1 teaspoon cinnamon, 2 tablespoons cornstarch, 2 tablespoons water, and 1 tablespoon lemon juice. Cook over medium heat for 8-10 minutes until apples are tender and liquid thickens. Cool completely. -
Step 2
Preheat oven to 350°F (175°C). Grease a 9-inch springform pan. Mix 2 cups graham cracker crumbs, 2 tablespoons granulated sugar, and ½ cup melted unsalted butter. Press firmly into the pan bottom and sides. Bake for 8-10 minutes. Cool. Reduce oven to 325°F (160°C). -
Step 3
In a large bowl, beat 24 oz softened cream cheese until smooth (2-3 min). Gradually add 1 cup granulated sugar, beat until fluffy (2-3 min). Reduce speed to low. Mix in 1 teaspoon vanilla extract and 1 cup room-temperature sour cream. Add 3 large eggs, one at a time, mixing until just combined. Gently fold in the cooled apple filling. -
Step 4
In a bowl, combine ¾ cup all-purpose flour. -
Step 5
Wrap springform pan bottom/sides with foil. Place in a roasting pan. Pour cheesecake batter into crust. Place in oven. Carefully pour hot water into roasting pan (halfway up springform). Bake for 60 minutes at 325°F (160°C). -
Step 6
After 60 minutes, remove from oven. Sprinkle flour crumble topping over cheesecake. Return to oven and bake for another 25-35 minutes, until edges are set and center slightly jiggles. Crumble should be golden brown. -
Step 7
Turn off oven; leave door ajar for 1 hour with cheesecake inside. Remove from oven and water bath; remove foil. Cool completely on a wire rack (2-3 hours). Cover and chill in refrigerator for at least 6-8 hours, ideally overnight. -
Step 8
Run a thin knife around the pan edge before releasing sides. Slice chilled cheesecake with a sharp knife, wiping clean between cuts. Serve. Optional: Drizzle with caramel sauce and a dusting of ground cinnamon.
Important Information
Nutrition Facts (Per Serving)
It is important to consider this information as approximate and not to use it as definitive health advice.
Allergy Information
Please check ingredients for potential allergens and consult a health professional if in doubt.