• Skip to primary navigation
  • Skip to main content
  • Skip to primary sidebar
Homesmad

Homesmad

  • Home
  • Breakfast & Brunch
  • Appetizers & Snacks
  • Dinner
  • Dessert
  • About
  • Privacy Policy
  • Contact
Homesmad
  • Home
  • Breakfast & Brunch
  • Appetizers & Snacks
  • Dinner
  • Dessert
  • About
  • Privacy Policy
  • Contact

Crispy Homemade Onion Ring Chips Snack Recipe!

October 16, 2025 by Lily author

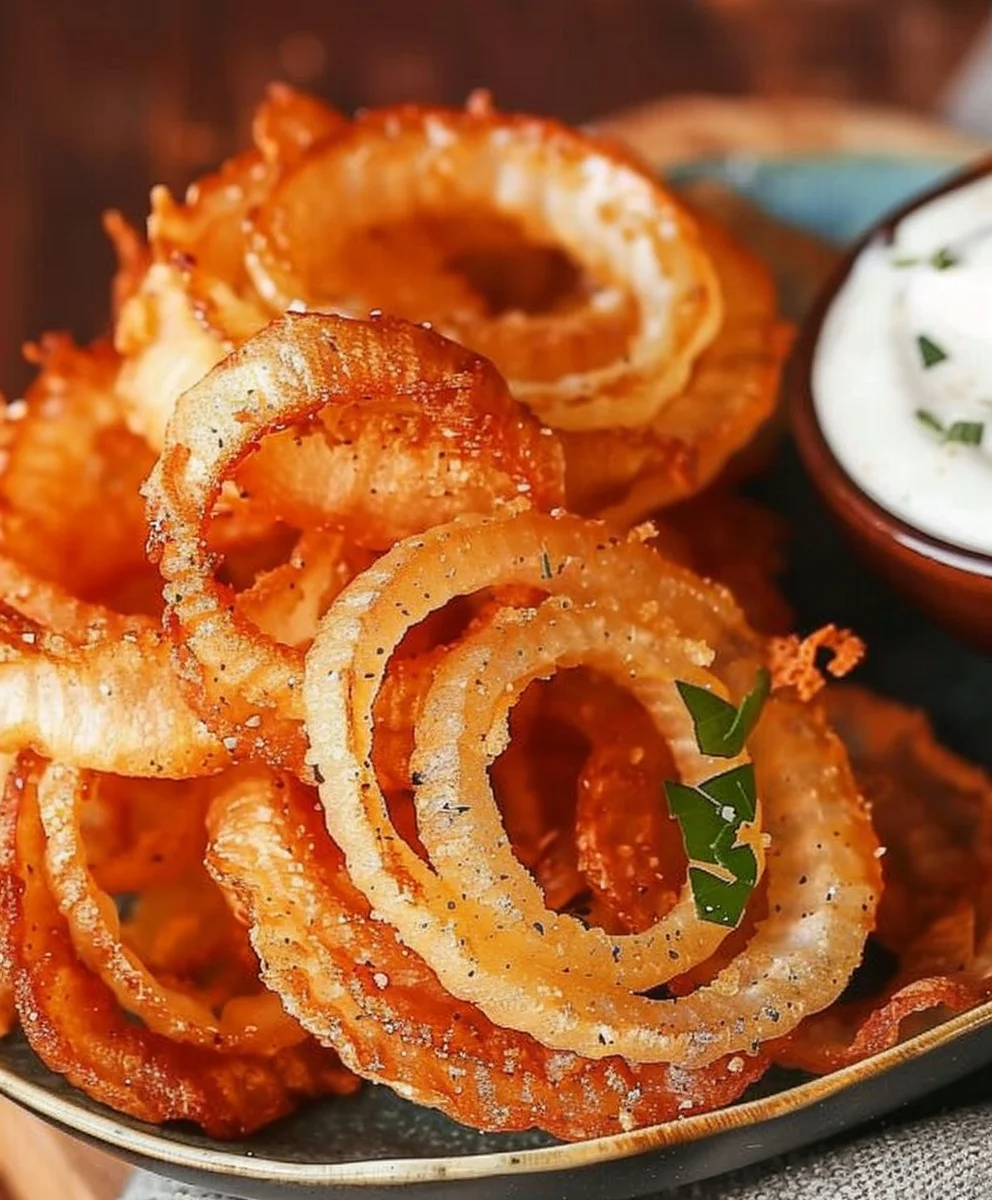
Onion Ring Chips Crispy Snack Recipe is about to revolutionize your snack game! Are you tired of the same old potato chips and craving something uniquely delicious, incredibly crispy, and surprisingly easy to make? Well, get ready to dive into a culinary adventure that transforms humble onions into an irresistible, light-as-air snack. While traditional onion rings have long held a cherished spot in our hearts as a classic diner staple, this innovative approach takes all that beloved savory flavor and elevates it into a delicate, super-crunchy chip form, perfect for dipping or munching straight from the bowl. I’ve found that the magic lies in achieving that perfect, shatteringly crisp texture that makes every bite an absolute delight. People adore this dish not just for its exquisite taste—the sweet, caramelized notes of onion amplified—but also for its satisfying crunch and the sheer convenience of preparing a gourmet-level snack without the fuss of deep-frying. This particular Onion Ring Chips Crispy Snack Recipe is designed to deliver maximum flavor and an unforgettable texture, making it an instant crowd-pleaser for any occasion, from casual movie nights to sophisticated gatherings. Get ready to impress everyone with this ingenious treat!

Crispy Homemade Onion Ring Chips Snack Recipe! this RECIPE

Ingredients:

  • For the Onion Rings:
    • 2 large sweet onions (such as Vidalia or Walla Walla), about 1 to 1.5 pounds total
    • Ice water, for soaking (optional, but highly recommended)
  • For the Crispy Batter:
    • 1 cup all-purpose flour, plus ¼ cup for dredging
    • ½ cup cornstarch (this is my secret for extra crispiness in this Onion Ring Chips Crispy Snack Recipe!)
    • 1 teaspoon baking powder
    • 1 teaspoon salt, plus more to taste after cooking
    • ½ teaspoon black pepper, freshly ground
    • ½ teaspoon garlic powder
    • ½ teaspoon onion powder
    • ¼ teaspoon paprika (smoked paprika adds a lovely depth!)
    • Pinch of cayenne pepper (optional, for a little kick)
    • 1 large egg
    • 1 cup milk (any kind works, but whole milk adds a bit more richness) or sparkling water for a lighter, crispier texture
    • 2 tablespoons vegetable oil (or canola, grapeseed) for the batter
  • For Cooking:
    • Non-stick cooking spray or additional vegetable oil for brushing
  • Optional for Serving:
    • Flaky sea salt, for sprinkling
    • Your favorite dipping sauces (ketchup, ranch, sriracha mayo, barbecue sauce)

Equipment You’ll Need for Your Onion Ring Chips Crispy Snack Recipe:

Having the right tools can make all the difference when crafting these delightful crispy onion ring chips. Here’s what I recommend you gather before we start:

  • Sharp chef’s knife and a sturdy cutting board
  • Several large mixing bowls (at least 3 for your dredging station)
  • Whisk
  • Measuring cups and spoons
  • Baking sheets (2-3, depending on the size of your oven and onion quantity)
  • Parchment paper or silicone baking mats (essential for preventing sticking and easy cleanup)
  • Wire cooling rack (optional, but helps maintain crispness after baking/air frying)
  • Tongs or a slotted spoon for handling the coated onion rings
  • Air fryer (if you choose the air frying method, otherwise an oven is perfect!)

Preparing Your Onions for the Perfect Crispy Snack:

The foundation of any good onion ring chip is, of course, the onion itself! Taking the time to prepare them properly is crucial for achieving that uniform crispness and delightful flavor.

  1. Choose Your Onions Wisely: I always recommend using sweet onions for this recipe, like Vidalia or Walla Walla. Their mild flavor ensures they cook down to a sweet, tender bite without being overwhelmingly pungent. That said, yellow onions will also work if that’s what you have on hand, just expect a slightly sharper flavor profile.
  2. Peel and Trim: Begin by carefully peeling the outer papery layers from your onions. Using a sharp knife, trim both the stem and root ends. Don’t cut off too much of the root end, as leaving a bit can help hold the onion together during slicing.
  3. Slice with Precision: This is arguably the most important step for our “Onion Ring Chips Crispy Snack Recipe.” We’re not making thick traditional onion rings here; we’re aiming for thinner, crispier chips. Lay the onion on its side and slice it into approximately ¼-inch thick rounds. Uniformity is key here! If some slices are too thin, they might burn; if too thick, they won’t get as crispy.
  4. Separate the Rings: Gently push out the individual rings from each sliced onion round. You’ll find that each slice yields several rings of varying sizes. Try to keep them as intact as possible. Discard any tiny inner pieces that would be too fiddly to coat, or save them for another dish.
  5. Optional (But Recommended) Ice Water Soak: To further mellow the onion’s pungency and ensure a super crisp texture, I like to place all the separated onion rings into a large bowl of ice water. Let them soak for about 15-30 minutes. This step helps draw out some of the harsher compounds, making them sweeter and also firmer, which helps them hold up better during the coating process.
  6. Thoroughly Dry Your Onions: After soaking, drain the onion rings well. This part is critical! Lay them out in a single layer on paper towels or a clean kitchen towel and pat them absolutely dry. Any excess moisture will prevent the batter from adhering properly, leading to a less crispy result. Don’t skip this step!

Crafting the Ultimate Crispy Batter for Your Onion Ring Chips:

The batter is what transforms a simple onion into a crunchy, golden “Onion Ring Chips Crispy Snack Recipe” sensation. My recipe focuses on creating a light yet durable coating that gets incredibly crispy, whether baked or air-fried.

  1. Prepare Your Dry Dredging Flour: In a shallow dish or a medium bowl, place the ¼ cup of plain all-purpose flour. This will be our first dip for the onion rings, ensuring the wet batter has something to cling to. Set this aside.
  2. Combine Dry Batter Ingredients: In a large mixing bowl, whisk together the remaining 1 cup all-purpose flour, ½ cup cornstarch, 1 teaspoon baking powder, 1 teaspoon salt, ½ teaspoon black pepper, ½ teaspoon garlic powder, ½ teaspoon onion powder, ¼ teaspoon paprika, and the optional pinch of cayenne pepper. Whisk these together thoroughly until they are well combined and there are no lumps. The cornstarch is a game-changer for crispness, and the baking powder helps create a light, airy texture.
  3. Mix Wet Batter Ingredients: In a separate medium bowl, whisk together the 1 large egg, 1 cup milk (or sparkling water), and 2 tablespoons vegetable oil. Whisk until everything is smoothly incorporated. Using sparkling water instead of milk can give an even lighter, more delicate crisp to your onion ring chips due to the carbonation.
  4. Combine Wet and Dry: Pour the wet ingredients into the bowl with the dry ingredients. Whisk gently until just combined. A few small lumps are perfectly fine; overmixing can develop the gluten in the flour, leading to a tougher batter. We’re aiming for a consistency that’s thick enough to coat the onion rings evenly but not so thick that it creates a heavy, doughy layer. It should be similar to a thick pancake batter.
  5. Rest the Batter (Optional, but Recommended): If you have time, let the batter rest for 10-15 minutes at room temperature. This allows the flour to fully hydrate and the baking powder to start working its magic, resulting in a lighter, more tender coating.
  6. Taste and Adjust Seasoning: Before you start coating, you can taste a tiny bit of the batter (just a tiny bit, it’s raw egg after all, but it gives you an idea of the seasoning). Adjust salt and pepper if needed. Remember, this batter is going to be the main flavor contributor for your “Onion Ring Chips Crispy Snack Recipe.”

Coating Your Onion Rings for Maximum Flavor and Crunch:

Proper coating is essential for achieving that uniform crispy exterior we’re after. This two-stage dredging method ensures the batter adheres beautifully to every surface of your onion rings.

  1. Set Up Your Dredging Station: Arrange your bowls in an assembly line fashion: first, the bowl with the plain ¼ cup flour (your dry dredge), then the bowl with your prepared wet batter, and finally, your prepared baking sheets. This keeps things organized and minimizes mess.
  2. First Dredge – Dry Flour: Take a handful of dried onion rings and place them into the bowl of plain flour. Toss them gently to coat them completely in the flour. Ensure every surface has a thin dusting. The dry flour acts as a bridge, giving the wet batter something to grip onto.
  3. Shake Off Excess Dry Flour: Remove the flour-dusted onion rings, shaking off any significant excess flour. We want a thin, even coat, not a thick powdery one. You can use a fine mesh sieve for this if you prefer.
  4. Second Dredge – Wet Batter: Transfer the flour-dusted onion rings into the wet batter. Using tongs or your clean hands, toss them gently in the batter, ensuring each ring is fully submerged and coated. The batter should cling nicely to the flour-dusted surface.
  5. Allow Excess Batter to Drip: Lift each coated onion ring individually with tongs. Hold it over the batter bowl for a few seconds, allowing any excess batter to drip off. A thin, even coat is what we’re aiming for for these crispy “Onion Ring Chips Crispy Snack Recipe” creations. Too much batter will result in a soggy or doughy texture rather than a crisp one.
  6. Arrange on Baking Sheets: Carefully place the coated onion rings in a single layer on your prepared baking sheets. Make sure they are not touching each other. Crowding the pan will lead to steaming instead of baking/frying, which will prevent them from getting truly crispy. If you have a lot of onion rings, you’ll need to work in batches.

Baking Your Onion Ring Chips to Golden Perfection:

Baking is a fantastic way to achieve a wonderfully crispy “Onion Ring Chips Crispy Snack Recipe” with less oil. It takes a little longer than air frying, but the results are just as satisfying.

  1. Preheat Your Oven: Position an oven rack in the center of your oven and preheat it to 400°F (200°C). A hot oven is crucial for immediate crisping.
  2. Prepare Baking Sheets: Line two large baking sheets with parchment paper or silicone baking mats. This is important to prevent sticking and allows for easy cleanup. Lightly spray the parchment paper or mats with non-stick cooking spray, or brush with a little oil. This helps with browning and ensures they don’t stick.
  3. Arrange Coated Rings: As detailed in the previous section, carefully arrange your batter-coated onion rings in a single layer on the prepared baking sheets. Leave a little space between each ring to allow hot air to circulate.
  4. Initial Bake: Place the baking sheets in the preheated oven. Bake for 15-20 minutes, or until the bottoms of the onion rings are golden brown and starting to crisp. Keep an eye on them, as oven temperatures can vary.
  5. Flip and Continue Baking: Carefully flip each onion ring chip over using tongs or a thin spatula. Spray the flipped side lightly with cooking spray or brush with oil. Return the baking sheets to the oven and continue baking for another 10-15 minutes, or until both sides are deeply golden brown and wonderfully crispy. You might need to rotate the baking sheets halfway through this second phase to ensure even browning.
  6. Achieving Maximum Crispness: If after the recommended baking time your onion ring chips aren’t as crispy as you’d like, you can reduce the oven temperature slightly to 375°F (190°C) and bake for an additional 5-10 minutes, keeping a very close watch to prevent burning. Sometimes, a slightly longer, lower bake can help dry them out and crisp them up further.
  7. Cool on a Wire Rack: Once golden and crispy, remove the baking sheets from the oven. Immediately transfer the “Onion Ring Chips Crispy Snack Recipe” items to a wire cooling rack. Cooling on a rack allows air to circulate all around them, preventing condensation and helping them maintain their crispness.

Air Frying Your Onion Ring Chips for a Healthier Crunch (Optional Method):

The air fryer is a fantastic tool for making these “Onion Ring Chips Crispy Snack Recipe” items incredibly crispy with minimal oil, and often in less time than baking. This is my go-to method for a quick batch!

  1. Preheat Your Air Fryer: Preheat your air fryer to 375°F (190°C) for about 3-5 minutes. Preheating ensures the food starts cooking immediately and helps achieve a better crust.
  2. Prepare the Air Fryer Basket: Lightly spray the inside of your air fryer basket with non-stick cooking spray or brush with a little oil. This helps prevent sticking.
  3. Arrange Coated Rings: Carefully place the batter-coated onion rings in a single layer in the air fryer basket. Do not overcrowd the basket! Air fryers rely on circulating hot air, and overcrowding will lead to steaming and soggy results. You will definitely need to work in batches.
  4. Lightly Spray with Oil: Once the onion rings are arranged, give them another very light spray with cooking oil. This helps them achieve that beautiful golden-brown color and extra crispness.
  5. Air Fry in Batches: Cook the onion rings for 8-12 minutes, shaking the basket gently or flipping the rings with tongs halfway through the cooking time. The exact time will depend on your air fryer model and the thickness of your onion rings. You’re looking for a deep golden-brown color and a visibly crispy texture.
  6. Monitor Closely: Always keep a close eye on your “Onion Ring Chips Crispy Snack Recipe” as they air fry, especially towards the end of the cooking time, as they can go from perfectly golden to burnt very quickly.
  7. Transfer and Repeat: Once a batch is done, immediately remove the crispy onion ring chips from the air fryer and transfer them to a wire cooling rack. This allows air to circulate around them and helps them stay crisp. Repeat the process with the remaining coated onion rings, ensuring you clean out any crumbs from the basket between batches if they start to accumulate.

Serving Suggestions and Storage Tips for Your Homemade Crispy Onion Ring Chips:

Congratulations, you’ve made a batch of incredibly delicious “Onion Ring Chips Crispy Snack Recipe” creations! Now comes the best part – enjoying them!

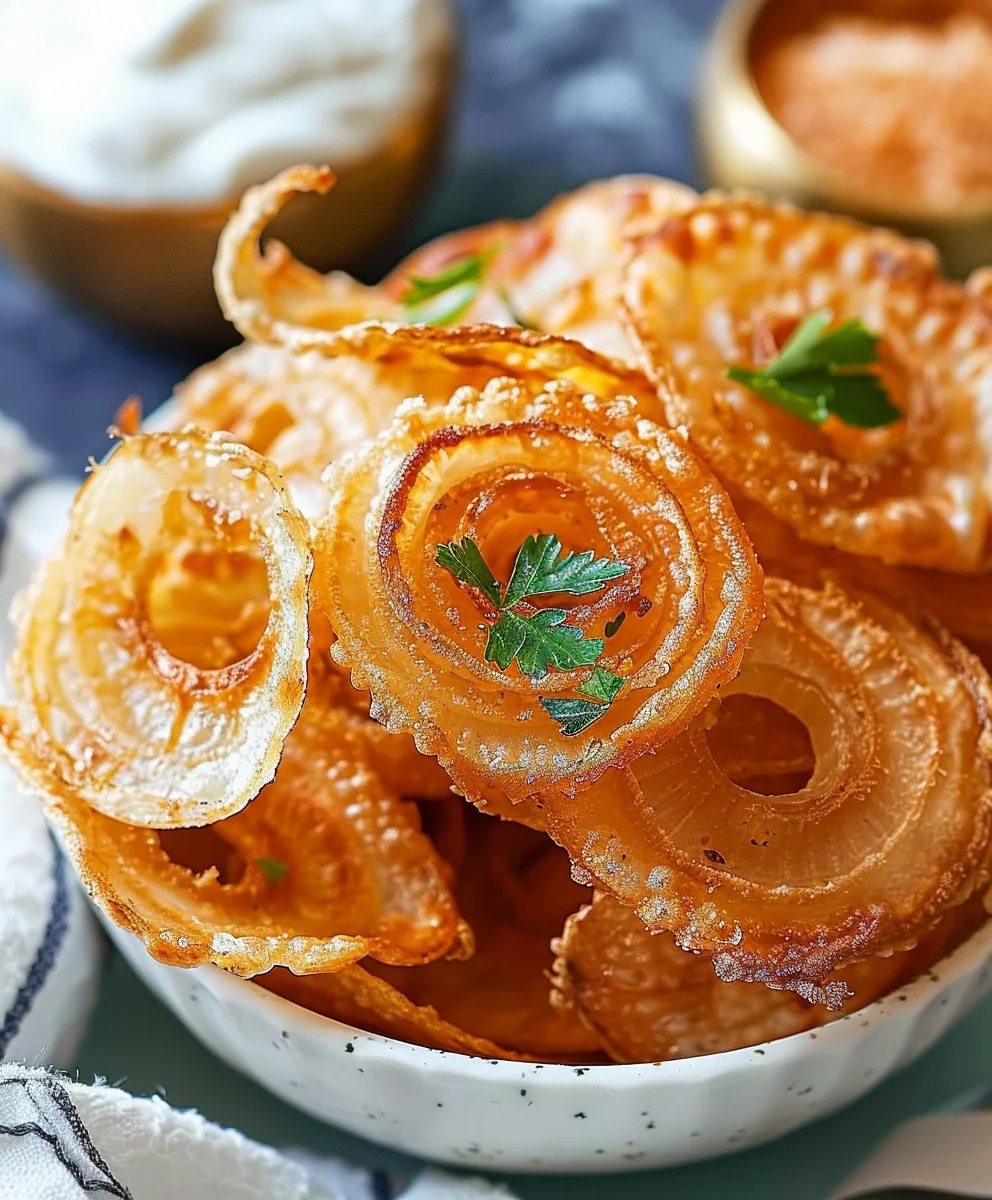
  1. Immediate Enjoyment is Key: These onion ring chips are truly at their best when served warm, straight off the cooling rack. The crispness is unparalleled in the first few minutes after cooking.
  2. Season Immediately: As soon as they come out of the oven or air fryer and onto the cooling rack, sprinkle them lightly with a pinch of flaky sea salt. The heat will help the salt adhere and enhance all those delicious flavors. This is your chance to add a final flourish of seasoning.
  3. Dipping Delights: While delicious on their own, crispy onion ring chips are fantastic with dipping sauces. My family loves them with a classic ketchup, but they also pair beautifully with ranch dressing, a spicy sriracha mayo, a tangy barbecue sauce, or even a creamy honey mustard. Feel free to experiment with your favorites!
  4. As a Side or Snack: These aren’t just a snack! They make a wonderful side dish for burgers, sandwiches, or even grilled chicken. Or, of course, they are perfect for simply munching on during a movie night or game day.
  5. Storing Leftovers (If You Have Any!): To be honest, these “Onion Ring Chips Crispy Snack Recipe” items are usually devoured quickly. However, if you happen to have any leftovers, allow them to cool completely at room temperature. Store them in an airtight container at room temperature for up to 1-2 days. Be aware that they will lose some of their crispness over time.
  6. Reheating for Renewed Crispness: To revive leftover onion ring chips and bring back some of their glorious crispness, I recommend reheating them in an air fryer or a preheated oven.
    • Air Fryer Reheating: Place them in a single layer in a preheated air fryer at 350°F (175°C) for 3-5 minutes, shaking the basket halfway through, until hot and crispy again.
    • Oven Reheating: Spread them on a baking sheet and reheat in a preheated oven at 375°F (190°C) for 5-8 minutes, or until warmed through and re-crisped. Avoid the microwave, as it will only make them soggy.

Crispy Homemade Onion Ring Chips Snack Recipe!

Conclusion:

So, there you have it – my absolute favorite new obsession, and soon to be yours too, I hope! What truly sets this particular snack apart and makes it an unmissable addition to your culinary repertoire is its ingenious simplicity coupled with an explosion of flavor and an utterly addictive texture. Forget everything you thought you knew about onion snacks; this isn’t just another side dish. We’re talking about a transformation of the humble onion into something truly extraordinary. Each piece delivers that satisfying, delicate crunch that immediately signals a delightful treat, followed by the subtle, sweet, and savory essence of perfectly cooked onion. It’s a revelation for your taste buds, offering a sophisticated twist on a classic comfort food. The best part? It’s surprisingly quick to whip up, making it an ideal candidate for impromptu gatherings, a last-minute craving, or just a rewarding personal snack-time indulgence.

I genuinely believe that once you try this, you’ll find yourself wondering how you ever managed without it. It’s not just a snack; it’s an experience. The method we’ve explored ensures maximum crispiness without the heavy oiliness often associated with deep-fried options, meaning you can enjoy these guilt-free. It’s the perfect harmony of flavor and texture, a snack that manages to be both light and incredibly satisfying. The golden-brown exterior and tender, flavorful interior create a contrast that keeps you reaching for just one more, then one more after that. Trust me when I say this is a recipe that will earn you rave reviews from family and friends, solidifying your reputation as a snack guru.

Now for the fun part – how to enjoy these delectable creations! While they are absolutely phenomenal straight out of the oven, still warm and inviting, their versatility is truly astounding. For a classic pairing, a dollop of creamy ranch or a tangy sriracha mayo makes for an unbeatable dipping experience. Imagine dipping one of those perfectly golden crisps into a vibrant, homemade aioli – pure bliss! But don’t stop there. Think outside the box: these “Onion Ring Chips Crispy Snack Recipe” treasures can elevate so many other dishes. Crumbled over a fresh green salad, they add a fantastic textural contrast and an unexpected burst of savory flavor. Use them as a unique topping for your favorite burger or hot dog, providing a satisfying crunch that takes an ordinary meal to gourmet heights. They also make a fantastic accompaniment to a hearty bowl of chili or a creamy tomato soup, acting as a sophisticated, flavorful alternative to croutons.

Feeling adventurous? Let’s talk variations! You can easily customize the flavor profile to suit your palate. For a smoky kick, a pinch of smoked paprika or chipotle powder works wonders. If you love a cheesy twist, a sprinkle of finely grated Parmesan or nutritional yeast (for a dairy-free option) during the last few minutes of baking will create a wonderfully savory crust. Herb lovers might enjoy adding finely chopped fresh rosemary or thyme to the coating mixture for an aromatic depth. Don’t be afraid to experiment with different types of onions too – sweet Vidalias will offer a milder flavor, while red onions can provide a beautiful color and a slightly sharper bite. The possibilities are truly endless, and each tweak can lead to a whole new favorite snack!

So, what are you waiting for? This is your official invitation to dive into your kitchen and experience the magic for yourself. I am genuinely excited for you to try this “Onion Ring Chips Crispy Snack Recipe” and discover the joy of making such an incredible treat from scratch. Once you’ve whipped up your first batch, I would absolutely love to hear about your experience! Did you stick to the original recipe, or did you put your own unique spin on it? What were your favorite serving suggestions? Please don’t hesitate to share your thoughts, your successes, and even your “aha!” moments in the comments section below. Even better, snap a photo of your magnificent creations and share them on social media – tag me so I can see your delicious results! Your feedback and shared experiences are what make this culinary journey so much more rewarding for all of us. Let’s build a community of snack enthusiasts who appreciate the simple yet profound pleasure of a perfectly crispy, homemade bite. Happy cooking, and happy snacking!


Crispy Homemade Onion Ring Chips Snack Recipe!

Crispy Homemade Onion Ring Chips Snack Recipe!

Revolutionize your snack game with these incredibly crispy, uniquely delicious, and surprisingly easy-to-make onion ring chips. This recipe transforms humble onions into a light-as-air snack with a perfect, shatteringly crisp texture, ideal for dipping or munching. It’s a gourmet-level snack without the fuss, designed for maximum flavor and unforgettable crunch.

Prep Time
30 Minutes

Cook Time
25 Minutes

Total Time
55 Minutes

Servings
4 servings

Ingredients

  • 2 large onions, sliced into 1/4-inch rings
  • 1 cup all-purpose flour
  • 1 teaspoon garlic powder
  • 1 teaspoon paprika
  • 1/2 teaspoon salt
  • 1/2 teaspoon black pepper
  • 1 cup buttermilk
  • 2 cups panko breadcrumbs
  • Vegetable oil, for frying

Instructions

  1. Step 1
    Peel and slice the onions into ¼-inch thick rings; separate them into individual rings. For best results, soak rings in ice water for 15-30 minutes, then pat them absolutely dry with paper towels.
  2. Step 2
    Prepare three shallow bowls. In the first, mix flour with garlic powder, paprika, salt, and black pepper. Place buttermilk in the second bowl. Add panko breadcrumbs to the third bowl.
  3. Step 3
    Working in batches, dredge onion rings first in the seasoned flour, shaking off excess. Dip into buttermilk, letting excess drip. Finally, coat thoroughly in panko breadcrumbs, gently pressing to adhere.
  4. Step 4
    In a large pot or deep skillet, heat vegetable oil to 350-375°F (175-190°C). Ensure oil is deep enough to submerge the rings.
  5. Step 5
    Carefully place a few coated onion rings into the hot oil without overcrowding. Fry for 2-4 minutes per side, or until golden brown and crispy.
  6. Step 6
    Remove fried rings with a slotted spoon and transfer to a wire rack lined with paper towels to drain excess oil. Immediately sprinkle with flaky sea salt. Repeat with remaining onion rings.
  7. Step 7
    Serve warm with your favorite dipping sauces like ketchup, ranch, or sriracha mayo.

Important Information

Nutrition Facts (Per Serving)

It is important to consider this information as approximate and not to use it as definitive health advice.

Allergy Information

Please check ingredients for potential allergens and consult a health professional if in doubt.

« Previous Post
Delicious Crispy Beef Bacon Honey Roasted Potatoes Recipe
Next Post »
Hearty Slow Cooker Cowboy Potato Casserole Recipe

If you enjoyed this…

Tortilla Pizza Rolls: Quick & Easy Kid-Friendly Snack!

Delicious Greek Salad Grazing Cups for Fresh Flavorful Snacking

Nashville Hot Cheese: The Ultimate Guide to Spicy, Cheesy Goodness

Primary Sidebar

Browse by Diet

BreakfastDinnerLunchDessertAppetizer

Sweet Peach Yogurt Parfait Delight

One of my fondest memories is from a lazy summer afternoon spent at my grandmother’s house. The sun filtered through the kitchen window, casting a warm glow over the table where she would create her culinary magic. It was during one of those blissful moments that I first tasted her Peach Yogurt Parfait with Honey and Granola. The sweet aroma of ripe peaches mingling with creamy yogurt and the crunch of granola was nothing short of heavenly. It felt like summer captured in a bowl, and I still remember the joy of diving in with a spoon, each layer revealing a new burst of flavor.

When I think about that parfait, I can almost hear the gentle hum of the bees outside, reminding me of the floral notes that honey brings to every bite. The vibrant yellows and soft oranges of the peaches contrast beautifully with the creamy white yogurt and the golden crunch of granola. It’s a dish that not only looks delightful but also tastes like a celebration of fresh, wholesome ingredients.

What makes my version of this Peach Yogurt Parfait special is the careful balance of flavors and textures. I use ripe, juicy peaches, drizzled with locally sourced honey, and a homemade granola that’s bursting with nuts and seeds for an extra crunch. It’s a simple dish, but every layer is crafted with love and attention.

Let me show you exactly how to make this delightful parfait, so you can bring a bit of that summer magic into your kitchen!

Sweet Peach Yogurt Parfait Delight

Why You’ll Love This Recipe

  • Delightfully creamy texture from the Greek yogurt, paired with the juicy sweetness of fresh peaches.
  • Ready in under 20 minutes, making it a quick and satisfying breakfast or snack option.
  • Budget-friendly, using common ingredients that you may already have in your pantry.
  • Customizable with your favorite granola and nuts, allowing you to tailor each parfait to your taste.
  • Perfectly balanced flavors with the bright acidity of lemon juice and the sweetness of honey enhancing the peaches.

Ingredients

  • For the Parfait:
  • 2 cups plain Greek yogurt (or vanilla yogurt for a sweeter option)
  • 2 large ripe peaches, diced (about 2 cups)
  • 1 tablespoon fresh lemon juice (to prevent browning of peaches)
  • 2 tablespoons honey (plus more for drizzling)
  • 1 teaspoon vanilla extract (optional for extra flavor)
  • For the Granola:
  • 1 cup granola (store-bought or homemade; see notes for a simple granola recipe)
  • 1/4 cup sliced almonds (optional for added crunch)
  • 1/4 cup shredded coconut (optional for added flavor)

Let’s dive into some key ingredients that make this Peach Yogurt Parfait so delightful! First, the Greek yogurt is not only creamy but also packed with protein, making it a satisfying option for breakfast or a snack. If you’re looking for a sweeter option, you can easily substitute it with vanilla yogurt, though it may alter the overall flavor balance. Next, the ripe peaches are the star of the show; their natural sweetness shines through, so I recommend choosing peaches that yield slightly to pressure, indicating they’re perfectly ripe. If peaches aren’t in season, feel free to use nectarines or even frozen peaches—just thaw them before use. Finally, honey adds a lovely floral sweetness that ties everything together. If you prefer, maple syrup can serve as a delicious substitute.

Step-by-Step Instructions

  1. Start by preparing the peaches. Wash them thoroughly, then slice and dice them into bite-sized pieces. In a medium bowl, toss the diced peaches with 1 tablespoon of fresh lemon juice to prevent browning. Set aside for about 5 minutes while the lemon juice works its magic.
  2. In a separate bowl, combine the Greek yogurt, 2 tablespoons of honey, and 1 teaspoon of vanilla extract if using. Stir the mixture until smooth and thoroughly blended. This should take about a minute. Avoid overmixing to maintain the creaminess of the yogurt.
  3. Now it’s time to layer your parfait. Grab a clear glass or bowl to showcase your beautiful creation. Start with a generous spoonful of the yogurt mixture at the bottom—about 1/4 cup will do. Use a spoon to spread it evenly.
  4. Add a layer of the diced peaches over the yogurt, ensuring they cover the yogurt completely. You might want to use about half of what you have prepared—roughly 1 cup. This layer should be visually appealing, so arrange the peaches neatly.
  5. Sprinkle 1/4 cup of granola over the peaches. This adds a delightful crunch. Make sure to distribute it evenly to ensure every bite has that satisfying texture. Avoid packing it down too tightly, as you want it to maintain its crunch.
  6. Repeat the layers: spoon in another 1/4 cup of yogurt, followed by another cup of peaches, and another sprinkle of granola. You should have at least two layers, but feel free to add more depending on your glass size.
  7. Finish off your parfait with a drizzle of honey on top for added sweetness and a touch of elegance. If you’re using sliced almonds or shredded coconut, sprinkle them on top now. It adds a lovely visual contrast and extra flavor.
  8. Serve immediately or refrigerate for up to 30 minutes before serving to allow the flavors to meld together. However, I recommend enjoying it fresh to maintain the granola’s crunch.

Pro Tips for the Best Peach Yogurt Parfait With Honey And Granola

  • Make sure to choose ripe peaches for the best flavor and texture. A common mistake is using unripe fruit, which can lead to a less enjoyable parfait. Look for peaches that are fragrant and slightly soft to the touch.
  • Use a clear glass to assemble your parfait; this not only makes for a beautiful presentation but also allows you to see the colorful layers, which adds to the enjoyment of eating it.
  • For an even creamier texture, consider whipping the Greek yogurt with a hand mixer for a couple of minutes before layering. This small adjustment makes a huge difference in mouthfeel.
  • Be mindful of the granola-to-yogurt ratio. Too much granola can overwhelm the parfait, while too little can make it feel too creamy. Aim for about 1/4 cup of granola per layer for the perfect balance.
  • If you’re making this for a gathering, consider preparing the yogurt and peaches ahead of time and layering them just before serving. This ensures the granola stays crunchy!

Variations & Serving Ideas

There are so many ways to get creative with your Peach Yogurt Parfait! For a tropical twist, swap out the peaches for mangoes or pineapples and top with coconut flakes. If you prefer a berry flavor, mix in some blueberries or strawberries with the peaches for added color and taste. For a nutty version, incorporate chopped walnuts or pecans instead of almonds.

As for serving ideas, this parfait pairs beautifully with a side of scrambled eggs for a hearty breakfast or fresh fruit salad for a light lunch. You might also enjoy it alongside whole grain toast with almond butter for an energizing snack. The contrast of flavors and textures will elevate your meal experience!

Storage, Make-Ahead & Reheating

The Peach Yogurt Parfait is best enjoyed fresh, but you can prepare some components ahead of time. Store the layered parfait in an airtight container in the refrigerator for up to 24 hours. However, be cautious; the granola may lose its crunch if stored too long. You can freeze the yogurt and peach mixture for up to 2 months; just remember to thaw it in the refrigerator overnight before serving.

If you plan to enjoy this dish the next day, it can taste even better as the flavors meld together. Just remember to add the granola right before serving to keep its delightful crunch!

Frequently Asked Questions

Can I make Peach Yogurt Parfait With Honey And Granola ahead of time?

Yes — in fact, it tastes even better the next day as the flavors meld. However, I recommend waiting to add the granola until just before serving to maintain its crunch.

What can I substitute for Greek yogurt?

If you prefer a lighter option, you can substitute Greek yogurt with regular yogurt or a dairy-free alternative like coconut yogurt. Just remember that this may alter the creaminess and flavor profile slightly.

Can I use frozen peaches for this parfait?

Absolutely! Just make sure to thaw the frozen peaches before using them. They will still add great flavor, though the texture may be slightly softer than fresh peaches.

How do I make the parfait vegan?

To make a vegan version, substitute the Greek yogurt with a plant-based yogurt alternative, and replace honey with maple syrup or agave nectar. This keeps the parfait sweet while adhering to a vegan diet.

What other fruits can I use in this recipe?

You can mix and match fruits based on your preference. Try using strawberries, blueberries, raspberries, or even bananas. Just make sure to adjust the lemon juice as needed to prevent browning.

Sweet Peach Yogurt Parfait Delight

Final Thoughts

The Peach Yogurt Parfait with Honey and Granola is a delightful blend of creamy yogurt, sweet peaches, and crunchy granola that creates a satisfying and nourishing treat. Each layer bursts with flavor, making it a perfect choice for breakfast or a light dessert.

This is the kind of recipe I come back to again and again, especially when I want something refreshing and wholesome to start my day. The harmony of sweet and tart flavors, combined with the delightful crunch, never fails to lift my spirits!

I encourage you to give this parfait a try and indulge in its comforting goodness. Feel free to share your results or even add your own twist—perhaps a sprinkle of cinnamon or a handful of nuts. Enjoy creating your perfect parfait!

Print
clock clock iconcutlery cutlery iconflag flag iconfolder folder iconinstagram instagram iconpinterest pinterest iconfacebook facebook iconprint print iconsquares squares iconheart heart iconheart solid heart solid icon

Peach Yogurt Parfait


  • Author: Lily author
  • Total Time: 15 minutes
  • Yield: 4 servings 1x
Pin Recipe
Print Recipe

Description

This Peach Yogurt Parfait combines creamy Greek yogurt, juicy peaches, and crunchy granola for a delightful treat. It’s a perfect breakfast or snack that captures the essence of summer in every bite.


Ingredients

Scale
  • For the Parfait:
  • 2 cups plain Greek yogurt (or vanilla yogurt for a sweeter option)
  • 2 large ripe peaches, diced (about 2 cups)
  • 1 tablespoon fresh lemon juice (to prevent browning of peaches)
  • 2 tablespoons honey (plus more for drizzling)
  • 1 teaspoon vanilla extract (optional for extra flavor)
  • For the Granola:
  • 1 cup granola (store-bought or homemade; see notes for a simple granola recipe)
  • 1/4 cup sliced almonds (optional for added crunch)
  • 1/4 cup shredded coconut (optional for added flavor)

Instructions

  1. Start by preparing the peaches. Wash them thoroughly, then slice and dice them into bite-sized pieces. In a medium bowl, toss the diced peaches with 1 tablespoon of fresh lemon juice to prevent browning. Set aside for about 5 minutes while the lemon juice works its magic.
  2. In a separate bowl, combine the Greek yogurt, 2 tablespoons of honey, and 1 teaspoon of vanilla extract if using. Stir the mixture until smooth and thoroughly blended. This should take about a minute. Avoid overmixing to maintain the creaminess of the yogurt.
  3. Now it’s time to layer your parfait. Grab a clear glass or bowl to showcase your beautiful creation. Start with a generous spoonful of the yogurt mixture at the bottom—about 1/4 cup will do. Use a spoon to spread it evenly.
  4. Add a layer of the diced peaches over the yogurt, ensuring they cover the yogurt completely. You might want to use about half of what you have prepared—roughly 1 cup. This layer should be visually appealing, so arrange the peaches neatly.
  5. Sprinkle 1/4 cup of granola over the peaches. This adds a delightful crunch. Make sure to distribute it evenly to ensure every bite has that satisfying texture. Avoid packing it down too tightly, as you want it to maintain its crunch.
  6. Repeat the layers: spoon in another 1/4 cup of yogurt, followed by another cup of peaches, and another sprinkle of granola. You should have at least two layers, but feel free to add more depending on your glass size.
  7. Finish off your parfait with a drizzle of honey on top for added sweetness and a touch of elegance. If you’re using sliced almonds or shredded coconut, sprinkle them on top now. It adds a lovely visual contrast and extra flavor.
  8. Serve immediately or refrigerate for up to 30 minutes before serving to allow the flavors to meld together. However, I recommend enjoying it fresh to maintain the granola’s crunch.
  • Prep Time: 15 mins
  • Cook Time: 0 mins
  • Category: Breakfast
  • Method: No-cook
  • Cuisine: American

Nutrition

  • Serving Size: 1 parfait
  • Calories: 250
  • Sugar: 20 g
  • Sodium: 50 mg
  • Fat: 5 g
  • Saturated Fat: 2 g
  • Unsaturated Fat: 3 g
  • Trans Fat: 0 g
  • Carbohydrates: 40 g
  • Fiber: 3 g
  • Protein: 10 g
  • Cholesterol: 10 mg

Keywords: Choose ripe peaches for the best flavor and texture. Use a clear glass for a beautiful presentation. For creaminess, consider whipping the yogurt before layering. Be mindful of the granola-to-yogurt ratio. Prepare yogurt and peaches ahead of time for gatherings, layering just before serving.

Did you make this recipe?

Share a photo and tag us — we can't wait to see what you've made!

Sun-Kissed Frozen Orange Cream Slush

As a child, summer days felt like they lasted forever. I remember the sticky heat wrapping around me as I played outside, my laughter mingling with the sounds of the neighborhood. But nothing could cool me down quite like the moment I’d spot my grandmother, laboring over her blender, whipping up her famous Frozen Orange Creamsicle Slush. That vibrant orange treat, with its frosty texture and sweet citrus aroma, was like a burst of sunshine in a cup. Just one sip, and I could feel the coolness wash over me, sparking pure joy.

This Frozen Orange Creamsicle Slush has a way of making you feel like a kid again. Its creamy, dreamy consistency is a delightful balance of bright orange and soft vanilla, inviting you to dive right in. The refreshing tang of orange dances on your tongue, while the smooth creaminess envelops you in a comforting embrace. It’s a nostalgic treat that’s perfect for hot summer afternoons or anytime you need a little pick-me-up.

What makes my version of this slush stand out is the addition of a hint of vanilla bean, which elevates the flavor and adds an extra layer of richness. Plus, it’s super easy to whip up with just a few simple ingredients that you probably already have on hand! So, if you’re ready to relive those sun-soaked memories, let me show you exactly how to make it.

Sun-Kissed Frozen Orange Cream Slush

Why You’ll Love This Recipe

  • Each slush is a perfect blend of creamy vanilla and zesty orange, creating a nostalgic flavor reminiscent of summer days.
  • This refreshing treat is ready in under 15 minutes, making it an ideal quick dessert for unexpected guests or hot afternoons.
  • With just 8 simple ingredients, it’s budget-friendly, ensuring you don’t have to break the bank to enjoy a delicious slush.
  • The slush has a perfectly smooth texture, thanks to the combination of ice and ice cream, providing a delightful contrast to the bright citrus flavors.
  • It’s highly customizable; you can easily adjust the sweetness and add fresh herbs for a unique twist that suits your taste.

Ingredients

  • 2 cups orange juice (freshly squeezed or store-bought)
  • 1 cup vanilla ice cream
  • 1 cup crushed ice
  • 1/2 cup milk (whole or 2%)
  • 1/4 cup granulated sugar (adjust based on sweetness preference)
  • 1 teaspoon vanilla extract
  • Zest of 1 orange (for added flavor)
  • Fresh orange slices and mint leaves (for garnish)

The star of this Frozen Orange Creamsicle Slush is the orange juice, which provides the vibrant, citrusy base. Freshly squeezed juice will yield the brightest flavor, but store-bought options can be just as convenient. If you’re opting for store-bought, choose 100% pure juice with no added sugars for the best results. Another essential ingredient is the vanilla ice cream; it adds creaminess and sweetness. You can substitute it with dairy-free ice cream if you’re looking for a vegan option. Whole or 2% milk complements the ice cream, creating a smooth blend. If you want a lower-calorie version, almond or oat milk can be good alternatives.

Lastly, the granulated sugar can be adjusted based on your sweetness preference. If you prefer a more natural sweetener, consider using honey or agave syrup. The orange zest enhances the flavor profile, providing an aromatic pop that brings the whole slush together. Don’t skip it! It adds an extra layer of brightness that makes this slush truly special.

Step-by-Step Instructions

  1. Start by preparing your ingredients. Gather 2 cups of orange juice, 1 cup of vanilla ice cream, and 1 cup of crushed ice. Make sure the ice is finely crushed, as larger chunks can make blending difficult.
  2. In a blender, combine the orange juice, vanilla ice cream, crushed ice, and 1/2 cup of milk. Add 1/4 cup of granulated sugar and 1 teaspoon of vanilla extract. If you like a sweeter slush, consider adding a bit more sugar at this stage.
  3. Add the zest of 1 orange to the blender. This step is crucial for enhancing the citrus flavor of your slush. Make sure not to include the bitter white pith—only the flavorful zest.
  4. Blend the mixture on medium-high speed for about 30-45 seconds. Stop once the ingredients are fully combined and the slush has a smooth, even consistency. If you notice large chunks of ice, blend for an additional 10-15 seconds. Avoid over-blending, as this can make the slush too liquidy.
  5. Once blended, taste the slush. If it needs more sweetness, add a little more sugar and blend for a few more seconds. If it’s too thick, you can add a splash of milk to reach your desired consistency.
  6. Pour the slush into glasses. This recipe typically serves 4, but you can easily double it for larger gatherings. Use a spoon to help guide the slush into the glasses if needed.
  7. Garnish each serving with fresh orange slices and mint leaves. The mint not only adds a pop of color but also a refreshing aroma that complements the citrus flavors beautifully.
  8. Serve immediately and enjoy! If you’ve made extra, you can refrigerate it for a short time, but it’s best enjoyed fresh.

Pro Tips for the Best Frozen Orange Creamsicle Slush

  • Don’t skip the orange zest! It’s a game-changer for flavor. Always zest before juicing to make it easier.
  • Use a high-powered blender for the best texture. A standard blender may struggle with ice, leading to uneven consistency. If you have a food processor, that can work too, but ensure the ice is finely crushed.
  • Adjust the ice-to-liquid ratio carefully. If your slush is too thick, it won’t blend well. Start with less ice and add more until you reach your preferred texture.
  • Be cautious with the sugar! Always start with the lower amount, as you can easily add more, but it’s hard to fix an overly sweet slush.
  • For a fun twist, consider adding a splash of coconut milk or a handful of fresh fruit like strawberries or pineapple. This not only enhances the flavor but also adds a beautiful color contrast.

Variations & Serving Ideas

There are countless ways to put a spin on your Frozen Orange Creamsicle Slush. Consider making a tropical version by adding in some pineapple juice or coconut milk for a delightful tropical twist. If you’re feeling adventurous, try incorporating a handful of frozen mango or peach slices for added sweetness. For a lighter version, swap out the vanilla ice cream for Greek yogurt for a creamy yet tangy alternative.

As for serving ideas, this refreshing slush pairs wonderfully with light summer dishes like grilled chicken skewers, fish tacos, or a simple salad topped with citrus vinaigrette. The bright, zesty flavors of the slush complement these dishes perfectly, making them an ideal pairing for a sunny day.

Storage, Make-Ahead & Reheating

This Frozen Orange Creamsicle Slush is best enjoyed fresh, but if you have leftovers, you can store them in an airtight container in the fridge for up to 2 days. Just keep in mind that the slush may lose some of its texture over time as the ice melts. It doesn’t freeze well, as the ice will turn into a solid block. If you must freeze it, blend again after thawing to restore the slushy consistency. This treat is best the day you make it, as the flavors meld together beautifully overnight, enhancing its deliciousness.

Frequently Asked Questions

Can I make Frozen Orange Creamsicle Slush ahead of time?

Yes — in fact, it tastes even better the next day as the flavors meld. However, it’s best to enjoy it fresh, as the texture can change if stored for too long. If you need to prepare it ahead, keep it in the fridge and re-blend before serving.

What kind of orange juice should I use?

For the best flavor, use freshly squeezed orange juice. However, if you’re short on time, opt for 100% pure store-bought juice without added sugars. This will ensure that your slush remains flavorful and refreshing.

Can I substitute the vanilla ice cream?

Absolutely! If you’re looking for a dairy-free option, coconut milk ice cream or a non-dairy vanilla ice cream can work wonderfully. They will still provide the creamy texture and sweetness you desire.

How can I adjust the sweetness of my slush?

You can easily adjust the sweetness by modifying the amount of sugar added. Start with 1/4 cup and taste the mixture before blending. If you prefer it sweeter, add more sugar gradually until it reaches your desired level.

What should I do if my slush is too thick?

If your slush is too thick, simply add a splash of milk or orange juice and blend again. This will help achieve a more drinkable consistency while maintaining the slushy texture. Adjust gradually to reach your preferred thickness.

Sun-Kissed Frozen Orange Cream Slush

Final Thoughts

The Frozen Orange Creamsicle Slush is a delightful blend of refreshing citrus and creamy goodness, making it a perfect treat for warm days or any time you crave a taste of nostalgia. The way the bright orange flavor dances with the creamy texture truly elevates this slush, transforming it into a satisfying escape from the everyday.

This is the kind of recipe I come back to again and again, especially when I’m looking to cool down or impress guests at a summer gathering. It’s simple to make and always brings smiles all around! I encourage you to try this recipe for yourself—don’t hesitate to share your results or even put your own spin on it. Happy slushing!

Print
clock clock iconcutlery cutlery iconflag flag iconfolder folder iconinstagram instagram iconpinterest pinterest iconfacebook facebook iconprint print iconsquares squares iconheart heart iconheart solid heart solid icon

Frozen Orange Creamsicle Slush


  • Author: Lily author
  • Total Time: 15 minutes
  • Yield: 4 servings 1x
Pin Recipe
Print Recipe

Description

This Frozen Orange Creamsicle Slush is a refreshing treat that combines creamy vanilla and zesty orange flavors. Perfect for hot summer days, it brings back nostalgic memories with every sip.


Ingredients

Scale
  • 2 cups orange juice (freshly squeezed or store-bought)
  • 1 cup vanilla ice cream
  • 1 cup crushed ice
  • 1/2 cup milk (whole or 2%)
  • 1/4 cup granulated sugar (adjust based on sweetness preference)
  • 1 teaspoon vanilla extract
  • Zest of 1 orange (for added flavor)
  • Fresh orange slices and mint leaves (for garnish)

Instructions

  1. Start by preparing your ingredients. Gather 2 cups of orange juice, 1 cup of vanilla ice cream, and 1 cup of crushed ice. Make sure the ice is finely crushed, as larger chunks can make blending difficult.
  2. In a blender, combine the orange juice, vanilla ice cream, crushed ice, and 1/2 cup of milk. Add 1/4 cup of granulated sugar and 1 teaspoon of vanilla extract. If you like a sweeter slush, consider adding a bit more sugar at this stage.
  3. Add the zest of 1 orange to the blender. This step is crucial for enhancing the citrus flavor of your slush. Make sure not to include the bitter white pith—only the flavorful zest.
  4. Blend the mixture on medium-high speed for about 30-45 seconds. Stop once the ingredients are fully combined and the slush has a smooth, even consistency. If you notice large chunks of ice, blend for an additional 10-15 seconds. Avoid over-blending, as this can make the slush too liquidy.
  5. Once blended, taste the slush. If it needs more sweetness, add a little more sugar and blend for a few more seconds. If it’s too thick, you can add a splash of milk to reach your desired consistency.
  6. Pour the slush into glasses. This recipe typically serves 4, but you can easily double it for larger gatherings. Use a spoon to help guide the slush into the glasses if needed.
  7. Garnish each serving with fresh orange slices and mint leaves. The mint not only adds a pop of color but also a refreshing aroma that complements the citrus flavors beautifully.
  8. Serve immediately and enjoy! If you’ve made extra, you can refrigerate it for a short time, but it's best enjoyed fresh.
  • Prep Time: 15 min
  • Cook Time: 0 min
  • Category: Dessert
  • Method: Blending
  • Cuisine: American

Nutrition

  • Serving Size: 1 serving
  • Calories: 200
  • Sugar: 30 g
  • Sodium: 50 mg
  • Fat: 5 g
  • Saturated Fat: 3 g
  • Unsaturated Fat: 2 g
  • Trans Fat: 0 g
  • Carbohydrates: 40 g
  • Fiber: 1 g
  • Protein: 2 g
  • Cholesterol: 20 mg

Keywords: Don't skip the orange zest! It's a game-changer for flavor. Always zest before juicing to make it easier.

Did you make this recipe?

Share a photo and tag us — we can't wait to see what you've made!

Zesty Lemon Poppy Seed Delight

One rainy afternoon, I found myself in my grandmother’s cozy kitchen, the kind that always smelled like warmth and love. She was whipping up her famous Lemon Poppy Seed Loaf, a recipe that had been passed down through generations. As the batter came together, the zesty aroma of fresh lemons filled the air, mingling perfectly with the nutty fragrance of poppy seeds. I can still picture her, apron-clad, as she expertly drizzled a vibrant citrus icing over the loaf, creating a glossy, sun-kissed finish that beckoned us to dive in. It was a moment that sparked my own passion for baking, and this recipe has become a cherished staple in my home ever since.

When you take a bite of this Lemon Poppy Seed Loaf, it’s like a burst of sunshine on your palate. The loaf is beautifully golden, with a tender crumb that melts in your mouth. Each slice is speckled with tiny poppy seeds, adding a delightful crunch that contrasts beautifully with the tangy sweetness of the lemon. And that citrus icing? It’s the finishing touch that elevates this loaf from ordinary to extraordinary, with its bright, zesty flavor dancing on your taste buds.

This recipe stands out because it embraces simplicity while delivering on flavor. I’ve added a hint of vanilla to the batter, enhancing the overall taste and making it even more indulgent. Trust me, once you make this Lemon Poppy Seed Loaf With Citrus Icing, it’ll become a go-to in your baking repertoire.

So, let me show you exactly how to make it!

Zesty Lemon Poppy Seed Delight

Why You’ll Love This Recipe

  • Moist and tender crumb that melts in your mouth, thanks to the perfect balance of butter and buttermilk.
  • Bright, zesty lemon flavor paired with crunchy poppy seeds, creating a delightful texture and taste experience.
  • Easy to whip up in just about an hour, perfect for last-minute gatherings or a cozy afternoon treat.
  • Budget-friendly with everyday ingredients, making it an accessible option for all home bakers.
  • The citrus icing adds a sweet tang that elevates the loaf, turning a simple recipe into a showstopper!

Ingredients

  • 1 ½ cups (190g) all-purpose flour
  • 1 teaspoon baking powder
  • ½ teaspoon baking soda
  • ½ teaspoon salt
  • 3 tablespoons poppy seeds
  • ½ cup (115g) unsalted butter, softened to room temperature
  • 1 cup (200g) granulated sugar
  • 2 large eggs
  • 1 teaspoon vanilla extract
  • 1 teaspoon lemon zest (from about 1 medium lemon)
  • ½ cup (120ml) buttermilk
  • 2 tablespoons fresh lemon juice

For the Citrus Icing:

  • 1 cup (120g) powdered sugar
  • 2 tablespoons fresh lemon juice
  • 1 tablespoon orange juice
  • 1 teaspoon lemon zest (for garnish, optional)

Let’s dive into the key ingredients that make this Lemon Poppy Seed Loaf so special. The all-purpose flour provides the structure and base for the loaf, while the baking powder and baking soda ensure it rises perfectly, giving the loaf a light texture. For a gluten-free variation, you could substitute the flour with a gluten-free all-purpose blend. Poppy seeds not only add a delightful crunch but also contribute to the unique flavor profile that pairs well with the citrus notes.

Unsalted butter is crucial for achieving the buttery richness that makes this loaf so moist. If you’re looking for a dairy-free option, coconut oil or a vegan butter can be used instead. The buttermilk is another essential component, providing acidity that activates the baking soda for a fluffy texture. If you don’t have buttermilk on hand, you can easily make a substitute by mixing ½ cup of milk with 1 tablespoon of vinegar or lemon juice and letting it sit for about 5 minutes.

Step-by-Step Instructions

  1. Preheat your oven to 350°F (175°C). Grease a 9×5-inch loaf pan or line it with parchment paper for easy removal later.
  2. In a medium mixing bowl, whisk together 1 ½ cups of all-purpose flour, 1 teaspoon of baking powder, ½ teaspoon of baking soda, ½ teaspoon of salt, and 3 tablespoons of poppy seeds. This helps to evenly distribute the baking agents and ensures a uniform rise.
  3. In a large mixing bowl, cream together ½ cup of softened unsalted butter and 1 cup of granulated sugar using an electric mixer on medium speed for about 3-4 minutes, until the mixture is light and fluffy. Make sure to scrape down the sides of the bowl occasionally.
  4. Add 2 large eggs, 1 teaspoon of vanilla extract, and 1 teaspoon of lemon zest to the creamed butter and sugar, mixing until fully combined. You want a smooth consistency, so ensure there are no lumps of butter.
  5. In a small bowl, combine ½ cup of buttermilk and 2 tablespoons of fresh lemon juice. Alternately add the dry ingredients and buttermilk mixture to the butter mixture, starting and ending with the dry ingredients. Mix just until combined; do not overmix, as this can lead to a dense loaf.
  6. Pour the batter into the prepared loaf pan. Smooth the top with a spatula, ensuring it’s even. Bake in the preheated oven for 50-60 minutes, or until a toothpick inserted in the center comes out clean. The edges should be lightly golden brown, and the center should feel just set.
  7. Once baked, remove the loaf from the oven and allow it to cool in the pan for about 10 minutes. Then, transfer it to a wire rack to cool completely. Resist the urge to slice too soon, as it will be crumbly if it’s still warm.
  8. While the loaf is cooling, prepare the citrus icing. In a medium bowl, whisk together 1 cup of powdered sugar, 2 tablespoons of fresh lemon juice, and 1 tablespoon of orange juice until smooth. If the icing is too thick, you can add a little more juice to reach your desired consistency.
  9. Once the loaf is completely cool, drizzle the citrus icing over the top. If you like, sprinkle with an additional teaspoon of lemon zest for an extra pop of flavor and color.

Pro Tips for the Best Lemon Poppy Seed Loaf With Citrus Icing

  • Be careful not to overmix your batter; this is a common mistake that can lead to a dense loaf. Mix just until the dry ingredients are incorporated for a light and fluffy texture.
  • Use room temperature ingredients, especially the butter and eggs. This helps to create a smoother batter and ensures even baking. Take your eggs out of the fridge about 30 minutes before you start.
  • For a more pronounced lemon flavor, consider adding a little lemon extract in addition to the zest and juice. Just a half teaspoon can elevate the citrus notes significantly.
  • When measuring your flour, spoon it into the measuring cup and level it off with a knife instead of scooping directly from the bag. This prevents packing and ensures you don’t end up with a dry loaf.
  • Invest in a good quality loaf pan; it makes a difference in heat distribution, which ensures even baking. If your pan is dark-coated, reduce the oven temperature by 25°F to prevent over-browning.

Variations & Serving Ideas

For a delightful twist, consider adding blueberries or raspberries to the batter for a fruity burst of flavor. You can also experiment with different citrus fruits—try lime or grapefruit zest and juice for a refreshing change. For a healthier option, substitute half of the all-purpose flour with whole wheat flour for added fiber without compromising too much on texture.

This Lemon Poppy Seed Loaf pairs beautifully with a light salad, such as a mixed greens salad with a vinaigrette, or a cup of tea for a cozy afternoon treat. It also complements a creamy cheese platter, as the acidity of the loaf balances rich cheeses perfectly. Lastly, a scoop of vanilla ice cream on the side creates a delightful contrast of temperatures and flavors!

Storage, Make-Ahead & Reheating

This Lemon Poppy Seed Loaf can be stored at room temperature for up to 3 days if wrapped tightly in plastic wrap. If you want to keep it longer, it freezes well for up to 3 months. To freeze, wrap the loaf tightly in plastic wrap and then in aluminum foil to prevent freezer burn.

When you’re ready to enjoy it again, simply thaw it in the fridge overnight. Reheat individual slices in the microwave for 15-20 seconds or in a toaster oven until warmed through. Interestingly, many people find that this loaf tastes even better the next day, as the flavors have time to meld!

Frequently Asked Questions

Can I make Lemon Poppy Seed Loaf With Citrus Icing ahead of time?

Yes — in fact, it tastes even better the next day! You can make the loaf a day in advance, allowing the flavors to develop. Just be sure to store it in an airtight container to maintain its moisture.

Can I substitute the poppy seeds?

Absolutely! If you don’t have poppy seeds on hand or prefer an alternative, you can use sesame seeds for a similar crunch or omit them entirely for a smooth loaf.

What can I use instead of buttermilk?

If you don’t have buttermilk, you can easily create a substitute by mixing ½ cup of milk (dairy or plant-based) with 1 tablespoon of vinegar or lemon juice. Let it sit for 5 minutes before using in the recipe.

How can I make this recipe gluten-free?

To make a gluten-free version of this Lemon Poppy Seed Loaf, substitute the all-purpose flour with a gluten-free all-purpose flour blend. Just ensure that the blend contains a binding agent like xanthan gum for the best results.

What is the best way to store leftover loaf?

Leftover Lemon Poppy Seed Loaf should be stored in an airtight container at room temperature for up to 3 days. For longer storage, wrap it tightly and freeze for up to 3 months. Thaw it before serving for the best texture.

Zesty Lemon Poppy Seed Delight

Final Thoughts

The Lemon Poppy Seed Loaf with Citrus Icing is truly a delightful treat that brings a burst of brightness to any occasion. The zesty lemon flavor combined with the subtle crunch of poppy seeds creates a satisfying balance, while the citrus icing adds a touch of sweetness that perfectly complements the loaf’s tanginess.

This is the kind of recipe I come back to again and again, especially when I want to brighten up a gloomy day or celebrate a small victory. The aroma that fills the kitchen as it bakes is absolutely heavenly! I encourage you to give this recipe a try; you might just find it becoming a beloved staple in your home. Don’t forget to share your results or even add your own unique twist—I can’t wait to see what you create!

Print
clock clock iconcutlery cutlery iconflag flag iconfolder folder iconinstagram instagram iconpinterest pinterest iconfacebook facebook iconprint print iconsquares squares iconheart heart iconheart solid heart solid icon

Lemon Poppy Seed Loaf


  • Author: Lily author
  • Total Time: 11 minute
  • Yield: 1 loaf 1x
Pin Recipe
Print Recipe

Description

This Lemon Poppy Seed Loaf is a delightful treat that combines zesty lemon flavor with crunchy poppy seeds. Topped with a citrus icing, it’s perfect for any occasion.


Ingredients

Scale
  • 1 ½ cups (190g) all-purpose flour
  • 1 teaspoon baking powder
  • ½ teaspoon baking soda
  • ½ teaspoon salt
  • 3 tablespoons poppy seeds
  • ½ cup (115g) unsalted butter, softened to room temperature
  • 1 cup (200g) granulated sugar
  • 2 large eggs
  • 1 teaspoon vanilla extract
  • 1 teaspoon lemon zest (from about 1 medium lemon)
  • ½ cup (120ml) buttermilk
  • 2 tablespoons fresh lemon juice
  • 1 cup (120g) powdered sugar
  • 2 tablespoons fresh lemon juice
  • 1 tablespoon orange juice
  • 1 teaspoon lemon zest (for garnish, optional)

Instructions

  1. Preheat your oven to 350°F (175°C). Grease a 9×5-inch loaf pan or line it with parchment paper for easy removal later.
  2. In a medium mixing bowl, whisk together 1 ½ cups of all-purpose flour, 1 teaspoon of baking powder, ½ teaspoon of baking soda, ½ teaspoon of salt, and 3 tablespoons of poppy seeds. This helps to evenly distribute the baking agents and ensures a uniform rise.
  3. In a large mixing bowl, cream together ½ cup of softened unsalted butter and 1 cup of granulated sugar using an electric mixer on medium speed for about 3-4 minutes, until the mixture is light and fluffy. Make sure to scrape down the sides of the bowl occasionally.
  4. Add 2 large eggs, 1 teaspoon of vanilla extract, and 1 teaspoon of lemon zest to the creamed butter and sugar, mixing until fully combined. You want a smooth consistency, so ensure there are no lumps of butter.
  5. In a small bowl, combine ½ cup of buttermilk and 2 tablespoons of fresh lemon juice. Alternately add the dry ingredients and buttermilk mixture to the butter mixture, starting and ending with the dry ingredients. Mix just until combined; do not overmix, as this can lead to a dense loaf.
  6. Pour the batter into the prepared loaf pan. Smooth the top with a spatula, ensuring it’s even. Bake in the preheated oven for 50-60 minutes, or until a toothpick inserted in the center comes out clean. The edges should be lightly golden brown, and the center should feel just set.
  7. Once baked, remove the loaf from the oven and allow it to cool in the pan for about 10 minutes. Then, transfer it to a wire rack to cool completely. Resist the urge to slice too soon, as it will be crumbly if it’s still warm.
  8. While the loaf is cooling, prepare the citrus icing. In a medium bowl, whisk together 1 cup of powdered sugar, 2 tablespoons of fresh lemon juice, and 1 tablespoon of orange juice until smooth. If the icing is too thick, you can add a little more juice to reach your desired consistency.
  9. Once the loaf is completely cool, drizzle the citrus icing over the top. If you like, sprinkle with an additional teaspoon of lemon zest for an extra pop of flavor and color.
  • Prep Time: 15 mins
  • Cook Time: 50-60 mins
  • Category: Dessert
  • Method: Baking
  • Cuisine: American

Nutrition

  • Serving Size: 1 slice
  • Calories: 200
  • Sugar: 15 g
  • Sodium: 150 mg
  • Fat: 8 g
  • Saturated Fat: 5 g
  • Unsaturated Fat: 3 g
  • Trans Fat: 0 g
  • Carbohydrates: 30 g
  • Fiber: 1 g
  • Protein: 3 g
  • Cholesterol: 40 mg

Keywords: Be careful not to overmix your batter; this is a common mistake that can lead to a dense loaf. Use room temperature ingredients for a smoother batter and even baking.

Did you make this recipe?

Share a photo and tag us — we can't wait to see what you've made!

  • Privacy Policy
  • Terms Of Service
  • Contact
  • About
  • GDPR

Copyright © 2025 Homesmad