• Skip to primary navigation
  • Skip to main content
  • Skip to primary sidebar
Homesmad

Homesmad

  • Home
  • Breakfast & Brunch
  • Appetizers & Snacks
  • Dinner
  • Dessert
  • About
  • Privacy Policy
  • Contact
Homesmad
  • Home
  • Breakfast & Brunch
  • Appetizers & Snacks
  • Dinner
  • Dessert
  • About
  • Privacy Policy
  • Contact

Best Red Velvet Brownies Recipe – Fudgy, Rich & Easy!

October 21, 2025 by Lily author

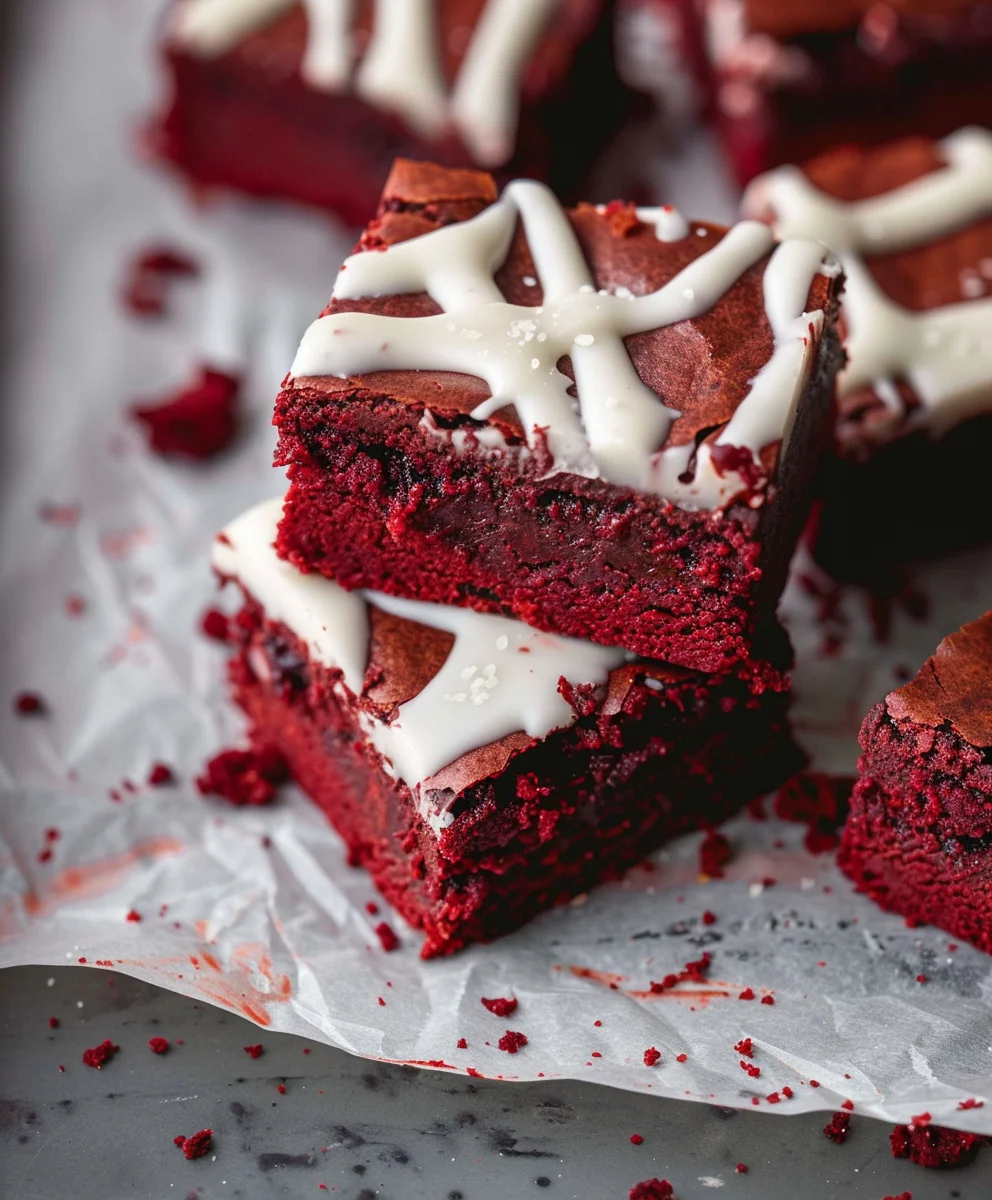
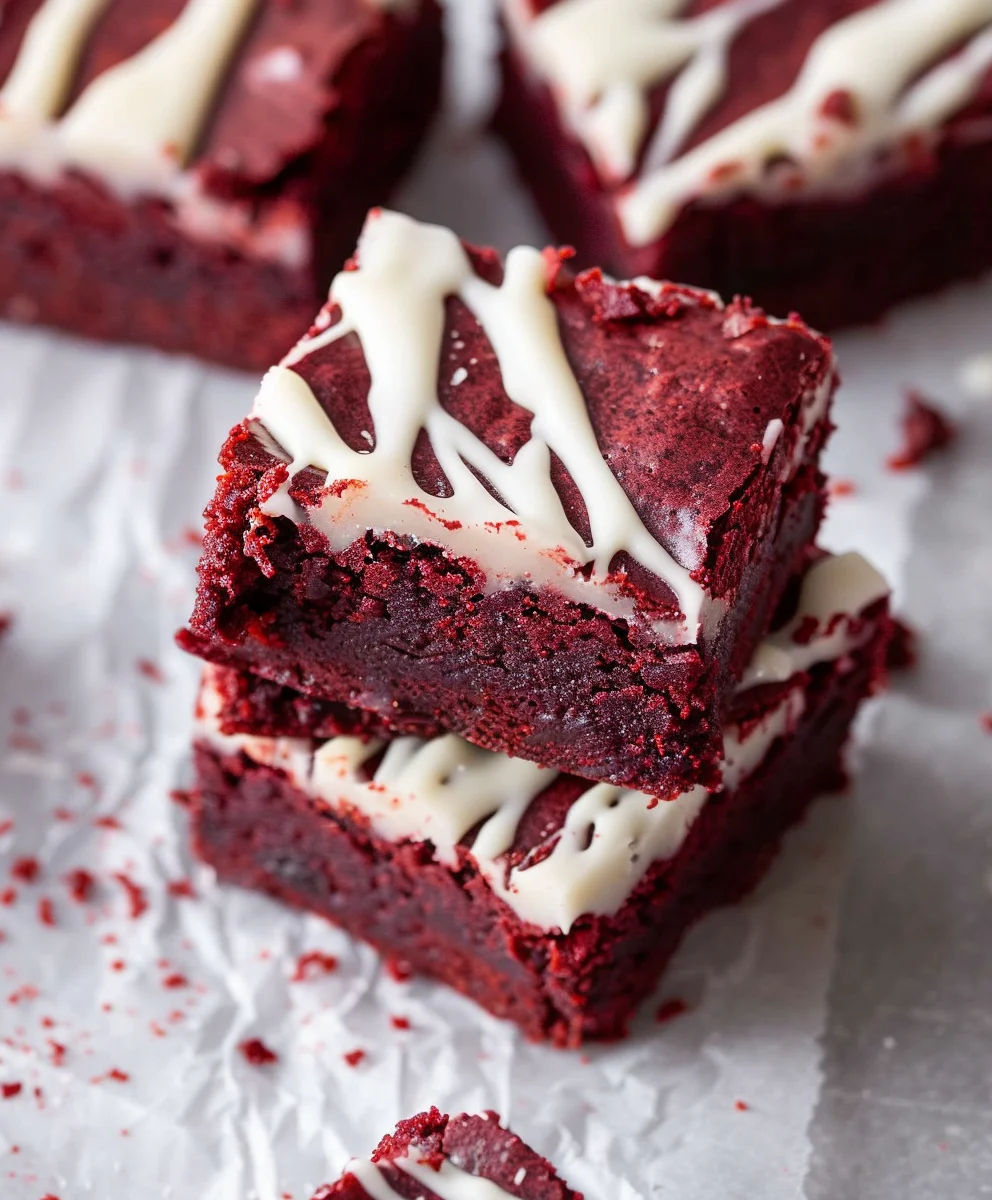
Red Velvet Brownies. Just hearing those three words conjures images of a truly unforgettable dessert experience, doesn’t it? As a dessert enthusiast, I know the magic these bring to any occasion. Imagine sinking your teeth into a vibrant, ruby-red square, dense and fudgy, with that signature hint of cocoa and a subtle tang that perfectly balances the sweetness. This isn’t just a brownie; it’s a celebration, a culinary masterpiece that marries two beloved dessert traditions into one utterly irresistible treat that I absolutely adore.

A Beloved Classic Reimagined

While the classic brownie has a storied American history, the “red velvet” component brings its own fascinating narrative, often traced back to the Southern United States. Traditionally a cake, its distinct crimson hue and a unique flavor profile, often achieved with a touch of cocoa and buttermilk, quickly made it a cherished favorite. I believe people adore these Red Velvet Brownies because they deliver the best of both worlds: the comforting, chewy texture of a perfect brownie combined with the sophisticated visual appeal and nuanced taste of a red velvet cake. That striking color alone is enough to captivate, but it’s the rich, moist crumb and the surprising depth of flavor that truly hooks you. They’re simply divine for any occasion, offering a delightful twist on a familiar favorite that always impresses.

Best Red Velvet Brownies Recipe - Fudgy, Rich & Easy! this RECIPE

Ingredients:

  • For the Red Velvet Brownies:
    • 1 cup (226g) unsalted butter, melted and slightly cooled
    • 1 ½ cups (300g) granulated sugar
    • ½ cup (100g) light brown sugar, packed
    • 4 large eggs, at room temperature
    • 2 teaspoons pure vanilla extract
    • 2 tablespoons (30ml) red gel food coloring (I highly recommend gel for the best color!)
    • 1 ½ cups (180g) all-purpose flour, sifted
    • ½ cup (45g) unsweetened cocoa powder, sifted (Dutch-processed or natural, both work beautifully)
    • 1 teaspoon baking powder
    • ½ teaspoon salt
    • ½ cup (120ml) buttermilk, at room temperature (if you don’t have buttermilk, you can make your own by adding 1 tablespoon of white vinegar or lemon juice to regular milk and letting it sit for 5-10 minutes)
  • For the Cream Cheese Frosting:
    • 8 ounces (226g) cream cheese, softened to room temperature
    • ½ cup (113g) unsalted butter, softened to room temperature
    • 4 cups (480g) powdered sugar (confectioners’ sugar), sifted
    • 1 teaspoon pure vanilla extract
    • Pinch of salt (optional, but I find it really balances the sweetness)

Equipment You’ll Need:

  • 9×13 inch baking pan
  • Parchment paper
  • Large mixing bowls (at least two)
  • Whisk
  • Rubber spatula
  • Electric mixer (stand mixer or hand mixer is fine) for the frosting
  • Measuring cups and spoons
  • Sifter (or a fine-mesh sieve)
  • Wire cooling rack

Preparing Your Red Velvet Brownies Batter:

  1. Preheat and Prepare Your Pan: First things first, let’s get that oven ready! Preheat your oven to 350°F (175°C). Then, take your 9×13 inch baking pan and line it with parchment paper, making sure to leave an overhang on two sides. This little trick will make lifting your glorious Red Velvet Brownies out of the pan a breeze once they’re baked and cooled. Lightly grease the exposed sides of the pan or the parchment paper itself with a little butter or non-stick spray. A well-prepared pan is key to a clean release and perfect edges.
  2. Combine Wet Ingredients: In a large mixing bowl, once your butter is perfectly melted and slightly cooled (we don’t want to scramble those eggs!), whisk in both the granulated sugar and the light brown sugar. I find that using both sugars gives these Red Velvet Brownies an incredible depth of flavor and a wonderfully chewy texture. Whisk them together until they are fully incorporated and the mixture looks smooth and glossy. This usually takes a couple of minutes of vigorous whisking. Next, we’ll add the eggs, one at a time, beating well after each addition. This ensures each egg is fully emulsified into the sugar and butter mixture, contributing to a truly luxurious and fudgy brownie. Don’t rush this step; it’s a small detail that makes a big difference in the final texture of your Red Velvet Brownies. After the eggs are fully incorporated, stir in your pure vanilla extract.
  3. Add That Signature Red Hue: Now for the magic! Stir in your red gel food coloring. I always recommend using a high-quality gel food coloring for the most vibrant and true red hue. Liquid food coloring can sometimes thin out your batter too much and result in a pinker, rather than deep red, color. Add it in gradually until you achieve that iconic, rich red velvet shade that makes these brownies so visually stunning. Make sure it’s evenly distributed throughout the wet mixture; you don’t want any streaks! This step is incredibly satisfying, watching the mixture transform into that beautiful deep red.
  4. Whisk Dry Ingredients: In a separate medium-sized bowl, sift together your all-purpose flour, unsweetened cocoa powder, baking powder, and salt. Sifting is important here as it breaks up any lumps in the flour and cocoa, ensuring a smooth, lump-free batter. It also helps to aerate the dry ingredients, which can contribute to a slightly lighter texture for your otherwise dense Red Velvet Brownies. Make sure these dry ingredients are thoroughly combined before adding them to your wet mixture.
  5. Combine Wet and Dry: Gradually add the dry ingredients mixture to your wet ingredients, mixing on low speed with an electric mixer or gently with a rubber spatula until just combined. It’s crucial not to overmix here! Overmixing can develop the gluten in the flour, leading to tough, cake-like brownies instead of the fudgy, tender texture we’re aiming for. Stop mixing as soon as you see no dry streaks of flour remaining.
  6. Fold in the Buttermilk: Finally, gently fold in the buttermilk. Buttermilk adds a lovely tang and moisture to the brownies, enhancing the classic red velvet flavor. Again, mix just until it’s incorporated. The batter for your Red Velvet Brownies should be thick and glossy, with a beautiful deep red color. Take a moment to admire that gorgeous batter!

Baking Your Perfect Red Velvet Brownies:

  1. Pour into Pan and Bake: Pour the prepared brownie batter evenly into your lined 9×13 inch baking pan. Use your rubber spatula to spread it right to the corners and smooth out the top. Give the pan a gentle tap on your counter a couple of times to release any large air bubbles. This also helps to ensure an even bake.
  2. Bake to Perfection: Transfer the pan to your preheated oven and bake for 25-30 minutes. Baking times can vary depending on your oven, so keep an eye on them. You want the edges to be set and a toothpick inserted into the center should come out with moist crumbs attached, but not wet batter. If the toothpick comes out completely clean, your brownies might be on the drier side, so aim for that slightly fudgy crumb. Overbaking is the enemy of fudgy brownies! For truly decadent Red Velvet Brownies, a slightly underbaked center is preferable.
  3. Cool Completely: Once baked, remove the pan from the oven and place it on a wire cooling rack. Let the brownies cool completely in the pan before attempting to frost them. This is perhaps the hardest part of the entire process – waiting! But it’s absolutely essential. If you try to frost warm brownies, your beautiful cream cheese frosting will simply melt into a messy puddle. Cooling can take anywhere from 1 to 2 hours, or even longer if your kitchen is warm. Patience is a virtue, especially when it comes to these heavenly treats. Once fully cooled, use the parchment paper overhangs to carefully lift the entire slab of brownies out of the pan and transfer it to a cutting board or serving platter.

Whipping Up the Cream Cheese Frosting:

  1. Cream Butter and Cream Cheese: In a large mixing bowl, using an electric mixer, beat the softened cream cheese and softened unsalted butter together on medium speed until the mixture is incredibly smooth, light, and fluffy. This usually takes about 2-3 minutes. Make sure your ingredients are truly at room temperature; this prevents lumps and ensures a silky-smooth frosting. This step is critical for a perfectly textured cream cheese frosting! Scrape down the sides of the bowl periodically to ensure everything is evenly incorporated.
  2. Gradually Add Powdered Sugar: With the mixer on low speed, gradually add the sifted powdered sugar, one cup at a time. If you add it all at once, you’ll end up with a cloud of sugar dust all over your kitchen! Once all the sugar has been added, increase the speed to medium-high and beat for another 2-3 minutes, until the frosting is light, fluffy, and voluminous.
  3. Finish with Vanilla and Salt: Finally, beat in the vanilla extract and a tiny pinch of salt (if using). The salt isn’t mandatory, but I find it truly enhances the flavor of the frosting, cutting through some of the sweetness and adding a lovely depth. Beat until just combined. Taste your frosting and adjust sweetness or vanilla to your preference. Your cream cheese frosting should be wonderfully creamy and spreadable, the perfect complement to your rich Red Velvet Brownies.

Assembling and Serving Your Red Velvet Brownies:

  1. Frost Your Brownies: Once your Red Velvet Brownies are completely cool, spread the luscious cream cheese frosting evenly over the top using an offset spatula or the back of a spoon. You can go for a rustic look or smooth it out for a more polished finish. Don’t be shy with the frosting; it’s what makes red velvet, well, red velvet!
  2. Chill and Slice: For the cleanest cuts, I recommend chilling the frosted brownies in the refrigerator for at least 30 minutes, or even an hour. This allows the frosting to firm up slightly and the brownies to set, making them much easier to slice neatly. Once chilled, use a large, sharp knife to cut the brownies into squares. For extra neat slices, wipe your knife clean with a damp cloth after each cut.
  3. Serve and Enjoy: Arrange your beautiful Red Velvet Brownies on a platter and serve them up! They are fantastic on their own, but you could also garnish them with a sprinkle of cocoa powder, some chocolate shavings, or even a few festive red sprinkles for an extra touch of elegance. These brownies are truly a showstopper, perfect for any gathering or just a special treat for yourself.

Storage Tips for Your Delicious Red Velvet Brownies:

Since these Red Velvet Brownies feature a cream cheese frosting, they are best stored in an airtight container in the refrigerator. They will keep well for up to 5-7 days. If you prefer them at room temperature, simply take them out of the fridge about 30 minutes before serving to allow the frosting to soften slightly. They are also freezer-friendly! You can freeze individual unfrosted brownies wrapped tightly in plastic wrap and then foil for up to 3 months. For frosted brownies, freeze them on a baking sheet until the frosting is firm, then wrap tightly and store. Thaw in the refrigerator before serving.

Troubleshooting Common Red Velvet Brownie Issues:

  • Brownies are Dry/Cakey: This is almost always due to overmixing the batter or overbaking. Remember to mix just until combined and pull them from the oven when a toothpick still has moist crumbs.
  • Brownies are Too Fudgy/Raw in the Middle: They might be underbaked. While a slightly gooey center is great, if it’s completely raw, pop them back in for a few more minutes. Ensure your oven temperature is accurate by using an oven thermometer.
  • Red Color Isn’t Vibrant: You likely used too little red food coloring, or a liquid food coloring which can be less potent than gel. Always opt for a high-quality gel food coloring for that signature deep red.
  • Frosting is Runny: This happens when the butter and cream cheese aren’t cold enough (or they’re too warm from sitting out too long), or if you didn’t add enough powdered sugar. If it’s too warm, chill the frosting in the refrigerator for 15-20 minutes, then beat again. If it’s still too thin, gradually add a bit more sifted powdered sugar.
  • Frosting is Lumpy: This is a clear sign your cream cheese or butter (or both!) were not softened enough to room temperature. Beat them for longer on medium speed until completely smooth before adding the sugar.
Making Your Red Velvet Brownies Extra Special:

There are so many ways to customize these incredible Red Velvet Brownies! For a textural delight, consider folding in 1/2 cup of white chocolate chips or chopped pecans into the batter just before baking. The white chocolate adds an extra layer of sweetness and a lovely contrast, while the pecans provide a satisfying crunch. If you’re feeling particularly fancy, you could drizzle some melted dark chocolate over the frosted brownies once they’ve set, creating a beautiful design. For holiday cheer, a sprinkle of festive red and white sprinkles on the frosting would be adorable. You could even swirl a small amount of extra red food coloring into a portion of the frosting to create a marbled effect, or divide the frosting and add a different flavor extract to a small portion, like a touch of almond extract for an intriguing variation. These Red Velvet Brownies are a versatile treat that welcomes your creative touch!

Best Red Velvet Brownies Recipe - Fudgy, Rich & Easy!

Conclusion:

Well, my friends, we’ve come to the delicious end of our baking journey, but truly, it’s just the beginning of your own delightful experience. I genuinely hope you’re feeling inspired and excited to whip up a batch of these incredible treats. If there’s one recipe I could implore you to try from my kitchen, it would be this one. Why, you ask? Because these aren’t just any brownies; they are a masterpiece of flavor and texture, a true celebration of indulgence. Imagine sinking your teeth into a square that is impossibly fudgy, with that signature cocoa depth perfectly balanced by a hint of tang, all wrapped up in a visually stunning, vibrant red hue. It’s a sensory experience that delivers on every front, making them an absolute must-try for anyone who appreciates truly exceptional baking. I’ve poured my heart into perfecting this recipe, and I’m confident that it will bring a smile to your face and to the faces of everyone you share them with.

The beauty of these brownies extends beyond their immediate deliciousness; it lies in their versatility. While they are utterly divine served simply, perhaps with a delicate dusting of powdered sugar to highlight their rich color, why stop there? For an elevated dessert experience that’s sure to impress, I highly recommend serving them slightly warm with a generous scoop of good quality vanilla bean ice cream. The contrast between the warm, fudgy brownie and the cold, creamy ice cream is simply heavenly. Alternatively, a dollop of freshly whipped cream can add a touch of lightness and elegance. If you’re feeling extra festive, a drizzle of melted white chocolate over the top before serving adds another layer of sweetness and visual appeal, especially if you then sprinkle on some holiday-themed nonpareils.

But let’s talk variations, because part of the fun of baking is making a recipe your own! If you adore that classic red velvet tang, consider incorporating a cream cheese swirl. You can do this by preparing a simple cream cheese mixture (softened cream cheese, a little sugar, an egg yolk, and a splash of vanilla) and swirling it into the brownie batter just before baking. This creates a beautiful marbled effect and an extra layer of flavor that is truly irresistible. For those who love a bit of crunch, folding in a handful of chopped pecans or walnuts into the batter can add a wonderful textural contrast. And if you’re a serious chocoholic, white chocolate chips or even dark chocolate chunks can be mixed into the batter to intensify the chocolate experience. For a deeper, more sophisticated chocolate flavor, a teaspoon of espresso powder added to the dry ingredients will subtly enhance the cocoa without making the brownies taste like coffee. Don’t be afraid to experiment! These Red Velvet Brownies are incredibly forgiving and adaptable, ready to become whatever your culinary imagination desires. They keep wonderfully at room temperature in an airtight container for several days, making them perfect for meal prepping your weekly treats or for gifting to friends and family. Chilled brownies also have a fantastic, dense texture that some people prefer, so experiment with serving temperatures too!

Now, it’s your turn! I’ve shared my secrets, my tips, and my enthusiasm, and all that’s left is for you to roll up your sleeves and give these a try. I truly believe that once you taste them, they’ll become a cherished addition to your baking repertoire, whether it’s for special occasions, holiday gatherings, or simply a well-deserved treat after a long week. Don’t just take my word for it; experience the magic for yourself. And please, please, please, when you do make them, I would absolutely love to hear all about it! Share your photos, tell me about any creative twists you added, or simply let me know how much you enjoyed them. Your feedback and your baking adventures inspire me endlessly. Tag me in your posts, drop a comment below, or send me a message – let’s connect and celebrate the joy of baking together. Happy baking, my dear readers, and I can’t wait to see your beautiful Red Velvet creations!


Best Red Velvet Brownies Recipe - Fudgy, Rich & Easy!

Best Red Velvet Brownies Recipe – Fudgy, Rich & Easy!

Indulge in these unforgettable Red Velvet Brownies, a culinary masterpiece that marries the fudgy texture of classic brownies with the nuanced taste and vibrant ruby-red hue of a red velvet cake. Rich, moist, and easy to make, they offer a delightful twist on a beloved favorite, perfect for any special occasion.

Prep Time
20 Minutes

Cook Time
25 Minutes

Total Time
45 Minutes

Servings
16 servings

Ingredients

  • 3/4 cup unsalted butter, melted
  • 2 oz chopped semi-sweet chocolate bar
  • 1 1/4 cup granulated sugar
  • 2 large eggs
  • 2 teaspoon vanilla extract
  • 1 teaspoon white vinegar
  • 1/2 tablespoon red gel food coloring
  • 2 tablespoons unsweetened cocoa powder
  • 1 1/4 cup all-purpose flour
  • 1/4 teaspoon salt
  • 1/2 cup white chocolate chips (optional)

Instructions

  1. Step 1
    Preheat your oven to 350°F (175°C). Line a 9×13 inch baking pan with parchment paper, leaving an overhang on two sides for easy lifting; lightly grease.
  2. Step 2
    In a large mixing bowl, whisk together the melted butter and chopped semi-sweet chocolate until smooth. Whisk in the granulated sugar until the mixture is smooth and glossy. Beat in the eggs one at a time, ensuring each is fully incorporated. Stir in the vanilla extract and white vinegar. Add the red gel food coloring and mix until a vibrant, even red hue is achieved throughout the wet mixture.
  3. Step 3
    In a separate medium-sized bowl, sift together the all-purpose flour, unsweetened cocoa powder, and salt. Whisk until thoroughly combined, breaking up any lumps.
  4. Step 4
    Gradually add the dry ingredients mixture to your wet ingredients, mixing gently with a rubber spatula until just combined. Do not overmix. If using, fold in the white chocolate chips.
  5. Step 5
    Pour the prepared brownie batter evenly into your lined 9×13 inch baking pan. Bake for 25-30 minutes, or until the edges are set and a toothpick inserted into the center comes out with moist crumbs attached (not wet batter). Overbaking will result in dry brownies.
  6. Step 6
    Once baked, remove the pan from the oven and place it on a wire cooling rack. Let the brownies cool completely in the pan for 1 to 2 hours. Once fully cooled, lift the slab out of the pan using the parchment paper overhangs, slice into squares, and serve.

Important Information

Nutrition Facts (Per Serving)

It is important to consider this information as approximate and not to use it as definitive health advice.

Allergy Information

Please check ingredients for potential allergens and consult a health professional if in doubt.

« Previous Post
Cheesy Garlic Chicken Wraps: Quick & Delicious Recipe!
Next Post »
Fried Strawberry Cheesecake Sandwiches: Crispy & Sweet Treat!

If you enjoyed this…

Fudgy Chewy Brookies: The Ultimate Recipe & Baking Guide

Cinnamon Roll Protein Bites: The Ultimate No-Bake Recipe

Little Bites Muffins: The Ultimate Guide to Flavors, Nutrition, and More

Primary Sidebar

Browse by Diet

BreakfastDinnerLunchDessertAppetizer

Sweet Peach Yogurt Parfait Delight

One of my fondest memories is from a lazy summer afternoon spent at my grandmother’s house. The sun filtered through the kitchen window, casting a warm glow over the table where she would create her culinary magic. It was during one of those blissful moments that I first tasted her Peach Yogurt Parfait with Honey and Granola. The sweet aroma of ripe peaches mingling with creamy yogurt and the crunch of granola was nothing short of heavenly. It felt like summer captured in a bowl, and I still remember the joy of diving in with a spoon, each layer revealing a new burst of flavor.

When I think about that parfait, I can almost hear the gentle hum of the bees outside, reminding me of the floral notes that honey brings to every bite. The vibrant yellows and soft oranges of the peaches contrast beautifully with the creamy white yogurt and the golden crunch of granola. It’s a dish that not only looks delightful but also tastes like a celebration of fresh, wholesome ingredients.

What makes my version of this Peach Yogurt Parfait special is the careful balance of flavors and textures. I use ripe, juicy peaches, drizzled with locally sourced honey, and a homemade granola that’s bursting with nuts and seeds for an extra crunch. It’s a simple dish, but every layer is crafted with love and attention.

Let me show you exactly how to make this delightful parfait, so you can bring a bit of that summer magic into your kitchen!

Sweet Peach Yogurt Parfait Delight

Why You’ll Love This Recipe

  • Delightfully creamy texture from the Greek yogurt, paired with the juicy sweetness of fresh peaches.
  • Ready in under 20 minutes, making it a quick and satisfying breakfast or snack option.
  • Budget-friendly, using common ingredients that you may already have in your pantry.
  • Customizable with your favorite granola and nuts, allowing you to tailor each parfait to your taste.
  • Perfectly balanced flavors with the bright acidity of lemon juice and the sweetness of honey enhancing the peaches.

Ingredients

  • For the Parfait:
  • 2 cups plain Greek yogurt (or vanilla yogurt for a sweeter option)
  • 2 large ripe peaches, diced (about 2 cups)
  • 1 tablespoon fresh lemon juice (to prevent browning of peaches)
  • 2 tablespoons honey (plus more for drizzling)
  • 1 teaspoon vanilla extract (optional for extra flavor)
  • For the Granola:
  • 1 cup granola (store-bought or homemade; see notes for a simple granola recipe)
  • 1/4 cup sliced almonds (optional for added crunch)
  • 1/4 cup shredded coconut (optional for added flavor)

Let’s dive into some key ingredients that make this Peach Yogurt Parfait so delightful! First, the Greek yogurt is not only creamy but also packed with protein, making it a satisfying option for breakfast or a snack. If you’re looking for a sweeter option, you can easily substitute it with vanilla yogurt, though it may alter the overall flavor balance. Next, the ripe peaches are the star of the show; their natural sweetness shines through, so I recommend choosing peaches that yield slightly to pressure, indicating they’re perfectly ripe. If peaches aren’t in season, feel free to use nectarines or even frozen peaches—just thaw them before use. Finally, honey adds a lovely floral sweetness that ties everything together. If you prefer, maple syrup can serve as a delicious substitute.

Step-by-Step Instructions

  1. Start by preparing the peaches. Wash them thoroughly, then slice and dice them into bite-sized pieces. In a medium bowl, toss the diced peaches with 1 tablespoon of fresh lemon juice to prevent browning. Set aside for about 5 minutes while the lemon juice works its magic.
  2. In a separate bowl, combine the Greek yogurt, 2 tablespoons of honey, and 1 teaspoon of vanilla extract if using. Stir the mixture until smooth and thoroughly blended. This should take about a minute. Avoid overmixing to maintain the creaminess of the yogurt.
  3. Now it’s time to layer your parfait. Grab a clear glass or bowl to showcase your beautiful creation. Start with a generous spoonful of the yogurt mixture at the bottom—about 1/4 cup will do. Use a spoon to spread it evenly.
  4. Add a layer of the diced peaches over the yogurt, ensuring they cover the yogurt completely. You might want to use about half of what you have prepared—roughly 1 cup. This layer should be visually appealing, so arrange the peaches neatly.
  5. Sprinkle 1/4 cup of granola over the peaches. This adds a delightful crunch. Make sure to distribute it evenly to ensure every bite has that satisfying texture. Avoid packing it down too tightly, as you want it to maintain its crunch.
  6. Repeat the layers: spoon in another 1/4 cup of yogurt, followed by another cup of peaches, and another sprinkle of granola. You should have at least two layers, but feel free to add more depending on your glass size.
  7. Finish off your parfait with a drizzle of honey on top for added sweetness and a touch of elegance. If you’re using sliced almonds or shredded coconut, sprinkle them on top now. It adds a lovely visual contrast and extra flavor.
  8. Serve immediately or refrigerate for up to 30 minutes before serving to allow the flavors to meld together. However, I recommend enjoying it fresh to maintain the granola’s crunch.

Pro Tips for the Best Peach Yogurt Parfait With Honey And Granola

  • Make sure to choose ripe peaches for the best flavor and texture. A common mistake is using unripe fruit, which can lead to a less enjoyable parfait. Look for peaches that are fragrant and slightly soft to the touch.
  • Use a clear glass to assemble your parfait; this not only makes for a beautiful presentation but also allows you to see the colorful layers, which adds to the enjoyment of eating it.
  • For an even creamier texture, consider whipping the Greek yogurt with a hand mixer for a couple of minutes before layering. This small adjustment makes a huge difference in mouthfeel.
  • Be mindful of the granola-to-yogurt ratio. Too much granola can overwhelm the parfait, while too little can make it feel too creamy. Aim for about 1/4 cup of granola per layer for the perfect balance.
  • If you’re making this for a gathering, consider preparing the yogurt and peaches ahead of time and layering them just before serving. This ensures the granola stays crunchy!

Variations & Serving Ideas

There are so many ways to get creative with your Peach Yogurt Parfait! For a tropical twist, swap out the peaches for mangoes or pineapples and top with coconut flakes. If you prefer a berry flavor, mix in some blueberries or strawberries with the peaches for added color and taste. For a nutty version, incorporate chopped walnuts or pecans instead of almonds.

As for serving ideas, this parfait pairs beautifully with a side of scrambled eggs for a hearty breakfast or fresh fruit salad for a light lunch. You might also enjoy it alongside whole grain toast with almond butter for an energizing snack. The contrast of flavors and textures will elevate your meal experience!

Storage, Make-Ahead & Reheating

The Peach Yogurt Parfait is best enjoyed fresh, but you can prepare some components ahead of time. Store the layered parfait in an airtight container in the refrigerator for up to 24 hours. However, be cautious; the granola may lose its crunch if stored too long. You can freeze the yogurt and peach mixture for up to 2 months; just remember to thaw it in the refrigerator overnight before serving.

If you plan to enjoy this dish the next day, it can taste even better as the flavors meld together. Just remember to add the granola right before serving to keep its delightful crunch!

Frequently Asked Questions

Can I make Peach Yogurt Parfait With Honey And Granola ahead of time?

Yes — in fact, it tastes even better the next day as the flavors meld. However, I recommend waiting to add the granola until just before serving to maintain its crunch.

What can I substitute for Greek yogurt?

If you prefer a lighter option, you can substitute Greek yogurt with regular yogurt or a dairy-free alternative like coconut yogurt. Just remember that this may alter the creaminess and flavor profile slightly.

Can I use frozen peaches for this parfait?

Absolutely! Just make sure to thaw the frozen peaches before using them. They will still add great flavor, though the texture may be slightly softer than fresh peaches.

How do I make the parfait vegan?

To make a vegan version, substitute the Greek yogurt with a plant-based yogurt alternative, and replace honey with maple syrup or agave nectar. This keeps the parfait sweet while adhering to a vegan diet.

What other fruits can I use in this recipe?

You can mix and match fruits based on your preference. Try using strawberries, blueberries, raspberries, or even bananas. Just make sure to adjust the lemon juice as needed to prevent browning.

Sweet Peach Yogurt Parfait Delight

Final Thoughts

The Peach Yogurt Parfait with Honey and Granola is a delightful blend of creamy yogurt, sweet peaches, and crunchy granola that creates a satisfying and nourishing treat. Each layer bursts with flavor, making it a perfect choice for breakfast or a light dessert.

This is the kind of recipe I come back to again and again, especially when I want something refreshing and wholesome to start my day. The harmony of sweet and tart flavors, combined with the delightful crunch, never fails to lift my spirits!

I encourage you to give this parfait a try and indulge in its comforting goodness. Feel free to share your results or even add your own twist—perhaps a sprinkle of cinnamon or a handful of nuts. Enjoy creating your perfect parfait!

Print
clock clock iconcutlery cutlery iconflag flag iconfolder folder iconinstagram instagram iconpinterest pinterest iconfacebook facebook iconprint print iconsquares squares iconheart heart iconheart solid heart solid icon

Peach Yogurt Parfait


  • Author: Lily author
  • Total Time: 15 minutes
  • Yield: 4 servings 1x
Pin Recipe
Print Recipe

Description

This Peach Yogurt Parfait combines creamy Greek yogurt, juicy peaches, and crunchy granola for a delightful treat. It’s a perfect breakfast or snack that captures the essence of summer in every bite.


Ingredients

Scale
  • For the Parfait:
  • 2 cups plain Greek yogurt (or vanilla yogurt for a sweeter option)
  • 2 large ripe peaches, diced (about 2 cups)
  • 1 tablespoon fresh lemon juice (to prevent browning of peaches)
  • 2 tablespoons honey (plus more for drizzling)
  • 1 teaspoon vanilla extract (optional for extra flavor)
  • For the Granola:
  • 1 cup granola (store-bought or homemade; see notes for a simple granola recipe)
  • 1/4 cup sliced almonds (optional for added crunch)
  • 1/4 cup shredded coconut (optional for added flavor)

Instructions

  1. Start by preparing the peaches. Wash them thoroughly, then slice and dice them into bite-sized pieces. In a medium bowl, toss the diced peaches with 1 tablespoon of fresh lemon juice to prevent browning. Set aside for about 5 minutes while the lemon juice works its magic.
  2. In a separate bowl, combine the Greek yogurt, 2 tablespoons of honey, and 1 teaspoon of vanilla extract if using. Stir the mixture until smooth and thoroughly blended. This should take about a minute. Avoid overmixing to maintain the creaminess of the yogurt.
  3. Now it’s time to layer your parfait. Grab a clear glass or bowl to showcase your beautiful creation. Start with a generous spoonful of the yogurt mixture at the bottom—about 1/4 cup will do. Use a spoon to spread it evenly.
  4. Add a layer of the diced peaches over the yogurt, ensuring they cover the yogurt completely. You might want to use about half of what you have prepared—roughly 1 cup. This layer should be visually appealing, so arrange the peaches neatly.
  5. Sprinkle 1/4 cup of granola over the peaches. This adds a delightful crunch. Make sure to distribute it evenly to ensure every bite has that satisfying texture. Avoid packing it down too tightly, as you want it to maintain its crunch.
  6. Repeat the layers: spoon in another 1/4 cup of yogurt, followed by another cup of peaches, and another sprinkle of granola. You should have at least two layers, but feel free to add more depending on your glass size.
  7. Finish off your parfait with a drizzle of honey on top for added sweetness and a touch of elegance. If you’re using sliced almonds or shredded coconut, sprinkle them on top now. It adds a lovely visual contrast and extra flavor.
  8. Serve immediately or refrigerate for up to 30 minutes before serving to allow the flavors to meld together. However, I recommend enjoying it fresh to maintain the granola’s crunch.
  • Prep Time: 15 mins
  • Cook Time: 0 mins
  • Category: Breakfast
  • Method: No-cook
  • Cuisine: American

Nutrition

  • Serving Size: 1 parfait
  • Calories: 250
  • Sugar: 20 g
  • Sodium: 50 mg
  • Fat: 5 g
  • Saturated Fat: 2 g
  • Unsaturated Fat: 3 g
  • Trans Fat: 0 g
  • Carbohydrates: 40 g
  • Fiber: 3 g
  • Protein: 10 g
  • Cholesterol: 10 mg

Keywords: Choose ripe peaches for the best flavor and texture. Use a clear glass for a beautiful presentation. For creaminess, consider whipping the yogurt before layering. Be mindful of the granola-to-yogurt ratio. Prepare yogurt and peaches ahead of time for gatherings, layering just before serving.

Did you make this recipe?

Share a photo and tag us — we can't wait to see what you've made!

Sun-Kissed Frozen Orange Cream Slush

As a child, summer days felt like they lasted forever. I remember the sticky heat wrapping around me as I played outside, my laughter mingling with the sounds of the neighborhood. But nothing could cool me down quite like the moment I’d spot my grandmother, laboring over her blender, whipping up her famous Frozen Orange Creamsicle Slush. That vibrant orange treat, with its frosty texture and sweet citrus aroma, was like a burst of sunshine in a cup. Just one sip, and I could feel the coolness wash over me, sparking pure joy.

This Frozen Orange Creamsicle Slush has a way of making you feel like a kid again. Its creamy, dreamy consistency is a delightful balance of bright orange and soft vanilla, inviting you to dive right in. The refreshing tang of orange dances on your tongue, while the smooth creaminess envelops you in a comforting embrace. It’s a nostalgic treat that’s perfect for hot summer afternoons or anytime you need a little pick-me-up.

What makes my version of this slush stand out is the addition of a hint of vanilla bean, which elevates the flavor and adds an extra layer of richness. Plus, it’s super easy to whip up with just a few simple ingredients that you probably already have on hand! So, if you’re ready to relive those sun-soaked memories, let me show you exactly how to make it.

Sun-Kissed Frozen Orange Cream Slush

Why You’ll Love This Recipe

  • Each slush is a perfect blend of creamy vanilla and zesty orange, creating a nostalgic flavor reminiscent of summer days.
  • This refreshing treat is ready in under 15 minutes, making it an ideal quick dessert for unexpected guests or hot afternoons.
  • With just 8 simple ingredients, it’s budget-friendly, ensuring you don’t have to break the bank to enjoy a delicious slush.
  • The slush has a perfectly smooth texture, thanks to the combination of ice and ice cream, providing a delightful contrast to the bright citrus flavors.
  • It’s highly customizable; you can easily adjust the sweetness and add fresh herbs for a unique twist that suits your taste.

Ingredients

  • 2 cups orange juice (freshly squeezed or store-bought)
  • 1 cup vanilla ice cream
  • 1 cup crushed ice
  • 1/2 cup milk (whole or 2%)
  • 1/4 cup granulated sugar (adjust based on sweetness preference)
  • 1 teaspoon vanilla extract
  • Zest of 1 orange (for added flavor)
  • Fresh orange slices and mint leaves (for garnish)

The star of this Frozen Orange Creamsicle Slush is the orange juice, which provides the vibrant, citrusy base. Freshly squeezed juice will yield the brightest flavor, but store-bought options can be just as convenient. If you’re opting for store-bought, choose 100% pure juice with no added sugars for the best results. Another essential ingredient is the vanilla ice cream; it adds creaminess and sweetness. You can substitute it with dairy-free ice cream if you’re looking for a vegan option. Whole or 2% milk complements the ice cream, creating a smooth blend. If you want a lower-calorie version, almond or oat milk can be good alternatives.

Lastly, the granulated sugar can be adjusted based on your sweetness preference. If you prefer a more natural sweetener, consider using honey or agave syrup. The orange zest enhances the flavor profile, providing an aromatic pop that brings the whole slush together. Don’t skip it! It adds an extra layer of brightness that makes this slush truly special.

Step-by-Step Instructions

  1. Start by preparing your ingredients. Gather 2 cups of orange juice, 1 cup of vanilla ice cream, and 1 cup of crushed ice. Make sure the ice is finely crushed, as larger chunks can make blending difficult.
  2. In a blender, combine the orange juice, vanilla ice cream, crushed ice, and 1/2 cup of milk. Add 1/4 cup of granulated sugar and 1 teaspoon of vanilla extract. If you like a sweeter slush, consider adding a bit more sugar at this stage.
  3. Add the zest of 1 orange to the blender. This step is crucial for enhancing the citrus flavor of your slush. Make sure not to include the bitter white pith—only the flavorful zest.
  4. Blend the mixture on medium-high speed for about 30-45 seconds. Stop once the ingredients are fully combined and the slush has a smooth, even consistency. If you notice large chunks of ice, blend for an additional 10-15 seconds. Avoid over-blending, as this can make the slush too liquidy.
  5. Once blended, taste the slush. If it needs more sweetness, add a little more sugar and blend for a few more seconds. If it’s too thick, you can add a splash of milk to reach your desired consistency.
  6. Pour the slush into glasses. This recipe typically serves 4, but you can easily double it for larger gatherings. Use a spoon to help guide the slush into the glasses if needed.
  7. Garnish each serving with fresh orange slices and mint leaves. The mint not only adds a pop of color but also a refreshing aroma that complements the citrus flavors beautifully.
  8. Serve immediately and enjoy! If you’ve made extra, you can refrigerate it for a short time, but it’s best enjoyed fresh.

Pro Tips for the Best Frozen Orange Creamsicle Slush

  • Don’t skip the orange zest! It’s a game-changer for flavor. Always zest before juicing to make it easier.
  • Use a high-powered blender for the best texture. A standard blender may struggle with ice, leading to uneven consistency. If you have a food processor, that can work too, but ensure the ice is finely crushed.
  • Adjust the ice-to-liquid ratio carefully. If your slush is too thick, it won’t blend well. Start with less ice and add more until you reach your preferred texture.
  • Be cautious with the sugar! Always start with the lower amount, as you can easily add more, but it’s hard to fix an overly sweet slush.
  • For a fun twist, consider adding a splash of coconut milk or a handful of fresh fruit like strawberries or pineapple. This not only enhances the flavor but also adds a beautiful color contrast.

Variations & Serving Ideas

There are countless ways to put a spin on your Frozen Orange Creamsicle Slush. Consider making a tropical version by adding in some pineapple juice or coconut milk for a delightful tropical twist. If you’re feeling adventurous, try incorporating a handful of frozen mango or peach slices for added sweetness. For a lighter version, swap out the vanilla ice cream for Greek yogurt for a creamy yet tangy alternative.

As for serving ideas, this refreshing slush pairs wonderfully with light summer dishes like grilled chicken skewers, fish tacos, or a simple salad topped with citrus vinaigrette. The bright, zesty flavors of the slush complement these dishes perfectly, making them an ideal pairing for a sunny day.

Storage, Make-Ahead & Reheating

This Frozen Orange Creamsicle Slush is best enjoyed fresh, but if you have leftovers, you can store them in an airtight container in the fridge for up to 2 days. Just keep in mind that the slush may lose some of its texture over time as the ice melts. It doesn’t freeze well, as the ice will turn into a solid block. If you must freeze it, blend again after thawing to restore the slushy consistency. This treat is best the day you make it, as the flavors meld together beautifully overnight, enhancing its deliciousness.

Frequently Asked Questions

Can I make Frozen Orange Creamsicle Slush ahead of time?

Yes — in fact, it tastes even better the next day as the flavors meld. However, it’s best to enjoy it fresh, as the texture can change if stored for too long. If you need to prepare it ahead, keep it in the fridge and re-blend before serving.

What kind of orange juice should I use?

For the best flavor, use freshly squeezed orange juice. However, if you’re short on time, opt for 100% pure store-bought juice without added sugars. This will ensure that your slush remains flavorful and refreshing.

Can I substitute the vanilla ice cream?

Absolutely! If you’re looking for a dairy-free option, coconut milk ice cream or a non-dairy vanilla ice cream can work wonderfully. They will still provide the creamy texture and sweetness you desire.

How can I adjust the sweetness of my slush?

You can easily adjust the sweetness by modifying the amount of sugar added. Start with 1/4 cup and taste the mixture before blending. If you prefer it sweeter, add more sugar gradually until it reaches your desired level.

What should I do if my slush is too thick?

If your slush is too thick, simply add a splash of milk or orange juice and blend again. This will help achieve a more drinkable consistency while maintaining the slushy texture. Adjust gradually to reach your preferred thickness.

Sun-Kissed Frozen Orange Cream Slush

Final Thoughts

The Frozen Orange Creamsicle Slush is a delightful blend of refreshing citrus and creamy goodness, making it a perfect treat for warm days or any time you crave a taste of nostalgia. The way the bright orange flavor dances with the creamy texture truly elevates this slush, transforming it into a satisfying escape from the everyday.

This is the kind of recipe I come back to again and again, especially when I’m looking to cool down or impress guests at a summer gathering. It’s simple to make and always brings smiles all around! I encourage you to try this recipe for yourself—don’t hesitate to share your results or even put your own spin on it. Happy slushing!

Print
clock clock iconcutlery cutlery iconflag flag iconfolder folder iconinstagram instagram iconpinterest pinterest iconfacebook facebook iconprint print iconsquares squares iconheart heart iconheart solid heart solid icon

Frozen Orange Creamsicle Slush


  • Author: Lily author
  • Total Time: 15 minutes
  • Yield: 4 servings 1x
Pin Recipe
Print Recipe

Description

This Frozen Orange Creamsicle Slush is a refreshing treat that combines creamy vanilla and zesty orange flavors. Perfect for hot summer days, it brings back nostalgic memories with every sip.


Ingredients

Scale
  • 2 cups orange juice (freshly squeezed or store-bought)
  • 1 cup vanilla ice cream
  • 1 cup crushed ice
  • 1/2 cup milk (whole or 2%)
  • 1/4 cup granulated sugar (adjust based on sweetness preference)
  • 1 teaspoon vanilla extract
  • Zest of 1 orange (for added flavor)
  • Fresh orange slices and mint leaves (for garnish)

Instructions

  1. Start by preparing your ingredients. Gather 2 cups of orange juice, 1 cup of vanilla ice cream, and 1 cup of crushed ice. Make sure the ice is finely crushed, as larger chunks can make blending difficult.
  2. In a blender, combine the orange juice, vanilla ice cream, crushed ice, and 1/2 cup of milk. Add 1/4 cup of granulated sugar and 1 teaspoon of vanilla extract. If you like a sweeter slush, consider adding a bit more sugar at this stage.
  3. Add the zest of 1 orange to the blender. This step is crucial for enhancing the citrus flavor of your slush. Make sure not to include the bitter white pith—only the flavorful zest.
  4. Blend the mixture on medium-high speed for about 30-45 seconds. Stop once the ingredients are fully combined and the slush has a smooth, even consistency. If you notice large chunks of ice, blend for an additional 10-15 seconds. Avoid over-blending, as this can make the slush too liquidy.
  5. Once blended, taste the slush. If it needs more sweetness, add a little more sugar and blend for a few more seconds. If it’s too thick, you can add a splash of milk to reach your desired consistency.
  6. Pour the slush into glasses. This recipe typically serves 4, but you can easily double it for larger gatherings. Use a spoon to help guide the slush into the glasses if needed.
  7. Garnish each serving with fresh orange slices and mint leaves. The mint not only adds a pop of color but also a refreshing aroma that complements the citrus flavors beautifully.
  8. Serve immediately and enjoy! If you’ve made extra, you can refrigerate it for a short time, but it's best enjoyed fresh.
  • Prep Time: 15 min
  • Cook Time: 0 min
  • Category: Dessert
  • Method: Blending
  • Cuisine: American

Nutrition

  • Serving Size: 1 serving
  • Calories: 200
  • Sugar: 30 g
  • Sodium: 50 mg
  • Fat: 5 g
  • Saturated Fat: 3 g
  • Unsaturated Fat: 2 g
  • Trans Fat: 0 g
  • Carbohydrates: 40 g
  • Fiber: 1 g
  • Protein: 2 g
  • Cholesterol: 20 mg

Keywords: Don't skip the orange zest! It's a game-changer for flavor. Always zest before juicing to make it easier.

Did you make this recipe?

Share a photo and tag us — we can't wait to see what you've made!

Zesty Lemon Poppy Seed Delight

One rainy afternoon, I found myself in my grandmother’s cozy kitchen, the kind that always smelled like warmth and love. She was whipping up her famous Lemon Poppy Seed Loaf, a recipe that had been passed down through generations. As the batter came together, the zesty aroma of fresh lemons filled the air, mingling perfectly with the nutty fragrance of poppy seeds. I can still picture her, apron-clad, as she expertly drizzled a vibrant citrus icing over the loaf, creating a glossy, sun-kissed finish that beckoned us to dive in. It was a moment that sparked my own passion for baking, and this recipe has become a cherished staple in my home ever since.

When you take a bite of this Lemon Poppy Seed Loaf, it’s like a burst of sunshine on your palate. The loaf is beautifully golden, with a tender crumb that melts in your mouth. Each slice is speckled with tiny poppy seeds, adding a delightful crunch that contrasts beautifully with the tangy sweetness of the lemon. And that citrus icing? It’s the finishing touch that elevates this loaf from ordinary to extraordinary, with its bright, zesty flavor dancing on your taste buds.

This recipe stands out because it embraces simplicity while delivering on flavor. I’ve added a hint of vanilla to the batter, enhancing the overall taste and making it even more indulgent. Trust me, once you make this Lemon Poppy Seed Loaf With Citrus Icing, it’ll become a go-to in your baking repertoire.

So, let me show you exactly how to make it!

Zesty Lemon Poppy Seed Delight

Why You’ll Love This Recipe

  • Moist and tender crumb that melts in your mouth, thanks to the perfect balance of butter and buttermilk.
  • Bright, zesty lemon flavor paired with crunchy poppy seeds, creating a delightful texture and taste experience.
  • Easy to whip up in just about an hour, perfect for last-minute gatherings or a cozy afternoon treat.
  • Budget-friendly with everyday ingredients, making it an accessible option for all home bakers.
  • The citrus icing adds a sweet tang that elevates the loaf, turning a simple recipe into a showstopper!

Ingredients

  • 1 ½ cups (190g) all-purpose flour
  • 1 teaspoon baking powder
  • ½ teaspoon baking soda
  • ½ teaspoon salt
  • 3 tablespoons poppy seeds
  • ½ cup (115g) unsalted butter, softened to room temperature
  • 1 cup (200g) granulated sugar
  • 2 large eggs
  • 1 teaspoon vanilla extract
  • 1 teaspoon lemon zest (from about 1 medium lemon)
  • ½ cup (120ml) buttermilk
  • 2 tablespoons fresh lemon juice

For the Citrus Icing:

  • 1 cup (120g) powdered sugar
  • 2 tablespoons fresh lemon juice
  • 1 tablespoon orange juice
  • 1 teaspoon lemon zest (for garnish, optional)

Let’s dive into the key ingredients that make this Lemon Poppy Seed Loaf so special. The all-purpose flour provides the structure and base for the loaf, while the baking powder and baking soda ensure it rises perfectly, giving the loaf a light texture. For a gluten-free variation, you could substitute the flour with a gluten-free all-purpose blend. Poppy seeds not only add a delightful crunch but also contribute to the unique flavor profile that pairs well with the citrus notes.

Unsalted butter is crucial for achieving the buttery richness that makes this loaf so moist. If you’re looking for a dairy-free option, coconut oil or a vegan butter can be used instead. The buttermilk is another essential component, providing acidity that activates the baking soda for a fluffy texture. If you don’t have buttermilk on hand, you can easily make a substitute by mixing ½ cup of milk with 1 tablespoon of vinegar or lemon juice and letting it sit for about 5 minutes.

Step-by-Step Instructions

  1. Preheat your oven to 350°F (175°C). Grease a 9×5-inch loaf pan or line it with parchment paper for easy removal later.
  2. In a medium mixing bowl, whisk together 1 ½ cups of all-purpose flour, 1 teaspoon of baking powder, ½ teaspoon of baking soda, ½ teaspoon of salt, and 3 tablespoons of poppy seeds. This helps to evenly distribute the baking agents and ensures a uniform rise.
  3. In a large mixing bowl, cream together ½ cup of softened unsalted butter and 1 cup of granulated sugar using an electric mixer on medium speed for about 3-4 minutes, until the mixture is light and fluffy. Make sure to scrape down the sides of the bowl occasionally.
  4. Add 2 large eggs, 1 teaspoon of vanilla extract, and 1 teaspoon of lemon zest to the creamed butter and sugar, mixing until fully combined. You want a smooth consistency, so ensure there are no lumps of butter.
  5. In a small bowl, combine ½ cup of buttermilk and 2 tablespoons of fresh lemon juice. Alternately add the dry ingredients and buttermilk mixture to the butter mixture, starting and ending with the dry ingredients. Mix just until combined; do not overmix, as this can lead to a dense loaf.
  6. Pour the batter into the prepared loaf pan. Smooth the top with a spatula, ensuring it’s even. Bake in the preheated oven for 50-60 minutes, or until a toothpick inserted in the center comes out clean. The edges should be lightly golden brown, and the center should feel just set.
  7. Once baked, remove the loaf from the oven and allow it to cool in the pan for about 10 minutes. Then, transfer it to a wire rack to cool completely. Resist the urge to slice too soon, as it will be crumbly if it’s still warm.
  8. While the loaf is cooling, prepare the citrus icing. In a medium bowl, whisk together 1 cup of powdered sugar, 2 tablespoons of fresh lemon juice, and 1 tablespoon of orange juice until smooth. If the icing is too thick, you can add a little more juice to reach your desired consistency.
  9. Once the loaf is completely cool, drizzle the citrus icing over the top. If you like, sprinkle with an additional teaspoon of lemon zest for an extra pop of flavor and color.

Pro Tips for the Best Lemon Poppy Seed Loaf With Citrus Icing

  • Be careful not to overmix your batter; this is a common mistake that can lead to a dense loaf. Mix just until the dry ingredients are incorporated for a light and fluffy texture.
  • Use room temperature ingredients, especially the butter and eggs. This helps to create a smoother batter and ensures even baking. Take your eggs out of the fridge about 30 minutes before you start.
  • For a more pronounced lemon flavor, consider adding a little lemon extract in addition to the zest and juice. Just a half teaspoon can elevate the citrus notes significantly.
  • When measuring your flour, spoon it into the measuring cup and level it off with a knife instead of scooping directly from the bag. This prevents packing and ensures you don’t end up with a dry loaf.
  • Invest in a good quality loaf pan; it makes a difference in heat distribution, which ensures even baking. If your pan is dark-coated, reduce the oven temperature by 25°F to prevent over-browning.

Variations & Serving Ideas

For a delightful twist, consider adding blueberries or raspberries to the batter for a fruity burst of flavor. You can also experiment with different citrus fruits—try lime or grapefruit zest and juice for a refreshing change. For a healthier option, substitute half of the all-purpose flour with whole wheat flour for added fiber without compromising too much on texture.

This Lemon Poppy Seed Loaf pairs beautifully with a light salad, such as a mixed greens salad with a vinaigrette, or a cup of tea for a cozy afternoon treat. It also complements a creamy cheese platter, as the acidity of the loaf balances rich cheeses perfectly. Lastly, a scoop of vanilla ice cream on the side creates a delightful contrast of temperatures and flavors!

Storage, Make-Ahead & Reheating

This Lemon Poppy Seed Loaf can be stored at room temperature for up to 3 days if wrapped tightly in plastic wrap. If you want to keep it longer, it freezes well for up to 3 months. To freeze, wrap the loaf tightly in plastic wrap and then in aluminum foil to prevent freezer burn.

When you’re ready to enjoy it again, simply thaw it in the fridge overnight. Reheat individual slices in the microwave for 15-20 seconds or in a toaster oven until warmed through. Interestingly, many people find that this loaf tastes even better the next day, as the flavors have time to meld!

Frequently Asked Questions

Can I make Lemon Poppy Seed Loaf With Citrus Icing ahead of time?

Yes — in fact, it tastes even better the next day! You can make the loaf a day in advance, allowing the flavors to develop. Just be sure to store it in an airtight container to maintain its moisture.

Can I substitute the poppy seeds?

Absolutely! If you don’t have poppy seeds on hand or prefer an alternative, you can use sesame seeds for a similar crunch or omit them entirely for a smooth loaf.

What can I use instead of buttermilk?

If you don’t have buttermilk, you can easily create a substitute by mixing ½ cup of milk (dairy or plant-based) with 1 tablespoon of vinegar or lemon juice. Let it sit for 5 minutes before using in the recipe.

How can I make this recipe gluten-free?

To make a gluten-free version of this Lemon Poppy Seed Loaf, substitute the all-purpose flour with a gluten-free all-purpose flour blend. Just ensure that the blend contains a binding agent like xanthan gum for the best results.

What is the best way to store leftover loaf?

Leftover Lemon Poppy Seed Loaf should be stored in an airtight container at room temperature for up to 3 days. For longer storage, wrap it tightly and freeze for up to 3 months. Thaw it before serving for the best texture.

Zesty Lemon Poppy Seed Delight

Final Thoughts

The Lemon Poppy Seed Loaf with Citrus Icing is truly a delightful treat that brings a burst of brightness to any occasion. The zesty lemon flavor combined with the subtle crunch of poppy seeds creates a satisfying balance, while the citrus icing adds a touch of sweetness that perfectly complements the loaf’s tanginess.

This is the kind of recipe I come back to again and again, especially when I want to brighten up a gloomy day or celebrate a small victory. The aroma that fills the kitchen as it bakes is absolutely heavenly! I encourage you to give this recipe a try; you might just find it becoming a beloved staple in your home. Don’t forget to share your results or even add your own unique twist—I can’t wait to see what you create!

Print
clock clock iconcutlery cutlery iconflag flag iconfolder folder iconinstagram instagram iconpinterest pinterest iconfacebook facebook iconprint print iconsquares squares iconheart heart iconheart solid heart solid icon

Lemon Poppy Seed Loaf


  • Author: Lily author
  • Total Time: 36 minute
  • Yield: 1 loaf 1x
Pin Recipe
Print Recipe

Description

This Lemon Poppy Seed Loaf is a delightful treat that combines zesty lemon flavor with crunchy poppy seeds. Topped with a citrus icing, it’s perfect for any occasion.


Ingredients

Scale
  • 1 ½ cups (190g) all-purpose flour
  • 1 teaspoon baking powder
  • ½ teaspoon baking soda
  • ½ teaspoon salt
  • 3 tablespoons poppy seeds
  • ½ cup (115g) unsalted butter, softened to room temperature
  • 1 cup (200g) granulated sugar
  • 2 large eggs
  • 1 teaspoon vanilla extract
  • 1 teaspoon lemon zest (from about 1 medium lemon)
  • ½ cup (120ml) buttermilk
  • 2 tablespoons fresh lemon juice
  • 1 cup (120g) powdered sugar
  • 2 tablespoons fresh lemon juice
  • 1 tablespoon orange juice
  • 1 teaspoon lemon zest (for garnish, optional)

Instructions

  1. Preheat your oven to 350°F (175°C). Grease a 9×5-inch loaf pan or line it with parchment paper for easy removal later.
  2. In a medium mixing bowl, whisk together 1 ½ cups of all-purpose flour, 1 teaspoon of baking powder, ½ teaspoon of baking soda, ½ teaspoon of salt, and 3 tablespoons of poppy seeds. This helps to evenly distribute the baking agents and ensures a uniform rise.
  3. In a large mixing bowl, cream together ½ cup of softened unsalted butter and 1 cup of granulated sugar using an electric mixer on medium speed for about 3-4 minutes, until the mixture is light and fluffy. Make sure to scrape down the sides of the bowl occasionally.
  4. Add 2 large eggs, 1 teaspoon of vanilla extract, and 1 teaspoon of lemon zest to the creamed butter and sugar, mixing until fully combined. You want a smooth consistency, so ensure there are no lumps of butter.
  5. In a small bowl, combine ½ cup of buttermilk and 2 tablespoons of fresh lemon juice. Alternately add the dry ingredients and buttermilk mixture to the butter mixture, starting and ending with the dry ingredients. Mix just until combined; do not overmix, as this can lead to a dense loaf.
  6. Pour the batter into the prepared loaf pan. Smooth the top with a spatula, ensuring it’s even. Bake in the preheated oven for 50-60 minutes, or until a toothpick inserted in the center comes out clean. The edges should be lightly golden brown, and the center should feel just set.
  7. Once baked, remove the loaf from the oven and allow it to cool in the pan for about 10 minutes. Then, transfer it to a wire rack to cool completely. Resist the urge to slice too soon, as it will be crumbly if it’s still warm.
  8. While the loaf is cooling, prepare the citrus icing. In a medium bowl, whisk together 1 cup of powdered sugar, 2 tablespoons of fresh lemon juice, and 1 tablespoon of orange juice until smooth. If the icing is too thick, you can add a little more juice to reach your desired consistency.
  9. Once the loaf is completely cool, drizzle the citrus icing over the top. If you like, sprinkle with an additional teaspoon of lemon zest for an extra pop of flavor and color.
  • Prep Time: 15 mins
  • Cook Time: 50-60 mins
  • Category: Dessert
  • Method: Baking
  • Cuisine: American

Nutrition

  • Serving Size: 1 slice
  • Calories: 200
  • Sugar: 15 g
  • Sodium: 150 mg
  • Fat: 8 g
  • Saturated Fat: 5 g
  • Unsaturated Fat: 3 g
  • Trans Fat: 0 g
  • Carbohydrates: 30 g
  • Fiber: 1 g
  • Protein: 3 g
  • Cholesterol: 40 mg

Keywords: Be careful not to overmix your batter; this is a common mistake that can lead to a dense loaf. Use room temperature ingredients for a smoother batter and even baking.

Did you make this recipe?

Share a photo and tag us — we can't wait to see what you've made!

  • Privacy Policy
  • Terms Of Service
  • Contact
  • About
  • GDPR

Copyright © 2025 Homesmad