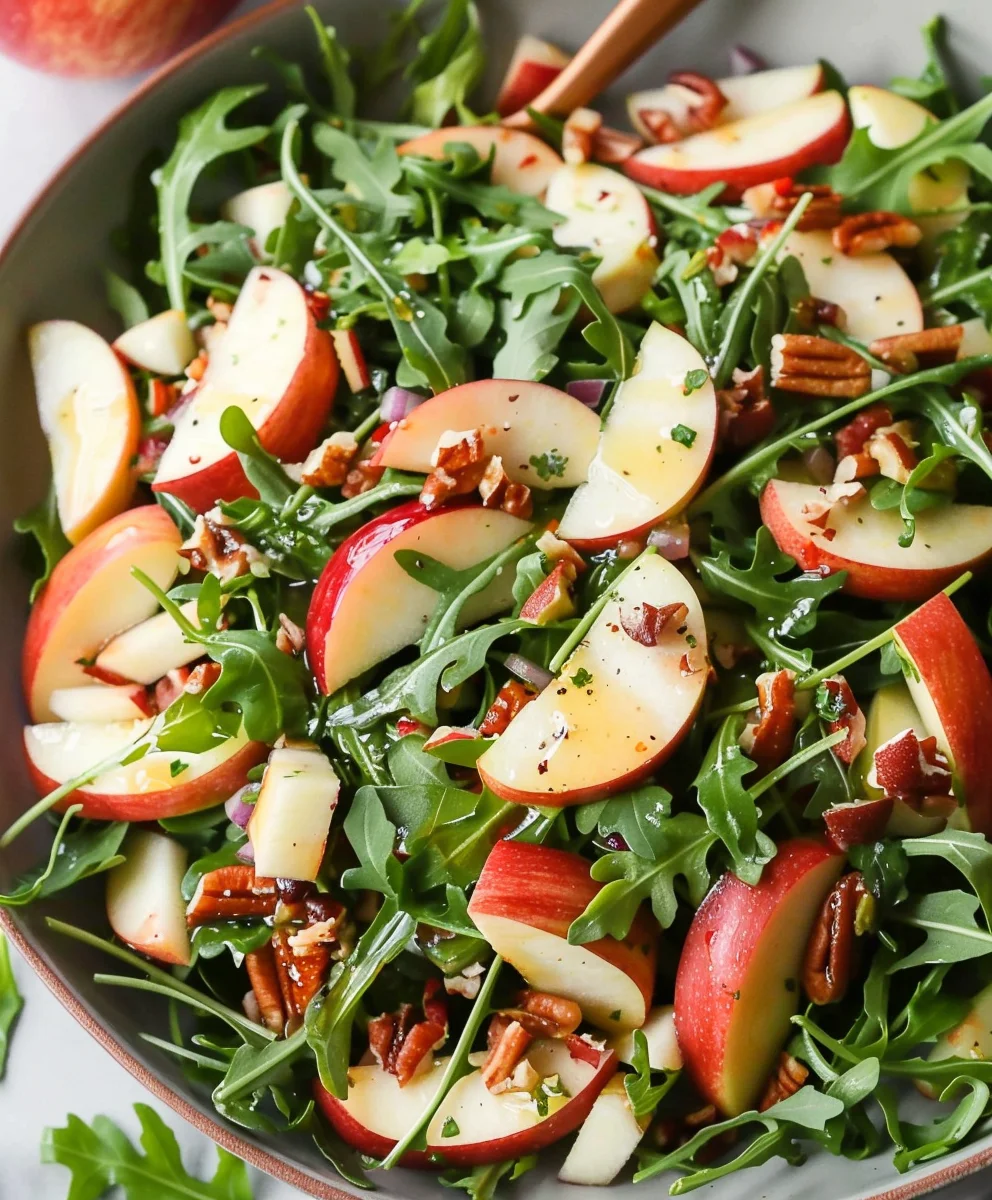
Apple Arugula Salad is more than just a side dish; it’s a vibrant symphony of flavors and textures that promises to elevate any meal from ordinary to extraordinary. Have you ever craved a dish that is both refreshingly light and surprisingly satisfying? One that cleanses the palate while still offering a delightful complexity, perfect for any season? I am thrilled to share my insights into this remarkable creation, a personal favorite that perfectly embodies the joy of simple, fresh ingredients coming together in exquisite harmony.
While the exact origins of combining crisp apples with the peppery punch of arugula in a single salad might be a more modern culinary innovation, both ingredients boast a rich and fascinating heritage. Arugula, or ‘rocket’ as it’s known in some parts of the world, was cherished by ancient Romans for its distinctive, slightly spicy flavor and believed health properties. Apples, on the other hand, have been a staple fruit across cultures for millennia, symbolizing health, vitality, and often, new beginnings. This contemporary pairing brilliantly marries these time-honored elements into a truly harmonious and refreshing experience.
People absolutely adore this dish for countless reasons, and I believe it’s the masterful contrast that truly shines. The sweet, juicy crunch of freshly sliced apples beautifully mellows the assertive, slightly bitter notes of the peppery arugula, creating a balanced flavor profile that tantalizes the taste buds. Add to that the vibrant colors and the incredible versatility – it’s a salad that feels gourmet yet takes mere minutes to prepare. Whether you’re looking for a quick, healthy lunch, a bright and zesty accompaniment to a rich dinner, or a stunning addition to your holiday spread, the Apple Arugula Salad consistently delivers a burst of freshness that delights the senses and leaves a lasting impression. Its effortless elegance and undeniable deliciousness make it a truly beloved choice for any occasion.

Ingredients:
- For the Salad Base:
- 5 ounces (approx. 5-6 cups) fresh arugula: I always look for vibrant green leaves, ensuring they’re crisp and free from any wilting. Arugula provides that wonderful peppery kick that truly defines this Apple Arugula Salad, offering a delightful contrast to the sweetness of the apples.
- 2 medium-sized apples: My personal favorites for this recipe are Honeycrisp or Fuji for their perfect balance of sweetness and crispness. Their firm texture holds up beautifully in the salad. Granny Smith apples also work wonderfully if you prefer a tart contrast that brightens the entire dish.
- 1/2 cup crumbled goat cheese or feta cheese: The creamy tang of fresh goat cheese is simply divine here, melting slightly into the dressing and creating pockets of rich flavor. However, crumbled feta offers a saltier, sharper counterpoint if that’s more your style, adding a Mediterranean twist.
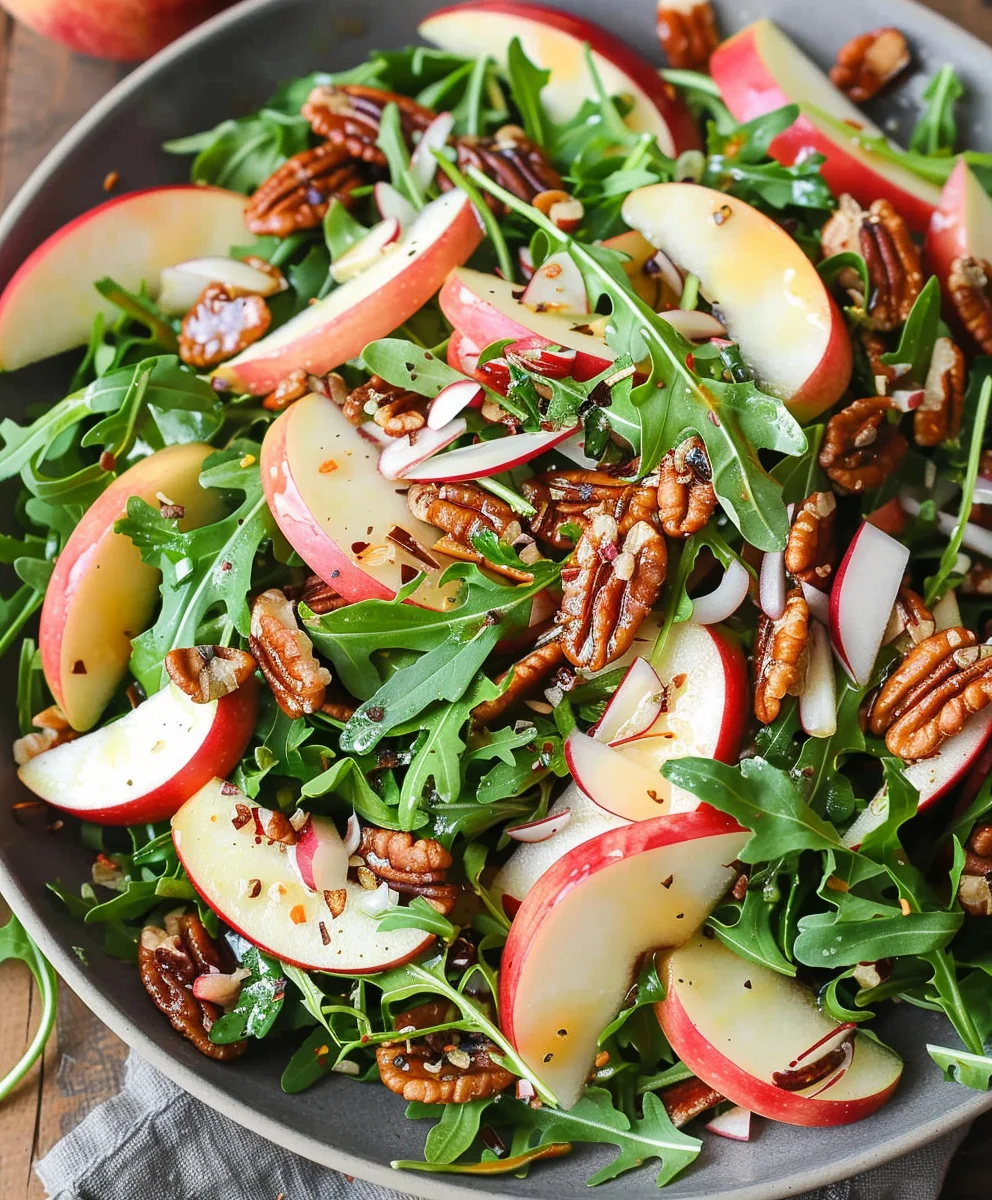
- 1/2 cup toasted walnuts or pecans: Toasting the nuts brings out their inherent nutty flavor, deepens their color, and adds an incredible depth and satisfying crunch. I usually give them a quick toast in a dry pan for a few minutes until fragrant and slightly golden.
- 1/4 cup dried cranberries or cherries (optional): These jewel-toned additions bring a lovely chewiness and a touch of concentrated sweetness to the salad, complementing the apples and arugula beautifully. They also add a pop of color.
- 1/4 medium red onion, very thinly sliced (optional, but highly recommended): A little red onion adds a sharp, zesty bite that really wakes up the palate and cuts through the richness of the cheese. If you find raw onion too strong, a quick soak in cold water for 10 minutes can significantly mellow out its pungency.
- For the Honey-Dijon Vinaigrette:
- 1/4 cup extra virgin olive oil: Choose a good quality extra virgin olive oil, as its nuanced flavor will shine through and form the luxurious base of our dressing. It’s truly worth investing in a brand you love.
- 2 tablespoons apple cider vinegar: This vinegar is a star player in our vinaigrette. It pairs perfectly with the apples in our Apple Arugula Salad, enhancing their natural sweetness while providing a crucial tangy balance.
- 1 tablespoon Dijon mustard: More than just flavor, Dijon mustard acts as a natural emulsifier, helping our dressing come together smoothly and preventing it from separating. It also adds a wonderful savory depth and a subtle spicy kick.
- 1 tablespoon honey or maple syrup: For that essential touch of sweetness to balance the tang of the vinegar and the sharpness of the mustard. Adjust this to your personal preference – some like it sweeter, some less so.
- 1 small clove garlic, minced (optional): I love the subtle warmth and aromatic complexity fresh garlic adds to a dressing. It’s a small addition that makes a big difference.
- 1/2 teaspoon sea salt: Or to taste. Salt is vital for bringing out all the flavors in the dressing and the salad itself. Start with this amount and adjust as needed.
- 1/4 teaspoon freshly ground black pepper: Again, adjust to your liking. Freshly ground pepper offers a more vibrant aroma and flavor compared to pre-ground versions.
Preparing Our Fresh Ingredients
- Wash and Dry the Arugula: First things first, we need to get our beautiful arugula ready. I like to gently rinse the 5 ounces of fresh arugula under cool running water, making sure to remove any soil or debris. It’s absolutely crucial to ensure it’s completely dry afterward, as any excess water clinging to the leaves can significantly dilute our lovely dressing, leading to a less flavorful and watery salad. I usually rely on my trusty salad spinner for this; it’s a kitchen gadget I truly can’t live without for fresh greens! If you don’t have one, a clean kitchen towel or several layers of paper towels will do the trick – just gently pat the leaves dry without bruising them. Once thoroughly dry, set the arugula aside in a large mixing bowl; this will be our vibrant and peppery base for the amazing Apple Arugula Salad.
- Prepare the Apples: Now for the star of the show, the apples! Take your two medium-sized apples – whether they’re the crisp Honeycrisp, the sweet Fuji, or the tart Granny Smith – and give them a good wash under cool water. I don’t typically peel my apples for this recipe, as the skin adds both beautiful color and extra fiber, contributing to the overall texture and nutritional value. However, feel free to peel them if you prefer a smoother bite. Carefully core the apples, then slice them into thin, even wedges or dice them into bite-sized pieces, whichever you find more appealing. I personally find thin slices work wonderfully for an elegant presentation and ensure you get a delightful bit of apple in every single forkful of your Apple Arugula Salad. To prevent the apple slices from browning, you can toss them gently with a very light squeeze of lemon juice, though for a salad that’s usually assembled just before serving, I often find it’s not entirely necessary as they’ll be eaten quickly. Set these prepared apples aside with your arugula.
- Crumble the Cheese: If you’re using a block of fresh goat cheese or a firmer block of feta, take your 1/2 cup portion and carefully crumble it directly into a small bowl. The goal is to achieve small, irregular pieces that will distribute nicely throughout the salad. If you’ve bought it pre-crumbled, fantastic! Just ensure it’s ready to go. The creamy texture and delightful tangy flavor of the cheese are going to be a delightful, rich counterpoint to the peppery arugula and the crisp, sweet apples. This element adds a wonderful depth and richness that truly makes the salad sing.
- Toast the Nuts (if not pre-toasted): If your walnuts or pecans aren’t already toasted (and if they aren’t, I highly recommend this step!), this is a quick and easy process that makes a huge difference in flavor and aroma. Heat a dry, non-stick skillet over medium-low heat. Add your 1/2 cup of nuts and toast them for about 3-5 minutes, stirring frequently to ensure even browning and prevent burning. You’ll know they’re ready when they become wonderfully fragrant and lightly golden. Be careful not to burn them; they can go from perfectly toasted to burnt very quickly! Once toasted, immediately remove them from the hot pan and spread them out on a plate to cool completely. This cooling step is crucial for maintaining their crisp texture when they are finally added to our beautiful salad.
- Slice the Red Onion (if using): If you’re opting for the optional 1/4 medium red onion, which I often do for that extra zing, slice it as thinly as you possibly can. A mandoline slicer is excellent for achieving paper-thin slices, but a sharp chef’s knife and a steady hand work just fine. Thinness is key here to ensure the onion’s flavor isn’t overwhelming. If you happen to be sensitive to the sharpness or pungency of raw onion, a little trick I often use is to place the slices in a small bowl of ice water for about 10-15 minutes. This simple step helps to significantly mellow out their strong flavor. After soaking, drain them thoroughly and pat dry with paper towels before adding them to your salad.
Crafting the Perfect Honey-Dijon Vinaigrette
- Gather Your Dressing Ingredients: For this delightfully bright and perfectly balanced Honey-Dijon Vinaigrette, we’ll need our 1/4 cup extra virgin olive oil, 2 tablespoons apple cider vinegar, 1 tablespoon Dijon mustard, 1 tablespoon honey or maple syrup, 1 small clove garlic (if you’re using it for that extra depth), 1/2 teaspoon sea salt, and 1/4 teaspoon freshly ground black pepper. Having everything measured out and at hand makes the process smooth and enjoyable.
- Combine the Wet Ingredients (and aromatics): In a small bowl or, my preference, a jar with a tight-fitting lid, combine the apple cider vinegar, Dijon mustard, honey or maple syrup, the finely minced garlic (if using), sea salt, and freshly ground black pepper. I truly love using a jar for making dressings because it makes shaking everything together so incredibly easy and effective, resulting in a perfectly emulsified dressing without much effort.
- Whisk or Shake to Emulsify: Begin by whisking these ingredients together vigorously until they are well combined and the honey has fully dissolved. If you’re using a jar, simply put on the lid and shake it like you mean it for about 30 seconds! We want to ensure the Dijon mustard and honey are fully incorporated with the vinegar, forming a cohesive base before we introduce the oil.
- Slowly Drizzle in the Olive Oil: This is where the magic of emulsification truly happens, transforming simple ingredients into a luscious dressing. While continuously whisking with a fork or a small whisk (or shaking between additions if using a jar), slowly drizzle in the 1/4 cup of extra virgin olive oil. Do not rush this step! Adding the oil slowly and steadily helps the dressing thicken and become beautifully creamy and cohesive, rather than separating into distinct layers. Continue to whisk or shake until the vinaigrette is smooth, cohesive, and slightly thickened – a lovely, uniform consistency. Once it’s emulsified, take a moment to taste it. Adjust seasonings as needed – perhaps a little more salt to enhance the flavors, a dash more pepper for a gentle kick, or a touch more honey for sweetness, depending entirely on your personal preference. This homemade dressing is truly what elevates our Apple Arugula Salad to restaurant quality, with a freshness that store-bought simply cannot match.
Assembling Your Beautiful Apple Arugula Salad
- Combine the Core Salad Components: In the large mixing bowl where you have your wonderfully dry and peppery arugula, gently add the prepared apple slices or diced pieces. Next, carefully sprinkle in the crumbled goat cheese or feta, ensuring it’s evenly distributed. Then, add the perfectly toasted nuts, and the vibrant dried cranberries or cherries (if you’ve chosen to include them). If you decided to add the thinly sliced red onion for that extra zest, now is the perfect time to add that in as well. At this stage, the bowl should be a beautiful mosaic of colors and textures, all ready for the final step.
- Dress the Apple Arugula Salad: This is a crucial step to ensure every single delicate arugula leaf and every piece of fruit and cheese gets perfectly coated with our delicious, homemade vinaigrette. Before pouring, give your Honey-Dijon Vinaigrette one final shake or whisk, as sometimes the ingredients can settle a little. I usually start by drizzling about half to two-thirds of the dressing evenly over all the salad ingredients. It’s always better to start with less; you can always add more later, but you can’t take it away!
- Toss Gently but Thoroughly: Using two large spoons or, if you prefer a more hands-on approach, clean hands (ensure they are very clean!), gently toss all the ingredients together. The goal here is to evenly distribute the dressing, apples, cheese, nuts, and any other delicious additions without bruising the delicate arugula leaves. Toss until everything looks lightly coated and beautifully integrated. Add more dressing, a little at a time, if you feel it needs it – but remember, a lightly dressed salad allows the fresh, natural flavors of the ingredients to truly shine through in this Apple Arugula Salad. Over-dressing can make the salad heavy and soggy.
- Final Check: Take a moment to admire your handiwork. Are the colors vibrant and appealing? Is everything well distributed, promising a delightful mix of flavors and textures in every bite? Does it look absolutely delicious and ready to be devoured? It most certainly should! Your beautifully assembled Apple Arugula Salad is now ready.
Serving and Enjoying Your Culinary Creation
- Immediate Serving is Best: For the absolute best experience, I always recommend serving this Apple Arugula Salad immediately after assembling and dressing. This ensures the arugula remains wonderfully crisp, the apples are fresh and firm, and the dressing is perfectly emulsified and clinging to every ingredient. The vibrant flavors of the peppery arugula, the sweet and crisp apples, the creamy cheese, and the crunchy nuts are truly at their peak right after everything comes together, offering the freshest taste sensation possible.
- Presentation Matters: You can serve the Apple Arugula Salad directly from your large mixing bowl for a more casual, family-style meal, which is often what I do. However, for a more elegant presentation, especially if you’re serving guests, I love to divide it among individual salad plates or shallow bowls. Sometimes I like to sprinkle a few extra toasted nuts, a small amount of freshly crumbled cheese, or an extra tiny drizzle of olive oil on top of each serving for a visually appealing garnish and a final touch of texture. A fresh grind of black pepper also adds a nice, aromatic finish.
- Pairing Suggestions: This incredibly versatile Apple Arugula Salad makes a fantastic light lunch all on its own, especially if you consider adding some grilled chicken breast, sautéed shrimp, or roasted chickpeas for an extra boost of protein, transforming it into a complete and satisfying meal. It also serves as a brilliant and refreshing side dish to a wide variety of main courses – think alongside succulent roasted chicken, flaky grilled fish, tender pork loin, or even a hearty pasta dish. Its bright, refreshing, and tangy profile helps to cut through richer flavors, providing a wonderful palate cleanser and balancing the meal beautifully.
- Storing Leftovers (if any): While I strongly advocate for serving this Apple Arugula Salad fresh to enjoy it at its absolute best, sometimes there are delightful leftovers. If you anticipate having some, a smart strategy is to only dress the portion you plan to eat immediately. Store the undressed components (arugula, apples, cheese, nuts, dried fruits, and onion) separately in airtight containers in the refrigerator. This will keep them fresh and crisp for a longer period. The homemade vinaigrette can be stored in its tightly sealed jar in the refrigerator for up to a week. Dressed salad, however, tends to wilt quickly due to the acidity of the dressing. If you do happen to have dressed leftovers, they are best consumed within a few hours; expect the arugula to lose some of its crispness, but it will still be tasty.
- Experiment and Personalize: One of the greatest joys of home cooking is the freedom to make a recipe truly your own. Don’t be afraid to experiment with this Apple Arugula Salad! Try different types of apples – perhaps a blend of sweet and tart – or vary the cheeses; blue cheese, with its pungent creaminess, is a bold but absolutely delicious choice that complements the apples wonderfully. Experiment with different nuts like pistachios or even homemade candied pecans for an extra special treat. You could even add thinly sliced fennel for an extra layer of crunch and a subtle anise flavor, or a sprinkle of poppy seeds to the dressing for visual interest and a slight textural variation. This Apple Arugula Salad is incredibly adaptable, inviting your personal touch to shine through, allowing you to tailor it perfectly to your taste buds. Remember, the ultimate goal is to create something that you and your loved ones will absolutely adore and keep coming back to. Enjoy every single vibrant, fresh, and utterly delicious bite of this culinary creation!
Conclusion:
And there you have it, my friends! We’ve reached the delicious conclusion of our journey with what I sincerely believe will become one of your absolute favorite recipes. This isn’t just another side dish; it’s a vibrant symphony of flavors and textures, a refreshing escape from the ordinary that promises to elevate any meal. I’ve poured my heart into sharing this with you because the sheer delight of a perfectly balanced bite – the crisp sweetness of apple, the peppery bite of arugula, the satisfying crunch of nuts, and the bright, tangy dressing – is something everyone deserves to experience. It’s light yet incredibly satisfying, proving that healthy eating can, and should, be utterly delectable. Forget the notion that salads are boring; this recipe defies all expectations, transforming simple ingredients into a culinary masterpiece that’s both impressive and surprisingly simple to assemble. It’s perfect for a quick weeknight dinner, elegant enough for a special gathering, and an absolute game-changer for your lunch routine. The unique combination of sweet and savory, with that delightful peppery kick, makes this a truly unforgettable dish.
Serving Suggestions and Creative Variations
One of the many reasons I adore this recipe is its incredible versatility. While it shines beautifully as a standalone side, offering a delightful counterpoint to richer main courses, its potential extends far beyond that. Imagine serving it as a light, refreshing starter before a hearty pasta dish or a slow-roasted chicken. It’s also an ideal candidate for a light lunch, perhaps topped with some grilled protein to make it a complete meal. I often find myself enjoying a generous portion with a simple piece of toasted sourdough bread, and it’s pure bliss. For dinner parties, a beautifully arranged bowl of this vibrant salad instantly brightens the table and tantalizes the taste buds before the main event.
But let’s talk about making it truly your own. The beauty of a great recipe lies in its adaptability, and this one is a fantastic canvas for your culinary creativity. Here are a few ways I love to switch things up:
Cheese Please!
If you’re a cheese lover like me, don’t hesitate to introduce some creamy, tangy goodness. Crumbled goat cheese or feta adds a lovely saltiness and an irresistible creaminess that complements the apples and arugula wonderfully. For a milder, nutty flavor, finely shaved Parmesan or Pecorino Romano can be a delightful addition. Or, if you’re feeling adventurous, a touch of crumbled blue cheese can bring a bold, pungent note that truly elevates the entire dish.
Nutty & Seedy Goodness
The crunch is crucial in this salad, and while the apples contribute significantly, different nuts and seeds can add new dimensions. Toasted walnuts or pecans offer an earthy richness, while candied pecans provide an extra layer of sweetness and crunch. For a more subtle texture and boost of nutrients, try adding sunflower seeds, pepitas (pumpkin seeds), or even slivered almonds. Each brings its own unique character and health benefits to the bowl.
Fruitful Additions
While apples are the star, other fruits can join the party! Sliced pears are a fantastic alternative or addition, offering a softer, delicate sweetness. Dried cranberries or cherries can introduce a chewy texture and a concentrated burst of tart-sweet flavor, especially lovely during the colder months. Pomegranate seeds, when in season, add a jewel-like appearance and a delightful pop of tangy juice with every bite. Even a handful of fresh grapes, halved, can bring a surprisingly juicy sweetness.
Protein Power-Up
To transform this amazing side into a satisfying main course, consider adding a lean protein. Grilled chicken or turkey breast, sliced thinly, is a classic and healthy choice. Pan-seared shrimp or flaked smoked salmon can add a touch of elegance and a different flavor profile. For plant-based options, roasted chickpeas or cannellini beans can provide a hearty texture and protein boost, making this salad incredibly fulfilling for vegetarians and vegans alike.
Greens Get Creative
While arugula is non-negotiable for its signature peppery kick, you can certainly blend it with other greens. A mix of baby spinach, mixed greens, or even some finely chopped curly kale can add varying textures and nutritional benefits. This allows you to customize the intensity of the peppery flavor to your preference, creating a truly unique blend.
Your Turn to Shine!
Now, it’s your moment to shine in the kitchen! I truly hope you feel inspired to gather your ingredients and whip up this sensational Apple Arugula Salad. Don’t be shy about making it your own with the variations I’ve suggested, or even coming up with entirely new combinations! The joy of cooking comes not just from following a recipe, but from experimenting and discovering your personal preferences. I promise you, the reward of that first crisp, sweet, peppery bite is absolutely worth it. It’s an experience that’s sure to delight your taste buds and impress anyone you share it with.
Once you’ve had the chance to try it, I would absolutely love to hear about your experience. Did you add a special ingredient? Did you serve it alongside a particular dish? What was your favorite part? Please share your thoughts and successes! Your feedback truly brightens my day and helps me understand what resonates most with you, my wonderful readers. Don’t hesitate to leave a comment below or even share a photo of your creation – I’m always so thrilled to see your culinary adventures come to life. So go ahead, embrace the freshness, savor the flavors, and enjoy every single bite of this incredible dish. Happy cooking!
Refreshing Apple Arugula Salad: Quick, Healthy Lunch Idea
Apple Arugula Salad is more than just a side dish; it’s a vibrant symphony of flavors and textures that promises to elevate any meal from ordinary to extraordinary. Have you ever craved a dish that is both refreshingly light and surprisingly satisfying? One that cleanses the palate while still offering a delightful complexity, perfect for any season? I am thrilled to share my insights into this remarkable creation, a personal favorite that perfectly embodies the joy of simple, fresh ingredients coming together in exquisite harmony.
Ingredients
-
3 apples, thinly sliced
-
5 oz arugula
-
1/4 cup red onion, thinly sliced
-
1/2 cup chopped figs
-
1/2 cup goat cheese crumbles
-
1 cup pecans
-
2 Tbsp maple syrup (for pecans)
-
1/2 cup extra virgin olive oil
-
3 Tbsp balsamic vinegar
-
1 1/2 tsp Dijon mustard
-
2 tsp maple syrup (for dressing)
-
1 garlic clove, minced
-
Pinch sea salt
-
1/2 tsp black pepper
Instructions
-
Step 1
Wash and thoroughly dry 5 oz arugula. Wash, core, and thinly slice 3 apples. (Optional: Toss apples with a squeeze of lemon juice to prevent browning). -
Step 2
Thinly slice 1/4 cup red onion. (Optional: Soak in ice water for 10-15 mins to mellow flavor, then drain and pat dry). Chop 1/2 cup figs. -
Step 3
Toast 1 cup pecans in a dry skillet over medium-low heat for 3-5 minutes until fragrant. Immediately remove from pan and cool. (For candied pecans: Return toasted pecans to pan, add 2 Tbsp maple syrup, stir until coated, then cool). -
Step 4
In a jar or small bowl, combine 3 Tbsp balsamic vinegar, 1 1/2 tsp Dijon mustard, 2 tsp maple syrup, 1 minced garlic clove, pinch sea salt, and 1/2 tsp black pepper. Whisk or shake vigorously. Slowly drizzle in 1/2 cup extra virgin olive oil while continuously whisking/shaking until emulsified. Taste and adjust seasoning. -
Step 5
In a large mixing bowl, combine the dry arugula, sliced apples, red onion, chopped figs, 1/2 cup goat cheese crumbles, and prepared pecans. -
Step 6
Drizzle about 1/2 to 2/3 of the prepared vinaigrette over the salad ingredients. Gently toss until all components are lightly coated. Add more dressing if desired. Serve immediately for optimal crispness and flavor.
Important Information
Nutrition Facts (Per Serving)
It is important to consider this information as approximate and not to use it as definitive health advice.
Allergy Information
Please check ingredients for potential allergens and consult a health professional if in doubt.