• Skip to primary navigation
  • Skip to main content
  • Skip to primary sidebar
Homesmad

Homesmad

  • Home
  • Breakfast & Brunch
  • Appetizers & Snacks
  • Dinner
  • Dessert
  • About
  • Privacy Policy
  • Contact
Homesmad
  • Home
  • Breakfast & Brunch
  • Appetizers & Snacks
  • Dinner
  • Dessert
  • About
  • Privacy Policy
  • Contact

Banana Bread Cookies Recipe: Soft, Chewy & Delicious!

October 29, 2025 by Lily author

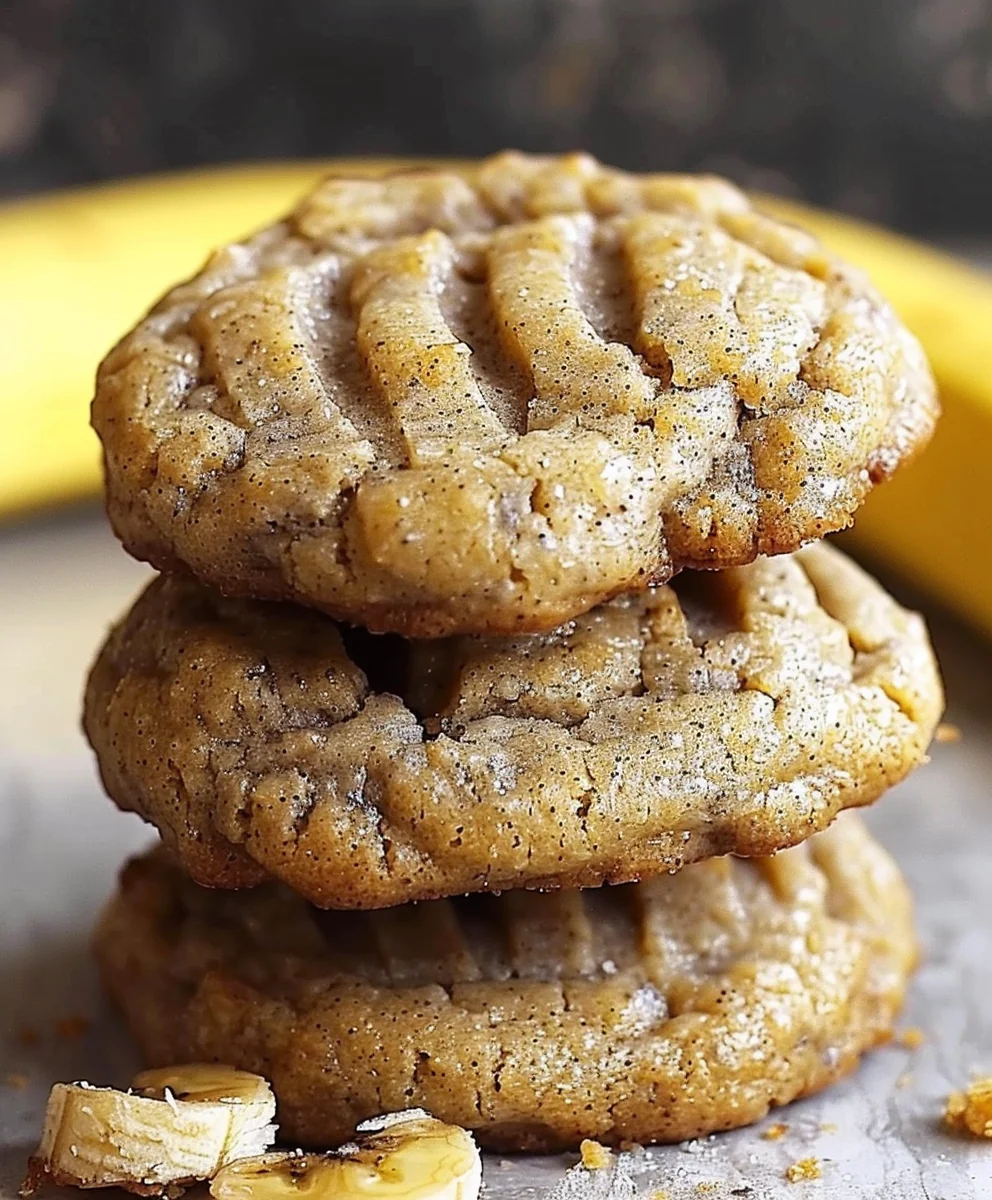
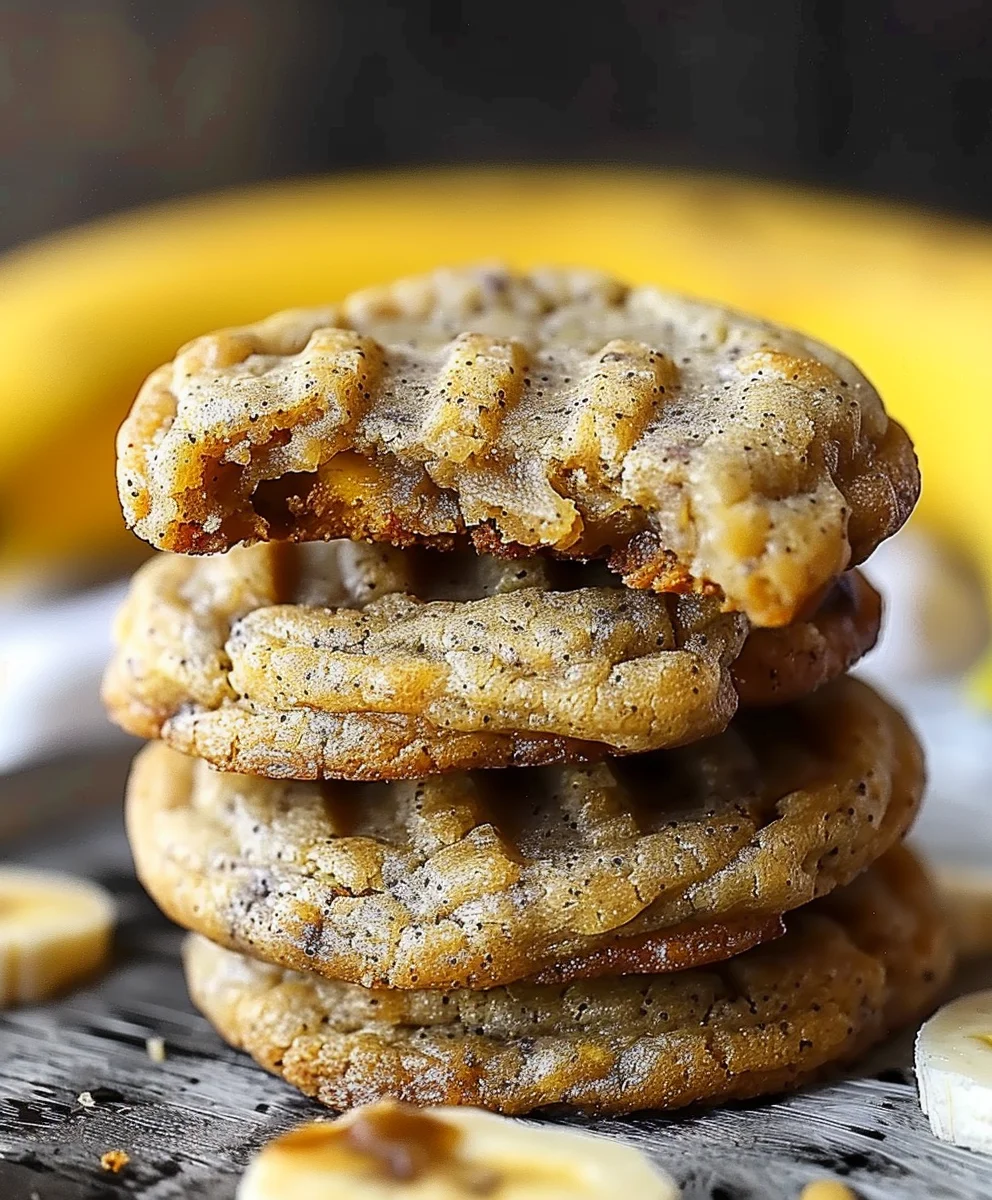
Banana Bread Cookies Recipe: There’s something undeniably comforting about a slice of warm banana bread, a timeless classic that evokes memories of home and simpler times. But what if you could capture all that heartwarming flavor and moist, tender texture in a perfectly portable, bite-sized package? That’s precisely what we’re about to explore today! I am absolutely thrilled to share with you a delightful twist on a beloved favorite, transforming that familiar loaf into an irresistible cookie.

The origins of traditional banana bread itself are often traced back to the convenience-driven kitchens of the Great Depression, a resourceful way to utilize overripe bananas rather than letting them go to waste. Over decades, it has evolved into a staple for many, cherished for its humble yet profound deliciousness. Our innovative take marries this classic heritage with the universal appeal of a cookie, offering the best of both worlds in a delightfully convenient format.

Why do people fall in love with these banana bread cookies?

It’s simple: they deliver that signature sweet, spiced banana flavor and incredible moistness you expect from the bread, but with the added convenience and pleasant chewiness of a perfect cookie. Imagine a soft, cake-like cookie that melts in your mouth, ideal for a quick breakfast on the go, a delightful afternoon treat, or a welcome addition to any dessert platter. This particular Banana Bread Cookies Recipe is designed to be effortlessly delicious, bringing joy with every single bite. Prepare to bake a new family favorite!

Banana Bread Cookies Recipe: Soft, Chewy & Delicious! this RECIPE

Ingredients:

  • For the Banana Bread Cookies:
    • 1 cup (2 sticks or 226g) unsalted butter, softened to room temperature
    • ¾ cup (150g) granulated sugar
    • ½ cup (100g) packed light brown sugar
    • 2 large eggs, at room temperature
    • 1 teaspoon pure vanilla extract
    • 1 ½ cups (about 3 medium) very ripe mashed bananas (about 360g), spotted or blackened is best!
    • 2 ¾ cups (345g) all-purpose flour
    • 1 teaspoon baking soda
    • 1 teaspoon ground cinnamon
    • ½ teaspoon salt
    • 1 cup (170g) chocolate chips (semi-sweet or milk chocolate), optional but highly recommended
    • ½ cup (60g) chopped walnuts or pecans, optional
  • For the Cream Cheese Frosting (Optional, but truly elevates this Banana Bread Cookies Recipe):
    • 4 oz (113g) cream cheese, softened
    • ¼ cup (56g) unsalted butter, softened
    • 1 ½ cups (180g) powdered sugar, sifted
    • ½ teaspoon pure vanilla extract
    • 1-2 tablespoons milk or cream, as needed for consistency

Equipment You’ll Need:

  1. Large mixing bowls (at least two)
  2. Electric mixer (stand mixer with paddle attachment or a hand-held mixer)
  3. Rubber spatula
  4. Whisk
  5. Measuring cups and spoons
  6. Baking sheets
  7. Parchment paper or silicone baking mats
  8. Cookie scoop (1.5 to 2 tablespoons capacity)
  9. Wire cooling rack
  10. Small saucepan (if browning butter for the frosting, though optional)

Prepping Our Ingredients for the Banana Bread Cookies Recipe:

  1. First things first, let’s get organized! Before we dive into the mixing, make sure your butter, eggs, and cream cheese (if you’re making the frosting) are all at room temperature. This is a crucial step for achieving that wonderfully smooth, lump-free cookie dough and creamy frosting. I usually set mine out on the counter about an hour or two before I plan to start baking.
  2. Next, let’s turn our attention to the star of the show: the bananas! Grab your very ripe bananas – the ones with lots of brown spots or even entirely black peels are ideal. These super ripe bananas are naturally sweeter and have a much more intense banana flavor, which is exactly what we want for our Banana Bread Cookies Recipe. Peel them and place them in a medium-sized bowl. Using a fork, thoroughly mash the bananas until they are smooth with only a few small lumps remaining. We’re aiming for a consistency similar to baby food here, not chunky salsa. Set them aside.
  3. In a separate, medium-sized bowl, we’re going to whisk together all of our dry ingredients. This ensures they are evenly distributed throughout the dough, preventing pockets of unmixed flour or baking soda. Combine the all-purpose flour, baking soda, ground cinnamon, and salt. Whisk vigorously for about 30 seconds until everything looks uniform. Trust me, this little step makes a big difference in the final texture of your cookies.
  4. Now, let’s get our baking environment ready. Preheat your oven to 375°F (190°C). While the oven heats up, line your baking sheets with parchment paper or silicone baking mats. This will prevent your delicious Banana Bread Cookies from sticking and will make cleanup a breeze. I like to prepare at least two baking sheets, so I can rotate them and keep the baking process moving smoothly.

Crafting the Cookie Dough:

  1. In a large mixing bowl, using your electric mixer, cream together the softened unsalted butter, granulated sugar, and packed light brown sugar. Start on low speed until the sugars are just incorporated, then increase to medium-high speed. Beat for about 2-3 minutes until the mixture is light, fluffy, and pale in color. This creaming process is vital as it incorporates air into the butter and sugar, which contributes to the cookies’ soft and chewy texture. Scrape down the sides of the bowl with your rubber spatula halfway through to ensure everything is evenly combined.
  2. Reduce the mixer speed to low. Add the two large eggs, one at a time, mixing well after each addition until just incorporated. Be careful not to overmix here. After the eggs, pour in the pure vanilla extract and mix until it’s fully combined with the butter and sugar mixture.
  3. Next, it’s time for our mashed bananas! Add the 1 ½ cups of mashed ripe bananas to the wet ingredients. Mix on low speed until the bananas are just incorporated into the mixture. The mixture might look a little curdled at this stage, but don’t worry, that’s perfectly normal. We’re just looking for an even distribution of that wonderful banana goodness.
  4. With the mixer still on low speed, gradually add the dry ingredients mixture (flour, baking soda, cinnamon, and salt) to the wet ingredients. Add about a third of the dry mixture at a time, mixing until just combined before adding the next portion. It’s very important not to overmix the dough once the flour has been added. Overmixing develops the gluten in the flour, which can lead to tough, dense cookies. Mix only until no streaks of dry flour remain. As soon as it comes together, stop the mixer.
  5. Now for the delightful additions! Gently fold in the chocolate chips and chopped walnuts or pecans (if you’re using them) using your rubber spatula. I love the combination of sweet chocolate and crunchy nuts with the banana, it really elevates this Banana Bread Cookies Recipe to another level. Mix just until they are evenly distributed throughout the dough. You want every bite to have a little bit of everything!
  6. At this point, you’ll have a wonderfully thick and fragrant cookie dough. While you can bake them immediately, I highly recommend chilling the dough for at least 30 minutes, or even an hour, in the refrigerator. Chilling helps the flavors meld, allows the flour to fully hydrate, and prevents the cookies from spreading too much during baking, resulting in a chewier, more flavorful cookie. You can even chill it overnight if you’re prepping ahead!

Baking the Perfect Banana Bread Cookies:

  1. Once your dough is chilled (if you chose to chill it) and your oven is preheated to 375°F (190°C), it’s time to shape our cookies. Using a 1.5 to 2 tablespoon capacity cookie scoop, drop rounded scoops of dough onto your prepared baking sheets, leaving about 2 inches of space between each cookie. These cookies will spread a bit, so giving them ample room ensures they bake evenly and don’t merge into one giant cookie.
  2. Bake one sheet at a time in the preheated oven for 10-12 minutes, or until the edges are lightly golden brown and the centers are just set. They should look puffy and soft. I like my Banana Bread Cookies to be slightly underbaked in the center for that ultimate chewy texture. If you press gently on the center, it should spring back slightly.
  3. As soon as they come out of the oven, let the cookies cool on the baking sheets for about 5 minutes. They are quite delicate when hot, and this brief cooling period allows them to set up and firm a little.
  4. After 5 minutes, carefully transfer the cookies to a wire cooling rack to cool completely. This prevents the bottoms from becoming soggy and helps them maintain their lovely soft texture. Resist the urge to stack them while warm, as this can flatten them or cause them to stick together.

Optional Cream Cheese Frosting (for an extra special Banana Bread Cookies Recipe treat):

While these Banana Bread Cookies are absolutely delicious on their own, a tangy cream cheese frosting truly makes them irresistible, adding a classic “banana bread” touch.

  1. In a medium mixing bowl, using your electric mixer, beat the softened cream cheese and softened unsalted butter together until smooth and creamy. This usually takes about 1-2 minutes on medium speed. Ensure there are no lumps of cream cheese or butter remaining.
  2. Gradually add the sifted powdered sugar to the cream cheese mixture, starting on low speed to avoid a powdered sugar cloud! Once incorporated, increase the speed to medium-high and beat until light and fluffy. This typically takes another 1-2 minutes.
  3. Stir in the pure vanilla extract. If your frosting seems too thick, add milk or cream one tablespoon at a time, mixing until you reach your desired consistency. You want a frosting that is spreadable but not too runny.
  4. Once your Banana Bread Cookies are completely cool (this is important, otherwise the frosting will melt!), generously spread or pipe the cream cheese frosting onto each cookie. For a neater finish, you can use an offset spatula or a piping bag.

Tips for the Best Banana Bread Cookies Recipe:

To ensure your Banana Bread Cookies turn out perfectly every single time, I’ve gathered a few extra tips and tricks I’ve learned along the way:

  1. Embrace Overripe Bananas: I cannot stress this enough – the riper your bananas, the better your cookies will taste. Those dark brown or black peels are your best friend. They contain more natural sugars and a more concentrated banana flavor, which is key to a truly outstanding Banana Bread Cookies Recipe. If you only have slightly ripe bananas, you can try roasting them in their skins at 300°F (150°C) for 15-20 minutes until they’re black and soft – just let them cool before mashing.
  2. Room Temperature Ingredients are Non-Negotiable: Butter, eggs, and cream cheese (for frosting) at room temperature emulsify better, creating a smoother, more uniform dough and frosting. Cold ingredients can lead to a lumpy mixture and affect the texture of your cookies.
  3. Don’t Overmix the Dough: Once you add the dry ingredients to the wet, mix only until the flour streaks disappear. Overmixing develops gluten, which can make your Banana Bread Cookies tough and dry instead of soft and chewy. A gentle hand is best here.
  4. Chill the Dough: While optional, chilling the cookie dough for at least 30 minutes (or up to 24 hours) makes a significant difference. It helps the flavors meld, allows the flour to fully hydrate, and prevents the cookies from spreading too much, resulting in thicker, chewier cookies with a more intense flavor. This is especially helpful if your kitchen is warm.
  5. Use a Cookie Scoop: A cookie scoop ensures uniform sizing for your cookies, which is important for even baking. Plus, it makes the process much faster and less messy!
  6. Watch Your Baking Time: Ovens vary, so the baking time is an estimate. Look for cookies that are lightly golden at the edges and still look soft and slightly puffy in the center. Remember, they continue to cook a little on the hot baking sheet after they come out of the oven.
  7. Cool Completely Before Frosting: If you’re using the cream cheese frosting, make sure your Banana Bread Cookies are completely cool before applying it. Warm cookies will simply melt the frosting, making a mess. Patience is a virtue!
  8. Storage: Store unfrosted Banana Bread Cookies in an airtight container at room temperature for up to 3-4 days. If frosted, they should be stored in an airtight container in the refrigerator for up to 3-4 days. Bring frosted cookies to room temperature for about 15-20 minutes before serving for the best texture and flavor.
  9. Experiment with Mix-ins: While chocolate chips and walnuts are classics, feel free to get creative! Try adding shredded coconut, white chocolate chips, dried cranberries, or a pinch of nutmeg or allspice for different flavor profiles in your Banana Bread Cookies Recipe.
  10. Freeze for Later: These cookies freeze beautifully! You can freeze the baked, unfrosted cookies in an airtight container for up to 2-3 months. Thaw at room temperature when ready to enjoy or frost. You can also freeze portions of the raw cookie dough. Just scoop balls of dough onto a baking sheet, freeze until solid, then transfer to a freezer-safe bag. Bake from frozen, adding a couple of minutes to the baking time.

I hope you enjoy baking and sharing this delightful Banana Bread Cookies Recipe as much as I do. They’re truly a comforting treat that brings together the best of both worlds!

Banana Bread Cookies Recipe: Soft, Chewy & Delicious!

Conclusion:

Well, my friends, we’ve reached the sweet end of our journey, but for you, it’s just the delicious beginning! I truly hope you’re feeling inspired to whip up a batch of these incredible cookies. This isn’t just another dessert; it’s a revelation, a brilliant mash-up that brings together the comforting, nostalgic flavors of your favorite banana bread with the delightful, portable convenience of a chewy cookie. Forget the fuss of slicing a loaf; imagine grabbing a soft, flavorful cookie that perfectly captures that warm, banana-infused essence, ready to enjoy anytime, anywhere. That’s the magic we’ve bottled here.

I genuinely believe this recipe is an absolute must-try for so many reasons. First, it’s remarkably simple, transforming those neglected, overly ripe bananas on your counter into something truly spectacular rather than letting them go to waste. You’ll be amazed at how quickly these come together, making them perfect for a last-minute craving or an impromptu gathering. The texture is divine – think soft, slightly chewy, and perfectly moist, bursting with natural sweetness and that characteristic banana bread spice. They strike that perfect balance, feeling indulgent without being overly heavy, making them suitable for almost any occasion. Plus, who doesn’t love a recipe that makes you feel like a culinary wizard with minimal effort? These cookies are pure joy in every bite, a testament to simple ingredients creating extraordinary results.

Elevate Your Cookie Experience: Serving Suggestions & Creative Variations

Once you’ve experienced the sheer deliciousness of these cookies straight from the oven, you might wonder how else to enjoy them. Oh, the possibilities are endless! They are absolutely fantastic served warm with a scoop of vanilla bean ice cream, turning a simple cookie into a sophisticated dessert. Imagine that warm, spiced banana flavor melting into the cold, creamy ice cream – pure bliss! For a cozy afternoon treat, pair them with a steaming mug of coffee, a frothy latte, or a fragrant herbal tea. They make a perfect companion to your morning brew, offering a slightly indulgent start to the day without being too heavy. Pack them in lunchboxes for a delightful midday pick-me-up, or arrange them on a platter for your next potluck or family gathering. Trust me, they’ll disappear fast!

But why stop there? This recipe is a fantastic canvas for your creativity. Want to add a delightful crunch? Stir in a handful of chopped walnuts or pecans – the nutty flavor complements the banana beautifully. For the chocolate lovers out there, consider adding milk chocolate chips, dark chocolate chunks, or even white chocolate chips for a different kind of sweetness. You could also experiment with dried fruits like raisins, dried cranberries, or chopped dates to introduce new textures and flavors. A sprinkle of flaky sea salt on top before baking can also enhance the sweetness and add a sophisticated touch. For those with a sweet tooth, a simple drizzle of cream cheese glaze (just powdered sugar, a touch of cream cheese, and a splash of milk) would elevate these to an even more decadent level. You could even try adding a swirl of peanut butter or a dollop of Nutella to the dough before baking for a truly unique twist. Don’t be afraid to make them your own!

Your Turn: Bake, Share, and Inspire!

Now that you have all the tips, tricks, and inspiration, it’s your moment to shine in the kitchen. I wholeheartedly encourage you to try this Banana Bread Cookies Recipe as soon as you have those perfectly ripe bananas. It’s more than just baking; it’s about creating moments of joy, sharing deliciousness with loved ones, and perhaps discovering a new favorite treat. There’s something truly special about the aroma of fresh-baked cookies filling your home, and these deliver on that promise every single time.

I am so excited for you to experience the magic for yourself. And once you do, please, please come back and share your experience with me! What variations did you try? Who did you share them with? Did they become an instant hit in your household? I absolutely adore hearing about your culinary adventures and seeing your creations. Your feedback and stories inspire not just me, but other readers too. So, preheat your ovens, gather your ingredients, and get ready to bake some seriously delicious memories. Happy baking, everyone!


Banana Bread Cookies Recipe: Soft, Chewy & Delicious!

Banana Bread Cookies Recipe: Soft, Chewy & Delicious!

Capture all that heartwarming flavor and moist, tender texture in a perfectly portable, bite-sized package with this Banana Bread Cookies Recipe, transforming a familiar loaf into an irresistible cookie.

Prep Time
55 Minutes

Cook Time
15 Minutes

Total Time
10 Minutes

Servings
18 cookies

Ingredients

  • 2 ripe bananas, mashed
  • 1 ½ cups all-purpose flour
  • ½ teaspoon baking soda
  • ¼ teaspoon salt
  • ½ teaspoon ground cinnamon
  • ½ cup unsalted butter, softened
  • ½ cup brown sugar
  • ¼ cup granulated sugar
  • 1 large egg
  • 1 teaspoon vanilla extract
  • ½ cup chocolate chips (optional)
  • ½ cup chopped walnuts or pecans (optional)

Instructions

  1. Step 1
    Ensure butter, eggs, and bananas are at room temperature. Mash bananas until mostly smooth. In a separate bowl, whisk together flour, baking soda, cinnamon, and salt. Preheat oven to 375°F (190°C) and line baking sheets with parchment paper.
  2. Step 2
    Cream softened butter, brown sugar, and granulated sugar in a large bowl with an electric mixer until light and fluffy (2-3 minutes). Beat in egg and vanilla extract until just combined. Mix in mashed bananas on low speed until just incorporated. Gradually add dry ingredients, mixing on low speed until no flour streaks remain; do not overmix. Gently fold in optional chocolate chips or nuts. Chill dough for at least 30 minutes (recommended for best texture).
  3. Step 3
    Scoop 1.5-2 tbsp dough onto prepared baking sheets, spacing 2 inches apart. Bake for 10-12 minutes, until edges are lightly golden brown and centers are just set. Cool on baking sheets for 5 minutes, then transfer to a wire rack to cool completely.

Important Information

Nutrition Facts (Per Serving)

It is important to consider this information as approximate and not to use it as definitive health advice.

Allergy Information

Please check ingredients for potential allergens and consult a health professional if in doubt.

« Previous Post
Savory Garlic Parmesan Chicken Meatloaves: A Family Favorite
Next Post »
Philly Cheesesteak Pasta: Easy & Cheesy Weeknight Meal

If you enjoyed this…

Strawberry Cheesecake Cookies: A Delicious Twist on a Classic Dessert

Healthy No Bake Cottage Cheese Brownie Batter Protein Bites

Homemade Peppermint Patties: The Ultimate Recipe Guide

Primary Sidebar

Browse by Diet

BreakfastDinnerLunchDessertAppetizer

Sweet Peach Yogurt Parfait Delight

One of my fondest memories is from a lazy summer afternoon spent at my grandmother’s house. The sun filtered through the kitchen window, casting a warm glow over the table where she would create her culinary magic. It was during one of those blissful moments that I first tasted her Peach Yogurt Parfait with Honey and Granola. The sweet aroma of ripe peaches mingling with creamy yogurt and the crunch of granola was nothing short of heavenly. It felt like summer captured in a bowl, and I still remember the joy of diving in with a spoon, each layer revealing a new burst of flavor.

When I think about that parfait, I can almost hear the gentle hum of the bees outside, reminding me of the floral notes that honey brings to every bite. The vibrant yellows and soft oranges of the peaches contrast beautifully with the creamy white yogurt and the golden crunch of granola. It’s a dish that not only looks delightful but also tastes like a celebration of fresh, wholesome ingredients.

What makes my version of this Peach Yogurt Parfait special is the careful balance of flavors and textures. I use ripe, juicy peaches, drizzled with locally sourced honey, and a homemade granola that’s bursting with nuts and seeds for an extra crunch. It’s a simple dish, but every layer is crafted with love and attention.

Let me show you exactly how to make this delightful parfait, so you can bring a bit of that summer magic into your kitchen!

Sweet Peach Yogurt Parfait Delight

Why You’ll Love This Recipe

  • Delightfully creamy texture from the Greek yogurt, paired with the juicy sweetness of fresh peaches.
  • Ready in under 20 minutes, making it a quick and satisfying breakfast or snack option.
  • Budget-friendly, using common ingredients that you may already have in your pantry.
  • Customizable with your favorite granola and nuts, allowing you to tailor each parfait to your taste.
  • Perfectly balanced flavors with the bright acidity of lemon juice and the sweetness of honey enhancing the peaches.

Ingredients

  • For the Parfait:
  • 2 cups plain Greek yogurt (or vanilla yogurt for a sweeter option)
  • 2 large ripe peaches, diced (about 2 cups)
  • 1 tablespoon fresh lemon juice (to prevent browning of peaches)
  • 2 tablespoons honey (plus more for drizzling)
  • 1 teaspoon vanilla extract (optional for extra flavor)
  • For the Granola:
  • 1 cup granola (store-bought or homemade; see notes for a simple granola recipe)
  • 1/4 cup sliced almonds (optional for added crunch)
  • 1/4 cup shredded coconut (optional for added flavor)

Let’s dive into some key ingredients that make this Peach Yogurt Parfait so delightful! First, the Greek yogurt is not only creamy but also packed with protein, making it a satisfying option for breakfast or a snack. If you’re looking for a sweeter option, you can easily substitute it with vanilla yogurt, though it may alter the overall flavor balance. Next, the ripe peaches are the star of the show; their natural sweetness shines through, so I recommend choosing peaches that yield slightly to pressure, indicating they’re perfectly ripe. If peaches aren’t in season, feel free to use nectarines or even frozen peaches—just thaw them before use. Finally, honey adds a lovely floral sweetness that ties everything together. If you prefer, maple syrup can serve as a delicious substitute.

Step-by-Step Instructions

  1. Start by preparing the peaches. Wash them thoroughly, then slice and dice them into bite-sized pieces. In a medium bowl, toss the diced peaches with 1 tablespoon of fresh lemon juice to prevent browning. Set aside for about 5 minutes while the lemon juice works its magic.
  2. In a separate bowl, combine the Greek yogurt, 2 tablespoons of honey, and 1 teaspoon of vanilla extract if using. Stir the mixture until smooth and thoroughly blended. This should take about a minute. Avoid overmixing to maintain the creaminess of the yogurt.
  3. Now it’s time to layer your parfait. Grab a clear glass or bowl to showcase your beautiful creation. Start with a generous spoonful of the yogurt mixture at the bottom—about 1/4 cup will do. Use a spoon to spread it evenly.
  4. Add a layer of the diced peaches over the yogurt, ensuring they cover the yogurt completely. You might want to use about half of what you have prepared—roughly 1 cup. This layer should be visually appealing, so arrange the peaches neatly.
  5. Sprinkle 1/4 cup of granola over the peaches. This adds a delightful crunch. Make sure to distribute it evenly to ensure every bite has that satisfying texture. Avoid packing it down too tightly, as you want it to maintain its crunch.
  6. Repeat the layers: spoon in another 1/4 cup of yogurt, followed by another cup of peaches, and another sprinkle of granola. You should have at least two layers, but feel free to add more depending on your glass size.
  7. Finish off your parfait with a drizzle of honey on top for added sweetness and a touch of elegance. If you’re using sliced almonds or shredded coconut, sprinkle them on top now. It adds a lovely visual contrast and extra flavor.
  8. Serve immediately or refrigerate for up to 30 minutes before serving to allow the flavors to meld together. However, I recommend enjoying it fresh to maintain the granola’s crunch.

Pro Tips for the Best Peach Yogurt Parfait With Honey And Granola

  • Make sure to choose ripe peaches for the best flavor and texture. A common mistake is using unripe fruit, which can lead to a less enjoyable parfait. Look for peaches that are fragrant and slightly soft to the touch.
  • Use a clear glass to assemble your parfait; this not only makes for a beautiful presentation but also allows you to see the colorful layers, which adds to the enjoyment of eating it.
  • For an even creamier texture, consider whipping the Greek yogurt with a hand mixer for a couple of minutes before layering. This small adjustment makes a huge difference in mouthfeel.
  • Be mindful of the granola-to-yogurt ratio. Too much granola can overwhelm the parfait, while too little can make it feel too creamy. Aim for about 1/4 cup of granola per layer for the perfect balance.
  • If you’re making this for a gathering, consider preparing the yogurt and peaches ahead of time and layering them just before serving. This ensures the granola stays crunchy!

Variations & Serving Ideas

There are so many ways to get creative with your Peach Yogurt Parfait! For a tropical twist, swap out the peaches for mangoes or pineapples and top with coconut flakes. If you prefer a berry flavor, mix in some blueberries or strawberries with the peaches for added color and taste. For a nutty version, incorporate chopped walnuts or pecans instead of almonds.

As for serving ideas, this parfait pairs beautifully with a side of scrambled eggs for a hearty breakfast or fresh fruit salad for a light lunch. You might also enjoy it alongside whole grain toast with almond butter for an energizing snack. The contrast of flavors and textures will elevate your meal experience!

Storage, Make-Ahead & Reheating

The Peach Yogurt Parfait is best enjoyed fresh, but you can prepare some components ahead of time. Store the layered parfait in an airtight container in the refrigerator for up to 24 hours. However, be cautious; the granola may lose its crunch if stored too long. You can freeze the yogurt and peach mixture for up to 2 months; just remember to thaw it in the refrigerator overnight before serving.

If you plan to enjoy this dish the next day, it can taste even better as the flavors meld together. Just remember to add the granola right before serving to keep its delightful crunch!

Frequently Asked Questions

Can I make Peach Yogurt Parfait With Honey And Granola ahead of time?

Yes — in fact, it tastes even better the next day as the flavors meld. However, I recommend waiting to add the granola until just before serving to maintain its crunch.

What can I substitute for Greek yogurt?

If you prefer a lighter option, you can substitute Greek yogurt with regular yogurt or a dairy-free alternative like coconut yogurt. Just remember that this may alter the creaminess and flavor profile slightly.

Can I use frozen peaches for this parfait?

Absolutely! Just make sure to thaw the frozen peaches before using them. They will still add great flavor, though the texture may be slightly softer than fresh peaches.

How do I make the parfait vegan?

To make a vegan version, substitute the Greek yogurt with a plant-based yogurt alternative, and replace honey with maple syrup or agave nectar. This keeps the parfait sweet while adhering to a vegan diet.

What other fruits can I use in this recipe?

You can mix and match fruits based on your preference. Try using strawberries, blueberries, raspberries, or even bananas. Just make sure to adjust the lemon juice as needed to prevent browning.

Sweet Peach Yogurt Parfait Delight

Final Thoughts

The Peach Yogurt Parfait with Honey and Granola is a delightful blend of creamy yogurt, sweet peaches, and crunchy granola that creates a satisfying and nourishing treat. Each layer bursts with flavor, making it a perfect choice for breakfast or a light dessert.

This is the kind of recipe I come back to again and again, especially when I want something refreshing and wholesome to start my day. The harmony of sweet and tart flavors, combined with the delightful crunch, never fails to lift my spirits!

I encourage you to give this parfait a try and indulge in its comforting goodness. Feel free to share your results or even add your own twist—perhaps a sprinkle of cinnamon or a handful of nuts. Enjoy creating your perfect parfait!

Print
clock clock iconcutlery cutlery iconflag flag iconfolder folder iconinstagram instagram iconpinterest pinterest iconfacebook facebook iconprint print iconsquares squares iconheart heart iconheart solid heart solid icon

Peach Yogurt Parfait


  • Author: Lily author
  • Total Time: 15 minutes
  • Yield: 4 servings 1x
Pin Recipe
Print Recipe

Description

This Peach Yogurt Parfait combines creamy Greek yogurt, juicy peaches, and crunchy granola for a delightful treat. It’s a perfect breakfast or snack that captures the essence of summer in every bite.


Ingredients

Scale
  • For the Parfait:
  • 2 cups plain Greek yogurt (or vanilla yogurt for a sweeter option)
  • 2 large ripe peaches, diced (about 2 cups)
  • 1 tablespoon fresh lemon juice (to prevent browning of peaches)
  • 2 tablespoons honey (plus more for drizzling)
  • 1 teaspoon vanilla extract (optional for extra flavor)
  • For the Granola:
  • 1 cup granola (store-bought or homemade; see notes for a simple granola recipe)
  • 1/4 cup sliced almonds (optional for added crunch)
  • 1/4 cup shredded coconut (optional for added flavor)

Instructions

  1. Start by preparing the peaches. Wash them thoroughly, then slice and dice them into bite-sized pieces. In a medium bowl, toss the diced peaches with 1 tablespoon of fresh lemon juice to prevent browning. Set aside for about 5 minutes while the lemon juice works its magic.
  2. In a separate bowl, combine the Greek yogurt, 2 tablespoons of honey, and 1 teaspoon of vanilla extract if using. Stir the mixture until smooth and thoroughly blended. This should take about a minute. Avoid overmixing to maintain the creaminess of the yogurt.
  3. Now it’s time to layer your parfait. Grab a clear glass or bowl to showcase your beautiful creation. Start with a generous spoonful of the yogurt mixture at the bottom—about 1/4 cup will do. Use a spoon to spread it evenly.
  4. Add a layer of the diced peaches over the yogurt, ensuring they cover the yogurt completely. You might want to use about half of what you have prepared—roughly 1 cup. This layer should be visually appealing, so arrange the peaches neatly.
  5. Sprinkle 1/4 cup of granola over the peaches. This adds a delightful crunch. Make sure to distribute it evenly to ensure every bite has that satisfying texture. Avoid packing it down too tightly, as you want it to maintain its crunch.
  6. Repeat the layers: spoon in another 1/4 cup of yogurt, followed by another cup of peaches, and another sprinkle of granola. You should have at least two layers, but feel free to add more depending on your glass size.
  7. Finish off your parfait with a drizzle of honey on top for added sweetness and a touch of elegance. If you’re using sliced almonds or shredded coconut, sprinkle them on top now. It adds a lovely visual contrast and extra flavor.
  8. Serve immediately or refrigerate for up to 30 minutes before serving to allow the flavors to meld together. However, I recommend enjoying it fresh to maintain the granola’s crunch.
  • Prep Time: 15 mins
  • Cook Time: 0 mins
  • Category: Breakfast
  • Method: No-cook
  • Cuisine: American

Nutrition

  • Serving Size: 1 parfait
  • Calories: 250
  • Sugar: 20 g
  • Sodium: 50 mg
  • Fat: 5 g
  • Saturated Fat: 2 g
  • Unsaturated Fat: 3 g
  • Trans Fat: 0 g
  • Carbohydrates: 40 g
  • Fiber: 3 g
  • Protein: 10 g
  • Cholesterol: 10 mg

Keywords: Choose ripe peaches for the best flavor and texture. Use a clear glass for a beautiful presentation. For creaminess, consider whipping the yogurt before layering. Be mindful of the granola-to-yogurt ratio. Prepare yogurt and peaches ahead of time for gatherings, layering just before serving.

Did you make this recipe?

Share a photo and tag us — we can't wait to see what you've made!

Sun-Kissed Frozen Orange Cream Slush

As a child, summer days felt like they lasted forever. I remember the sticky heat wrapping around me as I played outside, my laughter mingling with the sounds of the neighborhood. But nothing could cool me down quite like the moment I’d spot my grandmother, laboring over her blender, whipping up her famous Frozen Orange Creamsicle Slush. That vibrant orange treat, with its frosty texture and sweet citrus aroma, was like a burst of sunshine in a cup. Just one sip, and I could feel the coolness wash over me, sparking pure joy.

This Frozen Orange Creamsicle Slush has a way of making you feel like a kid again. Its creamy, dreamy consistency is a delightful balance of bright orange and soft vanilla, inviting you to dive right in. The refreshing tang of orange dances on your tongue, while the smooth creaminess envelops you in a comforting embrace. It’s a nostalgic treat that’s perfect for hot summer afternoons or anytime you need a little pick-me-up.

What makes my version of this slush stand out is the addition of a hint of vanilla bean, which elevates the flavor and adds an extra layer of richness. Plus, it’s super easy to whip up with just a few simple ingredients that you probably already have on hand! So, if you’re ready to relive those sun-soaked memories, let me show you exactly how to make it.

Sun-Kissed Frozen Orange Cream Slush

Why You’ll Love This Recipe

  • Each slush is a perfect blend of creamy vanilla and zesty orange, creating a nostalgic flavor reminiscent of summer days.
  • This refreshing treat is ready in under 15 minutes, making it an ideal quick dessert for unexpected guests or hot afternoons.
  • With just 8 simple ingredients, it’s budget-friendly, ensuring you don’t have to break the bank to enjoy a delicious slush.
  • The slush has a perfectly smooth texture, thanks to the combination of ice and ice cream, providing a delightful contrast to the bright citrus flavors.
  • It’s highly customizable; you can easily adjust the sweetness and add fresh herbs for a unique twist that suits your taste.

Ingredients

  • 2 cups orange juice (freshly squeezed or store-bought)
  • 1 cup vanilla ice cream
  • 1 cup crushed ice
  • 1/2 cup milk (whole or 2%)
  • 1/4 cup granulated sugar (adjust based on sweetness preference)
  • 1 teaspoon vanilla extract
  • Zest of 1 orange (for added flavor)
  • Fresh orange slices and mint leaves (for garnish)

The star of this Frozen Orange Creamsicle Slush is the orange juice, which provides the vibrant, citrusy base. Freshly squeezed juice will yield the brightest flavor, but store-bought options can be just as convenient. If you’re opting for store-bought, choose 100% pure juice with no added sugars for the best results. Another essential ingredient is the vanilla ice cream; it adds creaminess and sweetness. You can substitute it with dairy-free ice cream if you’re looking for a vegan option. Whole or 2% milk complements the ice cream, creating a smooth blend. If you want a lower-calorie version, almond or oat milk can be good alternatives.

Lastly, the granulated sugar can be adjusted based on your sweetness preference. If you prefer a more natural sweetener, consider using honey or agave syrup. The orange zest enhances the flavor profile, providing an aromatic pop that brings the whole slush together. Don’t skip it! It adds an extra layer of brightness that makes this slush truly special.

Step-by-Step Instructions

  1. Start by preparing your ingredients. Gather 2 cups of orange juice, 1 cup of vanilla ice cream, and 1 cup of crushed ice. Make sure the ice is finely crushed, as larger chunks can make blending difficult.
  2. In a blender, combine the orange juice, vanilla ice cream, crushed ice, and 1/2 cup of milk. Add 1/4 cup of granulated sugar and 1 teaspoon of vanilla extract. If you like a sweeter slush, consider adding a bit more sugar at this stage.
  3. Add the zest of 1 orange to the blender. This step is crucial for enhancing the citrus flavor of your slush. Make sure not to include the bitter white pith—only the flavorful zest.
  4. Blend the mixture on medium-high speed for about 30-45 seconds. Stop once the ingredients are fully combined and the slush has a smooth, even consistency. If you notice large chunks of ice, blend for an additional 10-15 seconds. Avoid over-blending, as this can make the slush too liquidy.
  5. Once blended, taste the slush. If it needs more sweetness, add a little more sugar and blend for a few more seconds. If it’s too thick, you can add a splash of milk to reach your desired consistency.
  6. Pour the slush into glasses. This recipe typically serves 4, but you can easily double it for larger gatherings. Use a spoon to help guide the slush into the glasses if needed.
  7. Garnish each serving with fresh orange slices and mint leaves. The mint not only adds a pop of color but also a refreshing aroma that complements the citrus flavors beautifully.
  8. Serve immediately and enjoy! If you’ve made extra, you can refrigerate it for a short time, but it’s best enjoyed fresh.

Pro Tips for the Best Frozen Orange Creamsicle Slush

  • Don’t skip the orange zest! It’s a game-changer for flavor. Always zest before juicing to make it easier.
  • Use a high-powered blender for the best texture. A standard blender may struggle with ice, leading to uneven consistency. If you have a food processor, that can work too, but ensure the ice is finely crushed.
  • Adjust the ice-to-liquid ratio carefully. If your slush is too thick, it won’t blend well. Start with less ice and add more until you reach your preferred texture.
  • Be cautious with the sugar! Always start with the lower amount, as you can easily add more, but it’s hard to fix an overly sweet slush.
  • For a fun twist, consider adding a splash of coconut milk or a handful of fresh fruit like strawberries or pineapple. This not only enhances the flavor but also adds a beautiful color contrast.

Variations & Serving Ideas

There are countless ways to put a spin on your Frozen Orange Creamsicle Slush. Consider making a tropical version by adding in some pineapple juice or coconut milk for a delightful tropical twist. If you’re feeling adventurous, try incorporating a handful of frozen mango or peach slices for added sweetness. For a lighter version, swap out the vanilla ice cream for Greek yogurt for a creamy yet tangy alternative.

As for serving ideas, this refreshing slush pairs wonderfully with light summer dishes like grilled chicken skewers, fish tacos, or a simple salad topped with citrus vinaigrette. The bright, zesty flavors of the slush complement these dishes perfectly, making them an ideal pairing for a sunny day.

Storage, Make-Ahead & Reheating

This Frozen Orange Creamsicle Slush is best enjoyed fresh, but if you have leftovers, you can store them in an airtight container in the fridge for up to 2 days. Just keep in mind that the slush may lose some of its texture over time as the ice melts. It doesn’t freeze well, as the ice will turn into a solid block. If you must freeze it, blend again after thawing to restore the slushy consistency. This treat is best the day you make it, as the flavors meld together beautifully overnight, enhancing its deliciousness.

Frequently Asked Questions

Can I make Frozen Orange Creamsicle Slush ahead of time?

Yes — in fact, it tastes even better the next day as the flavors meld. However, it’s best to enjoy it fresh, as the texture can change if stored for too long. If you need to prepare it ahead, keep it in the fridge and re-blend before serving.

What kind of orange juice should I use?

For the best flavor, use freshly squeezed orange juice. However, if you’re short on time, opt for 100% pure store-bought juice without added sugars. This will ensure that your slush remains flavorful and refreshing.

Can I substitute the vanilla ice cream?

Absolutely! If you’re looking for a dairy-free option, coconut milk ice cream or a non-dairy vanilla ice cream can work wonderfully. They will still provide the creamy texture and sweetness you desire.

How can I adjust the sweetness of my slush?

You can easily adjust the sweetness by modifying the amount of sugar added. Start with 1/4 cup and taste the mixture before blending. If you prefer it sweeter, add more sugar gradually until it reaches your desired level.

What should I do if my slush is too thick?

If your slush is too thick, simply add a splash of milk or orange juice and blend again. This will help achieve a more drinkable consistency while maintaining the slushy texture. Adjust gradually to reach your preferred thickness.

Sun-Kissed Frozen Orange Cream Slush

Final Thoughts

The Frozen Orange Creamsicle Slush is a delightful blend of refreshing citrus and creamy goodness, making it a perfect treat for warm days or any time you crave a taste of nostalgia. The way the bright orange flavor dances with the creamy texture truly elevates this slush, transforming it into a satisfying escape from the everyday.

This is the kind of recipe I come back to again and again, especially when I’m looking to cool down or impress guests at a summer gathering. It’s simple to make and always brings smiles all around! I encourage you to try this recipe for yourself—don’t hesitate to share your results or even put your own spin on it. Happy slushing!

Print
clock clock iconcutlery cutlery iconflag flag iconfolder folder iconinstagram instagram iconpinterest pinterest iconfacebook facebook iconprint print iconsquares squares iconheart heart iconheart solid heart solid icon

Frozen Orange Creamsicle Slush


  • Author: Lily author
  • Total Time: 15 minutes
  • Yield: 4 servings 1x
Pin Recipe
Print Recipe

Description

This Frozen Orange Creamsicle Slush is a refreshing treat that combines creamy vanilla and zesty orange flavors. Perfect for hot summer days, it brings back nostalgic memories with every sip.


Ingredients

Scale
  • 2 cups orange juice (freshly squeezed or store-bought)
  • 1 cup vanilla ice cream
  • 1 cup crushed ice
  • 1/2 cup milk (whole or 2%)
  • 1/4 cup granulated sugar (adjust based on sweetness preference)
  • 1 teaspoon vanilla extract
  • Zest of 1 orange (for added flavor)
  • Fresh orange slices and mint leaves (for garnish)

Instructions

  1. Start by preparing your ingredients. Gather 2 cups of orange juice, 1 cup of vanilla ice cream, and 1 cup of crushed ice. Make sure the ice is finely crushed, as larger chunks can make blending difficult.
  2. In a blender, combine the orange juice, vanilla ice cream, crushed ice, and 1/2 cup of milk. Add 1/4 cup of granulated sugar and 1 teaspoon of vanilla extract. If you like a sweeter slush, consider adding a bit more sugar at this stage.
  3. Add the zest of 1 orange to the blender. This step is crucial for enhancing the citrus flavor of your slush. Make sure not to include the bitter white pith—only the flavorful zest.
  4. Blend the mixture on medium-high speed for about 30-45 seconds. Stop once the ingredients are fully combined and the slush has a smooth, even consistency. If you notice large chunks of ice, blend for an additional 10-15 seconds. Avoid over-blending, as this can make the slush too liquidy.
  5. Once blended, taste the slush. If it needs more sweetness, add a little more sugar and blend for a few more seconds. If it’s too thick, you can add a splash of milk to reach your desired consistency.
  6. Pour the slush into glasses. This recipe typically serves 4, but you can easily double it for larger gatherings. Use a spoon to help guide the slush into the glasses if needed.
  7. Garnish each serving with fresh orange slices and mint leaves. The mint not only adds a pop of color but also a refreshing aroma that complements the citrus flavors beautifully.
  8. Serve immediately and enjoy! If you’ve made extra, you can refrigerate it for a short time, but it's best enjoyed fresh.
  • Prep Time: 15 min
  • Cook Time: 0 min
  • Category: Dessert
  • Method: Blending
  • Cuisine: American

Nutrition

  • Serving Size: 1 serving
  • Calories: 200
  • Sugar: 30 g
  • Sodium: 50 mg
  • Fat: 5 g
  • Saturated Fat: 3 g
  • Unsaturated Fat: 2 g
  • Trans Fat: 0 g
  • Carbohydrates: 40 g
  • Fiber: 1 g
  • Protein: 2 g
  • Cholesterol: 20 mg

Keywords: Don't skip the orange zest! It's a game-changer for flavor. Always zest before juicing to make it easier.

Did you make this recipe?

Share a photo and tag us — we can't wait to see what you've made!

Zesty Lemon Poppy Seed Delight

One rainy afternoon, I found myself in my grandmother’s cozy kitchen, the kind that always smelled like warmth and love. She was whipping up her famous Lemon Poppy Seed Loaf, a recipe that had been passed down through generations. As the batter came together, the zesty aroma of fresh lemons filled the air, mingling perfectly with the nutty fragrance of poppy seeds. I can still picture her, apron-clad, as she expertly drizzled a vibrant citrus icing over the loaf, creating a glossy, sun-kissed finish that beckoned us to dive in. It was a moment that sparked my own passion for baking, and this recipe has become a cherished staple in my home ever since.

When you take a bite of this Lemon Poppy Seed Loaf, it’s like a burst of sunshine on your palate. The loaf is beautifully golden, with a tender crumb that melts in your mouth. Each slice is speckled with tiny poppy seeds, adding a delightful crunch that contrasts beautifully with the tangy sweetness of the lemon. And that citrus icing? It’s the finishing touch that elevates this loaf from ordinary to extraordinary, with its bright, zesty flavor dancing on your taste buds.

This recipe stands out because it embraces simplicity while delivering on flavor. I’ve added a hint of vanilla to the batter, enhancing the overall taste and making it even more indulgent. Trust me, once you make this Lemon Poppy Seed Loaf With Citrus Icing, it’ll become a go-to in your baking repertoire.

So, let me show you exactly how to make it!

Zesty Lemon Poppy Seed Delight

Why You’ll Love This Recipe

  • Moist and tender crumb that melts in your mouth, thanks to the perfect balance of butter and buttermilk.
  • Bright, zesty lemon flavor paired with crunchy poppy seeds, creating a delightful texture and taste experience.
  • Easy to whip up in just about an hour, perfect for last-minute gatherings or a cozy afternoon treat.
  • Budget-friendly with everyday ingredients, making it an accessible option for all home bakers.
  • The citrus icing adds a sweet tang that elevates the loaf, turning a simple recipe into a showstopper!

Ingredients

  • 1 ½ cups (190g) all-purpose flour
  • 1 teaspoon baking powder
  • ½ teaspoon baking soda
  • ½ teaspoon salt
  • 3 tablespoons poppy seeds
  • ½ cup (115g) unsalted butter, softened to room temperature
  • 1 cup (200g) granulated sugar
  • 2 large eggs
  • 1 teaspoon vanilla extract
  • 1 teaspoon lemon zest (from about 1 medium lemon)
  • ½ cup (120ml) buttermilk
  • 2 tablespoons fresh lemon juice

For the Citrus Icing:

  • 1 cup (120g) powdered sugar
  • 2 tablespoons fresh lemon juice
  • 1 tablespoon orange juice
  • 1 teaspoon lemon zest (for garnish, optional)

Let’s dive into the key ingredients that make this Lemon Poppy Seed Loaf so special. The all-purpose flour provides the structure and base for the loaf, while the baking powder and baking soda ensure it rises perfectly, giving the loaf a light texture. For a gluten-free variation, you could substitute the flour with a gluten-free all-purpose blend. Poppy seeds not only add a delightful crunch but also contribute to the unique flavor profile that pairs well with the citrus notes.

Unsalted butter is crucial for achieving the buttery richness that makes this loaf so moist. If you’re looking for a dairy-free option, coconut oil or a vegan butter can be used instead. The buttermilk is another essential component, providing acidity that activates the baking soda for a fluffy texture. If you don’t have buttermilk on hand, you can easily make a substitute by mixing ½ cup of milk with 1 tablespoon of vinegar or lemon juice and letting it sit for about 5 minutes.

Step-by-Step Instructions

  1. Preheat your oven to 350°F (175°C). Grease a 9×5-inch loaf pan or line it with parchment paper for easy removal later.
  2. In a medium mixing bowl, whisk together 1 ½ cups of all-purpose flour, 1 teaspoon of baking powder, ½ teaspoon of baking soda, ½ teaspoon of salt, and 3 tablespoons of poppy seeds. This helps to evenly distribute the baking agents and ensures a uniform rise.
  3. In a large mixing bowl, cream together ½ cup of softened unsalted butter and 1 cup of granulated sugar using an electric mixer on medium speed for about 3-4 minutes, until the mixture is light and fluffy. Make sure to scrape down the sides of the bowl occasionally.
  4. Add 2 large eggs, 1 teaspoon of vanilla extract, and 1 teaspoon of lemon zest to the creamed butter and sugar, mixing until fully combined. You want a smooth consistency, so ensure there are no lumps of butter.
  5. In a small bowl, combine ½ cup of buttermilk and 2 tablespoons of fresh lemon juice. Alternately add the dry ingredients and buttermilk mixture to the butter mixture, starting and ending with the dry ingredients. Mix just until combined; do not overmix, as this can lead to a dense loaf.
  6. Pour the batter into the prepared loaf pan. Smooth the top with a spatula, ensuring it’s even. Bake in the preheated oven for 50-60 minutes, or until a toothpick inserted in the center comes out clean. The edges should be lightly golden brown, and the center should feel just set.
  7. Once baked, remove the loaf from the oven and allow it to cool in the pan for about 10 minutes. Then, transfer it to a wire rack to cool completely. Resist the urge to slice too soon, as it will be crumbly if it’s still warm.
  8. While the loaf is cooling, prepare the citrus icing. In a medium bowl, whisk together 1 cup of powdered sugar, 2 tablespoons of fresh lemon juice, and 1 tablespoon of orange juice until smooth. If the icing is too thick, you can add a little more juice to reach your desired consistency.
  9. Once the loaf is completely cool, drizzle the citrus icing over the top. If you like, sprinkle with an additional teaspoon of lemon zest for an extra pop of flavor and color.

Pro Tips for the Best Lemon Poppy Seed Loaf With Citrus Icing

  • Be careful not to overmix your batter; this is a common mistake that can lead to a dense loaf. Mix just until the dry ingredients are incorporated for a light and fluffy texture.
  • Use room temperature ingredients, especially the butter and eggs. This helps to create a smoother batter and ensures even baking. Take your eggs out of the fridge about 30 minutes before you start.
  • For a more pronounced lemon flavor, consider adding a little lemon extract in addition to the zest and juice. Just a half teaspoon can elevate the citrus notes significantly.
  • When measuring your flour, spoon it into the measuring cup and level it off with a knife instead of scooping directly from the bag. This prevents packing and ensures you don’t end up with a dry loaf.
  • Invest in a good quality loaf pan; it makes a difference in heat distribution, which ensures even baking. If your pan is dark-coated, reduce the oven temperature by 25°F to prevent over-browning.

Variations & Serving Ideas

For a delightful twist, consider adding blueberries or raspberries to the batter for a fruity burst of flavor. You can also experiment with different citrus fruits—try lime or grapefruit zest and juice for a refreshing change. For a healthier option, substitute half of the all-purpose flour with whole wheat flour for added fiber without compromising too much on texture.

This Lemon Poppy Seed Loaf pairs beautifully with a light salad, such as a mixed greens salad with a vinaigrette, or a cup of tea for a cozy afternoon treat. It also complements a creamy cheese platter, as the acidity of the loaf balances rich cheeses perfectly. Lastly, a scoop of vanilla ice cream on the side creates a delightful contrast of temperatures and flavors!

Storage, Make-Ahead & Reheating

This Lemon Poppy Seed Loaf can be stored at room temperature for up to 3 days if wrapped tightly in plastic wrap. If you want to keep it longer, it freezes well for up to 3 months. To freeze, wrap the loaf tightly in plastic wrap and then in aluminum foil to prevent freezer burn.

When you’re ready to enjoy it again, simply thaw it in the fridge overnight. Reheat individual slices in the microwave for 15-20 seconds or in a toaster oven until warmed through. Interestingly, many people find that this loaf tastes even better the next day, as the flavors have time to meld!

Frequently Asked Questions

Can I make Lemon Poppy Seed Loaf With Citrus Icing ahead of time?

Yes — in fact, it tastes even better the next day! You can make the loaf a day in advance, allowing the flavors to develop. Just be sure to store it in an airtight container to maintain its moisture.

Can I substitute the poppy seeds?

Absolutely! If you don’t have poppy seeds on hand or prefer an alternative, you can use sesame seeds for a similar crunch or omit them entirely for a smooth loaf.

What can I use instead of buttermilk?

If you don’t have buttermilk, you can easily create a substitute by mixing ½ cup of milk (dairy or plant-based) with 1 tablespoon of vinegar or lemon juice. Let it sit for 5 minutes before using in the recipe.

How can I make this recipe gluten-free?

To make a gluten-free version of this Lemon Poppy Seed Loaf, substitute the all-purpose flour with a gluten-free all-purpose flour blend. Just ensure that the blend contains a binding agent like xanthan gum for the best results.

What is the best way to store leftover loaf?

Leftover Lemon Poppy Seed Loaf should be stored in an airtight container at room temperature for up to 3 days. For longer storage, wrap it tightly and freeze for up to 3 months. Thaw it before serving for the best texture.

Zesty Lemon Poppy Seed Delight

Final Thoughts

The Lemon Poppy Seed Loaf with Citrus Icing is truly a delightful treat that brings a burst of brightness to any occasion. The zesty lemon flavor combined with the subtle crunch of poppy seeds creates a satisfying balance, while the citrus icing adds a touch of sweetness that perfectly complements the loaf’s tanginess.

This is the kind of recipe I come back to again and again, especially when I want to brighten up a gloomy day or celebrate a small victory. The aroma that fills the kitchen as it bakes is absolutely heavenly! I encourage you to give this recipe a try; you might just find it becoming a beloved staple in your home. Don’t forget to share your results or even add your own unique twist—I can’t wait to see what you create!

Print
clock clock iconcutlery cutlery iconflag flag iconfolder folder iconinstagram instagram iconpinterest pinterest iconfacebook facebook iconprint print iconsquares squares iconheart heart iconheart solid heart solid icon

Lemon Poppy Seed Loaf


  • Author: Lily author
  • Total Time: 24 minute
  • Yield: 1 loaf 1x
Pin Recipe
Print Recipe

Description

This Lemon Poppy Seed Loaf is a delightful treat that combines zesty lemon flavor with crunchy poppy seeds. Topped with a citrus icing, it’s perfect for any occasion.


Ingredients

Scale
  • 1 ½ cups (190g) all-purpose flour
  • 1 teaspoon baking powder
  • ½ teaspoon baking soda
  • ½ teaspoon salt
  • 3 tablespoons poppy seeds
  • ½ cup (115g) unsalted butter, softened to room temperature
  • 1 cup (200g) granulated sugar
  • 2 large eggs
  • 1 teaspoon vanilla extract
  • 1 teaspoon lemon zest (from about 1 medium lemon)
  • ½ cup (120ml) buttermilk
  • 2 tablespoons fresh lemon juice
  • 1 cup (120g) powdered sugar
  • 2 tablespoons fresh lemon juice
  • 1 tablespoon orange juice
  • 1 teaspoon lemon zest (for garnish, optional)

Instructions

  1. Preheat your oven to 350°F (175°C). Grease a 9×5-inch loaf pan or line it with parchment paper for easy removal later.
  2. In a medium mixing bowl, whisk together 1 ½ cups of all-purpose flour, 1 teaspoon of baking powder, ½ teaspoon of baking soda, ½ teaspoon of salt, and 3 tablespoons of poppy seeds. This helps to evenly distribute the baking agents and ensures a uniform rise.
  3. In a large mixing bowl, cream together ½ cup of softened unsalted butter and 1 cup of granulated sugar using an electric mixer on medium speed for about 3-4 minutes, until the mixture is light and fluffy. Make sure to scrape down the sides of the bowl occasionally.
  4. Add 2 large eggs, 1 teaspoon of vanilla extract, and 1 teaspoon of lemon zest to the creamed butter and sugar, mixing until fully combined. You want a smooth consistency, so ensure there are no lumps of butter.
  5. In a small bowl, combine ½ cup of buttermilk and 2 tablespoons of fresh lemon juice. Alternately add the dry ingredients and buttermilk mixture to the butter mixture, starting and ending with the dry ingredients. Mix just until combined; do not overmix, as this can lead to a dense loaf.
  6. Pour the batter into the prepared loaf pan. Smooth the top with a spatula, ensuring it’s even. Bake in the preheated oven for 50-60 minutes, or until a toothpick inserted in the center comes out clean. The edges should be lightly golden brown, and the center should feel just set.
  7. Once baked, remove the loaf from the oven and allow it to cool in the pan for about 10 minutes. Then, transfer it to a wire rack to cool completely. Resist the urge to slice too soon, as it will be crumbly if it’s still warm.
  8. While the loaf is cooling, prepare the citrus icing. In a medium bowl, whisk together 1 cup of powdered sugar, 2 tablespoons of fresh lemon juice, and 1 tablespoon of orange juice until smooth. If the icing is too thick, you can add a little more juice to reach your desired consistency.
  9. Once the loaf is completely cool, drizzle the citrus icing over the top. If you like, sprinkle with an additional teaspoon of lemon zest for an extra pop of flavor and color.
  • Prep Time: 15 mins
  • Cook Time: 50-60 mins
  • Category: Dessert
  • Method: Baking
  • Cuisine: American

Nutrition

  • Serving Size: 1 slice
  • Calories: 200
  • Sugar: 15 g
  • Sodium: 150 mg
  • Fat: 8 g
  • Saturated Fat: 5 g
  • Unsaturated Fat: 3 g
  • Trans Fat: 0 g
  • Carbohydrates: 30 g
  • Fiber: 1 g
  • Protein: 3 g
  • Cholesterol: 40 mg

Keywords: Be careful not to overmix your batter; this is a common mistake that can lead to a dense loaf. Use room temperature ingredients for a smoother batter and even baking.

Did you make this recipe?

Share a photo and tag us — we can't wait to see what you've made!

  • Privacy Policy
  • Terms Of Service
  • Contact
  • About
  • GDPR

Copyright © 2025 Homesmad